7 SportsStore: A real application
This chapter covers
• Creating the SportsStore ASP.NET Core project
• Adding a data model and support for a database
• Displaying a basic product catalog
• Paginating data
• Styling content
In the previous chapters, I built quick and simple ASP.NET Core applications. I described ASP.NET Core patterns, the essential C# features, and the tools that good ASP.NET Core developers require. Now it is time to put everything together and build a simple but realistic e-commerce application.
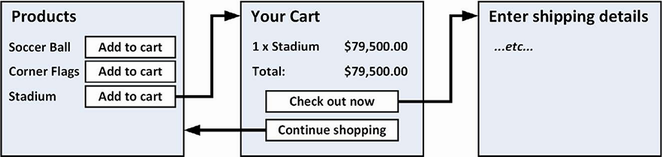
My application, called SportsStore, will follow the classic approach taken by online stores everywhere. I will create an online product catalog that customers can browse by category and page, a shopping cart where users can add and remove products, and a checkout where customers can enter their shipping details. I will also create an administration area that includes create, read, update, and delete (CRUD) facilities for managing the catalog, and I will protect it so that only logged-in administrators can make changes.
My goal in this chapter and those that follow is to give you a sense of what real ASP.NET Core development is by creating as realistic an example as possible. I want to focus on ASP.NET Core, of course, so I have simplified the integration with external systems, such as the database, and omitted others entirely, such as payment processing.
You might find the going a little slow as I build up the levels of infrastructure I need, but the initial investment will result in maintainable, extensible, well-structured code with excellent support for unit testing.
Unit testing
I include sections on unit testing different components in the SportsStore application throughout the development process, demonstrating how to isolate and test different ASP.NET Core components.
I know that unit testing is not embraced by everyone. If you do not want to unit test, that is fine with me. To that end, when I have something to say that is purely about testing, I put it in a sidebar like this one. If you are not interested in unit testing, you can skip right over these sections, and the SportsStore application will work just fine. You do not need to do any kind of unit testing to get the technology benefits of ASP.NET Core, although, of course, support for testing is a key reason for adopting ASP.NET Core in many projects.
Most of the features I use for the SportsStore application have their own chapters later in the book. Rather than duplicate everything here, I tell you just enough to make sense of the example application and point you to another chapter for in-depth information.
I will call out each step needed to build the application so that you can see how the ASP.NET Core features fit together. You should pay particular attention when I create views. You will get some odd results if you do not follow the examples closely.
7.1 Creating the projects
I am going to start with a minimal ASP.NET Core project and add the features I require as they are needed. Open a new PowerShell command prompt from the Windows Start menu and run the commands shown in listing 7.1 to get started.
TIP You can download the example project for this chapter—and for all the other chapters in this book—from https://github.com/manningbooks/pro-asp.net-core-7. See chapter 1 for how to get help if you have problems running the examples.
Listing 7.1 Creating the SportsStore project
dotnet new globaljson --sdk-version 7.0.100 --output SportsSln/SportsStore
dotnet new web --no-https --output SportsSln/SportsStore --framework net7.0
dotnet new sln -o SportsSln

dotnet sln SportsSln add SportsSln/SportsStore
These commands create a SportsSln solution folder that contains a SportsStore project folder created with the web project template. The SportsSln folder also contains a solution file, to which the SportsStore project is added.
I am using different names for the solution and project folders to make the examples easier to follow, but if you create a project with Visual Studio, the default is to use the same name for both folders. There is no “right” approach, and you can use whatever names suit your project.
7.1.1 Creating the unit test project
To create the unit test project, run the commands shown in listing 7.2 in the same location you used for the commands shown in listing 7.1.
Listing 7.2 Creating the unit test project
dotnet new xunit -o SportsSln/SportsStore.Tests --framework net7.0
dotnet sln SportsSln add SportsSln/SportsStore.Tests
dotnet add SportsSln/SportsStore.Tests reference SportsSln/SportsStore
I am going to use the Moq package to create mock objects. Run the command shown in listing 7.3 to install the Moq package into the unit testing project. Run this command from the same location as the commands in listing 7.2.
Listing 7.3 Installing the Moq package
dotnet add SportsSln/SportsStore.Tests package Moq --version 4.18.47.1.2 Opening the projects
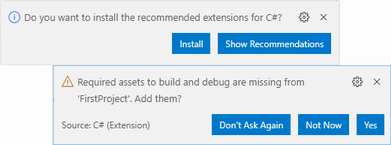
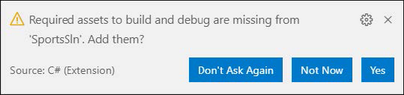
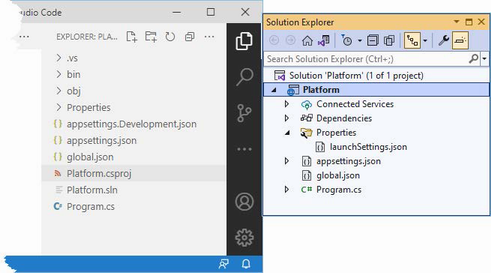
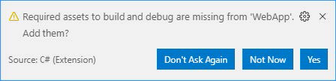
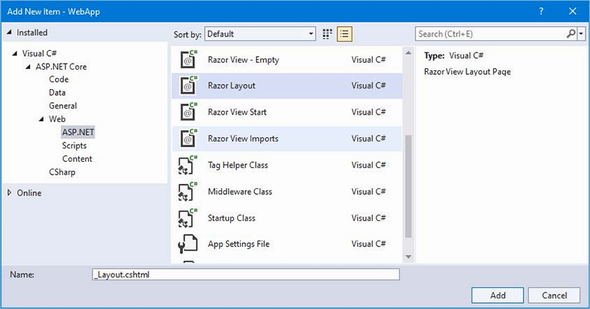
If you are using Visual Studio Code, select File > Open Folder, navigate to the SportsSln folder, and click the Select Folder button. Visual Studio Code will open the folder and discover the solution and project files. When prompted, as shown in figure 7.1, click Yes to install the assets required to build the projects. Select SportsStore if Visual Studio Code prompts you to select the project to run.
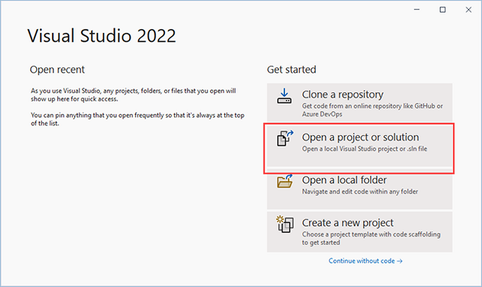
If you are using Visual Studio, click the “Open a project or solution” button on the splash screen or select File > Open > Project/Solution. Select the SportsSln.sln file in the SportsSln folder and click the Open button to open the project.
Figure 7.1 Adding assets in Visual Studio Code
7.1.3 Configuring the HTTP port
To configure the HTTP port that ASP.NET Core will use to listen for HTTP requests, make the changes shown in listing 7.4 to the launchSettings.json file in the SportsStore/Properties folder.
Listing 7.4 Setting the HTTP Port in the launchSettings.json File in the SportsStore/ Properties Folder
{
  "iisSettings": {
    "windowsAuthentication": false,
    "anonymousAuthentication": true,
    "iisExpress": {
      "applicationUrl": "http://localhost:5000",
      "sslPort": 0
    }
  },
  "profiles": {
    "SportsStore": {
      "commandName": "Project",
      "dotnetRunMessages": true,
      "launchBrowser": true,
      "applicationUrl": "http://localhost:5000",
      "environmentVariables": {
        "ASPNETCORE_ENVIRONMENT": "Development"
      }
    },
    "IIS Express": {
      "commandName": "IISExpress",
      "launchBrowser": true,
      "environmentVariables": {
        "ASPNETCORE_ENVIRONMENT": "Development"
      }
    }
  }
}
7.1.4 Creating the application project folders
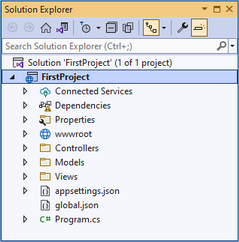
The next step is to create folders that will contain the application’s components. Right-click the SportsStore item in the Visual Studio Solution Explorer or Visual Studio Code Explorer pane and select Add > New Folder or New Folder to create the set of folders described in table 7.1.
Table 7.1 The application project folders
| Name | Description |
|---|---|
| Models | This folder will contain the data model and the classes that provide access to the data in the application’s database. |
| Controllers | This folder will contain the controller classes that handle HTTP requests. |
| Views | This folder will contain all the Razor files, grouped into separate subfolders. |
| Views/Home | This folder will contain Razor files that are specific to the Home controller, which I create in the “Creating the Controller and View” section. |
| Views/Shared | This folder will contain Razor files that are common to all controllers. |
7.1.5 Preparing the services and the request pipeline
The Program.cs file is used to configure the ASP.NET Core application. Apply the changes shown in listing 7.5 to the Program.cs file in the SportsStore project to configure the basic application features.
NOTE The Program.cs file is an important ASP.NET Core feature. I describe it in detail in part 2.
Listing 7.5 Configuring the application in the Program.cs file in the SportsStore folder
var builder = WebApplication.CreateBuilder(args);
builder.Services.AddControllersWithViews();
var app = builder.Build();
//app.MapGet("/", () => "Hello World!");
app.UseStaticFiles();
app.MapDefaultControllerRoute();
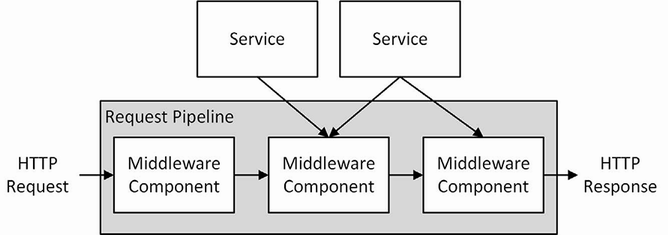
app.Run();The builder.Services property is used to set up objects, known as services, that can be used throughout the application and that are accessed through a feature called dependency injection, which I describe in chapter 14. The AddControllersWithViews method sets up the shared objects required by applications using the MVC Framework and the Razor view engine.
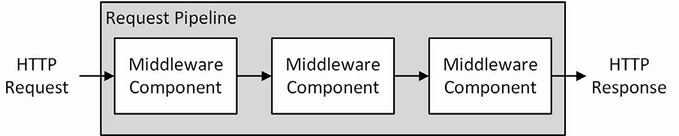
ASP.NET Core receives HTTP requests and passes them along a request pipeline, which is populated with middleware components registered using the app property. Each middleware component is able to inspect requests, modify them, generate a response, or modify the responses that other components have produced. The request pipeline is the heart of ASP.NET Core, and I describe it in detail in chapter 12, where I also explain how to create custom middleware components.
The UseStaticFiles method enables support for serving static content from the wwwroot folder and will be created later in the chapter.
One especially important middleware component provides the endpoint routing feature, which matches HTTP requests to the application features—known as endpoints—able to produce responses for them, a process I describe in detail in chapter 13. The endpoint routing feature is added to the request pipeline automatically, and the MapDefaultControllerRoute registers the MVC Framework as a source of endpoints using a default convention for mapping requests to classes and methods.
7.1.6 Configuring the Razor view engine
The Razor view engine is responsible for processing view files, which have the .cshtml extension, to generate HTML responses. Some initial preparation is required to configure Razor to make it easier to create views for the application.
Add a Razor View Imports file named _ViewImports.cshtml in the Views folder with the content shown in listing 7.6.
CAUTION Pay close attention to the contents of this file. It is easy to make a mistake that causes the application to generate incorrect HTML content.
Listing 7.6 The contents of the _ViewImports.cshtml file in the SportsStore/ Views folder
@using SportsStore.Models
@addTagHelper *, Microsoft.AspNetCore.Mvc.TagHelpers
The @using statement will allow me to use the types in the SportsStore.Models namespace in views without needing to refer to the namespace. The @addTagHelper statement enables the built-in tag helpers, which I use later to create HTML elements that reflect the configuration of the SportsStore application and which I describe in detail in chapter 15. (You may see a warning or error displayed by the code editor for the contents of this file, but this will be resolved shortly and can be ignored.)
Add a Razor View Start file named _ViewStart.cshtml to the SportsStore/Views folder with the content shown in listing 7.7. (The file will already contain this expression if you create the file using the Visual Studio item template.)
Listing 7.7 The contents of the _ViewStart.cshtml file in the SportsStore/Views folder
@{
    Layout = "_Layout";
}
The Razor View Start file tells Razor to use a layout file in the HTML that it generates, reducing the amount of duplication in views. To create the view, add a Razor layout named _Layout.cshtml to the Views/Shared folder, with the content shown in listing 7.8.
Listing 7.8 The contents of the _Layout.cshtml file in the SportsStore/Views/Shared folder
<!DOCTYPE html>
<html>
<head>
    <meta name="viewport" content="width=device-width" />
    <title>SportsStore</title>
</head>
<body>
    <div>
        @RenderBody()
    </div>
</body>
</html>
This file defines a simple HTML document into which the contents of other views will be inserted by the @RenderBody expression. I explain how Razor expressions work in detail in chapter 21.
7.1.7 Creating the controller and view
Add a class file named HomeController.cs in the SportsStore/Controllers folder and use it to define the class shown in listing 7.9. This is a minimal controller that contains just enough functionality to produce a response.
Listing 7.9 The contents of the HomeController.cs file in the SportsStore/Controllers folder
using Microsoft.AspNetCore.Mvc;

namespace SportsStore.Controllers {
    public class HomeController: Controller {

        public IActionResult Index() => View();

    }
}
The MapDefaultControllerRoute method used in listing 7.5 tells ASP.NET Core how to match URLs to controller classes. The configuration applied by that method declares that the Index action method defined by the Home controller will be used to handle requests.
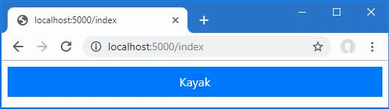
The Index action method doesn’t do anything useful yet and just returns the result of calling the View method, which is inherited from the Controller base class. This result tells ASP.NET Core to render the default view associated with the action method. To create the view, add a Razor View file named Index.cshtml to the Views/Home folder with the content shown in listing 7.10.
Listing 7.10 The contents of the Index.cshtml file in the SportsStore/Views/Home folder
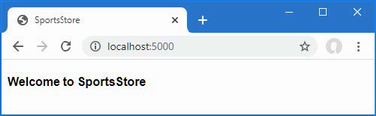
<h4>Welcome to SportsStore</h4>7.1.8 Starting the data model
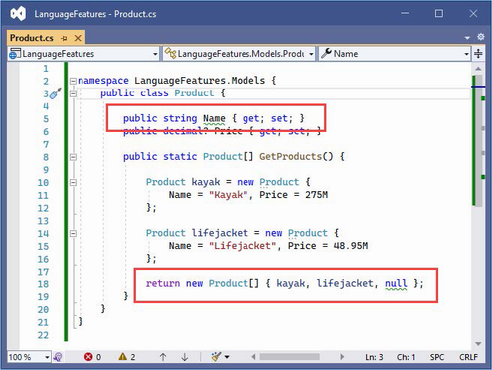
Almost all projects have a data model of some sort. Since this is an e-commerce application, the most obvious model I need is for a product. Add a class file named Product.cs to the Models folder and use it to define the class shown in listing 7.11.
Listing 7.11 The contents of the Product.cs file in the SportsStore/Models folder
using System.ComponentModel.DataAnnotations.Schema;

namespace SportsStore.Models {

    public class Product {

        public long? ProductID { get; set; }

        public string Name { get; set; } = String.Empty;

        public string Description { get; set; } = String.Empty;

        [Column(TypeName = "decimal(8, 2)")]
        public decimal Price { get; set; }

        public string Category { get; set; } = String.Empty;
    }
}
The Price property has been decorated with the Column attribute to specify the SQL data type that will be used to store values for this property. Not all C# types map neatly onto SQL types, and this attribute ensures the database uses an appropriate type for the application data.
7.1.9 Checking and running the application
Before going any further, it is a good idea to make sure the application builds and runs as expected. Run the command shown in listing 7.12 in the SportsStore folder.
Listing 7.12 Running the example application
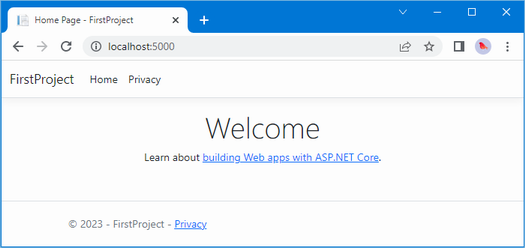
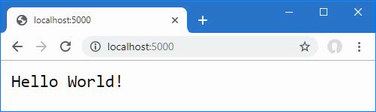
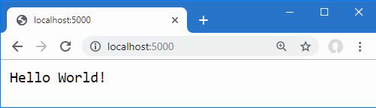
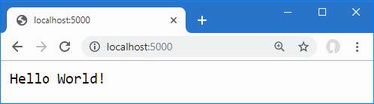
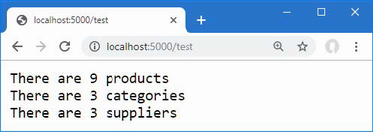
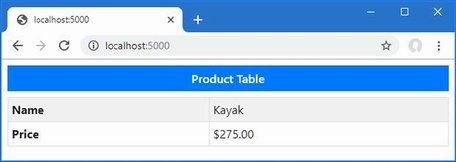
dotnet runRequest http://localhost:5000, and you will see the response shown in figure 7.2.

Figure 7.2 Running the example application
7.2 Adding data to the application
Now that the SportsStore contains some basic setup and can produce a simple response, it is time to add some data so that the application has something more useful to display. The SportsStore application will store its data in a SQL Server LocalDB database, which is accessed using Entity Framework Core. Entity Framework Core is the Microsoft object-to-relational mapping (ORM) framework, and it is the most widely used method of accessing databases in ASP.NET Core projects.
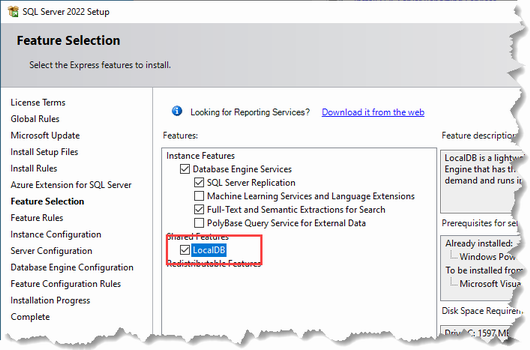
Caution If you did not install LocalDB when you prepared your development environment in chapter 2, you must do so now. The SportsStore application will not work without its database.
7.2.1 Installing the Entity Framework Core packages
The first step is to add Entity Framework Core to the project. Use a PowerShell command prompt to run the command shown in listing 7.13 in the SportsStore folder. If you receive an error asking you to specify a project, then delete the SportsStore - Backup.csproj file in the SportsStore folder and try again.
Listing 7.13 Adding the Entity Framework Core packages to the SportsStore project
dotnet add package Microsoft.EntityFrameworkCore.Design --version 7.0.0
dotnet add package Microsoft.EntityFrameworkCore.SqlServer --version 7.0.0
These packages install Entity Framework Core and the support for using SQL Server. Entity Framework Core also requires a tools package, which includes the command-line tools required to prepare and create databases for ASP.NET Core applications. Run the commands shown in listing 7.14 to remove any existing version of the tools package, if there is one, and install the version used in this book. (Since this package is installed globally, you can run these commands in any folder.)
Listing 7.14 Installing the Entity Framework Core tool package
dotnet tool uninstall --global dotnet-ef
dotnet tool install --global dotnet-ef --version 7.0.0
7.2.2 Defining the connection string
Configuration settings, such as database connection strings, are stored in JSON configuration files. To describe the connection to the database that will be used for the SportsStore data, add the entries shown in listing 7.15 to the appsettings.json file in the SportsStore folder.
The project also contains an appsettings.Development.json file that contains configuration settings that are used only in development. This file is displayed as nested within the appsettings.json file by Solution Explorer but is always visible in Visual Studio Code. I use only the appsettings.json file for the development of the SportsStore project, but I explain the relationship between the files and how they are both used in detail in chapter 15.
TIP Connection strings must be expressed as a single unbroken line, which is fine in the code editor but doesn’t fit on the printed page and is the cause of the awkward formatting in listing 7.15. When you define the connection string in your own project, make sure that the value of the SportsStoreConnection item is on a single line.
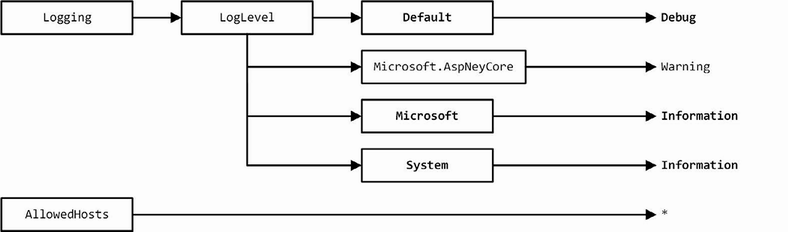
Listing 7.15 Adding a configuration setting in the appsettings.json file in the SportsStore folder
{
  "Logging": {
    "LogLevel": {
      "Default": "Information",
      "Microsoft.AspNetCore": "Warning"
    }
  },
  "AllowedHosts": "*",
  "ConnectionStrings": {
    "SportsStoreConnection": "Server=(localdb)\\MSSQLLocalDB;Database=SportsStore;MultipleActiveResultSets=true"
  }
}
This configuration string specifies a LocalDB database called SportsStore and enables the multiple active result set (MARS) feature, which is required for some of the database queries that will be made by the SportsStore application using Entity Framework Core.
Pay close attention when you add the configuration setting. JSON data must be expressed exactly as shown in the listing, which means you must ensure you correctly quote the property names and values. You can download the configuration file from the GitHub repository if you have difficulty.
TIP Each database server requires its own connection string format. A helpful site for formulating connection strings is https://www.connectionstrings.com.
7.2.3 Creating the database context class
Entity Framework Core provides access to the database through a context class. Add a class file named StoreDbContext.cs to the Models folder and use it to define the class shown in listing 7.16.
Listing 7.16 The contents of the StoreDbContext.cs file in the SportsStore/Models folder
using Microsoft.EntityFrameworkCore;

namespace SportsStore.Models {
    public class StoreDbContext : DbContext {

        public StoreDbContext(DbContextOptions<StoreDbContext> options)
            : base(options) { }

        public DbSet<Product> Products => Set<Product>();
    }
}
The DbContext base class provides access to the Entity Framework Core’s underlying functionality, and the Products property will provide access to the Product objects in the database. The StoreDbContext class is derived from DbContext and adds the properties that will be used to read and write the application’s data. There is only one property for now, which will provide access to Product objects.
7.2.4 Configuring Entity Framework Core
Entity Framework Core must be configured so that it knows the type of database to which it will connect, which connection string describes that connection, and which context class will present the data in the database. Listing 7.17 shows the required changes to the Program.cs file.
Listing 7.17 Configuring Entity Framework Core in the Program.cs file in the SportsStore folder
using Microsoft.EntityFrameworkCore;
using SportsStore.Models;

var builder = WebApplication.CreateBuilder(args);

builder.Services.AddControllersWithViews();

builder.Services.AddDbContext<StoreDbContext>(opts => {
    opts.UseSqlServer(
        builder.Configuration["ConnectionStrings:SportsStoreConnection"]);
});

var app = builder.Build();

app.UseStaticFiles();
app.MapDefaultControllerRoute();

app.Run();
The IConfiguration interface provides access to the ASP.NET Core configuration system, which includes the contents of the appsettings.json file and which I describe in detail in chapter 15. Access to the configuration data is through the builder.Configuration property, which allows the database connection string to be obtained. Entity Framework Core is configured with the AddDbContext method, which registers the database context class and configures the relationship with the database. The UseSQLServer method declares that SQL Server is being used.
7.2.5 Creating a repository
The next step is to create a repository interface and implementation class. The repository pattern is one of the most widely used, and it provides a consistent way to access the features presented by the database context class. Not everyone finds a repository useful, but my experience is that it can reduce duplication and ensures that operations on the database are performed consistently. Add a class file named IStoreRepository.cs to the Models folder and use it to define the interface shown in listing 7.18.
Listing 7.18 The contents of the IStoreRepository.cs file in the SportsStore/Models folder
namespace SportsStore.Models {
    public interface IStoreRepository {
        IQueryable<Product> Products { get; }
    }
}
This interface uses IQueryable<T> to allow a caller to obtain a sequence of Product objects. The IQueryable<T> interface is derived from the more familiar IEnumerable<T> interface and represents a collection of objects that can be queried, such as those managed by a database.
A class that depends on the IStoreRepository interface can obtain Product objects without needing to know the details of how they are stored or how the implementation class will deliver them.
Understanding IEnumerable<T> and IQueryable<T> interfaces
The IQueryable<T> interface is useful because it allows a collection of objects to be queried efficiently. Later in this chapter, I add support for retrieving a subset of Product objects from a database, and using the IQueryable<T> interface allows me to ask the database for just the objects that I require using standard LINQ statements and without needing to know what database server stores the data or how it processes the query. Without the IQueryable<T> interface, I would have to retrieve all of the Product objects from the database and then discard the ones that I don’t want, which becomes an expensive operation as the amount of data used by an application increases. It is for this reason that the IQueryable<T> interface is typically used instead of IEnumerable<T> in database repository interfaces and classes.
However, care must be taken with the IQueryable<T> interface because each time the collection of objects is enumerated, the query will be evaluated again, which means that a new query will be sent to the database. This can undermine the efficiency gains of using IQueryable<T>. In such situations, you can convert the IQueryable<T> interface to a more predictable form using the ToList or ToArray extension method.
To create an implementation of the repository interface, add a class file named EFStoreRepository.cs in the Models folder and use it to define the class shown in listing 7.19.
Listing 7.19 The contents of the EFStoreRepository.cs file in the SportsStore/Models folder
namespace SportsStore.Models {
    public class EFStoreRepository : IStoreRepository {
        private StoreDbContext context;

        public EFStoreRepository(StoreDbContext ctx) {
            context = ctx;
        }

        public IQueryable<Product> Products => context.Products;
    }
}
I’ll add additional functionality as I add features to the application, but for the moment, the repository implementation just maps the Products property defined by the IStoreRepository interface onto the Products property defined by the StoreDbContext class. The Products property in the context class returns a DbSet<Product> object, which implements the IQueryable<T> interface and makes it easy to implement the repository interface when using Entity Framework Core.
Earlier in the chapter, I explained that ASP.NET Core supports services that allow objects to be accessed throughout the application. One benefit of services is they allow classes to use interfaces without needing to know which implementation class is being used. I explain this in detail in chapter 14, but for the SportsStore chapters, it means that application components can access objects that implement the IStoreRepository interface without knowing that it is the EFStoreRepository implementation class they are using. This makes it easy to change the implementation class the application uses without needing to make changes to the individual components. Add the statement shown in listing 7.20 to the Program.cs file to create a service for the IStoreRepository interface that uses EFStoreRepository as the implementation class.
TIP Don’t worry if this doesn’t make sense right now. This topic is one of the most confusing aspects of working with ASP.NET Core, and it can take a while to understand.
Listing 7.20 Creating the repository service in the Program.cs file in the SportsStore folder
using Microsoft.EntityFrameworkCore;
using SportsStore.Models;

var builder = WebApplication.CreateBuilder(args);

builder.Services.AddControllersWithViews();

builder.Services.AddDbContext<StoreDbContext>(opts => {
    opts.UseSqlServer(
        builder.Configuration["ConnectionStrings:SportsStoreConnection"]);
});

builder.Services.AddScoped<IStoreRepository, EFStoreRepository>();

var app = builder.Build();

app.UseStaticFiles();
app.MapDefaultControllerRoute();

app.Run();
The AddScoped method creates a service where each HTTP request gets its own repository object, which is the way that Entity Framework Core is typically used.
7.2.6 Creating the database migration
Entity Framework Core can generate the schema for the database using the data model classes through a feature called migrations. When you prepare a migration, Entity Framework Core creates a C# class that contains the SQL commands required to prepare the database. If you need to modify your model classes, then you can create a new migration that contains the SQL commands required to reflect the changes. In this way, you don’t have to worry about manually writing and testing SQL commands and can just focus on the C# model classes in the application.
Entity Framework Core commands are performed from the command line. Open a PowerShell command prompt and run the command shown in listing 7.21 in the SportsStore folder to create the migration class that will prepare the database for its first use.
Listing 7.21 Creating the database migration
dotnet ef migrations add InitialWhen this command has finished, the SportsStore project will contain a Migrations folder. This is where Entity Framework Core stores its migration classes. One of the file names will be a timestamp followed by _Initial.cs, and this is the class that will be used to create the initial schema for the database. If you examine the contents of this file, you can see how the Product model class has been used to create the schema.
7.2.7 Creating seed data
To populate the database and provide some sample data, I added a class file called SeedData.cs to the Models folder and defined the class shown in listing 7.22.
Listing 7.22 The contents of the SeedData.cs file in the SportsStore/Models folder
using Microsoft.EntityFrameworkCore;

namespace SportsStore.Models {

    public static class SeedData {

        public static void EnsurePopulated(IApplicationBuilder app) {
            StoreDbContext context = app.ApplicationServices
                .CreateScope().ServiceProvider
                .GetRequiredService<StoreDbContext>();

            if (context.Database.GetPendingMigrations().Any()) {
                context.Database.Migrate();
            }

            if (!context.Products.Any()) {
                context.Products.AddRange(
                    new Product {
                        Name = "Kayak", Description =
                            "A boat for one person",
                        Category = "Watersports", Price = 275
                    },
                    new Product {
                        Name = "Lifejacket",
                        Description = "Protective and fashionable",
                        Category = "Watersports", Price = 48.95m
                    },
                    new Product {
                        Name = "Soccer Ball",
                        Description = "FIFA-approved size and weight",
                        Category = "Soccer", Price = 19.50m
                    },
                    new Product {
                        Name = "Corner Flags",
                        Description =
                          "Give your playing field a professional touch",
                        Category = "Soccer", Price = 34.95m
                    },
                    new Product {
                        Name = "Stadium",
                        Description = "Flat-packed 35,000-seat stadium",
                        Category = "Soccer", Price = 79500
                    },
                    new Product {
                        Name = "Thinking Cap",
                        Description = "Improve brain efficiency by 75%",
                        Category = "Chess", Price = 16
                    },
                    new Product {
                        Name = "Unsteady Chair",
                        Description =
                          "Secretly give your opponent a disadvantage",
                        Category = "Chess", Price = 29.95m
                    },
                    new Product {
                        Name = "Human Chess Board",
                        Description = "A fun game for the family",
                        Category = "Chess", Price = 75
                    },
                    new Product {
                        Name = "Bling-Bling King",
                        Description = "Gold-plated, diamond-studded King",
                        Category = "Chess", Price = 1200
                    }
                );
                context.SaveChanges();
            }
        }
    }
}
The static EnsurePopulated method receives an IApplicationBuilder argument, which is the interface used in the Program.cs file to register middleware components to handle HTTP requests. IApplicationBuilder also provides access to the application’s services, including the Entity Framework Core database context service.
The EnsurePopulated method obtains a StoreDbContext object through the IApplicationBuilder interface and calls the Database.Migrate method if there are any pending migrations, which means that the database will be created and prepared so that it can store Product objects. Next, the number of Product objects in the database is checked. If there are no objects in the database, then the database is populated using a collection of Product objects using the AddRange method and then written to the database using the SaveChanges method.
The final change is to seed the database when the application starts, which I have done by adding a call to the EnsurePopulated method from the Program.cs file, as shown in listing 7.23.
Listing 7.23 Seeding the database in the Program.cs file in the SportsStore folder
using Microsoft.EntityFrameworkCore;
using SportsStore.Models;

var builder = WebApplication.CreateBuilder(args);

builder.Services.AddControllersWithViews();

builder.Services.AddDbContext<StoreDbContext>(opts => {
    opts.UseSqlServer(
        builder.Configuration["ConnectionStrings:SportsStoreConnection"]);
});

builder.Services.AddScoped<IStoreRepository, EFStoreRepository>();

var app = builder.Build();

app.UseStaticFiles();
app.MapDefaultControllerRoute();

SeedData.EnsurePopulated(app);

app.Run();
Resetting the database
If you need to reset the database, then run this command in the SportsStore folder:
...
dotnet ef database drop --force --context StoreDbContext
...
Start ASP.NET Core, and the database will be re-created and seeded with data.
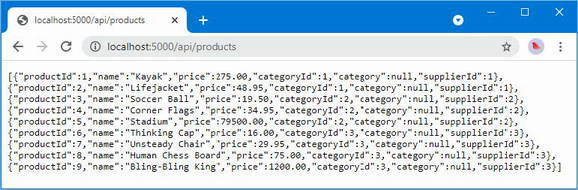
7.3 Displaying a list of products
As you have seen, the initial preparation work for an ASP.NET Core project can take some time. But the good news is that once the foundation is in place, the pace improves, and features are added more rapidly. In this section, I am going to create a controller and an action method that can display details of the products in the repository.
Using the Visual Studio scaffolding
As I noted in chapter 4, Visual Studio supports scaffolding to add items to a project.
I don’t use scaffolding in this book. The code and markup that the scaffolding generates are so generic as to be all but useless, and the scenarios that are supported are narrow and don’t address common development problems. My goal in this book is not only to make sure you know how to create ASP.NET Core applications but also to explain how everything works behind the scenes, and that is harder to do when responsibility for creating components is handed to the scaffolding.
If you are using Visual Studio, add items to the project by right-clicking a folder in the Solution Explorer, selecting Add > New Item from the pop-up menu, and then choosing an item template from the Add New Item window.
You may find your development style to be different from mine, and you may find that you prefer working with the scaffolding in your own projects. That’s perfectly reasonable, although I recommend you take the time to understand what the scaffolding does so you know where to look if you don’t get the results you expect.
7.3.1 Preparing the controller
Add the statements shown in listing 7.24 to prepare the controller to display the list of products.
Listing 7.24 Preparing the controller in the HomeController.cs file in the SportsStore/Controllers folder
using Microsoft.AspNetCore.Mvc;
using SportsStore.Models;

namespace SportsStore.Controllers {
    public class HomeController : Controller {
        private IStoreRepository repository;

        public HomeController(IStoreRepository repo) {
            repository = repo;
        }

        public IActionResult Index() => View(repository.Products);
    }
}
When ASP.NET Core needs to create a new instance of the HomeController class to handle an HTTP request, it will inspect the constructor and see that it requires an object that implements the IStoreRepository interface. To determine what implementation class should be used, ASP.NET Core consults the configuration created in the Program.cs file, which tells it that EFStoreRepository should be used and that a new instance should be created for every request. ASP.NET Core creates a new EFStoreRepository object and uses it to invoke the HomeController constructor to create the controller object that will process the HTTP request.
This is known as dependency injection, and its approach allows the HomeController object to access the application’s repository through the IStoreRepository interface without knowing which implementation class has been configured. I could reconfigure the service to use a different implementation class—one that doesn’t use Entity Framework Core, for example—and dependency injection means that the controller will continue to work without changes.
NOTE Some developers don’t like dependency injection and believe it makes applications more complicated. That’s not my view, but if you are new to dependency injection, then I recommend you wait until you have read chapter 14 before you make up your mind.
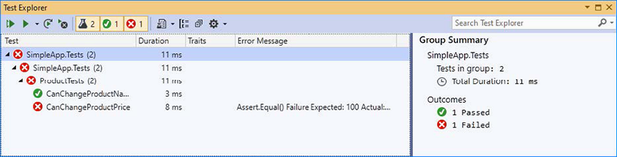
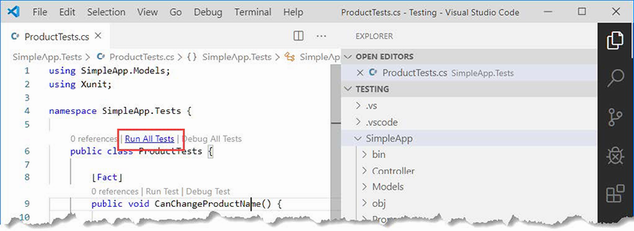
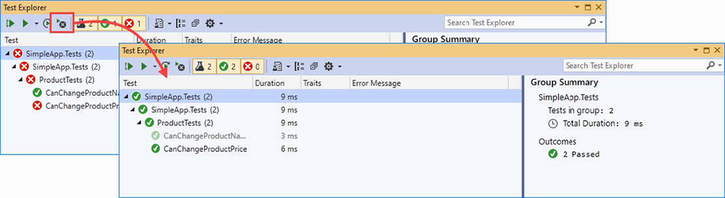
Unit test: repository access
I can unit test that the controller is accessing the repository correctly by creating a mock repository, injecting it into the constructor of the HomeController class, and then calling the Index method to get the response that contains the list of products. I then compare the Product objects I get to what I would expect from the test data in the mock implementation. See chapter 6 for details of how to set up unit tests. Here is the unit test I created for this purpose, in a class file called HomeControllerTests.cs that I added to the SportsStore.Tests project:
using System;
using System.Collections.Generic;
using System.Linq;
using Microsoft.AspNetCore.Mvc;
using Moq;
using SportsStore.Controllers;
using SportsStore.Models;
using Xunit;

namespace SportsStore.Tests {

    public class HomeControllerTests {

        [Fact]
        public void Can_Use_Repository() {
            // Arrange
            Mock<IStoreRepository> mock = new Mock<IStoreRepository>();
            mock.Setup(m => m.Products).Returns((new Product[] {
                new Product {ProductID = 1, Name = "P1"},
                new Product {ProductID = 2, Name = "P2"}
            }).AsQueryable<Product>());

            HomeController controller = new HomeController(mock.Object);

            // Act
            IEnumerable<Product>? result =
                (controller.Index() as ViewResult)?.ViewData.Model
                     as IEnumerable<Product>;

            // Assert
            Product[] prodArray = result?.ToArray()
                ?? Array.Empty<Product>();
            Assert.True(prodArray.Length == 2);
            Assert.Equal("P1", prodArray[0].Name);
            Assert.Equal("P2", prodArray[1].Name);
        }
    }
}
It is a little awkward to get the data returned from the action method. The result is a ViewResult object, and I have to cast the value of its ViewData.Model property to the expected data type. I explain the different result types that can be returned by action methods and how to work with them in part 2.
7.3.2 Updating the view
The Index action method in listing 7.24 passes the collection of Product objects from the repository to the View method, which means these objects will be the view model that Razor uses when it generates HTML content from the view. Make the changes to the view shown in listing 7.25 to generate content using the Product view model objects.
Listing 7.25 Using the product data in the Index.cshtml file in the SportsStore/Views/Home folder
@model IQueryable<Product>

@foreach (var p in Model ?? Enumerable.Empty<Product>()) {
    <div>
        <h3>@p.Name</h3>
        @p.Description
        <h4>@p.Price.ToString("c")</h4>
    </div>
}
The @model expression at the top of the file specifies that the view expects to receive a sequence of Product objects from the action method as its model data. I use an @foreach expression to work through the sequence and generate a simple set of HTML elements for each Product object that is received.
There is a quirk in the way that Razor Views work that means the model data is always nullable, even when the type specified by the @model expression is not. For this reason, I use the null-coalescing operator in the @foreach expression with an empty enumeration.
The view doesn’t know where the Product objects came from, how they were obtained, or whether they represent all the products known to the application. Instead, the view deals only with how details of each Product are displayed using HTML elements.
TIP I converted the Price property to a string using the ToString("c") method, which renders numerical values as currency according to the culture settings that are in effect on your server. For example, if the server is set up as en-US, then (1002.3).ToString("c") will return $1,002.30, but if the server is set to en-GB, then the same method will return £1,002.30.
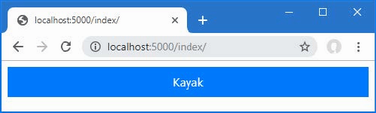
7.3.3 Running the application
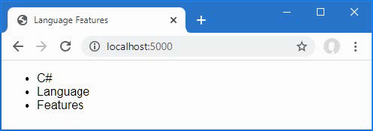
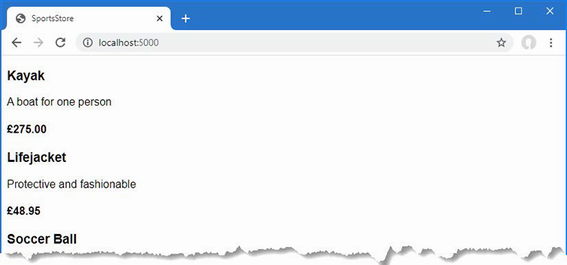
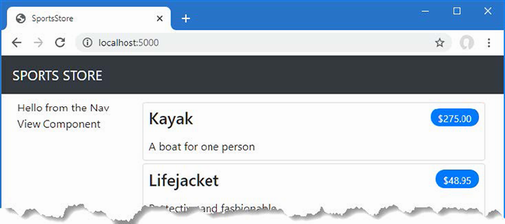
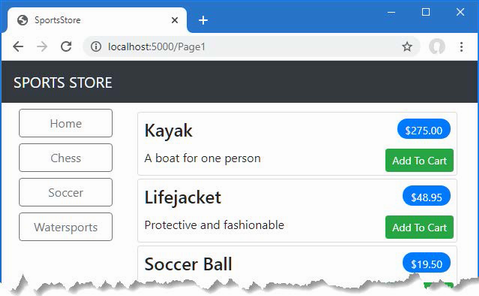
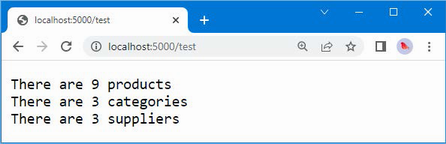
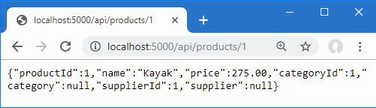
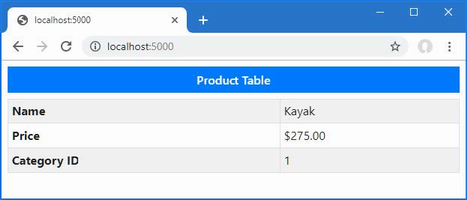
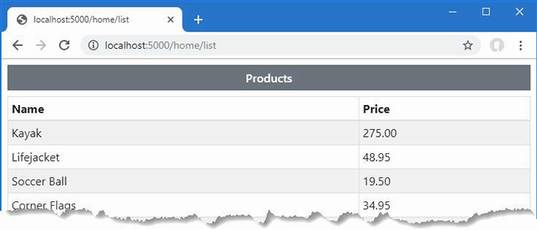
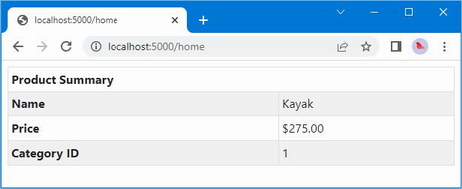
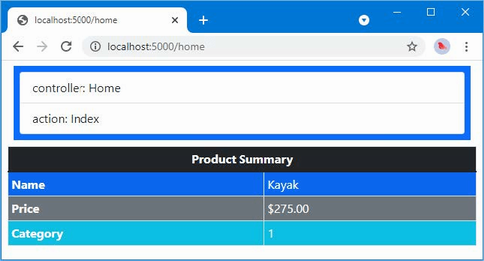
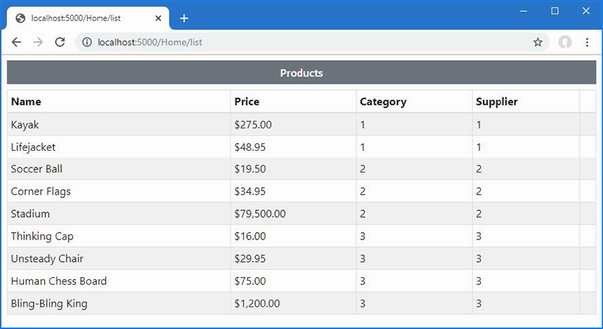
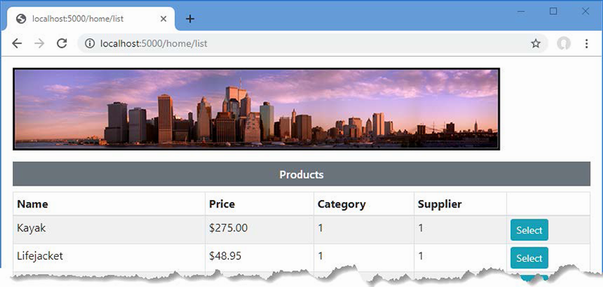
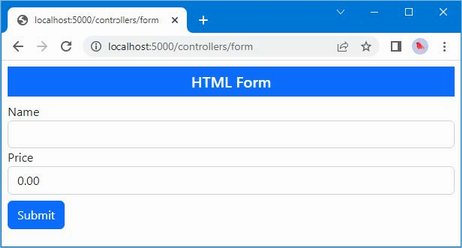
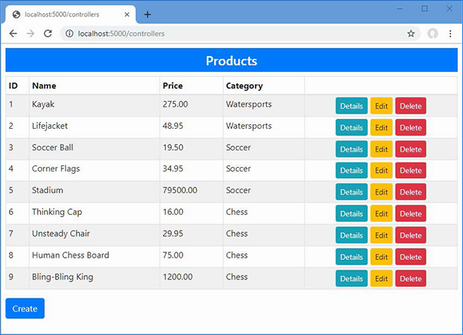
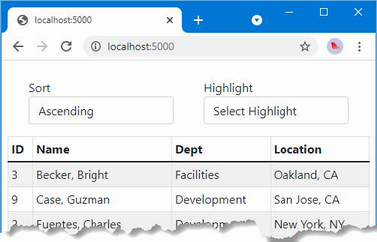
Start ASP.NET Core and request http://localhost:5000 to see the list of products, which is shown in figure 7.3. This is the typical pattern of development for ASP.NET Core. An initial investment of time setting everything up is necessary, and then the basic features of the application snap together quickly.

Figure 7.3 Displaying a list of products
7.4 Adding pagination
You can see from figure 7.3 that the Index.cshtml view displays the products in the database on a single page. In this section, I will add support for pagination so that the view displays a smaller number of products on a page and so the user can move from page to page to view the overall catalog. To do this, I am going to add a parameter to the Index method in the Home controller, as shown in listing 7.26.
Listing 7.26 Adding pagination in the HomeController.cs file in the SportsStore/Controllers folder
using Microsoft.AspNetCore.Mvc;
using SportsStore.Models;

namespace SportsStore.Controllers {
    public class HomeController : Controller {
        private IStoreRepository repository;

        public int PageSize = 4;

        public HomeController(IStoreRepository repo) {
            repository = repo;
        }

        public ViewResult Index(int productPage = 1)
            => View(repository.Products
                .OrderBy(p => p.ProductID)
                .Skip((productPage - 1) * PageSize)
                .Take(PageSize));
    }
}
The PageSize field specifies that I want four products per page. I have added an optional parameter to the Index method, which means that if the method is called without a parameter, the call is treated as though I had supplied the value specified in the parameter definition, with the effect that the action method displays the first page of products when it is invoked without an argument. Within the body of the action method, I get the Product objects, order them by the primary key, skip over the products that occur before the start of the current page, and take the number of products specified by the PageSize field.
Unit test: pagination
I can unit test the pagination feature by mocking the repository, requesting a specific page from the controller, and making sure I get the expected subset of the data. Here is the unit test I created for this purpose and added to the HomeControllerTests.cs file in the SportsStore.Tests project:
using System;
using System.Collections.Generic;
using System.Linq;
using Microsoft.AspNetCore.Mvc;
using Moq;
using SportsStore.Controllers;
using SportsStore.Models;
using Xunit;

namespace SportsStore.Tests {

    public class HomeControllerTests {

        [Fact]
        public void Can_Use_Repository() {
            // ...statements omitted for brevity...
        }

        [Fact]
        public void Can_Paginate() {
            // Arrange
            Mock<IStoreRepository> mock = new Mock<IStoreRepository>();
            mock.Setup(m => m.Products).Returns((new Product[] {
                new Product {ProductID = 1, Name = "P1"},
                new Product {ProductID = 2, Name = "P2"},
                new Product {ProductID = 3, Name = "P3"},
                new Product {ProductID = 4, Name = "P4"},
                new Product {ProductID = 5, Name = "P5"}
            }).AsQueryable<Product>());

            HomeController controller = new HomeController(mock.Object);
            controller.PageSize = 3;

            // Act
            IEnumerable<Product> result =
                (controller.Index(2) as ViewResult)?.ViewData.Model
                    as IEnumerable<Product>
                         ?? Enumerable.Empty<Product>();

            // Assert
            Product[] prodArray = result.ToArray();
            Assert.True(prodArray.Length == 2);
            Assert.Equal("P4", prodArray[0].Name);
            Assert.Equal("P5", prodArray[1].Name);
        }
    }
}
You can see the new test follows the pattern of the existing one, relying on Moq to provide a known set of data with which to work.
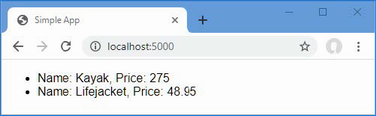
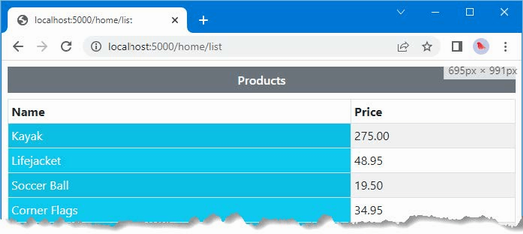
7.4.1 Displaying page links
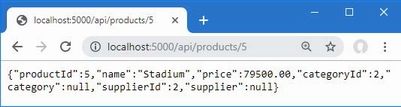
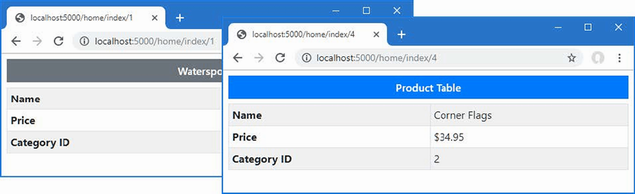
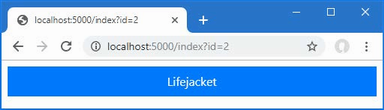
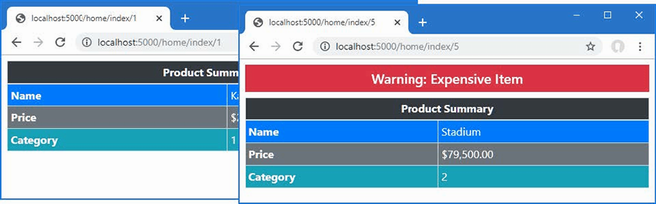
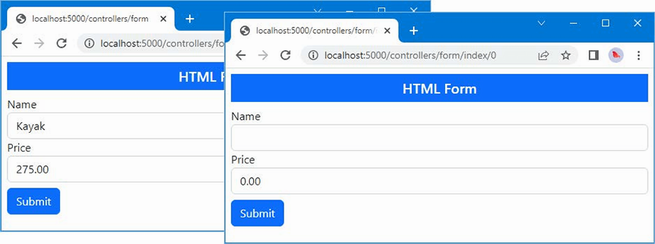
Restart ASP.NET Core and request http://localhost:5000, and you will see that there are now four items shown on the page, as shown in figure 7.4. If you want to view another page, you can append query string parameters to the end of the URL, like this:http://localhost:5000/?productPage=2
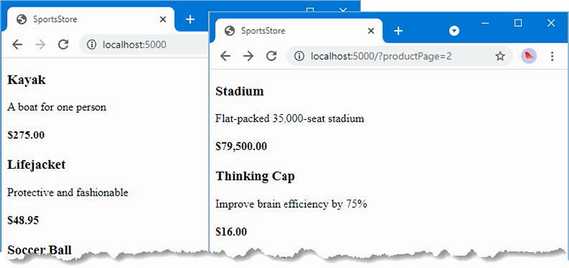
Figure 7.4 Paging through data
Using these query strings, you can navigate through the catalog of products. There is no way for customers to figure out that these query string parameters exist, and even if there were, customers are not going to want to navigate this way. Instead, I need to render some page links at the bottom of each list of products so that customers can navigate between pages. To do this, I am going to create a tag helper, which generates the HTML markup for the links I require.
Adding the view model
To support the tag helper, I am going to pass information to the view about the number of pages available, the current page, and the total number of products in the repository. The easiest way to do this is to create a view model class, which is used specifically to pass data between a controller and a view. Create a Models/ViewModels folder in the SportsStore project, add to it a class file named PagingInfo.cs, and define the class shown in listing 7.27.
Listing 7.27 The contents of the PagingInfo.cs file in the SportsStore/Models/ViewModels folder
namespace SportsStore.Models.ViewModels {

    public class PagingInfo {
        public int TotalItems { get; set; }
        public int ItemsPerPage { get; set; }
        public int CurrentPage { get; set; }

        public int TotalPages =>
            (int)Math.Ceiling((decimal)TotalItems / ItemsPerPage);
    }
}
Adding the tag helper class
Now that I have a view model, it is time to create a tag helper class. Create a folder named Infrastructure in the SportsStore project and add to it a class file called PageLinkTagHelper.cs, with the code shown in listing 7.28. Tag helpers are a big part of ASP.NET Core development, and I explain how they work and how to use and create them in chapters 25–27.
TIP The Infrastructure folder is where I put classes that deliver the plumbing for an application but that are not related to the application’s main functionality. You don’t have to follow this convention in your own projects.
Listing 7.28 The contents of the PageLinkTagHelper.cs file in the SportsStore/Infrastructure folder
using Microsoft.AspNetCore.Mvc;
using Microsoft.AspNetCore.Mvc.Rendering;
using Microsoft.AspNetCore.Mvc.Routing;
using Microsoft.AspNetCore.Mvc.ViewFeatures;
using Microsoft.AspNetCore.Razor.TagHelpers;
using SportsStore.Models.ViewModels;

namespace SportsStore.Infrastructure {

    [HtmlTargetElement("div", Attributes = "page-model")]
    public class PageLinkTagHelper : TagHelper {
        private IUrlHelperFactory urlHelperFactory;

        public PageLinkTagHelper(IUrlHelperFactory helperFactory) {
            urlHelperFactory = helperFactory;
        }

        [ViewContext]
        [HtmlAttributeNotBound]
        public ViewContext? ViewContext { get; set; }

        public PagingInfo? PageModel { get; set; }

        public string? PageAction { get; set; }

        public override void Process(TagHelperContext context,
                TagHelperOutput output) {
            if (ViewContext != null && PageModel != null) {
                IUrlHelper urlHelper
                    = urlHelperFactory.GetUrlHelper(ViewContext);
                TagBuilder result = new TagBuilder("div");
                for (int i = 1; i <= PageModel.TotalPages; i++) {
                    TagBuilder tag = new TagBuilder("a");
                    tag.Attributes["href"] = urlHelper.Action(PageAction,
                       new { productPage = i });
                    tag.InnerHtml.Append(i.ToString());
                    result.InnerHtml.AppendHtml(tag);
                }
                output.Content.AppendHtml(result.InnerHtml);
            }
        }
    }
}
This tag helper populates a div element with a elements that correspond to pages of products. I am not going to go into detail about tag helpers now; it is enough to know that they are one of the most useful ways that you can introduce C# logic into your views. The code for a tag helper can look tortured because C# and HTML don’t mix easily. But using tag helpers is preferable to including blocks of C# code in a view because a tag helper can be easily unit tested.
Most ASP.NET Core components, such as controllers and views, are discovered automatically, but tag helpers have to be registered. In listing 7.29, I have added a statement to the _ViewImports.cshtml file in the Views folder that tells ASP.NET Core to look for tag helper classes in the SportsStore project. I also added an @using expression so that I can refer to the view model classes in views without having to qualify their names with the namespace.
Listing 7.29 Registering a tag helper in the _ViewImports.cshtml file in the SportsStore/Views folder
@using SportsStore.Models
@using SportsStore.Models.ViewModels
@addTagHelper *, Microsoft.AspNetCore.Mvc.TagHelpers
@addTagHelper *, SportsStore
Unit test: creating page links
To test the PageLinkTagHelper tag helper class, I call the Process method with test data and provide a TagHelperOutput object that I inspect to see the HTML that is generated, as follows, which I defined in a new PageLinkTagHelperTests.cs file in the SportsStore.Tests project:
using System.Collections.Generic;
using System.Threading.Tasks;
using Microsoft.AspNetCore.Mvc;
using Microsoft.AspNetCore.Mvc.Rendering;
using Microsoft.AspNetCore.Mvc.Routing;
using Microsoft.AspNetCore.Razor.TagHelpers;
using Moq;
using SportsStore.Infrastructure;
using SportsStore.Models.ViewModels;
using Xunit;

namespace SportsStore.Tests {

    public class PageLinkTagHelperTests {

        [Fact]
        public void Can_Generate_Page_Links() {
            // Arrange
            var urlHelper = new Mock<IUrlHelper>();
            urlHelper.SetupSequence(x =>
                     x.Action(It.IsAny<UrlActionContext>()))
                .Returns("Test/Page1")
                .Returns("Test/Page2")
                .Returns("Test/Page3");

            var urlHelperFactory = new Mock<IUrlHelperFactory>();
            urlHelperFactory.Setup(f =>
                    f.GetUrlHelper(It.IsAny<ActionContext>()))
                        .Returns(urlHelper.Object);

            var viewContext = new Mock<ViewContext>();

            PageLinkTagHelper helper =
                    new PageLinkTagHelper(urlHelperFactory.Object) {
                        PageModel = new PagingInfo {
                            CurrentPage = 2,
                            TotalItems = 28,
                            ItemsPerPage = 10
                        },
                        ViewContext = viewContext.Object,
                        PageAction = "Test"
                    };

            TagHelperContext ctx = new TagHelperContext(
                new TagHelperAttributeList(),
                new Dictionary<object, object>(), "");

            var content = new Mock<TagHelperContent>();
            TagHelperOutput output = new TagHelperOutput("div",
                new TagHelperAttributeList(),
                (cache, encoder) => Task.FromResult(content.Object));

            // Act
            helper.Process(ctx, output);

            // Assert
            Assert.Equal(@"<a href=""Test/Page1"">1</a>"
                + @"<a href=""Test/Page2"">2</a>"
                + @"<a href=""Test/Page3"">3</a>",
                 output.Content.GetContent());
        }
    }
}
The complexity in this test is in creating the objects that are required to create and use a tag helper. Tag helpers use IUrlHelperFactory objects to generate URLs that target different parts of the application, and I have used Moq to create an implementation of this interface and the related IUrlHelper interface that provides test data.
The core part of the test verifies the tag helper output by using a literal string value that contains double quotes. C# is perfectly capable of working with such strings, as long as the string is prefixed with @ and uses two sets of double quotes ("") in place of one set of double quotes. You must remember not to break the literal string into separate lines unless the string you are comparing to is similarly broken. For example, the literal I use in the test method has wrapped onto several lines because the width of a printed page is narrow. I have not added a newline character; if I did, the test would fail.
Adding the view model data
I am not quite ready to use the tag helper because I have yet to provide an instance of the PagingInfo view model class to the view. To do this, I added a class file called ProductsListViewModel.cs to the Models/ViewModels folder of the SportsStore project with the content shown in listing 7.30.
Listing 7.30 The contents of the ProductsListViewModel.cs file in the SportsStore/Models/ViewModels folder
namespace SportsStore.Models.ViewModels {

    public class ProductsListViewModel {
        public IEnumerable<Product> Products { get; set; }
            = Enumerable.Empty<Product>();
        public PagingInfo PagingInfo { get; set; } = new();
    }
}
I can update the Index action method in the HomeController class to use the ProductsListViewModel class to provide the view with details of the products to display on the page and with details of the pagination, as shown in listing 7.31.
Listing 7.31 Updating the action method in the HomeController.cs file in the SportsStore/Controllers folder
using Microsoft.AspNetCore.Mvc;
using SportsStore.Models;
using SportsStore.Models.ViewModels;

namespace SportsStore.Controllers {
    public class HomeController : Controller {
        private IStoreRepository repository;
        public int PageSize = 4;

        public HomeController(IStoreRepository repo) {
            repository = repo;
        }

        public ViewResult Index(int productPage = 1)
           => View(new ProductsListViewModel {
               Products = repository.Products
                   .OrderBy(p => p.ProductID)
                   .Skip((productPage - 1) * PageSize)
                   .Take(PageSize),
               PagingInfo = new PagingInfo {
                   CurrentPage = productPage,
                   ItemsPerPage = PageSize,
                   TotalItems = repository.Products.Count()
               }
           });
    }
}
These changes pass a ProductsListViewModel object as the model data to the view.
Unit test: page model view data
I need to ensure that the controller sends the correct pagination data to the view. Here is the unit test I added to the HomeControllerTests class in the test project to make sure:
...
[Fact]
public void Can_Send_Pagination_View_Model() {

    // Arrange
    Mock<IStoreRepository> mock = new Mock<IStoreRepository>();
    mock.Setup(m => m.Products).Returns((new Product[] {
        new Product {ProductID = 1, Name = "P1"},
        new Product {ProductID = 2, Name = "P2"},
        new Product {ProductID = 3, Name = "P3"},
        new Product {ProductID = 4, Name = "P4"},
        new Product {ProductID = 5, Name = "P5"}
    }).AsQueryable<Product>());

    // Arrange
    HomeController controller =
        new HomeController(mock.Object) { PageSize = 3 };

    // Act
    ProductsListViewModel result =
        controller.Index(2)?.ViewData.Model as ProductsListViewModel
            ?? new();

    // Assert
    PagingInfo pageInfo = result.PagingInfo;
    Assert.Equal(2, pageInfo.CurrentPage);
    Assert.Equal(3, pageInfo.ItemsPerPage);
    Assert.Equal(5, pageInfo.TotalItems);
    Assert.Equal(2, pageInfo.TotalPages);
}
...
I also need to modify the earlier unit tests to reflect the new result from the Index action method. Here are the revised tests:
...
[Fact]
public void Can_Use_Repository() {
    // Arrange
    Mock<IStoreRepository> mock = new Mock<IStoreRepository>();
    mock.Setup(m => m.Products).Returns((new Product[] {
        new Product {ProductID = 1, Name = "P1"},
        new Product {ProductID = 2, Name = "P2"}
    }).AsQueryable<Product>());

    HomeController controller = new HomeController(mock.Object);

    // Act
    ProductsListViewModel result =
        controller.Index()?.ViewData.Model as ProductsListViewModel
            ?? new();

    // Assert
    Product[] prodArray = result.Products.ToArray();
    Assert.True(prodArray.Length == 2);
    Assert.Equal("P1", prodArray[0].Name);
    Assert.Equal("P2", prodArray[1].Name);
}

[Fact]
public void Can_Paginate() {
    // Arrange
    Mock<IStoreRepository> mock = new Mock<IStoreRepository>();
    mock.Setup(m => m.Products).Returns((new Product[] {
        new Product {ProductID = 1, Name = "P1"},
        new Product {ProductID = 2, Name = "P2"},
        new Product {ProductID = 3, Name = "P3"},
        new Product {ProductID = 4, Name = "P4"},
        new Product {ProductID = 5, Name = "P5"}
    }).AsQueryable<Product>());

    HomeController controller = new HomeController(mock.Object);
    controller.PageSize = 3;

    // Act
    ProductsListViewModel result =
        controller.Index(2)?.ViewData.Model as ProductsListViewModel
            ?? new();

    // Assert
    Product[] prodArray = result.Products.ToArray();
    Assert.True(prodArray.Length == 2);
    Assert.Equal("P4", prodArray[0].Name);
    Assert.Equal("P5", prodArray[1].Name);
}
...
I would usually create a common setup method, given the degree of duplication between these two test methods. However, since I am delivering the unit tests in individual sidebars like this one, I am going to keep everything separate so you can see each test on its own.
The view is currently expecting a sequence of Product objects, so I need to update the Index.cshtml file, as shown in listing 7.32, to deal with the new view model type.
Listing 7.32 Updating the Index.cshtml file in the SportsStore/Views/Home folder
@model ProductsListViewModel

@foreach (var p in Model.Products ?? Enumerable.Empty<Product>()) {
    <div>
        <h3>@p.Name</h3>
        @p.Description
        <h4>@p.Price.ToString("c")</h4>
    </div>
}
I have changed the @model directive to tell Razor that I am now working with a different data type. I updated the foreach loop so that the data source is the Products property of the model data.
Displaying the page links
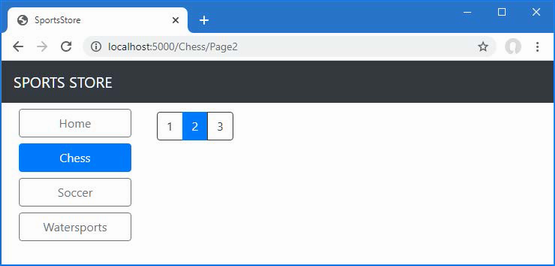
I have everything in place to add the page links to the Index view. I created the view model that contains the paging information, updated the controller so that it passes this information to the view, and changed the @model directive to match the new model view type. All that remains is to add an HTML element that the tag helper will process to create the page links, as shown in listing 7.33.
Listing 7.33 Adding the pagination links in the Index.cshtml file in the SportsStore/Views/Home folder
@model ProductsListViewModel

@foreach (var p in Model.Products ?? Enumerable.Empty<Product>()) {
    <div>
        <h3>@p.Name</h3>
        @p.Description
        <h4>@p.Price.ToString("c")</h4>
    </div>
}

<div page-model="@Model.PagingInfo" page-action="Index"></div>
Restart ASP.NET Core and request http://localhost:5000, and you will see the new page links, as shown in figure 7.5. The style is still basic, which I will fix later in the chapter. What is important for the moment is that the links take the user from page to page in the catalog and allow for exploration of the products for sale. When Razor finds the page-model attribute on the div element, it asks the PageLinkTagHelper class to transform the element, which produces the set of links shown in the figure.
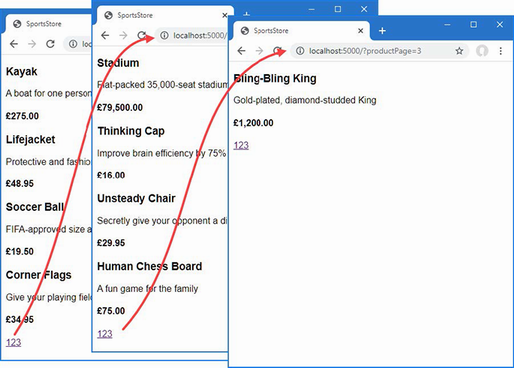
Figure 7.5 Displaying page navigation links
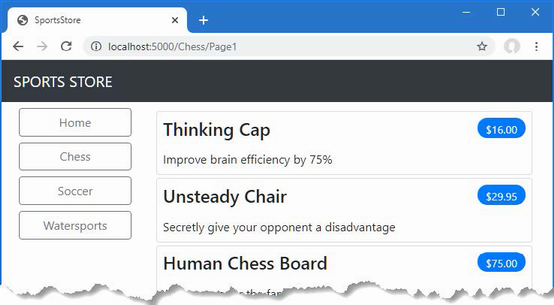
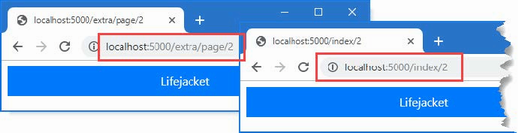
7.4.2 Improving the URLs
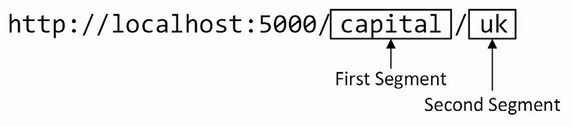
I have the page links working, but they still use the query string to pass page information to the server, like this:
http://localhost/?productPage=2
I can create URLs that are more appealing by creating a scheme that follows the pattern of composable URLs. A composable URL is one that makes sense to the user, like this one:
http://localhost/Page2
The ASP.NET Core routing feature makes it easy to change the URL scheme in an application. All I need to do is add a new route in the Program.cs file, as shown in listing 7.34.
Listing 7.34 Adding a new route in the Program.cs file in the SportsStore folder
using Microsoft.EntityFrameworkCore;
using SportsStore.Models;
var builder = WebApplication.CreateBuilder(args);
builder.Services.AddControllersWithViews();
builder.Services.AddDbContext<StoreDbContext>(opts => {
opts.UseSqlServer(
builder.Configuration["ConnectionStrings:SportsStoreConnection"]);
});
builder.Services.AddScoped<IStoreRepository, EFStoreRepository>();
var app = builder.Build();
app.UseStaticFiles();
app.MapControllerRoute("pagination",
"Products/Page{productPage}",
new { Controller = "Home", action = "Index" });
app.MapDefaultControllerRoute();
SeedData.EnsurePopulated(app);
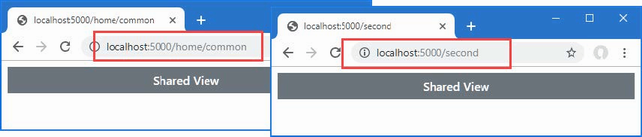
app.Run();This is the only alteration required to change the URL scheme for product pagination. ASP.NET Core and the routing function are tightly integrated, so the application automatically reflects a change like this in the URLs used by the application, including those generated by tag helpers like the one I use to generate the page navigation links.
Restart ASP.NET Core, request http://localhost:5000, and click one of the pagination links. The browser will navigate to a URL that uses the new URL scheme, as shown in figure 7.6.
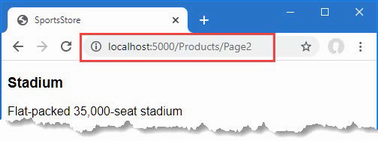
Figure 7.6 The new URL scheme displayed in the browser
7.5 Styling the content
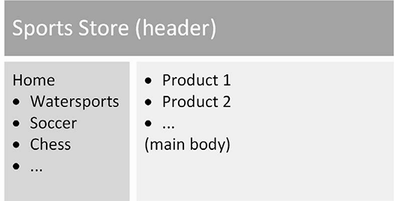
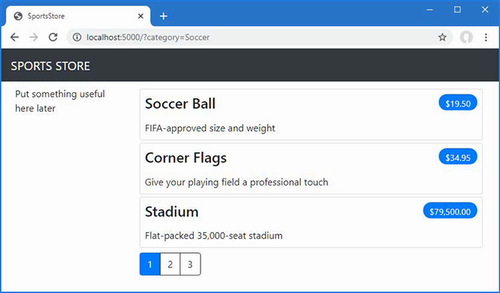
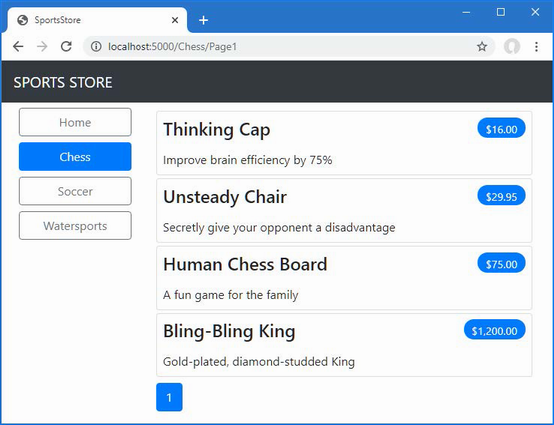
I have built a great deal of infrastructure, and the basic features of the application are starting to come together, but I have not paid any attention to appearance. Even though this book is not about design or CSS, the SportsStore application design is so miserably plain that it undermines its technical strengths. In this section, I will put some of that right. I am going to implement a classic two-column layout with a header, as shown in figure 7.7.

Figure 7.7 The design goal for the SportsStore application
7.5.1 Installing the Bootstrap package
I am going to use the Bootstrap package to provide the CSS styles I will apply to the application. As explained in chapter 4, client-side packages are installed using LibMan. If you did not install the LibMan package when following the examples in chapter 4, use a PowerShell command prompt to run the commands shown in listing 7.35, which remove any existing LibMan package and install the version required for this book.
Listing 7.35 Installing the LibMan tool package
dotnet tool uninstall --global Microsoft.Web.LibraryManager.Cli
dotnet tool install --global Microsoft.Web.LibraryManager.Cli --version 2.1.175
Once you have installed LibMan, run the commands shown in listing 7.36 in the SportsStore folder to initialize the example project and install the Bootstrap package.
Listing 7.36 Initializing the example project
libman init -p cdnjs
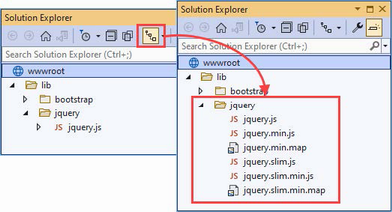
libman install bootstrap@5.2.3 -d wwwroot/lib/bootstrap7.5.2 Applying Bootstrap styles
Razor layouts provide common content so that it doesn’t have to be repeated in multiple views. Add the elements shown in listing 7.37 to the _Layout.cshtml file in the Views/Shared folder to include the Bootstrap CSS stylesheet in the content sent to the browser and define a common header that will be used throughout the SportsStore application.
Listing 7.37 Applying Bootstrap CSS to the _Layout.cshtml file in the SportsStore/Views/Shared folder
<!DOCTYPE html>
<html>
<head>
    <meta name="viewport" content="width=device-width" />
    <title>SportsStore</title>
    <link href="/lib/bootstrap/css/bootstrap.min.css" rel="stylesheet" />
</head>
<body>
    <div class="bg-dark text-white p-2">
        <span class="navbar-brand ml-2">SPORTS STORE</span>
    </div>
    <div class="row m-1 p-1">
        <div id="categories" class="col-3">
            Put something useful here later
        </div>
        <div class="col-9">
            @RenderBody()
        </div>
    </div>
</body>
</html>
Adding the Bootstrap CSS stylesheet to the layout means that I can use the styles it defines in any of the views that rely on the layout. Listing 7.38 shows the styling I applied to the Index.cshtml file.
Listing 7.38 Styling content in the Index.cshtml file in the SportsStore/Views/Home folder
@model ProductsListViewModel

@foreach (var p in Model.Products ?? Enumerable.Empty<Product>()) {
    <div class="card card-outline-primary m-1 p-1">
        <div class="bg-faded p-1">
            <h4>
                @p.Name
                <span class="badge rounded-pill bg-primary text-white"
                        style="float:right">
                    <small>@p.Price.ToString("c")</small>
                </span>
            </h4>
        </div>
        <div class="card-text p-1">@p.Description</div>
    </div>
}

<div page-model="@Model.PagingInfo" page-action="Index"
     page-classes-enabled="true" page-class="btn"
     page-class-normal="btn-outline-dark"
     page-class-selected="btn-primary" class="btn-group pull-right m-1">
</div>
I need to style the buttons generated by the PageLinkTagHelper class, but I don’t want to hardwire the Bootstrap classes into the C# code because it makes it harder to reuse the tag helper elsewhere in the application or change the appearance of the buttons. Instead, I have defined custom attributes on the div element that specify the classes that I require, and these correspond to properties I added to the tag helper class, which are then used to style the a elements that are produced, as shown in listing 7.39.
Listing 7.39 Adding classes to elements in the PageLinkTagHelper.cs file in the SportsStore/Infrastructure folder
using Microsoft.AspNetCore.Mvc;
using Microsoft.AspNetCore.Mvc.Rendering;
using Microsoft.AspNetCore.Mvc.Routing;
using Microsoft.AspNetCore.Mvc.ViewFeatures;
using Microsoft.AspNetCore.Razor.TagHelpers;
using SportsStore.Models.ViewModels;

namespace SportsStore.Infrastructure {

    [HtmlTargetElement("div", Attributes = "page-model")]
    public class PageLinkTagHelper : TagHelper {
        private IUrlHelperFactory urlHelperFactory;

        public PageLinkTagHelper(IUrlHelperFactory helperFactory) {
            urlHelperFactory = helperFactory;
        }

        [ViewContext]
        [HtmlAttributeNotBound]
        public ViewContext? ViewContext { get; set; }

        public PagingInfo? PageModel { get; set; }

        public string? PageAction { get; set; }

        public bool PageClassesEnabled { get; set; } = false;
        public string PageClass { get; set; } = String.Empty;
        public string PageClassNormal { get; set; } = String.Empty;
        public string PageClassSelected { get; set; } = String.Empty;

        public override void Process(TagHelperContext context,
                TagHelperOutput output) {
            if (ViewContext != null && PageModel != null) {
                IUrlHelper urlHelper
                    = urlHelperFactory.GetUrlHelper(ViewContext);
                TagBuilder result = new TagBuilder("div");
                for (int i = 1; i <= PageModel.TotalPages; i++) {
                    TagBuilder tag = new TagBuilder("a");
                    tag.Attributes["href"] = urlHelper.Action(PageAction,
                       new { productPage = i });
                    if (PageClassesEnabled) {
                        tag.AddCssClass(PageClass);
                        tag.AddCssClass(i == PageModel.CurrentPage
                            ? PageClassSelected : PageClassNormal);
                    }
                    tag.InnerHtml.Append(i.ToString());
                    result.InnerHtml.AppendHtml(tag);
                }
                output.Content.AppendHtml(result.InnerHtml);
            }
        }
    }
}
The values of the attributes are automatically used to set the tag helper property values, with the mapping between the HTML attribute name format (page-class-normal) and the C# property name format (PageClassNormal) taken into account. This allows tag helpers to respond differently based on the attributes of an HTML element, creating a more flexible way to generate content in an ASP.NET Core application.
Restart ASP.NET Core and request http://localhost:5000, and you will see the appearance of the application has been improved—at least a little, anyway—as illustrated by figure 7.8.
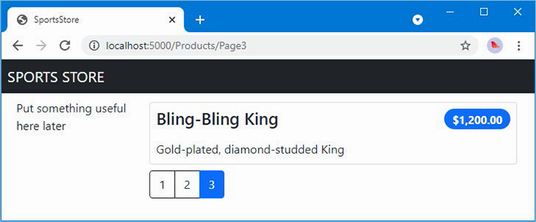
Figure 7.8 Applying styles to the SportsStore application
7.5.3 Creating a partial view
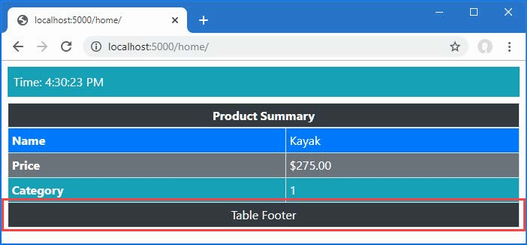
As a finishing flourish for this chapter, I am going to refactor the application to simplify the Index.cshtml view. I am going to create a partial view, which is a fragment of content that you can embed into another view, rather like a template. I describe partial views in detail in chapter 22, and they help reduce duplication when you need the same content to appear in different places in an application. Rather than copy and paste the same Razor markup into multiple views, you can define it once in a partial view. To create the partial view, I added a Razor View called ProductSummary.cshtml to the Views/Shared folder and added the markup shown in listing 7.40.
Listing 7.40 The contents of the ProductSummary.cshtml file in the SportsStore/Views/Shared folder
@model Product

<div class="card card-outline-primary m-1 p-1">
    <div class="bg-faded p-1">
        <h4>
            @Model.Name
            <span class="badge rounded-pill bg-primary text-white"
                  style="float:right">
                <small>@Model.Price.ToString("c")</small>
            </span>
        </h4>
    </div>
    <div class="card-text p-1">@Model.Description</div>
</div>
Now I need to update the Index.cshtml file in the Views/Home folder so that it uses the partial view, as shown in listing 7.41.
Listing 7.41 Using a partial view in the Index.cshtml file in the SportsStore/Views/Home folder
@model ProductsListViewModel

@foreach (var p in Model.Products ?? Enumerable.Empty<Product>()) {
    <partial name="ProductSummary" model="p" />
}

<div page-model="@Model.PagingInfo" page-action="Index"
     page-classes-enabled="true" page-class="btn"
     page-class-normal="btn-outline-dark"
     page-class-selected="btn-primary" class="btn-group pull-right m-1">
</div>
I have taken the markup that was previously in the @foreach expression in the Index.cshtml view and moved it to the new partial view. I call the partial view using a partial element, using the name and model attributes to specify the name of the partial view and its view model. Using a partial view allows the same markup to be inserted into any view that needs to display a summary of a product.
Restart ASP.NET Core and request http://localhost:5000, and you will see that introducing the partial view doesn’t change the appearance of the application; it just changes where Razor finds the content that is used to generate the response sent to the browser.
Summary
• The SportsStore ASP.NET Core project is created using the basic ASP.NET Core template.
• ASP.NET Core has close integration with Entity Framework Core, which is the .NET framework for working with relational data.
• Data can be paginated by including the page number in the request, either using the query string or the URL path and using the page when querying the database.
• The HTML content generated by ASP.NET Core can be styled using popular CSS frameworks, such as Bootstrap.