Pro ASP.NET Core 7 Chapter 6 Testing ASP.NET Core applications
Leave a reply
5 Essential C# features
This chapter covers
• Using C# language features for ASP.NET Core development
• Dealing with null values and the null state analysis feature
• Creating objects concisely
• Adding features to classes without directly modifying them
• Expressing functions concisely
• Modifying interfaces without breaking implementation classes
• Defining asynchronous methods
In this chapter, I describe C# features used in web application development that are not widely understood or that often cause confusion. This is not a book about C#, however, so I provide only a brief example for each feature so that you can follow the examples in the rest of the book and take advantage of these features in your projects. Table 5.1 provides a guide to this chapter.
Table 5.1 Chapter guide
| Problem | Solution | Listing |
|---|---|---|
Reducing duplication in using statements
|
Use global or implicit using statements.
|
8–10 |
| Managing null values | Use nullable and non-nullable types, which are managed with the null management operators. | 11–20 |
| Mixing static and dynamic values in strings | Use string interpolation. | 21 |
| Initializing and populate objects |
Use the object and collection initializers and target-typed new expressions.
|
22–26 |
| Assigning a value for specific types | Use pattern matching. | 27, 28 |
| Extending the functionality of a class without modifying it | Define an extension method. | 29–36 |
| Expressing functions and methods concisely | Use lambda expressions. | 37–44 |
| Defining a variable without explicitly declaring its type |
Use the var keyword.
|
45–47 |
| Modifying an interface without requiring changes in its implementation classes | Define a default implementation. | 48–52 |
| Performing work asynchronously |
Use tasks or the async/await keywords.
|
53–55 |
| Producing a sequence of values over time | Use an asynchronous enumerable. | 56–59 |
| Getting the name of a class or member |
Use a nameof expression.
|
60, 61 |
5.1 Preparing for this chapter
To create the example project for this chapter, open a new PowerShell command prompt and run the commands shown in listing 5.1. If you are using Visual Studio and prefer not to use the command line, you can create the project using the process described in chapter 4.
TIP You can download the example project for this chapter—and for all the other chapters in this book—from https://github.com/manningbooks/pro-asp.net-core-7. See chapter 1 for how to get help if you have problems running the examples.
Listing 5.1 Creating the example project
dotnet new globaljson --sdk-version 7.0.100 --output LanguageFeatures
dotnet new web --no-https --output LanguageFeatures --framework net7.0
dotnet new sln -o LanguageFeatures
dotnet sln LanguageFeatures add LanguageFeatures
5.1.1 Opening the project
If you are using Visual Studio, select File > Open > Project/Solution, select the LanguageFeatures.sln file in the LanguageFeatures folder, and click the Open button to open the solution file and the project it references. If you are using Visual Studio Code, select File > Open Folder, navigate to the LanguageFeatures folder, and click the Select Folder button.
5.1.2 Enabling the MVC Framework
The web project template creates a project that contains a minimal ASP.NET Core configuration. This means the placeholder content that is added by the mvc template used in chapter 3 is not available and that extra steps are required to reach the point where the application can produce useful output. In this section, I make the changes required to set up the MVC Framework, which is one of the application frameworks supported by ASP.NET Core, as I explained in chapter 1. First, to enable the MVC framework, make the changes shown in listing 5.2 to the Program.cs file.
Listing 5.2 Enabling MVC in the Program.cs file in the LanguageFeatures folder
var builder = WebApplication.CreateBuilder(args);
builder.Services.AddControllersWithViews();
var app = builder.Build();
//app.MapGet("/", () => "Hello World!");
app.MapDefaultControllerRoute();
app.Run();
I explain how to configure ASP.NET Core applications in part 2, but the two statements added in listing 5.2 provide a basic MVC framework setup using a default configuration.
5.1.3 Creating the application components
Now that the MVC framework is set up, I can add the application components that I will use to demonstrate important C# language features. As you create these components, you will see that the code editor underlines some expressions to warn you of potential problems. These are safe to ignore until the “Understanding Null State Analysis” section, where I explain their significance.
Creating the data model
I started by creating a simple model class so that I can have some data to work with. I added a folder called Models and created a class file called Product.cs within it, which I used to define the class shown in listing 5.3.
Listing 5.3 The contents of the Product.cs file in the Models folder
namespace LanguageFeatures.Models {
public class Product {
public string Name { get; set; }
public decimal? Price { get; set; }
public static Product[] GetProducts() {
Product kayak = new Product {
Name = "Kayak", Price = 275M
};
Product lifejacket = new Product {
Name = "Lifejacket", Price = 48.95M
};
return new Product[] { kayak, lifejacket, null };
}
}
}
The Product class defines Name and Price properties, and there is a static method called GetProducts that returns a Product array. One of the elements contained in the array returned by the GetProducts method is set to null, which I will use to demonstrate some useful language features later in the chapter.
The Visual Studio and Visual Studio Code editors will highlight a problem with the Name property. This is a deliberate error that I explain later in the chapter and which should be ignored for now.
Creating the controller and view
For the examples in this chapter, I use a simple controller class to demonstrate different language features. I created a Controllers folder and added to it a class file called HomeController.cs, the contents of which are shown in listing 5.4.
Listing 5.4 The contents of the HomeController.cs file in the Controllers folder
using Microsoft.AspNetCore.Mvc;
namespace LanguageFeatures.Controllers {
public class HomeController : Controller {
public ViewResult Index() {
return View(new string[] { "C#", "Language", "Features" });
}
}
}
The Index action method tells ASP.NET Core to render the default view and provides it with an array of strings as its view model, which will be included in the HTML sent to the client. To create the view, I added a Views/Home folder (by creating a Views folder and then adding a Home folder within it) and added a Razor View called Index.cshtml, the contents of which are shown in listing 5.5.
Listing 5.5 The contents of the Index.cshtml file in the Views/Home folder
@model IEnumerable<string>
@{ Layout = null; }
<!DOCTYPE html>
<html>
<head>
<meta name="viewport" content="width=device-width" />
<title>Language Features</title>
</head>
<body>
<ul>
@foreach (string s in Model) {
<li>@s</li>
}
</ul>
</body>
</html>
The code editor will highlight part of this file to denote a warning, which I explain shortly.
5.1.4 Selecting the HTTP port
Change the HTTP port that ASP.NET Core uses to receive requests, as shown in listing 5.6.
Listing 5.6 Setting the HTTP port in the launchSettings.json file in the Properties folder
{
"iisSettings": {
"windowsAuthentication": false,
"anonymousAuthentication": true,
"iisExpress": {
"applicationUrl": "http://localhost:5000",
"sslPort": 0
}
},
"profiles": {
"LanguageFeatures": {
"commandName": "Project",
"dotnetRunMessages": true,
"launchBrowser": true,
"applicationUrl": "http://localhost:5000",
"environmentVariables": {
"ASPNETCORE_ENVIRONMENT": "Development"
}
},
"IIS Express": {
"commandName": "IISExpress",
"launchBrowser": true,
"environmentVariables": {
"ASPNETCORE_ENVIRONMENT": "Development"
}
}
}
}
5.1.5 Running the example application
Start ASP.NET Core by running the command shown in listing 5.7 in the LanguageFeatures folder.
Listing 5.7 Running the example application
dotnet run
The output from the dotnet run command will include two build warnings, which I explain in the “Understanding Null State Analysis” section. Once ASP.NET Core has started, use a web browser to request http://localhost:5000, and you will see the output shown in figure 5.1.

Figure 5.1 Running the example application
Since the output from all the examples in this chapter is text, I will show the messages displayed by the browser like this:
• C#
• Language
• Features
5.2 Understanding top-level statements
Top-level statements are intended to remove unnecessary code structure from class files. A project can contain one file that defines code statements outside of a namespace or a file. For ASP.NET Core applications, this feature is used to configure the application in the Program.cs file. Here is the content of the Program.cs file in the example application for this chapter:
var builder = WebApplication.CreateBuilder(args);
builder.Services.AddControllersWithViews();
var app = builder.Build();
//app.MapGet("/", () => "Hello World!");
app.MapDefaultControllerRoute();
app.Run();
If you have used earlier versions of ASP.NET Core, you will be familiar with the Startup class, which was used to configure the application. Top-level statements have allowed this process to be simplified, and all of the configuration statements are now defined in the Program.cs file.
The compiler will report an error if there is more than one file in a project with top-level statements, so the Program.cs file is the only place you will find them in an ASP.NET Core project.
5.3 Understanding global using statements
C# supports global using statements, which allow a using statement to be defined once but take effect throughout a project. Traditionally, each code file contains a series of using statements that declare dependencies on the namespaces that it requires. Listing 5.8 adds a using statement that provides access to the types defined in the Models namespace. (The code editor will highlight part of this code listing, which I explain in the “Understanding Null State Analysis” section.)
Listing 5.8 Adding a statement in the HomeController.cs file in the Controllers folder
using Microsoft.AspNetCore.Mvc;
using LanguageFeatures.Models;
namespace LanguageFeatures.Controllers {
public class HomeController : Controller {
public ViewResult Index() {
Product[] products = Product.GetProducts();
return View(new string[] { products[0].Name });
}
}
}
To access the Product class, I added a using statement for the namespace that contains it, which is LanguageFeatures.Models. The code file already contains a using statement for the Microsoft.AspNetCore.Mvc namespace, which provides access to the Controller class, from which the HomeController class is derived.
In most projects, some namespaces are required throughout the application, such as those containing data model classes. This can result in a long list of using statements, duplicated in every code file. Global using statements address this problem by allowing using statements for commonly required namespaces to be defined in a single location. Add a code file named GlobalUsings.cs to the LanguageFeatures project with the content shown in listing 5.9.
Listing 5.9 The contents of the GlobalUsings.cs file in the LanguageFeatures folder
global using LanguageFeatures.Models;
global using Microsoft.AspNetCore.Mvc;
The global keyword is used to denote a global using. The statements in listing 5.9 make the LanguageFeatures.Models and Microsoft.AspNetCore.Mvc namespaces available throughout the application, which means they can be removed from the HomeController.cs file, as shown in listing 5.10.
Listing 5.10 Removing statements in the HomeController.cs file in the Controllers folder
//using Microsoft.AspNetCore.Mvc;
//using LanguageFeatures.Models;
namespace LanguageFeatures.Controllers {
public class HomeController : Controller {
public ViewResult Index() {
Product[] products = Product.GetProducts();
return View(new string[] { products[0].Name });
}
}
}
If you run the example, you will see the following results displayed in the browser window:
Kayak
You will receive warnings when compiling the project, which I explain in the “Understanding Null State Analysis” section.
NOTE Global using statements are a good idea, but I have not used them in this book because I want to make it obvious when I add a dependency to a new namespace.
5.3.1 Understanding implicit using statements
The ASP.NET Core project templates enable a feature named implicit usings, which define global using statements for these commonly required namespaces:
• System
• System.Collections.Generic
• System.IO
• System.Linq
• System.Net.Http
• System.Net.Http.Json
• System.Threading
• System.Threading.Tasks
• Microsoft.AspNetCore.Builder
• Microsoft.AspNetCore.Hosting
• Microsoft.AspNetCore.Http
• Microsoft.AspNetCore.Routing
• Microsoft.Extensions.Configuration
• Microsoft.Extensions.DependencyInjection
• Microsoft.Extensions.Hosting
• Microsoft.Extensions.Logging
using statements are not required for these namespaces, which are available throughout the application. These namespaces don’t cover all of the ASP.NET Core features, but they do cover the basics, which is why no explicit using statements are required in the Program.cs file.
5.4 Understanding null state analysis
The editor and compiler warnings shown in earlier sections are produced because ASP.NET Core project templates enable null state analysis, in which the compiler identifies attempts to access references that may be unintentionally null, preventing null reference exceptions at runtime.
Open the Product.cs file, and the editor will display two warnings, as shown in figure 5.2. The figure shows how Visual Studio displays a warning, but Visual Studio Code is similar.

Figure 5.2 A null state analysis warning
When null state analysis is enabled, C# variables are divided into two groups: nullable and non-nullable. As their name suggests, nullable variables can be assigned the special value null. This is the behavior that most programmers are familiar with, and it is entirely up to the developer to guard against trying to use null references, which will trigger a NullReferenceException.
By contrast, non-nullable variables can never be null. When you receive a non-nullable variable, you don’t have to guard against a null value because that is not a value that can ever be assigned.
A question mark (the ? character) is appended to a type to denote a nullable type. So, if a variable’s type is string?, for example, then it can be assigned any value string value or null. When attempting to access this variable, you should check to ensure that it isn’t null before attempting to access any of the fields, properties, or methods defined by the string type.
If a variable’s type is string, then it cannot be assigned null values, which means you can confidently access the features it provides without needing to guard against null references.
The compiler examines the code in the project and warns you when it finds statements that might break these rules. The most common issues are attempting to assign null to non-nullable variables and attempting to access members defined by nullable variables without checking to see if they are null. In the sections that follow, I explain the different ways that the warnings raised by the compiler in the example application can be addressed.
NOTE Getting to grips with nullable and non-nullable types can be frustrating. A change in one code file can simply move a warning to another part of the application, and it can feel like you are chasing problems through a project. But it is worth sticking with null state analysis because null reference exceptions are the most common runtime error, and few programmers are disciplined enough to guard against null values without the compiler analysis feature.
5.4.1 Ensuring fields and properties are assigned values
The first warning in the Product.cs file is for the Name field, whose type is string, which is a non-nullable type (because it hasn’t been annotated with a question mark).
...
public string Name { get; set; }
...
One consequence of using non-nullable types is that properties like Name must be assigned a value when a new instance of the enclosing class is created. If this were not the case, then the Name property would not be initialized and would be null. And this is a problem because we can’t assign null to a non-nullable property, even indirectly.
The required keyword can be used to indicate that a value is required for a non-nullable type, as shown in listing 5.11.
Listing 5.11 Using the required keyword in the Product.cs file in the Models folder
namespace LanguageFeatures.Models {
public class Product {
public required string Name { get; set; }
public decimal? Price { get; set; }
public static Product[] GetProducts() {
Product kayak = new Product {
Name = "Kayak", Price = 275M
};
Product lifejacket = new Product {
Name = "Lifejacket", Price = 48.95M
};
return new Product[] { kayak, lifejacket, null };
}
}
}
The compiler will check to make sure that a value is assigned to the property when a new instance of the containing type is created. The two Product objects used in the listing are created with a value for the Name field, which satisfies the demands of the required keyword. Listing 5.12 omits the Name value from one of Product objects.
Listing 5.12 Omitting a value in the Product.cs file in the Models folder
namespace LanguageFeatures.Models {
public class Product {
public required string Name { get; set; }
public decimal? Price { get; set; }
public static Product[] GetProducts() {
Product kayak = new Product {
Name = "Kayak", Price = 275M
};
Product lifejacket = new Product {
//Name = "Lifejacket",
Price = 48.95M
};
return new Product[] { kayak, lifejacket, null };
}
}
}
If you run the example, the build process will fail with this error:
Required member 'Product.Name' must be set in the object initializer or attribute constructor.
This error—and the corresponding red line in the code editor—tell you that a value for the Name property is required but has not been provided.
5.4.2 Providing a default value for non-nullable types
The required keyword is a good way to denote a property that cannot be null, and which requires a value when an object is created. This approach can become cumbersome in situations where there may not always be a suitable data value available, because it requires the code wants to create the object to provide a fallback value and there is no good way to enforce consistency.
For these situations a default value can be used instead of the required keyword, as shown in listing 5.13.
Listing 5.13 Providing a default value in the Product.cs file in the Models folder
namespace LanguageFeatures.Models {
public class Product {
public string Name { get; set; } = string.Empty;
public decimal? Price { get; set; }
public static Product[] GetProducts() {
Product kayak = new Product {
Name = "Kayak", Price = 275M
};
Product lifejacket = new Product {
//Name = "Lifejacket",
Price = 48.95M
};
return new Product[] { kayak, lifejacket, null };
}
}
}
The default value in this example is the empty string. This value will be replaced for Product objects that are created with a Name value and ensures consistency for objects that are created without one.
5.4.3 Using nullable types
The remaining warning in the Product.cs file occurs because there is a mismatch between the type used for the result of the GetProducts method and the values that are used to initialize it:
...
return new Product[] { kayak, lifejacket, null };
...
The type of the array that is created is Product[], which contains non-nullable Product references. But one of the values used to populate the array is null, which isn’t allowed. Listing 5.14 changes the array type so that nullable values are allowed.
Listing 5.14 Using a nullable type in the Product.cs file in the Models folder
namespace LanguageFeatures.Models {
public class Product {
public string Name { get; set; } = string.Empty;
public decimal? Price { get; set; }
public static Product?[] GetProducts() {
Product kayak = new Product {
Name = "Kayak", Price = 275M
};
Product lifejacket = new Product {
//Name = "Lifejacket",
Price = 48.95M
};
return new Product?[] { kayak, lifejacket, null };
}
}
}
/The type Product?[] denotes an array of Product? references, which means the result can include null. Notice that I had to make the same change to the result type declared by the GetProducts method because a Product?[] array cannot be used where a Product[] is expected.
Selecting the right nullable type
Care must be taken to apply the question mark correctly, especially when dealing with arrays and collections. A variable of type Product?[] denotes an array that can contain Product or null values but that won’t be null itself:
...
Product?[] arr1 = new Product?[] { kayak, lifejacket, null }; // OK
Product?[] arr2 = null; // Not OK
...
A variable of type Product[]? is an array that can hold only Product values and not null values, but the array itself may be null:
...
Product[]? arr1 = new Product?[] { kayak, lifejacket, null }; // Not OK
Product[]? arr2 = null; // OK
...
A variable of type Product?[]? is an array that can contain Product or null values and that can itself be null:
...
Product?[]? arr1 = new Product?[] { kayak, lifejacket, null }; // OK
Product?[]? arr2 = null; // Also OK
...
Null state analysis is a useful feature, but that doesn’t mean it is always easy to understand.
5.4.4 Checking for null values
I explained that dealing with null state analysis warnings can feel like chasing a problem through code, and you can see a simple example of this in the HomeController.cs file in the Controllers folder. In listing 5.14, I changed the type returned by the GetProducts method to allow null values, but that has created a mismatch in the HomeController class, which invokes that method and assigns the result to an array of non-nullable Product values:
...
Product[] products = Product.GetProducts();
...
This is easily resolved by changing the type of the products variable to match the type returned by the GetProducts method, as shown in listing 5.15.
Listing 5.15 Changing Type in the HomeController.cs File in the Controllers Folder
namespace LanguageFeatures.Controllers {
public class HomeController : Controller {
public ViewResult Index() {
Product?[] products = Product.GetProducts();
return View(new string[] { products[0].Name });
}
}
}
This resolves one warning and introduces another, as shown in figure 5.3.
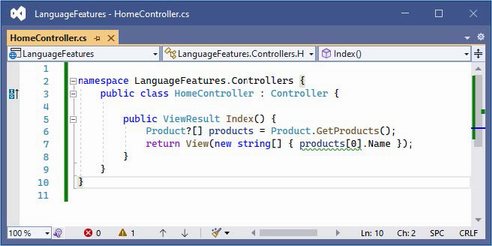
Figure 5.3 An additional null state analysis warning
The statement flagged by the compiler attempts to access the Name field of the element at index zero in the array, which might be null since the array type is Product?[]. Addressing this issue requires a check for null values, as shown in listing 5.16.
Listing 5.16 Guarding against null in the HomeController.cs file in the Controllers folder
namespace LanguageFeatures.Controllers {
public class HomeController : Controller {
public ViewResult Index() {
Product?[] products = Product.GetProducts();
Product? p = products[0];
string val;
if (p != null) {
val = p.Name;
} else {
val = "No value";
}
return View(new string[] { val });
}
}
}
This is an especially verbose way of avoiding a null, which I will refine shortly. But it demonstrates an important point, which is that the compiler can understand the effect of C# expressions when checking for a null reference. In listing 5.16, I use an if statement to see if a Product? variable is not null, and the compiler understands that the variable cannot be null within the scope of the if clause and doesn’t generate a warning when I read the name field:
...
if (p != null) {
val = p.Name;
} else {
val = "No value";
}
...
The compiler has a sophisticated understanding of C# but doesn’t always get it right, and I explain what to do when the compiler isn’t able to accurately determine whether a variable is null in the “Overriding Null State Analysis” section.
Using the null conditional operator
The null conditional operator is a more concise way of avoiding member access for null values, as shown in listing 5.17.
Listing 5.17 Null conditional operator in the HomeController.cs file in the Controllers folder
namespace LanguageFeatures.Controllers {
public class HomeController : Controller {
public ViewResult Index() {
Product?[] products = Product.GetProducts();
string? val = products[0]?.Name;
if (val != null) {
return View(new string[] { val });
}
return View(new string[] { "No Value" });
}
}
}
The null conditional operator is a question mark applied before a member is accessed, like this:
...
string? val = products[0]?.Name;
...
The operator returns null if it is applied to a variable that is null. In this case, if the element at index zero of the products array is null, then the operator will return null and prevent an attempt to access the Name property, which would cause an exception. If products[0] isn’t null, then the operator does nothing, and the expression returns the value assigned to the Name property. Applying the null conditional operator can return null, and its result must always be assigned to a nullable variable, such as the string? used in this example.
Using the null-coalescing operator
The null-coalescing operator is two question mark characters (??) and is used to provide a fallback value, often used in conjunction with the null conditional operator, as shown in listing 5.18.
Listing 5.18 Using the null-coalescing operator in the HomeController.cs file in the Controllers folder
namespace LanguageFeatures.Controllers {
public class HomeController : Controller {
public ViewResult Index() {
Product?[] products = Product.GetProducts();
return View(new string[] { products[0]?.Name ??"No Value" });
}
}
}
The ?? operator returns the value of its left-hand operand if it isn’t null. If the left-hand operand is null, then the ?? operator returns the value of its right-hand operand. This behavior works well with the null conditional operator. If products[0] is null, then the ? operator will return null, and the ?? operator will return "No Value". If products[0] isn’t null, then the result will be the value of its Name property. This is a more concise way of performing the same null checks shown in earlier examples.
NOTE The ? and ?? operators cannot always be used, and you will see examples in later chapters where I use an if statement to check for null values. One common example is when using the await/async keywords, which are described later in this chapter, and which do not integrate well with the null conditional operator.
5.4.5 Overriding null state analysis
The C# compiler has a sophisticated understanding of when a variable can be null, but it doesn’t always get it right, and there are times when you have a better understanding of whether a null value can arise than the compiler. In these situations, the null-forgiving operator can be used to tell the compiler that a variable isn’t null, regardless of what the null state analysis suggests, as shown in listing 5.19.
Listing 5.19 Using the null-forgiving operator in the HomeController.cs file in the Controllers folder
namespace LanguageFeatures.Controllers {
public class HomeController : Controller {
public ViewResult Index() {
Product?[] products = Product.GetProducts();
return View(new string[] { products[0]!.Name });
}
}
}
The null-forgiving operator is an exclamation mark and is used in this example to tell the compiler that products[0] isn’t null, even though null state analysis has identified that it might be.
When using the ! operator, you are telling the compiler that you have better insight into whether a variable can be null, and, naturally, this should be done only when you are entirely confident that you are right.
5.4.6 Disabling null state analysis warnings
An alternative to the null-forgiving operator is to disable null state analysis warnings for a particular section of code or a complete code file, as shown in listing 5.20.
Listing 5.20 Disabling warnings in the HomeController.cs file in the Controllers folder
namespace LanguageFeatures.Controllers {
public class HomeController : Controller {
public ViewResult Index() {
Product?[] products = Product.GetProducts();
#pragma warning disable CS8602
return View(new string[] { products[0].Name });
}
}
}
This listing uses a #pragma directive to suppress warning CS8602 (you can identify warnings in the output from the build process).
NOTE .NET includes a set of advanced attributes that can be used to provide the compiler with guidance for null state analysis. These are not widely used and are encountered only in chapter 36 of this book because they are used by one part of the ASP.NET Core API. See https://docs.microsoft.com/en-us/dotnet/csharp/language-reference/attributes/nullable-analysis for details.
5.5 Using string interpolation
C# supports string interpolation to create formatted strings, which uses templates with variable names that are resolved and inserted into the output, as shown in listing 5.21.
Listing 5.21 Using string interpolation in the HomeController.cs file in the Controllers folder
namespace LanguageFeatures.Controllers {
public class HomeController : Controller {
public ViewResult Index() {
Product?[] products = Product.GetProducts();
return View(new string[] {
$"Name: {products[0]?.Name}, Price: { products[0]?.Price }"
});
}
}
}
Interpolated strings are prefixed with the $ character and contain holes, which are references to values contained within the { and } characters. When the string is evaluated, the holes are filled in with the current values of the variables or constants that are specified.
TIP String interpolation supports the string format specifiers, which can be applied within holes, so $"Price: {price:C2}" would format the price value as a currency value with two decimal digits, for example.
Start ASP.NET Core and request http://localhost:5000, and you will see a formatted string:
Name: Kayak, Price: 275
5.6 Using object and collection initializers
When I create an object in the static GetProducts method of the Product class, I use an object initializer, which allows me to create an object and specify its property values in a single step, like this:
...
Product kayak = new Product {
Name = "Kayak", Price = 275M
};
...
This is another syntactic sugar feature that makes C# easier to use. Without this feature, I would have to call the Product constructor and then use the newly created object to set each of the properties, like this:
...
Product kayak = new Product();
kayak.Name = "Kayak";
kayak.Price = 275M;
...
A related feature is the collection initializer, which allows the creation of a collection and its contents to be specified in a single step. Without an initializer, creating a string array, for example, requires the size of the array and the array elements to be specified separately, as shown in listing 5.22.
Listing 5.22 Initializing an object in the HomeController.cs file in the Controllers folder
namespace LanguageFeatures.Controllers {
public class HomeController : Controller {
public ViewResult Index() {
string[] names = new string[3];
names[0] = "Bob";
names[1] = "Joe";
names[2] = "Alice";
return View("Index", names);
}
}
}
Using a collection initializer allows the contents of the array to be specified as part of the construction, which implicitly provides the compiler with the size of the array, as shown in listing 5.23.
Listing 5.23 A collection initializer in the HomeController.cs file in the Controllers folder
namespace LanguageFeatures.Controllers {
public class HomeController : Controller {
public ViewResult Index() {
return View("Index", new string[] { "Bob", "Joe", "Alice" });
}
}
}
The array elements are specified between the { and } characters, which allows for a more concise definition of the collection and makes it possible to define a collection inline within a method call. The code in listing 5.23 has the same effect as the code in listing 5.22. Restart ASP.NET Core and request http://localhost:5000, and you will see the following output in the browser window:
Bob
Joe
Alice
5.6.1 Using an index initializer
Recent versions of C# tidy up the way collections that use indexes, such as dictionaries, are initialized. Listing 5.24 shows the Index action rewritten to define a collection using the traditional C# approach to initializing a dictionary.
Listing 5.24 Initializing a dictionary in the HomeController.cs file in the Controllers folder
namespace LanguageFeatures.Controllers {
public class HomeController : Controller {
public ViewResult Index() {
Dictionary<string, Product> products
= new Dictionary<string, Product> {
{
"Kayak",
new Product { Name = "Kayak", Price = 275M }
},
{
"Lifejacket",
new Product{ Name = "Lifejacket", Price = 48.95M }
}
};
return View("Index", products.Keys);
}
}
}
The syntax for initializing this type of collection relies too much on the { and } characters, especially when the collection values are created using object initializers. The latest versions of C# support a more natural approach to initializing indexed collections that is consistent with the way that values are retrieved or modified once the collection has been initialized, as shown in listing 5.25.
Listing 5.25 Using collection initializer syntax in the HomeController.cs file in the Controllers folder
namespace LanguageFeatures.Controllers {
public class HomeController : Controller {
public ViewResult Index() {
Dictionary<string, Product> products
= new Dictionary<string, Product> {
["Kayak"] = new Product { Name = "Kayak", Price = 275M },
["Lifejacket"] = new Product { Name = "Lifejacket",
Price = 48.95M }
};
return View("Index", products.Keys);
}
}
}
The effect is the same—to create a dictionary whose keys are Kayak and Lifejacket and whose values are Product objects—but the elements are created using the index notation that is used for other collection operations. Restart ASP.NET Core and request http://localhost:5000, and you will see the following results in the browser:
Kayak
Lifejacket5.7 Using target-typed new expressions
The example in listing 5.25 is still verbose and declares the collection type when defining the variable and creating an instance with the new keyword:
...
Dictionary<string, Product> products = new Dictionary<string, Product> {
["Kayak"] = new Product { Name = "Kayak", Price = 275M },
["Lifejacket"] = new Product { Name = "Lifejacket", Price = 48.95M }
};
...This can be simplified using a target-typed new expression, as shown in listing 5.26.
Listing 5.26 Using a target-typed new expression in the HomeController.cs file in the Controllers folder
namespace LanguageFeatures.Controllers {
public class HomeController : Controller {
public ViewResult Index() {
Dictionary<string, Product> products = new () {
["Kayak"] = new Product { Name = "Kayak", Price = 275M },
["Lifejacket"] = new Product { Name = "Lifejacket",
Price = 48.95M }
};
return View("Index", products.Keys);
}
}
}The type can be replaced with new() when the compiler can determine which type is required and constructor arguments are provided as arguments to the new method. Creating instances with the new() expression works only when the compiler can determine which type is required. Restart ASP.NET Core and request http://localhost:5000, and you will see the following results in the browser:
Kayak
Lifejacket
5.8 Pattern Matching
One of the most useful recent additions to C# is support for pattern matching, which can be used to test that an object is of a specific type or has specific characteristics. This is another form of syntactic sugar, and it can dramatically simplify complex blocks of conditional statements. The is keyword is used to perform a type test, as demonstrated in listing 5.27.
Listing 5.27 Testing a type in the HomeController.cs file in the Controllers folder
namespace LanguageFeatures.Controllers {
public class HomeController : Controller {
public ViewResult Index() {
object[] data = new object[] { 275M, 29.95M,
"apple", "orange", 100, 10 };
decimal total = 0;
for (int i = 0; i < data.Length; i++) {
if (data[i] is decimal d) {
total += d;
}
}
return View("Index", new string[] { $"Total: {total:C2}" });
}
}
}
The is keyword performs a type check and, if a value is of the specified type, will assign the value to a new variable, like this:
...
if (data[i] is decimal d) {
...This expression evaluates as true if the value stored in data[i] is a decimal. The value of data[i] will be assigned to the variable d, which allows it to be used in subsequent statements without needing to perform any type conversions. The is keyword will match only the specified type, which means that only two of the values in the data array will be processed (the other items in the array are string and int values). If you run the application, you will see the following output in the browser window:
Total: $304.955.8.1 Pattern matching in switch statements
Pattern matching can also be used in switch statements, which support the when keyword for restricting when a value is matched by a case statement, as shown in listing 5.28.
Listing 5.28 Pattern matching in the HomeController.cs file in the Controllers folder
namespace LanguageFeatures.Controllers {
public class HomeController : Controller {
public ViewResult Index() {
object[] data = new object[] { 275M, 29.95M,
"apple", "orange", 100, 10 };
decimal total = 0;
for (int i = 0; i < data.Length; i++) {
switch (data[i]) {
case decimal decimalValue:
total += decimalValue;
break;
case int intValue when intValue > 50:
total += intValue;
break;
}
}
return View("Index", new string[] { $"Total: {total:C2}" });
}
}
}
To match any value of a specific type, use the type and variable name in the case statement, like this:
...
case decimal decimalValue:
...
This case statement matches any decimal value and assigns it to a new variable called decimalValue. To be more selective, the when keyword can be included, like this:
...
case int intValue when intValue > 50:
...
This case statement matches int values and assigns them to a variable called intValue, but only when the value is greater than 50. Restart ASP.NET Core and request http://localhost:5000, and you will see the following output in the browser window:
Total: $404.95
5.9 Using extension methods
Extension methods are a convenient way of adding methods to classes that you cannot modify directly, typically because they are provided by Microsoft or a third-party package. Listing 5.29 shows the definition of the ShoppingCart class, which I added to the Models folder in a class file called ShoppingCart.cs and which represents a collection of Product objects.
Listing 5.29 The contents of the ShoppingCart.cs file in the Models folder
namespace LanguageFeatures.Models {
public class ShoppingCart {
public IEnumerable<Product?>? Products { get; set; }
}
}This is a simple class that acts as a wrapper around a sequence of Product objects (I only need a basic class for this example). Note the type of the Products property, which denotes a nullable enumerable of nullable Products, meaning that the Products property may be null and that any sequence of elements assigned to the property may contain null values.
Suppose I need to be able to determine the total value of the Product objects in the ShoppingCart class, but I cannot modify the class because it comes from a third party, and I do not have the source code. I can use an extension method to add the functionality I need.
Add a class file named MyExtensionMethods.cs in the Models folder and use it to define the class shown in listing 5.30.
Listing 5.30 The contents of the MyExtensionMethods.cs file in the Models folder
namespace LanguageFeatures.Models {
public static class MyExtensionMethods {
public static decimal TotalPrices(this ShoppingCart cartParam) {
decimal total = 0;
if (cartParam.Products != null) {
foreach (Product? prod in cartParam.Products) {
total += prod?.Price ?? 0;
}
}
return total;
}
}
}Extension methods are static and are defined in static classes. Listing 5.30 defines a single extension method named TotalPrices. The this keyword in front of the first parameter marks TotalPrices as an extension method. The first parameter tells .NET which class the extension method can be applied to—ShoppingCart in this case. I can refer to the instance of the ShoppingCart that the extension method has been applied to by using the cartParam parameter. This extension method enumerates the Product objects in the ShoppingCart and returns the sum of the Product.Price property values. Listing 5.31 shows how I apply the extension method in the Home controller’s action method.
Note Extension methods do not let you break through the access rules that classes define for methods, fields, and properties. You can extend the functionality of a class by using an extension method but only using the class members that you had access to anyway.
Listing 5.31 Applying an extension method in the HomeController.cs file in the Controllers folder
namespace LanguageFeatures.Controllers {
public class HomeController : Controller {
public ViewResult Index() {
ShoppingCart cart
= new ShoppingCart { Products = Product.GetProducts()};
decimal cartTotal = cart.TotalPrices();
return View("Index",
new string[] { $"Total: {cartTotal:C2}" });
}
}
}The key statement is this one:
...
decimal cartTotal = cart.TotalPrices();
...I call the TotalPrices method on a ShoppingCart object as though it were part of the ShoppingCart class, even though it is an extension method defined by a different class altogether. .NET will find extension classes if they are in the scope of the current class, meaning that they are part of the same namespace or in a namespace that is the subject of a using statement. Restart ASP.NET Core and request http://localhost:5000, which will produce the following output in the browser window:
Total: $323.955.9.1 Applying extension methods to an interface
Extension methods can also be applied to an interface, which allows me to call the extension method on all the classes that implement the interface. Listing 5.32 shows the ShoppingCart class updated to implement the IEnumerable<Product> interface.
Listing 5.32 Implementing an interface in the ShoppingCart.cs file in the Models folder
using System.Collections;
namespace LanguageFeatures.Models {
public class ShoppingCart : IEnumerable<Product?> {
public IEnumerable<Product?>? Products { get; set; }
public IEnumerator<Product?> GetEnumerator() =>
Products?.GetEnumerator()
?? Enumerable.Empty<Product?>().GetEnumerator();
IEnumerator IEnumerable.GetEnumerator() => GetEnumerator();
}
}
I can now update the extension method so that it deals with IEnumerable<Product?>, as shown in listing 5.33.
Listing 5.33 Updating an extension method in the MyExtensionMethods.cs file in the Models folder
namespace LanguageFeatures.Models {
public static class MyExtensionMethods {
public static decimal TotalPrices(
this IEnumerable<Product?> products) {
decimal total = 0;
foreach (Product? prod in products) {
total += prod?.Price ?? 0;
}
return total;
}
}
}
The first parameter type has changed to IEnumerable<Product?>, which means the foreach loop in the method body works directly on Product? objects. The change to using the interface means that I can calculate the total value of the Product objects enumerated by any IEnumerable<Product?>, which includes instances of ShoppingCart but also arrays of Product objects, as shown in listing 5.34.
Listing 5.34 Applying an extension method in the HomeController.cs file in the Controllers folder
namespace LanguageFeatures.Controllers {
public class HomeController : Controller {
public ViewResult Index() {
ShoppingCart cart
= new ShoppingCart { Products = Product.GetProducts()};
Product[] productArray = {
new Product {Name = "Kayak", Price = 275M},
new Product {Name = "Lifejacket", Price = 48.95M}
};
decimal cartTotal = cart.TotalPrices();
decimal arrayTotal = productArray.TotalPrices();
return View("Index", new string[] {
$"Cart Total: {cartTotal:C2}",
$"Array Total: {arrayTotal:C2}" });
}
}
}
Restart ASP.NET Core and request http://localhost:5000, which will produce the following output in the browser, demonstrating that I get the same result from the extension method, irrespective of how the Product objects are collected:
Cart Total: $323.95
Array Total: $323.95
5.9.2 Creating filtering extension methods
The last thing I want to show you about extension methods is that they can be used to filter collections of objects. An extension method that operates on an IEnumerable<T> and that also returns an IEnumerable<T> can use the yield keyword to apply selection criteria to items in the source data to produce a reduced set of results. Listing 5.35 demonstrates such a method, which I have added to the MyExtensionMethods class.
Listing 5.35 A filtering extension method in the MyExtensionMethods.cs file in the Models folder
namespace LanguageFeatures.Models {
public static class MyExtensionMethods {
public static decimal TotalPrices(
this IEnumerable<Product?> products) {
decimal total = 0;
foreach (Product? prod in products) {
total += prod?.Price ?? 0;
}
return total;
}
public static IEnumerable<Product?> FilterByPrice(
this IEnumerable<Product?> productEnum,
decimal minimumPrice) {
foreach (Product? prod in productEnum) {
if ((prod?.Price ?? 0) >= minimumPrice) {
yield return prod;
}
}
}
}
}This extension method, called FilterByPrice, takes an additional parameter that allows me to filter products so that Product objects whose Price property matches or exceeds the parameter are returned in the result. Listing 5.36 shows this method being used.
Listing 5.36 Using the filtering extension method in the HomeController.cs file in the Controllers folder
namespace LanguageFeatures.Controllers {
public class HomeController : Controller {
public ViewResult Index() {
ShoppingCart cart
= new ShoppingCart { Products = Product.GetProducts()};
Product[] productArray = {
new Product {Name = "Kayak", Price = 275M},
new Product {Name = "Lifejacket", Price = 48.95M},
new Product {Name = "Soccer ball", Price = 19.50M},
new Product {Name = "Corner flag", Price = 34.95M}
};
decimal arrayTotal =
productArray.FilterByPrice(20).TotalPrices();
return View("Index",
new string[] { $"Array Total: {arrayTotal:C2}" });
}
}
}When I call the FilterByPrice method on the array of Product objects, only those that cost more than $20 are received by the TotalPrices method and used to calculate the total. If you run the application, you will see the following output in the browser window:
Total: $358.905.10 Using lambda expressions
Lambda expressions are a feature that causes a lot of confusion, not least because the feature they simplify is also confusing. To understand the problem that is being solved, consider the FilterByPrice extension method that I defined in the previous section. This method is written so that it can filter Product objects by price, which means I must create a second method if I want to filter by name, as shown in listing 5.37.
Listing 5.37 Adding a filter method in the MyExtensionMethods.cs file in the Models folder
namespace LanguageFeatures.Models {
public static class MyExtensionMethods {
public static decimal TotalPrices(
this IEnumerable<Product?> products) {
decimal total = 0;
foreach (Product? prod in products) {
total += prod?.Price ?? 0;
}
return total;
}
public static IEnumerable<Product?> FilterByPrice(
this IEnumerable<Product?> productEnum,
decimal minimumPrice) {
foreach (Product? prod in productEnum) {
if ((prod?.Price ?? 0) >= minimumPrice) {
yield return prod;
}
}
}
public static IEnumerable<Product?> FilterByName(
this IEnumerable<Product?> productEnum,
char firstLetter) {
foreach (Product? prod in productEnum) {
if (prod?.Name?[0] == firstLetter) {
yield return prod;
}
}
}
}
}Listing 5.38 shows the use of both filter methods applied in the controller to create two different totals.
Listing 5.38 Using two filter methods in the HomeController.cs file in the Controllers folder
namespace LanguageFeatures.Controllers {
public class HomeController : Controller {
public ViewResult Index() {
ShoppingCart cart
= new ShoppingCart { Products = Product.GetProducts()};
Product[] productArray = {
new Product {Name = "Kayak", Price = 275M},
new Product {Name = "Lifejacket", Price = 48.95M},
new Product {Name = "Soccer ball", Price = 19.50M},
new Product {Name = "Corner flag", Price = 34.95M}
};
decimal priceFilterTotal =
productArray.FilterByPrice(20).TotalPrices();
decimal nameFilterTotal =
productArray.FilterByName('S').TotalPrices();
return View("Index", new string[] {
$"Price Total: {priceFilterTotal:C2}",
$"Name Total: {nameFilterTotal:C2}" });
}
}
}The first filter selects all the products with a price of $20 or more, and the second filter selects products whose name starts with the letter S. You will see the following output in the browser window if you run the example application:
Price Total: $358.90
Name Total: $19.505.10.1 Defining functions
I can repeat this process indefinitely to create filter methods for every property and every combination of properties that I am interested in. A more elegant approach is to separate the code that processes the enumeration from the selection criteria. C# makes this easy by allowing functions to be passed around as objects. Listing 5.39 shows a single extension method that filters an enumeration of Product objects but that delegates the decision about which ones are included in the results to a separate function.
Listing 5.39 Creating a general filter method in the MyExtensionMethods.cs file in the Models folder
namespace LanguageFeatures.Models {
public static class MyExtensionMethods {
public static decimal TotalPrices(
this IEnumerable<Product?> products) {
decimal total = 0;
foreach (Product? prod in products) {
total += prod?.Price ?? 0;
}
return total;
}
public static IEnumerable<Product?> FilterByPrice(
this IEnumerable<Product?> productEnum,
decimal minimumPrice) {
foreach (Product? prod in productEnum) {
if ((prod?.Price ?? 0) >= minimumPrice) {
yield return prod;
}
}
}
public static IEnumerable<Product?> Filter(
this IEnumerable<Product?> productEnum,
Func<Product?, bool> selector) {
foreach (Product? prod in productEnum) {
if (selector(prod)) {
yield return prod;
}
}
}
}
}The second argument to the Filter method is a function that accepts a Product? object and that returns a bool value. The Filter method calls the function for each Product? object and includes it in the result if the function returns true. To use the Filter method, I can specify a method or create a stand-alone function, as shown in listing 5.40.
Listing 5.40 Using a function to filter objects in the HomeController.cs file in the Controllers folder
namespace LanguageFeatures.Controllers {
public class HomeController : Controller {
bool FilterByPrice(Product? p) {
return (p?.Price ?? 0) >= 20;
}
public ViewResult Index() {
ShoppingCart cart
= new ShoppingCart { Products = Product.GetProducts()};
Product[] productArray = {
new Product {Name = "Kayak", Price = 275M},
new Product {Name = "Lifejacket", Price = 48.95M},
new Product {Name = "Soccer ball", Price = 19.50M},
new Product {Name = "Corner flag", Price = 34.95M}
};
Func<Product?, bool> nameFilter = delegate (Product? prod) {
return prod?.Name?[0] == 'S';
};
decimal priceFilterTotal = productArray
.Filter(FilterByPrice)
.TotalPrices();
decimal nameFilterTotal = productArray
.Filter(nameFilter)
.TotalPrices();
return View("Index", new string[] {
$"Price Total: {priceFilterTotal:C2}",
$"Name Total: {nameFilterTotal:C2}" });
}
}
}Neither approach is ideal. Defining methods like FilterByPrice clutters up a class definition. Creating a Func<Product?, bool> object avoids this problem but uses an awkward syntax that is hard to read and hard to maintain. It is this issue that lambda expressions address by allowing functions to be defined in a more elegant and expressive way, as shown in listing 5.41.
Listing 5.41 Using a lambda expression in the HomeController.cs file in the Controllers folder
namespace LanguageFeatures.Controllers {
public class HomeController : Controller {
//bool FilterByPrice(Product? p) {
// return (p?.Price ?? 0) >= 20;
//}
public ViewResult Index() {
ShoppingCart cart
= new ShoppingCart { Products = Product.GetProducts()};
Product[] productArray = {
new Product {Name = "Kayak", Price = 275M},
new Product {Name = "Lifejacket", Price = 48.95M},
new Product {Name = "Soccer ball", Price = 19.50M},
new Product {Name = "Corner flag", Price = 34.95M}
};
//Func<Product?, bool> nameFilter = delegate (Product? prod) {
// return prod?.Name?[0] == 'S';
//};
decimal priceFilterTotal = productArray
.Filter(p => (p?.Price ?? 0) >= 20)
.TotalPrices();
decimal nameFilterTotal = productArray
.Filter(p => p?.Name?[0] == 'S')
.TotalPrices();
return View("Index", new string[] {
$"Price Total: {priceFilterTotal:C2}",
$"Name Total: {nameFilterTotal:C2}" });
}
}
}The lambda expressions are shown in bold. The parameters are expressed without specifying a type, which will be inferred automatically. The => characters are read aloud as “goes to” and link the parameter to the result of the lambda expression. In my examples, a Product? parameter called p goes to a bool result, which will be true if the Price property is equal or greater than 20 in the first expression or if the Name property starts with S in the second expression. This code works in the same way as the separate method and the function delegate but is more concise and is—for most people—easier to read.
Other Forms for Lambda Expressions
I don’t need to express the logic of my delegate in the lambda expression. I can as easily call a method, like this:
...
prod => EvaluateProduct(prod)
...If I need a lambda expression for a delegate that has multiple parameters, I must wrap the parameters in parentheses, like this:
...
(prod, count) => prod.Price > 20 && count > 0
...Finally, if I need logic in the lambda expression that requires more than one statement, I can do so by using braces ({}) and finishing with a return statement, like this:
...
(prod, count) => {
// ...multiple code statements...
return result;
}
...You do not need to use lambda expressions in your code, but they are a neat way of expressing complex functions simply and in a manner that is readable and clear. I like them a lot, and you will see them used throughout this book.
5.10.2 Using lambda expression methods and properties
Lambda expressions can be used to implement constructors, methods, and properties. In ASP.NET Core development, you will often end up with methods that contain a single statement that selects the data to display and the view to render. In listing 5.42, I have rewritten the Index action method so that it follows this common pattern.
Listing 5.42 Creating a common action pattern in the HomeController.cs file in the Controllers folder
namespace LanguageFeatures.Controllers {
public class HomeController : Controller {
public ViewResult Index() {
return View(Product.GetProducts().Select(p => p?.Name));
}
}
}The action method gets a collection of Product objects from the static Product.GetProducts method and uses LINQ to project the values of the Name properties, which are then used as the view model for the default view. If you run the application, you will see the following output displayed in the browser window:
KayakThere will be empty list items in the browser window as well because the GetProducts method includes a null reference in its results and one of the Product objects is created without a Name value, but that doesn’t matter for this section of the chapter.
When a constructor or method body consists of a single statement, it can be rewritten as a lambda expression, as shown in listing 5.43.
Listing 5.43 A lambda action method in the HomeController.cs file in the Controllers folder
namespace LanguageFeatures.Controllers {
public class HomeController : Controller {
public ViewResult Index() =>
View(Product.GetProducts().Select(p => p?.Name));
}
}Lambda expressions for methods omit the return keyword and use => (goes to) to associate the method signature (including its arguments) with its implementation. The Index method shown in listing 5.43 works in the same way as the one shown in listing 5.42 but is expressed more concisely. The same basic approach can also be used to define properties. Listing 5.44 shows the addition of a property that uses a lambda expression to the Product class.
Listing 5.44 A lambda property in the Product.cs file in the Models folder
namespace LanguageFeatures.Models {
public class Product {
public string Name { get; set; } = string.Empty;
public decimal? Price { get; set; }
public bool NameBeginsWithS => Name.Length > 0 && Name[0] == 'S';
public static Product?[] GetProducts() {
Product kayak = new Product {
Name = "Kayak", Price = 275M
};
Product lifejacket = new Product {
//Name = "Lifejacket",
Price = 48.95M
};
return new Product?[] { kayak, lifejacket, null };
}
}
}5.11 Using type inference and anonymous types
The var keyword allows you to define a local variable without explicitly specifying the variable type, as demonstrated by listing 5.45. This is called type inference, or implicit typing.
Listing 5.45 Using type inference in the HomeController.cs file in the Controllers folder
namespace LanguageFeatures.Controllers {
public class HomeController : Controller {
public ViewResult Index() {
var names = new[] { "Kayak", "Lifejacket", "Soccer ball" };
return View(names);
}
}
}It is not that the names variable does not have a type; instead, I am asking the compiler to infer the type from the code. The compiler examines the array declaration and works out that it is a string array. Running the example produces the following output:
Kayak
Lifejacket
Soccer ball5.11.1 Using anonymous types
By combining object initializers and type inference, I can create simple view model objects that are useful for transferring data between a controller and a view without having to define a class or struct, as shown in listing 5.46.
Listing 5.46 An anonymous type in the HomeController.cs file in the Controllers folder
namespace LanguageFeatures.Controllers {
public class HomeController : Controller {
public ViewResult Index() {
var products = new[] {
new { Name = "Kayak", Price = 275M },
new { Name = "Lifejacket", Price = 48.95M },
new { Name = "Soccer ball", Price = 19.50M },
new { Name = "Corner flag", Price = 34.95M }
};
return View(products.Select(p => p.Name));
}
}
}Each of the objects in the products array is an anonymously typed object. This does not mean that it is dynamic in the sense that JavaScript variables are dynamic. It just means that the type definition will be created automatically by the compiler. Strong typing is still enforced. You can get and set only the properties that have been defined in the initializer, for example. Restart ASP.NET Core and request http://localhost:5000, and you will see the following output in the browser window:
Kayak
Lifejacket
Soccer ball
Corner flagThe C# compiler generates the class based on the name and type of the parameters in the initializer. Two anonymously typed objects that have the same property names and types defined in the same order will be assigned to the same automatically generated class. This means that all the objects in the products array will have the same type because they define the same properties.
TIP I have to use the var keyword to define the array of anonymously typed objects because the type isn’t created until the code is compiled, so I don’t know the name of the type to use. The elements in an array of anonymously typed objects must all define the same properties; otherwise, the compiler can’t work out what the array type should be.
To demonstrate this, I have changed the output from the example in listing 5.47 so that it shows the type name rather than the value of the Name property.
Listing 5.47 Displaying the type name in the HomeController.cs file in the Controllers folder
namespace LanguageFeatures.Controllers {
public class HomeController : Controller {
public ViewResult Index() {
var products = new[] {
new { Name = "Kayak", Price = 275M },
new { Name = "Lifejacket", Price = 48.95M },
new { Name = "Soccer ball", Price = 19.50M },
new { Name = "Corner flag", Price = 34.95M }
};
return View(products.Select(p => p.GetType().Name));
}
}
}All the objects in the array have been assigned the same type, which you can see if you run the example. The type name isn’t user-friendly but isn’t intended to be used directly, and you may see a different name than the one shown in the following output:
<>f__AnonymousType0`2
<>f__AnonymousType0`2
<>f__AnonymousType0`2
<>f__AnonymousType0`25.12 Using default implementations in interfaces
C# provides the ability to define default implementations for properties and methods defined by interfaces. This may seem like an odd feature because an interface is intended to be a description of features without specifying an implementation, but this addition to C# makes it possible to update interfaces without breaking the existing implementations of them.
Add a class file named IProductSelection.cs to the Models folder and use it to define the interface shown in listing 5.48.
Listing 5.48 The contents of the IProductSelection.cs file in the Models folder
namespace LanguageFeatures.Models {
public interface IProductSelection {
IEnumerable<Product>? Products { get; }
}
}Update the ShoppingCart class to implement the new interface, as shown in listing 5.49.
Listing 5.49 Implementing an interface in the ShoppingCart.cs file in the Models folder
namespace LanguageFeatures.Models {
public class ShoppingCart : IProductSelection {
private List<Product> products = new();
public ShoppingCart(params Product[] prods) {
products.AddRange(prods);
}
public IEnumerable<Product>? Products { get => products; }
}
}Listing 5.50 updates the Home controller so that it uses the ShoppingCart class.
Listing 5.50 Using an interface in the HomeController.cs file in the Controllers folder
namespace LanguageFeatures.Controllers {
public class HomeController : Controller {
public ViewResult Index() {
IProductSelection cart = new ShoppingCart(
new Product { Name = "Kayak", Price = 275M },
new Product { Name = "Lifejacket", Price = 48.95M },
new Product { Name = "Soccer ball", Price = 19.50M },
new Product { Name = "Corner flag", Price = 34.95M }
);
return View(cart.Products?.Select(p => p.Name));
}
}
}This is the familiar use of an interface, and if you restart ASP.NET Core and request http://localhost:5000, you will see the following output in the browser:
Kayak
Lifejacket
Soccer ball
Corner flagIf I want to add a new feature to the interface, I must locate and update all the classes that implement it, which can be difficult, especially if an interface is used by other development teams in their projects. This is where the default implementation feature can be used, allowing new features to be added to an interface, as shown in listing 5.51.
Listing 5.51 Adding a feature in the IProductSelection.cs file in the Models folder
namespace LanguageFeatures.Models {
public interface IProductSelection {
IEnumerable<Product>? Products { get; }
IEnumerable<string>? Names => Products?.Select(p => p.Name);
}
}The listing defines a Names property and provides a default implementation, which means that consumers of the IProductSelection interface can use the Names property even if it isn’t defined by implementation classes, as shown in listing 5.52.
Listing 5.52 Using a default implementation in the HomeController.cs file in the Controllers folder
namespace LanguageFeatures.Controllers {
public class HomeController : Controller {
public ViewResult Index() {
IProductSelection cart = new ShoppingCart(
new Product { Name = "Kayak", Price = 275M },
new Product { Name = "Lifejacket", Price = 48.95M },
new Product { Name = "Soccer ball", Price = 19.50M },
new Product { Name = "Corner flag", Price = 34.95M }
);
return View(cart.Names);
}
}
}The ShoppingCart class has not been modified, but the Index method can use the default implementation of the Names property. Restart ASP.NET Core and request http://localhost:5000, and you will see the following output in the browser:
Kayak
Lifejacket
Soccer ball
Corner flag5.13 Using asynchronous methods
Asynchronous methods perform work in the background and notify you when they are complete, allowing your code to take care of other business while the background work is performed. Asynchronous methods are an important tool in removing bottlenecks from code and allow applications to take advantage of multiple processors and processor cores to perform work in parallel.
In ASP.NET Core, asynchronous methods can be used to improve the overall performance of an application by allowing the server more flexibility in the way that requests are scheduled and executed. Two C# keywords—async and await—are used to perform work asynchronously.
5.13.1 Working with tasks directly
C# and .NET have excellent support for asynchronous methods, but the code has tended to be verbose, and developers who are not used to parallel programming often get bogged down by the unusual syntax. To create an example, add a class file called MyAsyncMethods.cs to the Models folder and add the code shown in listing 5.53.
Listing 5.53 The contents of the MyAsyncMethods.cs file in the Models folder
namespace LanguageFeatures.Models {
public class MyAsyncMethods {
public static Task<long?> GetPageLength() {
HttpClient client = new HttpClient();
var httpTask = client.GetAsync("http://manning.com");
return httpTask.ContinueWith((Task<HttpResponseMessage>
antecedent) => {
return antecedent.Result.Content.Headers.ContentLength;
});
}
}
}This method uses a System.Net.Http.HttpClient object to request the contents of the Manning home page and returns its length. .NET represents work that will be done asynchronously as a Task. Task objects are strongly typed based on the result that the background work produces. So, when I call the HttpClient.GetAsync method, what I get back is a Task<HttpResponseMessage>. This tells me that the request will be performed in the background and that the result of the request will be an HttpResponseMessage object.
TIP When I use words like background, I am skipping over a lot of detail to make just the key points that are important to the world of ASP.NET Core. The .NET support for asynchronous methods and parallel programming is excellent, and I encourage you to learn more about it if you want to create truly high-performing applications that can take advantage of multicore and multiprocessor hardware. You will see how ASP.NET Core makes it easy to create asynchronous web applications throughout this book as I introduce different features.
The part that most programmers get bogged down with is the continuation, which is the mechanism by which you specify what you want to happen when the task is complete. In the example, I have used the ContinueWith method to process the HttpResponseMessage object I get from the HttpClient.GetAsync method, which I do with a lambda expression that returns the value of a property that contains the length of the content I get from the Manning web server. Here is the continuation code:
...
return httpTask.ContinueWith((Task<HttpResponseMessage> antecedent) => {
return antecedent.Result.Content.Headers.ContentLength;
});
...Notice that I use the return keyword twice. This is the part that causes confusion. The first use of the return keyword specifies that I am returning a Task<HttpResponseMessage> object, which, when the task is complete, will return the length of the ContentLength header. The ContentLength header returns a long? result (a nullable long value), and this means the result of my GetPageLength method is Task<long?>, like this:
...
public static Task<long?> GetPageLength() {
...Do not worry if this does not make sense—you are not alone in your confusion. It is for this reason that Microsoft added keywords to C# to simplify asynchronous methods.
5.13.2 Applying the async and await keywords
Microsoft introduced two keywords to C# that simplify using asynchronous methods like HttpClient.GetAsync. The keywords are async and await, and you can see how I have used them to simplify my example method in listing 5.54.
Listing 5.54 Using the async and await keywords in the MyAsyncMethods.cs file in the Models folder
namespace LanguageFeatures.Models {
public class MyAsyncMethods {
public async static Task<long?> GetPageLength() {
HttpClient client = new HttpClient();
var httpMessage = await client.GetAsync("http://manning.com");
return httpMessage.Content.Headers.ContentLength;
}
}
}I used the await keyword when calling the asynchronous method. This tells the C# compiler that I want to wait for the result of the Task that the GetAsync method returns and then carry on executing other statements in the same method.
Applying the await keyword means I can treat the result from the GetAsync method as though it were a regular method and just assign the HttpResponseMessage object that it returns to a variable. Even better, I can then use the return keyword in the normal way to produce a result from another method—in this case, the value of the ContentLength property. This is a much more natural technique, and it means I do not have to worry about the ContinueWith method and multiple uses of the return keyword.
When you use the await keyword, you must also add the async keyword to the method signature, as I have done in the example. The method result type does not change—my example GetPageLength method still returns a Task<long?>. This is because await and async are implemented using some clever compiler tricks, meaning that they allow a more natural syntax, but they do not change what is happening in the methods to which they are applied. Someone who is calling my GetPageLength method still has to deal with a Task<long?> result because there is still a background operation that produces a nullable long—although, of course, that programmer can also choose to use the await and async keywords.
This pattern follows through into the controller, which makes it easy to write asynchronous action methods, as shown in listing 5.55.
Note You can also use the async and await keywords in lambda expressions, which I demonstrate in later chapters.
Listing 5.55 An asynchronous action method in the HomeController.cs file in the Controllers folder
namespace LanguageFeatures.Controllers {
public class HomeController : Controller {
public async Task<ViewResult> Index() {
long? length = await MyAsyncMethods.GetPageLength();
return View(new string[] { $"Length: {length}" });
}
}
}I have changed the result of the Index action method to Task<ViewResult>, which declares that the action method will return a Task that will produce a ViewResult object when it completes, which will provide details of the view that should be rendered and the data that it requires. I have added the async keyword to the method’s definition, which allows me to use the await keyword when calling the MyAsyncMethods.GetPathLength method. .NET takes care of dealing with the continuations, and the result is asynchronous code that is easy to write, easy to read, and easy to maintain. Restart ASP.NET Core and request http://localhost:5000, and you will see output similar to the following (although with a different length since the content of the Manning website changes often):
Length: 4729225.13.3 Using an asynchronous enumerable
An asynchronous enumerable describes a sequence of values that will be generated over time. To demonstrate the issue that this feature addresses, listing 5.56 adds a method to the MyAsyncMethods class.
Listing 5.56 Adding a method in the MyAsyncMethods.cs file in the Models folder
namespace LanguageFeatures.Models {
public class MyAsyncMethods {
public async static Task<long?> GetPageLength() {
HttpClient client = new HttpClient();
var httpMessage = await client.GetAsync("http://manning.com");
return httpMessage.Content.Headers.ContentLength;
}
public static async Task<IEnumerable<long?>>
GetPageLengths(List<string> output,
params string[] urls) {
List<long?> results = new List<long?>();
HttpClient client = new HttpClient();
foreach (string url in urls) {
output.Add($"Started request for {url}");
var httpMessage = await client.GetAsync($"http://{url}");
results.Add(httpMessage.Content.Headers.ContentLength);
output.Add($"Completed request for {url}");
}
return results;
}
}
}The GetPageLengths method makes HTTP requests to a series of websites and gets their length. The requests are performed asynchronously, but there is no way to feed the results back to the method’s caller as they arrive. Instead, the method waits until all the requests are complete and then returns all the results in one go. In addition to the URLs that will be requested, this method accepts a List<string> to which I add messages in order to highlight how the code works. Listing 5.57 updates the Index action method of the Home controller to use the new method.
Listing 5.57 Using the new method in the HomeController.cs file in the Controllers folder
namespace LanguageFeatures.Controllers {
public class HomeController : Controller {
public async Task<ViewResult> Index() {
List<string> output = new List<string>();
foreach (long? len in await MyAsyncMethods.GetPageLengths(
output,
"manning.com", "microsoft.com", "amazon.com")) {
output.Add($"Page length: { len}");
}
return View(output);
}
}
}The action method enumerates the sequence produced by the GetPageLengths method and adds each result to the List<string> object, which produces an ordered sequence of messages showing the interaction between the foreach loop in the Index method that processes the results and the foreach loop in the GetPageLengths method that generates them. Restart ASP.NET Core and request http://localhost:5000, and you will see the following output in the browser (which may take several seconds to appear and may have different page lengths):
Started request for manning.com
Completed request for manning.com
Started request for microsoft.com
Completed request for microsoft.com
Started request for amazon.com
Completed request for amazon.com
Page length: 26973
Page length: 199526
Page length: 357777You can see that the Index action method doesn’t receive the results until all the HTTP requests have been completed. This is the problem that the asynchronous enumerable feature solves, as shown in listing 5.58.
Listing 5.58 Using an asynchronous enumerable in the MyAsyncMethods.cs file in the Models folder
namespace LanguageFeatures.Models {
public class MyAsyncMethods {
public async static Task<long?> GetPageLength() {
HttpClient client = new HttpClient();
var httpMessage = await client.GetAsync("http://manning.com");
return httpMessage.Content.Headers.ContentLength;
}
public static async IAsyncEnumerable<long?>
GetPageLengths(List<string> output,
params string[] urls) {
HttpClient client = new HttpClient();
foreach (string url in urls) {
output.Add($"Started request for {url}");
var httpMessage = await client.GetAsync($"http://{url}");
output.Add($"Completed request for {url}");
yield return httpMessage.Content.Headers.ContentLength;
}
}
}
}The methods result is IAsyncEnumerable<long?>, which denotes an asynchronous sequence of nullable long values. This result type has special support in .NET Core and works with standard yield return statements, which isn’t otherwise possible because the result constraints for asynchronous methods conflict with the yield keyword. Listing 5.59 updates the controller to use the revised method.
Listing 5.59 Using an asynchronous enumerable in the HomeController.cs file in the Controllers folder
namespace LanguageFeatures.Controllers {
public class HomeController : Controller {
public async Task<ViewResult> Index() {
List<string> output = new List<string>();
await foreach (long? len in MyAsyncMethods.GetPageLengths(
output,
"manning.com", "microsoft.com", "amazon.com")) {
output.Add($"Page length: { len}");
}
return View(output);
}
}
}The difference is that the await keyword is applied before the foreach keyword and not before the call to the async method. Restart ASP.NET Core and request http://localhost:5000; once the HTTP requests are complete, you will see that the order of the response messages has changed, like this:
Started request for manning.com
Completed request for manning.com
Page length: 26973
Started request for microsoft.com
Completed request for microsoft.com
Page length: 199528
Started request for amazon.com
Completed request for amazon.com
Page length: 441398The controller receives the next result in the sequence as it is produced. As I explain in chapter 19, ASP.NET Core has special support for using IAsyncEnumerable<T> results in web services, allowing data values to be serialized as the values in the sequence are generated.
5.14 Getting names
There are many tasks in web application development in which you need to refer to the name of an argument, variable, method, or class. Common examples include when you throw an exception or create a validation error when processing input from the user. The traditional approach has been to use a string value hard-coded with the name, as shown in listing 5.60.
Listing 5.60 Hard-coding a name in the HomeController.cs file in the Controllers folder
namespace LanguageFeatures.Controllers {
public class HomeController : Controller {
public ViewResult Index() {
var products = new[] {
new { Name = "Kayak", Price = 275M },
new { Name = "Lifejacket", Price = 48.95M },
new { Name = "Soccer ball", Price = 19.50M },
new { Name = "Corner flag", Price = 34.95M }
};
return View(products.Select(p =>
$"Name: {p.Name}, Price: {p.Price}"));
}
}
}
The call to the LINQ Select method generates a sequence of strings, each of which contains a hard-coded reference to the Name and Price properties. Restart ASP.NET Core and request http://localhost:5000, and you will see the following output in the browser window:
Name: Kayak, Price: 275
Name: Lifejacket, Price: 48.95
Name: Soccer ball, Price: 19.50
Name: Corner flag, Price: 34.95This approach is prone to errors, either because the name was mistyped or because the code was refactored and the name in the string isn’t correctly updated. C# supports the nameof expression, in which the compiler takes responsibility for producing a name string, as shown in listing 5.61.
Listing 5.61 Using nameof expressions in the HomeController.cs file in the Controllers folder
namespace LanguageFeatures.Controllers {
public class HomeController : Controller {
public ViewResult Index() {
var products = new[] {
new { Name = "Kayak", Price = 275M },
new { Name = "Lifejacket", Price = 48.95M },
new { Name = "Soccer ball", Price = 19.50M },
new { Name = "Corner flag", Price = 34.95M }
};
return View(products.Select(p =>
$"{nameof(p.Name)}: {p.Name}, {nameof(p.Price)}: {p.Price}"));
}
}
}The compiler processes a reference such as p.Name so that only the last part is included in the string, producing the same output as in previous examples. There is IntelliSense support for nameof expressions, so you will be prompted to select references, and expressions will be correctly updated when you refactor code. Since the compiler is responsible for dealing with nameof, using an invalid reference causes a compiler error, which prevents incorrect or outdated references from escaping notice.
Summary
• Top-level statements allow code to be defined outside of a class, which can make ASP.NET Core configuration more concise.
• Global using statements take effect throughout a project so that namespaces don’t have to be imported in individual C# files.
• Null state analysis ensures that null values are only assigned to nullable types and that values are read safely.
• String interpolation allows data values to be composed into strings.
• Object initialization patterns simplify the code required to create objects.
• Target-typed expressions omit the type name from the new statement.
• Pattern matching is used to execute code when a value has specific characteristics.
• Extension methods allow new functionality to be added to a type without needing to modify the class file.
• Lambda expressions are a concise way to express functions.
• Interfaces can be defined with default implementations, which means it is possible to modify the interface without breaking implementation classes.
• The async and await keywords are used to create asynchronous methods without needing to work directly with tasks and continuations.
3 Your first ASP.NET Core application
This chapter covers
• Using ASP.NET Core to create an application that accepts RSVP responses
• Creating a simple data model
• Creating a controller and view that presents and processes a form
• Validating user data and displaying validation errors
• Applying CSS styles to the HTML generated by the application
Now that you are set up for ASP.NET Core development, it is time to create a simple application. In this chapter, you’ll create a data-entry application using ASP.NET Core. My goal is to demonstrate ASP.NET Core in action, so I will pick up the pace a little and skip over some of the explanations as to how things work behind the scenes. But don’t worry; I’ll revisit these topics in-depth in later chapters.
3.1 Setting the scene
Imagine that a friend has decided to host a New Year’s Eve party and that she has asked me to create a web app that allows her invitees to electronically RSVP. She has asked for these four key features:
• A home page that shows information about the party
• A form that can be used to RSVP
• Validation for the RSVP form, which will display a thank-you page
• A summary page that shows who is coming to the party
In this chapter, I create an ASP.NET Core project and use it to create a simple application that contains these features; once everything works, I’ll apply some styling to improve the appearance of the finished application.
3.2 Creating the project
Open a PowerShell command prompt from the Windows Start menu, navigate to a convenient location, and run the commands in listing 3.1 to create a project named PartyInvites.
TIP You can download the example project for this chapter—and for all the other chapters in this book—from https://github.com/manningbooks/pro-asp.net-core-7. See chapter 1 for how to get help if you have problems running the examples.
Listing 3.1 Creating a new project
dotnet new globaljson --sdk-version 7.0.100 --output PartyInvites dotnet new mvc --no-https --output PartyInvites --framework net7.0 dotnet new sln -o PartyInvites dotnet sln PartyInvites add PartyInvites
These are the same commands I used to create the project in chapter 2. These commands ensure you get the right project starting point that uses the required version of .NET.
3.2.1 Preparing the project
Open the project (by opening the PartyInvites.sln file with Visual Studio or the PartyInvites folder in Visual Studio Code) and change the contents of the launchSettings.json file in the Properties folder, as shown in listing 3.2, to set the port that will be used to listen for HTTP requests.
Listing 3.2 Setting ports in the launchSettings.json file in the Properties folder
{
"iisSettings": {
"windowsAuthentication": false,
"anonymousAuthentication": true,
"iisExpress": {
"applicationUrl": "http://localhost:5000",
"sslPort": 0
}
},
"profiles": {
"PartyInvites": {
"commandName": "Project",
"dotnetRunMessages": true,
"launchBrowser": true,
"applicationUrl": "http://localhost:5000",
"environmentVariables": {
"ASPNETCORE_ENVIRONMENT": "Development"
}
},
"IIS Express": {
"commandName": "IISExpress",
"launchBrowser": true,
"environmentVariables": {
"ASPNETCORE_ENVIRONMENT": "Development"
}
}
}
}
Replace the contents of the HomeController.cs file in the Controllers folder with the code shown in listing 3.3.
Listing 3.3 The new contents of the HomeController.cs file in the Controllers folder
using Microsoft.AspNetCore.Mvc;
namespace PartyInvites.Controllers {
public class HomeController : Controller {
public IActionResult Index() {
return View();
}
}
}
This provides a clean starting point for the new application, defining a single action method that selects the default view for rendering. To provide a welcome message to party invitees, open the Index.cshtml file in the Views/Home folder and replace the contents with those shown in listing 3.4.
Listing 3.4 Replacing the contents of the Index.cshtml file in the Views/Home folder
@{
Layout = null;
}
<!DOCTYPE html>
<html>
<head>
<meta name="viewport" content="width=device-width" />
<title>Party!</title>
</head>
<body>
<div>
<div>
We're going to have an exciting party.<br />
(To do: sell it better. Add pictures or something.)
</div>
</div>
</body>
</html>
Run the command shown in listing 3.5 in the PartyInvites folder to compile and execute the project.
Listing 3.5 Compiling and running the project
dotnet watch
Once the project has started, a new browser window will be opened, and you will see the details of the party (well, the placeholder for the details, but you get the idea), as shown in figure 3.1.
Figure 3.1 Adding to the view HTML
Leave the dotnet watch command running. As you make changes to the project, you will see that the code is automatically recompiled and that changes are automatically displayed in the browser.
If you make a mistake following the examples, you may find that the dotnet watch command indicates that it can’t automatically update the browser. If that happens, select the option to restart the application.
3.2.2 Adding a data model
The data model is the most important part of any ASP.NET Core application. The model is the representation of the real-world objects, processes, and rules that define the subject, known as the domain, of the application. The model, often referred to as a domain model, contains the C# objects (known as domain objects) that make up the universe of the application and the methods that manipulate them. In most projects, the job of the ASP.NET Core application is to provide the user with access to the data model and the features that allow the user to interact with it.
The convention for an ASP.NET Core application is that the data model classes are defined in a folder named Models, which was added to the project by the template used in listing 3.1.
I don’t need a complex model for the PartyInvites project because it is such a simple application. I need just one domain class that I will call GuestResponse. This object will represent an RSVP from an invitee.
If you are using Visual Studio, right-click the Models folder and select Add > Class from the pop-up menu. Set the name of the class to GuestResponse.cs and click the Add button. If you are using Visual Studio Code, right-click the Models folder, select New File, and enter GuestResponse.cs as the file name. Use the new file to define the class shown in listing 3.6.
Listing 3.6 The contents of the GuestResponse.cs file in the Models folder
namespace PartyInvites.Models {
public class GuestResponse {
public string? Name { get; set; }
public string? Email { get; set; }
public string? Phone { get; set; }
public bool? WillAttend { get; set; }
}
}
Notice that all the properties defined by the GuestResponse class are nullable. I explain why this is important in the “Adding Validation” section later in the chapter.
Restarting the automatic build
You may see a warning produced by the dotnet watch command telling you that a hot reload cannot be applied. The dotnet watch command can’t cope with every type of change, and some changes cause the automatic rebuild process to fail. You will see this prompt at the command line:
watch : Do you want to restart your app
- Yes (y) / No (n) / Always (a) / Never (v)?
Press a to always rebuild the project. Microsoft makes frequent improvements to the dotnet watch command and so the actions that trigger this problem change.
3.2.3 Creating a second action and view
One of my application goals is to include an RSVP form, which means I need to define an action method that can receive requests for that form. A single controller class can define multiple action methods, and the convention is to group related actions in the same controller. Listing 3.7 adds a new action method to the Home controller. Controllers can return different result types, which are explained in later chapters.
Listing 3.7 Adding an action in the HomeController.cs file in the Controllers folder
using Microsoft.AspNetCore.Mvc;
namespace PartyInvites.Controllers {
public class HomeController : Controller {
public IActionResult Index() {
return View();
}
public ViewResult RsvpForm() {
return View();
}
}
}
Both action methods invoke the View method without arguments, which may seem odd, but remember that the Razor view engine will use the name of the action method when looking for a view file, as explained in chapter 2. That means the result from the Index action method tells Razor to look for a view called Index.cshtml, while the result from the RsvpForm action method tells Razor to look for a view called RsvpForm.cshtml.
If you are using Visual Studio, right-click the Views/Home folder and select Add > New Item from the pop-up menu. Select the Razor View – Empty item, set the name to RsvpForm.cshtml, and click the Add button to create the file. Replace the contents with those shown in listing 3.8.
If you are using Visual Studio Code, right-click the Views/Home folder and select New File from the pop-up menu. Set the name of the file to RsvpForm.cshtml and add the contents shown in listing 3.8.
Listing 3.8 The contents of the RsvpForm.cshtml file in the Views/Home folder
@{
Layout = null;
}
<!DOCTYPE html>
<html>
<head>
<meta name="viewport" content="width=device-width" />
<title>RsvpForm</title>
</head>
<body>
<div>
This is the RsvpForm.cshtml View
</div>
</body>
</html>
This content is just static HTML for the moment. Use the browser to request http://localhost:5000/home/rsvpform. The Razor view engine locates the RsvpForm.cshtml file and uses it to produce a response, as shown in figure 3.2.

Figure 3.2 Rendering a second view
3.2.4 Linking action methods
I want to be able to create a link from the Index view so that guests can see the RsvpForm view without having to know the URL that targets a specific action method, as shown in listing 3.9.
Listing 3.9 Adding a link in the Index.cshtml file in the Views/Home folder
@{
Layout = null;
}
<!DOCTYPE html>
<html>
<head>
<meta name="viewport" content="width=device-width" />
<title>Party!</title>
</head>
<body>
<div>
<div>
We're going to have an exciting party.<br />
(To do: sell it better. Add pictures or something.)
</div>
<a asp-action="RsvpForm">RSVP Now</a>
</div>
</body>
</html>
The addition to the listing is an a element that has an asp-action attribute. The attribute is an example of a tag helper attribute, which is an instruction for Razor that will be performed when the view is rendered. The asp-action attribute is an instruction to add an href attribute to the a element that contains a URL for an action method. I explain how tag helpers work in chapters 25–27, but this tag helper tells Razor to insert a URL for an action method defined by the same controller for which the current view is being rendered.
Use the browser to request http://localhost:5000, and you will see the link that the helper has created, as shown in figure 3.3.
Figure 3.3 Linking between action methods
Roll the mouse over the RSVP Now link in the browser. You will see that the link points to http://localhost:5000/Home/RsvpForm.
There is an important principle at work here, which is that you should use the features provided by ASP.NET Core to generate URLs, rather than hard-code them into your views. When the tag helper created the href attribute for the a element, it inspected the configuration of the application to figure out what the URL should be. This allows the configuration of the application to be changed to support different URL formats without needing to update any views.
3.2.5 Building the form
Now that I have created the view and can reach it from the Index view, I am going to build out the contents of the RsvpForm.cshtml file to turn it into an HTML form for editing GuestResponse objects, as shown in listing 3.10.
Listing 3.10 Creating a form view in the RsvpForm.cshtml file in the Views/Home folder
@model PartyInvites.Models.GuestResponse
@{
Layout = null;
}
<!DOCTYPE html>
<html>
<head>
<meta name="viewport" content="width=device-width" />
<title>RsvpForm</title>
</head>
<body>
<form asp-action="RsvpForm" method="post">
<div>
<label asp-for="Name">Your name:</label>
<input asp-for="Name" />
</div>
<div>
<label asp-for="Email">Your email:</label>
<input asp-for="Email" />
</div>
<div>
<label asp-for="Phone">Your phone:</label>
<input asp-for="Phone" />
</div>
<div>
<label asp-for="WillAttend">Will you attend?</label>
<select asp-for="WillAttend">
<option value="">Choose an option</option>
<option value="true">Yes, I'll be there</option>
<option value="false">No, I can't come</option>
</select>
</div>
<button type="submit">Submit RSVP</button>
</form>
</body>
</html>
The @model expression specifies that the view expects to receive a GuestResponse object as its view model. I have defined a label and input element for each property of the GuestResponse model class (or, in the case of the WillAttend property, a select element). Each element is associated with the model property using the asp-for attribute, which is another tag helper attribute. The tag helper attributes configure the elements to tie them to the view model object. Here is an example of the HTML that the tag helpers produce:
<p>
<label for="Name">Your name:</label>
<input type="text" id="Name" name="Name" value="">
</p>
The asp-for attribute on the label element sets the value of the for attribute. The asp-for attribute on the input element sets the id and name elements. This may not look especially useful, but you will see that associating elements with a model property offers additional advantages as the application functionality is defined.
Of more immediate use is the asp-action attribute applied to the form element, which uses the application’s URL routing configuration to set the action attribute to a URL that will target a specific action method, like this:
<form method="post" action="/Home/RsvpForm">
As with the helper attribute I applied to the a element, the benefit of this approach is that when you change the system of URLs that the application uses, the content generated by the tag helpers will reflect the changes automatically.
Use the browser to request http://localhost:5000 and click the RSVP Now link to see the form, as shown in figure 3.4.

Figure 3.4 Adding an HTML form to the application
3.2.6 Receiving form data
I have not yet told ASP.NET Core what I want to do when the form is posted to the server. As things stand, clicking the Submit RSVP button just clears any values you have entered in the form. That is because the form posts back to the RsvpForm action method in the Home controller, which just renders the view again. To receive and process submitted form data, I am going to use an important feature of controllers. I will add a second RsvpForm action method to create the following:
• A method that responds to HTTP GET requests: A GET request is what a browser issues normally each time someone clicks a link. This version of the action will be responsible for displaying the initial blank form when someone first visits /Home/RsvpForm.
• A method that responds to HTTP POST requests: The form element defined in listing 3.10 sets the method attribute to post, which causes the form data to be sent to the server as a POST request. This version of the action will be responsible for receiving submitted data and deciding what to do with it.
Handling GET and POST requests in separate C# methods helps to keep my controller code tidy since the two methods have different responsibilities. Both action methods are invoked by the same URL, but ASP.NET Core makes sure that the appropriate method is called, based on whether I am dealing with a GET or POST request. Listing 3.11 shows the changes to the HomeController class.
Listing 3.11 Adding a method in the HomeController.cs file in the Controllers folder
using Microsoft.AspNetCore.Mvc;
using PartyInvites.Models;
namespace PartyInvites.Controllers {
public class HomeController : Controller {
public IActionResult Index() {
return View();
}
[HttpGet]
public ViewResult RsvpForm() {
return View();
}
[HttpPost]
public ViewResult RsvpForm(GuestResponse guestResponse) {
// TODO: store response from guest
return View();
}
}
}
I have added the HttpGet attribute to the existing RsvpForm action method, which declares that this method should be used only for GET requests. I then added an overloaded version of the RsvpForm method, which accepts a GuestResponse object. I applied the HttpPost attribute to this method, which declares it will deal with POST requests. I explain how these additions to the listing work in the following sections. I also imported the PartyInvites.Models namespace—this is just so I can refer to the GuestResponse model type without needing to qualify the class name.
Understanding model binding
The first overload of the RsvpForm action method renders the same view as before—the RsvpForm.cshtml file—to generate the form shown in figure 3.4. The second overload is more interesting because of the parameter, but given that the action method will be invoked in response to an HTTP POST request and that the GuestResponse type is a C# class, how are the two connected?
The answer is model binding, a useful ASP.NET Core feature whereby incoming data is parsed and the key-value pairs in the HTTP request are used to populate properties of domain model types.
Model binding is a powerful and customizable feature that eliminates the grind of dealing with HTTP requests directly and lets you work with C# objects rather than dealing with individual data values sent by the browser. The GuestResponse object that is passed as the parameter to the action method is automatically populated with the data from the form fields. I dive into the details of model binding in chapter 28.
To demonstrate how model binding works, I need to do some preparatory work. One of the application goals is to present a summary page with details of who is attending the party, which means that I need to keep track of the responses that I receive. I am going to do this by creating an in-memory collection of objects. This isn’t useful in a real application because the response data will be lost when the application is stopped or restarted, but this approach will allow me to keep the focus on ASP.NET Core and create an application that can easily be reset to its initial state. Later chapters will demonstrate persistent data storage.
Add a class file named Repository.cs to the Models folder and use it to define the class shown in listing 3.12.
Listing 3.12 The contents of the Repository.cs file in the Models folder
namespace PartyInvites.Models {
public static class Repository {
private static List<GuestResponse> responses = new();
public static IEnumerable<GuestResponse> Responses => responses;
public static void AddResponse(GuestResponse response) {
Console.WriteLine(response);
responses.Add(response);
}
}
}
The Repository class and its members are static, which will make it easy for me to store and retrieve data from different places in the application. ASP.NET Core provides a more sophisticated approach for defining common functionality, called dependency injection, which I describe in chapter 14, but a static class is a good way to get started for a simple application like this one.
If you are using Visual Studio, saving the contents of the Repository.cs file will trigger a warning produced by the dotnet watch command telling you that a hot reload cannot be applied, which is the same warning described earlier in the chapter for Visual Studio Code users. You will see this prompt at the command line:
watch : Do you want to restart your app
- Yes (y) / No (n) / Always (a) / Never (v)?
Press a to always rebuild the project.
Storing responses
Now that I have somewhere to store the data, I can update the action method that receives the HTTP POST requests, as shown in listing 3.13.
Listing 3.13 Updating an action in the HomeController.cs file in the Controllers folder
using Microsoft.AspNetCore.Mvc;
using PartyInvites.Models;
namespace PartyInvites.Controllers {
public class HomeController : Controller {
public IActionResult Index() {
return View();
}
[HttpGet]
public ViewResult RsvpForm() {
return View();
}
[HttpPost]
public ViewResult RsvpForm(GuestResponse guestResponse) {
Repository.AddResponse(guestResponse);
return View("Thanks", guestResponse);
}
}
}
Before the POST version of the RsvpForm method is invoked, the ASP.NET Core model binding feature extracts values from the HTML form and assigns them to the properties of the GuestResponse object. The result is used as the argument when the method is invoked to handle the HTTP request, and all I have to do to deal with the form data sent in a request is to work with the GuestResponse object that is passed to the action method—in this case, to pass it as an argument to the Repository.AddResponse method so t hat the response can be stored.
3.2.7 Adding the Thanks view
The call to the View method in the RsvpForm action method creates a ViewResult that selects a view called Thanks and uses the GuestResponse object created by the model binder as the view model. Add a Razor View named Thanks.cshtml to the Views/Home folder with the content shown in listing 3.14 to present a response to the user.
Listing 3.14 The contents of the Thanks.cshtml file in the Views/Home folder
@model PartyInvites.Models.GuestResponse
@{
Layout = null;
}
<!DOCTYPE html>
<html>
<head>
<meta name="viewport" content="width=device-width" />
<title>Thanks</title>
</head>
<body>
<div>
<h1>Thank you, @Model?.Name!</h1>
@if (Model?.WillAttend == true) {
@:It's great that you're coming.
@:The drinks are already in the fridge!
} else {
@:Sorry to hear that you can't make it,
@:but thanks for letting us know.
}
</div>
Click <a asp-action="ListResponses">here</a> to see who is coming.
</body>
</html>
The HTML produced by the Thanks.cshtml view depends on the values assigned to the GuestResponse view model provided by the RsvpForm action method. To access the value of a property in the domain object, I use an @Model.
Now that I have created the Thanks view, I have a basic working example of handling a form. Use the browser to request http://localhost:5000, click the RSVP Now link, add some data to the form, and click the Submit RSVP button. You will see the response shown in figure 3.5 (although it will differ if your name is not Joe or you said you could not attend).
Figure 3.5 The Thanks view
3.2.8 Displaying responses
At the end of the Thanks.cshtml view, I added an a element to create a link to display the list of people who are coming to the party. I used the asp-action tag helper attribute to create a URL that targets an action method called ListResponses, like this:
... Click <a asp-action="ListResponses">here</a> to see who is coming. ...
If you hover the mouse over the link that is displayed by the browser, you will see that it targets the /Home/ListResponses URL. This doesn’t correspond to any of the action methods in the Home controller, and if you click the link, you will see a 404 Not Found error response.
To add an endpoint that will handle the URL, I need to add another action method to the Home controller, as shown in listing 3.15.
Listing 3.15 Adding an action in the HomeController.cs file in the Controllers folder
using Microsoft.AspNetCore.Mvc;
using PartyInvites.Models;
namespace PartyInvites.Controllers {
public class HomeController : Controller {
public IActionResult Index() {
return View();
}
[HttpGet]
public ViewResult RsvpForm() {
return View();
}
[HttpPost]
public ViewResult RsvpForm(GuestResponse guestResponse) {
Repository.AddResponse(guestResponse);
return View("Thanks", guestResponse);
}
public ViewResult ListResponses() {
return View(Repository.Responses
.Where(r => r.WillAttend == true));
}
}
}
The new action method is called ListResponses, and it calls the View method, using the Repository.Responses property as the argument. This will cause Razor to render the default view, using the action method name as the name of the view file, and to use the data from the repository as the view model. The view model data is filtered using LINQ so that only positive responses are provided to the view.
Add a Razor View named ListResponses.cshtml to the Views/Home folder with the content shown in listing 3.16.
Listing 3.16 Displaying data in the ListResponses.cshtml file in the Views/Home folder
@model IEnumerable<PartyInvites.Models.GuestResponse>
@{
Layout = null;
}
<!DOCTYPE html>
<html>
<head>
<meta name="viewport" content="width=device-width" />
<title>Responses</title>
</head>
<body>
<h2>Here is the list of people attending the party</h2>
<table>
<thead>
<tr><th>Name</th><th>Email</th><th>Phone</th></tr>
</thead>
<tbody>
@foreach (PartyInvites.Models.GuestResponse r in Model!) {
<tr>
<td>@r.Name</td>
<td>@r.Email</td>
<td>@r.Phone</td>
</tr>
}
</tbody>
</table>
</body>
</html>
Razor view files have the .cshtml file extension to denote a mix of C# code and HTML elements. You can see this in listing 3.16 where I have used an @foreach expression to process each of the GuestResponse objects that the action method passes to the view using the View method. Unlike a normal C# foreach loop, the body of a Razor @foreach expression contains HTML elements that are added to the response that will be sent back to the browser. In this view, each GuestResponse object generates a tr element that contains td elements populated with the value of an object property.
Use the browser to request http://localhost:5000, click the RSVP Now link, and fill in the form. Submit the form and then click the link to see a summary of the data that has been entered since the application was first started, as shown in figure 3.6. The view does not present the data in an appealing way, but it is enough for the moment, and I will address the styling of the application later in this chapter.
Figure 3.6 Showing a list of party attendees
3.2.9 Adding validation
I can now add data validation to the application. Without validation, users could enter nonsense data or even submit an empty form. In an ASP.NET Core application, validation rules are defined by applying attributes to model classes, which means the same validation rules can be applied in any form that uses that class. ASP.NET Core relies on attributes from the System.ComponentModel.DataAnnotations namespace, which I have applied to the GuestResponse class in listing 3.17.
Listing 3.17 Applying validation in the GuestResponse.cs file in the Models folder
using System.ComponentModel.DataAnnotations;
namespace PartyInvites.Models {
public class GuestResponse {
[Required(ErrorMessage = "Please enter your name")]
public string? Name { get; set; }
[Required(ErrorMessage = "Please enter your email address")]
[EmailAddress]
public string? Email { get; set; }
[Required(ErrorMessage = "Please enter your phone number")]
public string? Phone { get; set; }
[Required(ErrorMessage = "Please specify whether you'll attend")]
public bool? WillAttend { get; set; }
}
}
ASP.NET Core detects the attributes and uses them to validate data during the model-binding process.
As noted earlier, I used nullable types to define the GuestResponse properties. This is useful for denoting properties that may not be assigned values, but it has a special value for the WillAttend property because it allows the Required validation attribute to work. If I had used a regular non-nullable bool, the value I received through modelbinding could be only true or false, and I would not be able to tell whether the user had selected a value. A nullable bool has three possible values: true, false, and null. The value of the WillAttend property will be null if the user has not selected a value, and this causes the Required attribute to report a validation error. This is a nice example of how ASP.NET Core elegantly blends C# features with HTML and HTTP.
I check to see whether there has been a validation problem using the ModelState.IsValid property in the action method that receives the form data, as shown in listing 3.18.
Listing 3.18 Checking for errors in the HomeController.cs file in the Controllers folder
using Microsoft.AspNetCore.Mvc;
using PartyInvites.Models;
namespace PartyInvites.Controllers {
public class HomeController : Controller {
public IActionResult Index() {
return View();
}
[HttpGet]
public ViewResult RsvpForm() {
return View();
}
[HttpPost]
public ViewResult RsvpForm(GuestResponse guestResponse) {
if (ModelState.IsValid) {
Repository.AddResponse(guestResponse);
return View("Thanks", guestResponse);
} else {
return View();
}
}
public ViewResult ListResponses() {
return View(Repository.Responses
.Where(r => r.WillAttend == true));
}
}
}
The Controller base class provides a property called ModelState that provides details of the outcome of the model binding process. If the ModelState.IsValid property returns true, then I know that the model binder has been able to satisfy the validation constraints I specified through the attributes on the GuestResponse class. When this happens, I render the Thanks view, just as I did previously.
If the ModelState.IsValid property returns false, then I know that there are validation errors. The object returned by the ModelState property provides details of each problem that has been encountered, but I don’t need to get into that level of detail because I can rely on a useful feature that automates the process of asking the user to address any problems by calling the View method without any parameters.
When it renders a view, Razor has access to the details of any validation errors associated with the request, and tag helpers can access the details to display validation errors to the user. Listing 3.19 shows the addition of validation tag helper attributes to the RsvpForm view.
Listing 3.19 Adding a summary to the RsvpForm.cshtml file in the Views/Home folder
@model PartyInvites.Models.GuestResponse
@{
Layout = null;
}
<!DOCTYPE html>
<html>
<head>
<meta name="viewport" content="width=device-width" />
<title>RsvpForm</title>
</head>
<body>
<form asp-action="RsvpForm" method="post">
<div asp-validation-summary="All"></div>
<div>
<label asp-for="Name">Your name:</label>
<input asp-for="Name" />
</div>
<div>
<label asp-for="Email">Your email:</label>
<input asp-for="Email" />
</div>
<div>
<label asp-for="Phone">Your phone:</label>
<input asp-for="Phone" />
</div>
<div>
<label asp-for="WillAttend">Will you attend?</label>
<select asp-for="WillAttend">
<option value="">Choose an option</option>
<option value="true">Yes, I'll be there</option>
<option value="false">No, I can't come</option>
</select>
</div>
<button type="submit">Submit RSVP</button>
</form>
</body>
</html>
The asp-validation-summary attribute is applied to a div element, and it displays a list of validation errors when the view is rendered. The value for the asp-validation-summary attribute is a value from an enumeration called ValidationSummary, which specifies what types of validation errors the summary will contain. I specified All, which is a good starting point for most applications, and I describe the other values and explain how they work in chapter 29.
To see how the validation summary works, run the application, fill out the Name field, and submit the form without entering any other data. You will see a summary of validation errors, as shown in figure 3.7.
Figure 3.7 Displaying validation errors
The RsvpForm action method will not render the Thanks view until all the validation constraints applied to the GuestResponse class have been satisfied. Notice that the data entered in the Name field was preserved and displayed again when Razor rendered the view with the validation summary. This is another benefit of model binding, and it simplifies working with form data.
Highlighting invalid fields
The tag helper attributes that associate model properties with elements have a handy feature that can be used in conjunction with model binding. When a model class property has failed validation, the helper attributes will generate slightly different HTML. Here is the input element that is generated for the Phone field when there is no validation error:
<input type="text" data-val="true"
data-val-required="Please enter your phone number" id="Phone"
name="Phone" value="">
For comparison, here is the same HTML element after the user has submitted the form without entering data into the text field (which is a validation error because I applied the Required attribute to the Phone property of the GuestResponse class):
<input type="text" class="input-validation-error"
data-val="true" data-val-required="Please enter your phone number" id="Phone"
name="Phone" value="">
I have highlighted the difference: the asp-for tag helper attribute added the input element to a class called input-validation-error. I can take advantage of this feature by creating a stylesheet that contains CSS styles for this class and the others that different HTML helper attributes use.
The convention in ASP.NET Core projects is that static content is placed into the wwwroot folder and organized by content type so that CSS stylesheets go into the wwwroot/css folder, JavaScript files go into the wwwroot/js folder, and so on.
TIP The project template used in listing 3.1 creates a site.css file in the wwwroot/css folder. You can ignore this file, which I don’t use in this chapter.
If you are using Visual Studio, right-click the wwwroot/css folder and select Add > New Item from the pop-up menu. Locate the Style Sheet item template, as shown in figure 3.8; set the name of the file to styles.css; and click the Add button.

Figure 3.8 Creating a CSS stylesheet
If you are using Visual Studio Code, right-click the wwwroot/css folder, select New File from the pop-up menu, and use styles.css as the file name. Regardless of which editor you use, replace the contents of the file with the styles shown in listing 3.20.
Listing 3.20 The contents of the styles.css file in the wwwroot/css folder
.field-validation-error {
color: #f00;
}
.field-validation-valid {
display: none;
}
.input-validation-error {
border: 1px solid #f00;
background-color: #fee;
}
.validation-summary-errors {
font-weight: bold;
color: #f00;
}
.validation-summary-valid {
display: none;
}
To apply this stylesheet, I added a link element to the head section of the RsvpForm view, as shown in listing 3.21.
Listing 3.21 Applying a stylesheet in the RsvpForm.cshtml file in the Views/Home folder
...
<head>
<meta name="viewport" content="width=device-width" />
<title>RsvpForm</title>
<link rel="stylesheet" href="/css/styles.css" />
</head>
...
The link element uses the href attribute to specify the location of the stylesheet. Notice that the wwwroot folder is omitted from the URL. The default configuration for ASP.NET includes support for serving static content, such as images, CSS stylesheets, and JavaScript files, and it maps requests to the wwwroot folder automatically. With the application of the stylesheet, a more obvious validation error will be displayed when data is submitted that causes a validation error, as shown in figure 3.9.
Figure 3.9 Automatically highlighted validation errors
3.2.10 Styling the content
All the functional goals for the application are complete, but the overall appearance of the application is poor. When you create a project using the mvc template, as I did for the example in this chapter, some common client-side development packages are installed. While I am not a fan of using template projects, I do like the client-side libraries that Microsoft has chosen. One of them is called Bootstrap, which is a good CSS framework originally developed by Twitter that has become a major open-source project and a mainstay of web application development.
Styling the welcome view
The basic Bootstrap features work by applying classes to elements that correspond to CSS selectors defined in the files added to the wwwroot/lib/bootstrap folder. You can get full details of the classes that Bootstrap defines from http://getbootstrap.com, but you can see how I have applied some basic styling to the Index.cshtml view file in listing 3.22.
Listing 3.22 Adding Bootstrap to the Index.cshtml file in the Views/Home folder
@{
Layout = null;
}
<!DOCTYPE html>
<html>
<head>
<meta name="viewport" content="width=device-width" />
<link rel="stylesheet" href="/lib/bootstrap/dist/css/bootstrap.css" />
<title>Index</title>
</head>
<body>
<div class="text-center m-2">
<h3> We're going to have an exciting party!</h3>
<h4>And YOU are invited!</h4>
<a class="btn btn-primary" asp-action="RsvpForm">RSVP Now</a>
</div>
</body>
</html>
I have added a link element whose href attribute loads the bootstrap.css file from the wwwroot/lib/bootstrap/dist/css folder. The convention is that third-party CSS and JavaScript packages are installed into the wwwroot/lib folder, and I describe the tool that is used to manage these packages in chapter 4.
Having imported the Bootstrap stylesheets, I need to style my elements. This is a simple example, so I need to use only a small number of Bootstrap CSS classes: text-center, btn, and btn-primary.
The text-center class centers the contents of an element and its children. The btn class styles a button, input, or a element as a pretty button, and the btn-primary class specifies which of a range of colors I want the button to be. You can see the effect by running the application, as shown in figure 3.10.

Figure 3.10 Styling a view
It will be obvious to you that I am not a web designer. In fact, as a child, I was excused from art lessons on the basis that I had absolutely no talent whatsoever. This had the happy result of making more time for math lessons but meant that my artistic skills have not developed beyond those of the average 10-year-old. For a real project, I would seek a professional to help design and style the content, but for this example, I am going it alone, and that means applying Bootstrap with as much restraint and consistency as I can muster.
Styling the form view
Bootstrap defines classes that can be used to style forms. I am not going to go into detail, but you can see how I have applied these classes in listing 3.23.
Listing 3.23 Adding styles to the RsvpForm.cshtml file in the Views/Home folder
@model PartyInvites.Models.GuestResponse
@{
Layout = null;
}
<!DOCTYPE html>
<html>
<head>
<meta name="viewport" content="width=device-width" />
<title>RsvpForm</title>
<link rel="stylesheet" href="/lib/bootstrap/dist/css/bootstrap.css" />
<link rel="stylesheet" href="/css/styles.css" />
</head>
<body>
<h5 class="bg-primary text-white text-center m-2 p-2">RSVP</h5>
<form asp-action="RsvpForm" method="post" class="m-2">
<div asp-validation-summary="All"></div>
<div class="form-group">
<label asp-for="Name" class="form-label">Your name:</label>
<input asp-for="Name" class="form-control" />
</div>
<div class="form-group">
<label asp-for="Email" class="form-label">Your email:</label>
<input asp-for="Email" class="form-control" />
</div>
<div class="form-group">
<label asp-for="Phone" class="form-label">Your phone:</label>
<input asp-for="Phone" class="form-control" />
</div>
<div class="form-group">
<label asp-for="WillAttend" class="form-label">
Will you attend?
</label>
<select asp-for="WillAttend" class="form-select">
<option value="">Choose an option</option>
<option value="true">Yes, I'll be there</option>
<option value="false">No, I can't come</option>
</select>
</div>
<button type="submit" class="btn btn-primary mt-3">
Submit RSVP
</button>
</form>
</body>
</html>
The Bootstrap classes in this example create a header, just to give structure to the layout. To style the form, I have used the form-group class, which is used to style the element that contains the label and the associated input or select element, which is assigned to the form-control class. You can see the effect of the styles in figure 3.11.
Figure 3.11 Styling the RsvpForm view
Styling the thanks view
The next view file to style is Thanks.cshtml, and you can see how I have done this in listing 3.24, using CSS classes that are similar to the ones I used for the other views. To make an application easier to manage, it is a good principle to avoid duplicating code and markup wherever possible. ASP.NET Core provides several features to help reduce duplication, which I describe in later chapters. These features include Razor layouts (Chapter 22), partial views (Chapter 22), and view components (Chapter 24).
Listing 3.24 Applying styles to the Thanks.cshtml file in the Views/Home folder
@model PartyInvites.Models.GuestResponse
@{
Layout = null;
}
<!DOCTYPE html>
<html>
<head>
<meta name="viewport" content="width=device-width" />
<title>Thanks</title>
<link rel="stylesheet"
href="/lib/bootstrap/dist/css/bootstrap.css" />
</head>
<body class="text-center">
<div>
<h1>Thank you, @Model?.Name!</h1>
@if (Model?.WillAttend == true) {
@:It's great that you're coming.
@:The drinks are already in the fridge!
} else {
@:Sorry to hear that you can't make it,
@:but thanks for letting us know.
}
</div>
Click <a asp-action="ListResponses">here</a> to see who is coming.
</body>
</html>
Figure 3.12 shows the effect of the styles.
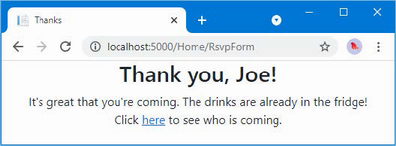
Figure 3.12 Styling the Thanks view
Styling the list view
The final view to style is ListResponses, which presents the list of attendees. Styling the content follows the same approach as used for the other views, as shown in listing 3.25.
Listing 3.25 Adding styles to the ListResponses.cshtml file in the Views/Home folder
@model IEnumerable<PartyInvites.Models.GuestResponse>
@{
Layout = null;
}
<!DOCTYPE html>
<html>
<head>
<meta name="viewport" content="width=device-width" />
<title>Responses</title>
<link rel="stylesheet" href="/lib/bootstrap/dist/css/bootstrap.css" />
</head>
<body>
<div class="text-center p-2">
<h2 class="text-center">
Here is the list of people attending the party
</h2>
<table class="table table-bordered table-striped table-sm">
<thead>
<tr><th>Name</th><th>Email</th><th>Phone</th></tr>
</thead>
<tbody>
@foreach (PartyInvites.Models.GuestResponse r in Model!) {
<tr>
<td>@r.Name</td>
<td>@r.Email</td>
<td>@r.Phone</td>
</tr>
}
</tbody>
</table>
</div>
</body>
</html>
Figure 3.13 shows the way that the table of attendees is presented. Adding these styles to the view completes the example application, which now meets all the development goals and has an improved appearance.

Figure 3.13 Styling the ListResponses view
Summary
• ASP.NET Core projects are created with the dotnet new command.
• Controllers define action methods that are used to handle HTTP requests.
• Views generate HTML content that is used to respond to HTTP requests.
• Views can contain HTML elements that are bound to data model properties.
• Model binding is the process by which request data is parsed and assigned to the properties of objects that are passed to action methods for processing.
• The data in the request can be subjected to validation and errors can be displayed to the user within the same HTML form that was used to submit the data.
• The HTML content generated by views can be styled using the same CSS features that are applied to static HTML content.
Pro ASP.NET Core 7 1 Putting ASP.NET Core in context
If you’re looking for breadth and depth coverage of ASP.NET Core development, this is the book for you.
—Greg White, Software Development Manager, PicoBrew Inc.
A must have book for the .NET developer/engineer.
—Foster Haines, Consultant, Foster’s Website Company
The book for web development professionals.
—Renato Gentile, Solutions Architect, S3K S.p.A.
This book guides you as a beginner and will remain your for-ever reference book.
—Werner Nindl, Partner, Nova Advisory
An encyclopedic journey.
—Richard Young, IT Director, Design Synthesis, Inc
From tiny throw-away sites to large production websites, this book teaches all you need to know.
—Samuel Bosch, Team Lead, ILVO
By the end of this book you should be able to write code for real-world projects.
—Rich Yonts, Senior Software Engineer, Teradata

Tenth Edition
To comment go to liveBook

Manning
Shelter Island
For more information on this and other Manning titles go to
For online information and ordering of these and other Manning books, please visit www.manning.com. The publisher offers discounts on these books when ordered in quantity.
For more information, please contact
Special Sales Department
Manning Publications Co.
20 Baldwin Road
PO Box 761
Shelter Island, NY 11964
Email: orders@manning.com
©2023 Adam Freeman. All rights reserved.
No part of this publication may be reproduced, stored in a retrieval system, or transmitted, in any form or by means electronic, mechanical, photocopying, or otherwise, without prior written permission of the publisher.
Many of the designations used by manufacturers and sellers to distinguish their products are claimed as trademarks. Where those designations appear in the book, and Manning Publications was aware of a trademark claim, the designations have been printed in initial caps or all caps.
♾ Recognizing the importance of preserving what has been written, it is Manning’s policy to have the books we publish printed on acid-free paper, and we exert our best efforts to that end. Recognizing also our responsibility to conserve the resources of our planet, Manning books are printed on paper that is at least 15 percent recycled and processed without the use of elemental chlorine.
|
|
Manning Publications Co. 20 Baldwin Road Technical PO Box 761 Shelter Island, NY 11964 |
|
Development editor: |
Marina Michaels |
|
Technical editor: |
Fabio Ferracchiati |
|
Production editor: |
Aleksandar Dragosavljević |
|
Copy editor: |
Katie Petito |
|
Typesetter: |
Tamara Švelić Sabljić |
|
Cover designer: |
Marija Tudor |
ISBN: 9781633437821
Dedicated to my lovely wife, Jacqui Griffyth.
(And also to Peanut.)
1 Putting ASP.NET Core in context
1.1 Understanding the application frameworks
Understanding the MVC Framework
Understanding the utility frameworks
Understanding the ASP.NET Core platform
What software do I need to follow the examples?
What platform do I need to follow the examples?
What if I have problems following the examples?
What if I find an error in the book?
What if I really enjoyed this book?
What if this book has made me angry and I want to complain?
2.2 Creating an ASP.NET Core project
Opening the project using Visual Studio
Opening the project with Visual Studio Code
2.3 Running the ASP.NET Core application
3 Your first ASP.NET Core application
Creating a second action and view
4.1 Creating ASP.NET Core projects
Creating a project using the command line
4.2 Adding code and content to projects
Understanding item scaffolding
4.3 Building and running projects
5.1 Preparing for this chapter
Creating the application components
Running the example application
5.2 Understanding top-level statements
5.3 Understanding global using statements
Understanding implicit using statements
5.4 Understanding null state analysis
Ensuring fields and properties are assigned values
Providing a default value for non-nullable types
Overriding null state analysis
Disabling null state analysis warnings
5.5 Using string interpolation
5.6 Using object and collection initializers
5.7 Using target-typed new expressions
5.8 Pattern Matching
Pattern matching in switch statements
Applying extension methods to an interface
Creating filtering extension methods
Using lambda expression methods and properties
5.11 Using type inference and anonymous types
5.12 Using default implementations in interfaces
5.13 Using asynchronous methods
Applying the async and await keywords
Using an asynchronous enumerable
5.14 Getting names
6 Testing ASP.NET Core applications
6.1 Preparing for this chapter
Creating the application components
Running the example application
6.2 Creating a unit test project
6.3 Writing and running unit tests
Running tests with the Visual Studio Test Explorer
Running tests with Visual Studio Code
Running tests from the command line
Isolating components for unit testing
7 SportsStore: A real application
Creating the unit test project
Creating the application project folders
Preparing the services and the request pipeline
Configuring the Razor view engine
Creating the controller and view
Checking and running the application
7.2 Adding data to the application
Installing the Entity Framework Core packages
Defining the connection string
Creating the database context class
Configuring Entity Framework Core
Creating the database migration
7.3 Displaying a list of products
Installing the Bootstrap package
8 SportsStore: Navigation and cart
8.1 Adding navigation controls
Building a category navigation menu
8.2 Building the shopping cart
Creating the Add to Cart buttons
9 SportsStore: Completing the cart
9.1 Refining the cart model with a service
Creating a storage-aware cart class
Simplifying the cart Razor Page
9.2 Completing the cart functionality
Adding the cart summary widget
Creating the controller and view
Completing the order controller
10 SportsStore: Administration
Creating the startup Razor Page
Creating the routing and layout components
10.2 Managing orders
Displaying orders to the administrator
10.3 Adding catalog management
Applying validation attributes to the data model
11 SportsStore: Security and deployment
11.1 Creating the Identity database
Installing the Identity package for Entity Framework Core
Defining the connection string
Creating and applying the database migration
11.2 Adding a conventional administration feature
11.3 Applying a basic authorization policy
11.4 Creating the account controller and views
11.5 Testing the security policy
11.6 Preparing ASP.NET Core for deployment
Creating the production configuration settings
Running the containerized application
12 Understanding the ASP.NET Core platform
12.1 Preparing for this chapter
Running the example application
12.2 Understanding the ASP.NET Core platform
Understanding middleware and the request pipeline
12.3 Understanding the ASP.NET Core project
Understanding the project file
12.4 Creating custom middleware
Defining middleware using a class
Understanding the return pipeline path
Short-Circuiting the request pipeline
Using the options pattern with class-based middleware
13.1 Preparing for this chapter
Adding the routing middleware and defining an endpoint
Simplifying the pipeline configuration
Using segment variables in URL patterns
Matching multiple values from a single URL segment
Using default values for segment variables
Using optional segments in a URL Pattern
Using a catchall segment variable
13.3 Advanced routing features
Avoiding ambiguous route exceptions
Accessing the endpoint in a middleware component
14.1 Preparing for this chapter
Creating a middleware component and an endpoint
Configuring the request pipeline
14.2 Understanding service location and tight coupling
Understanding the service location problem
Understanding the tightly coupled components problem
14.3 Using dependency injection
Using a Service with a Constructor Dependency
Getting services from the HttpContext object
Avoiding the transient service reuse pitfall
14.5 Other dependency injection features
Accessing services in the Program.cs file
Using service factory functions
Creating services with multiple implementations
Using unbound types in services
15 Using the platform features, part 1
15.1 Preparing for this chapter
15.2 Using the configuration service
Understanding the environment configuration file
Accessing configuration settings
Using the configuration data in the Program.cs file
Using configuration data with the options pattern
Understanding the launch settings file
15.3 Using the logging service
Logging messages with attributes
Configuring minimum logging levels
Logging HTTP requests and responses
15.4 Using static content and client-side packages
Adding the static content middleware
16 Using the platform features, part 2
16.1 Preparing for this chapter
16.2 Using cookies
Enabling cookie consent checking
16.3 Using sessions
Configuring the session service and middleware
16.4 Working with HTTPS connections
Enabling HTTP strict transport security
16.5 Using rate limits
16.6 Handling exceptions and errors
Returning an HTML error response
Enriching status code responses
16.7 Filtering requests using the host header
17.1 Preparing for this chapter
17.2 Caching data
Using a shared and persistent data cache
17.3 Caching responses
17.4 Caching output
Defining a custom cache policy
17.5 Using Entity Framework Core
Installing Entity Framework Core
Configuring the database service
Creating and applying the database migration
18 Creating the example project
18.1 Creating the project
18.2 Adding a data model
Adding NuGet packages to the project
Configuring EF Core services and middleware
Creating and applying the migration
18.4 Configuring the request pipeline
18.5 Running the example application
19 Creating RESTful web services
19.1 Preparing for this chapter
19.2 Understanding RESTful web services
Understanding request URLs and methods
19.3 Creating a web service using the minimal API
19.4 Creating a web service using a controller
19.5 Improving the web service
Applying the API controller attribute
20 Advanced web service features
20.1 Preparing for this chapter
Running the example application
20.2 Dealing with related data
Breaking circular references in related data
20.3 Supporting the HTTP PATCH method
Installing and configuring the JSON Patch package
20.4 Understanding content formatting
Understanding the default content policy
Understanding content negotiation
Specifying an action result format
Requesting a format in the URL
Restricting the formats received by an action method
20.5 Documenting and exploring web services
Installing and configuring the Swashbuckle package
Fine-Tuning the API description
21 Using controllers with views, part I
21.1 Preparing for this chapter
Running the example application
21.2 Getting started with views
Understanding the view model type pitfall
21.4 Understanding the Razor syntax
Understanding content expressions
22 Using controllers with views, part II
22.1 Preparing for this chapter
Running the example application
22.2 Using the view bag
22.3 Using temp data
22.4 Working with layouts
Configuring layouts using the view bag
22.5 Using partial views
22.6 Understanding content-encoding
23.1 Preparing for this chapter
Running the example application
23.2 Understanding Razor Pages
23.3 Understanding Razor Pages routing
Specifying a routing pattern in a Razor Page
Adding routes for a Razor Page
23.4 Understanding the Page model class
Using a code-behind class file
Understanding action results in Razor Pages
Handling multiple HTTP methods
23.5 Understanding the Razor Page view
Creating a layout for Razor Pages
Using partial views in Razor Pages
Creating Razor Pages without page models
24.1 Preparing for this chapter
Running the example application
24.2 Understanding view components
24.3 Creating and using a view component
24.4 Understanding view component results
24.5 Getting context data
Providing context from the parent view using arguments
Creating asynchronous view components
24.6 Creating view components classes
Creating a hybrid controller class
25.1 Preparing for this chapter
Running the example application
Narrowing the scope of a tag helper
Widening the scope of a tag helper
25.3 Advanced tag helper features
Creating elements programmatically
Prepending and appending content and elements
Working with model expressions
Coordinating between tag helpers
Suppressing the output element
25.4 Using tag helper components
Creating a tag helper component
Expanding tag helper component element selection
26 Using the built-in tag helpers
26.1 Preparing for this chapter
Installing a client-side package
Running the example application
26.2 Enabling the built-in tag helpers
26.3 Transforming anchor elements
Using anchor elements for Razor Pages
26.4 Using the JavaScript and CSS tag helpers
26.5 Working with image elements
26.6 Using the data cache
26.7 Using the hosting environment tag helper
27 Using the forms tag helpers
27.1 Preparing for this chapter
Running the example application
27.2 Understanding the form handling pattern
Creating a controller to handle forms
Creating a Razor Page to handle forms
27.3 Using tag helpers to improve HTML forms
27.4 Working with input elements
Transforming the input element type attribute
Formatting input element values
Displaying values from related data in input elements
27.5 Working with label elements
27.6 Working with select and option elements
27.8 Using the anti-forgery feature
Enabling the anti-forgery feature in a controller
Enabling the anti-forgery feature in a Razor Page
Using anti-forgery tokens with JavaScript clients
28.1 Preparing for this chapter
Running the example application
28.2 Understanding model binding
28.3 Binding simple data types
Binding simple data types in Razor Pages
Understanding default binding values
Selectively binding properties
28.5 Binding to arrays and collections
Binding to collections of complex types
28.6 Specifying a model binding source
Selecting a binding source for a property
Using headers for model binding
Using request bodies as binding sources
28.7 Manual model binding
29.1 Preparing for this chapter
Running the example application
29.2 Understanding the need for model validation
29.3 Validating data
Displaying validation messages
Understanding the implicit validation checks
Performing explicit validation
Configuring the default validation error messages
Displaying property-level validation messages
Displaying model-level messages
29.4 Explicitly validating data in a Razor Page
29.5 Specifying validation rules using metadata
Creating a custom property validation attribute
Creating a custom model validation attribute
29.6 Performing client-side validation
29.7 Performing remote validation
Performing remote validation in Razor Pages
30.1 Preparing for this chapter
Running the example application
30.2 Using filters
Understanding authorization filters
Understanding resource filters
Understanding exception filters
30.5 Managing the filter lifecycle
Using dependency injection scopes to manage filter lifecycles
30.7 Understanding and changing filter order
31.1 Preparing for this chapter
Running the example application
31.2 Creating an MVC forms application
Preparing the view model and the view
31.3 Creating a Razor Pages forms application
Defining pages for the CRUD operations
31.4 Creating new related data objects
Providing the related data in the same request
Breaking out to create new data
32 Creating the example project
32.1 Creating the project
Adding NuGet packages to the project
32.2 Adding a data model
Configuring Entity Framework Core
Creating and applying the migration
32.3 Adding the Bootstrap CSS framework
32.4 Configuring the services and middleware
32.5 Creating a controller and view
32.7 Running the example application
33 Using Blazor Server, part 1
33.1 Preparing for this chapter
33.2 Understanding Blazor Server
Understanding the Blazor Server advantages
Understanding the Blazor Server disadvantages
Choosing between Blazor Server and Angular/React/Vue.js
33.3 Getting started with Blazor
Configuring ASP.NET Core for Blazor Server
33.4 Understanding the basic Razor Component features
Understanding Blazor events and data bindings
33.5 Using class files to define components
Defining a Razor Component class
34 Using Blazor Server, part 2
34.1 Preparing for this chapter
34.2 Combining components
Configuring components with attributes
Creating custom events and bindings
34.3 Displaying child content in a component
Using generic type parameters in template components
34.4 Handling errors
Handling uncaught application errors
35.1 Preparing for this chapter
Navigating between routed components
Defining common content using layouts
35.3 Understanding the component lifecycle methods
Using the lifecycle methods for asynchronous tasks
35.4 Managing component interaction
Using references to child components
Interacting with components from other code
Interacting with components using JavaScript
36.1 Preparing for this chapter
Dropping the database and running the application
36.2 Using the Blazor form components
Creating custom form components
36.3 Using Entity Framework Core with Blazor
Understanding the EF Core context scope issue
Understanding the repeated query issue
36.4 Performing CRUD operations
Creating the details component
36.5 Extending the Blazor form features
Creating a custom validation constraint
Creating a valid-only submit button component
37.1 Preparing for this chapter
Dropping the database and running the application
37.2 Setting Up Blazor WebAssembly
Creating the Blazor WebAssembly project
Preparing the ASP.NET Core project
Adding the solution references
Completing the Blazor WebAssembly configuration
Testing the placeholder components
37.3 Creating a Blazor WebAssembly component
Importing the data model namespace
37.4 Completing the Blazor WebAssembly Form application
Creating the details component
38 Using ASP.NET Core Identity
38.1 Preparing for this chapter
38.2 Preparing the project for ASP.NET Core Identity
Preparing the ASP.NET Core Identity database
Creating and applying the Identity database migration
38.3 Creating user management tools
Preparing for user management tools
38.4 Creating role management tools
Preparing for role management tools
Enumerating and deleting roles
39 Applying ASP.NET Core Identity
39.1 Preparing for this chapter
39.2 Authenticating users
Inspecting the ASP.NET Core Identity cookie
Testing the authentication feature
Enabling the Identity authentication middleware
39.3 Authorizing access to endpoints
Applying the authorization attribute
Enabling the authorization middleware
Creating the access denied endpoint
Testing the authentication sequence
39.4 Authorizing access to Blazor applications
Performing authorization in Blazor components
Displaying content to authorized users
39.5 Authenticating and authorizing web services
Building a simple JavaScript client
Restricting access to the web service
Using bearer token authentication
This is the 49th book I have written. I wrote my first book in 1996, and I would not have believed anyone who told me that I would still be writing over a quarter of a century later, or that books would become such an important part of my life.
I have a bookshelf on which I keep every book I have written. It is an act of pure self-indulgence, but I am proud of these books and what they represent. They span 2.5 meters on a single shelf (or 8 feet if you prefer) and they mark the chapters of my life: the book I wrote the year I married my beloved wife; the book I was writing when my father died; the book I finished while we moved house; the book I wrote after I retired. Each book reminds me of people and places going back 27 years.
Of all the books I have written, Pro ASP.NET Core is my favourite. This is the 10th edition, but I almost didn’t write it at all. I had already written a book about ASP.NET Web Forms and found it to be a frustrating process, so I wasn’t keen to write about the MVC framework and Microsoft’s attempt to modernize their web development products. My wife persuaded me to accept the publisher’s offer and I have never looked back. ASP.NET has evolved into ASP.NET Core, and each edition of this book has been a little bigger and a little more detailed.
This is a big and complicated book because ASP.NET Core is big and complicated. But I put a lot of effort into writing books that are easy to follow, even if the topics can be difficult to understand. As I write this preface and I think of you, my future reader, my hope is that the book you hold in your hand helps you with your career, makes your project easier to implement, or helps you move into a new and more exciting role.
There is something unique about receiving the first copies of a book, fresh from the printers. The process of getting a book into print takes just enough time for it to be a surprise when the box arrives at the door. Writing is an abstract process and writing about software especially so. The finished book feels like an idea made real. These days, ebooks are more popular and more convenient, but my heart will always beat with joy for the printed version. As you hold this book, I hope you feel some of that joy, and that this book plays some small part in helping you achieve something you will be proud of, whatever that may be.
Pro ASP.NET Core, Tenth Edition was written to help you build web applications using the latest version of .NET and ASP.NET Core. It begins with setting up the development environment and creating a simple web application, before moving on to creating a simple but realistic online store, and then diving into the detail of important ASP.NET Core features.
This book is for experienced developers who are new to ASP.NET Core, or who are moving from an earlier version of ASP.NET, including legacy Web Forms.
The book has four parts. The first part covers setting up the development environment, creating a simple web application, and using the development tools. There is also a primer on important C# features for readers who are moving from an earlier version of ASP.NET or ASP.NET Core. The rest of this part of the book contains the SportsStore example application, which shows how to create a basic but functional online store, and demonstrates how the many different ASP.NET Core features work together.
The second part of the book describes the key features of the ASP.NET Core platform. I explain how HTTP requests are processed, how to create and use middleware components, how to create routes, how to define and consume services, and how to work with Entity Framework Core. These chapters explain the foundations of ASP.NET Core, and understanding them is essential for effective ASP.NET Core development.
The third part of the book focuses on the ASP.NET features you will need every day, including HTTP request handling, creating RESTful web services, generating HTML responses, and receiving data from users.
The final part of this book describes advanced ASP.NET Core features, including using Blazor to create rich client-side applications, and using ASP.NET Core Identity to authenticate users.
This book contains many examples of source code both in numbered listings and in line with normal text. In both cases, the source code is formatted in a fixed-width font to separate it from ordinary text. Code is also in bold to highlight statements that have changed from previous listings.
The source code for every chapter in this book is available at https://github.com/manningbooks/pro-asp.net-core-7.
Purchase of Pro ASP.NET Core 7, Tenth Edition includes free access to liveBook, Manning’s online reading platform. Using liveBook’s exclusive discussion features, you can attach comments to the book globally or to specific sections or paragraphs. It’s a snap to make notes for yourself, ask and answer technical questions, and receive help from the author and other users. To access the forum, go to https://livebook.manning.com/book/pro-aspdotnet-core-7-tenth-edition/discussion. You can also learn more about Manning’s forums and the rules of conduct at https://livebook.manning.com/discussion.
Manning’s commitment to our readers is to provide a venue where a meaningful dialogue between individual readers and between readers and the author can take place. It is not a commitment to any specific amount of participation on the part of the author, whose contribution to the forum remains voluntary (and unpaid). We suggest you try asking the author some challenging questions lest his interest stray! The forum and the archives of previous discussions will be accessible from the publisher’s website as long as the book is in print.

Adam Freeman is an experienced IT professional who started his career as a programmer. He has held senior positions in a range of companies, most recently serving as Chief Technology Officer and Chief Operating Officer of a global bank. He has written 49 programming books, focusing mostly on web application development. Now retired, he spends his time writing and trying to make furniture.
About the technical editor
Fabio Claudio Ferracchiati is a senior consultant and a senior analyst/developer using Microsoft technologies. He works for TIM (www.telecomitalia.it). He is a Microsoft Certified Solution Developer for .NET, a Microsoft Certified Application Developer for .NET, a Microsoft Certified Professional, and a prolific author and technical reviewer. Over the past ten years, he’s written articles for Italian and international magazines and coauthored more than ten books on a variety of computer topics.
The figure on the cover of Pro ASP.NET Core 7, Tenth Edition is “Turc en habit d’hiver,” or “Turk in winter clothes,” taken from a collection by Jacques Grasset de Saint-Sauveur, published in 1788. Each illustration is finely drawn and colored by hand.
In those days, it was easy to identify where people lived and what their trade or station in life was just by their dress. Manning celebrates the inventiveness and initiative of the computer business with book covers based on the rich diversity of regional culture centuries ago, brought back to life by pictures from collections such as this one.
This chapter covers
ASP.NET Core is Microsoft’s web development platform. The original ASP.NET was introduced in 2002, and it has been through several reinventions and reincarnations to become ASP.NET Core 7, which is the topic of this book.
ASP.NET Core consists of a platform for processing HTTP requests, a series of principal frameworks for creating applications, and secondary utility frameworks that provide supporting features, as illustrated by figure 1.1.
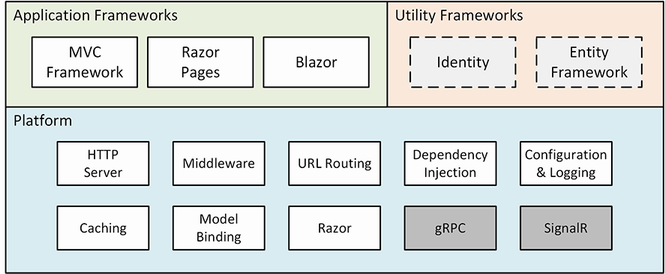
Figure 1.1 The structure of ASP.NET Core
When you start using ASP.NET Core, it can be confusing to find that there are different application frameworks available. As you will learn, these frameworks are complementary and solve different problems, or, for some features, solve the same problems in different ways. Understanding the relationship between these frameworks means understanding the changing design patterns that Microsoft has supported, as I explain in the sections that follow.
The MVC Framework was introduced in the early ASP.NET, long before .NET Core and the newer .NET were introduced. The original ASP.NET relied on a development model called Web Forms, which re-created the experience of writing desktop applications but resulted in unwieldy web projects that did not scale well. The MVC Framework was introduced alongside Web Forms with a development model that embraced the character of HTTP and HTML, rather than trying to hide it.
MVC stands for Model-View-Controller, which is a design pattern that describes the shape of an application. The MVC pattern emphasizes separation of concerns, where areas of functionality are defined independently, which was an effective antidote to the indistinct architectures that Web Forms led to.
Early versions of the MVC Framework were built on the ASP.NET foundations that were originally designed for Web Forms, which led to some awkward features and workarounds. With the move to .NET Core, ASP.NET became ASP.NET Core, and the MVC Framework was rebuilt on an open, extensible, and cross-platform foundation.
The MVC Framework remains an important part of ASP.NET Core, but the way it is commonly used has changed with the rise of single-page applications (SPAs). In an SPA, the browser makes a single HTTP request and receives an HTML document that delivers a rich client, typically written in a JavaScript framework such as Angular or React. The shift to SPAs means that the clean separation that the MVC Framework was originally intended for is not as important, and the emphasis placed on following the MVC pattern is no longer essential, even though the MVC Framework remains useful (and is used to support SPAs through web services, as described in chapter 19).
One drawback of the MVC Framework is that it can require a lot of preparatory work before an application can start producing content. Despite its structural problems, one advantage of Web Forms was that simple applications could be created in a couple of hours.
Razor Pages takes the development ethos of Web Forms and implements it using the platform features originally developed for the MVC Framework. Code and content are mixed to form self-contained pages; this re-creates the speed of Web Forms development without some of the underlying technical problems (although scaling up complex projects can still be an issue).
Razor Pages can be used alongside the MVC Framework, which is how I tend to use them. I write the main parts of the application using the MVC Framework and use Razor Pages for the secondary features, such as administration and reporting tools. You can see this approach in chapters 7–11, where I develop a realistic ASP.NET Core application called SportsStore.
The rise of JavaScript client-side frameworks can be a barrier for C# developers, who must learn a different—and somewhat idiosyncratic—programming language. I have come to love JavaScript, which is as fluid and expressive as C#. But it takes time and commitment to become proficient in a new programming language, especially one that has fundamental differences from C#.
Blazor attempts to bridge this gap by allowing C# to be used to write client-side applications. There are two versions of Blazor: Blazor Server and Blazor WebAssembly. Blazor Server relies on a persistent HTTP connection to the ASP.NET Core server, where the application’s C# code is executed. Blazor WebAssembly goes one step further and executes the application’s C# code in the browser. Neither version of Blazor is suited for all situations, as I explain in chapter 33, but they both give a sense of direction for the future of ASP.NET Core development.
Two frameworks are closely associated with ASP.NET Core but are not used directly to generate HTML content or data. Entity Framework Core is Microsoft’s object-relational mapping (ORM) framework, which represents data stored in a relational database as .NET objects. Entity Framework Core can be used in any .NET application, and it is commonly used to access databases in ASP.NET Core applications.
ASP.NET Core Identity is Microsoft’s authentication and authorization framework, and it is used to validate user credentials in ASP.NET Core applications and restrict access to application features.
I describe only the basic features of both frameworks in this book, focusing on the capabilities required by most ASP.NET Core applications. But these are both complex frameworks that are too large to describe in detail in what is already a large book about ASP.NET Core.
The ASP.NET Core platform contains the low-level features required to receive and process HTTP requests and create responses. There is an integrated HTTP server, a system of middleware components to handle requests, and core features that the application frameworks depend on, such as URL routing and the Razor view engine.
Most of your development time will be spent with the application frameworks, but effective ASP.NET Core use requires an understanding of the powerful capabilities that the platform provides, without which the higher-level frameworks could not function. I demonstrate how the ASP.NET Core platform works in detail in part 2 of this book and explain how the features it provides underpin every aspect of ASP.NET Core development.
I have not described two notable platform features in this book: SignalR and gRPC. SignalR is used to create low-latency communication channels between applications. It provides the foundation for the Blazor Server framework that I describe in part 4 of this book, but SignalR is rarely used directly, and there are better alternatives for those few projects that need low-latency messaging, such as Azure Event Grid or Azure Service Bus.
gRPC is an emerging standard for cross-platform remote procedure calls (RPCs) over HTTP that was originally created by Google (the g in gRPC) and offers efficiency and scalability benefits. gRPC may be the future standard for web services, but it cannot be used in web applications because it requires low-level control of the HTTP messages that it sends, which browsers do not allow. (There is a browser library that allows gRPC to be used via a proxy server, but that undermines the benefits of using gRPC.) Until gRPC can be used in the browser, its inclusion in ASP.NET Core is of interest only for projects that use it for communication between back-end servers, such as in microservices development. I may cover gRPC in future editions of this book but not until it can be used in the browser.
To get the most from this book, you should be familiar with the basics of web development, understand how HTML and CSS work, and have a working knowledge of C#. Don’t worry if you haven’t done any client-side development, such as JavaScript. The emphasis in this book is on C# and ASP.NET Core, and you will be able to pick up everything you need to know as you progress through the chapters. In chapter 5, I summarize the most important C# features for ASP.NET Core development.
You need a code editor (either Visual Studio or Visual Studio Code), the .NET Core Software Development Kit, and SQL Server LocalDB. All are available for use from Microsoft without charge, and chapter 2 contains instructions for installing everything you need.
This book is written for Windows. I used Windows 10 Pro, but any version of Windows supported by Visual Studio, Visual Studio Code, and .NET Core should work. ASP.NET Core is supported on other platforms, but the examples in this book rely on the SQL Server LocalDB feature, which is specific to Windows. You can contact me at adam@adam-freeman.com if you are trying to use another platform, and I will give you some general pointers for adapting the examples, albeit with the caveat that I won’t be able to provide detailed help if you get stuck.
The first thing to do is to go back to the start of the chapter and begin again. Most problems are caused by missing a step or not fully following a listing. Pay close attention to the emphasis in code listings, which highlights the changes that are required.
Next, check the errata/corrections list, which is included in the book’s GitHub repository. Technical books are complex, and mistakes are inevitable, despite my best efforts and those of my editors. Check the errata list for the list of known errors and instructions to resolve them.
If you still have problems, then download the project for the chapter you are reading from the book’s GitHub repository, https://github.com/manningbooks/pro-asp.net-core-7, and compare it to your project. I create the code for the GitHub repository by working through each chapter, so you should have the same files with the same contents in your project.
If you still can’t get the examples working, then you can contact me at adam@adam-freeman.com for help. Please make it clear in your email which book you are reading and which chapter/example is causing the problem. Please remember that I get a lot of emails and that I may not respond immediately.
You can report errors to me by email at adam@adam-freeman.com, although I ask that you first check the errata/corrections list for this book, which you can find in the book’s GitHub repository at https://github.com/manningbooks/pro-asp.net-core-7, in case it has already been reported.
I add errors that are likely to cause confusion to readers, especially problems with example code, to the errata/corrections file on the GitHub repository, with a grateful acknowledgment to the first reader who reported them. I also publish a typos list, which contains less serious issues, which usually means errors in the text surrounding examples that are unlikely to prevent a reader from following or understanding the examples.
I have tried to cover the features that will be required by most ASP.NET Core projects. This book is split into four parts, each of which covers a set of related topics.
Part 1: Introducing ASP.NET Core
This part of the book introduces ASP.NET Core. In addition to setting up your development environment and creating your first application, you’ll learn about the most important C# features for ASP.NET Core development and how to use the ASP.NET Core development tools. Most of part 1 is given over to the development of a project called SportsStore, through which I show you a realistic development process from inception to deployment, touching on all the main features of ASP.NET Core and showing how they fit together—something that can be lost in the deep-dive chapters in the rest of the book.
Part 2: The ASP.NET Core platform
The chapters in this part of the book describe the key features of the ASP.NET Core platform. I explain how HTTP requests are processed, how to create and use middleware components, how to create routes, how to define and consume services, and how to work with Entity Framework Core. These chapters explain the foundations of ASP.NET Core, and understanding them is essential for effective ASP.NET Core development.
Part 3: ASP.NET Core applications
The chapters in this part of the book explain how to create different types of applications, including RESTful web services and HTML applications using controllers and Razor Pages. These chapters also describe the features that make it easy to generate HTML, including the views, view components, and tag helpers.
Part 4: Advanced ASP.NET Core features
The final part of the book explains how to create applications using Blazor Server, how to use the experimental Blazor WebAssembly, and how to authenticate users and authorize access using ASP.NET Core Identity.
This book doesn’t cover basic web development topics, such as HTML and CSS, and doesn’t teach basic C# (although chapter 5 does describe C# features useful for ASP.NET Core development that may not be familiar to developers using older versions of .NET).
As much as I like to dive into the details in my books, not every ASP.NET Core feature is useful in mainstream development, and I have to keep my books to a printable size. When I decide to omit a feature, it is because I don’t think it is important or because the same outcome can be achieved using a technique that I do cover.
As noted earlier, I have not described the ASP.NET Core support for SignalR and gRPC, and I note other features in later chapters that I don’t describe, either because they are not broadly applicable or because there are better alternatives available. In each case, I explain why I have omitted a description and provide a reference to the Microsoft documentation for that topic.
You can email me at adam@adam-freeman.com. It has been a few years since I first published an email address in my books. I wasn’t entirely sure that it was a good idea, but I am glad that I did it. I have received emails from around the world, from readers working or studying in every industry, and—for the most part anyway—the emails are positive, polite, and a pleasure to receive.
I try to reply promptly, but I get a lot of email, and sometimes I get a backlog, especially when I have my head down trying to finish writing a book. I always try to help readers who are stuck with an example in the book, although I ask that you follow the steps described earlier in this chapter before contacting me.
While I welcome reader emails, there are some common questions for which the answers will always be no. I am afraid that I won’t write the code for your new startup, help you with your college assignment, get involved in your development team’s design dispute, or teach you how to program.
Please email me at adam@adam-freeman.com and let me know. It is always a delight to hear from a happy reader, and I appreciate the time it takes to send those emails. Writing these books can be difficult, and those emails provide essential motivation to persist at an activity that can sometimes feel impossible.
You can still email me at adam@adam-freeman.com, and I will still try to help you. Bear in mind that I can only help if you explain what the problem is and what you would like me to do about it. You should understand that sometimes the only outcome is to accept I am not the writer for you and that we will have closure only when you return this book and select another. I’ll give careful thought to whatever has upset you, but after 25 years of writing books, I have come to understand that not everyone enjoys reading the books I like to write.
ASP.NET Core is a cross-platform framework for creating web applications.
The ASP.NET Core platform is a powerful foundation on which application frameworks have been built.
The MVC Framework was the original ASP.NET Core framework. It is powerful and flexible but takes time to prepare.
The Razor Pages framework is a newer addition, which requires less initial preparation but can be more difficult to manage in complex projects.
Blazor is a framework that allows client-side applications to be written in C#, rather than JavaScript. There are versions of Blazor that execute the C# code within the ASP.NET Core server and entirely within the browser.
This chapter covers
The best way to appreciate a software development framework is to jump right in and use it. In this chapter, I explain how to prepare for ASP.NET Core development and how to create and run an ASP.NET Core application.
Microsoft provides a choice of tools for ASP.NET Core development: Visual Studio and Visual Studio Code. Visual Studio is the traditional development environment for .NET applications, and it offers an enormous range of tools and features for developing all sorts of applications. But it can be resource-hungry and slow, and some of the features are so determined to be helpful they get in the way of development.
Visual Studio Code is a lightweight alternative that doesn’t have the bells and whistles of Visual Studio but is perfectly capable of handling ASP.NET Core development.
All the examples in this book include instructions for both editors, and both Visual Studio and Visual Studio Code can be used without charge, so you can use whichever suits your development style.
If you are new to .NET development, then start with Visual Studio. It provides more structured support for creating the different types of files used in ASP.NET Core development, which will help ensure you get the expected results from the code examples.
ASP.NET Core 7 requires Visual Studio 2022. I use the free Visual Studio 2022 Community Edition, which can be downloaded from www.visualstudio.com. Run the installer, and you will see the prompt shown in figure 2.1.
Figure 2.1 Starting the Visual Studio installer
Click the Continue button, and the installer will download the installation files, as shown in figure 2.2.
Figure 2.2 Downloading the Visual Studio installer files
When the installer files have been downloaded, you will be presented with a set of installation options, grouped into workloads. Ensure that the “ASP.NET and web development” workload is checked, as shown in figure 2.3.
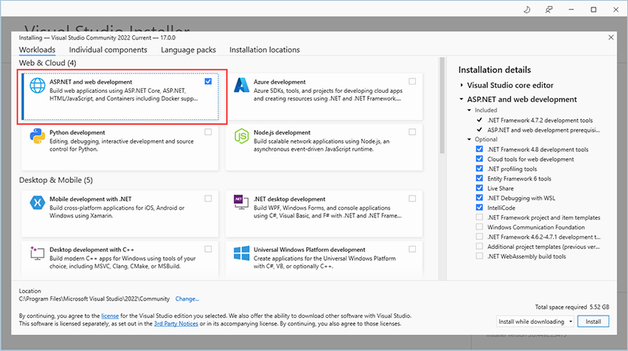
Figure 2.3 Selecting the workload
Select the “Individual components” section at the top of the window and ensure the SQL Server Express 2019 LocalDB option is checked, as shown in figure 2.4. This is the database component that I will be using to store data in later chapters.
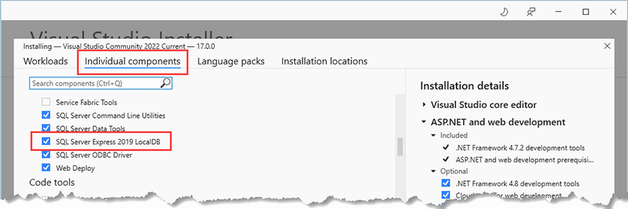
Figure 2.4 Ensuring LocalDB is installed
Click the Install button, and the files required for the selected workload will be downloaded and installed. To complete the installation, a reboot may be required.
2.1.2 Installing the .NET SDK
The Visual Studio installer will install the .NET Software Development Kit (SDK), but it may not install the version required for the examples in this book. Go to https://dotnet.microsoft.com/download/dotnet-core/7.0 and download the installer for version 7.0.0 of the .NET SDK, which is the current release at the time of writing. Run the installer; once the installation is complete, open a new PowerShell command prompt from the Windows Start menu and run the command shown in listing 2.1, which displays a list of the installed .NET SDKs.
Listing 2.1 Listing the Installed SDKs
dotnet --list-sdks
Here is the output from a fresh installation on a Windows machine that has not been used for .NET:
7.0.100 [C:\Program Files\dotnet\sdk]
If you have been working with different versions of .NET, you may see a longer list, like this one:
5.0.100 [C:\Program Files\dotnet\sdk] 6.0.100 [C:\Program Files\dotnet\sdk] 6.0.113 [C:\Program Files\dotnet\sdk] 6.0.202 [C:\Program Files\dotnet\sdk] 6.0.203 [C:\Program Files\dotnet\sdk] 7.0.100 [C:\Program Files\dotnet\sdk]
Regardless of how many entries there are, you must ensure there is one for the 7.0.1xx version, where the last two digits may differ.
If you have chosen to use Visual Studio Code, download the installer from https://code.visualstudio.com. No specific version is required, and you should select the current stable build. Run the installer and ensure you check the Add to PATH option, as shown in figure 2.5.
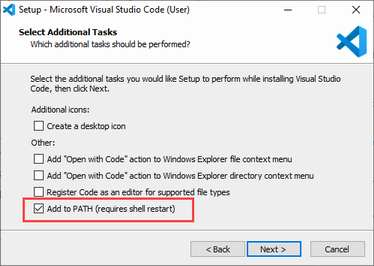
Figure 2.5 Configuring the Visual Studio Code installation
Installing the .NET SDK
The Visual Studio Code installer does not include the .NET SDK, which must be installed separately. Go to https://dotnet.microsoft.com/download/dotnet-core/7.0 and download the installer for version 7.0.0 of the .NET SDK. Run the installer; once the installation is complete, open a new PowerShell command prompt from the Windows Start menu and run the command shown in listing 2.2, which displays a list of the installed .NET SDKs.
Listing 2.2 Listing the Installed SDKs
dotnet --list-sdks
Here is the output from a fresh installation on a Windows machine that has not been used for .NET:
7.0.100 [C:\Program Files\dotnet\sdk]
If you have been working with different versions of .NET, you may see a longer list, like this one:
5.0.100 [C:\Program Files\dotnet\sdk] 6.0.100 [C:\Program Files\dotnet\sdk] 6.0.113 [C:\Program Files\dotnet\sdk] 6.0.202 [C:\Program Files\dotnet\sdk] 6.0.203 [C:\Program Files\dotnet\sdk] 7.0.100 [C:\Program Files\dotnet\sdk]
Regardless of how many entries there are, you must ensure there is one for the 7.0.1xx version, where the last two digits may differ.
Installing SQL Server LocalDB
The database examples in this book require LocalDB, which is a zero-configuration version of SQL Server that can be installed as part of the SQL Server Express edition, which is available for use without charge from https://www.microsoft.com/en-in/sql-server/sql-server-downloads. Download and run the Express edition installer and select the Custom option, as shown in figure 2.6.
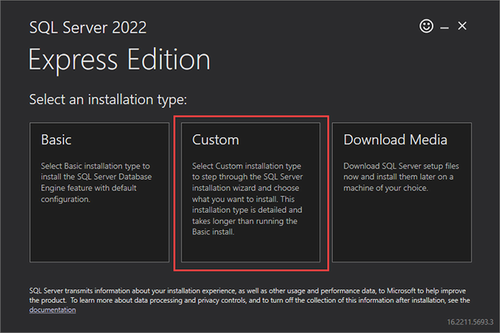
Figure 2.6 Selecting the installation option for SQL Server
Once you have selected the Custom option, you will be prompted to select a download location for the installation files. Click the Install button, and the download will begin.
When prompted, select the option to create a new SQL Server installation, as shown in figure 2.7.
Figure 2.7 Selecting an installation option
Work through the installation process, selecting the default options as they are presented. When you reach the Feature Selection page, ensure that the LocalDB option is checked, as shown in figure 2.8. (You may want to uncheck the Machine Learning Services option, which is not used in this book and takes a long time to download and install.)
Figure 2.8 Selecting the LocalDB feature
On the Instance Configuration page, select the “Default instance” option, as shown in figure 2.9.

Figure 2.9 Configuring the database
Continue to work through the installation process, selecting the default values, and complete the installation.
The most direct way to create a project is to use the command line. Open a new PowerShell command prompt from the Windows Start menu, navigate to the folder where you want to create your ASP.NET Core projects, and run the commands shown in listing 2.3.
Listing 2.3 Creating a new project
dotnet new globaljson --sdk-version 7.0.100 --output FirstProject dotnet new mvc --no-https --output FirstProject --framework net7.0 dotnet new sln -o FirstProject dotnet sln FirstProject add FirstProject
The first command creates a folder named FirstProject and adds to it a file named global.json, which specifies the version of .NET that the project will use; this ensures you get the expected results when following the examples. The second command creates a new ASP.NET Core project. The .NET SDK includes a range of templates for starting new projects, and the mvc template is one of the options available for ASP.NET Core applications. This project template creates a project that is configured for the MVC Framework, which is one of the application types supported by ASP.NET Core. Don’t be intimidated by the idea of choosing a framework, and don’t worry if you have not heard of MVC—by the end of the book, you will understand the features that each offers and how they fit together. The remaining commands create a solution file, which allows multiple projects to be used together.
Start Visual Studio and click the “Open a project or solution” button, as shown in figure 2.10.
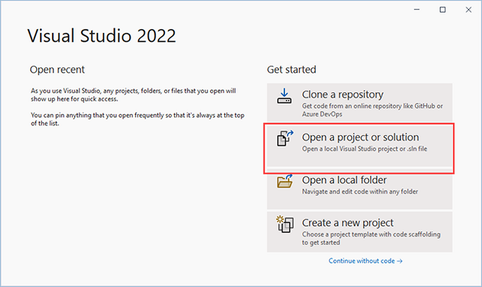
Figure 2.10 Opening the ASP.NET Core project
Navigate to the FirstProject folder, select the FirstProject.sln file, and click the Open button. Visual Studio will open the project and display its contents in the Solution Explorer window, as shown in figure 2.11. The files in the project were created by the project template.
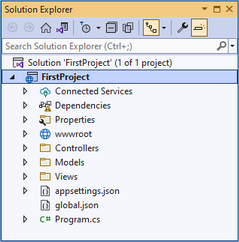
Figure 2.11 Opening the project in Visual Studio
Start Visual Studio Code and select File > Open Folder. Navigate to the FirstProject folder and click the Select Folder button. Visual Studio Code will open the project and display its contents in the Explorer pane, as shown in figure 2.12. (The default dark theme used in Visual Studio Code doesn’t show well on the page, so I have changed to the light theme for the screenshots in this book.)

Figure 2.12 Opening the project in Visual Studio Code
Additional configuration is required the first time you open a .NET project in Visual Studio Code. The first step is to click the Program.cs file in the Explorer pane. This will trigger a prompt from Visual Studio Code to install the features required for C# development, as shown in figure 2.13. If you have not opened a C# project before, you will see a prompt that offers to install the required assets, also shown in figure 2.13.
Figure 2.13 Installing Visual Studio Code C# features
Click the Install or Yes button, as appropriate, and Visual Studio Code will download and install the features required for .NET projects.
Visual Studio and Visual Studio Code can both run projects directly, but I use the command line tools throughout this book because they are more reliable and work more consistently, helping to ensure you get the expected results from the examples.
When the project is created, a file named launchSettings.json is created in the Properties folder, and it is this file that determines which HTTP port ASP.NET Core will use to listen for HTTP requests. Open this file in your chosen editor and change the ports in the URLs it contains to 5000, as shown in listing 2.4.
Listing 2.4 Setting the Port in the launchSettings.json File in the Properties Folder
{
"iisSettings": {
"windowsAuthentication": false,
"anonymousAuthentication": true,
"iisExpress": {
"applicationUrl": "http://localhost:5000",
"sslPort": 0
}
},
"profiles": {
"FirstProject": {
"commandName": "Project",
"dotnetRunMessages": true,
"launchBrowser": true,
"applicationUrl": "http://localhost:5000",
"environmentVariables": {
"ASPNETCORE_ENVIRONMENT": "Development"
}
},
"IIS Express": {
"commandName": "IISExpress",
"launchBrowser": true,
"environmentVariables": {
"ASPNETCORE_ENVIRONMENT": "Development"
}
}
}
}
It is only the URL in the profiles section that affects the .NET command-line tools, but I have changed both of them to avoid any problems. Open a new PowerShell command prompt from the Windows Start menu; navigate to the FirstProject project folder, which is the folder that contains the FirstProject.csproj file; and run the command shown in listing 2.5.
Listing 2.5 Starting the example application
dotnet runThe dotnet run command compiles and starts the project. Once the application has started, open a new browser window and request http://localhost:5000, which will produce the response shown in figure 2.14.
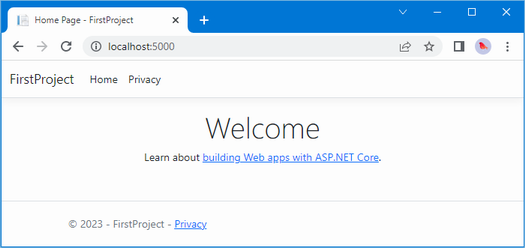
Figure 2.14 Running the example project
When you are finished, use Control+C to stop the ASP.NET Core application.
In an ASP.NET Core application, incoming requests are handled by endpoints. The endpoint that produced the response in figure 2.14 is an action, which is a method that is written in C#. An action is defined in a controller, which is a C# class that is derived from the Microsoft.AspNetCore.Mvc.Controller class, the built-in controller base class.
Each public method defined by a controller is an action, which means you can invoke the action method to handle an HTTP request. The convention in ASP.NET Core projects is to put controller classes in a folder named Controllers, which was created by the template used to set up the project.
The project template added a controller to the Controllers folder to help jump-start development. The controller is defined in the class file named HomeController.cs. Controller classes contain a name followed by the word Controller, which means that when you see a file called HomeController.cs, you know that it contains a controller called Home, which is the default controller that is used in ASP.NET Core applications.
Find the HomeController.cs file in the Solution Explorer or Explorer pane and click it to open it for editing. You will see the following code:
using System.Diagnostics;
using Microsoft.AspNetCore.Mvc;
using FirstProject.Models;
namespace FirstProject.Controllers;
public class HomeController : Controller {
private readonly ILogger<HomeController> _logger;
public HomeController(ILogger<HomeController> logger) {
_logger = logger;
}
public IActionResult Index() {
return View();
}
public IActionResult Privacy() {
return View();
}
[ResponseCache(Duration = 0, Location = ResponseCacheLocation.None,
NoStore = true)]
public IActionResult Error() {
return View(new ErrorViewModel { RequestId = Activity.Current?.Id
?? HttpContext.TraceIdentifier });
}
}
Using the code editor, replace the contents of the HomeController.cs file so that it matches listing 2.6. I have removed all but one of the methods, changed the result type and its implementation, and removed the using statements for unused namespaces.
Listing 2.6 Changing the HomeController.cs file in the Controllers folder
using Microsoft.AspNetCore.Mvc;
namespace FirstProject.Controllers {
public class HomeController : Controller {
public string Index() {
return "Hello World";
}
}
}
The result is that the Home controller defines a single action, named Index. These changes don’t produce a dramatic effect, but they make for a nice demonstration. I have changed the method named Index so that it returns the string Hello World. Using the PowerShell prompt, run the dotnet run command in the FirstProject folder again and use the browser to request http://localhost:5000. The configuration of the project created by the template in listing 2.3 means the HTTP request will be processed by the Index action defined by the Home controller. Put another way, the request will be processed by the Index method defined by the HomeController class. The string produced by the Index method is used as the response to the browser’s HTTP request, as shown in figure 2.15.
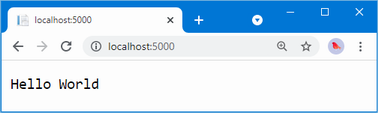
Figure 2.15 The output from the action method
The ASP.NET Core routing system is responsible for selecting the endpoint that will handle an HTTP request. A route is a rule that is used to decide how a request is handled. When the project was created, a default rule was created to get started. You can request any of the following URLs, and they will be dispatched to the Index action defined by the Home controller:
/
/Home
/Home/Index
So, when a browser requests http://yoursite/ or http://yoursite/Home, it gets back the output from HomeController’s Index method. You can try this yourself by changing the URL in the browser. At the moment, it will be http://localhost:5000/. If you append /Home or /Home/Index to the URL and press Return, you will see the same Hello World result from the application.
The output from the previous example wasn’t HTML—it was just the string Hello World. To produce an HTML response to a browser request, I need a view, which tells ASP.NET Core how to process the result produced by the Index method into an HTML response that can be sent to the browser.
Creating and rendering a view
The first thing I need to do is modify my Index action method, as shown in listing 2.7. The changes are shown in bold, which is a convention I follow throughout this book to make the examples easier to follow.
Listing 2.7 Rendering a view in the HomeController.cs file in the Controllers folder
using Microsoft.AspNetCore.Mvc;
namespace FirstProject.Controllers {
public class HomeController : Controller {
public ViewResult Index() {
return View("MyView");
}
}
}
When I return a ViewResult object from an action method, I am instructing ASP.NET Core to render a view. I create the ViewResult by calling the View method, specifying the name of the view that I want to use, which is MyView.
Use Control+C to stop ASP.NET Core and then use the dotnet run command to compile and start it again. Use the browser to request http://localhost:5000, and you will see ASP.NET Core trying to find the view, as shown by the error message displayed in figure 2.16.
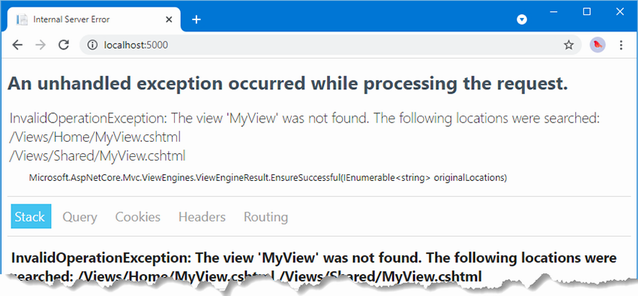
Figure 2.16 Trying to find a view
This is a helpful error message. It explains that ASP.NET Core could not find the view I specified for the action method and explains where it looked. Views are stored in the Views folder, organized into subfolders. Views that are associated with the Home controller, for example, are stored in a folder called Views/Home. Views that are not specific to a single controller are stored in a folder called Views/Shared. The template used to create the project added the Home and Shared folders automatically and added some placeholder views to get the project started.
If you are using Visual Studio, right-click the Views/Home folder in the Solution Explorer and select Add > New Item from the pop-up menu. Visual Studio will present you with a list of templates for adding items to the project. Locate the Razor View - Empty item, which can be found in the ASP.NET Core > Web > ASP.NET section, as shown in figure 2.17.
For Visual Studio, you may need to click the Show All Templates button before the list of templates is displayed. Set the name of the new file to MyView.cshtml and click the Add button. Visual Studio will add a file named MyView.cshtml to the Views/Home folder and will open it for editing. Replace the contents of the file with those shown in listing 2.8.
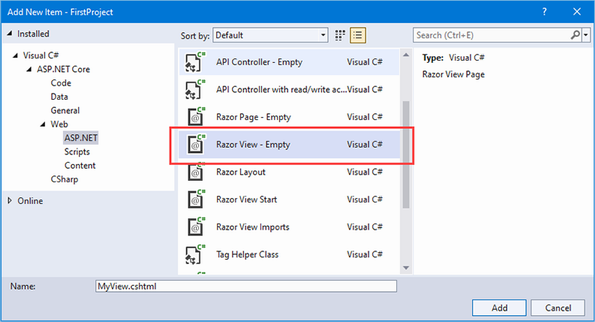
Figure 2.17 Selecting a Visual Studio item template
Visual Studio Code doesn’t provide item templates. Instead, right-click the Views/Home folder in the file explorer pane and select New File from the pop-up menu. Set the name of the file to MyView.cshtml and press Return. The file will be created and opened for editing. Add the content shown in listing 2.8.
Listing 2.8 The contents of the MyView.cshtml file in the Views/Home folder
@{
Layout = null;
}
<!DOCTYPE html>
<html>
<head>
<meta name="viewport" content="width=device-width" />
<title>Index</title>
</head>
<body>
<div>
Hello World (from the view)
</div>
</body>
</html>
The new contents of the view file are mostly HTML. The exception is the part that looks like this:
...
@{
Layout = null;
}
...
This is an expression that will be interpreted by Razor, which is the component that processes the contents of views and generates HTML that is sent to the browser. Razor is a view engine, and the expressions in views are known as Razor expressions.
The Razor expression in listing 2.8 tells Razor that I chose not to use a layout, which is like a template for the HTML that will be sent to the browser (and which I describe in chapter 22). To see the effect of creating the view, use Control+C to stop ASP.NET Core if it is running and use the dotnet run command to compile and start the application again. Use a browser to request http://localhost:5000, and you will see the result shown in figure 2.18.
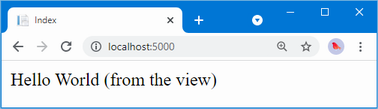
Figure 2.18 Rendering a view
When I first edited the Index action method, it returned a string value. This meant that ASP.NET Core did nothing except pass the string value as is to the browser. Now that the Index method returns a ViewResult, Razor is used to process a view and render an HTML response. Razor was able to locate the view because I followed the standard naming convention, which is to put view files in a folder whose name matched the controller that contains the action method. In this case, this meant putting the view file in the Views/Home folder, since the action method is defined by the Home controller.
I can return other results from action methods besides strings and ViewResult objects. For example, if I return a RedirectResult, the browser will be redirected to another URL. If I return an HttpUnauthorizedResult, I can prompt the user to log in. These objects are collectively known as action results. The action result system lets you encapsulate and reuse common responses in actions. I’ll tell you more about them and explain the different ways they can be used in chapter 19.
Adding dynamic output
The whole point of a web application is to construct and display dynamic output. The job of the action method is to construct data and pass it to the view so it can be used to create HTML content based on the data values. Action methods provide data to views by passing arguments to the View method, as shown in listing 2.9. The data provided to the view is known as the view model.
Listing 2.9 Using a view model in the HomeController.cs file in the Controllers folder
using Microsoft.AspNetCore.Mvc;
namespace FirstProject.Controllers {
public class HomeController : Controller {
public ViewResult Index() {
int hour = DateTime.Now.Hour;
string viewModel =
hour < 12 ? "Good Morning" : "Good Afternoon";
return View("MyView", viewModel);
}
}
}
The view model in this example is a string, and it is provided to the view as the second argument to the View method. Listing 2.10 updates the view so that it receives and uses the view model in the HTML it generates.
Listing 2.10 Using a view model in the MyView.cshtml file in the Views/Home folder
@model string
@{
Layout = null;
}
<!DOCTYPE html>
<html>
<head>
<meta name="viewport" content="width=device-width" />
<title>Index</title>
</head>
<body>
<div>
@Model World (from the view)
</div>
</body>
</html>
The type of the view model is specified using the @model expression, with a lowercase m. The view model value is included in the HTML output using the @Model expression, with an uppercase M. (It can be difficult at first to remember which is lowercase and which is uppercase, but it soon becomes second nature.)
When the view is rendered, the view model data provided by the action method is inserted into the HTML response. Use Control+C to stop ASP.NET Core and use the dotnet run command to build and start it again. Use a browser to request http://localhost:5000, and you will see the output shown in figure 2.19 (although you may see the morning greeting if you are following this example before midday).
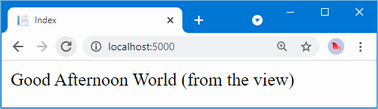
Figure 2.19 Generating dynamic content
It is a simple result, but this example reveals all the building blocks you need to create a simple ASP.NET Core web application and to generate a dynamic response. The ASP.NET Core platform receives an HTTP request and uses the routing system to match the request URL to an endpoint. The endpoint, in this case, is the Index action method defined by the Home controller. The method is invoked and produces a ViewResult object that contains the name of a view and a view model object. The Razor view engine locates and processes the view, evaluating the @Model expression to insert the data provided by the action method into the response, which is returned to the browser and displayed to the user. There are, of course, many other features available, but this is the essence of ASP.NET Core, and it is worth bearing this simple sequence in mind as you read the rest of the book.
ASP.NET Core development can be done with Visual Studio or Visual Studio Code, or you can choose your own code editor.
Most code editors provide integrated code builds, but the most reliable way to get consistent results across tools and platforms is by using the dotnet command.
ASP.NET Core relies on endpoints to process HTTP requests.
Endpoints can be written entirely in C# or use HTML that has been annotated with code expressions.
This chapter covers
Now that you are set up for ASP.NET Core development, it is time to create a simple application. In this chapter, you’ll create a data-entry application using ASP.NET Core. My goal is to demonstrate ASP.NET Core in action, so I will pick up the pace a little and skip over some of the explanations as to how things work behind the scenes. But don’t worry; I’ll revisit these topics in-depth in later chapters.
Imagine that a friend has decided to host a New Year’s Eve party and that she has asked me to create a web app that allows her invitees to electronically RSVP. She has asked for these four key features:
A home page that shows information about the party
A form that can be used to RSVP
Validation for the RSVP form, which will display a thank-you page
A summary page that shows who is coming to the party
In this chapter, I create an ASP.NET Core project and use it to create a simple application that contains these features; once everything works, I’ll apply some styling to improve the appearance of the finished application.
Open a PowerShell command prompt from the Windows Start menu, navigate to a convenient location, and run the commands in listing 3.1 to create a project named PartyInvites.
Listing 3.1 Creating a new project
dotnet new globaljson --sdk-version 7.0.100 --output PartyInvites dotnet new mvc --no-https --output PartyInvites --framework net7.0 dotnet new sln -o PartyInvites dotnet sln PartyInvites add PartyInvites
These are the same commands I used to create the project in chapter 2. These commands ensure you get the right project starting point that uses the required version of .NET.
Open the project (by opening the PartyInvites.sln file with Visual Studio or the PartyInvites folder in Visual Studio Code) and change the contents of the launchSettings.json file in the Properties folder, as shown in listing 3.2, to set the port that will be used to listen for HTTP requests.
Listing 3.2 Setting ports in the launchSettings.json file in the Properties folder
{
"iisSettings": {
"windowsAuthentication": false,
"anonymousAuthentication": true,
"iisExpress": {
"applicationUrl": "http://localhost:5000",
"sslPort": 0
}
},
"profiles": {
"PartyInvites": {
"commandName": "Project",
"dotnetRunMessages": true,
"launchBrowser": true,
"applicationUrl": "http://localhost:5000",
"environmentVariables": {
"ASPNETCORE_ENVIRONMENT": "Development"
}
},
"IIS Express": {
"commandName": "IISExpress",
"launchBrowser": true,
"environmentVariables": {
"ASPNETCORE_ENVIRONMENT": "Development"
}
}
}
}
Replace the contents of the HomeController.cs file in the Controllers folder with the code shown in listing 3.3.
Listing 3.3 The new contents of the HomeController.cs file in the Controllers folder
using Microsoft.AspNetCore.Mvc;
namespace PartyInvites.Controllers {
public class HomeController : Controller {
public IActionResult Index() {
return View();
}
}
}
This provides a clean starting point for the new application, defining a single action method that selects the default view for rendering. To provide a welcome message to party invitees, open the Index.cshtml file in the Views/Home folder and replace the contents with those shown in listing 3.4.
Listing 3.4 Replacing the contents of the Index.cshtml file in the Views/Home folder
@{
Layout = null;
}
<!DOCTYPE html>
<html>
<head>
<meta name="viewport" content="width=device-width" />
<title>Party!</title>
</head>
<body>
<div>
<div>
We're going to have an exciting party.<br />
(To do: sell it better. Add pictures or something.)
</div>
</div>
</body>
</html>
Run the command shown in listing 3.5 in the PartyInvites folder to compile and execute the project.
Listing 3.5 Compiling and running the project
dotnet watchOnce the project has started, a new browser window will be opened, and you will see the details of the party (well, the placeholder for the details, but you get the idea), as shown in figure 3.1.

Figure 3.1 Adding to the view HTML
Leave the dotnet watch command running. As you make changes to the project, you will see that the code is automatically recompiled and that changes are automatically displayed in the browser.
If you make a mistake following the examples, you may find that the dotnet watch command indicates that it can’t automatically update the browser. If that happens, select the option to restart the application.
The data model is the most important part of any ASP.NET Core application. The model is the representation of the real-world objects, processes, and rules that define the subject, known as the domain, of the application. The model, often referred to as a domain model, contains the C# objects (known as domain objects) that make up the universe of the application and the methods that manipulate them. In most projects, the job of the ASP.NET Core application is to provide the user with access to the data model and the features that allow the user to interact with it.
The convention for an ASP.NET Core application is that the data model classes are defined in a folder named Models, which was added to the project by the template used in listing 3.1.
I don’t need a complex model for the PartyInvites project because it is such a simple application. I need just one domain class that I will call GuestResponse. This object will represent an RSVP from an invitee.
If you are using Visual Studio, right-click the Models folder and select Add > Class from the pop-up menu. Set the name of the class to GuestResponse.cs and click the Add button. If you are using Visual Studio Code, right-click the Models folder, select New File, and enter GuestResponse.cs as the file name. Use the new file to define the class shown in listing 3.6.
Listing 3.6 The contents of the GuestResponse.cs file in the Models folder
namespace PartyInvites.Models {
public class GuestResponse {
public string? Name { get; set; }
public string? Email { get; set; }
public string? Phone { get; set; }
public bool? WillAttend { get; set; }
}
}
Notice that all the properties defined by the GuestResponse class are nullable. I explain why this is important in the “Adding Validation” section later in the chapter.
One of my application goals is to include an RSVP form, which means I need to define an action method that can receive requests for that form. A single controller class can define multiple action methods, and the convention is to group related actions in the same controller. Listing 3.7 adds a new action method to the Home controller. Controllers can return different result types, which are explained in later chapters.
Listing 3.7 Adding an action in the HomeController.cs file in the Controllers folder
using Microsoft.AspNetCore.Mvc;
namespace PartyInvites.Controllers {
public class HomeController : Controller {
public IActionResult Index() {
return View();
}
public ViewResult RsvpForm() {
return View();
}
}
}
Both action methods invoke the View method without arguments, which may seem odd, but remember that the Razor view engine will use the name of the action method when looking for a view file, as explained in chapter 2. That means the result from the Index action method tells Razor to look for a view called Index.cshtml, while the result from the RsvpForm action method tells Razor to look for a view called RsvpForm.cshtml.
If you are using Visual Studio, right-click the Views/Home folder and select Add > New Item from the pop-up menu. Select the Razor View – Empty item, set the name to RsvpForm.cshtml, and click the Add button to create the file. Replace the contents with those shown in listing 3.8.
If you are using Visual Studio Code, right-click the Views/Home folder and select New File from the pop-up menu. Set the name of the file to RsvpForm.cshtml and add the contents shown in listing 3.8.
Listing 3.8 The contents of the RsvpForm.cshtml file in the Views/Home folder
@{
Layout = null;
}
<!DOCTYPE html>
<html>
<head>
<meta name="viewport" content="width=device-width" />
<title>RsvpForm</title>
</head>
<body>
<div>
This is the RsvpForm.cshtml View
</div>
</body>
</html>
This content is just static HTML for the moment. Use the browser to request http://localhost:5000/home/rsvpform. The Razor view engine locates the RsvpForm.cshtml file and uses it to produce a response, as shown in figure 3.2.

Figure 3.2 Rendering a second view
I want to be able to create a link from the Index view so that guests can see the RsvpForm view without having to know the URL that targets a specific action method, as shown in listing 3.9.
Listing 3.9 Adding a link in the Index.cshtml file in the Views/Home folder
@{
Layout = null;
}
<!DOCTYPE html>
<html>
<head>
<meta name="viewport" content="width=device-width" />
<title>Party!</title>
</head>
<body>
<div>
<div>
We're going to have an exciting party.<br />
(To do: sell it better. Add pictures or something.)
</div>
<a asp-action="RsvpForm">RSVP Now</a>
</div>
</body>
</html>
The addition to the listing is an a element that has an asp-action attribute. The attribute is an example of a tag helper attribute, which is an instruction for Razor that will be performed when the view is rendered. The asp-action attribute is an instruction to add an href attribute to the a element that contains a URL for an action method. I explain how tag helpers work in chapters 25–27, but this tag helper tells Razor to insert a URL for an action method defined by the same controller for which the current view is being rendered.
Use the browser to request http://localhost:5000, and you will see the link that the helper has created, as shown in figure 3.3.
Figure 3.3 Linking between action methods
Roll the mouse over the RSVP Now link in the browser. You will see that the link points to http://localhost:5000/Home/RsvpForm.
There is an important principle at work here, which is that you should use the features provided by ASP.NET Core to generate URLs, rather than hard-code them into your views. When the tag helper created the href attribute for the a element, it inspected the configuration of the application to figure out what the URL should be. This allows the configuration of the application to be changed to support different URL formats without needing to update any views.
Now that I have created the view and can reach it from the Index view, I am going to build out the contents of the RsvpForm.cshtml file to turn it into an HTML form for editing GuestResponse objects, as shown in listing 3.10.
Listing 3.10 Creating a form view in the RsvpForm.cshtml file in the Views/Home folder
@model PartyInvites.Models.GuestResponse
@{
Layout = null;
}
<!DOCTYPE html>
<html>
<head>
<meta name="viewport" content="width=device-width" />
<title>RsvpForm</title>
</head>
<body>
<form asp-action="RsvpForm" method="post">
<div>
<label asp-for="Name">Your name:</label>
<input asp-for="Name" />
</div>
<div>
<label asp-for="Email">Your email:</label>
<input asp-for="Email" />
</div>
<div>
<label asp-for="Phone">Your phone:</label>
<input asp-for="Phone" />
</div>
<div>
<label asp-for="WillAttend">Will you attend?</label>
<select asp-for="WillAttend">
<option value="">Choose an option</option>
<option value="true">Yes, I'll be there</option>
<option value="false">No, I can't come</option>
</select>
</div>
<button type="submit">Submit RSVP</button>
</form>
</body>
</html>
The @model expression specifies that the view expects to receive a GuestResponse object as its view model. I have defined a label and input element for each property of the GuestResponse model class (or, in the case of the WillAttend property, a select element). Each element is associated with the model property using the asp-for attribute, which is another tag helper attribute. The tag helper attributes configure the elements to tie them to the view model object. Here is an example of the HTML that the tag helpers produce:
<p>
<label for="Name">Your name:</label>
<input type="text" id="Name" name="Name" value="">
</p>
The asp-for attribute on the label element sets the value of the for attribute. The asp-for attribute on the input element sets the id and name elements. This may not look especially useful, but you will see that associating elements with a model property offers additional advantages as the application functionality is defined.
Of more immediate use is the asp-action attribute applied to the form element, which uses the application’s URL routing configuration to set the action attribute to a URL that will target a specific action method, like this:
<form method="post" action="/Home/RsvpForm">
As with the helper attribute I applied to the a element, the benefit of this approach is that when you change the system of URLs that the application uses, the content generated by the tag helpers will reflect the changes automatically.
Use the browser to request http://localhost:5000 and click the RSVP Now link to see the form, as shown in figure 3.4.
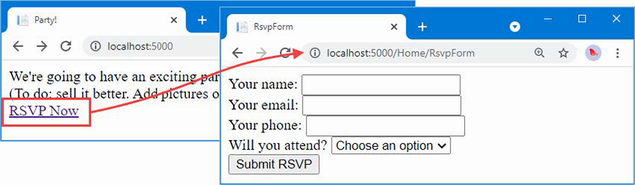
Figure 3.4 Adding an HTML form to the application
I have not yet told ASP.NET Core what I want to do when the form is posted to the server. As things stand, clicking the Submit RSVP button just clears any values you have entered in the form. That is because the form posts back to the RsvpForm action method in the Home controller, which just renders the view again. To receive and process submitted form data, I am going to use an important feature of controllers. I will add a second RsvpForm action method to create the following:
A method that responds to HTTP GET requests: A GET request is what a browser issues normally each time someone clicks a link. This version of the action will be responsible for displaying the initial blank form when someone first visits /Home/RsvpForm.
A method that responds to HTTP POST requests: The form element defined in listing 3.10 sets the method attribute to post, which causes the form data to be sent to the server as a POST request. This version of the action will be responsible for receiving submitted data and deciding what to do with it.
Handling GET and POST requests in separate C# methods helps to keep my controller code tidy since the two methods have different responsibilities. Both action methods are invoked by the same URL, but ASP.NET Core makes sure that the appropriate method is called, based on whether I am dealing with a GET or POST request. Listing 3.11 shows the changes to the HomeController class.
Listing 3.11 Adding a method in the HomeController.cs file in the Controllers folder
using Microsoft.AspNetCore.Mvc;
using PartyInvites.Models;
namespace PartyInvites.Controllers {
public class HomeController : Controller {
public IActionResult Index() {
return View();
}
[HttpGet]
public ViewResult RsvpForm() {
return View();
}
[HttpPost]
public ViewResult RsvpForm(GuestResponse guestResponse) {
// TODO: store response from guest
return View();
}
}
}
I have added the HttpGet attribute to the existing RsvpForm action method, which declares that this method should be used only for GET requests. I then added an overloaded version of the RsvpForm method, which accepts a GuestResponse object. I applied the HttpPost attribute to this method, which declares it will deal with POST requests. I explain how these additions to the listing work in the following sections. I also imported the PartyInvites.Models namespace—this is just so I can refer to the GuestResponse model type without needing to qualify the class name.
Understanding model binding
The first overload of the RsvpForm action method renders the same view as before—the RsvpForm.cshtml file—to generate the form shown in figure 3.4. The second overload is more interesting because of the parameter, but given that the action method will be invoked in response to an HTTP POST request and that the GuestResponse type is a C# class, how are the two connected?
The answer is model binding, a useful ASP.NET Core feature whereby incoming data is parsed and the key-value pairs in the HTTP request are used to populate properties of domain model types.
Model binding is a powerful and customizable feature that eliminates the grind of dealing with HTTP requests directly and lets you work with C# objects rather than dealing with individual data values sent by the browser. The GuestResponse object that is passed as the parameter to the action method is automatically populated with the data from the form fields. I dive into the details of model binding in chapter 28.
To demonstrate how model binding works, I need to do some preparatory work. One of the application goals is to present a summary page with details of who is attending the party, which means that I need to keep track of the responses that I receive. I am going to do this by creating an in-memory collection of objects. This isn’t useful in a real application because the response data will be lost when the application is stopped or restarted, but this approach will allow me to keep the focus on ASP.NET Core and create an application that can easily be reset to its initial state. Later chapters will demonstrate persistent data storage.
Add a class file named Repository.cs to the Models folder and use it to define the class shown in listing 3.12.
Listing 3.12 The contents of the Repository.cs file in the Models folder
namespace PartyInvites.Models {
public static class Repository {
private static List<GuestResponse> responses = new();
public static IEnumerable<GuestResponse> Responses => responses;
public static void AddResponse(GuestResponse response) {
Console.WriteLine(response);
responses.Add(response);
}
}
}
The Repository class and its members are static, which will make it easy for me to store and retrieve data from different places in the application. ASP.NET Core provides a more sophisticated approach for defining common functionality, called dependency injection, which I describe in chapter 14, but a static class is a good way to get started for a simple application like this one.
If you are using Visual Studio, saving the contents of the Repository.cs file will trigger a warning produced by the dotnet watch command telling you that a hot reload cannot be applied, which is the same warning described earlier in the chapter for Visual Studio Code users. You will see this prompt at the command line:
watch : Do you want to restart your app
- Yes (y) / No (n) / Always (a) / Never (v)?
Press a to always rebuild the project.
Storing responses
Now that I have somewhere to store the data, I can update the action method that receives the HTTP POST requests, as shown in listing 3.13.
Listing 3.13 Updating an action in the HomeController.cs file in the Controllers folder
using Microsoft.AspNetCore.Mvc;
using PartyInvites.Models;
namespace PartyInvites.Controllers {
public class HomeController : Controller {
public IActionResult Index() {
return View();
}
[HttpGet]
public ViewResult RsvpForm() {
return View();
}
[HttpPost]
public ViewResult RsvpForm(GuestResponse guestResponse) {
Repository.AddResponse(guestResponse);
return View("Thanks", guestResponse);
}
}
}
Before the POST version of the RsvpForm method is invoked, the ASP.NET Core model binding feature extracts values from the HTML form and assigns them to the properties of the GuestResponse object. The result is used as the argument when the method is invoked to handle the HTTP request, and all I have to do to deal with the form data sent in a request is to work with the GuestResponse object that is passed to the action method—in this case, to pass it as an argument to the Repository.AddResponse method so t hat the response can be stored.
The call to the View method in the RsvpForm action method creates a ViewResult that selects a view called Thanks and uses the GuestResponse object created by the model binder as the view model. Add a Razor View named Thanks.cshtml to the Views/Home folder with the content shown in listing 3.14 to present a response to the user.
Listing 3.14 The contents of the Thanks.cshtml file in the Views/Home folder
@model PartyInvites.Models.GuestResponse
@{
Layout = null;
}
<!DOCTYPE html>
<html>
<head>
<meta name="viewport" content="width=device-width" />
<title>Thanks</title>
</head>
<body>
<div>
<h1>Thank you, @Model?.Name!</h1>
@if (Model?.WillAttend == true) {
@:It's great that you're coming.
@:The drinks are already in the fridge!
} else {
@:Sorry to hear that you can't make it,
@:but thanks for letting us know.
}
</div>
Click <a asp-action="ListResponses">here</a> to see who is coming.
</body>
</html>
The HTML produced by the Thanks.cshtml view depends on the values assigned to the GuestResponse view model provided by the RsvpForm action method. To access the value of a property in the domain object, I use an @Model.<PropertyName> expression. So, for example, to get the value of the Name property, I use the @Model.Name expression. Don’t worry if the Razor syntax doesn’t make sense—I explain it in more detail in chapter 21.
Now that I have created the Thanks view, I have a basic working example of handling a form. Use the browser to request http://localhost:5000, click the RSVP Now link, add some data to the form, and click the Submit RSVP button. You will see the response shown in figure 3.5 (although it will differ if your name is not Joe or you said you could not attend).

Figure 3.5 The Thanks view
At the end of the Thanks.cshtml view, I added an a element to create a link to display the list of people who are coming to the party. I used the asp-action tag helper attribute to create a URL that targets an action method called ListResponses, like this:
... Click <a asp-action="ListResponses">here</a> to see who is coming. ...
If you hover the mouse over the link that is displayed by the browser, you will see that it targets the /Home/ListResponses URL. This doesn’t correspond to any of the action methods in the Home controller, and if you click the link, you will see a 404 Not Found error response.
To add an endpoint that will handle the URL, I need to add another action method to the Home controller, as shown in listing 3.15.
Listing 3.15 Adding an action in the HomeController.cs file in the Controllers folder
using Microsoft.AspNetCore.Mvc;
using PartyInvites.Models;
namespace PartyInvites.Controllers {
public class HomeController : Controller {
public IActionResult Index() {
return View();
}
[HttpGet]
public ViewResult RsvpForm() {
return View();
}
[HttpPost]
public ViewResult RsvpForm(GuestResponse guestResponse) {
Repository.AddResponse(guestResponse);
return View("Thanks", guestResponse);
}
public ViewResult ListResponses() {
return View(Repository.Responses
.Where(r => r.WillAttend == true));
}
}
}
The new action method is called ListResponses, and it calls the View method, using the Repository.Responses property as the argument. This will cause Razor to render the default view, using the action method name as the name of the view file, and to use the data from the repository as the view model. The view model data is filtered using LINQ so that only positive responses are provided to the view.
Add a Razor View named ListResponses.cshtml to the Views/Home folder with the content shown in listing 3.16.
Listing 3.16 Displaying data in the ListResponses.cshtml file in the Views/Home folder
@model IEnumerable<PartyInvites.Models.GuestResponse>
@{
Layout = null;
}
<!DOCTYPE html>
<html>
<head>
<meta name="viewport" content="width=device-width" />
<title>Responses</title>
</head>
<body>
<h2>Here is the list of people attending the party</h2>
<table>
<thead>
<tr><th>Name</th><th>Email</th><th>Phone</th></tr>
</thead>
<tbody>
@foreach (PartyInvites.Models.GuestResponse r in Model!) {
<tr>
<td>@r.Name</td>
<td>@r.Email</td>
<td>@r.Phone</td>
</tr>
}
</tbody>
</table>
</body>
</html>
Razor view files have the .cshtml file extension to denote a mix of C# code and HTML elements. You can see this in listing 3.16 where I have used an @foreach expression to process each of the GuestResponse objects that the action method passes to the view using the View method. Unlike a normal C# foreach loop, the body of a Razor @foreach expression contains HTML elements that are added to the response that will be sent back to the browser. In this view, each GuestResponse object generates a tr element that contains td elements populated with the value of an object property.
Use the browser to request http://localhost:5000, click the RSVP Now link, and fill in the form. Submit the form and then click the link to see a summary of the data that has been entered since the application was first started, as shown in figure 3.6. The view does not present the data in an appealing way, but it is enough for the moment, and I will address the styling of the application later in this chapter.

Figure 3.6 Showing a list of party attendees
I can now add data validation to the application. Without validation, users could enter nonsense data or even submit an empty form. In an ASP.NET Core application, validation rules are defined by applying attributes to model classes, which means the same validation rules can be applied in any form that uses that class. ASP.NET Core relies on attributes from the System.ComponentModel.DataAnnotations namespace, which I have applied to the GuestResponse class in listing 3.17.
Listing 3.17 Applying validation in the GuestResponse.cs file in the Models folder
using System.ComponentModel.DataAnnotations;
namespace PartyInvites.Models {
public class GuestResponse {
[Required(ErrorMessage = "Please enter your name")]
public string? Name { get; set; }
[Required(ErrorMessage = "Please enter your email address")]
[EmailAddress]
public string? Email { get; set; }
[Required(ErrorMessage = "Please enter your phone number")]
public string? Phone { get; set; }
[Required(ErrorMessage = "Please specify whether you'll attend")]
public bool? WillAttend { get; set; }
}
}
ASP.NET Core detects the attributes and uses them to validate data during the model-binding process.
As noted earlier, I used nullable types to define the GuestResponse properties. This is useful for denoting properties that may not be assigned values, but it has a special value for the WillAttend property because it allows the Required validation attribute to work. If I had used a regular non-nullable bool, the value I received through modelbinding could be only true or false, and I would not be able to tell whether the user had selected a value. A nullable bool has three possible values: true, false, and null. The value of the WillAttend property will be null if the user has not selected a value, and this causes the Required attribute to report a validation error. This is a nice example of how ASP.NET Core elegantly blends C# features with HTML and HTTP.
I check to see whether there has been a validation problem using the ModelState.IsValid property in the action method that receives the form data, as shown in listing 3.18.
Listing 3.18 Checking for errors in the HomeController.cs file in the Controllers folder
using Microsoft.AspNetCore.Mvc;
using PartyInvites.Models;
namespace PartyInvites.Controllers {
public class HomeController : Controller {
public IActionResult Index() {
return View();
}
[HttpGet]
public ViewResult RsvpForm() {
return View();
}
[HttpPost]
public ViewResult RsvpForm(GuestResponse guestResponse) {
if (ModelState.IsValid) {
Repository.AddResponse(guestResponse);
return View("Thanks", guestResponse);
} else {
return View();
}
}
public ViewResult ListResponses() {
return View(Repository.Responses
.Where(r => r.WillAttend == true));
}
}
}
The Controller base class provides a property called ModelState that provides details of the outcome of the model binding process. If the ModelState.IsValid property returns true, then I know that the model binder has been able to satisfy the validation constraints I specified through the attributes on the GuestResponse class. When this happens, I render the Thanks view, just as I did previously.
If the ModelState.IsValid property returns false, then I know that there are validation errors. The object returned by the ModelState property provides details of each problem that has been encountered, but I don’t need to get into that level of detail because I can rely on a useful feature that automates the process of asking the user to address any problems by calling the View method without any parameters.
When it renders a view, Razor has access to the details of any validation errors associated with the request, and tag helpers can access the details to display validation errors to the user. Listing 3.19 shows the addition of validation tag helper attributes to the RsvpForm view.
Listing 3.19 Adding a summary to the RsvpForm.cshtml file in the Views/Home folder
@model PartyInvites.Models.GuestResponse
@{
Layout = null;
}
<!DOCTYPE html>
<html>
<head>
<meta name="viewport" content="width=device-width" />
<title>RsvpForm</title>
</head>
<body>
<form asp-action="RsvpForm" method="post">
<div asp-validation-summary="All"></div>
<div>
<label asp-for="Name">Your name:</label>
<input asp-for="Name" />
</div>
<div>
<label asp-for="Email">Your email:</label>
<input asp-for="Email" />
</div>
<div>
<label asp-for="Phone">Your phone:</label>
<input asp-for="Phone" />
</div>
<div>
<label asp-for="WillAttend">Will you attend?</label>
<select asp-for="WillAttend">
<option value="">Choose an option</option>
<option value="true">Yes, I'll be there</option>
<option value="false">No, I can't come</option>
</select>
</div>
<button type="submit">Submit RSVP</button>
</form>
</body>
</html>
The asp-validation-summary attribute is applied to a div element, and it displays a list of validation errors when the view is rendered. The value for the asp-validation-summary attribute is a value from an enumeration called ValidationSummary, which specifies what types of validation errors the summary will contain. I specified All, which is a good starting point for most applications, and I describe the other values and explain how they work in chapter 29.
To see how the validation summary works, run the application, fill out the Name field, and submit the form without entering any other data. You will see a summary of validation errors, as shown in figure 3.7.

Figure 3.7 Displaying validation errors
The RsvpForm action method will not render the Thanks view until all the validation constraints applied to the GuestResponse class have been satisfied. Notice that the data entered in the Name field was preserved and displayed again when Razor rendered the view with the validation summary. This is another benefit of model binding, and it simplifies working with form data.
Highlighting invalid fields
The tag helper attributes that associate model properties with elements have a handy feature that can be used in conjunction with model binding. When a model class property has failed validation, the helper attributes will generate slightly different HTML. Here is the input element that is generated for the Phone field when there is no validation error:
<input type="text" data-val="true"
data-val-required="Please enter your phone number" id="Phone"
name="Phone" value="">
For comparison, here is the same HTML element after the user has submitted the form without entering data into the text field (which is a validation error because I applied the Required attribute to the Phone property of the GuestResponse class):
<input type="text" class="input-validation-error"
data-val="true" data-val-required="Please enter your phone number" id="Phone"
name="Phone" value="">
I have highlighted the difference: the asp-for tag helper attribute added the input element to a class called input-validation-error. I can take advantage of this feature by creating a stylesheet that contains CSS styles for this class and the others that different HTML helper attributes use.
The convention in ASP.NET Core projects is that static content is placed into the wwwroot folder and organized by content type so that CSS stylesheets go into the wwwroot/css folder, JavaScript files go into the wwwroot/js folder, and so on.
If you are using Visual Studio, right-click the wwwroot/css folder and select Add > New Item from the pop-up menu. Locate the Style Sheet item template, as shown in figure 3.8; set the name of the file to styles.css; and click the Add button.
Figure 3.8 Creating a CSS stylesheet
If you are using Visual Studio Code, right-click the wwwroot/css folder, select New File from the pop-up menu, and use styles.css as the file name. Regardless of which editor you use, replace the contents of the file with the styles shown in listing 3.20.
Listing 3.20 The contents of the styles.css file in the wwwroot/css folder
.field-validation-error {
color: #f00;
}
.field-validation-valid {
display: none;
}
.input-validation-error {
border: 1px solid #f00;
background-color: #fee;
}
.validation-summary-errors {
font-weight: bold;
color: #f00;
}
.validation-summary-valid {
display: none;
}
To apply this stylesheet, I added a link element to the head section of the RsvpForm view, as shown in listing 3.21.
Listing 3.21 Applying a stylesheet in the RsvpForm.cshtml file in the Views/Home folder
...
<head>
<meta name="viewport" content="width=device-width" />
<title>RsvpForm</title>
<link rel="stylesheet" href="/css/styles.css" />
</head>
...
The link element uses the href attribute to specify the location of the stylesheet. Notice that the wwwroot folder is omitted from the URL. The default configuration for ASP.NET includes support for serving static content, such as images, CSS stylesheets, and JavaScript files, and it maps requests to the wwwroot folder automatically. With the application of the stylesheet, a more obvious validation error will be displayed when data is submitted that causes a validation error, as shown in figure 3.9.

Figure 3.9 Automatically highlighted validation errors
All the functional goals for the application are complete, but the overall appearance of the application is poor. When you create a project using the mvc template, as I did for the example in this chapter, some common client-side development packages are installed. While I am not a fan of using template projects, I do like the client-side libraries that Microsoft has chosen. One of them is called Bootstrap, which is a good CSS framework originally developed by Twitter that has become a major open-source project and a mainstay of web application development.
Styling the welcome view
The basic Bootstrap features work by applying classes to elements that correspond to CSS selectors defined in the files added to the wwwroot/lib/bootstrap folder. You can get full details of the classes that Bootstrap defines from http://getbootstrap.com, but you can see how I have applied some basic styling to the Index.cshtml view file in listing 3.22.
Listing 3.22 Adding Bootstrap to the Index.cshtml file in the Views/Home folder
@{
Layout = null;
}
<!DOCTYPE html>
<html>
<head>
<meta name="viewport" content="width=device-width" />
<link rel="stylesheet" href="/lib/bootstrap/dist/css/bootstrap.css" />
<title>Index</title>
</head>
<body>
<div class="text-center m-2">
<h3> We're going to have an exciting party!</h3>
<h4>And YOU are invited!</h4>
<a class="btn btn-primary" asp-action="RsvpForm">RSVP Now</a>
</div>
</body>
</html>
I have added a link element whose href attribute loads the bootstrap.css file from the wwwroot/lib/bootstrap/dist/css folder. The convention is that third-party CSS and JavaScript packages are installed into the wwwroot/lib folder, and I describe the tool that is used to manage these packages in chapter 4.
Having imported the Bootstrap stylesheets, I need to style my elements. This is a simple example, so I need to use only a small number of Bootstrap CSS classes: text-center, btn, and btn-primary.
The text-center class centers the contents of an element and its children. The btn class styles a button, input, or a element as a pretty button, and the btn-primary class specifies which of a range of colors I want the button to be. You can see the effect by running the application, as shown in figure 3.10.
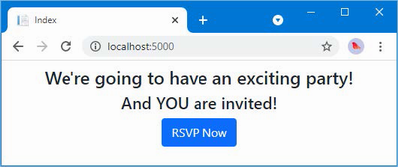
Figure 3.10 Styling a view
It will be obvious to you that I am not a web designer. In fact, as a child, I was excused from art lessons on the basis that I had absolutely no talent whatsoever. This had the happy result of making more time for math lessons but meant that my artistic skills have not developed beyond those of the average 10-year-old. For a real project, I would seek a professional to help design and style the content, but for this example, I am going it alone, and that means applying Bootstrap with as much restraint and consistency as I can muster.
Styling the form view
Bootstrap defines classes that can be used to style forms. I am not going to go into detail, but you can see how I have applied these classes in listing 3.23.
Listing 3.23 Adding styles to the RsvpForm.cshtml file in the Views/Home folder
@model PartyInvites.Models.GuestResponse
@{
Layout = null;
}
<!DOCTYPE html>
<html>
<head>
<meta name="viewport" content="width=device-width" />
<title>RsvpForm</title>
<link rel="stylesheet" href="/lib/bootstrap/dist/css/bootstrap.css" />
<link rel="stylesheet" href="/css/styles.css" />
</head>
<body>
<h5 class="bg-primary text-white text-center m-2 p-2">RSVP</h5>
<form asp-action="RsvpForm" method="post" class="m-2">
<div asp-validation-summary="All"></div>
<div class="form-group">
<label asp-for="Name" class="form-label">Your name:</label>
<input asp-for="Name" class="form-control" />
</div>
<div class="form-group">
<label asp-for="Email" class="form-label">Your email:</label>
<input asp-for="Email" class="form-control" />
</div>
<div class="form-group">
<label asp-for="Phone" class="form-label">Your phone:</label>
<input asp-for="Phone" class="form-control" />
</div>
<div class="form-group">
<label asp-for="WillAttend" class="form-label">
Will you attend?
</label>
<select asp-for="WillAttend" class="form-select">
<option value="">Choose an option</option>
<option value="true">Yes, I'll be there</option>
<option value="false">No, I can't come</option>
</select>
</div>
<button type="submit" class="btn btn-primary mt-3">
Submit RSVP
</button>
</form>
</body>
</html>
The Bootstrap classes in this example create a header, just to give structure to the layout. To style the form, I have used the form-group class, which is used to style the element that contains the label and the associated input or select element, which is assigned to the form-control class. You can see the effect of the styles in figure 3.11.

Figure 3.11 Styling the RsvpForm view
Styling the thanks view
The next view file to style is Thanks.cshtml, and you can see how I have done this in listing 3.24, using CSS classes that are similar to the ones I used for the other views. To make an application easier to manage, it is a good principle to avoid duplicating code and markup wherever possible. ASP.NET Core provides several features to help reduce duplication, which I describe in later chapters. These features include Razor layouts (Chapter 22), partial views (Chapter 22), and view components (Chapter 24).
Listing 3.24 Applying styles to the Thanks.cshtml file in the Views/Home folder
@model PartyInvites.Models.GuestResponse
@{
Layout = null;
}
<!DOCTYPE html>
<html>
<head>
<meta name="viewport" content="width=device-width" />
<title>Thanks</title>
<link rel="stylesheet"
href="/lib/bootstrap/dist/css/bootstrap.css" />
</head>
<body class="text-center">
<div>
<h1>Thank you, @Model?.Name!</h1>
@if (Model?.WillAttend == true) {
@:It's great that you're coming.
@:The drinks are already in the fridge!
} else {
@:Sorry to hear that you can't make it,
@:but thanks for letting us know.
}
</div>
Click <a asp-action="ListResponses">here</a> to see who is coming.
</body>
</html>
Figure 3.12 shows the effect of the styles.

Figure 3.12 Styling the Thanks view
Styling the list view
The final view to style is ListResponses, which presents the list of attendees. Styling the content follows the same approach as used for the other views, as shown in listing 3.25.
Listing 3.25 Adding styles to the ListResponses.cshtml file in the Views/Home folder
@model IEnumerable<PartyInvites.Models.GuestResponse>
@{
Layout = null;
}
<!DOCTYPE html>
<html>
<head>
<meta name="viewport" content="width=device-width" />
<title>Responses</title>
<link rel="stylesheet" href="/lib/bootstrap/dist/css/bootstrap.css" />
</head>
<body>
<div class="text-center p-2">
<h2 class="text-center">
Here is the list of people attending the party
</h2>
<table class="table table-bordered table-striped table-sm">
<thead>
<tr><th>Name</th><th>Email</th><th>Phone</th></tr>
</thead>
<tbody>
@foreach (PartyInvites.Models.GuestResponse r in Model!) {
<tr>
<td>@r.Name</td>
<td>@r.Email</td>
<td>@r.Phone</td>
</tr>
}
</tbody>
</table>
</div>
</body>
</html>
Figure 3.13 shows the way that the table of attendees is presented. Adding these styles to the view completes the example application, which now meets all the development goals and has an improved appearance.
Figure 3.13 Styling the ListResponses view
ASP.NET Core projects are created with the dotnet new command.
Controllers define action methods that are used to handle HTTP requests.
Views generate HTML content that is used to respond to HTTP requests.
Views can contain HTML elements that are bound to data model properties.
Model binding is the process by which request data is parsed and assigned to the properties of objects that are passed to action methods for processing.
The data in the request can be subjected to validation and errors can be displayed to the user within the same HTML form that was used to submit the data.
The HTML content generated by views can be styled using the same CSS features that are applied to static HTML content.
This chapter covers
In this chapter, I introduce the tools that Microsoft provides for ASP.NET Core development and that are used throughout this book.
Unlike earlier editions of this book, I rely on the command-line tools provided by the .NET SDK and additional tool packages that Microsoft publishes. In part, I have done this to help ensure you get the expected results from the examples but also because the command-line tools provide access to all the features required for ASP.NET Core development, regardless of which editor/IDE you have chosen.
Visual Studio—and, to a lesser extent, Visual Studio Code—offers access to some of the tools through user interfaces, which I describe in this chapter, but Visual Studio and Visual Studio Code don’t support all the features that are required for ASP.NET Core development, so there are times that using the command line is inevitable.
As ASP.NET Core has evolved, I have gradually moved to using just the command-line tools, except for when I need to use a debugger (although, as I explain later in the chapter, this is a rare requirement). Your preferences may differ, especially if you are used to working entirely within an IDE, but my suggestion is to give the command-line tools a go. They are simple, concise, and predictable, which cannot be said for all the equivalent functionality provided by Visual Studio and Visual Studio Code. Table 4.1 provides a guide to the chapter.
Table 4.1 Chapter guide
|
Problem |
Solution |
Listing |
|---|---|---|
|
Creating a project |
Use the |
1–3 |
|
Building and running projects |
Use the |
4–10 |
|
Adding packages to a project |
Use the |
11, 12 |
|
Installing tool commands |
Use the |
14, 15 |
|
Managing client-side packages |
Use the |
16–19 |
The .NET SDK includes a set of command-line tools for creating, managing, building, and running projects. Visual Studio provides integrated support for some of these tasks, but if you are using Visual Studio Code, then the command line is the only option.
I use the command-line tools throughout this book because they are simple and concise. The Visual Studio integrated support is awkward and makes it easy to unintentionally create a project with the wrong configuration, as the volume of emails from confused readers of earlier editions of this book has demonstrated.
The dotnet command provides access to the .NET command-line features. The dotnet new command is used to create a new project, configuration file, or solution file. To see the list of templates available for creating new items, open a PowerShell command prompt and run the command shown in listing 4.1.
Listing 4.1 Listing the .NET templates
dotnet new --list
Each template has a short name that makes it easier to use. There are many templates available, but table 4.2 describes the ones that are most useful for creating ASP.NET Core projects.
Table 4.2 Useful ASP.NET Core project templates
|
Name |
Description |
|---|---|
|
|
This template creates a project that is set up with the minimum code and content required for ASP.NET Core development. This is the template I use for most of the chapters in this book. |
|
|
This template creates an ASP.NET Core project configured to use the MVC Framework. |
|
|
This template creates an ASP.NET Core project configured to use Razor Pages. |
|
|
This template creates an ASP.NET Core project configured to use Blazor Server. |
|
|
This template creates an ASP.NET Core project that contains client-side features using the Angular JavaScript framework. |
|
|
This template creates an ASP.NET Core project that contains client-side features using the React JavaScript framework. |
|
|
This template creates an ASP.NET Core project that contains client-side features using the React JavaScript framework and the popular Redux library. |
There are also templates that create commonly required files used to configure projects, as described in table 4.3.
Table 4.3 The configuration item templates
|
Name |
Description |
|---|---|
|
|
This template adds a |
|
|
This template creates a solution file, which is used to group multiple projects and is commonly used by Visual Studio. The solution file is populated with the |
|
|
This template creates a |
To create a project, open a new PowerShell command prompt and run the commands shown in listing 4.2.
Listing 4.2 Creating a new project
dotnet new globaljson --sdk-version 7.0.100 --output MySolution/MyProject dotnet new web --no-https --output MySolution/MyProject --framework net7.0 dotnet new sln -o MySolution dotnet sln MySolution add MySolution/MyProject
The first command creates a MySolution/MyProject folder that contains a global.json file, which specifies that the project will use .NET version 7. The top-level folder, named MySolution, is used to group multiple projects. The nested MyProject folder will contain a single project.
I use the globaljson template to help ensure you get the expected results when following the examples in this book. Microsoft is good at ensuring backward compatibility with .NET releases, but breaking changes do occur, and it is a good idea to add a global.json file to projects so that everyone in the development team is using the same version.
The second command creates the project using the web template, which I use for most of the examples in this book. As noted in table 4.3, this template creates a project with the minimum content required for ASP.NET Core development. Each template has its own set of arguments that influence the project that is created. The --no-https argument creates a project without support for HTTPS. (I explain how to use HTTPS in chapter 16.) The --framework argument selects the .NET runtime that will be used for the project.
The other commands create a solution file that references the new project. Solution files are a convenient way of opening multiple related files at the same time. A MySolution.sln file is created in the MySolution folder, and opening this file in Visual Studio will load the project created with the web template. This is not essential, but it stops Visual Studio from prompting you to create the file when you exit the code editor.
Opening the project
To open the project, start Visual Studio, select Open a Project or Solution, and open the MySolution.sln file in the MySolution folder. Visual Studio will open the solution file, discover the reference to the project that was added by the final command in listing 4.2, and open the project as well.
Visual Studio Code works differently. Start Visual Studio Code, select File > Open Folder, and navigate to the MySolution folder. Click Select Folder, and Visual Studio Code will open the project.
Although Visual Studio Code and Visual Studio are working with the same project, each displays the contents differently. Visual Studio Code shows you a simple list of files, ordered alphabetically, as shown on the left of figure 4.1. Visual Studio hides some files and nests others within related file items, as shown on the right of figure 4.1.
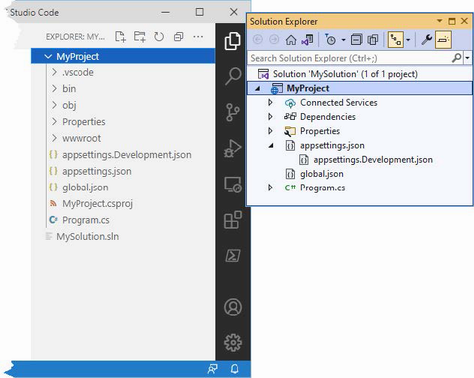
Figure 4.1 Opening a project in Visual Studio Code and Visual Studio
There are buttons at the top of the Visual Studio Solution Explorer that disable file nesting and show the hidden items in the project. When you open a project for the first time in Visual Studio Code, you may be prompted to add assets for building and debugging the project. Click the Yes button.
If you are using Visual Studio Code, then you add items to the project by right-clicking the folder that should contain the file and selecting New File from the pop-up menu (or selecting New Folder if you are adding a folder).
Right-click the My Project item in the list of files and select New Folder from the pop-up menu. Set the name to wwwroot, which is where static content is stored in ASP.NET Core projects. Press Enter, and a folder named wwwroot will be added to the project. Right-click the new wwwroot folder, select New File, and set the name to demo.xhtml. Press Enter to create the HTML file and add the content shown in listing 4.3.
Listing 4.3 The contents of the demo.xhtml file in the wwwroot folder
<!DOCTYPE html>
<html>
<head>
<meta charset="utf-8" />
<title></title>
</head>
<body>
<h3>HTML File from MyProject</h3>
</body>
</html>
Visual Studio provides a more comprehensive approach that can be helpful, but only when used selectively. To create a folder, right-click the MyProject item in the Solution Explorer and select Add > New Folder from the pop-up menu. Set the name of the new item to wwwroot and press Enter; Visual Studio will create the folder.
Right-click the new wwwroot item in the Solution Explorer and select Add > New Item from the pop-up menu. Visual Studio will present you with an extensive selection of templates for adding items to the project. These templates can be searched using the text field in the top-right corner of the window or filtered using the categories on the left of the window. The item template for an HTML file is named HTML Page, as shown in figure 4.2.
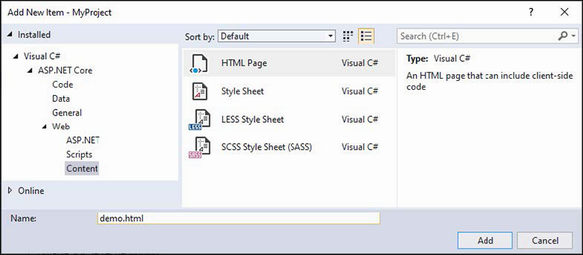
Figure 4.2 Adding an item to the example project
Enter demo.xhtml in the Name field, click the Add button to create the new file, and replace the contents with the element shown in listing 4.3. (If you omit the file extension, Visual Studio will add it for you based on the item template you have selected. If you entered just demo into the Name field when you created the file, Visual Studio would have created a file with the .xhtml extension because you had selected the HTML Page item template.)
The item templates presented by Visual Studio can be useful, especially for C# classes where it sets the namespace and class name automatically. But Visual Studio also provides scaffolded items, which I recommend against using. The Add > New Scaffolded Item leads to a selection of items that guide you through a process to add more complex items. Visual Studio will also offer individual scaffolded items based on the name of the folder that you are adding an item to. For example, if you right-click a folder named Views, Visual Studio will helpfully add scaffolded items to the top of the menu, as shown in figure 4.3.
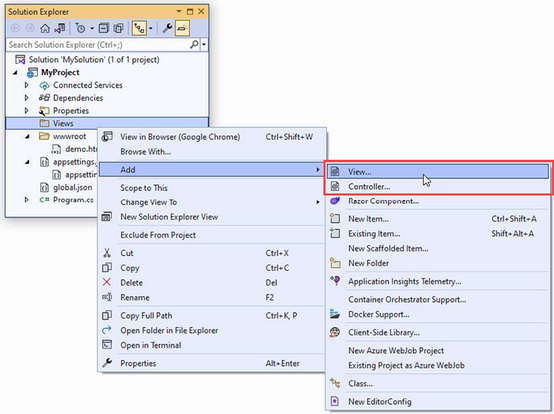
Figure 4.3 Scaffolded items in the Add menu
The View and Controller items are scaffolded, and selecting them will present you with choices that determine the content of the items you create.
Just like the project templates, I recommend against using scaffolded items, at least until you understand the content they create. In this book, I use only the Add > New Item menu for the examples and change the placeholder content immediately.
The simplest way to build and run a project is to use the command-line tools. To prepare, add the statement shown in listing 4.4 to the Program.cs class file in the MyProject folder.
Listing 4.4 Adding a statement in the Program.cs file in the MyProject folder
var builder = WebApplication.CreateBuilder(args);
var app = builder.Build();
app.MapGet("/", () => "Hello World!");
app.UseStaticFiles();
app.Run();
This statement adds support for responding to HTTP requests with static content in the wwwroot folder, such as the HTML file created in the previous section. (I explain this feature in more detail in chapter 15.)
Next, set the HTTP port that ASP.NET Core will use to receive HTTP requests, as shown in listing 4.5.
Listing 4.5 Setting the HTTP port in the launchSettings.json file in the Properties folder
{
"iisSettings": {
"windowsAuthentication": false,
"anonymousAuthentication": true,
"iisExpress": {
"applicationUrl": "http://localhost:5000",
"sslPort": 0
}
},
"profiles": {
"MyProject": {
"commandName": "Project",
"dotnetRunMessages": true,
"launchBrowser": true,
"applicationUrl": "http://localhost:5000",
"environmentVariables": {
"ASPNETCORE_ENVIRONMENT": "Development"
}
},
"IIS Express": {
"commandName": "IISExpress",
"launchBrowser": true,
"environmentVariables": {
"ASPNETCORE_ENVIRONMENT": "Development"
}
}
}
}
To build the example project, run the command shown in listing 4.6 in the MyProject folder.
Listing 4.6 Building the project
dotnet build
You can build and run the project in a single step by running the command shown in listing 4.7 in the MyProject folder.
Listing 4.7 Building and running the project
dotnet run
The compiler will build the project and then start the integrated ASP.NET Core HTTP server to listen for HTTP requests on port 5000. You can see the contents of the static HTML file added to the project earlier in the chapter by opening a new browser window and requesting http://localhost:5000/demo.xhtml, which produces the response shown in figure 4.4.
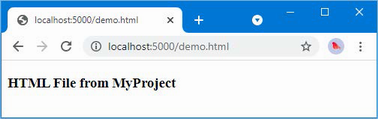
Figure 4.4 Running the example application
.NET has an integrated hot reload feature, which compiles and applies updates to applications on the fly. For ASP.NET Core applications, this means that changes to the project are automatically reflected in the browser without having to manually stop the ASP.NET Core application and use the dotnet run command. Use Control+C to stop ASP.NET Core if the application is still running from the previous section and run the command shown in listing 4.8 in the MyProject folder.
Listing 4.8 Starting the application with hot reload
dotnet watch
The dotnet watch command opens a new browser window, which it does to ensure that the browser loads a small piece of JavaScript that opens an HTTP connection to the server that is used to handle reloading. (The new browser window can be disabled by setting the launchBrowser property shown in listing 4.5 to false, but you will have to perform a manual reload the first time you start or restart ASP.NET Core.) Use the browser to request http://localhost:5000/demo.xhtml, and you will see the output shown on the left of figure 4.5.
The dotnet watch command monitors the project for changes. When a change is detected, the project is automatically recompiled, and the browser is reloaded. To see this process in action, make the change shown in listing 4.9 to the demo.xhtml file in the wwwroot folder.
Listing 4.9 Changing the message in the demo.xhtml file in the wwwroot folder
<!DOCTYPE html>
<html>
<head>
<meta charset="utf-8" />
<title></title>
</head>
<body>
<h3>New Message</h3>
</body>
</html>
When you save the changes to the HTML file, the dotnet watch tool will detect the change and automatically update the browser, as shown in figure 4.5.
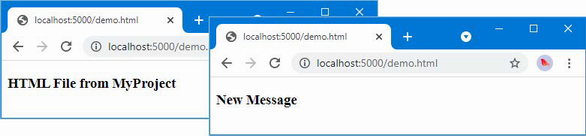
Figure 4.5 The hot reload feature
The dotnet watch command is a clever feat of engineering, and it has good support for ASP.NET Core applications, allowing changes to be easily applied. But not all changes can be handled with a hot reload.
If you are using Visual Studio, right-click the MyProject item in the Solution Explorer, select Add > Class from the pop-up menu, and set the name of the new class file to MyClass.cs. When Visual Studio opens the file for editing, change the namespace as shown in listing 4.10.
Listing 4.10 Changing a namespace in the MyClass.cs file in the MyProject folder
namespace MyProject.MyNamespace {
public class MyClass {
}
}
If you are using Visual Studio Code, add a file named MyClass.cs to the MyProject folder with the content shown in listing 4.10.
Regardless of which editor you use, you will see output similar to the following when you save the class file:
watch : File changed: C:\MySolution\MyProject\MyClass.cs. watch : Unable to apply hot reload because of a rude edit.
There are some changes that the dotnet watch command can’t handle with a hot reload and the application is restarted instead. You may be prompted to accept the restart. The restart has little effect on the example application, but it means that the application state is lost, which can be frustrating when working on real projects.
But even though it isn’t perfect, the hot reload feature is useful, especially when it comes to iterative adjustments to the HTML an application produces. I don’t use it in most of the chapters in this book because the examples require many changes that are not handled with hot reloads and that can prevent changes from taking effect, but I do use it for my own non-book related development projects.
Most projects require additional features beyond those set up by the project templates, such as support for accessing databases or for making HTTP requests, neither of which is included in the standard ASP.NET Core packages added to the project by the template used to create the example project. In the sections that follow, I describe the tools available to manage the different types of packages that are used in ASP.NET Core development.
.NET packages are added to a project with the dotnet add package command. Use a PowerShell command prompt to run the command shown in listing 4.11 in the MyProject folder to add a package to the example project.
Listing 4.11 Adding a package to the example project
dotnet add package Microsoft.EntityFrameworkCore.SqlServer --version 7.0.0
This command installs version 7.0.0 of the Microsoft.EntityFrameworkCore.SqlServer package. The package repository for .NET projects is nuget.org, where you can search for the package and see the versions available. The package installed in listing 4.11, for example, is described at https://www.nuget.org/packages/Microsoft.EntityFrameworkCore.SqlServer/7.0.0. You can see the packages installed in a project by running the command shown in listing 4.12.
Listing 4.12 Listing the packages in a project
dotnet list package
This command produces the following output when it is run in the MyProject folder, showing the package added in listing 4.11:
Project 'MyProject' has the following package references [net7.0]: Top-level Package Requested Resolved > Microsoft.EntityFrameworkCore.SqlServer 7.0.0 7.0.0
Packages are removed with the dotnet remove package command. To remove the package from the example project, run the command shown in listing 4.13 in the MyProject folder.
Listing 4.13 Removing a package from the example project
dotnet remove package Microsoft.EntityFrameworkCore.SqlServer
Tool packages install commands that can be used from the command line to perform operations on .NET projects. One common example is the Entity Framework Core tools package that installs commands that are used to manage databases in ASP.NET Core projects. Tool packages are managed using the dotnet tool command. To install the Entity Framework Core tools package, run the commands shown in listing 4.14.
Listing 4.14 Installing a tool package
dotnet tool uninstall --global dotnet-ef dotnet tool install --global dotnet-ef --version 7.0.0
The first command removes the dotnet-ef package, which is named dotnet-ef. This command will produce an error if the package has not already been installed, but it is a good idea to remove existing versions before installing a package. The dotnet tool install command installs version 7.0.0 of the dotnet-ef package, which is the version I use in this book. The commands installed by tool packages are used through the dotnet command. To test the package installed in listing 4.14, run the command shown in listing 4.15 in the MyProject folder.
Listing 4.15 Running a tool package command
dotnet ef --help
The commands added by this tool package are accessed using dotnet ef, and you will see examples in later chapters that rely on these commands.
Client-side packages contain content that is delivered to the client, such as images, CSS stylesheets, JavaScript files, and static HTML. Client-side packages are added to ASP.NET Core using the Library Manager (LibMan) tool. To install the LibMan tool package, run the commands shown in listing 4.16.
Listing 4.16 Installing the LibMan tool package
dotnet tool uninstall --global Microsoft.Web.LibraryManager.Cli dotnet tool install --global Microsoft.Web.LibraryManager.Cli --version 2.1.175
These commands remove any existing LibMan package and install the version that is used throughout this book. The next step is to initialize the project, which creates the file that LibMan uses to keep track of the client packages it installs. Run the command shown in listing 4.17 in the MyProject folder to initialize the example project.
Listing 4.17 Initializing the example project
libman init -p cdnjs
LibMan can download packages from different repositories. The -p argument in listing 4.17 specifies the repository at https://cdnjs.com, which is the most widely used. Once the project is initialized, client-side packages can be installed. To install the Bootstrap CSS framework that I use to style HTML content throughout this book, run the command shown in listing 4.18 in the MyProject folder.
Listing 4.18 Installing the Bootstrap CSS framework
libman install bootstrap@5.2.3 -d wwwroot/lib/bootstrap
The command installs version 5.2.3 of the Bootstrap package, which is known by the name bootstrap on the CDNJS repository. The -d argument specifies the location into which the package is installed. The convention in ASP.NET Core projects is to install client-side packages into the wwwroot/lib folder.
Once the package has been installed, add the classes shown in listing 4.19 to the elements in the demo.xhtml file. This is how the features provided by the Bootstrap package are applied.
Listing 4.19 Applying Bootstrap classes in the demo.xhtml file in the wwwroot folder
<!DOCTYPE html>
<html>
<head>
<meta charset="utf-8" />
<title></title>
<link href="/lib/bootstrap/css/bootstrap.min.css" rel="stylesheet" />
</head>
<body>
<h3 class="bg-primary text-white text-center p-2">New Message</h3>
</body>
</html>
Start ASP.NET Core and request http://localhost:5000/demo.xhtml, and you will see the styled content shown in figure 4.6.
Figure 4.6 Using a client-side package
Visual Studio and Visual Studio Code both provide debuggers that can be used to control and inspect the execution of an ASP.NET Core application. Open the Program.cs file in the MyProject folder, and click this statement in the code editor:
...
app.MapGet("/", () => "Hello World!");
...
Select Debug > Toggle Breakpoint in Visual Studio or select Run > Toggle Breakpoint in Visual Studio Code. A breakpoint is shown as a red dot alongside the code statement, as shown in figure 4.7, and will interrupt execution and pass control to the user.

Figure 4.7 Setting a breakpoint
Start the project by selecting Debug > Start Debugging in Visual Studio or selecting Run > Start Debugging in Visual Studio Code. (Choose .NET if Visual Studio Code prompts you to select an environment and then select the Start Debugging menu item again.)
The application will be started and continue normally until the statement to which the breakpoint is reached, at which point execution is halted. Execution can be controlled using the Debug or Run menu or the controls that Visual Studio and Visual Studio Code display. Both debuggers are packed with features—more so if you have a paid-for version of Visual Studio—and I don’t describe them in depth in this book. The Visual Studio debugger is described at https://docs.microsoft.com/en-us/visualstudio/debugger, and the Visual Studio Code debugger is described at https://code.visualstudio.com/docs/editor/debugging.
ASP.NET Core projects are created with the dotnet new command.
There are templates to jumpstart popular project types and to create common project items.
The dotnet build command compiles a project.
The dotnet run command builds and executes a project.
The dotnet watch command builds and executes a project, and performs hot reloading when changes are detected.
Packages are added to a project with the dotnet add package command.
Tool packages are installing using the dotnet tool install command.
Client-side packages are managed with the libman tool package.
This chapter covers
In this chapter, I describe C# features used in web application development that are not widely understood or that often cause confusion. This is not a book about C#, however, so I provide only a brief example for each feature so that you can follow the examples in the rest of the book and take advantage of these features in your projects. Table 5.1 provides a guide to this chapter.
|
Problem |
Solution |
Listing |
|---|---|---|
|
Reducing duplication in |
Use global or implicit |
8–10 |
|
Managing null values |
Use nullable and non-nullable types, which are managed with the null management operators. |
11–20 |
|
Mixing static and dynamic values in strings |
Use string interpolation. |
21 |
|
Initializing and populate objects |
Use the object and collection initializers and target-typed |
22–26 |
|
Assigning a value for specific types |
Use pattern matching. |
27, 28 |
|
Extending the functionality of a class without modifying it |
Define an extension method. |
29–36 |
|
Expressing functions and methods concisely |
Use lambda expressions. |
37–44 |
|
Defining a variable without explicitly declaring its type |
Use the |
45–47 |
|
Modifying an interface without requiring changes in its implementation classes |
Define a default implementation. |
48–52 |
|
Performing work asynchronously |
Use tasks or the |
53–55 |
|
Producing a sequence of values over time |
Use an asynchronous enumerable. |
56–59 |
|
Getting the name of a class or member |
Use a |
60, 61 |
To create the example project for this chapter, open a new PowerShell command prompt and run the commands shown in listing 5.1. If you are using Visual Studio and prefer not to use the command line, you can create the project using the process described in chapter 4.
Listing 5.1 Creating the example project
dotnet new globaljson --sdk-version 7.0.100 --output LanguageFeatures dotnet new web --no-https --output LanguageFeatures --framework net7.0 dotnet new sln -o LanguageFeatures dotnet sln LanguageFeatures add LanguageFeatures
If you are using Visual Studio, select File > Open > Project/Solution, select the LanguageFeatures.sln file in the LanguageFeatures folder, and click the Open button to open the solution file and the project it references. If you are using Visual Studio Code, select File > Open Folder, navigate to the LanguageFeatures folder, and click the Select Folder button.
The web project template creates a project that contains a minimal ASP.NET Core configuration. This means the placeholder content that is added by the mvc template used in chapter 3 is not available and that extra steps are required to reach the point where the application can produce useful output. In this section, I make the changes required to set up the MVC Framework, which is one of the application frameworks supported by ASP.NET Core, as I explained in chapter 1. First, to enable the MVC framework, make the changes shown in listing 5.2 to the Program.cs file.
Listing 5.2 Enabling MVC in the Program.cs file in the LanguageFeatures folder
var builder = WebApplication.CreateBuilder(args);
builder.Services.AddControllersWithViews();
var app = builder.Build();
//app.MapGet("/", () => "Hello World!");
app.MapDefaultControllerRoute();
app.Run();
I explain how to configure ASP.NET Core applications in part 2, but the two statements added in listing 5.2 provide a basic MVC framework setup using a default configuration.
Now that the MVC framework is set up, I can add the application components that I will use to demonstrate important C# language features. As you create these components, you will see that the code editor underlines some expressions to warn you of potential problems. These are safe to ignore until the “Understanding Null State Analysis” section, where I explain their significance.
Creating the data model
I started by creating a simple model class so that I can have some data to work with. I added a folder called Models and created a class file called Product.cs within it, which I used to define the class shown in listing 5.3.
Listing 5.3 The contents of the Product.cs file in the Models folder
namespace LanguageFeatures.Models {
public class Product {
public string Name { get; set; }
public decimal? Price { get; set; }
public static Product[] GetProducts() {
Product kayak = new Product {
Name = "Kayak", Price = 275M
};
Product lifejacket = new Product {
Name = "Lifejacket", Price = 48.95M
};
return new Product[] { kayak, lifejacket, null };
}
}
}
The Product class defines Name and Price properties, and there is a static method called GetProducts that returns a Product array. One of the elements contained in the array returned by the GetProducts method is set to null, which I will use to demonstrate some useful language features later in the chapter.
The Visual Studio and Visual Studio Code editors will highlight a problem with the Name property. This is a deliberate error that I explain later in the chapter and which should be ignored for now.
Creating the controller and view
For the examples in this chapter, I use a simple controller class to demonstrate different language features. I created a Controllers folder and added to it a class file called HomeController.cs, the contents of which are shown in listing 5.4.
Listing 5.4 The contents of the HomeController.cs file in the Controllers folder
using Microsoft.AspNetCore.Mvc;
namespace LanguageFeatures.Controllers {
public class HomeController : Controller {
public ViewResult Index() {
return View(new string[] { "C#", "Language", "Features" });
}
}
}
The Index action method tells ASP.NET Core to render the default view and provides it with an array of strings as its view model, which will be included in the HTML sent to the client. To create the view, I added a Views/Home folder (by creating a Views folder and then adding a Home folder within it) and added a Razor View called Index.cshtml, the contents of which are shown in listing 5.5.
Listing 5.5 The contents of the Index.cshtml file in the Views/Home folder
@model IEnumerable<string>
@{ Layout = null; }
<!DOCTYPE html>
<html>
<head>
<meta name="viewport" content="width=device-width" />
<title>Language Features</title>
</head>
<body>
<ul>
@foreach (string s in Model) {
<li>@s</li>
}
</ul>
</body>
</html>
The code editor will highlight part of this file to denote a warning, which I explain shortly.
Change the HTTP port that ASP.NET Core uses to receive requests, as shown in listing 5.6.
Listing 5.6 Setting the HTTP port in the launchSettings.json file in the Properties folder
{
"iisSettings": {
"windowsAuthentication": false,
"anonymousAuthentication": true,
"iisExpress": {
"applicationUrl": "http://localhost:5000",
"sslPort": 0
}
},
"profiles": {
"LanguageFeatures": {
"commandName": "Project",
"dotnetRunMessages": true,
"launchBrowser": true,
"applicationUrl": "http://localhost:5000",
"environmentVariables": {
"ASPNETCORE_ENVIRONMENT": "Development"
}
},
"IIS Express": {
"commandName": "IISExpress",
"launchBrowser": true,
"environmentVariables": {
"ASPNETCORE_ENVIRONMENT": "Development"
}
}
}
}
Start ASP.NET Core by running the command shown in listing 5.7 in the LanguageFeatures folder.
Listing 5.7 Running the example application
dotnet run
The output from the dotnet run command will include two build warnings, which I explain in the “Understanding Null State Analysis” section. Once ASP.NET Core has started, use a web browser to request http://localhost:5000, and you will see the output shown in figure 5.1.
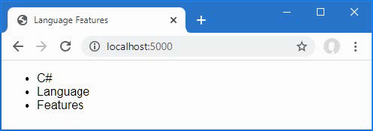
Figure 5.1 Running the example application
Since the output from all the examples in this chapter is text, I will show the messages displayed by the browser like this:
C# Language Features
Top-level statements are intended to remove unnecessary code structure from class files. A project can contain one file that defines code statements outside of a namespace or a file. For ASP.NET Core applications, this feature is used to configure the application in the Program.cs file. Here is the content of the Program.cs file in the example application for this chapter:
var builder = WebApplication.CreateBuilder(args);
builder.Services.AddControllersWithViews();
var app = builder.Build();
//app.MapGet("/", () => "Hello World!");
app.MapDefaultControllerRoute();
app.Run();
If you have used earlier versions of ASP.NET Core, you will be familiar with the Startup class, which was used to configure the application. Top-level statements have allowed this process to be simplified, and all of the configuration statements are now defined in the Program.cs file.
The compiler will report an error if there is more than one file in a project with top-level statements, so the Program.cs file is the only place you will find them in an ASP.NET Core project.
C# supports global using statements, which allow a using statement to be defined once but take effect throughout a project. Traditionally, each code file contains a series of using statements that declare dependencies on the namespaces that it requires. Listing 5.8 adds a using statement that provides access to the types defined in the Models namespace. (The code editor will highlight part of this code listing, which I explain in the “Understanding Null State Analysis” section.)
Listing 5.8 Adding a statement in the HomeController.cs file in the Controllers folder
using Microsoft.AspNetCore.Mvc;
using LanguageFeatures.Models;
namespace LanguageFeatures.Controllers {
public class HomeController : Controller {
public ViewResult Index() {
Product[] products = Product.GetProducts();
return View(new string[] { products[0].Name });
}
}
}
To access the Product class, I added a using statement for the namespace that contains it, which is LanguageFeatures.Models. The code file already contains a using statement for the Microsoft.AspNetCore.Mvc namespace, which provides access to the Controller class, from which the HomeController class is derived.
In most projects, some namespaces are required throughout the application, such as those containing data model classes. This can result in a long list of using statements, duplicated in every code file. Global using statements address this problem by allowing using statements for commonly required namespaces to be defined in a single location. Add a code file named GlobalUsings.cs to the LanguageFeatures project with the content shown in listing 5.9.
Listing 5.9 The contents of the GlobalUsings.cs file in the LanguageFeatures folder
global using LanguageFeatures.Models; global using Microsoft.AspNetCore.Mvc;
The global keyword is used to denote a global using. The statements in listing 5.9 make the LanguageFeatures.Models and Microsoft.AspNetCore.Mvc namespaces available throughout the application, which means they can be removed from the HomeController.cs file, as shown in listing 5.10.
Listing 5.10 Removing statements in the HomeController.cs file in the Controllers folder
//using Microsoft.AspNetCore.Mvc;
//using LanguageFeatures.Models;
namespace LanguageFeatures.Controllers {
public class HomeController : Controller {
public ViewResult Index() {
Product[] products = Product.GetProducts();
return View(new string[] { products[0].Name });
}
}
}
If you run the example, you will see the following results displayed in the browser window:
Kayak
You will receive warnings when compiling the project, which I explain in the “Understanding Null State Analysis” section.
The ASP.NET Core project templates enable a feature named implicit usings, which define global using statements for these commonly required namespaces:
System
System.Collections.Generic
System.IO
System.Linq
System.Net.Http
System.Net.Http.Json
System.Threading
System.Threading.Tasks
Microsoft.AspNetCore.Builder
Microsoft.AspNetCore.Hosting
Microsoft.AspNetCore.Http
Microsoft.AspNetCore.Routing
Microsoft.Extensions.Configuration
Microsoft.Extensions.DependencyInjection
Microsoft.Extensions.Hosting
Microsoft.Extensions.Logging
using statements are not required for these namespaces, which are available throughout the application. These namespaces don’t cover all of the ASP.NET Core features, but they do cover the basics, which is why no explicit using statements are required in the Program.cs file.
The editor and compiler warnings shown in earlier sections are produced because ASP.NET Core project templates enable null state analysis, in which the compiler identifies attempts to access references that may be unintentionally null, preventing null reference exceptions at runtime.
Open the Product.cs file, and the editor will display two warnings, as shown in figure 5.2. The figure shows how Visual Studio displays a warning, but Visual Studio Code is similar.
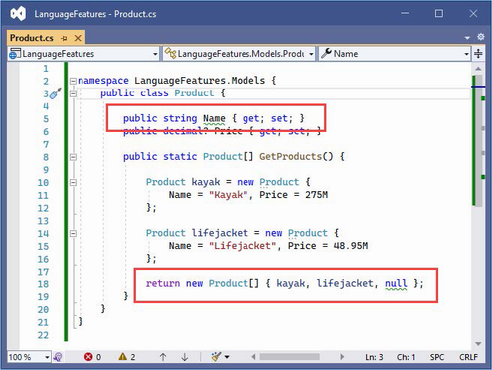
Figure 5.2 A null state analysis warning
When null state analysis is enabled, C# variables are divided into two groups: nullable and non-nullable. As their name suggests, nullable variables can be assigned the special value null. This is the behavior that most programmers are familiar with, and it is entirely up to the developer to guard against trying to use null references, which will trigger a NullReferenceException.
By contrast, non-nullable variables can never be null. When you receive a non-nullable variable, you don’t have to guard against a null value because that is not a value that can ever be assigned.
A question mark (the ? character) is appended to a type to denote a nullable type. So, if a variable’s type is string?, for example, then it can be assigned any value string value or null. When attempting to access this variable, you should check to ensure that it isn’t null before attempting to access any of the fields, properties, or methods defined by the string type.
If a variable’s type is string, then it cannot be assigned null values, which means you can confidently access the features it provides without needing to guard against null references.
The compiler examines the code in the project and warns you when it finds statements that might break these rules. The most common issues are attempting to assign null to non-nullable variables and attempting to access members defined by nullable variables without checking to see if they are null. In the sections that follow, I explain the different ways that the warnings raised by the compiler in the example application can be addressed.
The first warning in the Product.cs file is for the Name field, whose type is string, which is a non-nullable type (because it hasn’t been annotated with a question mark).
...
public string Name { get; set; }
...
One consequence of using non-nullable types is that properties like Name must be assigned a value when a new instance of the enclosing class is created. If this were not the case, then the Name property would not be initialized and would be null. And this is a problem because we can’t assign null to a non-nullable property, even indirectly.
The required keyword can be used to indicate that a value is required for a non-nullable type, as shown in listing 5.11.
Listing 5.11 Using the required keyword in the Product.cs file in the Models folder
namespace LanguageFeatures.Models {
public class Product {
public required string Name { get; set; }
public decimal? Price { get; set; }
public static Product[] GetProducts() {
Product kayak = new Product {
Name = "Kayak", Price = 275M
};
Product lifejacket = new Product {
Name = "Lifejacket", Price = 48.95M
};
return new Product[] { kayak, lifejacket, null };
}
}
}
The compiler will check to make sure that a value is assigned to the property when a new instance of the containing type is created. The two Product objects used in the listing are created with a value for the Name field, which satisfies the demands of the required keyword. Listing 5.12 omits the Name value from one of Product objects.
Listing 5.12 Omitting a value in the Product.cs file in the Models folder
namespace LanguageFeatures.Models {
public class Product {
public required string Name { get; set; }
public decimal? Price { get; set; }
public static Product[] GetProducts() {
Product kayak = new Product {
Name = "Kayak", Price = 275M
};
Product lifejacket = new Product {
//Name = "Lifejacket",
Price = 48.95M
};
return new Product[] { kayak, lifejacket, null };
}
}
}
If you run the example, the build process will fail with this error:
Required member 'Product.Name' must be set in the object initializer or attribute constructor.
This error—and the corresponding red line in the code editor—tell you that a value for the Name property is required but has not been provided.
The required keyword is a good way to denote a property that cannot be null, and which requires a value when an object is created. This approach can become cumbersome in situations where there may not always be a suitable data value available, because it requires the code wants to create the object to provide a fallback value and there is no good way to enforce consistency.
For these situations a default value can be used instead of the required keyword, as shown in listing 5.13.
Listing 5.13 Providing a default value in the Product.cs file in the Models folder
namespace LanguageFeatures.Models {
public class Product {
public string Name { get; set; } = string.Empty;
public decimal? Price { get; set; }
public static Product[] GetProducts() {
Product kayak = new Product {
Name = "Kayak", Price = 275M
};
Product lifejacket = new Product {
//Name = "Lifejacket",
Price = 48.95M
};
return new Product[] { kayak, lifejacket, null };
}
}
}
The default value in this example is the empty string. This value will be replaced for Product objects that are created with a Name value and ensures consistency for objects that are created without one.
The remaining warning in the Product.cs file occurs because there is a mismatch between the type used for the result of the GetProducts method and the values that are used to initialize it:
...
return new Product[] { kayak, lifejacket, null };
...
The type of the array that is created is Product[], which contains non-nullable Product references. But one of the values used to populate the array is null, which isn’t allowed. Listing 5.14 changes the array type so that nullable values are allowed.
Listing 5.14 Using a nullable type in the Product.cs file in the Models folder
namespace LanguageFeatures.Models {
public class Product {
public string Name { get; set; } = string.Empty;
public decimal? Price { get; set; }
public static Product?[] GetProducts() {
Product kayak = new Product {
Name = "Kayak", Price = 275M
};
Product lifejacket = new Product {
//Name = "Lifejacket",
Price = 48.95M
};
return new Product?[] { kayak, lifejacket, null };
}
}
}
The type Product?[] denotes an array of Product? references, which means the result can include null. Notice that I had to make the same change to the result type declared by the GetProducts method because a Product?[] array cannot be used where a Product[] is expected.
I explained that dealing with null state analysis warnings can feel like chasing a problem through code, and you can see a simple example of this in the HomeController.cs file in the Controllers folder. In listing 5.14, I changed the type returned by the GetProducts method to allow null values, but that has created a mismatch in the HomeController class, which invokes that method and assigns the result to an array of non-nullable Product values:
... Product[] products = Product.GetProducts(); ...
This is easily resolved by changing the type of the products variable to match the type returned by the GetProducts method, as shown in listing 5.15.
Listing 5.15 Changing Type in the HomeController.cs File in the Controllers Folder
namespace LanguageFeatures.Controllers {
public class HomeController : Controller {
public ViewResult Index() {
Product?[] products = Product.GetProducts();
return View(new string[] { products[0].Name });
}
}
}
This resolves one warning and introduces another, as shown in figure 5.3.

Figure 5.3 An additional null state analysis warning
The statement flagged by the compiler attempts to access the Name field of the element at index zero in the array, which might be null since the array type is Product?[]. Addressing this issue requires a check for null values, as shown in listing 5.16.
Listing 5.16 Guarding against null in the HomeController.cs file in the Controllers folder
namespace LanguageFeatures.Controllers {
public class HomeController : Controller {
public ViewResult Index() {
Product?[] products = Product.GetProducts();
Product? p = products[0];
string val;
if (p != null) {
val = p.Name;
} else {
val = "No value";
}
return View(new string[] { val });
}
}
}
This is an especially verbose way of avoiding a null, which I will refine shortly. But it demonstrates an important point, which is that the compiler can understand the effect of C# expressions when checking for a null reference. In listing 5.16, I use an if statement to see if a Product? variable is not null, and the compiler understands that the variable cannot be null within the scope of the if clause and doesn’t generate a warning when I read the name field:
...
if (p != null) {
val = p.Name;
} else {
val = "No value";
}
...
The compiler has a sophisticated understanding of C# but doesn’t always get it right, and I explain what to do when the compiler isn’t able to accurately determine whether a variable is null in the “Overriding Null State Analysis” section.
Using the null conditional operator
The null conditional operator is a more concise way of avoiding member access for null values, as shown in listing 5.17.
Listing 5.17 Null conditional operator in the HomeController.cs file in the Controllers folder
namespace LanguageFeatures.Controllers {
public class HomeController : Controller {
public ViewResult Index() {
Product?[] products = Product.GetProducts();
string? val = products[0]?.Name;
if (val != null) {
return View(new string[] { val });
}
return View(new string[] { "No Value" });
}
}
}
The null conditional operator is a question mark applied before a member is accessed, like this:
... string? val = products[0]?.Name; ...
The operator returns null if it is applied to a variable that is null. In this case, if the element at index zero of the products array is null, then the operator will return null and prevent an attempt to access the Name property, which would cause an exception. If products[0] isn’t null, then the operator does nothing, and the expression returns the value assigned to the Name property. Applying the null conditional operator can return null, and its result must always be assigned to a nullable variable, such as the string? used in this example.
Using the null-coalescing operator
The null-coalescing operator is two question mark characters (??) and is used to provide a fallback value, often used in conjunction with the null conditional operator, as shown in listing 5.18.
Listing 5.18 Using the null-coalescing operator in the HomeController.cs file in the Controllers folder
namespace LanguageFeatures.Controllers {
public class HomeController : Controller {
public ViewResult Index() {
Product?[] products = Product.GetProducts();
return View(new string[] { products[0]?.Name ?? "No Value" });
}
}
}
The ?? operator returns the value of its left-hand operand if it isn’t null. If the left-hand operand is null, then the ?? operator returns the value of its right-hand operand. This behavior works well with the null conditional operator. If products[0] is null, then the ? operator will return null, and the ?? operator will return "No Value". If products[0] isn’t null, then the result will be the value of its Name property. This is a more concise way of performing the same null checks shown in earlier examples.
The C# compiler has a sophisticated understanding of when a variable can be null, but it doesn’t always get it right, and there are times when you have a better understanding of whether a null value can arise than the compiler. In these situations, the null-forgiving operator can be used to tell the compiler that a variable isn’t null, regardless of what the null state analysis suggests, as shown in listing 5.19.
Listing 5.19 Using the null-forgiving operator in the HomeController.cs file in the Controllers folder
namespace LanguageFeatures.Controllers {
public class HomeController : Controller {
public ViewResult Index() {
Product?[] products = Product.GetProducts();
return View(new string[] { products[0]!.Name });
}
}
}
The null-forgiving operator is an exclamation mark and is used in this example to tell the compiler that products[0] isn’t null, even though null state analysis has identified that it might be.
When using the ! operator, you are telling the compiler that you have better insight into whether a variable can be null, and, naturally, this should be done only when you are entirely confident that you are right.
An alternative to the null-forgiving operator is to disable null state analysis warnings for a particular section of code or a complete code file, as shown in listing 5.20.
Listing 5.20 Disabling warnings in the HomeController.cs file in the Controllers folder
namespace LanguageFeatures.Controllers {
public class HomeController : Controller {
public ViewResult Index() {
Product?[] products = Product.GetProducts();
#pragma warning disable CS8602
return View(new string[] { products[0].Name });
}
}
}
This listing uses a #pragma directive to suppress warning CS8602 (you can identify warnings in the output from the build process).
C# supports string interpolation to create formatted strings, which uses templates with variable names that are resolved and inserted into the output, as shown in listing 5.21.
Listing 5.21 Using string interpolation in the HomeController.cs file in the Controllers folder
namespace LanguageFeatures.Controllers {
public class HomeController : Controller {
public ViewResult Index() {
Product?[] products = Product.GetProducts();
return View(new string[] {
$"Name: {products[0]?.Name}, Price: { products[0]?.Price }"
});
}
}
}
Interpolated strings are prefixed with the $ character and contain holes, which are references to values contained within the { and } characters. When the string is evaluated, the holes are filled in with the current values of the variables or constants that are specified.
Start ASP.NET Core and request http://localhost:5000, and you will see a formatted string:
Name: Kayak, Price: 275
When I create an object in the static GetProducts method of the Product class, I use an object initializer, which allows me to create an object and specify its property values in a single step, like this:
...
Product kayak = new Product {
Name = "Kayak", Price = 275M
};
...
This is another syntactic sugar feature that makes C# easier to use. Without this feature, I would have to call the Product constructor and then use the newly created object to set each of the properties, like this:
... Product kayak = new Product(); kayak.Name = "Kayak"; kayak.Price = 275M; ...
A related feature is the collection initializer, which allows the creation of a collection and its contents to be specified in a single step. Without an initializer, creating a string array, for example, requires the size of the array and the array elements to be specified separately, as shown in listing 5.22.
Listing 5.22 Initializing an object in the HomeController.cs file in the Controllers folder
namespace LanguageFeatures.Controllers {
public class HomeController : Controller {
public ViewResult Index() {
string[] names = new string[3];
names[0] = "Bob";
names[1] = "Joe";
names[2] = "Alice";
return View("Index", names);
}
}
}
Using a collection initializer allows the contents of the array to be specified as part of the construction, which implicitly provides the compiler with the size of the array, as shown in listing 5.23.
Listing 5.23 A collection initializer in the HomeController.cs file in the Controllers folder
namespace LanguageFeatures.Controllers {
public class HomeController : Controller {
public ViewResult Index() {
return View("Index", new string[] { "Bob", "Joe", "Alice" });
}
}
}
The array elements are specified between the { and } characters, which allows for a more concise definition of the collection and makes it possible to define a collection inline within a method call. The code in listing 5.23 has the same effect as the code in listing 5.22. Restart ASP.NET Core and request http://localhost:5000, and you will see the following output in the browser window:
Bob Joe Alice
Recent versions of C# tidy up the way collections that use indexes, such as dictionaries, are initialized. Listing 5.24 shows the Index action rewritten to define a collection using the traditional C# approach to initializing a dictionary.
Listing 5.24 Initializing a dictionary in the HomeController.cs file in the Controllers folder
namespace LanguageFeatures.Controllers {
public class HomeController : Controller {
public ViewResult Index() {
Dictionary<string, Product> products
= new Dictionary<string, Product> {
{
"Kayak",
new Product { Name = "Kayak", Price = 275M }
},
{
"Lifejacket",
new Product{ Name = "Lifejacket", Price = 48.95M }
}
};
return View("Index", products.Keys);
}
}
}
The syntax for initializing this type of collection relies too much on the { and } characters, especially when the collection values are created using object initializers. The latest versions of C# support a more natural approach to initializing indexed collections that is consistent with the way that values are retrieved or modified once the collection has been initialized, as shown in listing 5.25.
Listing 5.25 Using collection initializer syntax in the HomeController.cs file in the Controllers folder
namespace LanguageFeatures.Controllers {
public class HomeController : Controller {
public ViewResult Index() {
Dictionary<string, Product> products
= new Dictionary<string, Product> {
["Kayak"] = new Product { Name = "Kayak", Price = 275M },
["Lifejacket"] = new Product { Name = "Lifejacket",
Price = 48.95M }
};
return View("Index", products.Keys);
}
}
}
The effect is the same—to create a dictionary whose keys are Kayak and Lifejacket and whose values are Product objects—but the elements are created using the index notation that is used for other collection operations. Restart ASP.NET Core and request http://localhost:5000, and you will see the following results in the browser:
Kayak Lifejacket
The example in listing 5.25 is still verbose and declares the collection type when defining the variable and creating an instance with the new keyword:
...
Dictionary<string, Product> products = new Dictionary<string, Product> {
["Kayak"] = new Product { Name = "Kayak", Price = 275M },
["Lifejacket"] = new Product { Name = "Lifejacket", Price = 48.95M }
};
...
This can be simplified using a target-typed new expression, as shown in listing 5.26.
Listing 5.26 Using a target-typed new expression in the HomeController.cs file in the Controllers folder
namespace LanguageFeatures.Controllers {
public class HomeController : Controller {
public ViewResult Index() {
Dictionary<string, Product> products = new () {
["Kayak"] = new Product { Name = "Kayak", Price = 275M },
["Lifejacket"] = new Product { Name = "Lifejacket",
Price = 48.95M }
};
return View("Index", products.Keys);
}
}
}
The type can be replaced with new() when the compiler can determine which type is required and constructor arguments are provided as arguments to the new method. Creating instances with the new() expression works only when the compiler can determine which type is required. Restart ASP.NET Core and request http://localhost:5000, and you will see the following results in the browser:
Kayak Lifejacket
One of the most useful recent additions to C# is support for pattern matching, which can be used to test that an object is of a specific type or has specific characteristics. This is another form of syntactic sugar, and it can dramatically simplify complex blocks of conditional statements. The is keyword is used to perform a type test, as demonstrated in listing 5.27.
Listing 5.27 Testing a type in the HomeController.cs file in the Controllers folder
namespace LanguageFeatures.Controllers {
public class HomeController : Controller {
public ViewResult Index() {
object[] data = new object[] { 275M, 29.95M,
"apple", "orange", 100, 10 };
decimal total = 0;
for (int i = 0; i < data.Length; i++) {
if (data[i] is decimal d) {
total += d;
}
}
return View("Index", new string[] { $"Total: {total:C2}" });
}
}
}
The is keyword performs a type check and, if a value is of the specified type, will assign the value to a new variable, like this:
...
if (data[i] is decimal d) {
...
This expression evaluates as true if the value stored in data[i] is a decimal. The value of data[i] will be assigned to the variable d, which allows it to be used in subsequent statements without needing to perform any type conversions. The is keyword will match only the specified type, which means that only two of the values in the data array will be processed (the other items in the array are string and int values). If you run the application, you will see the following output in the browser window:
Total: $304.95
Pattern matching can also be used in switch statements, which support the when keyword for restricting when a value is matched by a case statement, as shown in listing 5.28.
Listing 5.28 Pattern matching in the HomeController.cs file in the Controllers folder
namespace LanguageFeatures.Controllers {
public class HomeController : Controller {
public ViewResult Index() {
object[] data = new object[] { 275M, 29.95M,
"apple", "orange", 100, 10 };
decimal total = 0;
for (int i = 0; i < data.Length; i++) {
switch (data[i]) {
case decimal decimalValue:
total += decimalValue;
break;
case int intValue when intValue > 50:
total += intValue;
break;
}
}
return View("Index", new string[] { $"Total: {total:C2}" });
}
}
}
To match any value of a specific type, use the type and variable name in the case statement, like this:
... case decimal decimalValue: ...
This case statement matches any decimal value and assigns it to a new variable called decimalValue. To be more selective, the when keyword can be included, like this:
... case int intValue when intValue > 50: ...
This case statement matches int values and assigns them to a variable called intValue, but only when the value is greater than 50. Restart ASP.NET Core and request http://localhost:5000, and you will see the following output in the browser window:
Total: $404.95
Extension methods are a convenient way of adding methods to classes that you cannot modify directly, typically because they are provided by Microsoft or a third-party package. Listing 5.29 shows the definition of the ShoppingCart class, which I added to the Models folder in a class file called ShoppingCart.cs and which represents a collection of Product objects.
Listing 5.29 The contents of the ShoppingCart.cs file in the Models folder
namespace LanguageFeatures.Models {
public class ShoppingCart {
public IEnumerable<Product?>? Products { get; set; }
}
}
This is a simple class that acts as a wrapper around a sequence of Product objects (I only need a basic class for this example). Note the type of the Products property, which denotes a nullable enumerable of nullable Products, meaning that the Products property may be null and that any sequence of elements assigned to the property may contain null values.
Suppose I need to be able to determine the total value of the Product objects in the ShoppingCart class, but I cannot modify the class because it comes from a third party, and I do not have the source code. I can use an extension method to add the functionality I need.
Add a class file named MyExtensionMethods.cs in the Models folder and use it to define the class shown in listing 5.30.
Listing 5.30 The contents of the MyExtensionMethods.cs file in the Models folder
namespace LanguageFeatures.Models {
public static class MyExtensionMethods {
public static decimal TotalPrices(this ShoppingCart cartParam) {
decimal total = 0;
if (cartParam.Products != null) {
foreach (Product? prod in cartParam.Products) {
total += prod?.Price ?? 0;
}
}
return total;
}
}
}
Extension methods are static and are defined in static classes. Listing 5.30 defines a single extension method named TotalPrices. The this keyword in front of the first parameter marks TotalPrices as an extension method. The first parameter tells .NET which class the extension method can be applied to—ShoppingCart in this case. I can refer to the instance of the ShoppingCart that the extension method has been applied to by using the cartParam parameter. This extension method enumerates the Product objects in the ShoppingCart and returns the sum of the Product.Price property values. Listing 5.31 shows how I apply the extension method in the Home controller’s action method.
Listing 5.31 Applying an extension method in the HomeController.cs file in the Controllers folder
namespace LanguageFeatures.Controllers {
public class HomeController : Controller {
public ViewResult Index() {
ShoppingCart cart
= new ShoppingCart { Products = Product.GetProducts()};
decimal cartTotal = cart.TotalPrices();
return View("Index",
new string[] { $"Total: {cartTotal:C2}" });
}
}
}
The key statement is this one:
...
decimal cartTotal = cart.TotalPrices();
...
I call the TotalPrices method on a ShoppingCart object as though it were part of the ShoppingCart class, even though it is an extension method defined by a different class altogether. .NET will find extension classes if they are in the scope of the current class, meaning that they are part of the same namespace or in a namespace that is the subject of a using statement. Restart ASP.NET Core and request http://localhost:5000, which will produce the following output in the browser window:
Total: $323.95
Extension methods can also be applied to an interface, which allows me to call the extension method on all the classes that implement the interface. Listing 5.32 shows the ShoppingCart class updated to implement the IEnumerable<Product> interface.
Listing 5.32 Implementing an interface in the ShoppingCart.cs file in the Models folder
using System.Collections;
namespace LanguageFeatures.Models {
public class ShoppingCart : IEnumerable<Product?> {
public IEnumerable<Product?>? Products { get; set; }
public IEnumerator<Product?> GetEnumerator() =>
Products?.GetEnumerator()
?? Enumerable.Empty<Product?>().GetEnumerator();
IEnumerator IEnumerable.GetEnumerator() => GetEnumerator();
}
}
I can now update the extension method so that it deals with IEnumerable<Product?>, as shown in listing 5.33.
Listing 5.33 Updating an extension method in the MyExtensionMethods.cs file in the Models folder
namespace LanguageFeatures.Models {
public static class MyExtensionMethods {
public static decimal TotalPrices(
this IEnumerable<Product?> products) {
decimal total = 0;
foreach (Product? prod in products) {
total += prod?.Price ?? 0;
}
return total;
}
}
}
The first parameter type has changed to IEnumerable<Product?>, which means the foreach loop in the method body works directly on Product? objects. The change to using the interface means that I can calculate the total value of the Product objects enumerated by any IEnumerable<Product?>, which includes instances of ShoppingCart but also arrays of Product objects, as shown in listing 5.34.
Listing 5.34 Applying an extension method in the HomeController.cs file in the Controllers folder
namespace LanguageFeatures.Controllers {
public class HomeController : Controller {
public ViewResult Index() {
ShoppingCart cart
= new ShoppingCart { Products = Product.GetProducts()};
Product[] productArray = {
new Product {Name = "Kayak", Price = 275M},
new Product {Name = "Lifejacket", Price = 48.95M}
};
decimal cartTotal = cart.TotalPrices();
decimal arrayTotal = productArray.TotalPrices();
return View("Index", new string[] {
$"Cart Total: {cartTotal:C2}",
$"Array Total: {arrayTotal:C2}" });
}
}
}
Restart ASP.NET Core and request http://localhost:5000, which will produce the following output in the browser, demonstrating that I get the same result from the extension method, irrespective of how the Product objects are collected:
Cart Total: $323.95 Array Total: $323.95
The last thing I want to show you about extension methods is that they can be used to filter collections of objects. An extension method that operates on an IEnumerable<T> and that also returns an IEnumerable<T> can use the yield keyword to apply selection criteria to items in the source data to produce a reduced set of results. Listing 5.35 demonstrates such a method, which I have added to the MyExtensionMethods class.
Listing 5.35 A filtering extension method in the MyExtensionMethods.cs file in the Models folder
namespace LanguageFeatures.Models {
public static class MyExtensionMethods {
public static decimal TotalPrices(
this IEnumerable<Product?> products) {
decimal total = 0;
foreach (Product? prod in products) {
total += prod?.Price ?? 0;
}
return total;
}
public static IEnumerable<Product?> FilterByPrice(
this IEnumerable<Product?> productEnum,
decimal minimumPrice) {
foreach (Product? prod in productEnum) {
if ((prod?.Price ?? 0) >= minimumPrice) {
yield return prod;
}
}
}
}
}
This extension method, called FilterByPrice, takes an additional parameter that allows me to filter products so that Product objects whose Price property matches or exceeds the parameter are returned in the result. Listing 5.36 shows this method being used.
Listing 5.36 Using the filtering extension method in the HomeController.cs file in the Controllers folder
namespace LanguageFeatures.Controllers {
public class HomeController : Controller {
public ViewResult Index() {
ShoppingCart cart
= new ShoppingCart { Products = Product.GetProducts()};
Product[] productArray = {
new Product {Name = "Kayak", Price = 275M},
new Product {Name = "Lifejacket", Price = 48.95M},
new Product {Name = "Soccer ball", Price = 19.50M},
new Product {Name = "Corner flag", Price = 34.95M}
};
decimal arrayTotal =
productArray.FilterByPrice(20).TotalPrices();
return View("Index",
new string[] { $"Array Total: {arrayTotal:C2}" });
}
}
}
When I call the FilterByPrice method on the array of Product objects, only those that cost more than $20 are received by the TotalPrices method and used to calculate the total. If you run the application, you will see the following output in the browser window:
Total: $358.90
Lambda expressions are a feature that causes a lot of confusion, not least because the feature they simplify is also confusing. To understand the problem that is being solved, consider the FilterByPrice extension method that I defined in the previous section. This method is written so that it can filter Product objects by price, which means I must create a second method if I want to filter by name, as shown in listing 5.37.
Listing 5.37 Adding a filter method in the MyExtensionMethods.cs file in the Models folder
namespace LanguageFeatures.Models {
public static class MyExtensionMethods {
public static decimal TotalPrices(
this IEnumerable<Product?> products) {
decimal total = 0;
foreach (Product? prod in products) {
total += prod?.Price ?? 0;
}
return total;
}
public static IEnumerable<Product?> FilterByPrice(
this IEnumerable<Product?> productEnum,
decimal minimumPrice) {
foreach (Product? prod in productEnum) {
if ((prod?.Price ?? 0) >= minimumPrice) {
yield return prod;
}
}
}
public static IEnumerable<Product?> FilterByName(
this IEnumerable<Product?> productEnum,
char firstLetter) {
foreach (Product? prod in productEnum) {
if (prod?.Name?[0] == firstLetter) {
yield return prod;
}
}
}
}
}
Listing 5.38 shows the use of both filter methods applied in the controller to create two different totals.
Listing 5.38 Using two filter methods in the HomeController.cs file in the Controllers folder
namespace LanguageFeatures.Controllers {
public class HomeController : Controller {
public ViewResult Index() {
ShoppingCart cart
= new ShoppingCart { Products = Product.GetProducts()};
Product[] productArray = {
new Product {Name = "Kayak", Price = 275M},
new Product {Name = "Lifejacket", Price = 48.95M},
new Product {Name = "Soccer ball", Price = 19.50M},
new Product {Name = "Corner flag", Price = 34.95M}
};
decimal priceFilterTotal =
productArray.FilterByPrice(20).TotalPrices();
decimal nameFilterTotal =
productArray.FilterByName('S').TotalPrices();
return View("Index", new string[] {
$"Price Total: {priceFilterTotal:C2}",
$"Name Total: {nameFilterTotal:C2}" });
}
}
}
The first filter selects all the products with a price of $20 or more, and the second filter selects products whose name starts with the letter S. You will see the following output in the browser window if you run the example application:
Price Total: $358.90 Name Total: $19.50
I can repeat this process indefinitely to create filter methods for every property and every combination of properties that I am interested in. A more elegant approach is to separate the code that processes the enumeration from the selection criteria. C# makes this easy by allowing functions to be passed around as objects. Listing 5.39 shows a single extension method that filters an enumeration of Product objects but that delegates the decision about which ones are included in the results to a separate function.
Listing 5.39 Creating a general filter method in the MyExtensionMethods.cs file in the Models folder
namespace LanguageFeatures.Models {
public static class MyExtensionMethods {
public static decimal TotalPrices(
this IEnumerable<Product?> products) {
decimal total = 0;
foreach (Product? prod in products) {
total += prod?.Price ?? 0;
}
return total;
}
public static IEnumerable<Product?> FilterByPrice(
this IEnumerable<Product?> productEnum,
decimal minimumPrice) {
foreach (Product? prod in productEnum) {
if ((prod?.Price ?? 0) >= minimumPrice) {
yield return prod;
}
}
}
public static IEnumerable<Product?> Filter(
this IEnumerable<Product?> productEnum,
Func<Product?, bool> selector) {
foreach (Product? prod in productEnum) {
if (selector(prod)) {
yield return prod;
}
}
}
}
}
The second argument to the Filter method is a function that accepts a Product? object and that returns a bool value. The Filter method calls the function for each Product? object and includes it in the result if the function returns true. To use the Filter method, I can specify a method or create a stand-alone function, as shown in listing 5.40.
Listing 5.40 Using a function to filter objects in the HomeController.cs file in the Controllers folder
namespace LanguageFeatures.Controllers {
public class HomeController : Controller {
bool FilterByPrice(Product? p) {
return (p?.Price ?? 0) >= 20;
}
public ViewResult Index() {
ShoppingCart cart
= new ShoppingCart { Products = Product.GetProducts()};
Product[] productArray = {
new Product {Name = "Kayak", Price = 275M},
new Product {Name = "Lifejacket", Price = 48.95M},
new Product {Name = "Soccer ball", Price = 19.50M},
new Product {Name = "Corner flag", Price = 34.95M}
};
Func<Product?, bool> nameFilter = delegate (Product? prod) {
return prod?.Name?[0] == 'S';
};
decimal priceFilterTotal = productArray
.Filter(FilterByPrice)
.TotalPrices();
decimal nameFilterTotal = productArray
.Filter(nameFilter)
.TotalPrices();
return View("Index", new string[] {
$"Price Total: {priceFilterTotal:C2}",
$"Name Total: {nameFilterTotal:C2}" });
}
}
}
Neither approach is ideal. Defining methods like FilterByPrice clutters up a class definition. Creating a Func<Product?, bool> object avoids this problem but uses an awkward syntax that is hard to read and hard to maintain. It is this issue that lambda expressions address by allowing functions to be defined in a more elegant and expressive way, as shown in listing 5.41.
Listing 5.41 Using a lambda expression in the HomeController.cs file in the Controllers folder
namespace LanguageFeatures.Controllers {
public class HomeController : Controller {
//bool FilterByPrice(Product? p) {
// return (p?.Price ?? 0) >= 20;
//}
public ViewResult Index() {
ShoppingCart cart
= new ShoppingCart { Products = Product.GetProducts()};
Product[] productArray = {
new Product {Name = "Kayak", Price = 275M},
new Product {Name = "Lifejacket", Price = 48.95M},
new Product {Name = "Soccer ball", Price = 19.50M},
new Product {Name = "Corner flag", Price = 34.95M}
};
//Func<Product?, bool> nameFilter = delegate (Product? prod) {
// return prod?.Name?[0] == 'S';
//};
decimal priceFilterTotal = productArray
.Filter(p => (p?.Price ?? 0) >= 20)
.TotalPrices();
decimal nameFilterTotal = productArray
.Filter(p => p?.Name?[0] == 'S')
.TotalPrices();
return View("Index", new string[] {
$"Price Total: {priceFilterTotal:C2}",
$"Name Total: {nameFilterTotal:C2}" });
}
}
}
The lambda expressions are shown in bold. The parameters are expressed without specifying a type, which will be inferred automatically. The => characters are read aloud as “goes to” and link the parameter to the result of the lambda expression. In my examples, a Product? parameter called p goes to a bool result, which will be true if the Price property is equal or greater than 20 in the first expression or if the Name property starts with S in the second expression. This code works in the same way as the separate method and the function delegate but is more concise and is—for most people—easier to read.
Lambda expressions can be used to implement constructors, methods, and properties. In ASP.NET Core development, you will often end up with methods that contain a single statement that selects the data to display and the view to render. In listing 5.42, I have rewritten the Index action method so that it follows this common pattern.
Listing 5.42 Creating a common action pattern in the HomeController.cs file in the Controllers folder
namespace LanguageFeatures.Controllers {
public class HomeController : Controller {
public ViewResult Index() {
return View(Product.GetProducts().Select(p => p?.Name));
}
}
}
The action method gets a collection of Product objects from the static Product.GetProducts method and uses LINQ to project the values of the Name properties, which are then used as the view model for the default view. If you run the application, you will see the following output displayed in the browser window:
Kayak
There will be empty list items in the browser window as well because the GetProducts method includes a null reference in its results and one of the Product objects is created without a Name value, but that doesn’t matter for this section of the chapter.
When a constructor or method body consists of a single statement, it can be rewritten as a lambda expression, as shown in listing 5.43.
Listing 5.43 A lambda action method in the HomeController.cs file in the Controllers folder
namespace LanguageFeatures.Controllers {
public class HomeController : Controller {
public ViewResult Index() =>
View(Product.GetProducts().Select(p => p?.Name));
}
}
Lambda expressions for methods omit the return keyword and use => (goes to) to associate the method signature (including its arguments) with its implementation. The Index method shown in listing 5.43 works in the same way as the one shown in listing 5.42 but is expressed more concisely. The same basic approach can also be used to define properties. Listing 5.44 shows the addition of a property that uses a lambda expression to the Product class.
Listing 5.44 A lambda property in the Product.cs file in the Models folder
namespace LanguageFeatures.Models {
public class Product {
public string Name { get; set; } = string.Empty;
public decimal? Price { get; set; }
public bool NameBeginsWithS => Name.Length > 0 && Name[0] == 'S';
public static Product?[] GetProducts() {
Product kayak = new Product {
Name = "Kayak", Price = 275M
};
Product lifejacket = new Product {
//Name = "Lifejacket",
Price = 48.95M
};
return new Product?[] { kayak, lifejacket, null };
}
}
}
The var keyword allows you to define a local variable without explicitly specifying the variable type, as demonstrated by listing 5.45. This is called type inference, or implicit typing.
Listing 5.45 Using type inference in the HomeController.cs file in the Controllers folder
namespace LanguageFeatures.Controllers {
public class HomeController : Controller {
public ViewResult Index() {
var names = new[] { "Kayak", "Lifejacket", "Soccer ball" };
return View(names);
}
}
}
It is not that the names variable does not have a type; instead, I am asking the compiler to infer the type from the code. The compiler examines the array declaration and works out that it is a string array. Running the example produces the following output:
Kayak Lifejacket Soccer ball
By combining object initializers and type inference, I can create simple view model objects that are useful for transferring data between a controller and a view without having to define a class or struct, as shown in listing 5.46.
Listing 5.46 An anonymous type in the HomeController.cs file in the Controllers folder
namespace LanguageFeatures.Controllers {
public class HomeController : Controller {
public ViewResult Index() {
var products = new[] {
new { Name = "Kayak", Price = 275M },
new { Name = "Lifejacket", Price = 48.95M },
new { Name = "Soccer ball", Price = 19.50M },
new { Name = "Corner flag", Price = 34.95M }
};
return View(products.Select(p => p.Name));
}
}
}
Each of the objects in the products array is an anonymously typed object. This does not mean that it is dynamic in the sense that JavaScript variables are dynamic. It just means that the type definition will be created automatically by the compiler. Strong typing is still enforced. You can get and set only the properties that have been defined in the initializer, for example. Restart ASP.NET Core and request http://localhost:5000, and you will see the following output in the browser window:
Kayak Lifejacket Soccer ball Corner flag
The C# compiler generates the class based on the name and type of the parameters in the initializer. Two anonymously typed objects that have the same property names and types defined in the same order will be assigned to the same automatically generated class. This means that all the objects in the products array will have the same type because they define the same properties.
To demonstrate this, I have changed the output from the example in listing 5.47 so that it shows the type name rather than the value of the Name property.
Listing 5.47 Displaying the type name in the HomeController.cs file in the Controllers folder
namespace LanguageFeatures.Controllers {
public class HomeController : Controller {
public ViewResult Index() {
var products = new[] {
new { Name = "Kayak", Price = 275M },
new { Name = "Lifejacket", Price = 48.95M },
new { Name = "Soccer ball", Price = 19.50M },
new { Name = "Corner flag", Price = 34.95M }
};
return View(products.Select(p => p.GetType().Name));
}
}
}
All the objects in the array have been assigned the same type, which you can see if you run the example. The type name isn’t user-friendly but isn’t intended to be used directly, and you may see a different name than the one shown in the following output:
<>f__AnonymousType0`2 <>f__AnonymousType0`2 <>f__AnonymousType0`2 <>f__AnonymousType0`2
C# provides the ability to define default implementations for properties and methods defined by interfaces. This may seem like an odd feature because an interface is intended to be a description of features without specifying an implementation, but this addition to C# makes it possible to update interfaces without breaking the existing implementations of them.
Add a class file named IProductSelection.cs to the Models folder and use it to define the interface shown in listing 5.48.
Listing 5.48 The contents of the IProductSelection.cs file in the Models folder
namespace LanguageFeatures.Models {
public interface IProductSelection {
IEnumerable<Product>? Products { get; }
}
}
Update the ShoppingCart class to implement the new interface, as shown in listing 5.49.
Listing 5.49 Implementing an interface in the ShoppingCart.cs file in the Models folder
namespace LanguageFeatures.Models {
public class ShoppingCart : IProductSelection {
private List<Product> products = new();
public ShoppingCart(params Product[] prods) {
products.AddRange(prods);
}
public IEnumerable<Product>? Products { get => products; }
}
}
Listing 5.50 updates the Home controller so that it uses the ShoppingCart class.
Listing 5.50 Using an interface in the HomeController.cs file in the Controllers folder
namespace LanguageFeatures.Controllers {
public class HomeController : Controller {
public ViewResult Index() {
IProductSelection cart = new ShoppingCart(
new Product { Name = "Kayak", Price = 275M },
new Product { Name = "Lifejacket", Price = 48.95M },
new Product { Name = "Soccer ball", Price = 19.50M },
new Product { Name = "Corner flag", Price = 34.95M }
);
return View(cart.Products?.Select(p => p.Name));
}
}
}
This is the familiar use of an interface, and if you restart ASP.NET Core and request http://localhost:5000, you will see the following output in the browser:
Kayak Lifejacket Soccer ball Corner flag
If I want to add a new feature to the interface, I must locate and update all the classes that implement it, which can be difficult, especially if an interface is used by other development teams in their projects. This is where the default implementation feature can be used, allowing new features to be added to an interface, as shown in listing 5.51.
Listing 5.51 Adding a feature in the IProductSelection.cs file in the Models folder
namespace LanguageFeatures.Models {
public interface IProductSelection {
IEnumerable<Product>? Products { get; }
IEnumerable<string>? Names => Products?.Select(p => p.Name);
}
}
The listing defines a Names property and provides a default implementation, which means that consumers of the IProductSelection interface can use the Names property even if it isn’t defined by implementation classes, as shown in listing 5.52.
Listing 5.52 Using a default implementation in the HomeController.cs file in the Controllers folder
namespace LanguageFeatures.Controllers {
public class HomeController : Controller {
public ViewResult Index() {
IProductSelection cart = new ShoppingCart(
new Product { Name = "Kayak", Price = 275M },
new Product { Name = "Lifejacket", Price = 48.95M },
new Product { Name = "Soccer ball", Price = 19.50M },
new Product { Name = "Corner flag", Price = 34.95M }
);
return View(cart.Names);
}
}
}
The ShoppingCart class has not been modified, but the Index method can use the default implementation of the Names property. Restart ASP.NET Core and request http://localhost:5000, and you will see the following output in the browser:
Kayak Lifejacket Soccer ball Corner flag
Asynchronous methods perform work in the background and notify you when they are complete, allowing your code to take care of other business while the background work is performed. Asynchronous methods are an important tool in removing bottlenecks from code and allow applications to take advantage of multiple processors and processor cores to perform work in parallel.
In ASP.NET Core, asynchronous methods can be used to improve the overall performance of an application by allowing the server more flexibility in the way that requests are scheduled and executed. Two C# keywords—async and await—are used to perform work asynchronously.
C# and .NET have excellent support for asynchronous methods, but the code has tended to be verbose, and developers who are not used to parallel programming often get bogged down by the unusual syntax. To create an example, add a class file called MyAsyncMethods.cs to the Models folder and add the code shown in listing 5.53.
Listing 5.53 The contents of the MyAsyncMethods.cs file in the Models folder
namespace LanguageFeatures.Models {
public class MyAsyncMethods {
public static Task<long?> GetPageLength() {
HttpClient client = new HttpClient();
var httpTask = client.GetAsync("http://manning.com");
return httpTask.ContinueWith((Task<HttpResponseMessage>
antecedent) => {
return antecedent.Result.Content.Headers.ContentLength;
});
}
}
}
This method uses a System.Net.Http.HttpClient object to request the contents of the Manning home page and returns its length. .NET represents work that will be done asynchronously as a Task. Task objects are strongly typed based on the result that the background work produces. So, when I call the HttpClient.GetAsync method, what I get back is a Task<HttpResponseMessage>. This tells me that the request will be performed in the background and that the result of the request will be an HttpResponseMessage object.
The part that most programmers get bogged down with is the continuation, which is the mechanism by which you specify what you want to happen when the task is complete. In the example, I have used the ContinueWith method to process the HttpResponseMessage object I get from the HttpClient.GetAsync method, which I do with a lambda expression that returns the value of a property that contains the length of the content I get from the Manning web server. Here is the continuation code:
...
return httpTask.ContinueWith((Task<HttpResponseMessage> antecedent) => {
return antecedent.Result.Content.Headers.ContentLength;
});
...
Notice that I use the return keyword twice. This is the part that causes confusion. The first use of the return keyword specifies that I am returning a Task<HttpResponseMessage> object, which, when the task is complete, will return the length of the ContentLength header. The ContentLength header returns a long? result (a nullable long value), and this means the result of my GetPageLength method is Task<long?>, like this:
...
public static Task<long?> GetPageLength() {
...
Do not worry if this does not make sense—you are not alone in your confusion. It is for this reason that Microsoft added keywords to C# to simplify asynchronous methods.
Microsoft introduced two keywords to C# that simplify using asynchronous methods like HttpClient.GetAsync. The keywords are async and await, and you can see how I have used them to simplify my example method in listing 5.54.
Listing 5.54 Using the async and await keywords in the MyAsyncMethods.cs file in the Models folder
namespace LanguageFeatures.Models {
public class MyAsyncMethods {
public async static Task<long?> GetPageLength() {
HttpClient client = new HttpClient();
var httpMessage = await client.GetAsync("http://manning.com");
return httpMessage.Content.Headers.ContentLength;
}
}
}
I used the await keyword when calling the asynchronous method. This tells the C# compiler that I want to wait for the result of the Task that the GetAsync method returns and then carry on executing other statements in the same method.
Applying the await keyword means I can treat the result from the GetAsync method as though it were a regular method and just assign the HttpResponseMessage object that it returns to a variable. Even better, I can then use the return keyword in the normal way to produce a result from another method—in this case, the value of the ContentLength property. This is a much more natural technique, and it means I do not have to worry about the ContinueWith method and multiple uses of the return keyword.
When you use the await keyword, you must also add the async keyword to the method signature, as I have done in the example. The method result type does not change—my example GetPageLength method still returns a Task<long?>. This is because await and async are implemented using some clever compiler tricks, meaning that they allow a more natural syntax, but they do not change what is happening in the methods to which they are applied. Someone who is calling my GetPageLength method still has to deal with a Task<long?> result because there is still a background operation that produces a nullable long—although, of course, that programmer can also choose to use the await and async keywords.
This pattern follows through into the controller, which makes it easy to write asynchronous action methods, as shown in listing 5.55.
Listing 5.55 An asynchronous action method in the HomeController.cs file in the Controllers folder
namespace LanguageFeatures.Controllers {
public class HomeController : Controller {
public async Task<ViewResult> Index() {
long? length = await MyAsyncMethods.GetPageLength();
return View(new string[] { $"Length: {length}" });
}
}
}
I have changed the result of the Index action method to Task<ViewResult>, which declares that the action method will return a Task that will produce a ViewResult object when it completes, which will provide details of the view that should be rendered and the data that it requires. I have added the async keyword to the method’s definition, which allows me to use the await keyword when calling the MyAsyncMethods.GetPathLength method. .NET takes care of dealing with the continuations, and the result is asynchronous code that is easy to write, easy to read, and easy to maintain. Restart ASP.NET Core and request http://localhost:5000, and you will see output similar to the following (although with a different length since the content of the Manning website changes often):
Length: 472922
An asynchronous enumerable describes a sequence of values that will be generated over time. To demonstrate the issue that this feature addresses, listing 5.56 adds a method to the MyAsyncMethods class.
Listing 5.56 Adding a method in the MyAsyncMethods.cs file in the Models folder
namespace LanguageFeatures.Models {
public class MyAsyncMethods {
public async static Task<long?> GetPageLength() {
HttpClient client = new HttpClient();
var httpMessage = await client.GetAsync("http://manning.com");
return httpMessage.Content.Headers.ContentLength;
}
public static async Task<IEnumerable<long?>>
GetPageLengths(List<string> output,
params string[] urls) {
List<long?> results = new List<long?>();
HttpClient client = new HttpClient();
foreach (string url in urls) {
output.Add($"Started request for {url}");
var httpMessage = await client.GetAsync($"http://{url}");
results.Add(httpMessage.Content.Headers.ContentLength);
output.Add($"Completed request for {url}");
}
return results;
}
}
}
The GetPageLengths method makes HTTP requests to a series of websites and gets their length. The requests are performed asynchronously, but there is no way to feed the results back to the method’s caller as they arrive. Instead, the method waits until all the requests are complete and then returns all the results in one go. In addition to the URLs that will be requested, this method accepts a List<string> to which I add messages in order to highlight how the code works. Listing 5.57 updates the Index action method of the Home controller to use the new method.
Listing 5.57 Using the new method in the HomeController.cs file in the Controllers folder
namespace LanguageFeatures.Controllers {
public class HomeController : Controller {
public async Task<ViewResult> Index() {
List<string> output = new List<string>();
foreach (long? len in await MyAsyncMethods.GetPageLengths(
output,
"manning.com", "microsoft.com", "amazon.com")) {
output.Add($"Page length: { len}");
}
return View(output);
}
}
}
The action method enumerates the sequence produced by the GetPageLengths method and adds each result to the List<string> object, which produces an ordered sequence of messages showing the interaction between the foreach loop in the Index method that processes the results and the foreach loop in the GetPageLengths method that generates them. Restart ASP.NET Core and request http://localhost:5000, and you will see the following output in the browser (which may take several seconds to appear and may have different page lengths):
Started request for manning.com Completed request for manning.com Started request for microsoft.com Completed request for microsoft.com Started request for amazon.com Completed request for amazon.com Page length: 26973 Page length: 199526 Page length: 357777
You can see that the Index action method doesn’t receive the results until all the HTTP requests have been completed. This is the problem that the asynchronous enumerable feature solves, as shown in listing 5.58.
Listing 5.58 Using an asynchronous enumerable in the MyAsyncMethods.cs file in the Models folder
namespace LanguageFeatures.Models {
public class MyAsyncMethods {
public async static Task<long?> GetPageLength() {
HttpClient client = new HttpClient();
var httpMessage = await client.GetAsync("http://manning.com");
return httpMessage.Content.Headers.ContentLength;
}
public static async IAsyncEnumerable<long?>
GetPageLengths(List<string> output,
params string[] urls) {
HttpClient client = new HttpClient();
foreach (string url in urls) {
output.Add($"Started request for {url}");
var httpMessage = await client.GetAsync($"http://{url}");
output.Add($"Completed request for {url}");
yield return httpMessage.Content.Headers.ContentLength;
}
}
}
}
The methods result is IAsyncEnumerable<long?>, which denotes an asynchronous sequence of nullable long values. This result type has special support in .NET Core and works with standard yield return statements, which isn’t otherwise possible because the result constraints for asynchronous methods conflict with the yield keyword. Listing 5.59 updates the controller to use the revised method.
Listing 5.59 Using an asynchronous enumerable in the HomeController.cs file in the Controllers folder
namespace LanguageFeatures.Controllers {
public class HomeController : Controller {
public async Task<ViewResult> Index() {
List<string> output = new List<string>();
await foreach (long? len in MyAsyncMethods.GetPageLengths(
output,
"manning.com", "microsoft.com", "amazon.com")) {
output.Add($"Page length: { len}");
}
return View(output);
}
}
}
The difference is that the await keyword is applied before the foreach keyword and not before the call to the async method. Restart ASP.NET Core and request http://localhost:5000; once the HTTP requests are complete, you will see that the order of the response messages has changed, like this:
Started request for manning.com Completed request for manning.com Page length: 26973 Started request for microsoft.com Completed request for microsoft.com Page length: 199528 Started request for amazon.com Completed request for amazon.com Page length: 441398
The controller receives the next result in the sequence as it is produced. As I explain in chapter 19, ASP.NET Core has special support for using IAsyncEnumerable<T> results in web services, allowing data values to be serialized as the values in the sequence are generated.
There are many tasks in web application development in which you need to refer to the name of an argument, variable, method, or class. Common examples include when you throw an exception or create a validation error when processing input from the user. The traditional approach has been to use a string value hard-coded with the name, as shown in listing 5.60.
Listing 5.60 Hard-coding a name in the HomeController.cs file in the Controllers folder
namespace LanguageFeatures.Controllers {
public class HomeController : Controller {
public ViewResult Index() {
var products = new[] {
new { Name = "Kayak", Price = 275M },
new { Name = "Lifejacket", Price = 48.95M },
new { Name = "Soccer ball", Price = 19.50M },
new { Name = "Corner flag", Price = 34.95M }
};
return View(products.Select(p =>
$"Name: {p.Name}, Price: {p.Price}"));
}
}
}
The call to the LINQ Select method generates a sequence of strings, each of which contains a hard-coded reference to the Name and Price properties. Restart ASP.NET Core and request http://localhost:5000, and you will see the following output in the browser window:
Name: Kayak, Price: 275 Name: Lifejacket, Price: 48.95 Name: Soccer ball, Price: 19.50 Name: Corner flag, Price: 34.95
This approach is prone to errors, either because the name was mistyped or because the code was refactored and the name in the string isn’t correctly updated. C# supports the nameof expression, in which the compiler takes responsibility for producing a name string, as shown in listing 5.61.
Listing 5.61 Using nameof expressions in the HomeController.cs file in the Controllers folder
namespace LanguageFeatures.Controllers {
public class HomeController : Controller {
public ViewResult Index() {
var products = new[] {
new { Name = "Kayak", Price = 275M },
new { Name = "Lifejacket", Price = 48.95M },
new { Name = "Soccer ball", Price = 19.50M },
new { Name = "Corner flag", Price = 34.95M }
};
return View(products.Select(p =>
$"{nameof(p.Name)}: {p.Name}, {nameof(p.Price)}: {p.Price}"));
}
}
}
The compiler processes a reference such as p.Name so that only the last part is included in the string, producing the same output as in previous examples. There is IntelliSense support for nameof expressions, so you will be prompted to select references, and expressions will be correctly updated when you refactor code. Since the compiler is responsible for dealing with nameof, using an invalid reference causes a compiler error, which prevents incorrect or outdated references from escaping notice.
Top-level statements allow code to be defined outside of a class, which can make ASP.NET Core configuration more concise.
Global using statements take effect throughout a project so that namespaces don’t have to be imported in individual C# files.
Null state analysis ensures that null values are only assigned to nullable types and that values are read safely.
String interpolation allows data values to be composed into strings.
Object initialization patterns simplify the code required to create objects.
Target-typed expressions omit the type name from the new statement.
Pattern matching is used to execute code when a value has specific characteristics.
Extension methods allow new functionality to be added to a type without needing to modify the class file.
Lambda expressions are a concise way to express functions.
Interfaces can be defined with default implementations, which means it is possible to modify the interface without breaking implementation classes.
The async and await keywords are used to create asynchronous methods without needing to work directly with tasks and continuations.
This chapter covers
In this chapter, I demonstrate how to unit test ASP.NET Core applications. Unit testing is a form of testing in which individual components are isolated from the rest of the application so their behavior can be thoroughly validated. ASP.NET Core has been designed to make it easy to create unit tests, and there is support for a wide range of unit testing frameworks. I show you how to set up a unit test project and describe the process for writing and running tests. Table 6.1 provides a guide to the chapter.
Table 6.1 Chapter guide
|
Problem |
Solution |
Listing |
|---|---|---|
|
Creating a unit test project |
Use the |
8 |
|
Creating an XUnit test |
Create a class with methods decorated with the |
10 |
|
Running unit tests |
Use the Visual Studio or Visual Studio Code test runners or use the |
12 |
|
Isolating a component for testing |
Create mock implementations of the objects that the component under test requires. |
13–20 |
To prepare for this chapter, I need to create a simple ASP.NET Core project. Open a new PowerShell command prompt using the Windows Start menu, navigate to a convenient location, and run the commands shown in listing 6.1.
Listing 6.1 Creating the example project
dotnet new globaljson --sdk-version 7.0.100 --output Testing/SimpleApp dotnet new web --no-https --output Testing/SimpleApp --framework net7.0 dotnet new sln -o Testing dotnet sln Testing add Testing/SimpleApp
These commands create a new project named SimpleApp using the web template, which contains the minimal configuration for ASP.NET Core applications. The project folder is contained within a solution folder also called Testing.
If you are using Visual Studio, select File > Open > Project/Solution, select the Testing.sln file in the Testing folder, and click the Open button to open the solution file and the project it references. If you are using Visual Studio Code, select File > Open Folder, navigate to the Testing folder, and click the Select Folder button.
Set the port on which ASP.NET Core will receive HTTP requests by editing the launchSettings.json file in the Properties folder, as shown in listing 6.2.
Listing 6.2 Setting the HTTP port in the launchSettings.json file in the Properties folder
{
"iisSettings": {
"windowsAuthentication": false,
"anonymousAuthentication": true,
"iisExpress": {
"applicationUrl": "http://localhost:5000",
"sslPort": 0
}
},
"profiles": {
"SimpleApp": {
"commandName": "Project",
"dotnetRunMessages": true,
"launchBrowser": true,
"applicationUrl": "http://localhost:5000",
"environmentVariables": {
"ASPNETCORE_ENVIRONMENT": "Development"
}
},
"IIS Express": {
"commandName": "IISExpress",
"launchBrowser": true,
"environmentVariables": {
"ASPNETCORE_ENVIRONMENT": "Development"
}
}
}
}
As I explained in chapter 1, ASP.NET Core supports different application frameworks, but I am going to continue using the MVC Framework in this chapter. I introduce the other frameworks in the SportsStore application that I start to build in chapter 7, but for the moment, the MVC Framework gives me a foundation for demonstrating how to perform unit testing that is familiar from earlier examples. Add the statements shown in listing 6.3 to the Program.cs file in the SimpleApp folder.
Listing 6.3 Enabling the MVC Framework in the Program.cs file in the SimpleApp folder
var builder = WebApplication.CreateBuilder(args);
builder.Services.AddControllersWithViews();
var app = builder.Build();
//app.MapGet("/", () => "Hello World!");
app.MapDefaultControllerRoute();
app.Run();
Now that the MVC Framework is set up, I can add the application components that I will use to run tests.
Creating the data model
I started by creating a simple model class so that I can have some data to work with. I added a folder called Models and created a class file called Product.cs within it, which I used to define the class shown in listing 6.4.
Listing 6.4 The contents of the Product.cs file in the Models folder
namespace SimpleApp.Models {
public class Product {
public string Name { get; set; } = string.Empty;
public decimal? Price { get; set; }
public static Product[] GetProducts() {
Product kayak = new Product {
Name = "Kayak", Price = 275M
};
Product lifejacket = new Product {
Name = "Lifejacket", Price = 48.95M
};
return new Product[] { kayak, lifejacket };
}
}
}
The Product class defines Name and Price properties, and there is a static method called GetProducts that returns a Products array.
Creating the controller and view
For the examples in this chapter, I use a simple controller class to demonstrate different language features. I created a Controllers folder and added to it a class file called HomeController.cs, the contents of which are shown in listing 6.5.
Listing 6.5 The contents of the HomeController.cs file in the Controllers folder
using Microsoft.AspNetCore.Mvc;
using SimpleApp.Models;
namespace SimpleApp.Controllers {
public class HomeController : Controller {
public ViewResult Index() {
return View(Product.GetProducts());
}
}
}
The Index action method tells ASP.NET Core to render the default view and provides it with the Product objects obtained from the static Product.GetProducts method. To create the view for the action method, I added a Views/Home folder (by creating a Views folder and then adding a Home folder within it) and added a Razor View called Index.cshtml, with the contents shown in listing 6.6.
Listing 6.6 The contents of the Index.cshtml file in the Views/Home folder
@using SimpleApp.Models
@model IEnumerable<Product>
@{ Layout = null; }
<!DOCTYPE html>
<html>
<head>
<meta name="viewport" content="width=device-width" />
<title>Simple App</title>
</head>
<body>
<ul>
@foreach (Product p in Model ?? Enumerable.Empty<Product>()) {
<li>Name: @p.Name, Price: @p.Price</li>
}
</ul>
</body>
</html>
Start ASP.NET Core by running the command shown in listing 6.7 in the SimpleApp folder.
Listing 6.7 Running the example application
dotnet run
Request http://localhost:5000, and you will see the output shown in figure 6.1.
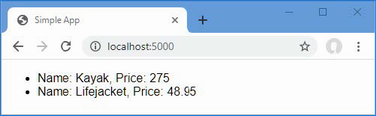
Figure 6.1 Running the example application
For ASP.NET Core applications, you generally create a separate Visual Studio project to hold the unit tests, each of which is defined as a method in a C# class. Using a separate project means you can deploy your application without also deploying the tests. The .NET Core SDK includes templates for unit test projects using three popular test tools, as described in table 6.2.
Table 6.2 The unit test project tools
|
Name |
Description |
|---|---|
|
|
This template creates a project configured for the MS Test framework, which is produced by Microsoft. |
|
|
This template creates a project configured for the NUnit framework. |
|
|
This template creates a project configured for the XUnit framework. |
These testing frameworks have largely the same feature set and differ only in how they are implemented and how they integrate into third-party testing environments. I recommend starting with XUnit if you do not have an established preference, largely because it is the test framework that I find easiest to work with.
The convention is to name the unit test project <ApplicationName>.Tests. Run the commands shown in listing 6.8 in the Testing folder to create the XUnit test project named SimpleApp.Tests, add it to the solution file, and create a reference between projects so the unit tests can be applied to the classes defined in the SimpleApp project.
Listing 6.8 Creating the unit test project
dotnet new xunit -o SimpleApp.Tests --framework net7.0 dotnet sln add SimpleApp.Tests dotnet add SimpleApp.Tests reference SimpleApp
If you are using Visual Studio, you will be prompted to reload the solution, which will cause the new unit test project to be displayed in the Solution Explorer, alongside the existing project. You may find that Visual Studio Code doesn’t build the new project. If that happens, select Terminal > Configure Default Build Task, select “build” from the list, and, if prompted, select .NET Core from the list of environments.
Removing the default test class
The project template adds a C# class file to the test project, which will confuse the results of later examples. Either delete the UnitTest1.cs file from the SimpleApp.Tests folder using the Solution Explorer or File Explorer pane or run the command shown in listing 6.9 in the Testing folder.
Listing 6.9 Removing the default test class file
Remove-Item SimpleApp.Tests/UnitTest1.cs
Now that all the preparation is complete, I can write some tests. To get started, I added a class file called ProductTests.cs to the SimpleApp.Tests project and used it to define the class shown in listing 6.10. This is a simple class, but it contains everything required to get started with unit testing.
Listing 6.10 The contents of the ProductTests.cs file in the SimpleApp.Tests folder
using SimpleApp.Models;
using Xunit;
namespace SimpleApp.Tests {
public class ProductTests {
[Fact]
public void CanChangeProductName() {
// Arrange
var p = new Product { Name = "Test", Price = 100M };
// Act
p.Name = "New Name";
//Assert
Assert.Equal("New Name", p.Name);
}
[Fact]
public void CanChangeProductPrice() {
// Arrange
var p = new Product { Name = "Test", Price = 100M };
// Act
p.Price = 200M;
//Assert
Assert.Equal(100M, p.Price);
}
}
}
There are two unit tests in the ProductTests class, each of which tests a behavior of the Product model class from the SimpleApp project. A test project can contain many classes, each of which can contain many unit tests.
Conventionally, the name of the test methods describes what the test does, and the name of the class describes what is being tested. This makes it easier to structure the tests in a project and to understand what the results of all the tests are when they are run by Visual Studio. The name ProductTests indicates that the class contains tests for the Product class, and the method names indicate that they test the ability to change the name and price of a Product object.
The Fact attribute is applied to each method to indicate that it is a test. Within the method body, a unit test follows a pattern called arrange, act, assert (A/A/A). Arrange refers to setting up the conditions for the test, act refers to performing the test, and assert refers to verifying that the result was the one that was expected.
The arrange and act sections of these tests are regular C# code, but the assert section is handled by xUnit.net, which provides a class called Assert, whose methods are used to check that the outcome of an action is the one that is expected.
The methods of the Assert class are static and are used to perform different kinds of comparison between the expected and actual results. Table 6.3 shows the commonly used Assert methods.
Table 6.3 Commonly used xUnit.net assert methods
|
Name |
Description |
|---|---|
|
|
This method asserts that the result is equal to the expected outcome. There are overloaded versions of this method for comparing different types and for comparing collections. There is also a version of this method that accepts an additional argument of an object that implements the |
|
|
This method asserts that the result is not equal to the expected outcome. |
|
|
This method asserts that the result is |
|
|
This method asserts that the result is |
|
|
This method asserts that the result is of a specific type. |
|
|
This method asserts that the result is not a specific type. |
|
|
This method asserts that the result is |
|
|
This method asserts that the result is not |
|
|
This method asserts that the result falls between |
|
|
This method asserts that the result falls outside |
|
|
This method asserts that the specified expression throws a specific exception type. |
Each Assert method allows different types of comparison to be made and throws an exception if the result is not what was expected. The exception is used to indicate that a test has failed. In the tests in listing 6.10, I used the Equal method to determine whether the value of a property has been changed correctly.
...
Assert.Equal("New Name", p.Name);
...
Visual Studio includes support for finding and running unit tests through the Test Explorer window, which is available through the Test > Test Explorer menu and is shown in figure 6.2.
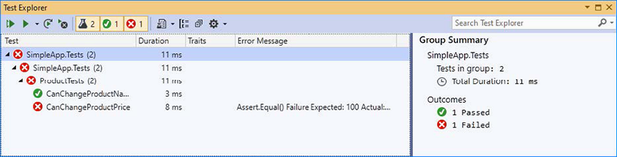
Figure 6.2 The Visual Studio Test Explorer
Run the tests by clicking the Run All Tests button in the Test Explorer window (it is the button that shows two arrows and is the first button in the row at the top of the window). As noted, the CanChangeProductPrice test contains an error that causes the test to fail, which is clearly indicated in the test results shown in the figure.
Visual Studio Code detects tests and allows them to be run using the code lens feature, which displays details about code features in the editor. To run all the tests in the ProductTests class, click Run All Tests in the code editor when the unit test class is open, as shown in figure 6.3.
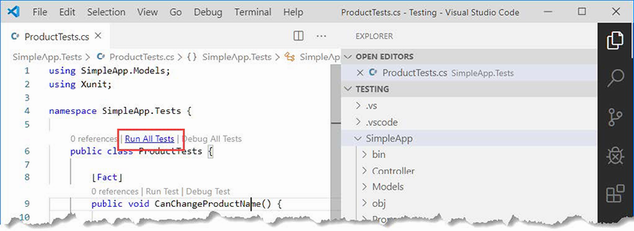
Figure 6.3 Running tests with the Visual Studio Code code lens feature
Visual Studio Code runs the tests using the command-line tools that I describe in the following section, and the results are displayed as text in a terminal window.
To run the tests in the project, run the command shown in listing 6.11 in the Testing folder.
Listing 6.11 Running unit tests
dotnet test
The tests are discovered and executed, producing the following results, which show the deliberate error that I introduced earlier:
Starting test execution, please wait...
A total of 1 test files matched the specified pattern.
[xUnit.net 00:00:00.81]
SimpleApp.Tests.ProductTests.CanChangeProductPrice [FAIL]
Failed SimpleApp.Tests.ProductTests.CanChangeProductPrice [4 ms]
Error Message:
Assert.Equal() Failure
Expected: 100
Actual: 200
Stack Trace:
at SimpleApp.Tests.ProductTests.CanChangeProductPrice() in
C:\Testing\SimpleApp.Tests\ProductTests.cs:line 31
at System.RuntimeMethodHandle.InvokeMethod(Object target, Void**
arguments, Signature sig, Boolean isConstructor)
at System.Reflection.MethodInvoker.Invoke(Object obj, IntPtr* args,
BindingFlags invokeAttr)
Failed! - Failed: 1, Passed: 1, Skipped: 0,
Total: 2, Duration: 26 ms - SimpleApp.Tests.dll (net7.0)
The problem with the unit test is with the arguments to the Assert.Equal method, which compares the test result to the original Price property value rather than the value it has been changed to. Listing 6.12 corrects the problem.
Listing 6.12 Correcting a test in the ProductTests.cs file in the SimpleApp.Tests folder
using SimpleApp.Models;
using Xunit;
namespace SimpleApp.Tests {
public class ProductTests {
[Fact]
public void CanChangeProductName() {
// Arrange
var p = new Product { Name = "Test", Price = 100M };
// Act
p.Name = "New Name";
//Assert
Assert.Equal("New Name", p.Name);
}
[Fact]
public void CanChangeProductPrice() {
// Arrange
var p = new Product { Name = "Test", Price = 100M };
// Act
p.Price = 200M;
//Assert
Assert.Equal(200M, p.Price);
}
}
}
Run the tests again, and you will see they all pass. If you are using Visual Studio, you can click the Run Failed Tests button, which will execute only the tests that failed, as shown in figure 6.4.
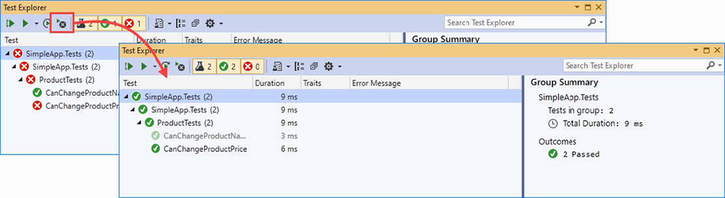
Figure 6.4 Running only failed tests
Writing unit tests for model classes like Product is easy. Not only is the Product class simple, but it is self-contained, which means that when I perform an action on a Product object, I can be confident that I am testing the functionality provided by the Product class.
The situation is more complicated with other components in an ASP.NET Core application because there are dependencies between them. The next set of tests that I define will operate on the controller, examining the sequence of Product objects that are passed between the controller and the view.
When comparing objects instantiated from custom classes, you will need to use the xUnit.net Assert.Equal method that accepts an argument that implements the IEqualityComparer<T> interface so that the objects can be compared. My first step is to add a class file called Comparer.cs to the unit test project and use it to define the helper classes shown in listing 6.13.
Listing 6.13 The contents of the Comparer.cs file in the SimpleApp.Tests folder
using System;
using System.Collections.Generic;
namespace SimpleApp.Tests {
public class Comparer {
public static Comparer<U?> Get<U>(Func<U?, U?, bool> func) {
return new Comparer<U?>(func);
}
}
public class Comparer<T> : Comparer, IEqualityComparer<T> {
private Func<T?, T?, bool> comparisonFunction;
public Comparer(Func<T?, T?, bool> func) {
comparisonFunction = func;
}
public bool Equals(T? x, T? y) {
return comparisonFunction(x, y);
}
public int GetHashCode(T obj) {
return obj?.GetHashCode() ?? 0;
}
}
}
These classes will allow me to create IEqualityComparer<T> objects using lambda expressions rather than having to define a new class for each type of comparison that I want to make. This isn’t essential, but it will simplify the code in my unit test classes and make them easier to read and maintain.
Now that I can easily make comparisons, I can illustrate the problem of dependencies between components in the application. I added a new class called HomeControllerTests.cs to the SimpleApp.Tests folder and used it to define the unit test shown in listing 6.14.
Listing 6.14 The HomeControllerTests.cs file in the SimpleApp.Tests folder
using Microsoft.AspNetCore.Mvc;
using System.Collections.Generic;
using SimpleApp.Controllers;
using SimpleApp.Models;
using Xunit;
namespace SimpleApp.Tests {
public class HomeControllerTests {
[Fact]
public void IndexActionModelIsComplete() {
// Arrange
var controller = new HomeController();
Product[] products = new Product[] {
new Product { Name = "Kayak", Price = 275M },
new Product { Name = "Lifejacket", Price = 48.95M}
};
// Act
var model = (controller.Index() as ViewResult)?.ViewData.Model
as IEnumerable<Product>;
// Assert
Assert.Equal(products, model,
Comparer.Get<Product>((p1, p2) => p1?.Name == p2?.Name
&& p1?.Price == p2?.Price));
}
}
}
The unit test creates an array of Product objects and checks that they correspond to the ones the Index action method provides as the view model. (Ignore the act section of the test for the moment; I explain the ViewResult class in chapters 21 and 22. For the moment, it is enough to know that I am getting the model data returned by the Index action method.)
The test passes, but it isn’t a useful result because the Product data that I am testing is coming from the hardwired objects’ Product class. I can’t write a test to make sure that the controller behaves correctly when there are more than two Product objects, for example, or if the Price property of the first object has a decimal fraction. The overall effect is that I am testing the combined behavior of the HomeController and Product classes and only for the specific hardwired objects.
Unit tests are effective when they target small parts of an application, such as an individual method or class. What I need is the ability to isolate the Home controller from the rest of the application so that I can limit the scope of the test and rule out any impact caused by the repository.
Isolating a component
The key to isolating components is to use C# interfaces. To separate the controller from the repository, I added a new class file called IDataSource.cs to the Models folder and used it to define the interface shown in listing 6.15.
Listing 6.15 The contents of the IDataSource.cs file in the SimpleApp/Models folder
namespace SimpleApp.Models {
public interface IDataSource {
IEnumerable<Product> Products { get; }
}
}
In listing 6.16, I have removed the static method from the Product class and created a new class that implements the IDataSource interface.
Listing 6.16 A data source in the Product.cs file in the SimpleApp/Models folder
namespace SimpleApp.Models {
public class Product {
public string Name { get; set; } = string.Empty;
public decimal? Price { get; set; }
//public static Product[] GetProducts() {
// Product kayak = new Product {
// Name = "Kayak", Price = 275M
// };
// Product lifejacket = new Product {
// Name = "Lifejacket", Price = 48.95M
// };
// return new Product[] { kayak, lifejacket };
//}
}
public class ProductDataSource : IDataSource {
public IEnumerable<Product> Products =>
new Product[] {
new Product { Name = "Kayak", Price = 275M },
new Product { Name = "Lifejacket", Price = 48.95M }
};
}
}
The next step is to modify the controller so that it uses the ProductDataSource class as the source for its data, as shown in listing 6.17.
Listing 6.17 Adding a property in the HomeController.cs file in the Controllers folder
using Microsoft.AspNetCore.Mvc;
using SimpleApp.Models;
namespace SimpleApp.Controllers {
public class HomeController : Controller {
public IDataSource dataSource = new ProductDataSource();
public ViewResult Index() {
return View(dataSource.Products);
}
}
}
This may not seem like a significant change, but it allows me to change the data source the controller uses during testing, which is how I can isolate the controller. In listing 6.18, I have updated the controller unit tests so they use a special version of the repository.
Listing 6.18 Isolating the controller in the HomeControllerTests.cs file in the SimpleApp.Tests folder
using Microsoft.AspNetCore.Mvc;
using System.Collections.Generic;
using SimpleApp.Controllers;
using SimpleApp.Models;
using Xunit;
namespace SimpleApp.Tests {
public class HomeControllerTests {
class FakeDataSource : IDataSource {
public FakeDataSource(Product[] data) => Products = data;
public IEnumerable<Product> Products { get; set; }
}
[Fact]
public void IndexActionModelIsComplete() {
// Arrange
Product[] testData = new Product[] {
new Product { Name = "P1", Price = 75.10M },
new Product { Name = "P2", Price = 120M },
new Product { Name = "P3", Price = 110M }
};
IDataSource data = new FakeDataSource(testData);
var controller = new HomeController();
controller.dataSource = data;
// Act
var model = (controller.Index() as ViewResult)?.ViewData.Model
as IEnumerable<Product>;
// Assert
Assert.Equal(data.Products, model,
Comparer.Get<Product>((p1, p2) => p1?.Name == p2?.Name
&& p1?.Price == p2?.Price));
}
}
}
I have defined a fake implementation of the IDataSource interface that lets me use any test data with the controller.
It was easy to create a fake implementation for the IDataSource interface, but most classes for which fake implementations are required are more complex and cannot be handled as easily.
A better approach is to use a mocking package, which makes it easy to create fake—or mock—objects for tests. There are many mocking packages available, but the one I use (and have for years) is called Moq. To add Moq to the unit test project, run the command shown in listing 6.19 in the Testing folder.
Listing 6.19 Installing the mocking package
dotnet add SimpleApp.Tests package Moq --version 4.18.4
I can use the Moq framework to create a fake IDataSource object without having to define a custom test class, as shown in listing 6.20.
Listing 6.20 Creating a mock object in the HomeControllerTests.cs file in the SimpleApp.Tests folder
using Microsoft.AspNetCore.Mvc;
using System.Collections.Generic;
using SimpleApp.Controllers;
using SimpleApp.Models;
using Xunit;
using Moq;
namespace SimpleApp.Tests {
public class HomeControllerTests {
//class FakeDataSource : IDataSource {
// public FakeDataSource(Product[] data) => Products = data;
// public IEnumerable<Product> Products { get; set; }
//}
[Fact]
public void IndexActionModelIsComplete() {
// Arrange
Product[] testData = new Product[] {
new Product { Name = "P1", Price = 75.10M },
new Product { Name = "P2", Price = 120M },
new Product { Name = "P3", Price = 110M }
};
var mock = new Mock<IDataSource>();
mock.SetupGet(m => m.Products).Returns(testData);
var controller = new HomeController();
controller.dataSource = mock.Object;
// Act
var model = (controller.Index() as ViewResult)?.ViewData.Model
as IEnumerable<Product>;
// Assert
Assert.Equal(testData, model,
Comparer.Get<Product>((p1, p2) => p1?.Name == p2?.Name
&& p1?.Price == p2?.Price));
mock.VerifyGet(m => m.Products, Times.Once);
}
}
}
The use of Moq has allowed me to remove the fake implementation of the IDataSource interface and replace it with a few lines of code. I am not going to go into detail about the different features that Moq supports, but I will explain the way that I used Moq in the examples. (See https://github.com/Moq/moq4 for examples and documentation for Moq. There are also examples in later chapters as I explain how to unit test different types of components.)
The first step is to create a new instance of the Mock object, specifying the interface that should be implemented, like this:
... var mock = new Mock<IDataSource>(); ...
The Mock object I created will fake the IDataSource interface. To create an implementation of the Product property, I use the SetUpGet method, like this:
... mock.SetupGet(m => m.Products).Returns(testData); ...
The SetupGet method is used to implement the getter for a property. The argument to this method is a lambda expression that specifies the property to be implemented, which is Products in this example. The Returns method is called on the result of the SetupGet method to specify the result that will be returned when the property value is read.
The Mock class defines an Object property, which returns the object that implements the specified interface with the behaviors that have been defined. I used the Object property to set the dataSource field defined by the HomeController, like this:
... controller.dataSource = mock.Object; ...
The final Moq feature I used was to check that the Products property was called once, like this:
... mock.VerifyGet(m => m.Products, Times.Once); ...
The VerifyGet method is one of the methods defined by the Mock class to inspect the state of the mock object when the test has completed. In this case, the VerifyGet method allows me to check the number of times that the Products property method has been read. The Times.Once value specifies that the VerifyGet method should throw an exception if the property has not been read exactly once, which will cause the test to fail. (The Assert methods usually used in tests work by throwing an exception when a test fails, which is why the VerifyGet method can be used to replace an Assert method when working with mock objects.)
The overall effect is the same as my fake interface implementation, but mocking is more flexible and more concise and can provide more insight into the behavior of the components under test.
Unit tests are typically defined within a dedicated unit test project.
A test framework simplifies writing unit tests by providing common features, such as assertions.
Unit tests typically follow the arrange/act/assert pattern.
Tests can be run within Visual Studio/Visual Studio Code or using the dotnet test command.
Effective unit tests isolate and test individual components.
Isolating components is simplified by mocking packages, such as Moq.
This chapter covers
In the previous chapters, I built quick and simple ASP.NET Core applications. I described ASP.NET Core patterns, the essential C# features, and the tools that good ASP.NET Core developers require. Now it is time to put everything together and build a simple but realistic e-commerce application.
My application, called SportsStore, will follow the classic approach taken by online stores everywhere. I will create an online product catalog that customers can browse by category and page, a shopping cart where users can add and remove products, and a checkout where customers can enter their shipping details. I will also create an administration area that includes create, read, update, and delete (CRUD) facilities for managing the catalog, and I will protect it so that only logged-in administrators can make changes.
My goal in this chapter and those that follow is to give you a sense of what real ASP.NET Core development is by creating as realistic an example as possible. I want to focus on ASP.NET Core, of course, so I have simplified the integration with external systems, such as the database, and omitted others entirely, such as payment processing.
You might find the going a little slow as I build up the levels of infrastructure I need, but the initial investment will result in maintainable, extensible, well-structured code with excellent support for unit testing.
Most of the features I use for the SportsStore application have their own chapters later in the book. Rather than duplicate everything here, I tell you just enough to make sense of the example application and point you to another chapter for in-depth information.
I will call out each step needed to build the application so that you can see how the ASP.NET Core features fit together. You should pay particular attention when I create views. You will get some odd results if you do not follow the examples closely.
I am going to start with a minimal ASP.NET Core project and add the features I require as they are needed. Open a new PowerShell command prompt from the Windows Start menu and run the commands shown in listing 7.1 to get started.
Listing 7.1 Creating the SportsStore project
dotnet new globaljson --sdk-version 7.0.100 --output SportsSln/SportsStore dotnet new web --no-https --output SportsSln/SportsStore --framework net7.0 dotnet new sln -o SportsSln dotnet sln SportsSln add SportsSln/SportsStore
These commands create a SportsSln solution folder that contains a SportsStore project folder created with the web project template. The SportsSln folder also contains a solution file, to which the SportsStore project is added.
I am using different names for the solution and project folders to make the examples easier to follow, but if you create a project with Visual Studio, the default is to use the same name for both folders. There is no “right” approach, and you can use whatever names suit your project.
To create the unit test project, run the commands shown in listing 7.2 in the same location you used for the commands shown in listing 7.1.
Listing 7.2 Creating the unit test project
dotnet new xunit -o SportsSln/SportsStore.Tests --framework net7.0 dotnet sln SportsSln add SportsSln/SportsStore.Tests dotnet add SportsSln/SportsStore.Tests reference SportsSln/SportsStore
I am going to use the Moq package to create mock objects. Run the command shown in listing 7.3 to install the Moq package into the unit testing project. Run this command from the same location as the commands in listing 7.2.
Listing 7.3 Installing the Moq package
dotnet add SportsSln/SportsStore.Tests package Moq --version 4.18.4
If you are using Visual Studio Code, select File > Open Folder, navigate to the SportsSln folder, and click the Select Folder button. Visual Studio Code will open the folder and discover the solution and project files. When prompted, as shown in figure 7.1, click Yes to install the assets required to build the projects. Select SportsStore if Visual Studio Code prompts you to select the project to run.
If you are using Visual Studio, click the “Open a project or solution” button on the splash screen or select File > Open > Project/Solution. Select the SportsSln.sln file in the SportsSln folder and click the Open button to open the project.
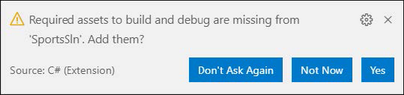
Figure 7.1 Adding assets in Visual Studio Code
To configure the HTTP port that ASP.NET Core will use to listen for HTTP requests, make the changes shown in listing 7.4 to the launchSettings.json file in the SportsStore/Properties folder.
Listing 7.4 Setting the HTTP Port in the launchSettings.json File in the SportsStore/ Properties Folder
{
"iisSettings": {
"windowsAuthentication": false,
"anonymousAuthentication": true,
"iisExpress": {
"applicationUrl": "http://localhost:5000",
"sslPort": 0
}
},
"profiles": {
"SportsStore": {
"commandName": "Project",
"dotnetRunMessages": true,
"launchBrowser": true,
"applicationUrl": "http://localhost:5000",
"environmentVariables": {
"ASPNETCORE_ENVIRONMENT": "Development"
}
},
"IIS Express": {
"commandName": "IISExpress",
"launchBrowser": true,
"environmentVariables": {
"ASPNETCORE_ENVIRONMENT": "Development"
}
}
}
}
The next step is to create folders that will contain the application’s components. Right-click the SportsStore item in the Visual Studio Solution Explorer or Visual Studio Code Explorer pane and select Add > New Folder or New Folder to create the set of folders described in table 7.1.
Table 7.1 The application project folders
|
Name |
Description |
|---|---|
|
|
This folder will contain the data model and the classes that provide access to the data in the application’s database. |
|
|
This folder will contain the controller classes that handle HTTP requests. |
|
|
This folder will contain all the Razor files, grouped into separate subfolders. |
|
|
This folder will contain Razor files that are specific to the Home controller, which I create in the “Creating the Controller and View” section. |
|
|
This folder will contain Razor files that are common to all controllers. |
The Program.cs file is used to configure the ASP.NET Core application. Apply the changes shown in listing 7.5 to the Program.cs file in the SportsStore project to configure the basic application features.
Listing 7.5 Configuring the application in the Program.cs file in the SportsStore folder
var builder = WebApplication.CreateBuilder(args);
builder.Services.AddControllersWithViews();
var app = builder.Build();
//app.MapGet("/", () => "Hello World!");
app.UseStaticFiles();
app.MapDefaultControllerRoute();
app.Run();
The builder.Services property is used to set up objects, known as services, that can be used throughout the application and that are accessed through a feature called dependency injection, which I describe in chapter 14. The AddControllersWithViews method sets up the shared objects required by applications using the MVC Framework and the Razor view engine.
ASP.NET Core receives HTTP requests and passes them along a request pipeline, which is populated with middleware components registered using the app property. Each middleware component is able to inspect requests, modify them, generate a response, or modify the responses that other components have produced. The request pipeline is the heart of ASP.NET Core, and I describe it in detail in chapter 12, where I also explain how to create custom middleware components.
The UseStaticFiles method enables support for serving static content from the wwwroot folder and will be created later in the chapter.
One especially important middleware component provides the endpoint routing feature, which matches HTTP requests to the application features—known as endpoints—able to produce responses for them, a process I describe in detail in chapter 13. The endpoint routing feature is added to the request pipeline automatically, and the MapDefaultControllerRoute registers the MVC Framework as a source of endpoints using a default convention for mapping requests to classes and methods.
The Razor view engine is responsible for processing view files, which have the .cshtml extension, to generate HTML responses. Some initial preparation is required to configure Razor to make it easier to create views for the application.
Add a Razor View Imports file named _ViewImports.cshtml in the Views folder with the content shown in listing 7.6.
Listing 7.6 The contents of the _ViewImports.cshtml file in the SportsStore/ Views folder
@using SportsStore.Models @addTagHelper *, Microsoft.AspNetCore.Mvc.TagHelpers
The @using statement will allow me to use the types in the SportsStore.Models namespace in views without needing to refer to the namespace. The @addTagHelper statement enables the built-in tag helpers, which I use later to create HTML elements that reflect the configuration of the SportsStore application and which I describe in detail in chapter 15. (You may see a warning or error displayed by the code editor for the contents of this file, but this will be resolved shortly and can be ignored.)
Add a Razor View Start file named _ViewStart.cshtml to the SportsStore/Views folder with the content shown in listing 7.7. (The file will already contain this expression if you create the file using the Visual Studio item template.)
Listing 7.7 The contents of the _ViewStart.cshtml file in the SportsStore/Views folder
@{
Layout = "_Layout";
}
The Razor View Start file tells Razor to use a layout file in the HTML that it generates, reducing the amount of duplication in views. To create the view, add a Razor layout named _Layout.cshtml to the Views/Shared folder, with the content shown in listing 7.8.
Listing 7.8 The contents of the _Layout.cshtml file in the SportsStore/Views/Shared folder
<!DOCTYPE html>
<html>
<head>
<meta name="viewport" content="width=device-width" />
<title>SportsStore</title>
</head>
<body>
<div>
@RenderBody()
</div>
</body>
</html>
This file defines a simple HTML document into which the contents of other views will be inserted by the @RenderBody expression. I explain how Razor expressions work in detail in chapter 21.
Add a class file named HomeController.cs in the SportsStore/Controllers folder and use it to define the class shown in listing 7.9. This is a minimal controller that contains just enough functionality to produce a response.
Listing 7.9 The contents of the HomeController.cs file in the SportsStore/Controllers folder
using Microsoft.AspNetCore.Mvc;
namespace SportsStore.Controllers {
public class HomeController: Controller {
public IActionResult Index() => View();
}
}
The MapDefaultControllerRoute method used in listing 7.5 tells ASP.NET Core how to match URLs to controller classes. The configuration applied by that method declares that the Index action method defined by the Home controller will be used to handle requests.
The Index action method doesn’t do anything useful yet and just returns the result of calling the View method, which is inherited from the Controller base class. This result tells ASP.NET Core to render the default view associated with the action method. To create the view, add a Razor View file named Index.cshtml to the Views/Home folder with the content shown in listing 7.10.
Listing 7.10 The contents of the Index.cshtml file in the SportsStore/Views/Home folder
<h4>Welcome to SportsStore</h4>
Almost all projects have a data model of some sort. Since this is an e-commerce application, the most obvious model I need is for a product. Add a class file named Product.cs to the Models folder and use it to define the class shown in listing 7.11.
Listing 7.11 The contents of the Product.cs file in the SportsStore/Models folder
using System.ComponentModel.DataAnnotations.Schema;
namespace SportsStore.Models {
public class Product {
public long? ProductID { get; set; }
public string Name { get; set; } = String.Empty;
public string Description { get; set; } = String.Empty;
[Column(TypeName = "decimal(8, 2)")]
public decimal Price { get; set; }
public string Category { get; set; } = String.Empty;
}
}
The Price property has been decorated with the Column attribute to specify the SQL data type that will be used to store values for this property. Not all C# types map neatly onto SQL types, and this attribute ensures the database uses an appropriate type for the application data.
Before going any further, it is a good idea to make sure the application builds and runs as expected. Run the command shown in listing 7.12 in the SportsStore folder.
Listing 7.12 Running the example application
dotnet run
Request http://localhost:5000, and you will see the response shown in figure 7.2.
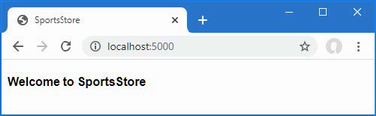
Figure 7.2 Running the example application
Now that the SportsStore contains some basic setup and can produce a simple response, it is time to add some data so that the application has something more useful to display. The SportsStore application will store its data in a SQL Server LocalDB database, which is accessed using Entity Framework Core. Entity Framework Core is the Microsoft object-to-relational mapping (ORM) framework, and it is the most widely used method of accessing databases in ASP.NET Core projects.
The first step is to add Entity Framework Core to the project. Use a PowerShell command prompt to run the command shown in listing 7.13 in the SportsStore folder. If you receive an error asking you to specify a project, then delete the SportsStore - Backup.csproj file in the SportsStore folder and try again.
Listing 7.13 Adding the Entity Framework Core packages to the SportsStore project
dotnet add package Microsoft.EntityFrameworkCore.Design --version 7.0.0 dotnet add package Microsoft.EntityFrameworkCore.SqlServer --version 7.0.0
These packages install Entity Framework Core and the support for using SQL Server. Entity Framework Core also requires a tools package, which includes the command-line tools required to prepare and create databases for ASP.NET Core applications. Run the commands shown in listing 7.14 to remove any existing version of the tools package, if there is one, and install the version used in this book. (Since this package is installed globally, you can run these commands in any folder.)
Listing 7.14 Installing the Entity Framework Core tool package
dotnet tool uninstall --global dotnet-ef dotnet tool install --global dotnet-ef --version 7.0.0
Configuration settings, such as database connection strings, are stored in JSON configuration files. To describe the connection to the database that will be used for the SportsStore data, add the entries shown in listing 7.15 to the appsettings.json file in the SportsStore folder.
The project also contains an appsettings.Development.json file that contains configuration settings that are used only in development. This file is displayed as nested within the appsettings.json file by Solution Explorer but is always visible in Visual Studio Code. I use only the appsettings.json file for the development of the SportsStore project, but I explain the relationship between the files and how they are both used in detail in chapter 15.
Listing 7.15 Adding a configuration setting in the appsettings.json file in the SportsStore folder
{
"Logging": {
"LogLevel": {
"Default": "Information",
"Microsoft.AspNetCore": "Warning"
}
},
"AllowedHosts": "*",
"ConnectionStrings": {
"SportsStoreConnection": "Server=(localdb)\\MSSQLLocalDB;Database=
➥SportsStore;MultipleActiveResultSets=true"
}
}
This configuration string specifies a LocalDB database called SportsStore and enables the multiple active result set (MARS) feature, which is required for some of the database queries that will be made by the SportsStore application using Entity Framework Core.
Pay close attention when you add the configuration setting. JSON data must be expressed exactly as shown in the listing, which means you must ensure you correctly quote the property names and values. You can download the configuration file from the GitHub repository if you have difficulty.
Entity Framework Core provides access to the database through a context class. Add a class file named StoreDbContext.cs to the Models folder and use it to define the class shown in listing 7.16.
Listing 7.16 The contents of the StoreDbContext.cs file in the SportsStore/Models folder
using Microsoft.EntityFrameworkCore;
namespace SportsStore.Models {
public class StoreDbContext : DbContext {
public StoreDbContext(DbContextOptions<StoreDbContext> options)
: base(options) { }
public DbSet<Product> Products => Set<Product>();
}
}
The DbContext base class provides access to the Entity Framework Core’s underlying functionality, and the Products property will provide access to the Product objects in the database. The StoreDbContext class is derived from DbContext and adds the properties that will be used to read and write the application’s data. There is only one property for now, which will provide access to Product objects.
Entity Framework Core must be configured so that it knows the type of database to which it will connect, which connection string describes that connection, and which context class will present the data in the database. Listing 7.17 shows the required changes to the Program.cs file.
Listing 7.17 Configuring Entity Framework Core in the Program.cs file in the SportsStore folder
using Microsoft.EntityFrameworkCore;
using SportsStore.Models;
var builder = WebApplication.CreateBuilder(args);
builder.Services.AddControllersWithViews();
builder.Services.AddDbContext<StoreDbContext>(opts => {
opts.UseSqlServer(
builder.Configuration["ConnectionStrings:SportsStoreConnection"]);
});
var app = builder.Build();
app.UseStaticFiles();
app.MapDefaultControllerRoute();
app.Run();
The IConfiguration interface provides access to the ASP.NET Core configuration system, which includes the contents of the appsettings.json file and which I describe in detail in chapter 15. Access to the configuration data is through the builder.Configuration property, which allows the database connection string to be obtained. Entity Framework Core is configured with the AddDbContext method, which registers the database context class and configures the relationship with the database. The UseSQLServer method declares that SQL Server is being used.
The next step is to create a repository interface and implementation class. The repository pattern is one of the most widely used, and it provides a consistent way to access the features presented by the database context class. Not everyone finds a repository useful, but my experience is that it can reduce duplication and ensures that operations on the database are performed consistently. Add a class file named IStoreRepository.cs to the Models folder and use it to define the interface shown in listing 7.18.
Listing 7.18 The contents of the IStoreRepository.cs file in the SportsStore/Models folder
namespace SportsStore.Models {
public interface IStoreRepository {
IQueryable<Product> Products { get; }
}
}
This interface uses IQueryable<T> to allow a caller to obtain a sequence of Product objects. The IQueryable<T> interface is derived from the more familiar IEnumerable<T> interface and represents a collection of objects that can be queried, such as those managed by a database.
A class that depends on the IStoreRepository interface can obtain Product objects without needing to know the details of how they are stored or how the implementation class will deliver them.
To create an implementation of the repository interface, add a class file named EFStoreRepository.cs in the Models folder and use it to define the class shown in listing 7.19.
Listing 7.19 The contents of the EFStoreRepository.cs file in the SportsStore/Models folder
namespace SportsStore.Models {
public class EFStoreRepository : IStoreRepository {
private StoreDbContext context;
public EFStoreRepository(StoreDbContext ctx) {
context = ctx;
}
public IQueryable<Product> Products => context.Products;
}
}
I’ll add additional functionality as I add features to the application, but for the moment, the repository implementation just maps the Products property defined by the IStoreRepository interface onto the Products property defined by the StoreDbContext class. The Products property in the context class returns a DbSet<Product> object, which implements the IQueryable<T> interface and makes it easy to implement the repository interface when using Entity Framework Core.
Earlier in the chapter, I explained that ASP.NET Core supports services that allow objects to be accessed throughout the application. One benefit of services is they allow classes to use interfaces without needing to know which implementation class is being used. I explain this in detail in chapter 14, but for the SportsStore chapters, it means that application components can access objects that implement the IStoreRepository interface without knowing that it is the EFStoreRepository implementation class they are using. This makes it easy to change the implementation class the application uses without needing to make changes to the individual components. Add the statement shown in listing 7.20 to the Program.cs file to create a service for the IStoreRepository interface that uses EFStoreRepository as the implementation class.
Listing 7.20 Creating the repository service in the Program.cs file in the SportsStore folder
using Microsoft.EntityFrameworkCore;
using SportsStore.Models;
var builder = WebApplication.CreateBuilder(args);
builder.Services.AddControllersWithViews();
builder.Services.AddDbContext<StoreDbContext>(opts => {
opts.UseSqlServer(
builder.Configuration["ConnectionStrings:SportsStoreConnection"]);
});
builder.Services.AddScoped<IStoreRepository, EFStoreRepository>();
var app = builder.Build();
app.UseStaticFiles();
app.MapDefaultControllerRoute();
app.Run();
The AddScoped method creates a service where each HTTP request gets its own repository object, which is the way that Entity Framework Core is typically used.
Entity Framework Core can generate the schema for the database using the data model classes through a feature called migrations. When you prepare a migration, Entity Framework Core creates a C# class that contains the SQL commands required to prepare the database. If you need to modify your model classes, then you can create a new migration that contains the SQL commands required to reflect the changes. In this way, you don’t have to worry about manually writing and testing SQL commands and can just focus on the C# model classes in the application.
Entity Framework Core commands are performed from the command line. Open a PowerShell command prompt and run the command shown in listing 7.21 in the SportsStore folder to create the migration class that will prepare the database for its first use.
Listing 7.21 Creating the database migration
dotnet ef migrations add Initial
When this command has finished, the SportsStore project will contain a Migrations folder. This is where Entity Framework Core stores its migration classes. One of the file names will be a timestamp followed by _Initial.cs, and this is the class that will be used to create the initial schema for the database. If you examine the contents of this file, you can see how the Product model class has been used to create the schema.
To populate the database and provide some sample data, I added a class file called SeedData.cs to the Models folder and defined the class shown in listing 7.22.
Listing 7.22 The contents of the SeedData.cs file in the SportsStore/Models folder
using Microsoft.EntityFrameworkCore;
namespace SportsStore.Models {
public static class SeedData {
public static void EnsurePopulated(IApplicationBuilder app) {
StoreDbContext context = app.ApplicationServices
.CreateScope().ServiceProvider
.GetRequiredService<StoreDbContext>();
if (context.Database.GetPendingMigrations().Any()) {
context.Database.Migrate();
}
if (!context.Products.Any()) {
context.Products.AddRange(
new Product {
Name = "Kayak", Description =
"A boat for one person",
Category = "Watersports", Price = 275
},
new Product {
Name = "Lifejacket",
Description = "Protective and fashionable",
Category = "Watersports", Price = 48.95m
},
new Product {
Name = "Soccer Ball",
Description = "FIFA-approved size and weight",
Category = "Soccer", Price = 19.50m
},
new Product {
Name = "Corner Flags",
Description =
"Give your playing field a professional touch",
Category = "Soccer", Price = 34.95m
},
new Product {
Name = "Stadium",
Description = "Flat-packed 35,000-seat stadium",
Category = "Soccer", Price = 79500
},
new Product {
Name = "Thinking Cap",
Description = "Improve brain efficiency by 75%",
Category = "Chess", Price = 16
},
new Product {
Name = "Unsteady Chair",
Description =
"Secretly give your opponent a disadvantage",
Category = "Chess", Price = 29.95m
},
new Product {
Name = "Human Chess Board",
Description = "A fun game for the family",
Category = "Chess", Price = 75
},
new Product {
Name = "Bling-Bling King",
Description = "Gold-plated, diamond-studded King",
Category = "Chess", Price = 1200
}
);
context.SaveChanges();
}
}
}
}
The static EnsurePopulated method receives an IApplicationBuilder argument, which is the interface used in the Program.cs file to register middleware components to handle HTTP requests. IApplicationBuilder also provides access to the application’s services, including the Entity Framework Core database context service.
The EnsurePopulated method obtains a StoreDbContext object through the IApplicationBuilder interface and calls the Database.Migrate method if there are any pending migrations, which means that the database will be created and prepared so that it can store Product objects. Next, the number of Product objects in the database is checked. If there are no objects in the database, then the database is populated using a collection of Product objects using the AddRange method and then written to the database using the SaveChanges method.
The final change is to seed the database when the application starts, which I have done by adding a call to the EnsurePopulated method from the Program.cs file, as shown in listing 7.23.
Listing 7.23 Seeding the database in the Program.cs file in the SportsStore folder
using Microsoft.EntityFrameworkCore;
using SportsStore.Models;
var builder = WebApplication.CreateBuilder(args);
builder.Services.AddControllersWithViews();
builder.Services.AddDbContext<StoreDbContext>(opts => {
opts.UseSqlServer(
builder.Configuration["ConnectionStrings:SportsStoreConnection"]);
});
builder.Services.AddScoped<IStoreRepository, EFStoreRepository>();
var app = builder.Build();
app.UseStaticFiles();
app.MapDefaultControllerRoute();
SeedData.EnsurePopulated(app);
app.Run();
As you have seen, the initial preparation work for an ASP.NET Core project can take some time. But the good news is that once the foundation is in place, the pace improves, and features are added more rapidly. In this section, I am going to create a controller and an action method that can display details of the products in the repository.
Add the statements shown in listing 7.24 to prepare the controller to display the list of products.
Listing 7.24 Preparing the controller in the HomeController.cs file in the SportsStore/Controllers folder
using Microsoft.AspNetCore.Mvc;
using SportsStore.Models;
namespace SportsStore.Controllers {
public class HomeController : Controller {
private IStoreRepository repository;
public HomeController(IStoreRepository repo) {
repository = repo;
}
public IActionResult Index() => View(repository.Products);
}
}
When ASP.NET Core needs to create a new instance of the HomeController class to handle an HTTP request, it will inspect the constructor and see that it requires an object that implements the IStoreRepository interface. To determine what implementation class should be used, ASP.NET Core consults the configuration created in the Program.cs file, which tells it that EFStoreRepository should be used and that a new instance should be created for every request. ASP.NET Core creates a new EFStoreRepository object and uses it to invoke the HomeController constructor to create the controller object that will process the HTTP request.
This is known as dependency injection, and its approach allows the HomeController object to access the application’s repository through the IStoreRepository interface without knowing which implementation class has been configured. I could reconfigure the service to use a different implementation class—one that doesn’t use Entity Framework Core, for example—and dependency injection means that the controller will continue to work without changes.
The Index action method in listing 7.24 passes the collection of Product objects from the repository to the View method, which means these objects will be the view model that Razor uses when it generates HTML content from the view. Make the changes to the view shown in listing 7.25 to generate content using the Product view model objects.
Listing 7.25 Using the product data in the Index.cshtml file in the SportsStore/Views/Home folder
@model IQueryable<Product>
@foreach (var p in Model ?? Enumerable.Empty<Product>()) {
<div>
<h3>@p.Name</h3>
@p.Description
<h4>@p.Price.ToString("c")</h4>
</div>
}
The @model expression at the top of the file specifies that the view expects to receive a sequence of Product objects from the action method as its model data. I use an @foreach expression to work through the sequence and generate a simple set of HTML elements for each Product object that is received.
There is a quirk in the way that Razor Views work that means the model data is always nullable, even when the type specified by the @model expression is not. For this reason, I use the null-coalescing operator in the @foreach expression with an empty enumeration.
The view doesn’t know where the Product objects came from, how they were obtained, or whether they represent all the products known to the application. Instead, the view deals only with how details of each Product are displayed using HTML elements.
Start ASP.NET Core and request http://localhost:5000 to see the list of products, which is shown in figure 7.3. This is the typical pattern of development for ASP.NET Core. An initial investment of time setting everything up is necessary, and then the basic features of the application snap together quickly.
Figure 7.3 Displaying a list of products
You can see from figure 7.3 that the Index.cshtml view displays the products in the database on a single page. In this section, I will add support for pagination so that the view displays a smaller number of products on a page and so the user can move from page to page to view the overall catalog. To do this, I am going to add a parameter to the Index method in the Home controller, as shown in listing 7.26.
Listing 7.26 Adding pagination in the HomeController.cs file in the SportsStore/Controllers folder
using Microsoft.AspNetCore.Mvc;
using SportsStore.Models;
namespace SportsStore.Controllers {
public class HomeController : Controller {
private IStoreRepository repository;
public int PageSize = 4;
public HomeController(IStoreRepository repo) {
repository = repo;
}
public ViewResult Index(int productPage = 1)
=> View(repository.Products
.OrderBy(p => p.ProductID)
.Skip((productPage - 1) * PageSize)
.Take(PageSize));
}
}
The PageSize field specifies that I want four products per page. I have added an optional parameter to the Index method, which means that if the method is called without a parameter, the call is treated as though I had supplied the value specified in the parameter definition, with the effect that the action method displays the first page of products when it is invoked without an argument. Within the body of the action method, I get the Product objects, order them by the primary key, skip over the products that occur before the start of the current page, and take the number of products specified by the PageSize field.
Restart ASP.NET Core and request http://localhost:5000, and you will see that there are now four items shown on the page, as shown in figure 7.4. If you want to view another page, you can append query string parameters to the end of the URL, like this:
http://localhost:5000/?productPage=2
Figure 7.4 Paging through data
Using these query strings, you can navigate through the catalog of products. There is no way for customers to figure out that these query string parameters exist, and even if there were, customers are not going to want to navigate this way. Instead, I need to render some page links at the bottom of each list of products so that customers can navigate between pages. To do this, I am going to create a tag helper, which generates the HTML markup for the links I require.
Adding the view model
To support the tag helper, I am going to pass information to the view about the number of pages available, the current page, and the total number of products in the repository. The easiest way to do this is to create a view model class, which is used specifically to pass data between a controller and a view. Create a Models/ViewModels folder in the SportsStore project, add to it a class file named PagingInfo.cs, and define the class shown in listing 7.27.
Listing 7.27 The contents of the PagingInfo.cs file in the SportsStore/Models/ViewModels folder
namespace SportsStore.Models.ViewModels {
public class PagingInfo {
public int TotalItems { get; set; }
public int ItemsPerPage { get; set; }
public int CurrentPage { get; set; }
public int TotalPages =>
(int)Math.Ceiling((decimal)TotalItems / ItemsPerPage);
}
}
Adding the tag helper class
Now that I have a view model, it is time to create a tag helper class. Create a folder named Infrastructure in the SportsStore project and add to it a class file called PageLinkTagHelper.cs, with the code shown in listing 7.28. Tag helpers are a big part of ASP.NET Core development, and I explain how they work and how to use and create them in chapters 25–27.
Listing 7.28 The contents of the PageLinkTagHelper.cs file in the SportsStore/Infrastructure folder
using Microsoft.AspNetCore.Mvc;
using Microsoft.AspNetCore.Mvc.Rendering;
using Microsoft.AspNetCore.Mvc.Routing;
using Microsoft.AspNetCore.Mvc.ViewFeatures;
using Microsoft.AspNetCore.Razor.TagHelpers;
using SportsStore.Models.ViewModels;
namespace SportsStore.Infrastructure {
[HtmlTargetElement("div", Attributes = "page-model")]
public class PageLinkTagHelper : TagHelper {
private IUrlHelperFactory urlHelperFactory;
public PageLinkTagHelper(IUrlHelperFactory helperFactory) {
urlHelperFactory = helperFactory;
}
[ViewContext]
[HtmlAttributeNotBound]
public ViewContext? ViewContext { get; set; }
public PagingInfo? PageModel { get; set; }
public string? PageAction { get; set; }
public override void Process(TagHelperContext context,
TagHelperOutput output) {
if (ViewContext != null && PageModel != null) {
IUrlHelper urlHelper
= urlHelperFactory.GetUrlHelper(ViewContext);
TagBuilder result = new TagBuilder("div");
for (int i = 1; i <= PageModel.TotalPages; i++) {
TagBuilder tag = new TagBuilder("a");
tag.Attributes["href"] = urlHelper.Action(PageAction,
new { productPage = i });
tag.InnerHtml.Append(i.ToString());
result.InnerHtml.AppendHtml(tag);
}
output.Content.AppendHtml(result.InnerHtml);
}
}
}
}
This tag helper populates a div element with a elements that correspond to pages of products. I am not going to go into detail about tag helpers now; it is enough to know that they are one of the most useful ways that you can introduce C# logic into your views. The code for a tag helper can look tortured because C# and HTML don’t mix easily. But using tag helpers is preferable to including blocks of C# code in a view because a tag helper can be easily unit tested.
Most ASP.NET Core components, such as controllers and views, are discovered automatically, but tag helpers have to be registered. In listing 7.29, I have added a statement to the _ViewImports.cshtml file in the Views folder that tells ASP.NET Core to look for tag helper classes in the SportsStore project. I also added an @using expression so that I can refer to the view model classes in views without having to qualify their names with the namespace.
Listing 7.29 Registering a tag helper in the _ViewImports.cshtml file in the SportsStore/Views folder
@using SportsStore.Models @using SportsStore.Models.ViewModels @addTagHelper *, Microsoft.AspNetCore.Mvc.TagHelpers @addTagHelper *, SportsStore
Adding the view model data
I am not quite ready to use the tag helper because I have yet to provide an instance of the PagingInfo view model class to the view. To do this, I added a class file called ProductsListViewModel.cs to the Models/ViewModels folder of the SportsStore project with the content shown in listing 7.30.
Listing 7.30 The contents of the ProductsListViewModel.cs file in the SportsStore/Models/ViewModels folder
namespace SportsStore.Models.ViewModels {
public class ProductsListViewModel {
public IEnumerable<Product> Products { get; set; }
= Enumerable.Empty<Product>();
public PagingInfo PagingInfo { get; set; } = new();
}
}
I can update the Index action method in the HomeController class to use the ProductsListViewModel class to provide the view with details of the products to display on the page and with details of the pagination, as shown in listing 7.31.
Listing 7.31 Updating the action method in the HomeController.cs file in the SportsStore/Controllers folder
using Microsoft.AspNetCore.Mvc;
using SportsStore.Models;
using SportsStore.Models.ViewModels;
namespace SportsStore.Controllers {
public class HomeController : Controller {
private IStoreRepository repository;
public int PageSize = 4;
public HomeController(IStoreRepository repo) {
repository = repo;
}
public ViewResult Index(int productPage = 1)
=> View(new ProductsListViewModel {
Products = repository.Products
.OrderBy(p => p.ProductID)
.Skip((productPage - 1) * PageSize)
.Take(PageSize),
PagingInfo = new PagingInfo {
CurrentPage = productPage,
ItemsPerPage = PageSize,
TotalItems = repository.Products.Count()
}
});
}
}
These changes pass a ProductsListViewModel object as the model data to the view.
The view is currently expecting a sequence of Product objects, so I need to update the Index.cshtml file, as shown in listing 7.32, to deal with the new view model type.
Listing 7.32 Updating the Index.cshtml file in the SportsStore/Views/Home folder
@model ProductsListViewModel
@foreach (var p in Model.Products ?? Enumerable.Empty<Product>()) {
<div>
<h3>@p.Name</h3>
@p.Description
<h4>@p.Price.ToString("c")</h4>
</div>
}
I have changed the @model directive to tell Razor that I am now working with a different data type. I updated the foreach loop so that the data source is the Products property of the model data.
Displaying the page links
I have everything in place to add the page links to the Index view. I created the view model that contains the paging information, updated the controller so that it passes this information to the view, and changed the @model directive to match the new model view type. All that remains is to add an HTML element that the tag helper will process to create the page links, as shown in listing 7.33.
Listing 7.33 Adding the pagination links in the Index.cshtml file in the SportsStore/Views/Home folder
@model ProductsListViewModel
@foreach (var p in Model.Products ?? Enumerable.Empty<Product>()) {
<div>
<h3>@p.Name</h3>
@p.Description
<h4>@p.Price.ToString("c")</h4>
</div>
}
<div page-model="@Model.PagingInfo" page-action="Index"></div>
Restart ASP.NET Core and request http://localhost:5000, and you will see the new page links, as shown in figure 7.5. The style is still basic, which I will fix later in the chapter. What is important for the moment is that the links take the user from page to page in the catalog and allow for exploration of the products for sale. When Razor finds the page-model attribute on the div element, it asks the PageLinkTagHelper class to transform the element, which produces the set of links shown in the figure.
Figure 7.5 Displaying page navigation links
I have the page links working, but they still use the query string to pass page information to the server, like this:
http://localhost/?productPage=2
I can create URLs that are more appealing by creating a scheme that follows the pattern of composable URLs. A composable URL is one that makes sense to the user, like this one:
http://localhost/Page2
The ASP.NET Core routing feature makes it easy to change the URL scheme in an application. All I need to do is add a new route in the Program.cs file, as shown in listing 7.34.
Listing 7.34 Adding a new route in the Program.cs file in the SportsStore folder
using Microsoft.EntityFrameworkCore;
using SportsStore.Models;
var builder = WebApplication.CreateBuilder(args);
builder.Services.AddControllersWithViews();
builder.Services.AddDbContext<StoreDbContext>(opts => {
opts.UseSqlServer(
builder.Configuration["ConnectionStrings:SportsStoreConnection"]);
});
builder.Services.AddScoped<IStoreRepository, EFStoreRepository>();
var app = builder.Build();
app.UseStaticFiles();
app.MapControllerRoute("pagination",
"Products/Page{productPage}",
new { Controller = "Home", action = "Index" });
app.MapDefaultControllerRoute();
SeedData.EnsurePopulated(app);
app.Run();
This is the only alteration required to change the URL scheme for product pagination. ASP.NET Core and the routing function are tightly integrated, so the application automatically reflects a change like this in the URLs used by the application, including those generated by tag helpers like the one I use to generate the page navigation links.
Restart ASP.NET Core, request http://localhost:5000, and click one of the pagination links. The browser will navigate to a URL that uses the new URL scheme, as shown in figure 7.6.
Figure 7.6 The new URL scheme displayed in the browser
I have built a great deal of infrastructure, and the basic features of the application are starting to come together, but I have not paid any attention to appearance. Even though this book is not about design or CSS, the SportsStore application design is so miserably plain that it undermines its technical strengths. In this section, I will put some of that right. I am going to implement a classic two-column layout with a header, as shown in figure 7.7.
Figure 7.7 The design goal for the SportsStore application
I am going to use the Bootstrap package to provide the CSS styles I will apply to the application. As explained in chapter 4, client-side packages are installed using LibMan. If you did not install the LibMan package when following the examples in chapter 4, use a PowerShell command prompt to run the commands shown in listing 7.35, which remove any existing LibMan package and install the version required for this book.
Listing 7.35 Installing the LibMan tool package
dotnet tool uninstall --global Microsoft.Web.LibraryManager.Cli
dotnet tool install --global Microsoft.Web.LibraryManager.Cli
--version 2.1.175
Once you have installed LibMan, run the commands shown in listing 7.36 in the SportsStore folder to initialize the example project and install the Bootstrap package.
Listing 7.36 Initializing the example project
libman init -p cdnjs libman install bootstrap@5.2.3 -d wwwroot/lib/bootstrap
Razor layouts provide common content so that it doesn’t have to be repeated in multiple views. Add the elements shown in listing 7.37 to the _Layout.cshtml file in the Views/Shared folder to include the Bootstrap CSS stylesheet in the content sent to the browser and define a common header that will be used throughout the SportsStore application.
Listing 7.37 Applying Bootstrap CSS to the _Layout.cshtml file in the SportsStore/Views/Shared folder
<!DOCTYPE html>
<html>
<head>
<meta name="viewport" content="width=device-width" />
<title>SportsStore</title>
<link href="/lib/bootstrap/css/bootstrap.min.css" rel="stylesheet" />
</head>
<body>
<div class="bg-dark text-white p-2">
<span class="navbar-brand ml-2">SPORTS STORE</span>
</div>
<div class="row m-1 p-1">
<div id="categories" class="col-3">
Put something useful here later
</div>
<div class="col-9">
@RenderBody()
</div>
</div>
</body>
</html>
Adding the Bootstrap CSS stylesheet to the layout means that I can use the styles it defines in any of the views that rely on the layout. Listing 7.38 shows the styling I applied to the Index.cshtml file.
Listing 7.38 Styling content in the Index.cshtml file in the SportsStore/Views/Home folder
@model ProductsListViewModel
@foreach (var p in Model.Products ?? Enumerable.Empty<Product>()) {
<div class="card card-outline-primary m-1 p-1">
<div class="bg-faded p-1">
<h4>
@p.Name
<span class="badge rounded-pill bg-primary text-white"
style="float:right">
<small>@p.Price.ToString("c")</small>
</span>
</h4>
</div>
<div class="card-text p-1">@p.Description</div>
</div>
}
<div page-model="@Model.PagingInfo" page-action="Index"
page-classes-enabled="true" page-class="btn"
page-class-normal="btn-outline-dark"
page-class-selected="btn-primary" class="btn-group pull-right m-1">
</div>
I need to style the buttons generated by the PageLinkTagHelper class, but I don’t want to hardwire the Bootstrap classes into the C# code because it makes it harder to reuse the tag helper elsewhere in the application or change the appearance of the buttons. Instead, I have defined custom attributes on the div element that specify the classes that I require, and these correspond to properties I added to the tag helper class, which are then used to style the a elements that are produced, as shown in listing 7.39.
Listing 7.39 Adding classes to elements in the PageLinkTagHelper.cs file in the SportsStore/Infrastructure folder
using Microsoft.AspNetCore.Mvc;
using Microsoft.AspNetCore.Mvc.Rendering;
using Microsoft.AspNetCore.Mvc.Routing;
using Microsoft.AspNetCore.Mvc.ViewFeatures;
using Microsoft.AspNetCore.Razor.TagHelpers;
using SportsStore.Models.ViewModels;
namespace SportsStore.Infrastructure {
[HtmlTargetElement("div", Attributes = "page-model")]
public class PageLinkTagHelper : TagHelper {
private IUrlHelperFactory urlHelperFactory;
public PageLinkTagHelper(IUrlHelperFactory helperFactory) {
urlHelperFactory = helperFactory;
}
[ViewContext]
[HtmlAttributeNotBound]
public ViewContext? ViewContext { get; set; }
public PagingInfo? PageModel { get; set; }
public string? PageAction { get; set; }
public bool PageClassesEnabled { get; set; } = false;
public string PageClass { get; set; } = String.Empty;
public string PageClassNormal { get; set; } = String.Empty;
public string PageClassSelected { get; set; } = String.Empty;
public override void Process(TagHelperContext context,
TagHelperOutput output) {
if (ViewContext != null && PageModel != null) {
IUrlHelper urlHelper
= urlHelperFactory.GetUrlHelper(ViewContext);
TagBuilder result = new TagBuilder("div");
for (int i = 1; i <= PageModel.TotalPages; i++) {
TagBuilder tag = new TagBuilder("a");
tag.Attributes["href"] = urlHelper.Action(PageAction,
new { productPage = i });
if (PageClassesEnabled) {
tag.AddCssClass(PageClass);
tag.AddCssClass(i == PageModel.CurrentPage
? PageClassSelected : PageClassNormal);
}
tag.InnerHtml.Append(i.ToString());
result.InnerHtml.AppendHtml(tag);
}
output.Content.AppendHtml(result.InnerHtml);
}
}
}
}
The values of the attributes are automatically used to set the tag helper property values, with the mapping between the HTML attribute name format (page-class-normal) and the C# property name format (PageClassNormal) taken into account. This allows tag helpers to respond differently based on the attributes of an HTML element, creating a more flexible way to generate content in an ASP.NET Core application.
Restart ASP.NET Core and request http://localhost:5000, and you will see the appearance of the application has been improved—at least a little, anyway—as illustrated by figure 7.8.
Figure 7.8 Applying styles to the SportsStore application
As a finishing flourish for this chapter, I am going to refactor the application to simplify the Index.cshtml view. I am going to create a partial view, which is a fragment of content that you can embed into another view, rather like a template. I describe partial views in detail in chapter 22, and they help reduce duplication when you need the same content to appear in different places in an application. Rather than copy and paste the same Razor markup into multiple views, you can define it once in a partial view. To create the partial view, I added a Razor View called ProductSummary.cshtml to the Views/Shared folder and added the markup shown in listing 7.40.
Listing 7.40 The contents of the ProductSummary.cshtml file in the SportsStore/Views/Shared folder
@model Product
<div class="card card-outline-primary m-1 p-1">
<div class="bg-faded p-1">
<h4>
@Model.Name
<span class="badge rounded-pill bg-primary text-white"
style="float:right">
<small>@Model.Price.ToString("c")</small>
</span>
</h4>
</div>
<div class="card-text p-1">@Model.Description</div>
</div>
Now I need to update the Index.cshtml file in the Views/Home folder so that it uses the partial view, as shown in listing 7.41.
Listing 7.41 Using a partial view in the Index.cshtml file in the SportsStore/Views/Home folder
@model ProductsListViewModel
@foreach (var p in Model.Products ?? Enumerable.Empty<Product>()) {
<partial name="ProductSummary" model="p" />
}
<div page-model="@Model.PagingInfo" page-action="Index"
page-classes-enabled="true" page-class="btn"
page-class-normal="btn-outline-dark"
page-class-selected="btn-primary" class="btn-group pull-right m-1">
</div>
I have taken the markup that was previously in the @foreach expression in the Index.cshtml view and moved it to the new partial view. I call the partial view using a partial element, using the name and model attributes to specify the name of the partial view and its view model. Using a partial view allows the same markup to be inserted into any view that needs to display a summary of a product.
Restart ASP.NET Core and request http://localhost:5000, and you will see that introducing the partial view doesn’t change the appearance of the application; it just changes where Razor finds the content that is used to generate the response sent to the browser.
The SportsStore ASP.NET Core project is created using the basic ASP.NET Core template.
ASP.NET Core has close integration with Entity Framework Core, which is the .NET framework for working with relational data.
Data can be paginated by including the page number in the request, either using the query string or the URL path and using the page when querying the database.
The HTML content generated by ASP.NET Core can be styled using popular CSS frameworks, such as Bootstrap.
This chapter covers
In this chapter, I continue to build out the SportsStore example app. I add support for navigating around the application and start building a shopping cart.
The SportsStore application will be more useful if customers can navigate products by category. I will do this in three phases:
Enhance the Index action method in the HomeController class so that it can filter the Product objects in the repository
Revisit and enhance the URL scheme
Create a category list that will go into the sidebar of the site, highlighting the current category and linking to others
I am going to start by enhancing the view model class, ProductsListViewModel, which I added to the SportsStore project in the previous chapter. I need to communicate the current category to the view to render the sidebar, and this is as good a place to start as any. Listing 8.1 shows the changes I made to the ProductsListViewModel.cs file in the Models/ViewModels folder.
Listing 8.1 Modifying the ProductsListViewModel.cs file in the SportsStore/Models/ ViewModels folder
namespace SportsStore.Models.ViewModels {
public class ProductsListViewModel {
public IEnumerable<Product> Products { get; set; }
= Enumerable.Empty<Product>();
public PagingInfo PagingInfo { get; set; } = new();
public string? CurrentCategory { get; set; }
}
}
I added a property called CurrentCategory. The next step is to update the Home controller so that the Index action method will filter Product objects by category and use the property I added to the view model to indicate which category has been selected, as shown in listing 8.2.
Listing 8.2 Supporting categories in the HomeController.cs file in the SportsStore/ Controllers folder
using Microsoft.AspNetCore.Mvc;
using SportsStore.Models;
using SportsStore.Models.ViewModels;
namespace SportsStore.Controllers {
public class HomeController : Controller {
private IStoreRepository repository;
public int PageSize = 4;
public HomeController(IStoreRepository repo) {
repository = repo;
}
public ViewResult Index(string? category, int productPage = 1)
=> View(new ProductsListViewModel {
Products = repository.Products
.Where(p => category == null ||
p.Category == category)
.OrderBy(p => p.ProductID)
.Skip((productPage - 1) * PageSize)
.Take(PageSize),
PagingInfo = new PagingInfo {
CurrentPage = productPage,
ItemsPerPage = PageSize,
TotalItems = repository.Products.Count()
},
CurrentCategory = category
});
}
}
I made three changes to the action method. First, I added a parameter called category. This parameter is used by the second change in the listing, which is an enhancement to the LINQ query: if cat is not null, only those Product objects with a matching Category property are selected. The last change is to set the value of the CurrentCategory property I added to the ProductsListViewModel class. However, these changes mean that the value of PagingInfo.TotalItems is incorrectly calculated because it doesn’t take the category filter into account. I will fix this later.
To see the effect of the category filtering, start ASP.NET Core and select a category using the following URL:
http://localhost:5000/?category=soccer
You will see only the products in the Soccer category, as shown in figure 8.1.
Figure 8.1 Using the query string to filter by category
Users won’t want to navigate to categories using URLs, but you can see how small changes can have a big impact once the basic structure of an ASP.NET Core application is in place.
No one wants to see or use ugly URLs such as /?category=Soccer. To address this, I am going to change the routing configuration in the Program.cs file to create a more useful set of URLs, as shown in listing 8.3.
Listing 8.3 Changing the schema in the Program.cs file in the SportsStore folder
using Microsoft.EntityFrameworkCore;
using SportsStore.Models;
var builder = WebApplication.CreateBuilder(args);
builder.Services.AddControllersWithViews();
builder.Services.AddDbContext<StoreDbContext>(opts => {
opts.UseSqlServer(
builder.Configuration["ConnectionStrings:SportsStoreConnection"]);
});
builder.Services.AddScoped<IStoreRepository, EFStoreRepository>();
var app = builder.Build();
app.UseStaticFiles();
app.MapControllerRoute("catpage",
"{category}/Page{productPage:int}",
new { Controller = "Home", action = "Index" });
app.MapControllerRoute("page", "Page{productPage:int}",
new { Controller = "Home", action = "Index", productPage = 1 });
app.MapControllerRoute("category", "{category}",
new { Controller = "Home", action = "Index", productPage = 1 });
app.MapControllerRoute("pagination",
"Products/Page{productPage}",
new { Controller = "Home", action = "Index", productPage = 1 });
app.MapDefaultControllerRoute();
SeedData.EnsurePopulated(app);
app.Run();
Table 8.1 describes the URL scheme that these routes represent. I explain the routing system in detail in chapter 13.
Table 8.1 Route summary
|
URL |
Leads To |
|---|---|
|
|
Lists the first page of products from all categories |
|
|
Lists the specified page (in this case, page 2), showing items from all categories |
|
|
Shows the first page of items from a specific category (in this case, the |
|
|
Shows the specified page (in this case, page 2) of items from the specified category (in this case, |
The ASP.NET Core routing system handles incoming requests from clients, but it also generates outgoing URLs that conform to the URL scheme and that can be embedded in web pages. By using the routing system both to handle incoming requests and to generate outgoing URLs, I can ensure that all the URLs in the application are consistent.
The IUrlHelper interface provides access to URL-generating functionality. I used this interface and the Action method it defines in the tag helper I created in the previous chapter. Now that I want to start generating more complex URLs, I need a way to receive additional information from the view without having to add extra properties to the tag helper class. Fortunately, tag helpers have a nice feature that allows properties with a common prefix to be received all together in a single collection, as shown in listing 8.4.
Listing 8.4 Prefixed values in the PageLinkTagHelper.cs file in the SportsStore/ Infrastructure folder
using Microsoft.AspNetCore.Mvc;
using Microsoft.AspNetCore.Mvc.Rendering;
using Microsoft.AspNetCore.Mvc.Routing;
using Microsoft.AspNetCore.Mvc.ViewFeatures;
using Microsoft.AspNetCore.Razor.TagHelpers;
using SportsStore.Models.ViewModels;
namespace SportsStore.Infrastructure {
[HtmlTargetElement("div", Attributes = "page-model")]
public class PageLinkTagHelper : TagHelper {
private IUrlHelperFactory urlHelperFactory;
public PageLinkTagHelper(IUrlHelperFactory helperFactory) {
urlHelperFactory = helperFactory;
}
[ViewContext]
[HtmlAttributeNotBound]
public ViewContext? ViewContext { get; set; }
public PagingInfo? PageModel { get; set; }
public string? PageAction { get; set; }
[HtmlAttributeName(DictionaryAttributePrefix = "page-url-")]
public Dictionary<string, object> PageUrlValues { get; set; }
= new Dictionary<string, object>();
public bool PageClassesEnabled { get; set; } = false;
public string PageClass { get; set; } = String.Empty;
public string PageClassNormal { get; set; } = String.Empty;
public string PageClassSelected { get; set; } = String.Empty;
public override void Process(TagHelperContext context,
TagHelperOutput output) {
if (ViewContext != null && PageModel != null) {
IUrlHelper urlHelper
= urlHelperFactory.GetUrlHelper(ViewContext);
TagBuilder result = new TagBuilder("div");
for (int i = 1; i <= PageModel.TotalPages; i++) {
TagBuilder tag = new TagBuilder("a");
PageUrlValues["productPage"] = i;
tag.Attributes["href"] = urlHelper.Action(PageAction,
PageUrlValues);
if (PageClassesEnabled) {
tag.AddCssClass(PageClass);
tag.AddCssClass(i == PageModel.CurrentPage
? PageClassSelected : PageClassNormal);
}
tag.InnerHtml.Append(i.ToString());
result.InnerHtml.AppendHtml(tag);
}
output.Content.AppendHtml(result.InnerHtml);
}
}
}
}
Decorating a tag helper property with the HtmlAttributeName attribute allows me to specify a prefix for attribute names on the element, which in this case will be page-url-. The value of any attribute whose name begins with this prefix will be added to the dictionary that is assigned to the PageUrlValues property, which is then passed to the IUrlHelper.Action method to generate the URL for the href attribute of the a elements that the tag helper produces.
In listing 8.5, I have added a new attribute to the div element that is processed by the tag helper, specifying the category that will be used to generate the URL. I have added only one new attribute to the view, but any attribute with the same prefix would be added to the dictionary.
Listing 8.5 Adding a attribute in the Index.cshtml file in the SportsStore/Views/ Home folder
@model ProductsListViewModel
@foreach (var p in Model.Products ?? Enumerable.Empty<Product>()) {
<partial name="ProductSummary" model="p" />
}
<div page-model="@Model.PagingInfo" page-action="Index"
page-classes-enabled="true" page-class="btn"
page-class-normal="btn-outline-dark"
page-class-selected="btn-primary"
page-url-category="@Model.CurrentCategory!"
class="btn-group pull-right m-1">
</div>
I used the null-forgiving operator in the page-url-category expression so that I can pass a null value without receiving a compiler warning.
Prior to this change, the links generated for the pagination links looked like this:
http://localhost:5000/Page1
If the user clicked a page link like this, the category filter would be lost, and the application would present a page containing products from all categories. By adding the current category, taken from the view model, I generate URLs like this instead:
http://localhost:5000/Chess/Page1
When the user clicks this kind of link, the current category will be passed to the Index action method, and the filtering will be preserved. To see the effect of this change, start ASP.NET Core and request http://localhost:5000/chess, which will display just the products in the Chess category, as shown in figure 8.2.
Figure 8.2 Filtering data by category
I need to provide users with a way to select a category that does not involve typing in URLs. This means presenting a list of the available categories and indicating which, if any, is currently selected.
ASP.NET Core has the concept of view components, which are perfect for creating items such as reusable navigation controls. A view component is a C# class that provides a small amount of reusable application logic with the ability to select and display Razor partial views. I describe view components in detail in chapter 24.
In this case, I will create a view component that renders the navigation menu and integrate it into the application by invoking the component from the shared layout. This approach gives me a regular C# class that can contain whatever application logic I need and that can be unit tested like any other class.
Creating the navigation view component
I created a folder called Components, which is the conventional home of view components, in the SportsStore project and added to it a class file named NavigationMenuViewComponent.cs, which I used to define the class shown in listing 8.6.
Listing 8.6 The contents of the NavigationMenuViewComponent.cs file in the SportsStore/Components folder
using Microsoft.AspNetCore.Mvc;
namespace SportsStore.Components {
public class NavigationMenuViewComponent : ViewComponent {
public string Invoke() {
return "Hello from the Nav View Component";
}
}
}
The view component’s Invoke method is called when the component is used in a Razor view, and the result of the Invoke method is inserted into the HTML sent to the browser. I have started with a simple view component that returns a string, but I’ll replace this with HTML shortly.
I want the category list to appear on all pages, so I am going to use the view component in the shared layout, rather than in a specific view. Within a view, view components are applied using a tag helper, as shown in listing 8.7.
Listing 8.7 Using a view component in the _Layout.cshtml file in the SportsStore/ Views/Shared folder
<!DOCTYPE html>
<html>
<head>
<meta name="viewport" content="width=device-width" />
<title>SportsStore</title>
<link href="/lib/bootstrap/css/bootstrap.min.css" rel="stylesheet" />
</head>
<body>
<div class="bg-dark text-white p-2">
<span class="navbar-brand ml-2">SPORTS STORE</span>
</div>
<div class="row m-1 p-1">
<div id="categories" class="col-3">
<vc:navigation-menu />
</div>
<div class="col-9">
@RenderBody()
</div>
</div>
</body>
</html>
I removed the placeholder text and replaced it with the vc:navigation-menu element, which inserts the view component. The element omits the ViewComponent part of the class name and hyphenates it, such that vc:navigation-menu specifies the NavigationMenuViewComponent class.
Restart ASP.NET Core and request http://localhost:5000, and you will see that the output from the Invoke method is included in the HTML sent to the browser, as shown in figure 8.3.
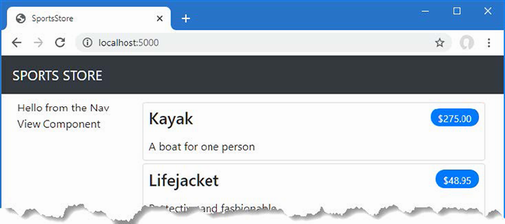
Figure 8.3 Using a view component
Generating category lists
I can now return to the navigation view component and generate a real set of categories. I could build the HTML for the categories programmatically, as I did for the page tag helper, but one of the benefits of working with view components is they can render Razor partial views. That means I can use the view component to generate the list of categories and then use the more expressive Razor syntax to render the HTML that will display them. The first step is to update the view component, as shown in listing 8.8.
Listing 8.8 Adding categories in the NavigationMenuViewComponent.cs file in the SportsStore/Components folder
using Microsoft.AspNetCore.Mvc;
using SportsStore.Models;
namespace SportsStore.Components {
public class NavigationMenuViewComponent : ViewComponent {
private IStoreRepository repository;
public NavigationMenuViewComponent(IStoreRepository repo) {
repository = repo;
}
public IViewComponentResult Invoke() {
return View(repository.Products
.Select(x => x.Category)
.Distinct()
.OrderBy(x => x));
}
}
}
The constructor defined in listing 8.8 defines an IStoreRepository parameter. When ASP.NET Core needs to create an instance of the view component class, it will note the need to provide a value for this parameter and inspect the configuration in the Program.cs file to determine which implementation object should be used. This is the same dependency injection feature that I used in the controller in chapter 7, and it has the same effect, which is to allow the view component to access data without knowing which repository implementation will be used, a feature I describe in detail in chapter 14.
In the Invoke method, I use LINQ to select and order the set of categories in the repository and pass them as the argument to the View method, which renders the default Razor partial view, details of which are returned from the method using an IViewComponentResult object, a process I describe in more detail in chapter 24.
Creating the view
Razor uses different conventions for locating views that are selected by view components. Both the default name of the view and the locations that are searched for the view are different from those used for controllers. To that end, I created the Views/Shared/Components/NavigationMenu folder in the SportsStore project and added to it a Razor View named Default.cshtml, to which I added the content shown in listing 8.9.
Listing 8.9 The contents of the Default.cshtml file in the SportsStore/Views/ Shared/Components/NavigationMenu folder
@model IEnumerable<string>
<div class="d-grid gap-2">
<a class="btn btn-outline-secondary"asp-action="Index"
asp-controller="Home" asp-route-category="">
Home
</a>
@foreach (string category in Model ?? Enumerable.Empty<string>()) {
<a class="btn btn-outline-secondary"
asp-action="Index" asp-controller="Home"
asp-route-category="@category"
asp-route-productPage="1">
@category
</a>
}
</div>
This view uses one of the built-in tag helpers, which I describe in chapters 25–27, to create anchor elements whose href attribute contains a URL that selects a different product category.
Restart ASP.NET Core and request http://localhost:5000 to see the category navigation buttons. If you click a button, the list of items is updated to show only items from the selected category, as shown in figure 8.4.
Figure 8.4 Generating category links with a view component
Highlighting the current category
There is no feedback to the user to indicate which category has been selected. It might be possible to infer the category from the items in the list, but some clear visual feedback seems like a good idea. ASP.NET Core components such as controllers and view components can receive information about the current request by asking for a context object. Most of the time, you can rely on the base classes that you use to create components to take care of getting the context object for you, such as when you use the Controller base class to create controllers.
The ViewComponent base class is no exception and provides access to context objects through a set of properties. One of the properties is called RouteData, which provides information about how the request URL was handled by the routing system.
In listing 8.10, I use the RouteData property to access the request data to get the value for the currently selected category. I could pass the category to the view by creating another view model class (and that’s what I would do in a real project), but for variety, I am going to use the view bag feature, which allows unstructured data to be passed to a view alongside the view model object. I describe how this feature works in detail in chapter 22.
Listing 8.10 Passing the selected category in the NavigationMenuViewComponent.cs file in the SportsStore/Components folder
using Microsoft.AspNetCore.Mvc;
using SportsStore.Models;
namespace SportsStore.Components {
public class NavigationMenuViewComponent : ViewComponent {
private IStoreRepository repository;
public NavigationMenuViewComponent(IStoreRepository repo) {
repository = repo;
}
public IViewComponentResult Invoke() {
ViewBag.SelectedCategory = RouteData?.Values["category"];
return View(repository.Products
.Select(x => x.Category)
.Distinct()
.OrderBy(x => x));
}
}
}
Inside the Invoke method, I have dynamically assigned a SelectedCategory property to the ViewBag object and set its value to be the current category, which is obtained through the context object returned by the RouteData property. The ViewBag is a dynamic object that allows me to define new properties simply by assigning values to them.
Now that I am providing information about which category is selected, I can update the view selected by the view component and vary the CSS classes used to style the links so that the one representing the current category is distinct. Listing 8.11 shows the change I made to the Default.cshtml file.
Listing 8.11 Highlighting in the Default.cshtml file in the SportsStore/Views/Shared/Components/NavigationMenu folder
@model IEnumerable<string>
<div class="d-grid gap-2">
<a class="btn btn-outline-secondary"asp-action="Index"
asp-controller="Home" asp-route-category="">
Home
</a>
@foreach (string category in Model ?? Enumerable.Empty<string>()) {
<a class="btn @(category == ViewBag.SelectedCategory
? "btn-primary": "btn-outline-secondary")"
asp-action="Index" asp-controller="Home"
asp-route-category="@category"
asp-route-productPage="1">
@category
</a>
}
</div>
I have used a Razor expression within the class attribute to apply the btn-primary class to the element that represents the selected category and the btn-secondary class otherwise. These classes apply different Bootstrap styles and make the active button obvious, which you can see by restarting ASP.NET Core, requesting http://localhost:5000, and clicking one of the category buttons, as shown in figure 8.5.

Figure 8.5 Highlighting the selected category
I need to correct the page links so that they work correctly when a category is selected. Currently, the number of page links is determined by the total number of products in the repository and not the number of products in the selected category. This means that the customer can click the link for page 2 of the Chess category and end up with an empty page because there are not enough chess products to fill two pages. You can see the problem in figure 8.6.
Figure 8.6 Displaying the wrong page links when a category is selected
I can fix this by updating the Index action method in the Home controller so that the pagination information takes the categories into account, as shown in listing 8.12.
Listing 8.12 Creating Category Pagination Data in the HomeController.cs File in the SportsStore/Controllers Folder
using Microsoft.AspNetCore.Mvc;
using SportsStore.Models;
using SportsStore.Models.ViewModels;
namespace SportsStore.Controllers {
public class HomeController : Controller {
private IStoreRepository repository;
public int PageSize = 4;
public HomeController(IStoreRepository repo) {
repository = repo;
}
public ViewResult Index(string? category, int productPage = 1)
=> View(new ProductsListViewModel {
Products = repository.Products
.Where(p => category == null
|| p.Category == category)
.OrderBy(p => p.ProductID)
.Skip((productPage - 1) * PageSize)
.Take(PageSize),
PagingInfo = new PagingInfo {
CurrentPage = productPage,
ItemsPerPage = PageSize,
TotalItems = category == null
? repository.Products.Count()
: repository.Products.Where(e =>
e.Category == category).Count()
},
CurrentCategory = category
});
}
}
If a category has been selected, I return the number of items in that category; if not, I return the total number of products. Restart ASP.NET Core and request http://localhost:5000 to see the changes when a category is selected, as shown in figure 8.7.
Figure 8.7 Displaying category-specific page counts
The application is progressing nicely, but I cannot sell any products until I implement a shopping cart. In this section, I will create the shopping cart experience shown in figure 8.8. This will be familiar to anyone who has ever made a purchase online.
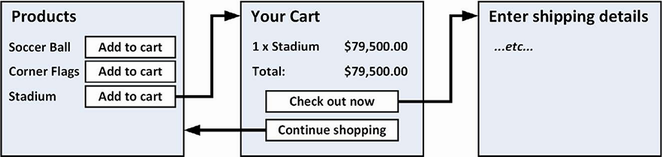
Figure 8.8 The basic shopping cart flow
An Add To Cart button will be displayed alongside each of the products in the catalog. Clicking this button will show a summary of the products the customer has selected so far, including the total cost. At this point, the user can click the Continue Shopping button to return to the product catalog or click the Checkout Now button to complete the order and finish the shopping session.
So far, I have used the MVC Framework to define the SportsStore project features. For variety, I am going to use Razor Pages—another application framework supported by ASP.NET Core—to implement the shopping cart. Listing 8.13 configures the Program.cs file to enable Razor Pages in the SportsStore application.
Listing 8.13 Enabling Razor Pages in the Program.cs file in the SportsStore folder
using Microsoft.EntityFrameworkCore;
using SportsStore.Models;
var builder = WebApplication.CreateBuilder(args);
builder.Services.AddControllersWithViews();
builder.Services.AddDbContext<StoreDbContext>(opts => {
opts.UseSqlServer(
builder.Configuration["ConnectionStrings:SportsStoreConnection"]);
});
builder.Services.AddScoped<IStoreRepository, EFStoreRepository>();
builder.Services.AddRazorPages();
var app = builder.Build();
app.UseStaticFiles();
app.MapControllerRoute("catpage",
"{category}/Page{productPage:int}",
new { Controller = "Home", action = "Index" });
app.MapControllerRoute("page", "Page{productPage:int}",
new { Controller = "Home", action = "Index", productPage = 1 });
app.MapControllerRoute("category", "{category}",
new { Controller = "Home", action = "Index", productPage = 1 });
app.MapControllerRoute("pagination",
"Products/Page{productPage}",
new { Controller = "Home", action = "Index", productPage = 1 });
app.MapDefaultControllerRoute();
app.MapRazorPages();
SeedData.EnsurePopulated(app);
app.Run();
The AddRazorPages method sets up the services used by Razor Pages, and the MapRazorPages method registers Razor Pages as endpoints that the URL routing system can use to handle requests.
Add a folder named Pages, which is the conventional location for Razor Pages, to the SportsStore project. Add a Razor View Imports file named _ViewImports.cshtml to the Pages folder with the content shown in listing 8.14. These expressions set the namespace that the Razor Pages will belong to and allow the SportsStore classes to be used in Razor Pages without needing to specify their namespace.
Listing 8.14 The _ViewImports.cshtml file in the SportsStore/Pages folder
@namespace SportsStore.Pages @using Microsoft.AspNetCore.Mvc.RazorPages @using SportsStore.Models @using SportsStore.Infrastructure @addTagHelper *, Microsoft.AspNetCore.Mvc.TagHelpers
Next, add a Razor View Start file named _ViewStart.cshtml to the Pages folder, with the content shown in listing 8.15. Razor Pages have their own configuration files, and this one specifies that the Razor Pages in the SportsStore project will use a layout file named _CartLayout by default.
Listing 8.15 The contents of the _ViewStart.cshtml file in the SportsStore/Pages folder
@{
Layout = "_CartLayout";
}
Finally, to provide the layout the Razor Pages will use, add a Razor View named _CartLayout.cshtml to the Pages folder with the content shown in listing 8.16.
Listing 8.16 The contents of the _CartLayout.cshtml file in the SportsStore/Pages folder
<!DOCTYPE html>
<html>
<head>
<meta name="viewport" content="width=device-width" />
<title>SportsStore</title>
<link href="/lib/bootstrap/css/bootstrap.min.css" rel="stylesheet" />
</head>
<body>
<div class="bg-dark text-white p-2">
<span class="navbar-brand ml-2">SPORTS STORE</span>
</div>
<div class="m-1 p-1">
@RenderBody()
</div>
</body>
</html>
If you are using Visual Studio, use the Razor Page template item and set the item name to Cart.cshtml. This will create a Cart.cshtml file and a Cart.cshtml.cs class file. Replace the contents of the file with those shown in listing 8.17. If you are using Visual Studio Code, just create a Cart.cshtml file with the content shown in listing 8.17.
Listing 8.17 The contents of the Cart.cshtml file in the SportsStore/Pages folder
@page <h4>This is the Cart Page</h4>
Restart ASP.NET Core and request http://localhost:5000/cart to see the placeholder content from listing 8.17, which is shown in figure 8.9. Notice that I have not had to register the page and that the mapping between the /cart URL path and the Razor Page has been handled automatically.
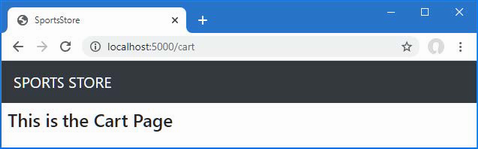
Figure 8.9 Placeholder content from a Razor Page
I have some preparation to do before I can implement the cart feature. First, I need to create the buttons that will add products to the cart. To prepare for this, I added a class file called UrlExtensions.cs to the Infrastructure folder and defined the extension method shown in listing 8.18.
Listing 8.18 The UrlExtensions.cs file in the SportsStore/Infrastructure folder
namespace SportsStore.Infrastructure {
public static class UrlExtensions {
public static string PathAndQuery(this HttpRequest request) =>
request.QueryString.HasValue
? $"{request.Path}{request.QueryString}"
: request.Path.ToString();
}
}
The PathAndQuery extension method operates on the HttpRequest class, which ASP.NET Core uses to describe an HTTP request. The extension method generates a URL that the browser will be returned to after the cart has been updated, taking into account the query string, if there is one. In listing 8.19, I have added the namespace that contains the extension method to the view imports file so that I can use it in the partial view.
Listing 8.19 Adding a namespace in the _ViewImports.cshtml file in the SportsStore/Views folder
@using SportsStore.Models @using SportsStore.Models.ViewModels @using SportsStore.Infrastructure @addTagHelper *, Microsoft.AspNetCore.Mvc.TagHelpers @addTagHelper *, SportsStore
In listing 8.20, I have updated the partial view that describes each product so that it contains an Add To Cart button.
Listing 8.20 Adding the Buttons to the ProductSummary.cshtml File in the SportsStore/Views/Shared Folder
@model Product
<div class="card card-outline-primary m-1 p-1">
<div class="bg-faded p-1">
<h4>
@Model.Name
<span class="badge rounded-pill bg-primary text-white"
style="float:right">
<small>@Model.Price.ToString("c")</small>
</span>
</h4>
</div>
<form id="@Model.ProductID" asp-page="/Cart" method="post">
<input type="hidden" asp-for="ProductID" />
<input type="hidden" name="returnUrl"
value="@ViewContext.HttpContext.Request.PathAndQuery()" />
<span class="card-text p-1">
@Model.Description
<button type="submit" style="float:right"
class="btn btn-success btn-sm pull-right" >
Add To Cart
</button>
</span>
</form>
</div>
I have added a form element that contains hidden input elements specifying the ProductID value from the view model and the URL that the browser should be returned to after the cart has been updated. The form element and one of the input elements are configured using built-in tag helpers, which are a useful way of generating forms that contain model values and that target controllers or Razor Pages, as described in chapter 27. The other input element uses the extension method I created to set the return URL. I also added a button element that will submit the form to the application.
I am going to store details of a user’s cart using session state, which is data associated with a series of requests made by a user. ASP.NET provides a range of different ways to store session state, including storing it in memory, which is the approach that I am going to use. This has the advantage of simplicity, but it means that the session data is lost when the application is stopped or restarted. Enabling sessions requires adding services and middleware in the Program.cs file, as shown in listing 8.21.
Listing 8.21 Enabling sessions in the Program.cs file in the SportsStore folder
using Microsoft.EntityFrameworkCore;
using SportsStore.Models;
var builder = WebApplication.CreateBuilder(args);
builder.Services.AddControllersWithViews();
builder.Services.AddDbContext<StoreDbContext>(opts => {
opts.UseSqlServer(
builder.Configuration["ConnectionStrings:SportsStoreConnection"]);
});
builder.Services.AddScoped<IStoreRepository, EFStoreRepository>();
builder.Services.AddRazorPages();
builder.Services.AddDistributedMemoryCache();
builder.Services.AddSession();
var app = builder.Build();
app.UseStaticFiles();
app.UseSession();
app.MapControllerRoute("catpage",
"{category}/Page{productPage:int}",
new { Controller = "Home", action = "Index" });
app.MapControllerRoute("page", "Page{productPage:int}",
new { Controller = "Home", action = "Index", productPage = 1 });
app.MapControllerRoute("category", "{category}",
new { Controller = "Home", action = "Index", productPage = 1 });
app.MapControllerRoute("pagination",
"Products/Page{productPage}",
new { Controller = "Home", action = "Index", productPage = 1 });
app.MapDefaultControllerRoute();
app.MapRazorPages();
SeedData.EnsurePopulated(app);
app.Run();
The AddDistributedMemoryCache method call sets up the in-memory data store. The AddSession method registers the services used to access session data, and the UseSession method allows the session system to automatically associate requests with sessions when they arrive from the client.
Now that the preparations are complete, I can implement the cart features. I started by adding a class file called Cart.cs to the Models folder in the SportsStore project and used it to define the classes shown in listing 8.22.
Listing 8.22 The contents of the Cart.cs file in the SportsStore/Models folder
namespace SportsStore.Models {
public class Cart {
public List<CartLine> Lines { get; set; } = new List<CartLine>();
public void AddItem(Product product, int quantity) {
CartLine? line = Lines
.Where(p => p.Product.ProductID == product.ProductID)
.FirstOrDefault();
if (line == null) {
Lines.Add(new CartLine {
Product = product,
Quantity = quantity
});
} else {
line.Quantity += quantity;
}
}
public void RemoveLine(Product product) =>
Lines.RemoveAll(l => l.Product.ProductID
== product.ProductID);
public decimal ComputeTotalValue() =>
Lines.Sum(e => e.Product.Price * e.Quantity);
public void Clear() => Lines.Clear();
}
public class CartLine {
public int CartLineID { get; set; }
public Product Product { get; set; } = new();
public int Quantity { get; set; }
}
}
The Cart class uses the CartLine class, defined in the same file, to represent a product selected by the customer and the quantity the user wants to buy. I defined methods to add an item to the cart, remove a previously added item from the cart, calculate the total cost of the items in the cart, and reset the cart by removing all the items.
Defining session state extension methods
The session state feature in ASP.NET Core stores only int, string, and byte[] values. Since I want to store a Cart object, I need to define extension methods to the ISession interface, which provides access to the session state data to serialize Cart objects into JSON and convert them back. I added a class file called SessionExtensions.cs to the Infrastructure folder and defined the extension methods shown in listing 8.23.
Listing 8.23 The SessionExtensions.cs file in the SportsStore/Infrastructure folder
using System.Text.Json;
namespace SportsStore.Infrastructure {
public static class SessionExtensions {
public static void SetJson(this ISession session,
string key, object value) {
session.SetString(key, JsonSerializer.Serialize(value));
}
public static T? GetJson<T>(this ISession session, string key) {
var sessionData = session.GetString(key);
return sessionData == null
? default(T) : JsonSerializer.Deserialize<T>(sessionData);
}
}
}
These methods serialize objects into the JavaScript Object Notation format, making it easy to store and retrieve Cart objects.
Completing the Razor Page
The Cart Razor Page will receive the HTTP POST request that the browser sends when the user clicks an Add To Cart button. It will use the request form data to get the Product object from the database and use it to update the user’s cart, which will be stored as session data for use by future requests. Listing 8.24 implements these features.
Listing 8.24 Handling requests in the Cart.cshtml file in the SportsStore/Pages folder
@page
@model CartModel
<h2>Your cart</h2>
<table class="table table-bordered table-striped">
<thead>
<tr>
<th>Quantity</th>
<th>Item</th>
<th class="text-right">Price</th>
<th class="text-right">Subtotal</th>
</tr>
</thead>
<tbody>
@foreach (var line in Model.Cart?.Lines
?? Enumerable.Empty<CartLine>()) {
<tr>
<td class="text-center">@line.Quantity</td>
<td class="text-left">@line.Product.Name</td>
<td class="text-right">
@line.Product.Price.ToString("c")
</td>
<td class="text-right">
@((line.Quantity * line.Product.Price).ToString("c"))
</td>
</tr>
}
</tbody>
<tfoot>
<tr>
<td colspan="3" class="text-right">Total:</td>
<td class="text-right">
@Model.Cart?.ComputeTotalValue().ToString("c")
</td>
</tr>
</tfoot>
</table>
<div class="text-center">
<a class="btn btn-primary" href="@Model.ReturnUrl">
Continue shopping
</a>
</div>
Razor Pages allow HTML content, Razor expressions, and code to be combined in a single file, as I explain in chapter 23, but if you want to unit test a Razor Page, then you need to use a separate class file. If you are using Visual Studio, there will already be a class file named Cart.cshtml.cs in the Pages folder, which was created by the Razor Page template item. If you are using Visual Studio Code, you will need to create the class file separately. Use the class file, however it has been created, to define the class shown in listing 8.25.
Listing 8.25 The Cart.cshtml.cs file in the SportsStore/Pages folder
using Microsoft.AspNetCore.Mvc;
using Microsoft.AspNetCore.Mvc.RazorPages;
using SportsStore.Infrastructure;
using SportsStore.Models;
namespace SportsStore.Pages {
public class CartModel : PageModel {
private IStoreRepository repository;
public CartModel(IStoreRepository repo) {
repository = repo;
}
public Cart? Cart { get; set; }
public string ReturnUrl { get; set; } = "/";
public void OnGet(string returnUrl) {
ReturnUrl = returnUrl ?? "/";
Cart = HttpContext.Session.GetJson<Cart>("cart")
?? new Cart();
}
public IActionResult OnPost(long productId, string returnUrl) {
Product? product = repository.Products
.FirstOrDefault(p => p.ProductID == productId);
if (product != null) {
Cart = HttpContext.Session.GetJson<Cart>("cart")
?? new Cart();
Cart.AddItem(product, 1);
HttpContext.Session.SetJson("cart", Cart);
}
return RedirectToPage(new { returnUrl = returnUrl });
}
}
}
The class associated with a Razor Page is known as its page model class, and it defines handler methods that are invoked for different types of HTTP requests, which update state before rendering the view. The page model class in listing 8.25, which is named CartModel, defines an OnPost handler method, which is invoked to handle HTTP POST requests. It does this by retrieving a Product from the database, retrieving the user’s Cart from the session data, and updating its content using the Product. The modified Cart is stored, and the browser is redirected to the same Razor Page, which it will do using a GET request (which prevents reloading the browser from triggering a duplicate POST request).
The GET request is handled by the OnGet handler method, which sets the values of the ReturnUrl and Cart properties, after which the Razor content section of the page is rendered. The expressions in the HTML content are evaluated using the CartModel as the view model object, which means that the values assigned to the ReturnUrl and Cart properties can be accessed within the expressions. The content generated by the Razor Page details the products added to the user’s cart and provides a button to navigate back to the point where the product was added to the cart.
The handler methods use parameter names that match the input elements in the HTML forms produced by the ProductSummary.cshtml view. This allows ASP.NET Core to associate incoming form POST variables with those parameters, meaning I do not need to process the form directly. This is known as model binding and is a powerful tool for simplifying development, as I explain in detail in chapter 28.
The result is that the basic functions of the shopping cart are in place. First, products are listed along with a button to add them to the cart, which you can see by restarting ASP.NET Core and requesting http://localhost:5000, as shown in figure 8.10.
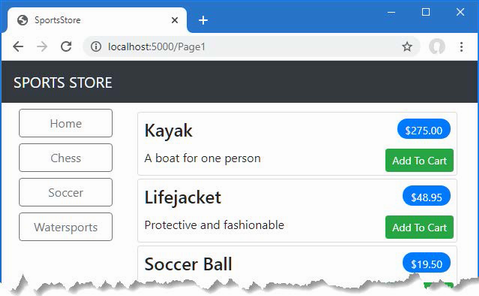
Figure 8.10 The Add To Cart buttons
Second, when the user clicks an Add To Cart button, the appropriate product is added to their cart, and a summary of the cart is displayed, as shown in figure 8.11. Clicking the Continue Shopping button returns the user to the product page they came from.
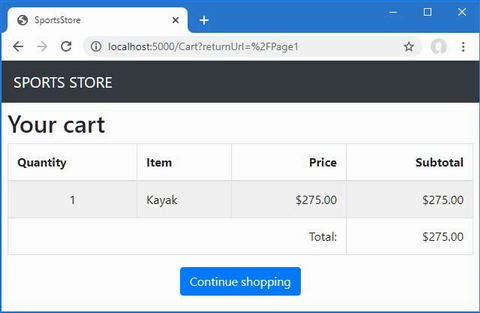
Figure 8.11 Displaying the contents of the shopping cart
The navigation controls include the selected category in the request URL, which is combined with the page number when querying the database.
The View Bag allows data to be passed to views alongside the view model.
Razor Pages are well-suited for simple self-contained features, like displaying the contents of a shopping cart.
Sessions allow data to be associated with a series of related requests.
This chapter covers
In this chapter, I continue to build the SportsStore example app. In the previous chapter, I added the basic support for a shopping cart, and now I am going to improve on and complete that functionality.
I defined a Cart model class in the previous chapter and demonstrated how it can be stored using the session feature, allowing the user to build up a set of products for purchase. The responsibility for managing the persistence of the Cart class fell to the Cart Razor Page, which has to deal with getting and storing Cart objects as session data.
The problem with this approach is that I will have to duplicate the code that obtains and stores Cart objects in any other Razor Page or controller that uses them. In this section, I am going to use the services feature that sits at the heart of ASP.NET Core to simplify the way that Cart objects are managed, freeing individual components from needing to deal with the details directly.
Services are commonly used to hide details of how interfaces are implemented from the components that depend on them. But services can be used to solve lots of other problems as well and can be used to shape and reshape an application, even when you are working with concrete classes such as Cart.
The first step in tidying up the way that the Cart class is used will be to create a subclass that is aware of how to store itself using session state. To prepare, I apply the virtual keyword to the Cart class, as shown in listing 9.1, so that I can override the members.
Listing 9.1 Applying the keyword in the Cart.cs file in the SportsStore/Models folder
namespace SportsStore.Models {
public class Cart {
public List<CartLine> Lines { get; set; } = new List<CartLine>();
public virtual void AddItem(Product product, int quantity) {
CartLine? line = Lines
.Where(p => p.Product.ProductID == product.ProductID)
.FirstOrDefault();
if (line == null) {
Lines.Add(new CartLine {
Product = product,
Quantity = quantity
});
} else {
line.Quantity += quantity;
}
}
public virtual void RemoveLine(Product product) =>
Lines.RemoveAll(l =>
l.Product.ProductID == product.ProductID);
public decimal ComputeTotalValue() =>
Lines.Sum(e => e.Product.Price * e.Quantity);
public virtual void Clear() => Lines.Clear();
}
public class CartLine {
public int CartLineID { get; set; }
public Product Product { get; set; } = new();
public int Quantity { get; set; }
}
}
Next, I added a class file called SessionCart.cs to the Models folder and used it to define the class shown in listing 9.2.
Listing 9.2 The contents of the SessionCart.cs file in the SportsStore/Models folder
using System.Text.Json.Serialization;
using SportsStore.Infrastructure;
namespace SportsStore.Models {
public class SessionCart : Cart {
public static Cart GetCart(IServiceProvider services) {
ISession? session =
services.GetRequiredService<IHttpContextAccessor>()
.HttpContext?.Session;
SessionCart cart = session?.GetJson<SessionCart>("Cart")
?? new SessionCart();
cart.Session = session;
return cart;
}
[JsonIgnore]
public ISession? Session { get; set; }
public override void AddItem(Product product, int quantity) {
base.AddItem(product, quantity);
Session?.SetJson("Cart", this);
}
public override void RemoveLine(Product product) {
base.RemoveLine(product);
Session?.SetJson("Cart", this);
}
public override void Clear() {
base.Clear();
Session?.Remove("Cart");
}
}
}
The SessionCart class subclasses the Cart class and overrides the AddItem, RemoveLine, and Clear methods so they call the base implementations and then store the updated state in the session using the extension methods on the ISession interface. The static GetCart method is a factory for creating SessionCart objects and providing them with an ISession object so they can store themselves.
Getting hold of the ISession object is a little complicated. I obtain an instance of the IHttpContextAccessor service, which provides me with access to an HttpContext object that, in turn, provides me with the ISession. This indirect approach is required because the session isn’t provided as a regular service.
The next step is to create a service for the Cart class. My goal is to satisfy requests for Cart objects with SessionCart objects that will seamlessly store themselves. You can see how I created the service in listing 9.3.
Listing 9.3 Creating the cart service in the Program.cs file in the SportsStore folder
using Microsoft.EntityFrameworkCore;
using SportsStore.Models;
var builder = WebApplication.CreateBuilder(args);
builder.Services.AddControllersWithViews();
builder.Services.AddDbContext<StoreDbContext>(opts => {
opts.UseSqlServer(
builder.Configuration["ConnectionStrings:SportsStoreConnection"]);
});
builder.Services.AddScoped<IStoreRepository, EFStoreRepository>();
builder.Services.AddRazorPages();
builder.Services.AddDistributedMemoryCache();
builder.Services.AddSession();
builder.Services.AddScoped<Cart>(sp => SessionCart.GetCart(sp));
builder.Services.AddSingleton<IHttpContextAccessor,
HttpContextAccessor>();
var app = builder.Build();
app.UseStaticFiles();
app.UseSession();
app.MapControllerRoute("catpage",
"{category}/Page{productPage:int}",
new { Controller = "Home", action = "Index" });
app.MapControllerRoute("page", "Page{productPage:int}",
new { Controller = "Home", action = "Index", productPage = 1 });
app.MapControllerRoute("category", "{category}",
new { Controller = "Home", action = "Index", productPage = 1 });
app.MapControllerRoute("pagination",
"Products/Page{productPage}",
new { Controller = "Home", action = "Index", productPage = 1 });
app.MapDefaultControllerRoute();
app.MapRazorPages();
SeedData.EnsurePopulated(app);
app.Run();
The AddScoped method specifies that the same object should be used to satisfy related requests for Cart instances. How requests are related can be configured, but by default, it means that any Cart required by components handling the same HTTP request will receive the same object.
Rather than provide the AddScoped method with a type mapping, as I did for the repository, I have specified a lambda expression that will be invoked to satisfy Cart requests. The expression receives the collection of services that have been registered and passes the collection to the GetCart method of the SessionCart class. The result is that requests for the Cart service will be handled by creating SessionCart objects, which will serialize themselves as session data when they are modified.
I also added a service using the AddSingleton method, which specifies that the same object should always be used. The service I created tells ASP.NET Core to use the HttpContextAccessor class when implementations of the IHttpContextAccessor interface are required. This service is required so I can access the current session in the SessionCart class.
The benefit of creating this kind of service is that it allows me to simplify the code where Cart objects are used. In listing 9.4, I have reworked the page model class for the Cart Razor Page to take advantage of the new service.
Listing 9.4 Using the service in the Cart.cshtml.cs file in the SportsStore/Pages folder
using Microsoft.AspNetCore.Mvc;
using Microsoft.AspNetCore.Mvc.RazorPages;
using SportsStore.Infrastructure;
using SportsStore.Models;
namespace SportsStore.Pages {
public class CartModel : PageModel {
private IStoreRepository repository;
public CartModel(IStoreRepository repo, Cart cartService) {
repository = repo;
Cart = cartService;
}
public Cart Cart { get; set; }
public string ReturnUrl { get; set; } = "/";
public void OnGet(string returnUrl) {
ReturnUrl = returnUrl ?? "/";
//Cart = HttpContext.Session.GetJson<Cart>("cart")
// ?? new Cart();
}
public IActionResult OnPost(long productId, string returnUrl) {
Product? product = repository.Products
.FirstOrDefault(p => p.ProductID == productId);
if (product != null) {
Cart.AddItem(product, 1);
}
return RedirectToPage(new { returnUrl = returnUrl });
}
}
}
The page model class indicates that it needs a Cart object by declaring a constructor argument, which has allowed me to remove the statements that load and store sessions from the handler methods. The result is a simpler page model class that focuses on its role in the application without having to worry about how Cart objects are created or persisted. And, since services are available throughout the application, any component can get hold of the user’s cart using the same technique.
Now that I have introduced the Cart service, it is time to complete the cart functionality by adding two new features. The first will allow the customer to remove an item from the cart. The second feature will display a summary of the cart at the top of the page.
To remove items from the cart, I need to add a Remove button to the content rendered by the Cart Razor Page that will submit an HTTP POST request. The changes are shown in listing 9.5.
Listing 9.5 Removing cart items in the Cart.cshtml file in the SportsStore/Pages folder
@page
@model CartModel
<h2>Your cart</h2>
<table class="table table-bordered table-striped">
<thead>
<tr>
<th>Quantity</th>
<th>Item</th>
<th class="text-right">Price</th>
<th class="text-right">Subtotal</th>
<th></th>
</tr>
</thead>
<tbody>
@foreach (var line in Model.Cart?.Lines
?? Enumerable.Empty<CartLine>()) {
<tr>
<td class="text-center">@line.Quantity</td>
<td class="text-left">@line.Product.Name</td>
<td class="text-right">
@line.Product.Price.ToString("c")
</td>
<td class="text-right">
@((line.Quantity * line.Product.Price).ToString("c"))
</td>
<td class="text-center">
<form asp-page-handler="Remove" method="post">
<input type="hidden" name="ProductID"
value="@line.Product.ProductID" />
<input type="hidden" name="returnUrl"
value="@Model?.ReturnUrl" />
<button type="submit"
class="btn btn-sm btn-danger">
Remove
</button>
</form>
</td>
</tr>
}
</tbody>
<tfoot>
<tr>
<td colspan="3" class="text-right">Total:</td>
<td class="text-right">
@Model.Cart?.ComputeTotalValue().ToString("c")
</td>
</tr>
</tfoot>
</table>
<div class="text-center">
<a class="btn btn-primary" href="@Model.ReturnUrl">
Continue shopping
</a>
</div>
The button requires a new handler method in the page model class that will receive the request and modify the cart, as shown in listing 9.6.
Listing 9.6 Removing an item in the Cart.cshtml.cs file in the SportsStore/Pages folder
using Microsoft.AspNetCore.Mvc;
using Microsoft.AspNetCore.Mvc.RazorPages;
using SportsStore.Infrastructure;
using SportsStore.Models;
namespace SportsStore.Pages {
public class CartModel : PageModel {
private IStoreRepository repository;
public CartModel(IStoreRepository repo, Cart cartService) {
repository = repo;
Cart = cartService;
}
public Cart Cart { get; set; }
public string ReturnUrl { get; set; } = "/";
public void OnGet(string returnUrl) {
ReturnUrl = returnUrl ?? "/";
}
public IActionResult OnPost(long productId, string returnUrl) {
Product? product = repository.Products
.FirstOrDefault(p => p.ProductID == productId);
if (product != null) {
Cart.AddItem(product, 1);
}
return RedirectToPage(new { returnUrl = returnUrl });
}
public IActionResult OnPostRemove(long productId,
string returnUrl) {
Cart.RemoveLine(Cart.Lines.First(cl =>
cl.Product.ProductID == productId).Product);
return RedirectToPage(new { returnUrl = returnUrl });
}
}
}
The new HTML content defines an HTML form. The handler method that will receive the request is specified with the asp-page-handler tag helper attribute, like this:
... <form asp-page-handler="Remove" method="post"> ...
The specified name is prefixed with On and given a suffix that matches the request type so that a value of Remove selects the OnPostRemove handler method. The handler method uses the value it receives to locate the item in the cart and remove it.
Restart ASP.NET Core and request http://localhost:5000. Click the Add To Cart buttons to add items to the cart and then click a Remove button. The cart will be updated to remove the item you specified, as shown in figure 9.1.

Figure 9.1 Removing items from the shopping cart
I may have a functioning cart, but there is an issue with the way it is integrated into the interface. Customers can tell what is in their cart only by viewing the cart summary screen. And they can view the cart summary screen only by adding a new item to the cart.
To solve this problem, I am going to add a widget that summarizes the contents of the cart and that can be clicked to display the cart contents throughout the application. I will do this in much the same way that I added the navigation widget—as a view component whose output I can include in a Razor layout.
Adding the Font Awesome package
As part of the cart summary, I am going to display a button that allows the user to check out. Rather than display the word checkout in the button, I want to use a cart symbol. Since I have no artistic skills, I am going to use the Font Awesome package, which is an excellent set of open source icons that are integrated into applications as fonts, where each character in the font is a different image. You can learn more about Font Awesome, including inspecting the icons it contains, at https://fontawesome.com.
To install the client-side package, use a PowerShell command prompt to run the command shown in listing 9.7 in the SportsStore project.
Listing 9.7 Installing the icon package
libman install font-awesome@6.2.1 -d wwwroot/lib/font-awesome
Creating the view component class and view
I added a class file called CartSummaryViewComponent.cs in the Components folder and used it to define the view component shown in listing 9.8.
Listing 9.8 The CartSummaryViewComponent.cs file in the SportsStore/ Components folder
using Microsoft.AspNetCore.Mvc;
using SportsStore.Models;
namespace SportsStore.Components {
public class CartSummaryViewComponent : ViewComponent {
private Cart cart;
public CartSummaryViewComponent(Cart cartService) {
cart = cartService;
}
public IViewComponentResult Invoke() {
return View(cart);
}
}
}
This view component can take advantage of the service that I created earlier in the chapter to receive a Cart object as a constructor argument. The result is a simple view component class that passes on the Cart to the View method to generate the fragment of HTML that will be included in the layout. To create the view for the component, I created the Views/Shared/Components/CartSummary folder and added to it a Razor View named Default.cshtml with the content shown in listing 9.9.
Listing 9.9 The Default.cshtml file in the Views/Shared/Components/ CartSummary folder
@model Cart
<div class="">
@if (Model.Lines.Count() > 0) {
<small class="navbar-text">
<b>Your cart:</b>
@Model.Lines.Sum(x => x.Quantity) item(s)
@Model.ComputeTotalValue().ToString("c")
</small>
}
<a class="btn btn-sm btn-secondary navbar-btn" asp-page="/Cart"
asp-route-returnurl=
"@ViewContext.HttpContext.Request.PathAndQuery()">
<i class="fa fa-shopping-cart"></i>
</a>
</div>
The view displays a button with the Font Awesome cart icon and, if there are items in the cart, provides a snapshot that details the number of items and their total value. Now that I have a view component and a view, I can modify the layout so that the cart summary is included in the responses generated by the Home controller, as shown in listing 9.10.
Listing 9.10 Adding the summary in the _Layout.cshtml file in the Views/Shared folder
<!DOCTYPE html>
<html>
<head>
<meta name="viewport" content="width=device-width" />
<title>SportsStore</title>
<link href="/lib/bootstrap/css/bootstrap.min.css" rel="stylesheet" />
<link href="/lib/font-awesome/css/all.min.css" rel="stylesheet" />
</head>
<body>
<div class="bg-dark text-white p-2">
<div class="container-fluid">
<div class="row">
<div class="col navbar-brand">SPORTS STORE</div>
<div class="col-6 navbar-text text-end">
<vc:cart-summary />
</div>
</div>
</div>
</div>
<div class="row m-1 p-1">
<div id="categories" class="col-3">
<vc:navigation-menu />
</div>
<div class="col-9">
@RenderBody()
</div>
</div>
</body>
</html>
You can see the cart summary by starting the application. When the cart is empty, only the checkout button is shown. If you add items to the cart, then the number of items and their combined cost are shown, as illustrated in figure 9.2. With this addition, customers know what is in their cart and have an obvious way to check out from the store.
Figure 9.2 Displaying a summary of the cart
I have now reached the final customer feature in SportsStore: the ability to check out and complete an order. In the following sections, I will extend the data model to provide support for capturing the shipping details from a user and add the application support to process those details.
I added a class file called Order.cs to the Models folder and used it to define the class shown in listing 9.11. This is the class I will use to represent the shipping details for a customer.
Listing 9.11 The contents of the Order.cs file in the SportsStore/Models folder
using System.ComponentModel.DataAnnotations;
using Microsoft.AspNetCore.Mvc.ModelBinding;
namespace SportsStore.Models {
public class Order {
[BindNever]
public int OrderID { get; set; }
[BindNever]
public ICollection<CartLine> Lines { get; set; }
= new List<CartLine>();
[Required(ErrorMessage = "Please enter a name")]
public string? Name { get; set; }
[Required(ErrorMessage = "Please enter the first address line")]
public string? Line1 { get; set; }
public string? Line2 { get; set; }
public string? Line3 { get; set; }
[Required(ErrorMessage = "Please enter a city name")]
public string? City { get; set; }
[Required(ErrorMessage = "Please enter a state name")]
public string? State { get; set; }
public string? Zip { get; set; }
[Required(ErrorMessage = "Please enter a country name")]
public string? Country { get; set; }
public bool GiftWrap { get; set; }
}
}
I am using the validation attributes from the System.ComponentModel.DataAnnotations namespace, just as I did in chapter 3. I describe validation further in chapter 29.
I also use the BindNever attribute, which prevents the user from supplying values for these properties in an HTTP request. This is a feature of the model binding system, which I describe in chapter 28, and it stops ASP.NET Core using values from the HTTP request to populate sensitive or important model properties.
The goal is to reach the point where users can enter their shipping details and submit an order. To start, I need to add a Checkoutbutton to the cart view, as shown in listing 9.12.
Listing 9.12 Adding a button in the Cart.cshtml file in the SportsStore/Pages folder
...
<div class="text-center">
<a class="btn btn-primary" href="@Model.ReturnUrl">
Continue shopping
</a>
<a class="btn btn-primary" asp-action="Checkout"
asp-controller="Order">
Checkout
</a>
</div>
...
This change generates a link that I have styled as a button and that, when clicked, calls the Checkout action method of the Order controller, which I create in the following section. To show how Razor Pages and controllers can work together, I am going to handle the order processing in a controller and then return to a Razor Page at the end of the process. To see the Checkout button, restart ASP.NET Core, request http://localhost:5000, and click one of the Add To Cart buttons. The new button is shown as part of the cart summary, as shown in figure 9.3.
Figure 9.3 The Checkout button
I now need to define the controller that will deal with the order. I added a class file called OrderController.cs to the Controllers folder and used it to define the class shown in listing 9.13.
Listing 9.13 The OrderController.cs file in the SportsStore/Controllers folder
using Microsoft.AspNetCore.Mvc;
using SportsStore.Models;
namespace SportsStore.Controllers {
public class OrderController : Controller {
public ViewResult Checkout() => View(new Order());
}
}
The Checkout method returns the default view and passes a new Order object as the view model. To create the view, I created the Views/Order folder and added to it a Razor View called Checkout.cshtml with the markup shown in listing 9.14.
Listing 9.14 The Checkout.cshtml file in the SportsStore/Views/Order folder
@model Order
<h2>Check out now</h2>
<p>Please enter your details, and we'll ship your goods right away!</p>
<form asp-action="Checkout" method="post">
<h3>Ship to</h3>
<div class="form-group">
<label>Name:</label>
<input asp-for="Name" class="form-control" />
</div>
<h3>Address</h3>
<div class="form-group">
<label>Line 1:</label>
<input asp-for="Line1" class="form-control" />
</div>
<div class="form-group">
<label>Line 2:</label>
<input asp-for="Line2" class="form-control" />
</div>
<div class="form-group">
<label>Line 3:</label>
<input asp-for="Line3" class="form-control" />
</div>
<div class="form-group">
<label>City:</label>
<input asp-for="City" class="form-control" />
</div>
<div class="form-group">
<label>State:</label>
<input asp-for="State" class="form-control" />
</div>
<div class="form-group">
<label>Zip:</label>
<input asp-for="Zip" class="form-control" />
</div>
<div class="form-group">
<label>Country:</label>
<input asp-for="Country" class="form-control" />
</div>
<h3>Options</h3>
<div class="checkbox">
<label>
<input asp-for="GiftWrap" /> Gift wrap these items
</label>
</div>
<div class="text-center">
<input class="btn btn-primary" type="submit"
value="Complete Order" />
</div>
</form>
For each of the properties in the model, I have created a label and input elements to capture the user input, styled with Bootstrap, and configured using a tag helper. The asp-for attribute on the input elements is handled by a built-in tag helper that generates the type, id, name, and value attributes based on the specified model property, as described in chapter 27.
You can see the form, shown in figure 9.4, by restarting ASP.NET Core, requesting http://localhost:5000, adding an item to the basket, and clicking the Checkout button. Or, more directly, you can request http://localhost:5000/order/checkout.
Figure 9.4 The shipping details form
I will process orders by writing them to the database. Most e-commerce sites would not simply stop there, of course, and I have not provided support for processing credit cards or other forms of payment. But I want to keep things focused on ASP.NET Core, so a simple database entry will do.
Extending the database
Adding a new kind of model to the database is simple because of the initial setup I went through in chapter 7. First, I added a new property to the database context class, as shown in listing 9.15.
Listing 9.15 Adding a property in the StoreDbContext.cs file in the SportsStore/Models folder
using Microsoft.EntityFrameworkCore;
namespace SportsStore.Models {
public class StoreDbContext : DbContext {
public StoreDbContext(DbContextOptions<StoreDbContext> options)
: base(options) { }
public DbSet<Product> Products => Set<Product>();
public DbSet<Order> Orders => Set<Order>();
}
}
This change is enough for Entity Framework Core to create a database migration that will allow Order objects to be stored in the database. To create the migration, use a PowerShell command prompt to run the command shown in listing 9.16 in the SportsStore folder.
Listing 9.16 Creating a migration
dotnet ef migrations add Orders
This command tells Entity Framework Core to take a new snapshot of the application data model, work out how it differs from the previous database version, and generate a new migration called Orders. The new migration will be applied automatically when the application starts because the SeedData calls the Migrate method provided by Entity Framework Core.
Creating the order repository
I am going to follow the same pattern I used for the product repository to provide access to the Order objects. I added a class file called IOrderRepository.cs to the Models folder and used it to define the interface shown in listing 9.17.
Listing 9.17 The IOrderRepository.cs file in the SportsStore/Models folder
namespace SportsStore.Models {
public interface IOrderRepository {
IQueryable<Order> Orders { get; }
void SaveOrder(Order order);
}
}
To implement the order repository interface, I added a class file called EFOrderRepository.cs to the Models folder and defined the class shown in listing 9.18.
Listing 9.18 The EFOrderRepository.cs File in the SportsStore/Models folder
using Microsoft.EntityFrameworkCore;
namespace SportsStore.Models {
public class EFOrderRepository : IOrderRepository {
private StoreDbContext context;
public EFOrderRepository(StoreDbContext ctx) {
context = ctx;
}
public IQueryable<Order> Orders => context.Orders
.Include(o => o.Lines)
.ThenInclude(l => l.Product);
public void SaveOrder(Order order) {
context.AttachRange(order.Lines.Select(l => l.Product));
if (order.OrderID == 0) {
context.Orders.Add(order);
}
context.SaveChanges();
}
}
}
This class implements the IOrderRepository interface using Entity Framework Core, allowing the set of Order objects that have been stored to be retrieved and allowing for orders to be created or changed.
In listing 9.19, I have registered the order repository as a service in the Program.cs file.
Listing 9.19 Registering the service in the Program.cs file in the SportsStore folder
using Microsoft.EntityFrameworkCore;
using SportsStore.Models;
var builder = WebApplication.CreateBuilder(args);
builder.Services.AddControllersWithViews();
builder.Services.AddDbContext<StoreDbContext>(opts => {
opts.UseSqlServer(
builder.Configuration["ConnectionStrings:SportsStoreConnection"]);
});
builder.Services.AddScoped<IStoreRepository, EFStoreRepository>();
builder.Services.AddScoped<IOrderRepository, EFOrderRepository>();
builder.Services.AddRazorPages();
builder.Services.AddDistributedMemoryCache();
builder.Services.AddSession();
builder.Services.AddScoped<Cart>(sp => SessionCart.GetCart(sp));
builder.Services.AddSingleton<IHttpContextAccessor,
HttpContextAccessor>();
var app = builder.Build();
app.UseStaticFiles();
app.UseSession();
app.MapControllerRoute("catpage",
"{category}/Page{productPage:int}",
new { Controller = "Home", action = "Index" });
app.MapControllerRoute("page", "Page{productPage:int}",
new { Controller = "Home", action = "Index", productPage = 1 });
app.MapControllerRoute("category", "{category}",
new { Controller = "Home", action = "Index", productPage = 1 });
app.MapControllerRoute("pagination",
"Products/Page{productPage}",
new { Controller = "Home", action = "Index", productPage = 1 });
app.MapDefaultControllerRoute();
app.MapRazorPages();
SeedData.EnsurePopulated(app);
app.Run();
To complete the OrderController class, I need to modify the constructor so that it receives the services it requires to process an order and add an action method that will handle the HTTP form POST request when the user clicks the Complete Order button. Listing 9.20 shows both changes.
Listing 9.20 Completing the controller in the OrderController.cs file in the SportsStore/Controllers folder
using Microsoft.AspNetCore.Mvc;
using SportsStore.Models;
namespace SportsStore.Controllers {
public class OrderController : Controller {
private IOrderRepository repository;
private Cart cart;
public OrderController(IOrderRepository repoService,
Cart cartService) {
repository = repoService;
cart = cartService;
}
public ViewResult Checkout() => View(new Order());
[HttpPost]
public IActionResult Checkout(Order order) {
if (cart.Lines.Count() == 0) {
ModelState.AddModelError("",
"Sorry, your cart is empty!");
}
if (ModelState.IsValid) {
order.Lines = cart.Lines.ToArray();
repository.SaveOrder(order);
cart.Clear();
return RedirectToPage("/Completed",
new { orderId = order.OrderID });
} else {
return View();
}
}
}
}
The Checkout action method is decorated with the HttpPost attribute, which means that it will be used to handle POST requests—in this case, when the user submits the form.
In chapter 8, I use the ASP.NET Core model binding feature to receive simple data values from the request. This same feature is used in the new action method to receive a completed Order object. When a request is processed, the model binding system tries to find values for the properties defined by the Order class. This works on a best-effort basis, which means I may receive an Order object lacking property values if there is no corresponding data item in the request.
To ensure I have the data I require, I applied validation attributes to the Order class. ASP.NET Core checks the validation constraints that I applied to the Order class and provides details of the result through the ModelState property. I can see whether there are any problems by checking the ModelState.IsValid property. I call the ModelState.AddModelError method to register an error message if there are no items in the cart. I will explain how to display such errors shortly, and I have much more to say about model binding and validation in chapters 28 and 29.
ASP.NET Core uses the validation attributes applied to the Order class to validate user data, but I need to make a simple change to display any problems. This relies on another built-in tag helper that inspects the validation state of the data provided by the user and adds warning messages for each problem that has been discovered. Listing 9.21 shows the addition of an HTML element that will be processed by the tag helper to the Checkout.cshtml file.
Listing 9.21 Adding a validation summary to the Checkout.cshtml file in the SportsStore/Views/Order folder
@model Order
<h2>Check out now</h2>
<p>Please enter your details, and we'll ship your goods right away!</p>
<div asp-validation-summary="All" class="text-danger"></div>
<form asp-action="Checkout" method="post">
<h3>Ship to</h3>
<div class="form-group">
<label>Name:</label>
<input asp-for="Name" class="form-control" />
</div>
<h3>Address</h3>
<div class="form-group">
<label>Line 1:</label>
<input asp-for="Line1" class="form-control" />
</div>
<div class="form-group">
<label>Line 2:</label>
<input asp-for="Line2" class="form-control" />
</div>
<div class="form-group">
<label>Line 3:</label>
<input asp-for="Line3" class="form-control" />
</div>
<div class="form-group">
<label>City:</label>
<input asp-for="City" class="form-control" />
</div>
<div class="form-group">
<label>State:</label>
<input asp-for="State" class="form-control" />
</div>
<div class="form-group">
<label>Zip:</label>
<input asp-for="Zip" class="form-control" />
</div>
<div class="form-group">
<label>Country:</label>
<input asp-for="Country" class="form-control" />
</div>
<h3>Options</h3>
<div class="checkbox">
<label>
<input asp-for="GiftWrap" /> Gift wrap these items
</label>
</div>
<div class="text-center">
<input class="btn btn-primary" type="submit"
value="Complete Order" />
</div>
</form>
With this simple change, validation errors are reported to the user. To see the effect, restart ASP.NET Core, request http://localhost:5000/Order/Checkout, and click the Complete Order button without filling out the form. ASP.NET Core will process the form data, detect that the required values were not found, and generate the validation errors shown in figure 9.5.
Figure 9.5 Displaying validation messages
To complete the checkout process, I am going to create a Razor Page that displays a thank-you message with a summary of the order. Add a Razor Page named Completed.cshtml to the Pages folder with the contents shown in listing 9.22.
Listing 9.22 The contents of the Completed.cshtml file in the SportsStore/Pages folder
@page
<div class="text-center">
<h2>Thanks!</h2>
<p>Thanks for placing order #@OrderId</p>
<p>We'll ship your goods as soon as possible.</p>
<a class="btn btn-primary" asp-controller="Home">Return to Store</a>
</div>
@functions {
[BindProperty(SupportsGet = true)]
public string? OrderId { get; set; }
}
Although Razor Pages usually have page model classes, they are not a requirement, and simple features can be developed without them. In this example, I have defined a property named OrderId and decorated it with the BindProperty attribute, which specifies that a value for this property should be obtained from the request by the model binding system.
Now customers can go through the entire process, from selecting products to checking out. If they provide valid shipping details (and have items in their cart), they will see the summary page when they click the Complete Order button, as shown in figure 9.6.
Notice the way the application moves between controllers and Razor Pages. The application features that ASP.NET Core provides are complementary and can be mixed freely in projects.
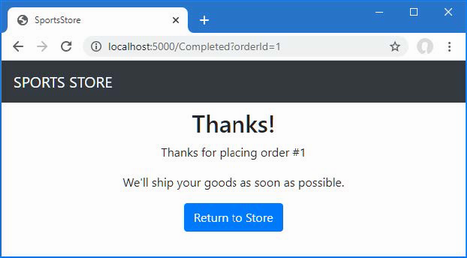
Figure 9.6 The completed order summary view
Representations of user data can be written to persist themselves as session data.
View components are used to present content that is not directly related to the view model for the current response, such as a summary of a shopping cart.
View components can access services via dependency injection to get the data they require.
User data can be received using HTTP POST requests, which are transformed into C# objects by model binding.
ASP.NET Core provides integrated support for validating user data and displaying details of validation problems to the user.Revisit and enhance the URL scheme
Create a category list that will go into the sidebar of the site, highlighting the current category and linking to others
In this chapter, I continue to build the SportsStore application to give the site administrator a way to manage orders and products. In this chapter, I use Blazor to create administration features. Blazor combines client-side JavaScript code with server-side code executed by ASP.NET Core, connected by a persistent HTTP connection. I describe Blazor in detail in chapters 32–35, but it is important to understand that the Blazor model is not suited to all projects. (I use Blazor Server in this chapter, which is a supported part of the ASP.NET Core platform. There is also Blazor WebAssembly, which is, at the time of writing, experimental and runs entirely in the browser. I describe Blazor WebAssembly in chapter 36.)
The first step is to enable the services and middleware for Blazor, as shown in listing 10.1.
Listing 10.1 Enabling Blazor in the Program.cs file in the SportsStore folder
using Microsoft.EntityFrameworkCore;
using SportsStore.Models;
var builder = WebApplication.CreateBuilder(args);
builder.Services.AddControllersWithViews();
builder.Services.AddDbContext<StoreDbContext>(opts => {
opts.UseSqlServer(
builder.Configuration["ConnectionStrings:SportsStoreConnection"]);
});
builder.Services.AddScoped<IStoreRepository, EFStoreRepository>();
builder.Services.AddScoped<IOrderRepository, EFOrderRepository>();
builder.Services.AddRazorPages();
builder.Services.AddDistributedMemoryCache();
builder.Services.AddSession();
builder.Services.AddScoped<Cart>(sp => SessionCart.GetCart(sp));
builder.Services.AddSingleton<IHttpContextAccessor,
HttpContextAccessor>();
builder.Services.AddServerSideBlazor();
var app = builder.Build();
app.UseStaticFiles();
app.UseSession();
app.MapControllerRoute("catpage",
"{category}/Page{productPage:int}",
new { Controller = "Home", action = "Index" });
app.MapControllerRoute("page", "Page{productPage:int}",
new { Controller = "Home", action = "Index", productPage = 1 });
app.MapControllerRoute("category", "{category}",
new { Controller = "Home", action = "Index", productPage = 1 });
app.MapControllerRoute("pagination",
"Products/Page{productPage}",
new { Controller = "Home", action = "Index", productPage = 1 });
app.MapDefaultControllerRoute();
app.MapRazorPages();
app.MapBlazorHub();
app.MapFallbackToPage("/admin/{*catchall}", "/Admin/Index");
SeedData.EnsurePopulated(app);
app.Run();
The AddServerSideBlazor method creates the services that Blazor uses, and the MapBlazorHub method registers the Blazor middleware components. The final addition is to finesse the routing system to ensure that Blazor works seamlessly with the rest of the application.
Blazor requires its own imports file to specify the namespaces that it uses. Create the Pages/Admin folder and add to it a file named _Imports.razor with the content shown in listing 10.2. (If you are using Visual Studio, you can use the Razor Components template to create this file.)
Listing 10.2 The _Imports.razor file in the SportsStore/Pages/Admin folder
@using Microsoft.AspNetCore.Components @using Microsoft.AspNetCore.Components.Forms @using Microsoft.AspNetCore.Components.Routing @using Microsoft.AspNetCore.Components.Web @using Microsoft.EntityFrameworkCore @using SportsStore.Models
The first four @using expressions are for the namespaces required for Blazor. The last two expressions are for convenience in the examples that follow because they will allow me to use Entity Framework Core and the classes in the Models namespace.
Blazor relies on a Razor Page to provide the initial content to the browser, which includes the JavaScript code that connects to the server and renders the Blazor HTML content. Add a Razor Page named Index.cshtml to the Pages/Admin folder with the contents shown in listing 10.3.
Listing 10.3 The Index.cshtml File in the SportsStore/Pages/Admin Folder
@page "/admin"
@{ Layout = null; }
<!DOCTYPE html>
<html>
<head>
<title>SportsStore Admin</title>
<link href="/lib/bootstrap/css/bootstrap.min.css" rel="stylesheet" />
<base href="/" />
</head>
<body>
<component type="typeof(Routed)" render-mode="Server" />
<script src="/_framework/blazor.server.js"></script>
</body>
</html>
The component element is used to insert a Razor Component in the output from the Razor Page. Razor Components are the confusingly named Blazor building blocks, and the component element applied in listing 10.3 is named Routed and will be created shortly. The Razor Page also contains a script element that tells the browser to load the JavaScript file that Blazor Server uses. Requests for this file are intercepted by the Blazor Server middleware, and you don’t need to explicitly add the JavaScript file to the project.
Add a Razor Component named Routed.razor to the Pages/Admin folder and add the content shown in listing 10.4.
Listing 10.4 The Routed.razor File in the SportsStore/Pages/Admin Folder
<Router AppAssembly="typeof(Program).Assembly">
<Found>
<RouteView RouteData="@context"
DefaultLayout="typeof(AdminLayout)" />
</Found>
<NotFound>
<h4 class="bg-danger text-white text-center p-2">
No Matching Route Found
</h4>
</NotFound>
</Router>
The content of this component is described in detail in part 4 of this book, but, for this chapter, it is enough to know that the component will use the browser’s current URL to locate a Razor Component that can be displayed to the user. If no matching component can be found, then an error message is displayed.
Blazor has its own system of layouts. To create the layout for the administration tools, add a Razor Component named AdminLayout.razor to the Pages/Admin folder with the content shown in listing 10.5.
Listing 10.5 The AdminLayout.razor File in the SportsStore/Pages/Admin Folder
@inherits LayoutComponentBase
<div class="bg-info text-white p-2">
<span class="navbar-brand ml-2">SPORTS STORE Administration</span>
</div>
<div class="container-fluid">
<div class="row p-2">
<div class="col-3">
<div class="d-grid gap-1">
<NavLink class="btn btn-outline-primary"
href="/admin/products"
ActiveClass="btn-primary text-white"
Match="NavLinkMatch.Prefix">
Products
</NavLink>
<NavLink class="btn btn-outline-primary"
href="/admin/orders"
ActiveClass="btn-primary text-white"
Match="NavLinkMatch.Prefix">
Orders
</NavLink>
</div>
</div>
<div class="col">
@Body
</div>
</div>
</div>
Blazor uses Razor syntax to generate HTML but introduces its own directives and features. This layout renders a two-column display with Product and Order navigation buttons, which are created using NavLink elements. These elements apply a built-in Razor Component that changes the URL without triggering a new HTTP request, which allows Blazor to respond to user interaction without losing the application state.
To complete the initial setup, I need to add the components that will provide the administration tools, although they will contain placeholder messages at first. Add a Razor Component named Products.razor to the Pages/Admin folder with the content shown in listing 10.6.
Listing 10.6 The Products.razor File in the SportsStore/Pages/Admin Folder
@page "/admin/products" @page "/admin" <h4>This is the products component</h4>
The @page directives specify the URLs for which this component will be displayed, which are /admin/products and /admin. Next, add a Razor Component named Orders.razor to the Pages/Admin folder with the content shown in listing 10.7.
Listing 10.7 The Orders.razor File in the SportsStore/Pages/Admin Folder
@page "/admin/orders" <h4>This is the orders component</h4>
To make sure that Blazor is working correctly, start ASP.NET Core and request http://localhost:5000/admin. This request will be handled by the Index Razor Page in the Pages/Admin folder, which will include the Blazor JavaScript file in the content it sends to the browser. The JavaScript code will open a persistent HTTP connection to the ASP.NET Core server, and the initial Blazor content will be rendered, as shown in figure 10.1.
Figure 10.1 The Blazor application
Click the Orders button, and content generated by the Orders Razor Component will be displayed, as shown in figure 10.2. Unlike the other ASP.NET Core application frameworks I used in earlier chapters, the new content is displayed without a new HTTP request being sent, even though the URL displayed by the browser changes.
Figure 10.2 Navigating in the Blazor application
Now that Blazor has been set up and tested, I am going to start implementing administration features. In the previous chapter, I added support for receiving orders from customers and storing them in a database. In this section, I am going to create a simple administration tool that will let me view the orders that have been received and mark them as shipped.
The first change I need to make is to enhance the data model so that I can record which orders have been shipped. Listing 10.8 shows the addition of a new property to the Order class, which is defined in the Order.cs file in the Models folder.
Listing 10.8 Adding a property in the Order.cs file in the SportsStore/Models folder
using System.ComponentModel.DataAnnotations;
using Microsoft.AspNetCore.Mvc.ModelBinding;
namespace SportsStore.Models {
public class Order {
[BindNever]
public int OrderID { get; set; }
[BindNever]
public ICollection<CartLine> Lines { get; set; }
= new List<CartLine>();
[Required(ErrorMessage = "Please enter a name")]
public string? Name { get; set; }
[Required(ErrorMessage = "Please enter the first address line")]
public string? Line1 { get; set; }
public string? Line2 { get; set; }
public string? Line3 { get; set; }
[Required(ErrorMessage = "Please enter a city name")]
public string? City { get; set; }
[Required(ErrorMessage = "Please enter a state name")]
public string? State { get; set; }
public string? Zip { get; set; }
[Required(ErrorMessage = "Please enter a country name")]
public string? Country { get; set; }
public bool GiftWrap { get; set; }
[BindNever]
public bool Shipped { get; set; }
}
}
This iterative approach of extending and adapting the data model to support different features is typical of ASP.NET Core development. In an ideal world, you would be able to completely define the data model at the start of the project and just build the application around it, but that happens only for the simplest of projects, and, in practice, iterative development is to be expected as the understanding of what is required develops and evolves.
Entity Framework Core migrations make this process easier because you don’t have to manually keep the database schema synchronized to the model class by writing your own SQL commands. To update the database to reflect the addition of the Shipped property to the Order class, open a new PowerShell window and run the command shown in listing 10.9 in the SportsStore project.
Listing 10.9 Creating a new migration
dotnet ef migrations add ShippedOrders
The migration will be applied automatically when the application is started and the SeedData class calls the Migrate method provided by Entity Framework Core.
I am going to display two tables, one of which shows the orders waiting to be shipped and the other the shipped orders. Each order will be presented with a button that changes the shipping state. This is not entirely realistic because orders processing is typically more complex than simply updating a field in the database, but integration with warehouse and fulfillment systems is well beyond the scope of this book.
To avoid duplicating code and content, I am going to create a Razor Component that displays a table without knowing which category of order it is dealing with. Add a Razor Component named OrderTable.razor to the Pages/Admin folder with the content shown in listing 10.10.
Listing 10.10 The OrderTable.razor file in the SportsStore/Pages/Admin folder
<table class="table table-sm table-striped table-bordered">
<thead>
<tr><th colspan="5" class="text-center">@TableTitle</th></tr>
</thead>
<tbody>
@if (Orders?.Count() > 0) {
@foreach (Order o in Orders) {
<tr>
<td>@o.Name</td>
<td>@o.Zip</td>
<th>Product</th>
<th>Quantity</th>
<td>
<button class="btn btn-sm btn-danger"
@onclick="@(e =>
OrderSelected.InvokeAsync(o.OrderID))">
@ButtonLabel
</button>
</td>
</tr>
@foreach (CartLine line in o.Lines) {
<tr>
<td colspan="2"></td>
<td>@line.Product.Name</td>
<td>@line.Quantity</td>
<td></td>
</tr>
}
}
} else {
<tr><td colspan="5" class="text-center">No Orders</td></tr>
}
</tbody>
</table>
@code {
[Parameter]
public string TableTitle { get; set; } = "Orders";
[Parameter]
public IEnumerable<Order> Orders { get; set; }
= Enumerable.Empty<Order>();
[Parameter]
public string ButtonLabel { get; set; } = "Ship";
[Parameter]
public EventCallback<int> OrderSelected { get; set; }
}
Razor Components, as the name suggests, rely on the Razor approach to annotated HTML elements. The view part of the component is supported by the statements in the @code section. The @code section in this component defines four properties that are decorated with the Parameter attribute, which means the values will be provided at runtime by the parent component, which I will create shortly. The values provided for the parameters are used in the view section of the component to display details of a sequence of Order objects.
Blazor adds expressions to the Razor syntax. The view section of this component includes this button element, which has an @onclick attribute:
...
<button class="btn btn-sm btn-danger"
@onclick="@(e => OrderSelected.InvokeAsync(o.OrderID))">
@ButtonLabel
</button>
...
This tells Blazor how to react when the user clicks the button. In this case, the expression tells Razor to call the InvokeAsync method of the OrderSelected property. This is how the table will communicate with the rest of the Blazor application and will become clearer as I build out additional features.
The next step is to create a component that will get the Order data from the database and use the OrderTable component to display it to the user. Remove the placeholder content in the Orders component and replace it with the code and content shown in listing 10.11.
Listing 10.11 The revised contents of the Orders.razor file in the SportsStore/Pages/Admin folder
@page "/admin/orders"
@inherits OwningComponentBase<IOrderRepository>
<OrderTable TableTitle="Unshipped Orders" Orders="UnshippedOrders"
ButtonLabel="Ship" OrderSelected="ShipOrder" />
<OrderTable TableTitle="Shipped Orders" Orders="ShippedOrders"
ButtonLabel="Reset" OrderSelected="ResetOrder" />
<button class="btn btn-info" @onclick="@(e => UpdateData())">
Refresh Data
</button>
@code {
public IOrderRepository Repository => Service;
public IEnumerable<Order> AllOrders { get; set; }
= Enumerable.Empty<Order>();
public IEnumerable<Order> UnshippedOrders { get; set; }
= Enumerable.Empty<Order>();
public IEnumerable<Order> ShippedOrders { get; set; }
= Enumerable.Empty<Order>();
protected async override Task OnInitializedAsync() {
await UpdateData();
}
public async Task UpdateData() {
AllOrders = await Repository.Orders.ToListAsync();
UnshippedOrders = AllOrders.Where(o => !o.Shipped);
ShippedOrders = AllOrders.Where(o => o.Shipped);
}
public void ShipOrder(int id) => UpdateOrder(id, true);
public void ResetOrder(int id) => UpdateOrder(id, false);
private void UpdateOrder(int id, bool shipValue) {
Order? o = Repository.Orders.FirstOrDefault(o => o.OrderID == id);
if (o != null) {
o.Shipped = shipValue;
Repository.SaveOrder(o);
}
}
}
Blazor Components are not like the other application framework building blocks used for the user-facing sections of the SportsStore application. Instead of dealing with individual requests, components can be long-lived and deal with multiple user interactions over a longer period. This requires a different style of development, especially when it comes to dealing with data using Entity Framework Core. The @inherits expression ensures that this component gets its own repository object, which ensures its operations are separate from those performed by other components displayed to the same user. And to avoid repeatedly querying the database—which can be a serious problem in Blazor, as I explain in part 4—the repository is used only when the component is initialized, when Blazor invokes the OnInitializedAsync method, or when the user clicks a Refresh Data button.
To display its data to the user, the OrderTable component is used, which is applied as an HTML element, like this:
...
<OrderTable TableTitle="Unshipped Orders"
Orders="UnshippedOrders" ButtonLabel="Ship" OrderSelected="ShipOrder" />
...
The values assigned to the OrderTable element’s attributes are used to set the properties decorated with the Parameter attribute in listing 10.10. In this way, a single component can be configured to present two different sets of data without the need to duplicate code and content.
The ShipOrder and ResetOrder methods are used as the values for the OrderSelected attributes, which means they are invoked when the user clicks one of the buttons presented by the OrderTable component, updating the data in the database through the repository.
To see the new features, restart ASP.NET Core, request http://localhost:5000, and create an order. Once you have at least one order in the database, request http://localhost:5000/admin/orders, and you will see a summary of the order you created displayed in the Unshipped Orders table. Click the Ship button, and the order will be updated and moved to the Shipped Orders table, as shown in figure 10.3.
Figure 10.3 Administering orders
The convention for managing more complex collections of items is to present the user with two interfaces: a list interface and an edit interface, as shown in figure 10.4.
Figure 10.4 Sketch of a CRUD UI for the product catalog
Together, these interfaces allow a user to create, read, update, and delete items in the collection. Collectively, these actions are known as CRUD. In this section, I will implement these interfaces using Blazor.
The first step is to add features to the repository that will allow Product objects to be created, modified, and deleted. Listing 10.12 adds new methods to the IStoreRepository interface.
Listing 10.12 Adding methods in the IStoreRepository.cs file in the SportsStore/Models folder
namespace SportsStore.Models {
public interface IStoreRepository {
IQueryable<Product> Products { get; }
void SaveProduct(Product p);
void CreateProduct(Product p);
void DeleteProduct(Product p);
}
}
Listing 10.13 adds implementations of these methods to the Entity Framework Core repository class.
Listing 10.13 Implementing methods in the EFStoreRepository.cs file in the SportsStore/Models folder
namespace SportsStore.Models {
public class EFStoreRepository : IStoreRepository {
private StoreDbContext context;
public EFStoreRepository(StoreDbContext ctx) {
context = ctx;
}
public IQueryable<Product> Products => context.Products;
public void CreateProduct(Product p) {
context.Add(p);
context.SaveChanges();
}
public void DeleteProduct(Product p) {
context.Remove(p);
context.SaveChanges();
}
public void SaveProduct(Product p) {
context.SaveChanges();
}
}
}
I want to validate the values the user provides when editing or creating Product objects, just as I did for the customer checkout process. In listing 10.14, I have added validation attributes to the Product data model class.
Listing 10.14 Adding validation in the Product.cs file in the SportsStore/Models folder
using System.ComponentModel.DataAnnotations.Schema;
using System.ComponentModel.DataAnnotations;
namespace SportsStore.Models {
public class Product {
public long? ProductID { get; set; }
[Required(ErrorMessage = "Please enter a product name")]
public string Name { get; set; } = String.Empty;
[Required(ErrorMessage = "Please enter a description")]
public string Description { get; set; } = String.Empty;
[Required]
[Range(0.01, double.MaxValue,
ErrorMessage = "Please enter a positive price")]
[Column(TypeName = "decimal(8, 2)")]
public decimal Price { get; set; }
[Required(ErrorMessage = "Please specify a category")]
public string Category { get; set; } = String.Empty;
}
}
Blazor uses the same approach to validation as the rest of ASP.NET Core but, as you will see, applies it in a different way to deal with the more interactive nature of Razor Components.
I am going to start by creating the table that will present the user with a table of products and the links that will allow them to be inspected and edited. Replace the contents of the Products.razor file with those shown in listing 10.15.
Listing 10.15 The revised contents of the Products.razor file in the SportsStore/Pages/Admin folder
@page "/admin/products"
@page "/admin"
@inherits OwningComponentBase<IStoreRepository>
<table class="table table-sm table-striped table-bordered">
<thead>
<tr>
<th>ID</th>
<th>Name</th>
<th>Category</th>
<th>Price</th>
<td />
</tr>
</thead>
<tbody>
@if (ProductData?.Count() > 0) {
@foreach (Product p in ProductData) {
<tr>
<td>@p.ProductID</td>
<td>@p.Name</td>
<td>@p.Category</td>
<td>@p.Price.ToString("c")</td>
<td>
<NavLink class="btn btn-info btn-sm"
href="@GetDetailsUrl(p.ProductID ?? 0)">
Details
</NavLink>
<NavLink class="btn btn-warning btn-sm"
href="@GetEditUrl(p.ProductID ?? 0)">
Edit
</NavLink>
</td>
</tr>
}
} else {
<tr>
<td colspan="5" class="text-center">No Products</td>
</tr>
}
</tbody>
</table>
<NavLink class="btn btn-primary" href="/admin/products/create">
Create
</NavLink>
@code {
public IStoreRepository Repository => Service;
public IEnumerable<Product> ProductData { get; set; }
= Enumerable.Empty<Product>();
protected async override Task OnInitializedAsync() {
await UpdateData();
}
public async Task UpdateData() {
ProductData = await Repository.Products.ToListAsync();
}
public string GetDetailsUrl(long id) =>
$"/admin/products/details/{id}";
public string GetEditUrl(long id) =>
$"/admin/products/edit/{id}";
}
The component presents each Product object in the repository in a table row with NavLink components that will navigate to the components that will provide a detailed view and an editor. There is also a button that navigates to the component that will allow new Product objects to be created and stored in the database. Restart ASP.NET Core and request http://localhost:5000/admin/products, and you will see the content shown in figure 10.5, although none of the buttons presented by the Products component work currently because I have yet to create the components they target.
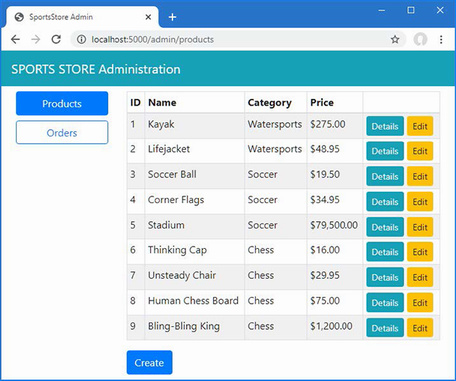
Figure 10.5 Presenting a list of products
The job of the detail component is to display all the fields for a single Product object. Add a Razor Component named Details.razor to the Pages/Admin folder with the content shown in listing 10.16.
Listing 10.16 The Details.razor file in the SportsStore/Pages/Admin folder
@page "/admin/products/details/{id:long}"
@inherits OwningComponentBase<IStoreRepository>
<h3 class="bg-info text-white text-center p-1">Details</h3>
<table class="table table-sm table-bordered table-striped">
<tbody>
<tr><th>ID</th><td>@Product?.ProductID</td></tr>
<tr><th>Name</th><td>@Product?.Name</td></tr>
<tr><th>Description</th><td>@Product?.Description</td></tr>
<tr><th>Category</th><td>@Product?.Category</td></tr>
<tr><th>Price</th><td>@Product?.Price.ToString("C")</td></tr>
</tbody>
</table>
<NavLink class="btn btn-warning" href="@EditUrl">Edit</NavLink>
<NavLink class="btn btn-secondary" href="/admin/products">Back</NavLink>
@code {
[Inject]
public IStoreRepository? Repository { get; set; }
[Parameter]
public long Id { get; set; }
public Product? Product { get; set; }
protected override void OnParametersSet() {
Product =
Repository?.Products.FirstOrDefault(p => p.ProductID == Id);
}
public string EditUrl => $"/admin/products/edit/{Product?.ProductID}";
}
The component uses the Inject attribute to declare that it requires an implementation of the IStoreRepository interface, which is one of the ways that Blazor provides access to the application’s services. The value of the Id property will be populated from the URL that has been used to navigate to the component, which is used to retrieve the Product object from the database. To see the detail view, restart ASP.NET Core, request http://localhost:5000/admin/products, and click one of the Details buttons, as shown in figure 10.6.
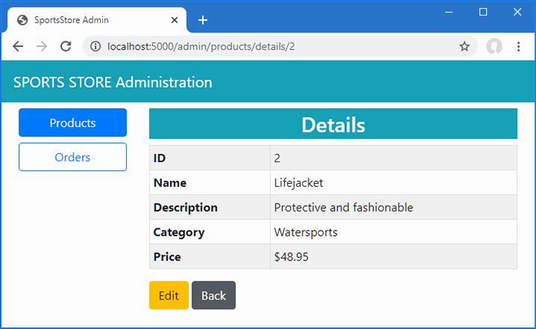
Figure 10.6 Displaying details of a product
The operations to create and edit data will be handled by the same component. Add a Razor Component named Editor.razor to the Pages/Admin folder with the content shown in listing 10.17.
Listing 10.17 The Editor.razor file in the SportsStore/Pages/Admin folder
@page "/admin/products/edit/{id:long}"
@page "/admin/products/create"
@inherits OwningComponentBase<IStoreRepository>
<style>
div.validation-message { color: rgb(220, 53, 69); font-weight: 500 }
</style>
<h3 class="bg-@ThemeColor text-white text-center p-1">
@TitleText a Product
</h3>
<EditForm Model="Product" OnValidSubmit="SaveProduct">
<DataAnnotationsValidator />
@if(Product.ProductID.HasValue && Product.ProductID.Value != 0) {
<div class="form-group">
<label>ID</label>
<input class="form-control" disabled
value="@Product.ProductID" />
</div>
}
<div class="form-group">
<label>Name</label>
<ValidationMessage For="@(() => Product.Name)" />
<InputText class="form-control" @bind-Value="Product.Name" />
</div>
<div class="form-group">
<label>Description</label>
<ValidationMessage For="@(() => Product.Description)" />
<InputText class="form-control"
@bind-Value="Product.Description" />
</div>
<div class="form-group">
<label>Category</label>
<ValidationMessage For="@(() => Product.Category)" />
<InputText class="form-control" @bind-Value="Product.Category" />
</div>
<div class="form-group">
<label>Price</label>
<ValidationMessage For="@(() => Product.Price)" />
<InputNumber class="form-control" @bind-Value="Product.Price" />
</div>
<div class="mt-2">
<button type="submit" class="btn btn-@ThemeColor">Save</button>
<NavLink class="btn btn-secondary" href="/admin/products">
Cancel
</NavLink>
</div>
</EditForm>
@code {
public IStoreRepository Repository => Service;
[Inject]
public NavigationManager? NavManager { get; set; }
[Parameter]
public long Id { get; set; } = 0;
public Product Product { get; set; } = new Product();
protected override void OnParametersSet() {
if (Id != 0) {
Product = Repository.Products
.FirstOrDefault(p => p.ProductID == Id) ?? new();
}
}
public void SaveProduct() {
if (Id == 0) {
Repository.CreateProduct(Product);
} else {
Repository.SaveProduct(Product);
}
NavManager?.NavigateTo("/admin/products");
}
public string ThemeColor => Id == 0 ? "primary" : "warning";
public string TitleText => Id == 0 ? "Create" : "Edit";
}
Blazor provides a set of built-in Razor Components that are used to display and validate forms, which is important because the browser can’t submit data using a POST request in a Blazor Component. The EditForm component is used to render a Blazor-friendly form, and the InputText and InputNumber components render input elements that accept string and number values and that automatically update a model property when the user makes a change.
Data validation is integrated into these built-in components, and the OnValidSubmit attribute on the EditForm component is used to specify a method that is invoked only if the data entered into the form conforms to the rules defined by the validation attributes.
Blazor also provides the NavigationManager class, which is used to programmatically navigate between components without triggering a new HTTP request. The Editor component uses NavigationManager, which is obtained as a service, to return to the Products component after the database has been updated.
To see the editor, restart ASP.NET Core, request http://localhost:5000/admin, and click the Create button. Click the Save button without filling out the form fields, and you will see the validation errors that Blazor produces automatically, as shown in figure 10.7. Fill out the form and click Save again, and you will see the product you created displayed in the table, also as shown in figure 10.7.
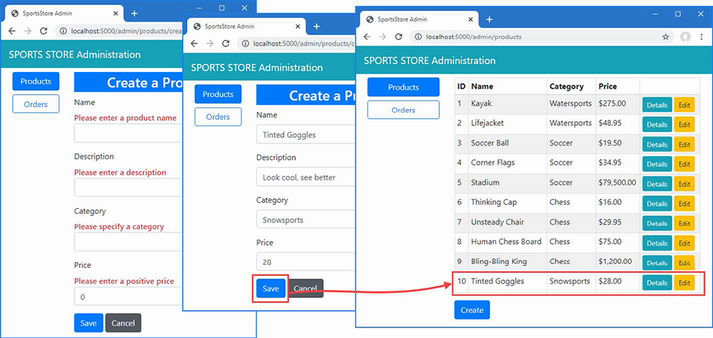
Figure 10.7 Using the Editor component
Click the Edit button for one of the products, and the same component will be used to edit the selected Product object’s properties. Click the Save button, and any changes you made—if they pass validation—will be stored in the database, as shown in figure 10.8.
Figure 10.8 Editing products
The final CRUD feature is deleting products, which is easily implemented in the Products component, as shown in listing 10.18.
Listing 10.18 Adding delete support in the Products.razor file in the SportsStore/Pages/Admin folder
@page "/admin/products"
@page "/admin"
@inherits OwningComponentBase<IStoreRepository>
<table class="table table-sm table-striped table-bordered">
<thead>
<tr>
<th>ID</th>
<th>Name</th>
<th>Category</th>
<th>Price</th>
<td />
</tr>
</thead>
<tbody>
@if (ProductData?.Count() > 0) {
@foreach (Product p in ProductData) {
<tr>
<td>@p.ProductID</td>
<td>@p.Name</td>
<td>@p.Category</td>
<td>@p.Price.ToString("c")</td>
<td>
<NavLink class="btn btn-info btn-sm"
href="@GetDetailsUrl(p.ProductID ?? 0)">
Details
</NavLink>
<NavLink class="btn btn-warning btn-sm"
href="@GetEditUrl(p.ProductID ?? 0)">
Edit
</NavLink>
<button class="btn btn-danger btn-sm"
@onclick="@(e => DeleteProduct(p))">
Delete
</button>
</td>
</tr>
}
} else {
<tr>
<td colspan="5" class="text-center">No Products</td>
</tr>
}
</tbody>
</table>
<NavLink class="btn btn-primary" href="/admin/products/create">
Create
</NavLink>
@code {
public IStoreRepository Repository => Service;
public IEnumerable<Product> ProductData { get; set; }
= Enumerable.Empty<Product>();
protected async override Task OnInitializedAsync() {
await UpdateData();
}
public async Task UpdateData() {
ProductData = await Repository.Products.ToListAsync();
}
public async Task DeleteProduct(Product p) {
Repository.DeleteProduct(p);
await UpdateData();
}
public string GetDetailsUrl(long id) =>
$"/admin/products/details/{id}";
public string GetEditUrl(long id) =>
$"/admin/products/edit/{id}";
}
The new button element is configured with the @onclick attribute, which invokes the DeleteProduct method. The selected Product object is removed from the database, and the data displayed by the component is updated. Restart ASP.NET Core, request http://localhost:5000/admin/products, and click a Delete button to remove an object from the database, as shown in figure 10.9.
Figure 10.9 Deleting objects from the database
Blazor creates ASP.NET Core applications that use JavaScript to respond to user interaction, handled by C# code running in the ASP.NET Core server.
Blazor functionality is created using Razor Components, which have a similar syntax to Razor Pages and views.
Requests are directed to components using the @page directive.
The lifecycle of repository objects is aligned the to the component lifecycle using the @inherits OwningComponentBase<T> expression.
Blazor provides built-in components for common tasks, such as receiving user input, defining layouts, and navigating between pages.
This chapter covers
Authentication and authorization are provided by the ASP.NET Core Identity system, which integrates neatly into the ASP.NET Core platform and the individual application frameworks. In the sections that follow, I will create a basic security setup that allows one user, called Admin, to authenticate and access the administration features in the application. ASP.NET Core Identity provides many more features for authenticating users and authorizing access to application features and data, and you can find more information in chapters 37 and 38, where I show you how to create and manage user accounts and how to perform authorization using roles. But, as I noted previously, ASP.NET Core Identity is a large framework in its own right, and I cover only the basic features in this book.
My goal in this chapter is just to get enough functionality in place to prevent customers from being able to access the sensitive parts of the SportsStore application and, in doing so, give you a flavor of how authentication and authorization fit into an ASP.NET Core application.
The ASP.NET Identity system is endlessly configurable and extensible and supports lots of options for how its user data is stored. I am going to use the most common, which is to store the data using Microsoft SQL Server accessed using Entity Framework Core.
To add the package that contains the ASP.NET Core Identity support for Entity Framework Core, use a PowerShell command prompt to run the command shown in listing 11.1 in the SportsStore folder.
Listing 11.1 Installing the Entity Framework Core package
dotnet add package Microsoft.AspNetCore.Identity.EntityFrameworkCore
--version 7.0.0
I need to create a database context file that will act as the bridge between the database and the Identity model objects it provides access to. I added a class file called AppIdentityDbContext.cs to the Models folder and used it to define the class shown in listing 11.2.
Listing 11.2 The AppIdentityDbContext.cs file in the SportsStore/Models folder
using Microsoft.AspNetCore.Identity;
using Microsoft.AspNetCore.Identity.EntityFrameworkCore;
using Microsoft.EntityFrameworkCore;
namespace SportsStore.Models {
public class AppIdentityDbContext : IdentityDbContext<IdentityUser> {
public AppIdentityDbContext(
DbContextOptions<AppIdentityDbContext> options)
: base(options) { }
}
}
The AppIdentityDbContext class is derived from IdentityDbContext, which provides Identity-specific features for Entity Framework Core. For the type parameter, I used the IdentityUser class, which is the built-in class used to represent users.
The next step is to define the connection string for the database. Listing 11.3 shows the addition of the connection string to the appsettings.json file of the SportsStore project, which follows the same format as the connection string that I defined for the product database.
Listing 11.3 Defining a connection string in the appsettings.json file in the SportsStore folder
{
"Logging": {
"LogLevel": {
"Default": "Information",
"Microsoft.AspNetCore": "Warning"
}
},
"AllowedHosts": "*",
"ConnectionStrings": {
"SportsStoreConnection": "Server=(localdb)\\MSSQLLocalDB;Database=
➥SportsStore;MultipleActiveResultSets=true",
"IdentityConnection": "Server=(localdb)\\MSSQLLocalDB;Database=Identity
➥;MultipleActiveResultSets=true"
}
}
Remember that the connection string has to be defined in a single unbroken line in the appsettings.json file and is shown across multiple lines in the listing only because of the fixed width of a book page. The addition in the listing defines a connection string called IdentityConnection that specifies a LocalDB database called Identity.
Like other ASP.NET Core features, Identity is configured in the Program.cs file. Listing 11.4 shows the additions I made to set up Identity in the SportsStore project, using the context class and connection string defined previously.
Listing 11.4 Configuring identity in the Program.cs file in the SportsStore folder
using Microsoft.EntityFrameworkCore;
using SportsStore.Models;
using Microsoft.AspNetCore.Identity;
var builder = WebApplication.CreateBuilder(args);
builder.Services.AddControllersWithViews();
builder.Services.AddDbContext<StoreDbContext>(opts => {
opts.UseSqlServer(
builder.Configuration["ConnectionStrings:SportsStoreConnection"]);
});
builder.Services.AddScoped<IStoreRepository, EFStoreRepository>();
builder.Services.AddScoped<IOrderRepository, EFOrderRepository>();
builder.Services.AddRazorPages();
builder.Services.AddDistributedMemoryCache();
builder.Services.AddSession();
builder.Services.AddScoped<Cart>(sp => SessionCart.GetCart(sp));
builder.Services.AddSingleton<IHttpContextAccessor,
HttpContextAccessor>();
builder.Services.AddServerSideBlazor();
builder.Services.AddDbContext<AppIdentityDbContext>(options =>
options.UseSqlServer(
builder.Configuration["ConnectionStrings:IdentityConnection"]));
builder.Services.AddIdentity<IdentityUser, IdentityRole>()
.AddEntityFrameworkStores<AppIdentityDbContext>();
var app = builder.Build();
app.UseStaticFiles();
app.UseSession();
app.UseAuthentication();
app.UseAuthorization();
app.MapControllerRoute("catpage",
"{category}/Page{productPage:int}",
new { Controller = "Home", action = "Index" });
app.MapControllerRoute("page", "Page{productPage:int}",
new { Controller = "Home", action = "Index", productPage = 1 });
app.MapControllerRoute("category", "{category}",
new { Controller = "Home", action = "Index", productPage = 1 });
app.MapControllerRoute("pagination",
"Products/Page{productPage}",
new { Controller = "Home", action = "Index", productPage = 1 });
app.MapDefaultControllerRoute();
app.MapRazorPages();
app.MapBlazorHub();
app.MapFallbackToPage("/admin/{*catchall}", "/Admin/Index");
SeedData.EnsurePopulated(app);
app.Run();
In the listing, I extended the Entity Framework Core configuration to register the context class and used the AddIdentity method to set up the Identity services using the built-in classes to represent users and roles. I called the UseAuthentication and UseAuthorization methods to set up the middleware components that implement the security policy.
The basic configuration is in place, and it is time to use the Entity Framework Core migrations feature to define the schema and apply it to the database. Open a new command prompt or PowerShell window and run the command shown in listing 11.5 in the SportsStore folder to create a new migration for the Identity database.
Listing 11.5 Creating the identity migration
dotnet ef migrations add Initial --context AppIdentityDbContext
The important difference from previous database commands is that I have used the -context argument to specify the name of the context class associated with the database that I want to work with, which is AppIdentityDbContext. When you have multiple databases in the application, it is important to ensure that you are working with the right context class.
Once Entity Framework Core has generated the initial migration, run the command shown in listing 11.6 in the SportsStore folder to create the database and apply the migration.
Listing 11.6 Applying the identity migration
dotnet ef database update --context AppIdentityDbContext
The result is a new LocalDB database called Identity that you can inspect using the Visual Studio SQL Server Object Explorer.
I am going to explicitly create the Admin user by seeding the database when the application starts. I added a class file called IdentitySeedData.cs to the Models folder and defined the static class shown in listing 11.7.
Listing 11.7 The IdentitySeedData.cs file in the SportsStore/Models folder
using Microsoft.AspNetCore.Identity;
using Microsoft.EntityFrameworkCore;
namespace SportsStore.Models {
public static class IdentitySeedData {
private const string adminUser = "Admin";
private const string adminPassword = "Secret123$";
public static async void EnsurePopulated(
IApplicationBuilder app) {
AppIdentityDbContext context = app.ApplicationServices
.CreateScope().ServiceProvider
.GetRequiredService<AppIdentityDbContext>();
if (context.Database.GetPendingMigrations().Any()) {
context.Database.Migrate();
}
UserManager<IdentityUser> userManager =
app.ApplicationServices
.CreateScope().ServiceProvider
.GetRequiredService<UserManager<IdentityUser>>();
IdentityUser? user =
await userManager.FindByNameAsync(adminUser);
if (user == null) {
user = new IdentityUser("Admin");
user.Email = "admin@example.com";
user.PhoneNumber = "555-1234";
await userManager.CreateAsync(user, adminPassword);
}
}
}
}
This code ensures the database is created and up-to-date and uses the UserManager<T> class, which is provided as a service by ASP.NET Core Identity for managing users, as described in chapter 38. The database is searched for the Admin user account, which is created—with a password of Secret123$—if it is not present. Do not change the hard-coded password in this example because Identity has a validation policy that requires passwords to contain a number and range of characters. See chapter 38 for details of how to change the validation settings.
To ensure that the Identity database is seeded when the application starts, I added the statement shown in listing 11.8 to the Program.cs file.
Listing 11.8 Seeding the identity database in the Program.cs file in the SportsStore folder
using Microsoft.AspNetCore.Identity;
using Microsoft.EntityFrameworkCore;
using SportsStore.Models;
var builder = WebApplication.CreateBuilder(args);
builder.Services.AddControllersWithViews();
builder.Services.AddDbContext<StoreDbContext>(opts => {
opts.UseSqlServer(
builder.Configuration["ConnectionStrings:SportsStoreConnection"]);
});
builder.Services.AddScoped<IStoreRepository, EFStoreRepository>();
builder.Services.AddScoped<IOrderRepository, EFOrderRepository>();
builder.Services.AddRazorPages();
builder.Services.AddDistributedMemoryCache();
builder.Services.AddSession();
builder.Services.AddScoped<Cart>(sp => SessionCart.GetCart(sp));
builder.Services.AddSingleton<IHttpContextAccessor,
HttpContextAccessor>();
builder.Services.AddServerSideBlazor();
builder.Services.AddDbContext<AppIdentityDbContext>(options =>
options.UseSqlServer(
builder.Configuration["ConnectionStrings:IdentityConnection"]));
builder.Services.AddIdentity<IdentityUser, IdentityRole>()
.AddEntityFrameworkStores<AppIdentityDbContext>();
var app = builder.Build();
app.UseStaticFiles();
app.UseSession();
app.UseAuthentication();
app.UseAuthorization();
app.MapControllerRoute("catpage",
"{category}/Page{productPage:int}",
new { Controller = "Home", action = "Index" });
app.MapControllerRoute("page", "Page{productPage:int}",
new { Controller = "Home", action = "Index", productPage = 1 });
app.MapControllerRoute("category", "{category}",
new { Controller = "Home", action = "Index", productPage = 1 });
app.MapControllerRoute("pagination",
"Products/Page{productPage}",
new { Controller = "Home", action = "Index", productPage = 1 });
app.MapDefaultControllerRoute();
app.MapRazorPages();
app.MapBlazorHub();
app.MapFallbackToPage("/admin/{*catchall}", "/Admin/Index");
SeedData.EnsurePopulated(app);
IdentitySeedData.EnsurePopulated(app);
app.Run();
In chapter 10, I used Blazor to create the administration features so that I could demonstrate a wide range of ASP.NET Core features in the SportsStore project. Although Blazor is useful, it is not suitable for all projects—as I explain in part 4—and most projects are likely to use controllers or Razor Pages for their administration features. I describe the way that ASP.NET Core Identity works with all the application frameworks in chapter 38, but just to provide a balance to the all-Blazor tools created in chapter 10, I am going to create a Razor Page that will display the list of users in the ASP.NET Core Identity database. I describe how to manage the Identity database in more detail in chapter 38, and this Razor Page is just to add a sensitive feature to the SportsStore application that isn’t created with Blazor. Add a Razor Page named IdentityUsers.cshtml to the SportsStore/Pages/Admin folder with the contents shown in listing 11.9.
Listing 11.9 The IdentityUsers.cshtml file in the SportsStore/Pages/Admin folder
@page
@model IdentityUsersModel
@using Microsoft.AspNetCore.Identity
<h3 class="bg-primary text-white text-center p-2">Admin User</h3>
<table class="table table-sm table-striped table-bordered">
<tbody>
<tr><th>User</th><td>@Model.AdminUser?.UserName</td></tr>
<tr><th>Email</th><td>@Model.AdminUser?.Email</td></tr>
<tr><th>Phone</th><td>@Model.AdminUser?.PhoneNumber</td></tr>
</tbody>
</table>
@functions {
public class IdentityUsersModel : PageModel {
private UserManager<IdentityUser> userManager;
public IdentityUsersModel(UserManager<IdentityUser> mgr) {
userManager = mgr;
}
public IdentityUser? AdminUser { get; set; } = new();
public async Task OnGetAsync() {
AdminUser = await userManager.FindByNameAsync("Admin");
}
}
}
Restart ASP.NET Core and request http://localhost:5000/admin/identityusers to see the content generated by the Razor Page, which is shown in figure 11.1.
Figure 11.1 A Razor Page administration feature
Now that I have configured ASP.NET Core Identity, I can apply an authorization policy to the parts of the application that I want to protect. I am going to use the most basic authorization policy possible, which is to allow access to any authenticated user. Although this can be a useful policy in real applications as well, there are also options for creating finer-grained authorization controls, as described in chapters 37 and 38, but since the SportsStore application has only one user, distinguishing between anonymous and authenticated requests is sufficient.
For controllers and Razor pages, the Authorize attribute is used to restrict access, as shown in listing 11.10.
Listing 11.10 Restricting access in the IdentityUsers.cshtml file in the SportsStore/Pages/Admin folder
@page
@model IdentityUsersModel
@using Microsoft.AspNetCore.Identity
@using Microsoft.AspNetCore.Authorization
<h3 class="bg-primary text-white text-center p-2">Admin User</h3>
<table class="table table-sm table-striped table-bordered">
<tbody>
<tr><th>User</th><td>@Model.AdminUser?.UserName</td></tr>
<tr><th>Email</th><td>@Model.AdminUser?.Email</td></tr>
<tr><th>Phone</th><td>@Model.AdminUser?.PhoneNumber</td></tr>
</tbody>
</table>
@functions {
[Authorize]
public class IdentityUsersModel : PageModel {
private UserManager<IdentityUser> userManager;
public IdentityUsersModel(UserManager<IdentityUser> mgr) {
userManager = mgr;
}
public IdentityUser? AdminUser { get; set; } = new();
public async Task OnGetAsync() {
AdminUser = await userManager.FindByNameAsync("Admin");
}
}
}
When there are only authorized and unauthorized users, the Authorize attribute can be applied to the Razor Page that acts as the entry point for the Blazor part of the application, as shown in listing 11.11.
Listing 11.11 Applying authorization in the Index.cshtml file in the SportsStore/Pages/Admin folder
@page "/admin"
@{ Layout = null; }
@using Microsoft.AspNetCore.Authorization
@attribute [Authorize]
<!DOCTYPE html>
<html>
<head>
<title>SportsStore Admin</title>
<link href="/lib/bootstrap/css/bootstrap.min.css" rel="stylesheet" />
<base href="/" />
</head>
<body>
<component type="typeof(Routed)" render-mode="Server" />
<script src="/_framework/blazor.server.js"></script>
</body>
</html>
Since this Razor Page has been configured without a page model class, I can apply the attribute with an @attribute expression.
When an unauthenticated user sends a request that requires authorization, the user is redirected to the /Account/Login URL, which the application can use to prompt the user for their credentials. In chapters 38 and 39, I show you how to handle authentication using Razor Pages, so, for variety, I am going to use controllers and views for SportsStore. In preparation, I added a view model to represent the user’s credentials by adding a class file called LoginModel.cs to the Models/ViewModels folder and using it to define the class shown in listing 11.12.
Listing 11.12 The LoginModel.cs file in the SportsStore/Models/ViewModels folder
using System.ComponentModel.DataAnnotations;
namespace SportsStore.Models.ViewModels {
public class LoginModel {
public required string Name { get; set; }
public required string Password { get; set; }
public string ReturnUrl { get; set; } = "/";
}
}
The Name and Password properties have been decorated with the Required attribute, which uses model validation to ensure that values have been provided. Next, I added a class file called AccountController.cs to the Controllers folder and used it to define the controller shown in listing 11.13. This is the controller that will respond to requests to the /Account/Login URL.
Listing 11.13 The AccountController.cs file in the SportsStore/Controllers folder
using Microsoft.AspNetCore.Authorization;
using Microsoft.AspNetCore.Identity;
using Microsoft.AspNetCore.Mvc;
using SportsStore.Models.ViewModels;
namespace SportsStore.Controllers {
public class AccountController : Controller {
private UserManager<IdentityUser> userManager;
private SignInManager<IdentityUser> signInManager;
public AccountController(UserManager<IdentityUser> userMgr,
SignInManager<IdentityUser> signInMgr) {
userManager = userMgr;
signInManager = signInMgr;
}
public ViewResult Login(string returnUrl) {
return View(new LoginModel {
Name = string.Empty, Password = string.Empty,
ReturnUrl = returnUrl
});
}
[HttpPost]
[ValidateAntiForgeryToken]
public async Task<IActionResult> Login(LoginModel loginModel) {
if (ModelState.IsValid) {
IdentityUser? user =
await userManager.FindByNameAsync(loginModel.Name);
if (user != null) {
await signInManager.SignOutAsync();
if ((await signInManager.PasswordSignInAsync(user,
loginModel.Password, false, false)).Succeeded) {
return Redirect(loginModel?.ReturnUrl
?? "/Admin");
}
}
ModelState.AddModelError("", "Invalid name or password");
}
return View(loginModel);
}
[Authorize]
public async Task<RedirectResult> Logout(string returnUrl = "/") {
await signInManager.SignOutAsync();
return Redirect(returnUrl);
}
}
}
When the user is redirected to the /Account/Login URL, the GET version of the Login action method renders the default view for the page, providing a view model object that includes the URL to which the browser should be redirected if the authentication request is successful.
Authentication credentials are submitted to the POST version of the Login method, which uses the UserManager<IdentityUser> and SignInManager<IdentityUser> services that have been received through the controller’s constructor to authenticate the user and log them into the system. I explain how these classes work in chapters 37 and 38, but for now, it is enough to know that if there is an authentication failure, then I create a model validation error and render the default view; however, if authentication is successful, then I redirect the user to the URL that they want to access before they are prompted for their credentials.
To provide the Login method with a view to render, I created the Views/Account folder and added a Razor View file called Login.cshtml with the contents shown in listing 11.14.
Listing 11.14 The Login.cshtml file in the SportsStore/Views/Account folder
@model LoginModel
@{
Layout = null;
}
<!DOCTYPE html>
<html>
<head>
<meta name="viewport" content="width=device-width" />
<title>SportsStore</title>
<link href="/lib/bootstrap/css/bootstrap.min.css" rel="stylesheet" />
</head>
<body>
<div class="bg-dark text-white p-2">
<span class="navbar-brand ml-2">SPORTS STORE</span>
</div>
<div class="m-1 p-1">
<div class="text-danger" asp-validation-summary="All"></div>
<form asp-action="Login" asp-controller="Account" method="post">
<input type="hidden" asp-for="ReturnUrl" />
<div class="form-group">
<label asp-for="Name"></label>
<input asp-for="Name" class="form-control" />
</div>
<div class="form-group">
<label asp-for="Password"></label>
<input asp-for="Password" type="password"
class="form-control" />
</div>
<button class="btn btn-primary mt-2" type="submit">
Log In
</button>
</form>
</div>
</body>
</html>
The final step is a change to the shared administration layout to add a button that will log out the current user by sending a request to the Logout action, as shown in listing 11.15. This is a useful feature that makes it easier to test the application, without which you would need to clear the browser’s cookies to return to the unauthenticated state.
Listing 11.15 Adding a logout button in the AdminLayout.razor file in the SportsStore/Pages/Admin Folder
@inherits LayoutComponentBase
<div class="bg-info text-white p-2">
<div class="container-fluid">
<div class="row">
<div class="col">
<span class="navbar-brand ml-2">
SPORTS STORE Administration
</span>
</div>
<div class="col-2 text-right">
<a class="btn btn-sm btn-primary" href="/account/logout">
Log Out
</a>
</div>
</div>
</div>
</div>
<div class="container-fluid">
<div class="row p-2">
<div class="col-3">
<div class="d-grid gap-1">
<NavLink class="btn btn-outline-primary"
href="/admin/products"
ActiveClass="btn-primary text-white"
Match="NavLinkMatch.Prefix">
Products
</NavLink>
<NavLink class="btn btn-outline-primary"
href="/admin/orders"
ActiveClass="btn-primary text-white"
Match="NavLinkMatch.Prefix">
Orders
</NavLink>
</div>
</div>
<div class="col">
@Body
</div>
</div>
</div>
Everything is in place, and you can test the security policy by restarting ASP.NET Core and requesting http://localhost:5000/admin or http://localhost:5000/admin/identityusers.
Since you are presently unauthenticated and you are trying to target an action that requires authorization, your browser will be redirected to the /Account/Login URL. Enter Admin and Secret123$ as the name and password and submit the form. The Account controller will check the credentials you provided with the seed data added to the Identity database and—assuming you entered the right details—authenticate you and redirect you to the URL you requested, to which you now have access. Figure 11.2 illustrates the process.
Figure 11.2 The administration authentication/authorization process
In this section, I will prepare SportsStore and create a container that can be deployed into production. There is a wide range of deployment models available for ASP.NET Core applications, but I have picked Docker containers because they can be run on most hosting platforms or be deployed into a private data center. This is not a complete guide to deployment, but it will give you a sense of the process to prepare an application.
At the moment, the application is configured to use the developer-friendly error pages, which provide helpful information when a problem occurs. This is not information that end users should see, so I added a Razor Page named Error.cshtml to the Pages folder with the content shown in listing 11.16.
Listing 11.16 The contents of the Error.cshtml file in the Pages folder
@page "/error"
@{
Layout = null;
}
<!DOCTYPE html>
<html>
<head>
<meta name="viewport" content="width=device-width" />
<link href="/lib/bootstrap/css/bootstrap.min.css" rel="stylesheet" />
<title>Error</title>
</head>
<body class="text-center">
<h2 class="text-danger">Error.</h2>
<h3 class="text-danger">
An error occurred while processing your request
</h3>
</body>
</html>
This kind of error page is the last resort, and it is best to keep it as simple as possible and not to rely on shared views, view components, or other rich features. In this case, I have disabled shared layouts and defined a simple HTML document that explains that there has been an error, without providing any information about what has happened.
In listing 11.17, I have reconfigured the application so that the Error page is used for unhandled exceptions when the application is in the production environment. I have also set the locale, which is required when deploying to a Docker container. The locale I have chosen is en-US, which represents the language and currency conventions of English as it is spoken in the United States.
Listing 11.17 Configuring error handling in the Program.cs file in the SportsStore folder
using Microsoft.AspNetCore.Identity;
using Microsoft.EntityFrameworkCore;
using SportsStore.Models;
var builder = WebApplication.CreateBuilder(args);
builder.Services.AddControllersWithViews();
builder.Services.AddDbContext<StoreDbContext>(opts => {
opts.UseSqlServer(
builder.Configuration["ConnectionStrings:SportsStoreConnection"]);
});
builder.Services.AddScoped<IStoreRepository, EFStoreRepository>();
builder.Services.AddScoped<IOrderRepository, EFOrderRepository>();
builder.Services.AddRazorPages();
builder.Services.AddDistributedMemoryCache();
builder.Services.AddSession();
builder.Services.AddScoped<Cart>(sp => SessionCart.GetCart(sp));
builder.Services.AddSingleton<IHttpContextAccessor,
HttpContextAccessor>();
builder.Services.AddServerSideBlazor();
builder.Services.AddDbContext<AppIdentityDbContext>(options =>
options.UseSqlServer(
builder.Configuration["ConnectionStrings:IdentityConnection"]));
builder.Services.AddIdentity<IdentityUser, IdentityRole>()
.AddEntityFrameworkStores<AppIdentityDbContext>();
var app = builder.Build();
if (app.Environment.IsProduction()) {
app.UseExceptionHandler("/error");
}
app.UseRequestLocalization(opts => {
opts.AddSupportedCultures("en-US")
.AddSupportedUICultures("en-US")
.SetDefaultCulture("en-US");
});
app.UseStaticFiles();
app.UseSession();
app.UseAuthentication();
app.UseAuthorization();
app.MapControllerRoute("catpage",
"{category}/Page{productPage:int}",
new { Controller = "Home", action = "Index" });
app.MapControllerRoute("page", "Page{productPage:int}",
new { Controller = "Home", action = "Index", productPage = 1 });
app.MapControllerRoute("category", "{category}",
new { Controller = "Home", action = "Index", productPage = 1 });
app.MapControllerRoute("pagination",
"Products/Page{productPage}",
new { Controller = "Home", action = "Index", productPage = 1 });
app.MapDefaultControllerRoute();
app.MapRazorPages();
app.MapBlazorHub();
app.MapFallbackToPage("/admin/{*catchall}", "/Admin/Index");
SeedData.EnsurePopulated(app);
IdentitySeedData.EnsurePopulated(app);
app.Run();
As I explain in chapter 12, the IWebHostEnvironment interface describes the environment in which the application is running. The changes mean that the UseExceptionHandler method is called when the application is in production, but the developer-friendly error pages are used otherwise.
The JSON configuration files that are used to define settings such as connection strings can be created so they apply only when the application is in a specific environment, such as development, staging, or production. The template I used to create the SportsStore project in chapter 7 created the appsettings.json and appsettings.Development.json files, which are intended to be the default settings that are overridden with those that are specific for development. I am going to take the reverse approach for this chapter and define a file that contains just those settings that are specific to production. Add a JSON file named appsettings.Production.json to the SportsStore folder with the content shown in listing 11.18.
Listing 11.18 The appsettings.Production.json file in the SportsStore folder
{
"ConnectionStrings": {
"SportsStoreConnection": "Server=sqlserver;Database=SportsStore;
➥MultipleActiveResultSets=true;User=sa;Password=MyDatabaseSecret123;Encrypt=False",
"IdentityConnection": "Server=sqlserver;Database=Identity;
➥MultipleActiveResultSets=true;User=sa;Password=MyDatabaseSecret123;Encrypt=False"
}
}
These connection strings, each of which is defined on a single line, describe connections to SQL Server running on sqlserver, which is another Docker container running SQL Server. For simplicity, I have disabled encryption for the connections to the database.
In the sections that follow, I configure and create the Docker image for the application that can be deployed into a container environment such as Microsoft Azure or Amazon Web Services. Bear in mind that containers are only one style of deployment and there are many others available if this approach does not suit you.
Installing Docker Desktop
Go to https://docker.com and download and install the Docker Desktop package. Follow the installation process, reboot your Windows machine, and run the command shown in listing 11.19 to check that Docker has been installed and is in your path. (The Docker installation process seems to change often, which is why I have not been more specific about the process.)
Listing 11.19 Checking the Docker Desktop installation
docker --version
Creating the Docker configuration files
Docker is configured using a file named Dockerfile. There is no Visual Studio item template for this file, so use the Text File template to add a file named Dockerfile.text to the project and then rename the file to Dockerfile. If you are using Visual Studio Code, you can just create a file named Dockerfile without the extension. Use the configuration settings shown in listing 11.20 as the contents for the new file.
Listing 11.20 The contents of the Dockerfile File in the SportsStore folder
FROM mcr.microsoft.com/dotnet/aspnet:7.0 COPY /bin/Release/net7.0/publish/ SportsStore/ ENV ASPNETCORE_ENVIRONMENT Production ENV Logging__Console__FormatterName=Simple EXPOSE 5000 WORKDIR /SportsStore ENTRYPOINT ["dotnet", "SportsStore.dll", "--urls=http://0.0.0.0:5000"]
These instructions copy the SportsStore application into a Docker image and configure its execution. Next, create a file called docker-compose.yml with the content shown in listing 11.21. Visual Studio doesn’t have a template for this type of file, but if you select the Text File template and enter the complete file name, it will create the file. Visual Studio Code users can simply create a file named docker-compose.yml.
Listing 11.21 The contents of the docker-compose.yml file in the SportsStore folder
version: "3"
services:
sportsstore:
build: .
ports:
- "5000:5000"
environment:
- ASPNETCORE_ENVIRONMENT=Production
depends_on:
- sqlserver
sqlserver:
image: "mcr.microsoft.com/mssql/server"
environment:
SA_PASSWORD: "MyDatabaseSecret123"
ACCEPT_EULA: "Y"
The YML files are especially sensitive to formatting and indentation, and it is important to create this file exactly as shown. If you have problems, then use the docker-compose.yml file from the GitHub repository for this book.
Publishing and imaging the application
Prepare the SportsStore application by using a PowerShell prompt to run the command shown listing 11.22 in the SportsStore folder.
Listing 11.22 Preparing the application
dotnet publish -c Release
Next, run the command shown in listing 11.23 to create the Docker image for the SportsStore application. This command will take some time to complete the first time it is run because it will download the Docker images for ASP.NET Core.
Listing 11.23 Performing the Docker build
docker-compose build
The first time you run this command, you may be prompted to allow Docker to use the network, as shown in figure 11.3.
Figure 11.3 Granting network access
Click the Allow button, return to the PowerShell prompt, use Control+C to terminate the Docker containers, and run the command in listing 11.23 again.
Run the command shown in listing 11.24 in the SportsStore folder to start the Docker containers for SQL Server.
Listing 11.24 Starting the database container
docker-compose up sqlserver
This command will take some time to complete the first time it is run because it will download the Docker images for SQL Server. You will see a large amount of output as SQL Server starts up. Once the database is running, use a separate command prompt to run the command shown in listing 11.25 to start the container for the SportsStore application.
Listing 11.25 Starting the SportsStore container
docker-compose up sportsstore
The application will be ready when you see output like this:
... sportsstore_1 | info: Microsoft.Hosting.Lifetime[0] sportsstore_1 | Now listening on: http://0.0.0.0:5000 sportsstore_1 | info: Microsoft.Hosting.Lifetime[0] sportsstore_1 | Application started. Press Ctrl+C to shut down. sportsstore_1 | info: Microsoft.Hosting.Lifetime[0] sportsstore_1 | Hosting environment: Production sportsstore_1 | info: Microsoft.Hosting.Lifetime[0] sportsstore_1 | Content root path: /SportsStore ...
Open a new browser window and request http://localhost:5000, and you will receive a response from the containerized version of SportsStore, as shown in figure 11.4, which is now ready for deployment. Use Control+C at the PowerShell command prompts to terminate the Docker containers.

Figure 11.4 Running the SportsStore application in a container
ASP.NET Core applications use ASP.NET Core Identity for user authentication and have built-in support for enforcing authorization using attributes.
Applications are published to prepare them for deployment, using the dotnet publish command, specifying the environment name to ensure the correct configuration settings are used.
Applications can be deployed into containers, which can be used on most hosting platforms or hosted locally within a data center.
The ASP.NET Core platform is the foundation for creating web applications; it provides the features that make it possible to use frameworks like MVC and Blazor. In this chapter, I explain how the basic ASP.NET Core features work, describe the purpose of the files in an ASP.NET Core project, and explain how the ASP.NET Core request pipeline is used to process HTTP requests and demonstrate the different ways that it can be customized.
Don’t worry if not everything in this chapter makes immediate sense or appears to apply to the applications you intend to create. The features I describe in this chapter are the underpinnings for everything that ASP.NET Core does, and understanding how they work helps provide a context for understanding the features that you will use daily, as well as giving you the knowledge you need to diagnose problems when you don’t get the behavior you expect. Table 12.1 puts the ASP.NET Core platform in context.
Table 12.1 Putting the ASP.NET Core platform in context
|
Question |
Answer |
|---|---|
|
What is it? |
The ASP.NET Core platform is the foundation on which web applications are built and provides features for processing HTTP requests. |
|
Why is it useful? |
The ASP.NET Core platform takes care of the low-level details of web applications so that developers can focus on features for the end user. |
|
How is it used? |
The key building blocks are services and middleware components, both of which can be created using top-level statements in the |
|
Are there any pitfalls or limitations? |
The use of the |
|
Are there any alternatives? |
The ASP.NET Core platform is required for ASP.NET Core applications, but you can choose not to work with the platform directly and rely on just the higher-level ASP.NET Core features, which are described in later chapters. |
Table 12.2 provides a guide to the chapter.
Table 12.2 Chapter guide
|
Problem |
Solution |
Listing |
|---|---|---|
|
Creating a middleware component |
Call the |
6–8 |
|
Modifying a response |
Write a middleware component that uses the return pipeline path. |
9 |
|
Preventing other components from processing a request |
Short-circuit the request pipeline or create terminal middleware. |
10, 12–14 |
|
Using different sets of middleware |
Create a pipeline branch. |
11 |
|
Configuring middleware components |
Use the options pattern. |
15–18 |
To prepare for this chapter, I am going to create a new project named Platform, using the template that provides the minimal ASP.NET Core setup. Open a new PowerShell command prompt from the Windows Start menu and run the commands shown in listing 12.1.
Listing 12.1 Creating the project
dotnet new globaljson --sdk-version 7.0.100 --output Platform dotnet new web --no-https --output Platform --framework net7.0 dotnet new sln -o Platform dotnet sln Platform add Platform
If you are using Visual Studio, open the Platform.sln file in the Platform folder. If you are using Visual Studio Code, open the Platform folder. Click the Yes button when prompted to add the assets required for building and debugging the project.
Open the launchSettings.json file in the Properties folder and change the ports that will be used to handle HTTP requests, as shown in listing 12.2.
Listing 12.2 Setting ports in the launchSettings.json file in the Properties folder
{
"iisSettings": {
"windowsAuthentication": false,
"anonymousAuthentication": true,
"iisExpress": {
"applicationUrl": "http://localhost:5000",
"sslPort": 0
}
},
"profiles": {
"Platform": {
"commandName": "Project",
"dotnetRunMessages": true,
"launchBrowser": true,
"applicationUrl": "http://localhost:5000",
"environmentVariables": {
"ASPNETCORE_ENVIRONMENT": "Development"
}
},
"IIS Express": {
"commandName": "IISExpress",
"launchBrowser": true,
"environmentVariables": {
"ASPNETCORE_ENVIRONMENT": "Development"
}
}
}
}
To start the application, run the command shown in listing 12.3 in the Platform folder.
Listing 12.3 Starting the example application
dotnet run
Open a new browser window and use it to request http://localhost:5000. You will see the output shown in figure 12.1.
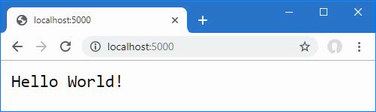
Figure 12.1 Running the example application
To understand ASP.NET Core, it is helpful to focus on just the key features: the request pipeline, middleware, and services. Understanding how these features fit together—even without going into detail—provides useful context for understanding the contents of the ASP.NET Core project and the shape of the ASP.NET Core platform.
The purpose of the ASP.NET Core platform is to receive HTTP requests and send responses to them, which ASP.NET Core delegates to middleware components. Middleware components are arranged in a chain, known as the request pipeline.
When a new HTTP request arrives, the ASP.NET Core platform creates an object that describes it and a corresponding object that describes the response that will be sent in return. These objects are passed to the first middleware component in the chain, which inspects the request and modifies the response. The request is then passed to the next middleware component in the chain, with each component inspecting the request and adding to the response. Once the request has made its way through the pipeline, the ASP.NET Core platform sends the response, as illustrated in figure 12.2.
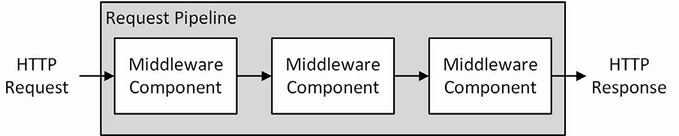
Figure 12.2 The ASP.NET Core request pipeline
Some components focus on generating responses for requests, but others are there to provide supporting features, such as formatting specific data types or reading and writing cookies. ASP.NET Core includes middleware components that solve common problems, as described in chapters 15 and 16, and I show how to create custom middleware components later in this chapter. If no response is generated by the middleware components, then ASP.NET Core will return a response with the HTTP 404 Not Found status code.
Services are objects that provide features in a web application. Any class can be used as a service, and there are no restrictions on the features that services provide. What makes services special is that they are managed by ASP.NET Core, and a feature called dependency injection makes it possible to easily access services anywhere in the application, including middleware components.
Dependency injection can be a difficult topic to understand, and I describe it in detail in chapter 14. For now, it is enough to know that there are objects that are managed by the ASP.NET Core platform that can be shared by middleware components, either to coordinate between components or to avoid duplicating common features, such as logging or loading configuration data, as shown in figure 12.3.
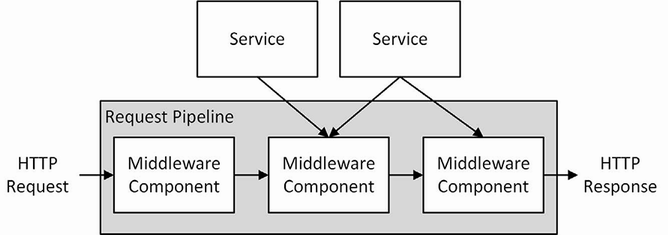
Figure 12.3 Services in the ASP.NET Core platform
As the figure shows, middleware components use only the services they require to do their work. As you will learn in later chapters, ASP.NET Core provides some basic services that can be supplemented by additional services that are specific to an application.
The web template produces a project with just enough code and configuration to start the ASP.NET Core runtime with some basic services and middleware components. Figure 12.4 shows the files added to the project by the template.
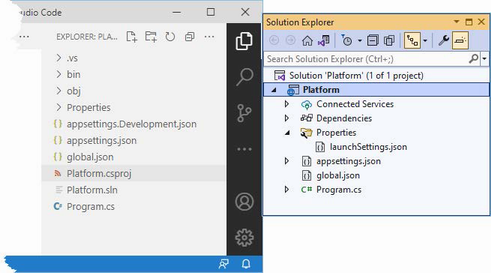
Figure 12.4 The files in the example project
Visual Studio and Visual Studio Code take different approaches to displaying files and folders. Visual Studio hides items that are not commonly used by the developer and nests related items together, while Visual Studio Code shows everything.
This is why the two project views shown in the figure are different: Visual Studio has hidden the bin and obj folders and nested the appsettings.Development.json file within the appsettings.json file. The buttons at the top of the Solution Explorer window can be used to prevent nesting and to show all the files in the project.
Although there are few files in the project, they underpin ASP.NET Core development and are described in table 12.3.
Table 12.3 The files and folders in the Example project
|
Name |
Description |
|---|---|
|
|
This file is used to configure the application, as described in chapter 15. |
|
|
This file is used to define configuration settings that are specific to development, as explained in chapter 15. |
|
|
This folder contains the compiled application files. Visual Studio hides this folder. |
|
|
This file is used to select a specific version of the .NET Core SDK. |
|
|
This file is used to configure the application when it starts. |
|
|
This folder contains the intermediate output from the compiler. Visual Studio hides this folder. |
|
|
This file describes the project to the .NET Core tools, including the package dependencies and build instructions, as described in the “Understanding the Project File” section. Visual Studio hides this file, but it can be edited by right-clicking the project item in the Solution Explorer and selecting Edit Project File from the pop-up menu. |
|
|
This file is used to organize projects. Visual Studio hides this folder. |
|
|
This file is the entry point for the ASP.NET Core platform and is used to configure the platform, as described in the “Understanding the Entry Point” section |
The Program.cs file contains the code statements that are executed when the application is started and that are used to configure the ASP.NET platform and the individual frameworks it supports. Here is the content of the Program.cs file in the example project:
var builder = WebApplication.CreateBuilder(args);
var app = builder.Build();
app.MapGet("/", () => "Hello World!");
app.Run();
This file contains only top-level statements. The first statement calls the WebApplication.CreateBuilder and assigns the result to a variable named builder:
... var builder = WebApplication.CreateBuilder(args); ...
This method is responsible for setting up the basic features of the ASP.NET Core platform, including creating services responsible for configuration data and logging, both of which are described in chapter 15. This method also sets up the HTTP server, named Kestrel, that is used to receive HTTP requests.
The result from the CreateBuilder method is a WebApplicationBuilder object, which is used to register additional services, although none are defined at present. The WebApplicationBuilder class defines a Build method that is used to finalize the initial setup:
... var app = builder.Build(); ...
The result of the Build method is a WebApplication object, which is used to set up middleware components. The template has set up one middleware component, using the MapGet extension method:
...
app.MapGet("/", () => "Hello World!");
...
MapGet is an extension method for the IEndpointRouteBuilder interface, which is implemented by the WebApplication class, and which sets up a function that will handle HTTP requests with a specified URL path. In this case, the function responds to requests for the default URL path, which is denoted by /, and the function responds to all requests by returning a simple string response, which is how the output shown in figure 12.1 was produced.
Most projects need a more sophisticated set of responses, and Microsoft provides middleware as part of ASP.NET Core that deals with the most common features required by web applications, which I describe in chapters 15 and 16. You can also create your own middleware, as described in the “Creating Custom Middleware” section, when the built-in features don’t suit your requirements.
The final statement in the Program.cs file calls the Run method defined by the WebApplication class, which starts listening to HTTP requests.
Even though the function used with the MapGet method returns a string, ASP.NET Core is clever enough to create a valid HTTP response that will be understood by browsers. While ASP.NET Core is still running, open a new PowerShell command prompt and run the command shown in listing 12.4 to send an HTTP request to the ASP.NET Core server.
Listing 12.4 Sending an HTTP Request
(Invoke-WebRequest http://localhost:5000).RawContent
The output from this command shows that the response sent by ASP.NET Core contains an HTTP status code and the set of basic headers, like this:
HTTP/1.1 200 OK Transfer-Encoding: chunked Content-Type: text/plain; charset=utf-8 Date: Wed, 14 Dec 2022 08:09:13 GMT Server: Kestrel
The Platform.csproj file, known as the project file, contains the information that .NET Core uses to build the project and keep track of dependencies. Here is the content that was added to the file by the Empty template when the project was created:
<Project Sdk="Microsoft.NET.Sdk.Web">
<PropertyGroup>
<TargetFramework>net7.0</TargetFramework>
<Nullable>enable</Nullable>
<ImplicitUsings>enable</ImplicitUsings>
</PropertyGroup>
</Project>
The csproj file is hidden when using Visual Studio; you can edit it by right-clicking the Platform project item in the Solution Explorer and selecting Edit Project File from the pop-up menu.
The project file contains XML elements that describe the project to MSBuild, the Microsoft build engine. MSBuild can be used to create complex build processes and is described in detail at https://docs.microsoft.com/en-us/visualstudio/msbuild/msbuild.
There is no need to edit the project file directly in most projects. The most common change to the file is to add dependencies on other .NET packages, but these are typically added using the command-line tools or the interface provided by Visual Studio.
To add a package to the project using the command line, open a new PowerShell command prompt, navigate to the Platform project folder (the one that contains the csproj file), and run the command shown in listing 12.5.
Listing 12.5 Adding a package to the project
dotnet add package Swashbuckle.AspNetCore --version 6.4.0
This command adds the Swashbuckle.AspNetCore package to the project. You will see this package used in chapter 20, but for now, it is the effect of the dotnet add package command that is important.
The new dependency will be shown in the Platform.csproj file:
<Project Sdk="Microsoft.NET.Sdk.Web">
<PropertyGroup>
<TargetFramework>net7.0</TargetFramework>
<Nullable>enable</Nullable>
<ImplicitUsings>enable</ImplicitUsings>
</PropertyGroup>
<ItemGroup>
<PackageReference Include="Swashbuckle.AspNetCore" Version="6.4.0" />
</ItemGroup>
</Project>
As mentioned, Microsoft provides various middleware components for ASP.NET Core that handle the features most commonly required by web applications. You can also create your own middleware, which is a useful way to understand how ASP.NET Core works, even if you use only the standard components in your projects. The key method for creating middleware is Use, as shown in listing 12.6.
Listing 12.6 Creating custom middleware in the Program.cs file in the Platform folder
var builder = WebApplication.CreateBuilder(args);
var app = builder.Build();
app.Use(async (context, next) => {
if (context.Request.Method == HttpMethods.Get
&& context.Request.Query["custom"] == "true") {
context.Response.ContentType = "text/plain";
await context.Response.WriteAsync("Custom Middleware \n");
}
await next();
});
app.MapGet("/", () => "Hello World!");
app.Run();
The Use method registers a middleware component that is typically expressed as a lambda function that receives each request as it passes through the pipeline (there is another method used for classes, as described in the next section).
The arguments to the lambda function are an HttpContext object and a function that is invoked to tell ASP.NET Core to pass the request to the next middleware component in the pipeline.
The HttpContext object describes the HTTP request and the HTTP response and provides additional context, including details of the user associated with the request. Table 12.4 describes the most useful members provided by the HttpContext class, which is defined in the Microsoft.AspNetCore.Http namespace.
Table 12.4 Useful HttpContext members
|
Name |
Description |
|---|---|
|
|
This property returns a |
|
|
This property returns an |
|
|
This property provides access to the services available for the request, as described in chapter 14. |
|
|
This property returns an |
|
|
This property returns the session data associated with the request. The session data feature is described in chapter 16. |
|
|
This property returns details of the user associated with the request, as described in chapters 37 and 38. |
|
|
This property provides access to request features, which allow access to the low-level aspects of request handling. See chapter 16 for an example of using a request feature. |
The ASP.NET Core platform is responsible for processing the HTTP request to create the HttpRequest object, which means that middleware and endpoints don’t have to worry about the raw request data. Table 12.5 describes the most useful members of the HttpRequest class.
Table 12.5 Useful HttpRequest members
|
Name |
Description |
|---|---|
|
|
This property returns a stream that can be used to read the request body. |
|
|
This property returns the value of the |
|
|
This property returns the value of the |
|
|
This property returns the request cookies. |
|
|
This property returns a representation of the request body as a form. |
|
|
This property returns the request headers. |
|
|
This property returns |
|
|
This property returns the HTTP verb—also known as the HTTP method—used for the request. |
|
|
This property returns the path section of the request URL. |
|
|
This property returns the query string section of the request URL as key-value pairs. |
The HttpResponse object describes the HTTP response that will be sent back to the client when the request has made its way through the pipeline. Table 12.6 describes the most useful members of the HttpResponse class. The ASP.NET Core platform makes dealing with responses as easy as possible, sets headers automatically, and makes it easy to send content to the client.
Table 12.6 Useful HttpResponse members
|
Name |
Description |
|---|---|
|
|
This property sets the value of the |
|
|
This property sets the value of the |
|
|
This property allows cookies to be associated with the response. |
|
|
This property returns |
|
|
This property allows the response headers to be set. |
|
|
This property sets the status code for the response. |
|
|
This asynchronous method writes a data string to the response body. |
|
|
This method sends a redirection response. |
When creating custom middleware, the HttpContext, HttpRequest, and HttpResponse objects are used directly, but, as you will learn in later chapters, this isn’t usually required when using the higher-level ASP.NET Core features such as the MVC Framework and Razor Pages.
The middleware function I defined in listing 12.6 uses the HttpRequest object to check the HTTP method and query string to identify GET requests that have a custom parameter in the query string whose value is true, like this:
...
if (context.Request.Method == HttpMethods.Get
&& context.Request.Query["custom"] == "true") {
...
The HttpMethods class defines static strings for each HTTP method. For GET requests with the expected query string, the middleware function uses the ContentType property to set the Content-Type header and uses the WriteAsync method to add a string to the body of the response.
...
context.Response.ContentType = "text/plain";
await context.Response.WriteAsync("Custom Middleware \n");
...
Setting the Content-Type header is important because it prevents the subsequent middleware component from trying to set the response status code and headers. ASP.NET Core will always try to make sure that a valid HTTP response is sent, and this can lead to the response headers or status code being set after an earlier component has already written content to the response body, which produces an exception (because the headers have to be sent to the client before the response body can begin).
The second argument to the middleware is the function conventionally named next that tells ASP.NET Core to pass the request to the next component in the request pipeline.
...
if (context.Request.Method == HttpMethods.Get
&& context.Request.Query["custom"] == "true") {
context.Response.ContentType = "text/plain";
await context.Response.WriteAsync("Custom Middleware \n");
}
await next();
...
No arguments are required when invoking the next middleware component because ASP.NET Core takes care of providing the component with the HttpContext object and its own next function so that it can process the request. The next function is asynchronous, which is why the await keyword is used and why the lambda function is defined with the async keyword.
Start ASP.NET Core using the dotnet run command and use a browser to request http://localhost:5000/?custom=true. You will see that the new middleware function writes its message to the response before passing on the request to the next middleware component, as shown in figure 12.5. Remove the query string, or change true to false, and the middleware component will pass on the request without adding to the response.
Figure 12.5 Creating custom middleware
Defining middleware using lambda functions is convenient, but it can lead to a long and complex series of statements in the Program.cs file and makes it hard to reuse middleware in different projects. Middleware can also be defined using classes, which keeps the code outside of the Program.cs file. To create a middleware class, add a class file named Middleware.cs to the Platform folder, with the content shown in listing 12.7.
Listing 12.7 The contents of the Middleware.cs file in the Platform folder
namespace Platform {
public class QueryStringMiddleWare {
private RequestDelegate next;
public QueryStringMiddleWare(RequestDelegate nextDelegate) {
next = nextDelegate;
}
public async Task Invoke(HttpContext context) {
if (context.Request.Method == HttpMethods.Get
&& context.Request.Query["custom"] == "true") {
if (!context.Response.HasStarted) {
context.Response.ContentType = "text/plain";
}
await context.Response.WriteAsync("Class Middleware \n");
}
await next(context);
}
}
}
Middleware classes receive a RequestDelegate object as a constructor parameter, which is used to forward the request to the next component in the pipeline. The Invoke method is called by ASP.NET Core when a request is received and is given an HttpContext object that provides access to the request and response, using the same classes that lambda function middleware receives. The RequestDelegate returns a Task, which allows it to work asynchronously.
One important difference in class-based middleware is that the HttpContext object must be used as an argument when invoking the RequestDelegate to forward the request, like this:
... await next(context); ...
Class-based middleware components are added to the pipeline with the UseMiddleware method, which accepts the middleware as a type argument, as shown in listing 12.8.
Listing 12.8 Adding class-based middleware in the Program.cs file in the Platform folder
var builder = WebApplication.CreateBuilder(args);
var app = builder.Build();
app.Use(async (context, next) => {
if (context.Request.Method == HttpMethods.Get
&& context.Request.Query["custom"] == "true") {
context.Response.ContentType = "text/plain";
await context.Response.WriteAsync("Custom Middleware \n");
}
await next();
});
app.UseMiddleware<Platform.QueryStringMiddleWare>();
app.MapGet("/", () => "Hello World!");
app.Run();
When the ASP.NET Core is started, the QueryStringMiddleware class will be instantiated, and its Invoke method will be called to process requests as they are received.
Use the dotnet run command to start ASP.NET Core and use a browser to request http://localhost:5000/?custom=true. You will see the output from both middleware components, as shown in figure 12.6.
Figure 12.6 Using a class-based middleware component
Middleware components can modify the HTTPResponse object after the next function has been called, as shown by the new middleware in listing 12.9.
Listing 12.9 Adding new middleware in the Program.cs file in the Platform folder
var builder = WebApplication.CreateBuilder(args);
var app = builder.Build();
app.Use(async (context, next) => {
await next();
await context.Response
.WriteAsync($"\nStatus Code: { context.Response.StatusCode}");
});
app.Use(async (context, next) => {
if (context.Request.Method == HttpMethods.Get
&& context.Request.Query["custom"] == "true") {
context.Response.ContentType = "text/plain";
await context.Response.WriteAsync("Custom Middleware \n");
}
await next();
});
app.UseMiddleware<Platform.QueryStringMiddleWare>();
app.MapGet("/", () => "Hello World!");
app.Run();
The new middleware immediately calls the next method to pass the request along the pipeline and then uses the WriteAsync method to add a string to the response body. This may seem like an odd approach, but it allows middleware to make changes to the response before and after it is passed along the request pipeline by defining statements before and after the next function is invoked, as illustrated by figure 12.7.

Figure 12.7 Passing requests and responses through the ASP.NET Core pipeline
Middleware can operate before the request is passed on, after the request has been processed by other components, or both. The result is that several middleware components collectively contribute to the response that is produced, each providing some aspect of the response or providing some feature or data that is used later in the pipeline.
Start ASP.NET Core using the dotnet run command and use a browser to request http://localhost:5000, which will produce output that includes the content from the new middleware component, as shown in figure 12.8.
Figure 12.8 Modifying a response in the return path
Components that generate complete responses can choose not to call the next function so that the request isn’t passed on. Components that don’t pass on requests are said to short-circuit the pipeline, which is what the new middleware component shown in listing 12.10 does for requests that target the /short URL.
Listing 12.10 Short-Circuiting the pipeline in the Program.cs file in the Platform folder
var builder = WebApplication.CreateBuilder(args);
var app = builder.Build();
app.Use(async (context, next) => {
await next();
await context.Response
.WriteAsync($"\nStatus Code: { context.Response.StatusCode}");
});
app.Use(async (context, next) => {
if (context.Request.Path == "/short") {
await context.Response
.WriteAsync($"Request Short Circuited");
} else {
await next();
}
});
app.Use(async (context, next) => {
if (context.Request.Method == HttpMethods.Get
&& context.Request.Query["custom"] == "true") {
context.Response.ContentType = "text/plain";
await context.Response.WriteAsync("Custom Middleware \n");
}
await next();
});
app.UseMiddleware<Platform.QueryStringMiddleWare>();
app.MapGet("/", () => "Hello World!");
app.Run();
The new middleware checks the Path property of the HttpRequest object to see whether the request is for the /short URL; if it is, it calls the WriteAsync method without calling the next function. To see the effect, restart ASP.NET Core and use a browser to request http://localhost:5000/short?custom=true, which will produce the output shown in figure 12.9.

Figure 12.9 Short-circuiting the request pipeline
Even though the URL has the query string parameter that is expected by the next component in the pipeline, the request isn’t forwarded, so that subsequent middleware doesn’t get used. Notice, however, that the previous component in the pipeline has added its message to the response. That’s because the short-circuiting only prevents components further along the pipeline from being used and doesn’t affect earlier components, as illustrated in figure 12.10.

Figure 12.10 Short-circuiting the request pipeline
The Map method is used to create a section of pipeline that is used to process requests for specific URLs, creating a separate sequence of middleware components, as shown in listing 12.11.
Listing 12.11 Creating a pipeline branch in the Program.cs file in the Platform folder
var builder = WebApplication.CreateBuilder(args);
var app = builder.Build();
app.Map("/branch", branch => {
branch.UseMiddleware<Platform.QueryStringMiddleWare>();
branch.Use(async (HttpContext context, Func<Task> next) => {
await context.Response.WriteAsync($"Branch Middleware");
});
});
app.UseMiddleware<Platform.QueryStringMiddleWare>();
app.MapGet("/", () => "Hello World!");
app.Run();
The first argument to the Map method specifies the string that will be used to match URLs. The second argument is the branch of the pipeline, to which middleware components are added with the Use and UseMiddleware methods.
The statements in listing 12.11 create a branch that is used for URLs that start with /branch and that pass requests through the QueryStringMiddleware class defined in listing 12.7 and a middleware lambda expression that adds a message to the response. Figure 12.11 shows the effect of the branch on the request pipeline.

Figure 12.11 Adding a branch to the request pipeline
When a URL is matched by the Map method, it follows the branch. In this example, the final component in the middleware branch doesn’t invoke the next delegate, which means that requests do not pass through the middleware components on the main path through the pipeline.
The same middleware can be used in different parts of the pipeline, which can be seen in listing 12.11, where the QueryStringMiddleWare class is used in both the main part of the pipeline and the branch.
To see the different ways that requests are handled, restart ASP.NET Core and use a browser to request the http://localhost:5000/?custom=true URL, which will be handled on the main part of the pipeline and will produce the output shown on the left of figure 12.12. Navigate to http://localhost:5000/branch?custom=true, and the request will be forwarded to the middleware in the branch, producing the output shown on the right in figure 12.12.
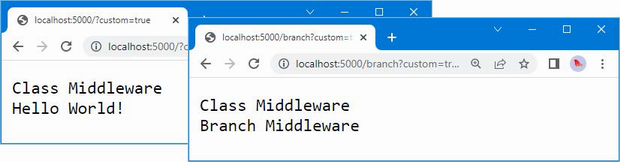
Figure 12.12 The effect of branching the request pipeline
Terminal middleware never forwards requests to other components and always marks the end of the request pipeline. There is a terminal middleware component in the Program.cs file, as shown here:
...
branch.Use(async (context, next) => {
await context.Response.WriteAsync($"Branch Middleware");
});
...
ASP.NET Core supports the Run method as a convenience feature for creating terminal middleware, which makes it obvious that a middleware component won’t forward requests and that a deliberate decision has been made not to call the next function. In listing 12.12, I have used the Run method for the terminal middleware in the pipeline branch.
Listing 12.12 Using the run method in the Program.cs file in the Platform folder
var builder = WebApplication.CreateBuilder(args);
var app = builder.Build();
((IApplicationBuilder)app).Map("/branch", branch => {
branch.UseMiddleware<Platform.QueryStringMiddleWare>();
branch.Run(async (context) => {
await context.Response.WriteAsync($"Branch Middleware");
});
});
app.UseMiddleware<Platform.QueryStringMiddleWare>();
app.MapGet("/", () => "Hello World!");
app.Run();
The middleware function passed to the Run method receives only an HttpContext object and doesn’t have to define a parameter that isn’t used. Behind the scenes, the Run method is implemented through the Use method, and this feature is provided only as a convenience.
Class-based components can be written so they can be used as both regular and terminal middleware, as shown in listing 12.13.
Listing 12.13 Adding terminal support in the Middleware.cs file in the Platform folder
namespace Platform {
public class QueryStringMiddleWare {
private RequestDelegate? next;
public QueryStringMiddleWare() {
// do nothing
}
public QueryStringMiddleWare(RequestDelegate nextDelegate) {
next = nextDelegate;
}
public async Task Invoke(HttpContext context) {
if (context.Request.Method == HttpMethods.Get
&& context.Request.Query["custom"] == "true") {
if (!context.Response.HasStarted) {
context.Response.ContentType = "text/plain";
}
await context.Response.WriteAsync("Class Middleware\n");
}
if (next != null) {
await next(context);
}
}
}
}
The component will forward requests only when the constructor has been provided with a non-null value for the nextDelegate parameter. listing 12.14 shows the application of the component in both standard and terminal forms.
Listing 12.14 Applying middleware in the Program.cs file in the Platform folder
var builder = WebApplication.CreateBuilder(args);
var app = builder.Build();
((IApplicationBuilder)app).Map("/branch", branch => {
branch.Run(new Platform.QueryStringMiddleWare().Invoke);
});
app.UseMiddleware<Platform.QueryStringMiddleWare>();
app.MapGet("/", () => "Hello World!");
app.Run();
There is no equivalent to the UseMiddleware method for terminal middleware, so the Run method must be used by creating a new instance of the middleware class and selecting its Invoke method. Using the Run method doesn’t alter the output from the middleware, which you can see by restarting ASP.NET Core and navigating to the http://localhost:5000/branch?custom=true URL, which produces the content shown in figure 12.13.
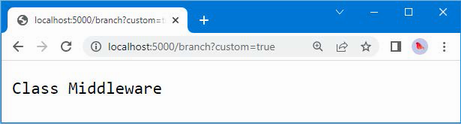
Figure 12.13. Using the Run method to create terminal middleware
There is a common pattern for configuring middleware that is known as the options pattern and that is used by some of the built-in middleware components described in later chapters.
The starting point is to define a class that contains the configuration options for a middleware component. Add a class file named MessageOptions.cs to the Platform folder with the code shown in listing 12.15.
Listing 12.15 The contents of the MessageOptions.cs file in the Platform folder
namespace Platform {
public class MessageOptions {
public string CityName { get; set; } = "New York";
public string CountryName{ get; set; } = "USA";
}
}
The MessageOptions class defines properties that detail a city and a country. In listing 12.16, I have used the options pattern to create a custom middleware component that relies on the MessageOptions class for its configuration. I have also removed some of the middleware from previous examples for brevity.
Listing 12.16 Using the options pattern in the Program.cs file in the Platform folder
using Microsoft.Extensions.Options;
using Platform;
var builder = WebApplication.CreateBuilder(args);
builder.Services.Configure<MessageOptions>(options => {
options.CityName = "Albany";
});
var app = builder.Build();
app.MapGet("/location", async (HttpContext context,
IOptions<MessageOptions> msgOpts) => {
Platform.MessageOptions opts = msgOpts.Value;
await context.Response.WriteAsync($"{opts.CityName}, "
+ opts.CountryName);
});
app.MapGet("/", () => "Hello World!");
app.Run();
The options are set up using the Services.Configure method defined by the WebApplicationBuilder class, using a generic type parameter like this:
...
builder.Services.Configure<MessageOptions>(options => {
options.CityName = "Albany";
});
...
This statement creates options using the MessageOptions class and changes the value of the CityName property. When the application starts, the ASP.NET Core platform will create a new instance of the MessageOptions class and pass it to the function supplied as the argument to the Configure method, allowing the default option values to be changed.
The options will be available as a service, which means this statement must appear before the call to the Build method is called, as shown in the listing.
Middleware components can access the configuration options by defining a parameter for the function that handles the request, like this:
...
app.MapGet("/location", async (HttpContext context,
IOptions<MessageOptions> msgOpts) => {
Platform.MessageOptions opts = msgOpts.Value;
await context.Response.WriteAsync($"{opts.CityName}, "
+ opts.CountryName);
});
...
Some of the extension methods used to register middleware components will accept any function to handle requests. When a request is processed, the ASP.NET Core platform inspects the function to find parameters that require services, which allows the middleware component to use the configuration options in the response it generates:
...
app.MapGet("/location", async (HttpContext context,
IOptions<MessageOptions> msgOpts) => {
Platform.MessageOptions opts = msgOpts.Value;
await context.Response.WriteAsync($"{opts.CityName}, "
+ opts.CountryName);
});
...
This is an example of dependency injection, which I describe in detail in chapter 14. For now, however, you can see how the middleware component uses the options pattern by restarting ASP.NET Core and using a browser to request http://localhost:5000/location, which will produce the response shown in figure 12.14.
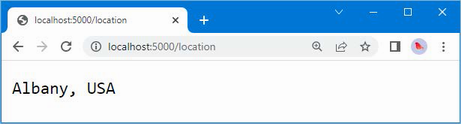
Figure 12.14 Using the options pattern
The options pattern can also be used with class-based middleware and is applied in a similar way. Add the statements shown in listing 12.17 to the Middleware.cs file to define a class-based middleware component that uses the MessageOptions class for configuration.
Listing 12.17 Defining middleware in the Middleware.cs file in the Platform folder
using Microsoft.Extensions.Options;
namespace Platform {
public class QueryStringMiddleWare {
private RequestDelegate? next;
// ...statements omitted for brevity...
}
public class LocationMiddleware {
private RequestDelegate next;
private MessageOptions options;
public LocationMiddleware(RequestDelegate nextDelegate,
IOptions<MessageOptions> opts) {
next = nextDelegate;
options = opts.Value;
}
public async Task Invoke(HttpContext context) {
if (context.Request.Path == "/location") {
await context.Response
.WriteAsync($"{options.CityName}, "
+ options.CountryName);
} else {
await next(context);
}
}
}
}
The LocationMiddleware class defines an IOptions<MessageOptions> constructor parameter, which can be used in the Invoke method to access the options settings.
Listing 12.18 reconfigures the request pipeline to replace the lambda function middleware component with the class from listing 12.17.
Listing 12.18 Using class-based middleware in the Program.cs file in the Platform folder
//using Microsoft.Extensions.Options;
using Platform;
var builder = WebApplication.CreateBuilder(args);
builder.Services.Configure<MessageOptions>(options => {
options.CityName = "Albany";
});
var app = builder.Build();
app.UseMiddleware<LocationMiddleware>();
app.MapGet("/", () => "Hello World!");
app.Run();
When the UseMiddleware statement is executed, the LocationMiddleware constructor is inspected, and its IOptions<MessageOptions> parameter will be resolved using the object created with the Services.Configure method. This is done using the dependency injection feature that is described in chapter 14, but the immediate effect is that the options pattern can be used to easily configure class-based middleware. Restart ASP.NET Core and request http://localhost:5000/location to test the new middleware, which will produce the same output as shown in figure 12.14.
ASP.NET Core uses a pipeline to process HTTP requests.
Each request is passed to a series of middleware components for processing.
Once the request has reached the end of the pipeline, the same middleware components are able to inspect and modify the response before it is sent.
Middleware components can choose not to forward requests to the next component in the pipeline, known as “short-circuiting.”
ASP.NET Core can be configured to use different sequences of middleware components to handle different request URLs.
Middleware is configured using the options pattern, which is a simple and consistent approach used throughout ASP.NET Core.
This chapter covers
The URL routing feature makes it easier to generate responses by consolidating the processing and matching of request URLs. In this chapter, I explain how the ASP.NET Core platform supports URL routing, show its use, and explain why it can be preferable to creating custom middleware components. Table 13.1 puts URL routing in context.
Table 13.1 Putting URL routing in context
|
Question |
Answer |
|---|---|
|
What is it? |
URL routing consolidates the processing and matching of URLs, allowing components known as endpoints to generate responses. |
|
Why is it useful? |
URL routing obviates the need for each middleware component to process the URL to see whether the request will be handled or passed along the pipeline. The result is more efficient and easier to maintain. |
|
How is it used? |
The URL routing middleware components are added to the request pipeline and configured with a set of routes. Each route contains a URL path and a delegate that will generate a response when a request with the matching path is received. |
|
Are there any pitfalls or limitations? |
It can be difficult to define the set of routes matching all the URLs supported by a complex application. |
|
Are there any alternatives? |
URL routing is optional, and custom middleware components can be used instead. |
Table 13.2 provides a guide to the chapter.
Table 13.2 Chapter guide
|
Problem |
Solution |
Listing |
|---|---|---|
|
Handling requests for a specific set of URLs |
Define a route with a pattern that matches the required URLs. |
1–7 |
|
Extracting values from URLs |
Use segment variables. |
8–11, 15 |
|
Generating URLs |
Use the link generator to produce URLs from routes. |
12–14, 16 |
|
Matching URLs with different numbers of segments |
Use optional segments or catchall segments in the URL routing pattern. |
17–19 |
|
Restricting matches |
Use constraints in the URL routing pattern. |
20–22, 24–27 |
|
Matching requests that are not otherwise handled |
Define fallback routes. |
23 |
|
Seeing which endpoint will handle a request |
Use the routing context data. |
28 |
In this chapter, I continue to use the Platform project from chapter 12. To prepare for this chapter, add a file called Population.cs to the Platform folder with the code shown in listing 13.1.
Listing 13.1 The contents of the Population.cs file in the Platform folder
namespace Platform {
public class Population {
private RequestDelegate? next;
public Population() { }
public Population(RequestDelegate nextDelegate) {
next = nextDelegate;
}
public async Task Invoke(HttpContext context) {
string[] parts = context.Request.Path.ToString()
.Split("/", StringSplitOptions.RemoveEmptyEntries);
if (parts.Length == 2 && parts[0] == "population") {
string city = parts[1];
int? pop = null;
switch (city.ToLower()) {
case "london":
pop = 8_136_000;
break;
case "paris":
pop = 2_141_000;
break;
case "monaco":
pop = 39_000;
break;
}
if (pop.HasValue) {
await context.Response
.WriteAsync($"City: {city}, Population: {pop}");
return;
}
}
if (next != null) {
await next(context);
}
}
}
}
This middleware component responds to requests for /population/<city> where <city> is london, paris, or monaco. The middleware component splits up the URL path string, checks that it has the expected length, and uses a switch statement to determine if it is a request for a URL that it can respond to. A response is generated if the URL matches the pattern the middleware is looking for; otherwise, the request is passed along the pipeline.
Add a class file named Capital.cs to the Platform folder with the code shown in listing 13.2.
Listing 13.2 The contents of the Capital.cs file in the Platform folder
namespace Platform {
public class Capital {
private RequestDelegate? next;
public Capital() { }
public Capital(RequestDelegate nextDelegate) {
next = nextDelegate;
}
public async Task Invoke(HttpContext context) {
string[] parts = context.Request.Path.ToString()
.Split("/", StringSplitOptions.RemoveEmptyEntries);
if (parts.Length == 2 && parts[0] == "capital") {
string? capital = null;
string country = parts[1];
switch (country.ToLower()) {
case "uk":
capital = "London";
break;
case "france":
capital = "Paris";
break;
case "monaco":
context.Response.Redirect(
$"/population/{country}");
return;
}
if (capital != null) {
await context.Response.WriteAsync(
$"{capital} is the capital of {country}");
return;
}
}
if (next != null) {
await next(context);
}
}
}
}
This middleware component is looking for requests for /capital/<country>, where <country> is uk, france, or monaco. The capital cities of the United Kingdom and France are displayed, but requests for Monaco, which is a city and a state, are redirected to /population/monaco.
Listing 13.3 replaces the middleware examples from the previous chapter and adds the new middleware components to the request pipeline.
Listing 13.3 Replacing the contents of the Program.cs file in the Platform folder
using Platform;
var builder = WebApplication.CreateBuilder(args);
var app = builder.Build();
app.UseMiddleware<Population>();
app.UseMiddleware<Capital>();
app.Run(async (context) => {
await context.Response.WriteAsync("Terminal Middleware Reached");
});
app.Run();
Start ASP.NET Core by running the command shown in listing 13.4 in the Platform folder.
Listing 13.4 Starting the ASP.NET Core Runtime
dotnet run
Navigate to http://localhost:5000/population/london, and you will see the output on the left side of figure 13.1. Navigate to http://localhost:5000/capital/france to see the output from the other middleware component, which is shown on the right side of figure 13.1.

Figure 13.1 Running the example application
Each middleware component decides whether to act on a request as it passes along the pipeline. Some components are looking for a specific header or query string value, but most components—especially terminal and short-circuiting components—are trying to match URLs.
Each middleware component has to repeat the same set of steps as the request works its way along the pipeline. You can see this in the middleware defined in the previous section, where both components go through the same process: split up the URL, check the number of parts, inspect the first part, and so on.
This approach is far from ideal. It is inefficient because the same set of operations is repeated by each middleware component to process the URL. It is difficult to maintain because the URL that each component is looking for is hidden in its code. It breaks easily because changes must be carefully worked through in multiple places. For example, the Capital component redirects requests to a URL whose path starts with /population, which is handled by the Population component. If the Population component is revised to support the /size URL instead, then this change must also be reflected in the Capital component. Real applications can support complex sets of URLs and working changes fully through individual middleware components can be difficult.
URL routing solves these problems by introducing middleware that takes care of matching request URLs so that components, called endpoints, can focus on responses. The mapping between endpoints and the URLs they require is expressed in a route. The routing middleware processes the URL, inspects the set of routes, and finds the endpoint to handle the request, a process known as routing.
The routing middleware is added using two separate methods: UseRouting and UseEndpoints. The UseRouting method adds the middleware responsible for processing requests to the pipeline. The UseEndpoints method is used to define the routes that match URLs to endpoints. URLs are matched using patterns that are compared to the path of request URLs, and each route creates a relationship between one URL pattern and one endpoint. Listing 13.5 shows the use of the routing middleware and contains a simple route.
Listing 13.5 Using the routing middleware in the Program.cs file in the Platform folder
using Platform;
var builder = WebApplication.CreateBuilder(args);
var app = builder.Build();
app.UseMiddleware<Population>();
app.UseMiddleware<Capital>();
app.UseRouting();
#pragma warning disable ASP0014
app.UseEndpoints(endpoints => {
endpoints.MapGet("routing", async context => {
await context.Response.WriteAsync("Request Was Routed");
});
});
app.Run(async (context) => {
await context.Response.WriteAsync("Terminal Middleware Reached");
});
app.Run();
There are no arguments to the UseRouting method. The UseEndpoints method receives a function that accepts an IEndpointRouteBuilder object and uses it to create routes using the extension methods described in table 13.3.
The code in listing 13.5 contains a #pragma directive that prevents a compiler warning, which I explain in the next section.
Table 13.3 The IEndpointRouteBuilder extension methods
|
Name |
Description |
|---|---|
|
|
This method routes HTTP GET requests that match the URL pattern to the endpoint. |
|
|
This method routes HTTP POST requests that match the URL pattern to the endpoint. |
|
|
This method routes HTTP PUT requests that match the URL pattern to the endpoint. |
|
|
This method routes HTTP DELETE requests that match the URL pattern to the endpoint. |
|
|
This method routes requests made with one of the specified HTTP methods that match the URL pattern to the endpoint. |
|
|
This method routes all HTTP requests that match the URL pattern to the endpoint. |
Endpoints are defined using RequestDelegate, which is the same delegate used by conventional middleware, so endpoints are asynchronous methods that receive an HttpContext object and use it to generate a response. This means that the features described in chapter 12 for middleware components can also be used in endpoints.
Restart ASP.NET Core and use a browser to request http://localhost:5000/routing to test the new route. When matching a request, the routing middleware applies the route’s URL pattern to the path section of the URL. The path is separated from the hostname by the / character, as shown in figure 13.2.
Figure 13.2 The URL path
The path in the URL matches the pattern specified in the route.
...
endpoints.MapGet("routing", async context => {
...
URL patterns are conventionally expressed without a leading / character, which isn’t part of the URL path. When the request URL path matches the URL pattern, the request will be forwarded to the endpoint function, which generates the response shown in figure 13.3.
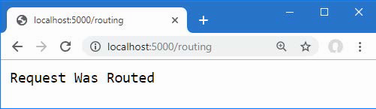
Figure 13.3 Using an endpoint to generate a response
The routing middleware short-circuits the pipeline when a route matches a URL so that the response is generated only by the route’s endpoint. The request isn’t forwarded to other endpoints or middleware components that appear later in the request pipeline.
If the request URL isn’t matched by any route, then the routing middleware passes the request to the next middleware component in the request pipeline. To test this behavior, request the http://localhost:5000/notrouted URL, whose path doesn’t match the pattern in the route defined in listing 13.5.
The routing middleware can’t match the URL path to a route and forwards the request, which reaches the terminal middleware, producing the response shown in figure 13.4.
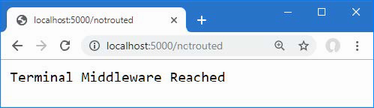
Figure 13.4 Requesting a URL for which there is no matching route
Endpoints generate responses in the same way as the middleware components demonstrated in earlier chapters: they receive an HttpContext object that provides access to the request and response through HttpRequest and HttpResponse objects. This means that any middleware component can also be used as an endpoint. Listing 13.6 adds a route that uses the Capital and Population middleware components as endpoints.
Listing 13.6 Using components as endpoints in the Program.cs file in the Platform folder
using Platform;
var builder = WebApplication.CreateBuilder(args);
var app = builder.Build();
//app.UseMiddleware<Population>();
//app.UseMiddleware<Capital>();
app.UseRouting();
#pragma warning disable ASP0014
app.UseEndpoints(endpoints => {
endpoints.MapGet("routing", async context => {
await context.Response.WriteAsync("Request Was Routed");
});
endpoints.MapGet("capital/uk", new Capital().Invoke);
endpoints.MapGet("population/paris", new Population().Invoke);
});
app.Run(async (context) => {
await context.Response.WriteAsync("Terminal Middleware Reached");
});
app.Run();
Using middleware components like this is awkward because I need to create new instances of the classes to select the Invoke method as the endpoint. The URL patterns used by the routes support only some of the URLs that the middleware components support, but it is useful to understand that endpoints rely on features that are familiar from earlier chapters. To test the new routes, restart ASP.NET Core and use a browser to request http://localhost:5000/capital/uk and http://localhost:5000/population/paris, which will produce the results shown in figure 13.5.
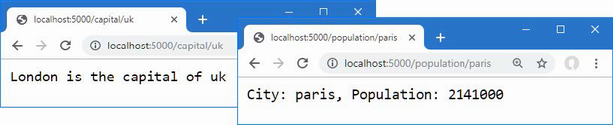
Figure 13.5 Using middleware components as endpoints
I demonstrated the use of the UseRouting and UseEndpoints method because I wanted to emphasize that routing builds on the standard pipeline features and is implemented using regular middleware components.
However, as part of a drive to simplify the configuration of ASP.NET Core applications, Microsoft automatically applies the UseRouting and UseEndpoints methods to the request pipeline, which means that the methods described in table 13.3 can be used directly on the WebApplication object returned by the WebApplication.CreateBuilder method, as shown in listing 13.7.
When you call the UseEndpoints method, the C# code analyzer generates a warning that suggests registering routes at the top level of the Program.cs file.
Listing 13.7 Simplifying the code in the Program.cs file in the Platform folder
using Platform;
var builder = WebApplication.CreateBuilder(args);
var app = builder.Build();
app.UseRouting();
//#pragma warning disable ASP0014
//app.UseEndpoints(endpoints => {
// endpoints.MapGet("routing", async context => {
// await context.Response.WriteAsync("Request Was Routed");
// });
// endpoints.MapGet("capital/uk", new Capital().Invoke);
// endpoints.MapGet("population/paris", new Population().Invoke);
//});
app.MapGet("routing", async context => {
await context.Response.WriteAsync("Request Was Routed");
});
app.MapGet("capital/uk", new Capital().Invoke);
app.MapGet("population/paris", new Population().Invoke);
//app.Run(async (context) => {
// await context.Response.WriteAsync("Terminal Middleware Reached");
//});
app.Run();
The WebApplication class implements the IEndpointRouteBuilder interface, which means that endpoints can be created more concisely. Behind the scenes, the routing middleware is still responsible for matching requests and selecting routes.
Restart ASP.NET Core and use a browser to request http://localhost:5000/capital/uk and http://localhost:5000/population/paris, which will produce the results shown in figure 13.5.
Using middleware components as endpoints shows that URL routing builds on the standard ASP.NET Core platform features. Although the URLs that the application handles can be seen by examining the routes, not all of the URLs understood by the Capital and Population classes are routed, and there have been no efficiency gains since the URL is processed once by the routing middleware to select the route and again by the Capital or Population class to extract the data values they require.
Making improvements requires understanding more about how URL patterns are used. When a request arrives, the routing middleware processes the URL to extract the segments from its path, which are the sections of the path separated by the / character, as shown in figure 13.6.
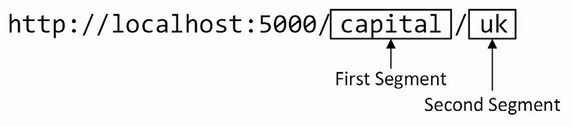
Figure 13.6 The URL segments
The routing middleware also extracts the segments from the URL routing pattern, as shown in figure 13.7.
Figure 13.7 The URL pattern segments
To route a request, the segments from the URL pattern are compared to those from the request to see whether they match. The request is routed to the endpoint if its path contains the same number of segments and each segment has the same content as those in the URL pattern, as summarized in table 13.4.
Table 13.4 Matching URL segments
|
URL Path |
Description |
|---|---|
|
|
No match—too few segments |
|
|
No match—too many segments |
|
|
No match—first segment is not |
|
|
Matches |
The URL pattern used in listing 13.7 uses literal segments, also known as static segments, which match requests using fixed strings. The first segment in the pattern will match only those requests whose path has capital as the first segment, for example, and the second segment in the pattern will match only those requests whose second segment is uk. Put these together, and you can see why the route matches only those requests whose path is /capital/uk.
Segment variables, also known as route parameters, expand the range of path segments that a pattern segment will match, allowing more flexible routing. Segment variables are given a name and are denoted by curly braces (the { and } characters), as shown in listing 13.8.
Listing 13.8 Using segment variables in the Program.cs file in the Platform folder
using Platform;
var builder = WebApplication.CreateBuilder(args);
var app = builder.Build();
app.MapGet("{first}/{second}/{third}", async context => {
await context.Response.WriteAsync("Request Was Routed\n");
foreach (var kvp in context.Request.RouteValues) {
await context.Response
.WriteAsync($"{kvp.Key}: {kvp.Value}\n");
}
});
app.MapGet("capital/uk", new Capital().Invoke);
app.MapGet("population/paris", new Population().Invoke);
app.Run();
The URL pattern {first}/{second}/{third} matches URLs whose path contains three segments, regardless of what those segments contain. When a segment variable is used, the routing middleware provides the endpoint with the contents of the URL path segment they have matched. This content is available through the HttpRequest.RouteValues property, which returns a RouteValuesDictionary object. Table 13.5 describes the most useful RouteValuesDictionary members.
Table 13.5 Useful RouteValuesDictionary members
|
Name |
Description |
|---|---|
|
|
The class defines an indexer that allows values to be retrieved by key. |
|
|
This property returns the collection of segment variable names. |
|
|
This property returns the collection of segment variable values. |
|
|
This property returns the number of segment variables. |
|
|
This method returns |
The RouteValuesDictionary class is enumerable, which means that it can be used in a foreach loop to generate a sequence of KeyValuePair<string, object> objects, each of which corresponds to the name of a segment variable and the corresponding value extracted from the request URL. The endpoint in listing 13.8 enumerates the HttpRequest.RouteValues property to generate a response that lists the names and values of the segment variables matched by the URL pattern.
The names of the segment variables are first, second, and third, and you can see the values extracted from the URL by restarting ASP.NET Core and requesting any three-segment URL, such as http://localhost:5000/apples/oranges/cherries, which produces the response shown in figure 13.8.
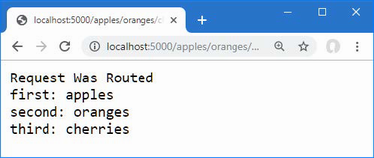
Figure 13.8 Using segment variables
Refactoring middleware into an endpoint
Endpoints usually rely on the routing middleware to provide specific segment variables, rather than enumerating all the segment variables. By relying on the URL pattern to provide a specific value, I can refactor the Capital and Population classes to depend on the route data, as shown in listing 13.9.
Listing 13.9 Depending on the route data in the Capital.cs file in the Platform folder
namespace Platform {
public class Capital {
public static async Task Endpoint(HttpContext context) {
string? capital = null;
string? country
= context.Request.RouteValues["country"] as string;
switch ((country ?? "").ToLower()) {
case "uk":
capital = "London";
break;
case "france":
capital = "Paris";
break;
case "monaco":
context.Response.Redirect($"/population/{country}");
return;
}
if (capital != null) {
await context.Response
.WriteAsync($"{capital} is the capital of {country}");
} else {
context.Response.StatusCode
= StatusCodes.Status404NotFound;
}
}
}
}
Middleware components can be used as endpoints, but the opposite isn’t true once there is a dependency on the data provided by the routing middleware. In listing 13.9, I used the route data to get the value of a segment variable named country through the indexer defined by the RouteValuesDictionary class.
... string country = context.Request.RouteValues["country"] as string; ...
The indexer returns an object value that is cast to a string using the as keyword. The listing removes the statements that pass the request along the pipeline, which the routing middleware handles on behalf of endpoints.
The use of the segment variable means that requests may be routed to the endpoint with values that are not supported, so I added a statement that returns a 404 status code for countries the endpoint doesn’t understand.
I also removed the constructors and replaced the Invoke instance method with a static method named Endpoint, which better fits with the way that endpoints are used in routes. Listing 13.10 applies the same set of changes to the Population class, transforming it from a standard middleware component into an endpoint that depends on the routing middleware to process URLs.
Listing 13.10 Depending on route data in the Population.cs file in the Platform folder
namespace Platform {
public class Population {
public static async Task Endpoint(HttpContext context) {
string? city = context.Request.RouteValues["city"] as string;
int? pop = null;
switch ((city ?? "").ToLower()) {
case "london":
pop = 8_136_000;
break;
case "paris":
pop = 2_141_000;
break;
case "monaco":
pop = 39_000;
break;
}
if (pop.HasValue) {
await context.Response
.WriteAsync($"City: {city}, Population: {pop}");
} else {
context.Response.StatusCode
= StatusCodes.Status404NotFound;
}
}
}
}
The change to static methods tidies up the use of the endpoints when defining routes, as shown in listing 13.11.
Listing 13.11 Updating routes in the Program.cs file in the Platform folder
using Platform;
var builder = WebApplication.CreateBuilder(args);
var app = builder.Build();
app.MapGet("{first}/{second}/{third}", async context => {
await context.Response.WriteAsync("Request Was Routed\n");
foreach (var kvp in context.Request.RouteValues) {
await context.Response
.WriteAsync($"{kvp.Key}: {kvp.Value}\n");
}
});
app.MapGet("capital/{country}", Capital.Endpoint);
app.MapGet("population/{city}", Population.Endpoint);
app.Run();
The new routes match URLs whose path has two segments, the first of which is capital or population. The contents of the second segment are assigned to the segment variables named country and city, allowing the endpoints to support the full set of URLs that were handled at the start of the chapter, without the need to process the URL directly. To test the new routes, restart ASP.NET Core and request http://localhost:5000/capital/uk and http://localhost:5000/population/london, which will produce the responses shown in figure 13.9.

Figure 13.9 Using segment variables in endpoints
These changes address two of the problems I described at the start of the chapter. Efficiency has improved because the URL is processed only once by the routing middleware and not by multiple components. And it is easier to see the URLs that each endpoint supports because the URL patterns show how requests will be matched.
The final problem was the difficulty in making changes. The Capital endpoint still has a hardwired dependency on the URL that the Population endpoint supports. To break this dependency, the routing system allows URLs to be generated by supplying data values for segment variables. The first step is to assign a name to the route that will be the target of the URL that is generated, as shown in listing 13.12.
Listing 13.12 Naming a route in the Program.cs file in the Platform folder
using Platform;
var builder = WebApplication.CreateBuilder(args);
var app = builder.Build();
app.MapGet("{first}/{second}/{third}", async context => {
await context.Response.WriteAsync("Request Was Routed\n");
foreach (var kvp in context.Request.RouteValues) {
await context.Response
.WriteAsync($"{kvp.Key}: {kvp.Value}\n");
}
});
app.MapGet("capital/{country}", Capital.Endpoint);
app.MapGet("population/{city}", Population.Endpoint)
.WithMetadata(new RouteNameMetadata("population"));
app.Run();
The WithMetadata method is used on the result from the MapGet method to assign metadata to the route. The only metadata required for generating URLs is a name, which is assigned by passing a new RouteNameMetadata object, whose constructor argument specifies the name that will be used to refer to the route. The effect of the change in the listing is to assign the route the name population.
In listing 13.13, I have revised the Capital endpoint to remove the direct dependency on the /population URL and rely on the routing features to generate a URL.
Listing 13.13 Generating a URL in the Capital.cs file in the Platform folder
namespace Platform {
public class Capital {
public static async Task Endpoint(HttpContext context) {
string? capital = null;
string? country
= context.Request.RouteValues["country"] as string;
switch ((country ?? "").ToLower()) {
case "uk":
capital = "London";
break;
case "france":
capital = "Paris";
break;
case "monaco":
LinkGenerator? generator =
context.RequestServices.GetService<LinkGenerator>();
string? url = generator?.GetPathByRouteValues(context,
"population", new { city = country });
if (url != null) {
context.Response.Redirect(url);
}
return;
}
if (capital != null) {
await context.Response
.WriteAsync($"{capital} is the capital of {country}");
} else {
context.Response.StatusCode
= StatusCodes.Status404NotFound;
}
}
}
}
URLs are generated using the LinkGenerator class. You can’t just create a new LinkGenerator instance; one must be obtained using the dependency injection feature that is described in chapter 14. For this chapter, it is enough to know that this statement obtains the LinkGenerator object that the endpoint will use:
...
LinkGenerator? generator =
context.RequestServices.GetService<LinkGenerator>();
...
The LinkGenerator class provides the GetPathByRouteValues method, which is used to generate the URL that will be used in the redirection.
...
generator?.GetPathByRouteValues(context,"population",
new { city = country });
...
The arguments to the GetPathByRouteValues method are the endpoint’s HttpContext object, the name of the route that will be used to generate the link, and an object that is used to provide values for the segment variables. The GetPathByRouteValues method returns a URL that will be routed to the Population endpoint, which can be confirmed by restarting ASP.NET Core and requesting the http://localhost:5000/capital/monaco URL. The request will be routed to the Capital endpoint, which will generate the URL and use it to redirect the browser, producing the result shown in figure 13.10.

Figure 13.10 Generating a URL
The benefit of this approach is that the URL is generated from the URL pattern in the named route, which means a change in the URL pattern is reflected in the generated URLs, without the need to make changes to endpoints. To demonstrate, listing 13.14 changes the URL pattern.
Listing 13.14 Changing a URL pattern in the Program.cs file in the Platform folder
using Platform;
var builder = WebApplication.CreateBuilder(args);
var app = builder.Build();
app.MapGet("{first}/{second}/{third}", async context => {
await context.Response.WriteAsync("Request Was Routed\n");
foreach (var kvp in context.Request.RouteValues) {
await context.Response
.WriteAsync($"{kvp.Key}: {kvp.Value}\n");
}
});
app.MapGet("capital/{country}", Capital.Endpoint);
app.MapGet("size/{city}", Population.Endpoint)
.WithMetadata(new RouteNameMetadata("population"));
app.Run();
The name assigned to the route is unchanged, which ensures that the same endpoint is targeted by the generated URL. To see the effect of the new pattern, restart ASP.NET Core and request the http://localhost:5000/capital/monaco URL again. The redirection is to a URL that is matched by the modified pattern, as shown in figure 13.11. This feature addresses the final problem that I described at the start of the chapter, making it easy to change the URLs that an application supports.
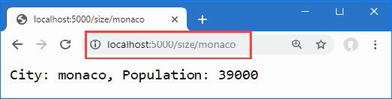
Figure 13.11 Changing the URL pattern
The previous section introduced the basic URL routing features, but most applications require more work to ensure that URLs are routed correctly, either to increase or to restrict the range of URLs that are matched by a route. In the sections that follow, I show you the different ways that URL patterns can be adjusted to fine-tune the matching process.
Most segment variables correspond directly to a segment in the URL path, but the routing middleware is able to perform more complex matches, allowing a single segment to be matched to a variable while discarding unwanted characters. Listing 13.15 defines a route that matches only part of a URL segment to a variable.
Listing 13.15 Matching part of a segment in the Program.cs file in the Platform folder
using Platform;
var builder = WebApplication.CreateBuilder(args);
var app = builder.Build();
app.MapGet("files/{filename}.{ext}", async context => {
await context.Response.WriteAsync("Request Was Routed\n");
foreach (var kvp in context.Request.RouteValues) {
await context.Response
.WriteAsync($"{kvp.Key}: {kvp.Value}\n");
}
});
app.MapGet("capital/{country}", Capital.Endpoint);
app.MapGet("size/{city}", Population.Endpoint)
.WithMetadata(new RouteNameMetadata("population"));
app.Run();
A URL pattern can contain as many segment variables as you need, as long as they are separated by a static string. The requirement for a static separator is so the routing middleware knows where the content for one variable ends and the content for the next starts. The pattern in listing 13.15 matches segment variables named filename and ext, which are separated by a period; this pattern is often used by process file names. To see how the pattern matches URLs, restart ASP.NET Core and request the http://localhost:5000/files/myfile.txt URL, which will produce the response shown in figure 13.12.
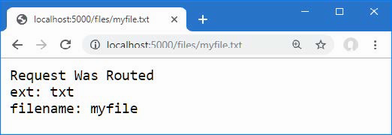
Figure 13.12 Matching multiple values from a single path segment
Patterns can be defined with default values that are used when the URL doesn’t contain a value for the corresponding segment, increasing the range of URLs that a route can match. Listing 13.16 shows the use of default values in a pattern.
Listing 13.16 Using Default Values in the Program.cs File in the Platform Folder
using Platform;
var builder = WebApplication.CreateBuilder(args);
var app = builder.Build();
app.MapGet("files/{filename}.{ext}", async context => {
await context.Response.WriteAsync("Request Was Routed\n");
foreach (var kvp in context.Request.RouteValues) {
await context.Response
.WriteAsync($"{kvp.Key}: {kvp.Value}\n");
}
});
app.MapGet("capital/{country=France}", Capital.Endpoint);
app.MapGet("size/{city}", Population.Endpoint)
.WithMetadata(new RouteNameMetadata("population"));
app.Run();
Default values are defined using an equal sign and the value to be used. The default value in the listing uses the value France when there is no second segment in the URL path. The result is that the range of URLs that can be matched by the route increases, as described in table 13.6.
Table 13.6 Matching URLs
|
URL Path |
Description |
|---|---|
|
|
No match—too few segments |
|
|
No match—first segment isn’t |
|
|
Matches, |
|
|
Matches, |
|
|
No match—too many segments |
To test the default value, restart ASP.NET Core and navigate to http://localhost:5000/capital, which will produce the result shown in figure 13.13.
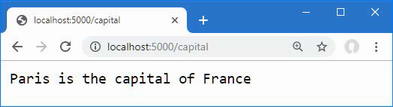
Figure 13.13 Using a default value for a segment variable
Default values allow URLs to be matched with fewer segments, but the use of the default value isn’t obvious to the endpoint. Some endpoints define their own responses to deal with URLs that omit segments, for which optional segments are used. To prepare, listing 13.17 updates the Population endpoint so that it uses a default value when no city value is available in the routing data.
Listing 13.17 Using a default value in the Population.cs file in the Platform folder
namespace Platform {
public class Population {
public static async Task Endpoint(HttpContext context) {
string city = context.Request.RouteValues["city"]
as string ?? "london";
int? pop = null;
switch (city.ToLower()) {
case "london":
pop = 8_136_000;
break;
case "paris":
pop = 2_141_000;
break;
case "monaco":
pop = 39_000;
break;
}
if (pop.HasValue) {
await context.Response
.WriteAsync($"City: {city}, Population: {pop}");
} else {
context.Response.StatusCode
= StatusCodes.Status404NotFound;
}
}
}
}
The change uses london as the default value because there is no city segment variable available. Listing 13.18 updates the route for the Population endpoint to make the second segment optional.
Listing 13.18 Using an optional segment in the Program.cs file in the Platform folder
using Platform;
var builder = WebApplication.CreateBuilder(args);
var app = builder.Build();
app.MapGet("files/{filename}.{ext}", async context => {
await context.Response.WriteAsync("Request Was Routed\n");
foreach (var kvp in context.Request.RouteValues) {
await context.Response
.WriteAsync($"{kvp.Key}: {kvp.Value}\n");
}
});
app.MapGet("capital/{country=France}", Capital.Endpoint);
app.MapGet("size/{city?}", Population.Endpoint)
.WithMetadata(new RouteNameMetadata("population"));
app.Run();
Optional segments are denoted with a question mark (the ? character) after the variable name and allow the route to match URLs that don’t have a corresponding path segment, as described in table 13.7.
Table 13.7 Matching URLs
|
URL Path |
Description |
|---|---|
|
|
No match—too few segments. |
|
|
No match—first segment isn’t |
|
|
Matches. No value for the |
|
|
Matches, |
|
|
No match—too many segments. |
To test the optional segment, restart ASP.NET Core and navigate to http://localhost:5000/size, which will produce the response shown in figure 13.14.
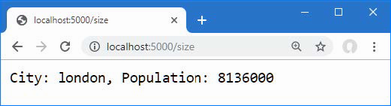
Figure 13.14 Using an optional segment
Optional segments allow a pattern to match shorter URL paths. A catchall segment does the opposite and allows routes to match URLs that contain more segments than the pattern. A catchall segment is denoted with an asterisk before the variable name, as shown in listing 13.19.
Listing 13.19 Using a catchall segment in the Program.cs file in the Platform folder
using Platform;
var builder = WebApplication.CreateBuilder(args);
var app = builder.Build();
app.MapGet("{first}/{second}/{*catchall}", async context => {
await context.Response.WriteAsync("Request Was Routed\n");
foreach (var kvp in context.Request.RouteValues) {
await context.Response
.WriteAsync($"{kvp.Key}: {kvp.Value}\n");
}
});
app.MapGet("capital/{country=France}", Capital.Endpoint);
app.MapGet("size/{city?}", Population.Endpoint)
.WithMetadata(new RouteNameMetadata("population"));
app.Run();
The new pattern contains two-segment variables and a catchall, and the result is that the route will match any URL whose path contains two or more segments. There is no upper limit to the number of segments that the URL pattern in this route will match, and the contents of any additional segments are assigned to the segment variable named catchall. Restart ASP.NET Core and navigate to http://localhost:5000/one/two/three/four, which produces the response shown in figure 13.15.
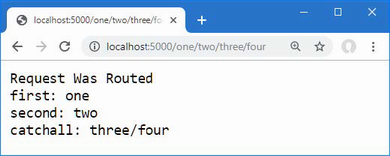
Figure 13.15 Using a catchall segment variable
Default values, optional segments, and catchall segments all increase the range of URLs that a route will match. Constraints have the opposite effect and restrict matches. This can be useful if an endpoint can deal only with specific segment contents or if you want to differentiate matching closely related URLs for different endpoints. Constraints are applied by a colon (the : character) and a constraint type after a segment variable name, as shown in listing 13.20.
Listing 13.20 Applying constraints in the Program.cs file in the Platform folder
using Platform;
var builder = WebApplication.CreateBuilder(args);
var app = builder.Build();
app.MapGet("{first:int}/{second:bool}", async context => {
await context.Response.WriteAsync("Request Was Routed\n");
foreach (var kvp in context.Request.RouteValues) {
await context.Response
.WriteAsync($"{kvp.Key}: {kvp.Value}\n");
}
});
app.MapGet("capital/{country=France}", Capital.Endpoint);
app.MapGet("size/{city?}", Population.Endpoint)
.WithMetadata(new RouteNameMetadata("population"));
app.Run();
This example constrains the first segment variable so it will match only the path segments that can be parsed to an int value, and it constrains the second segment so it will match only the path segments that can be parsed to a bool. Values that don’t match the constraints won’t be matched by the route. Table 13.8 describes the URL pattern constraints.
Table 13.8 The URL pattern constraints
|
Constraint |
Description |
|---|---|
|
|
This constraint matches the letters a to z (and is case-insensitive). |
|
|
This constraint matches |
|
|
This constraint matches |
|
|
This constraint matches |
|
|
This constraint matches |
|
|
This constraint matches segments whose content represents a file name, in the form |
|
|
This constraint matches |
|
|
This constraint matches |
|
|
This constraint matches |
|
|
This constraint matches path segments that have the specified number of characters. |
|
|
This constraint matches path segments whose length falls between the lower and upper values specified. |
|
|
This constraint matches |
|
|
This constraint matches path segments that can be parsed to an |
|
|
This constraint matches path segments whose length is equal to or less than the specified value. |
|
|
This constraint matches path segments that can be parsed to an |
|
|
This constraint matches path segments whose length is equal to or more than the specified value. |
|
|
This constraint matches segments that do not represent a file name, i.e., values that would not be matched by the |
|
|
This constraint matches path segments that can be parsed to an |
|
|
This constraint applies a regular expression to match path segments. |
To test the constraints, restart ASP.NET Core and request http://localhost:5000/100/true, which is a URL whose path segments conform to the constraints in listing 13.20 and that produces the result shown on the left side of figure 13.16. Request http://localhost:5000/apples/oranges, which has the right number of segments but contains values that don’t conform to the constraints. None of the routes matches the request, which is forwarded to the terminal middleware, as shown on the right of figure 13.16.
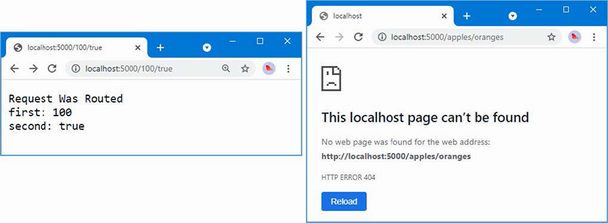
Figure 13.16 Testing constraints
Constraints can be combined to further restrict matching, as shown in listing 13.21.
Listing 13.21 Combining URL pattern constraints in the Program.cs file in the Platform folder
using Platform;
var builder = WebApplication.CreateBuilder(args);
var app = builder.Build();
app.MapGet("{first:alpha:length(3)}/{second:bool}", async context => {
await context.Response.WriteAsync("Request Was Routed\n");
foreach (var kvp in context.Request.RouteValues) {
await context.Response
.WriteAsync($"{kvp.Key}: {kvp.Value}\n");
}
});
app.MapGet("capital/{country=France}", Capital.Endpoint);
app.MapGet("size/{city?}", Population.Endpoint)
.WithMetadata(new RouteNameMetadata("population"));
app.Run();
The constraints are combined, and only path segments that can satisfy all the constraints will be matched. The combination in listing 13.21 constrains the URL pattern so that the first segment will match only three alphabetic characters. To test the pattern, restart ASP.NET Core and request http://localhost:5000/dog/true, which will produce the output shown in figure 13.17. Requesting the URL http://localhost:5000/dogs/true won’t match the route because the first segment contains four characters.
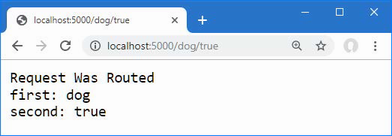
Figure 13.17 Combining constraints
Constraining matching to a specific set of values
The regex constraint applies a regular expression, which provides the basis for one of the most commonly required restrictions: matching only a specific set of values. In listing 13.22, I have applied the regex constraint to the routes for the Capital endpoint, so it will receive requests only for the values it can process.
Listing 13.22 Matching specific values in the Program.cs file in the Platform folder
using Platform;
var builder = WebApplication.CreateBuilder(args);
var app = builder.Build();
app.MapGet("{first:alpha:length(3)}/{second:bool}", async context => {
await context.Response.WriteAsync("Request Was Routed\n");
foreach (var kvp in context.Request.RouteValues) {
await context.Response
.WriteAsync($"{kvp.Key}: {kvp.Value}\n");
}
});
app.MapGet("capital/{country:regex(^uk|france|monaco$)}",
Capital.Endpoint);
app.MapGet("size/{city?}", Population.Endpoint)
.WithMetadata(new RouteNameMetadata("population"));
app.Run();
The route will match only those URLs with two segments. The first segment must be capital, and the second segment must be uk, france, or monaco. Regular expressions are case-insensitive, which you can confirm by restarting ASP.NET Core and requesting http://localhost:5000/capital/UK, which will produce the result shown in figure 13.18.
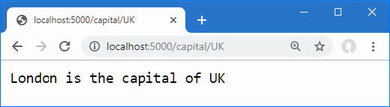
Figure 13.18 Matching specific values with a regular expression
Fallback routes direct a request to an endpoint only when no other route matches a request. Fallback routes prevent requests from being passed further along the request pipeline by ensuring that the routing system will always generate a response, as shown in listing 13.23.
Listing 13.23 Using a fallback route in the Program.cs file in the Platform folder
using Platform;
var builder = WebApplication.CreateBuilder(args);
var app = builder.Build();
app.MapGet("{first:alpha:length(3)}/{second:bool}", async context => {
await context.Response.WriteAsync("Request Was Routed\n");
foreach (var kvp in context.Request.RouteValues) {
await context.Response
.WriteAsync($"{kvp.Key}: {kvp.Value}\n");
}
});
app.MapGet("capital/{country:regex(^uk|france|monaco$)}",
Capital.Endpoint);
app.MapGet("size/{city?}", Population.Endpoint)
.WithMetadata(new RouteNameMetadata("population"));
app.MapFallback(async context => {
await context.Response.WriteAsync("Routed to fallback endpoint");
});
app.Run();
The MapFallback method creates a route that will be used as a last resort and that will match any request. Table 13.9 describes the methods for creating fallback routes. (There are also methods for creating fallback routes that are specific to other parts of ASP.NET Core and that are described in part 3.)
Table 13.9 The methods for creating fallback routes
|
Name |
Description |
|---|---|
|
|
This method creates a fallback that routes requests to an endpoint. |
|
|
This method creates a fallback that routes requests to a file. |
With the addition of the route in listing 13.23, the routing middleware will handle all requests, including those that match none of the regular routes. Restart ASP.NET Core and navigate to a URL that won’t be matched by any of the routes, such as http://localhost:5000/notmatched, and you will see the response shown in figure 13.19.
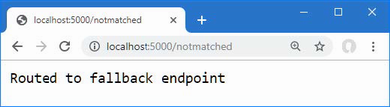
Figure 13.19 Using a fallback route
The routing features described in the previous sections address the needs of most projects, especially since they are usually accessed through higher-level features such as the MVC Framework, described in part 3. There are some advanced features for projects that have unusual routing requirements, which I describe in the following sections.
If the constraints described in table 13.8 are not sufficient, you can define your own custom constraints by implementing the IRouteConstraint interface. To create a custom constraint, add a file named CountryRouteConstraint.cs to the Platform folder and add the code shown in listing 13.24.
Listing 13.24 The contents of the CountryRouteConstraint.cs file in the Platform folder
namespace Platform {
public class CountryRouteConstraint : IRouteConstraint {
private static string[] countries = { "uk", "france", "monaco" };
public bool Match(HttpContext? httpContext, IRouter? route,
string routeKey, RouteValueDictionary values,
RouteDirection routeDirection) {
string segmentValue = values[routeKey] as string ?? "";
return Array.IndexOf(countries, segmentValue.ToLower()) > -1;
}
}
}
The IRouteConstraint interface defines the Match method, which is called to allow a constraint to decide whether a request should be matched by the route. The parameters for the Match method provide the HttpContext object for the request, the route, the name of the segment, the segment variables extracted from the URL, and whether the request is to check for an incoming or outgoing URL. The Match method returns true if the constraint is satisfied by the request and false if it is not. The constraint in listing 13.24 defines a set of countries that are compared to the value of the segment variable to which the constraint has been applied. The constraint is satisfied if the segment matches one of the countries. Custom constraints are set up using the options pattern, as shown in listing 13.25. (The options pattern is described in chapter 12.)
Listing 13.25 Using a custom constraint in the Program.cs file in the Platform folder
using Platform;
var builder = WebApplication.CreateBuilder(args);
builder.Services.Configure<RouteOptions>(opts => {
opts.ConstraintMap.Add("countryName",
typeof(CountryRouteConstraint));
});
var app = builder.Build();
app.MapGet("capital/{country:countryName}", Capital.Endpoint);
app.MapGet("capital/{country:regex(^uk|france|monaco$)}",
Capital.Endpoint);
app.MapGet("size/{city?}", Population.Endpoint)
.WithMetadata(new RouteNameMetadata("population"));
app.MapFallback(async context => {
await context.Response.WriteAsync("Routed to fallback endpoint");
});
app.Run();
The options pattern is applied to the RouteOptions class, which defines the ConstraintMap property. Each constraint is registered with a key that allows it to be applied in URL patterns. In listing 13.25, the key for the CountryRouteConstraint class is countryName, which allows me to constrain a route like this:
...
endpoints.MapGet("capital/{country:countryName}", Capital.Endpoint);
...
Requests will be matched by this route only when the first segment of the URL is capital and the second segment is one of the countries defined in listing 13.24.
When trying to route a request, the routing middleware assigns each route a score. As explained earlier in the chapter, precedence is given to more specific routes, and route selection is usually a straightforward process that behaves predictably, albeit with the occasional surprise if you don’t think through and test the full range of URLs the application will support.
If two routes have the same score, the routing system can’t choose between them and throws an exception, indicating that the routes are ambiguous. In most cases, the best approach is to modify the ambiguous routes to increase specificity by introducing literal segments or a constraint. There are some situations where that won’t be possible, and some extra work is required to get the routing system to work as intended. Listing 13.26 replaces the routes from the previous example with two new routes that are ambiguous, but only for some requests.
Listing 13.26 Defining ambiguous routes in the Program.cs file in the Platform folder
using Platform;
var builder = WebApplication.CreateBuilder(args);
builder.Services.Configure<RouteOptions>(opts => {
opts.ConstraintMap.Add("countryName",
typeof(CountryRouteConstraint));
});
var app = builder.Build();
app.Map("{number:int}", async context => {
await context.Response.WriteAsync("Routed to the int endpoint");
});
app.Map("{number:double}", async context => {
await context.Response
.WriteAsync("Routed to the double endpoint");
});
app.MapFallback(async context => {
await context.Response.WriteAsync("Routed to fallback endpoint");
});
app.Run();
These routes are ambiguous only for some values. Only one route matches URLs where the first path segment can be parsed to a double, but both routes match for where the segment can be parsed as an int or a double. To see the issue, restart ASP.NET Core and request http://localhost:5000/23.5. The path segment 23.5 can be parsed to a double and produces the response shown on the left side of figure 13.20. Request http://localhost:5000/23, and you will see the exception shown on the right of figure 13.20. The segment 23 can be parsed as both an int and a double, which means that the routing system cannot identify a single route to handle the request.
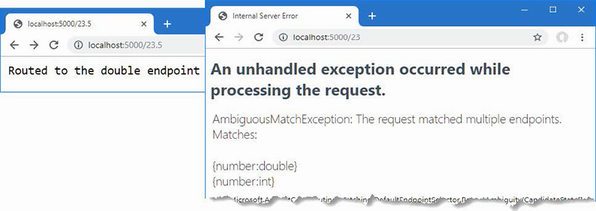
Figure 13.20 An occasionally ambiguous routing configuration
For these situations, preference can be given to a route by defining its order relative to other matching routes, as shown in listing 13.27.
Listing 13.27 Breaking route ambiguity in the Program.cs file in the Platform folder
using Platform;
var builder = WebApplication.CreateBuilder(args);
builder.Services.Configure<RouteOptions>(opts => {
opts.ConstraintMap.Add("countryName",
typeof(CountryRouteConstraint));
});
var app = builder.Build();
app.Map("{number:int}", async context => {
await context.Response.WriteAsync("Routed to the int endpoint");
}).Add(b => ((RouteEndpointBuilder)b).Order = 1);
app.Map("{number:double}", async context => {
await context.Response
.WriteAsync("Routed to the double endpoint");
}).Add(b => ((RouteEndpointBuilder)b).Order = 2);
app.MapFallback(async context => {
await context.Response.WriteAsync("Routed to fallback endpoint");
});
app.Run();
The process is awkward and requires a call to the Add method, casting to a RouteEndpointBuilder and setting the value of the Order property. Precedence is given to the route with the lowest Order value, which means that these changes tell the routing system to use the first route for URLs that both routes can handle. Restart ASP.NET Core and request the http://localhost:5000/23 URL again, and you will see that the first route handles the request, as shown in figure 13.21.
Figure 13.21 Avoiding ambiguous routes
As earlier chapters demonstrated, not all middleware generates responses. Some components provide features used later in the request pipeline, such as the session middleware, or enhance the response in some way, such as status code middleware.
One limitation of the normal request pipeline is that a middleware component at the start of the pipeline can’t tell which of the later components will generate a response. The routing middleware does something different.
As I demonstrated at the start of the chapter, routing is set up by calling the UseRouting and UseEndpoints methods, either explicitly or relying on the ASP.NET Core platform to call them during startup.
Although routes are registered in the UseEndpoints method, the selection of a route is done in the UseRouting method, and the endpoint is executed to generate a response in the UseEndpoints method. Any middleware component that is added to the request pipeline between the UseRouting method and the UseEndpoints method can see which endpoint has been selected before the response is generated and alter its behavior accordingly.
In listing 13.28, I have added a middleware component that adds different messages to the response based on the route that has been selected to handle the request.
Listing 13.28 Adding a middleware component in the Program.cs file in the Platform folder
using Platform;
var builder = WebApplication.CreateBuilder(args);
builder.Services.Configure<RouteOptions>(opts => {
opts.ConstraintMap.Add("countryName",
typeof(CountryRouteConstraint));
});
var app = builder.Build();
app.Use(async (context, next) => {
Endpoint? end = context.GetEndpoint();
if (end != null) {
await context.Response
.WriteAsync($"{end.DisplayName} Selected \n");
} else {
await context.Response.WriteAsync("No Endpoint Selected \n");
}
await next();
});
app.Map("{number:int}", async context => {
await context.Response.WriteAsync("Routed to the int endpoint");
}).WithDisplayName("Int Endpoint")
.Add(b => ((RouteEndpointBuilder)b).Order = 1);
app.Map("{number:double}", async context => {
await context.Response
.WriteAsync("Routed to the double endpoint");
}).WithDisplayName("Double Endpoint")
.Add(b => ((RouteEndpointBuilder)b).Order = 2);
app.MapFallback(async context => {
await context.Response.WriteAsync("Routed to fallback endpoint");
});
app.Run();
The GetEndpoint extension method on the HttpContext class returns the endpoint that has been selected to handle the request, described through an Endpoint object. The Endpoint class defines the properties described in table 13.10.
Table 13.10 The properties defined by the Endpoint class
|
Name |
Description |
|---|---|
|
|
This property returns the display name associated with the endpoint, which can be set using the |
|
|
This property returns the collection of metadata associated with the endpoint. |
|
|
This property returns the delegate that will be used to generate the response. |
To make it easier to identify the endpoint that the routing middleware has selected, I used the WithDisplayName method to assign names to the routes in listing 13.28. The new middleware component adds a message to the response reporting the endpoint that has been selected. Restart ASP.NET Core and request the http://localhost:5000/23 URL to see the output from the middleware that shows the endpoint has been selected between the two methods that add the routing middleware to the request pipeline, as shown in figure 13.22.
Figure 13.22 Determining the endpoint
Routes allow an endpoint to match request with a URL pattern.
URL patterns can match variable segments whose values can be read by the endpoint.
URL patterns can contain optional segments that match URLs when they are present.
Matching URLs can be controlled using constraints.
Routes can be used to generate URLs that can be included in responses, ensuring that subsequent requests target a given endpoint.
This chapter covers
Services are objects that are shared between middleware components and endpoints. There are no restrictions on the features that services can provide, but they are usually used for tasks that are needed in multiple parts of the application, such as logging or database access.
The ASP.NET Core dependency injection feature is used to create and consume services. This topic causes confusion and can be difficult to understand. In this chapter, I describe the problems that dependency injection solves and explain how dependency injection is supported by the ASP.NET Core platform. Table 14.1 puts dependency injection in context.
Table 14.1 Putting dependency injection in context
|
Question |
Answer |
|---|---|
|
What is it? |
Dependency injection makes it easy to create loosely coupled components, which typically means that components consume functionality defined by interfaces without having any firsthand knowledge of which implementation classes are being used. |
|
Why is it useful? |
Dependency injection makes it easier to change the behavior of an application by changing the components that implement the interfaces that define application features. It also results in components that are easier to isolate for unit testing. |
|
How is it used? |
The |
|
Are there any pitfalls or limitations? |
There are some differences in the way that middleware components and endpoints are handled and the way that services with different lifecycles are accessed. |
|
Are there any alternatives? |
You don’t have to use dependency injection in your code, but it is helpful to know how it works because it is used by the ASP.NET Core platform to provide features to developers. |
Table 14.2 provides a guide to the chapter.
Table 14.2 Chapter guide
|
Problem |
Solution |
Listing |
|---|---|---|
|
Obtaining a service in a handler function defined in the |
Add a parameter to the handler function. |
15 |
|
Obtaining a service in a middleware component |
Define a constructor parameter. |
16, 30–32 |
|
Obtaining a service in an endpoint |
Get an |
17 |
|
Instantiating a class that has constructor dependencies |
Use the |
18–20 |
|
Defining services that are instantiated for every dependency |
Define transient services. |
21–25 |
|
Defining services that are instantiated for every request |
Define scoped services. |
26–29 |
|
Accessing configuration services before the |
Use the properties defined by the |
33 |
|
Managing service instantiation |
Use a service factory. |
34, 35 |
|
Defining multiple implementations for a service |
Define multiple services with the same scope and consume them through the |
36–38 |
|
Using services that support generic type parameters |
Use a service with an unbound type. |
39 |
In this chapter, I continue to use the Platform project from chapter 13. New classes are required to prepare for this chapter. Start by creating the Platform/Services folder and add to it a class file named IResponseFormatter.cs, with the code shown in listing 14.1.
Listing 14.1 The contents of the IResponseFormatter.cs file in the Services folder
namespace Platform.Services {
public interface IResponseFormatter {
Task Format(HttpContext context, string content);
}
}
The IResponseFormatter interface defines a single method that receives an HttpContext object and a string. To create an implementation of the interface, add a class called TextResponseFormatter.cs to the Platform/Services folder with the code shown in listing 14.2.
Listing 14.2 The contents of the TextResponseFormatter.cs file in the Services folder
namespace Platform.Services {
public class TextResponseFormatter : IResponseFormatter {
private int responseCounter = 0;
public async Task Format(HttpContext context, string content) {
await context.Response.
WriteAsync($"Response {++responseCounter}:\n{content}");
}
}
}
The TextResponseFormatter class implements the interface and writes the content to the response as a simple string with a prefix to make it obvious when the class is used.
Some of the examples in this chapter show how features are applied differently when using middleware and endpoints. Add a file called WeatherMiddleware.cs to the Platform folder with the code shown in listing 14.3.
Listing 14.3 The contents of the WeatherMiddleware.cs file in the Platform folder
namespace Platform {
public class WeatherMiddleware {
private RequestDelegate next;
public WeatherMiddleware(RequestDelegate nextDelegate) {
next = nextDelegate;
}
public async Task Invoke(HttpContext context) {
if (context.Request.Path == "/middleware/class") {
await context.Response
.WriteAsync("Middleware Class: It is raining in London");
} else {
await next(context);
}
}
}
}
To create an endpoint that produces a similar result to the middleware component, add a file called WeatherEndpoint.cs to the Platform folder with the code shown in listing 14.4.
Listing 14.4 The contents of the WeatherEndpoint.cs file in the Platform folder
namespace Platform {
public class WeatherEndpoint {
public static async Task Endpoint(HttpContext context) {
await context.Response
.WriteAsync("Endpoint Class: It is cloudy in Milan");
}
}
}
Replace the contents of the Program.cs file with those shown in listing 14.5. The classes defined in the previous section are applied alongside a lambda function that produce similar results.
Listing 14.5 Replacing the contents of the Program.cs file in the Platform folder
using Platform;
using Platform.Services;
var builder = WebApplication.CreateBuilder(args);
var app = builder.Build();
app.UseMiddleware<WeatherMiddleware>();
app.MapGet("endpoint/class", WeatherEndpoint.Endpoint);
IResponseFormatter formatter = new TextResponseFormatter();
app.MapGet("endpoint/function", async context => {
await formatter.Format(context,
"Endpoint Function: It is sunny in LA");
});
app.Run();
Start the application by opening a new PowerShell command prompt, navigating to the Platform project folder, and running the command shown in listing 14.6.
Listing 14.6 Starting the ASP.NET Core Runtime
dotnet run
Use a browser to request http://localhost:5000/endpoint/function, and you will see the response shown in figure 14.1. Each time you reload the browser, the counter shown in the response will be incremented.
Figure 14.1 Running the example application
To understand dependency injection, it is important to start with the two problems it solves. In the sections that follow, I describe both problems addressed by dependency injection.
Most projects have features that need to be used in different parts of the application, which are known as services. Common examples include logging tools and configuration settings but can extend to any shared feature, including the TextResponseFormatter class that is defined in listing 14.2 and to handle requests by the middleware component and the lambda function.
Each TextResponseFormatter object maintains a counter that is included in the response sent to the browser, and if I want to incorporate the same counter into the responses generated by other endpoints, I need to have a way to make a single TextResponseFormatter object available in such a way that it can be easily found and consumed at every point where responses are generated.
There are many ways to make services locatable, but there are two main approaches, aside from the one that is the main topic of this chapter. The first approach is to create an object and use it as a constructor or method argument to pass it to the part of the application where it is required. The other approach is to add a static property to the service class that provides direct access to the shared instance, as shown in listing 14.7. This is known as the singleton pattern, and it was a common approach before the widespread use of dependency injection.
Listing 14.7 A singleton in the TextResponseFormatter.cs file in the Services folder
namespace Platform.Services {
public class TextResponseFormatter : IResponseFormatter {
private int responseCounter = 0;
private static TextResponseFormatter? shared;
public async Task Format(HttpContext context, string content) {
await context.Response.
WriteAsync($"Response {++responseCounter}:\n{content}");
}
public static TextResponseFormatter Singleton {
get {
if (shared == null) {
shared = new TextResponseFormatter();
}
return shared;
}
}
}
}
This is a basic implementation of the singleton pattern, and there are many variations that pay closer attention to issues such as safe concurrent access. What’s important for this chapter is that the changes in listing 14.7 rely on the consumers of the TextResponseFormatter service obtaining a shared object through the static Singleton property, as shown in listing 14.8.
Listing 14.8 Using a singleton in the WeatherEndpoint.cs file in the Platform folder
using Platform.Services;
namespace Platform {
public class WeatherEndpoint {
public static async Task Endpoint(HttpContext context) {
await TextResponseFormatter.Singleton.Format(context,
"Endpoint Class: It is cloudy in Milan");
}
}
}
Listing 14.9 makes the same change to the lambda function in the Program.cs file.
Listing 14.9 Using a service in the Program.cs file in the Platform folder
using Platform;
using Platform.Services;
var builder = WebApplication.CreateBuilder(args);
var app = builder.Build();
app.UseMiddleware<WeatherMiddleware>();
app.MapGet("endpoint/class", WeatherEndpoint.Endpoint);
IResponseFormatter formatter = TextResponseFormatter.Singleton;
app.MapGet("endpoint/function", async context => {
await formatter.Format(context,
"Endpoint Function: It is sunny in LA");
});
app.Run();
The singleton pattern allows me to share a single TextResponseFormatter object so it is used by two endpoints, with the effect that a single counter is incremented by requests for two different URLs.
To see the effect of the singleton pattern, restart ASP.NET Core and request the http://localhost:5000/endpoint/class and http://localhost:5000/endpoint/function URLs. A single counter is updated for both URLs, as shown in figure 14.2.
Figure 14.2 Implementing the singleton pattern to create a shared service
The singleton pattern is simple to understand and easy to use, but the knowledge of how services are located is spread throughout the application, and all service classes and service consumers need to understand how to access the shared object. This can lead to variations in the singleton pattern as new services are created and creates many points in the code that must be updated when there is a change. This pattern can also be rigid and doesn’t allow any flexibility in how services are managed because every consumer always shares a single service object.
Although I defined an interface in listing 14.1, the way that I have used the singleton pattern means that consumers are always aware of the implementation class they are using because that’s the class whose static property is used to get the shared object. If I want to switch to a different implementation of the IResponseFormatter interface, I must locate every use of the service and replace the existing implementation class with the new one. There are patterns to solve this problem, too, such as the type broker pattern, in which a class provides access to singleton objects through their interfaces. Add a class file called TypeBroker.cs to the Platform/Services folder and use it to define the code shown in listing 14.10.
Listing 14.10 The contents of the TypeBroker.cs file in the Services folder
namespace Platform.Services {
public static class TypeBroker {
private static IResponseFormatter formatter
= new TextResponseFormatter();
public static IResponseFormatter Formatter => formatter;
}
}
The Formatter property provides access to a shared service object that implements the IResponseFormatter interface. Consumers of the service need to know that the TypeBroker class is responsible for selecting the implementation that will be used, but this pattern means that service consumers can work through interfaces rather than concrete classes, as shown in listing 14.11.
Listing 14.11 Using a type broker in the WeatherEndpoint.cs file in the Platform folder
using Platform.Services;
namespace Platform {
public class WeatherEndpoint {
public static async Task Endpoint(HttpContext context) {
await TypeBroker.Formatter.Format(context,
"Endpoint Class: It is cloudy in Milan");
}
}
}
Listing 14.12 makes the same change to the lambda function so that both uses of the IResponseFormatter interface get their implementation objects from the type broker.
Listing 14.12 Using a type broker in the Program.cs file in the Platform folder
using Platform;
using Platform.Services;
var builder = WebApplication.CreateBuilder(args);
var app = builder.Build();
app.UseMiddleware<WeatherMiddleware>();
app.MapGet("endpoint/class", WeatherEndpoint.Endpoint);
IResponseFormatter formatter = TypeBroker.Formatter;
app.MapGet("endpoint/function", async context => {
await formatter.Format(context,
"Endpoint Function: It is sunny in LA");
});
app.Run();
This approach makes it easy to switch to a different implementation class by altering just the TypeBroker class and prevents service consumers from creating dependencies on a specific implementation. It also means that service classes can focus on the features they provide without having to deal with how those features will be located. To demonstrate, add a class file called HtmlResponseFormatter.cs to the Platform/Services folder with the code shown in listing 14.13.
Listing 14.13 The contents of the HtmlResponseFormatter.cs file in the Services folder
namespace Platform.Services {
public class HtmlResponseFormatter : IResponseFormatter {
public async Task Format(HttpContext context, string content) {
context.Response.ContentType = "text/html";
await context.Response.WriteAsync($@"
<!DOCTYPE html>
<html lang=""en"">
<head><title>Response</title></head>
<body>
<h2>Formatted Response</h2>
<span>{content}</span>
</body>
</html>");
}
}
}
This implementation of the IResponseFormatter sets the ContentType property of the HttpResponse object and inserts the content into an HTML template string. To use the new formatter class, I only need to change the TypeBroker, as shown in listing 14.14.
Listing 14.14 changing the TypeBroker.cs file in the Platform/Services folder
namespace Platform.Services {
public static class TypeBroker {
private static IResponseFormatter formatter
= new HtmlResponseFormatter();
public static IResponseFormatter Formatter => formatter;
}
}
To confirm the new formatter works, restart ASP.NET Core and request http://localhost:5000/endpoint/function, which will produce the result shown in figure 14.3.
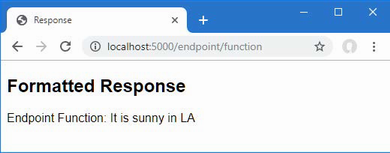
Figure 14.3 Using a different service implementation class
Dependency injection provides an alternative approach to providing services that tidy up the rough edges that arise in the singleton and type broker patterns, and is integrated with other ASP.NET Core features. Listing 14.15 shows the use of ASP.NET Core dependency injection to replace the type broker from the previous section.
Listing 14.15 Using dependency injection in the Program.cs file in the Platform folder
using Platform;
using Platform.Services;
var builder = WebApplication.CreateBuilder(args);
builder.Services.AddSingleton<IResponseFormatter,
HtmlResponseFormatter>();
var app = builder.Build();
app.UseMiddleware<WeatherMiddleware>();
app.MapGet("endpoint/class", WeatherEndpoint.Endpoint);
//IResponseFormatter formatter = TypeBroker.Formatter;
app.MapGet("endpoint/function",
async (HttpContext context, IResponseFormatter formatter) => {
await formatter.Format(context,
"Endpoint Function: It is sunny in LA");
});
app.Run();
Services are registered using extension methods defined by the IServiceCollection interface, an implementation of which is obtained using the WebApplicationBuilder.Services property. In the listing, I used an extension method to create a service for the IResponseFormatter interface:
... builder.Services.AddSingleton<IResponseFormatter, HtmlResponseFormatter>(); ...
The AddSingleton method is one of the extension methods available for services and tells ASP.NET Core that a single object should be used to satisfy all demands for the service (the other extension methods are described in the “Using Service Lifecycles” section). The interface and the implementation class are specified as generic type arguments. To consume the service, I added parameters to the functions that handle requests, like this:
...
async (HttpContext context, IResponseFormatter formatter) => {
...
Many of the methods that are used to register middleware or create endpoints will accept any function, which allows parameters to be defined for the services that are required to produce a response. One consequence of this feature is that the C# compiler can’t determine the parameter types, which is why I had to specify them in the listing.
The new parameter declares a dependency on the IResponseFormatter interface, and the function is said to depend on the interface. Before the function is invoked to handle a request, its parameters are inspected, the dependency is detected, and the application’s services are inspected to determine whether it is possible to resolve the dependency.
The call to the AddSingleton method told the dependency injection system that a dependency on the IResponseFormatter interface can be resolved with an HtmlResponseFormatter object. The object is created and used as an argument to invoke the handler function. Because the object that resolves the dependency is provided from outside the function that uses it, it is said to have been injected, which is why the process is known as dependency injection.
Defining a service and consuming it in the same code file may not seem impressive, but once a service is defined, it can be used almost anywhere in an ASP.NET Core application. Listing 14.16 declares a dependency on the IResponseFormatter interface in the middleware class defined at the start of the chapter.
Listing 14.16 A dependency in the WeatherMiddleware.cs file in the Platform folder
using Platform.Services;
namespace Platform {
public class WeatherMiddleware {
private RequestDelegate next;
private IResponseFormatter formatter;
public WeatherMiddleware(RequestDelegate nextDelegate,
IResponseFormatter respFormatter) {
next = nextDelegate;
formatter = respFormatter;
}
public async Task Invoke(HttpContext context) {
if (context.Request.Path == "/middleware/class") {
await formatter.Format(context,
"Middleware Class: It is raining in London");
} else {
await next(context);
}
}
}
}
To declare the dependency, I added a constructor parameter. To see the result, restart ASP.NET Core and request the http://localhost:5000/middleware/class URL, which will produce the response shown in figure 14.4.

Figure 14.4 Declaring a dependency in a middleware class
When the request pipeline is being set up, the ASP.NET Core platform reaches the statement in the Program.cs file that adds the WeatherMiddleware class as a component.
... app.UseMiddleware<WeatherMiddleware>(); ...
The platform understands it needs to create an instance of the WeatherMiddleware class and inspects the constructor. The dependency on the IResponseFormatter interface is detected, the services are inspected to see if the dependency can be resolved, and the shared service object is used when the constructor is invoked.
There are two important points to understand about this example. The first is that WeatherMiddleware doesn’t know which implementation class will be used to resolve its dependency on the IResponseFormatter interface—it just knows that it will receive an object that conforms to the interface through its constructor parameter. Second, the WeatherMiddleware class doesn’t know how the dependency is resolved—it just declares a constructor parameter and relies on ASP.NET Core to figure out the details. This is a more elegant approach than my implementations of the singleton and type broker patterns earlier in the chapter, and I can change the implementation class used to resolve the service by changing the generic type parameters used in the Program.cs file.
ASP.NET Core does a good job of supporting dependency injection as widely as possible but there will be times when you are not working directly with the ASP.NET Core API and won’t have a way to declare your service dependencies directly.
Services can be accessed through the HttpContext object, which is used to represent the current request and response, as shown in listing 14.17. You may find that you receive an HttpContext object even if you are working with third-party code that acts as an intermediary to ASP.NET Core and which doesn’t allow you to resolve services.
Listing 14.17 Using the HttpContext in the WeatherEndpoint.cs file in the Platform folder
using Platform.Services;
namespace Platform {
public class WeatherEndpoint {
public static async Task Endpoint(HttpContext context) {
IResponseFormatter formatter = context.RequestServices
.GetRequiredService<IResponseFormatter>();
await formatter.Format(context,
"Endpoint Class: It is cloudy in Milan");
}
}
}
The HttpContext.RequestServices property returns an object that implements the IServiceProvider interfaces, which provides access to the services that have been configured in the Program.cs file. The Microsoft.Extensions.DependencyInjection namespace contains extension methods for the IServiceProvider interface that allow individual services to be obtained, as described in table 14.3.
Table 14.3 The IServiceProvider extension methods for obtaining services
|
Name |
Description |
|---|---|
|
|
This method returns a service for the type specified by the generic type parameter or |
|
|
This method returns a service for the type specified or |
|
|
This method returns a service specified by the generic type parameter and throws an exception if a service isn’t available. |
|
|
This method returns a service for the type specified and throws an exception if a service isn’t available. |
When the Endpoint method is invoked in listing 14.17, the GetRequiredService<T> method is used to obtain an IResponseFormatter object, which is used to format the response. To see the effect, restart ASP.NET Core and use the browser to request http://localhost:5000/endpoint/class, which will produce the formatted response shown in figure 14.5.
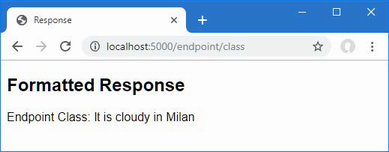
Figure 14.5 Using a service in an endpoint class
Using the activation utility class
I defined static methods for endpoint classes in chapter 13 because it makes them easier to use when creating routes. But for endpoints that require services, it can often be easier to use a class that can be instantiated because it allows for a more generalized approach to handling services. Listing 14.18 revises the endpoint with a constructor and removes the static keyword from the Endpoint method.
Listing 14.18 Revising the endpoint in the WeatherEndpoint.cs file in the Platform folder
using Platform.Services;
namespace Platform {
public class WeatherEndpoint {
private IResponseFormatter formatter;
public WeatherEndpoint(IResponseFormatter responseFormatter) {
formatter = responseFormatter;
}
public async Task Endpoint(HttpContext context) {
await formatter.Format(context,
"Endpoint Class: It is cloudy in Milan");
}
}
}
The most common use of dependency injection in ASP.NET Core applications is in class constructors. Injection through methods, such as performed for middleware classes, is a complex process to re-create, but there are some useful built-in tools that take care of inspecting constructors and resolving dependencies using services. Create a file called EndpointExtensions.cs to the Services folder with the content shown in listing 14.19.
Listing 14.19 The contents of the EndpointExtensions.cs file in the Services folder
using System.Reflection;
namespace Microsoft.AspNetCore.Builder {
public static class EndpointExtensions {
public static void MapEndpoint<T>(this IEndpointRouteBuilder app,
string path, string methodName = "Endpoint") {
MethodInfo? methodInfo = typeof(T).GetMethod(methodName);
if (methodInfo?.ReturnType != typeof(Task)) {
throw new System.Exception("Method cannot be used");
}
T endpointInstance =
ActivatorUtilities.CreateInstance<T>(app.ServiceProvider);
app.MapGet(path, (RequestDelegate)methodInfo
.CreateDelegate(typeof(RequestDelegate),
endpointInstance));
}
}
}
The MapEndpoint extension method accepts a generic type parameter that specifies the endpoint class that will be used. The other arguments are the path that will be used to create the route and the name of the endpoint class method that processes requests.
A new instance of the endpoint class is created, and a delegate to the specified method is used to create a route. Like any code that uses .NET reflection, the extension method in listing 14.19 can be difficult to read, but this is the key statement for this chapter:
...
T endpointInstance =
ActivatorUtilities.CreateInstance<T>(app.ServiceProvider);
...
The ActivatorUtilities class, defined in the Microsoft.Extensions.DependencyInjection namespace, provides methods for instantiating classes that have dependencies declared through their constructor. Table 14.4 shows the most useful ActivatorUtilities methods.
Table 14.4 The ActivatorUtilities methods
|
Name |
Description |
|---|---|
|
|
This method creates a new instance of the class specified by the type parameter, resolving dependencies using the services and additional (optional) arguments. |
|
|
This method creates a new instance of the class specified by the parameter, resolving dependencies using the services and additional (optional) arguments. |
|
|
This method returns a service of the specified type, if one is available, or creates a new instance if there is no service. |
|
|
This method returns a service of the specified type, if one is available, or creates a new instance if there is no service. |
These methods make it easy to instantiate classes that declare constructor dependencies. Both methods resolve constructor dependencies using services through an IServiceProvider object and an optional array of arguments that are used for dependencies that are not services. These methods make it easy to apply dependency injection to custom classes, and the use of the CreateInstance method results in an extension method that can create routes with endpoint classes that consume services. Listing 14.20 uses the new extension method to create a route.
Listing 14.20 Creating a route in the Program.cs file in the Platform folder
using Platform;
using Platform.Services;
var builder = WebApplication.CreateBuilder(args);
builder.Services.AddSingleton<IResponseFormatter,
HtmlResponseFormatter>();
var app = builder.Build();
app.UseMiddleware<WeatherMiddleware>();
//app.MapGet("endpoint/class", WeatherEndpoint.Endpoint);
app.MapEndpoint<WeatherEndpoint>("endpoint/class");
app.MapGet("endpoint/function",
async (HttpContext context, IResponseFormatter formatter) => {
await formatter.Format(context,
"Endpoint Function: It is sunny in LA");
});
app.Run();
To confirm that requests are routed to the endpoint, restart ASP.NET Core and request the http://localhost:5000/endpoint/class URL, which should produce the same response as shown in figure 14.5.
When I created the service in the previous section, I used the AddSingleton extension method, like this:
... builder.Services.AddSingleton<IResponseFormatter, HtmlResponseFormatter>(); ...
The AddSingleton method produces a service that is instantiated the first time it is used to resolve a dependency and is then reused for each subsequent dependency. This means that any dependency on the IResponseFormatter object will be resolved using the same HtmlResponseFormatter object.
Singletons are a good way to get started with services, but there are some problems for which they are not suited, so ASP.NET Core supports scoped and transient services, which give different lifecycles for the objects that are created to resolve dependencies. Table 14.5 describes the set of methods used to create services. There are versions of these methods that accept types as conventional arguments, as demonstrated in the “Using Unbound Types in Services” section, later in this chapter.
Table 14.5 The extension methods for creating services
|
Name |
Description |
|---|---|
|
|
This method creates a single object of type |
|
|
This method creates a new object of type |
|
|
This method creates a new object of type |
There are versions of the methods in Table 14.5 that have a single type argument, which allows a service to be created that solves the service location problem without addressing the tightly coupled issue. You can see an example of this type of service in chapter 24, where I share a simple data source that isn’t accessed through an interface.
The AddTransient method does the opposite of the AddSingleton method and creates a new instance of the implementation class for every dependency that is resolved. To create a service that will demonstrate the use of service lifecycles, add a file called GuidService.cs to the Platform/Services folder with the code shown in listing 14.21.
Listing 14.21 The contents of the GuidService.cs file in the Services folder
namespace Platform.Services {
public class GuidService : IResponseFormatter {
private Guid guid = Guid.NewGuid();
public async Task Format(HttpContext context, string content) {
await context.Response.WriteAsync($"Guid: {guid}\n{content}");
}
}
}
The Guid struct generates a unique identifier, which will make it obvious when a different instance is used to resolve a dependency on the IResponseFormatter interface. In listing 14.22, I have changed the statement that creates the IResponseFormatter service to use the AddTransient method and the GuidService implementation class.
Listing 14.22 Creating a transient service in the Program.cs file in the Platform folder
using Platform;
using Platform.Services;
var builder = WebApplication.CreateBuilder(args);
builder.Services.AddTransient<IResponseFormatter, GuidService>();
var app = builder.Build();
app.UseMiddleware<WeatherMiddleware>();
app.MapEndpoint<WeatherEndpoint>("endpoint/class");
app.MapGet("endpoint/function",
async (HttpContext context, IResponseFormatter formatter) => {
await formatter.Format(context,
"Endpoint Function: It is sunny in LA");
});
app.Run();
If you restart ASP.NET Core and request the http://localhost:5000/endpoint/function URL, you will receive the responses similar to the ones shown in figure 14.6. Each response will be shown with a different GUID value, confirming that transient service objects have been used to resolve the dependency on the IResponseFormatter service.
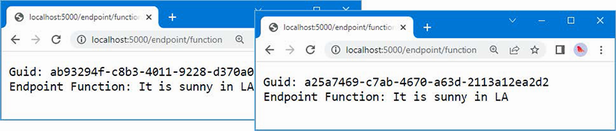
Figure 14.6 Using transient services
There is a pitfall when using transient services, which you can see by requesting http://localhost:5000/middleware/class and clicking the reload button. Unlike the previous example, the same GUID value is shown in every response, as shown in figure 14.7.
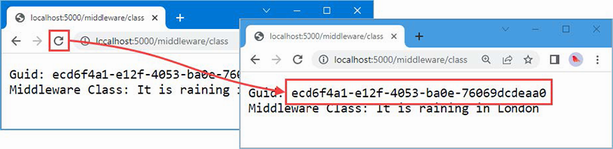
Figure 14.7 The same GUID values appearing in responses
New service objects are created only when dependencies are resolved, not when services are used. The components and endpoints in the example application have their dependencies resolved only when the application starts and the top-level statements in the Program.cs file are executed. Each receives a separate service object, which is then reused for every request that is processed.
To address this issue, I have to ensure that the dependency is resolved every time the Invoke method is called, as shown in listing 14.23.
Listing 14.23 Moving dependencies in the Platform/WeatherMiddleware.cs file
using Platform.Services;
namespace Platform {
public class WeatherMiddleware {
private RequestDelegate next;
//private IResponseFormatter formatter;
public WeatherMiddleware(RequestDelegate nextDelegate) {
next = nextDelegate;
//formatter = respFormatter;
}
public async Task Invoke(HttpContext context,
IResponseFormatter formatter) {
if (context.Request.Path == "/middleware/class") {
await formatter.Format(context,
"Middleware Class: It is raining in London");
} else {
await next(context);
}
}
}
}
The ASP.NET Core platform will resolve dependencies declared by the Invoke method every time a request is processed, which ensures that a new transient service object is created.
The ActivatorUtilities class doesn’t deal with resolving dependencies for methods. The simplest way of solving this issue for endpoints is to explicitly request services when each request is handled, which is the approach I used earlier when showing how services are used. It is also possible to enhance the extension method to request services on behalf of an endpoint, as shown in listing 14.24.
Listing 14.24 Requesting services in the Services/EndpointExtensions.cs file
using System.Reflection;
namespace Microsoft.AspNetCore.Builder {
public static class EndpointExtensions {
public static void MapEndpoint<T>(this IEndpointRouteBuilder app,
string path, string methodName = "Endpoint") {
MethodInfo? methodInfo = typeof(T).GetMethod(methodName);
if (methodInfo?.ReturnType != typeof(Task)) {
throw new System.Exception("Method cannot be used");
}
T endpointInstance =
ActivatorUtilities.CreateInstance<T>(app.ServiceProvider);
ParameterInfo[] methodParams = methodInfo!.GetParameters();
app.MapGet(path, context =>
(Task)methodInfo.Invoke(endpointInstance,
methodParams.Select(p =>
p.ParameterType == typeof(HttpContext) ? context
: app.ServiceProvider.GetService(p.ParameterType))
.ToArray())!);
}
}
}
The code in listing 14.24 isn’t as efficient as the approach taken by the ASP.NET Core platform for middleware components. All the parameters defined by the method that handles requests are treated as services to be resolved, except for the HttpContext parameter. A route is created with a delegate that resolves the services for every request and invokes the method that handles the request. Listing 14.25 revises the WeatherEndpoint class to move the dependency on IResponseFormatter to the Endpoint method so that a new service object will be received for every request.
Listing 14.25 Moving the dependency in the Platform/WeatherEndpoint.cs file
using Platform.Services;
namespace Platform {
public class WeatherEndpoint {
//private IResponseFormatter formatter;
//public WeatherEndpoint(IResponseFormatter responseFormatter) {
// formatter = responseFormatter;
//}
public async Task Endpoint(HttpContext context,
IResponseFormatter formatter) {
await formatter.Format(context,
"Endpoint Class: It is cloudy in Milan");
}
}
}
The changes in listing 14.23 to listing 14.25 ensure that the transient service is resolved for every request, which means that a new GuidService object is created and every response contains a unique ID.
Restart ASP.NET Core, navigate to http://localhost:5000/endpoint/class, and click the browser’s reload button. Each time you reload, a new request is sent to ASP.NET Core, and the component or endpoint that handles the request receives a new service object, such that a different GUID is shown in each response, as shown in figure 14.8.
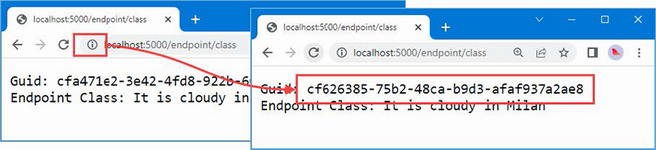
Figure 14.8 Using a transient service
Scoped services strike a balance between singleton and transient services. Within a scope, dependencies are resolved with the same object. A new scope is started for each HTTP request, which means that a service object will be shared by all the components that handle that request. To prepare for a scoped service, listing 14.26 changes the WeatherMiddleware class to declare three dependencies on the same service.
Listing 14.26 Adding dependencies in the Platform/WeatherMiddleware.cs file
using Platform.Services;
namespace Platform {
public class WeatherMiddleware {
private RequestDelegate next;
public WeatherMiddleware(RequestDelegate nextDelegate) {
next = nextDelegate;
}
public async Task Invoke(HttpContext context,
IResponseFormatter formatter1,
IResponseFormatter formatter2,
IResponseFormatter formatter3) {
if (context.Request.Path == "/middleware/class") {
await formatter1.Format(context, string.Empty);
await formatter2.Format(context, string.Empty);
await formatter3.Format(context, string.Empty);
} else {
await next(context);
}
}
}
}
Declaring several dependencies on the same service isn’t required in real projects, but it is useful for this example because each dependency is resolved independently. Since the IResponseFormatter service was created with the AddTransient method, each dependency is resolved with a different object. Restart ASP.NET Core and request http://localhost:5000/middleware/class, and you will see that a different GUID is used for each of the three messages written to the response, as shown in figure 14.9. When you reload the browser, a new set of three GUIDs is displayed.
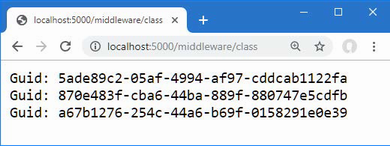
Figure 14.9 Resolving dependencies on a transient service
Listing 14.27 changes the IResponseFormatter service to use the scoped lifecycle with the AddScoped method.
Listing 14.27 Using a scoped service in the Program.cs file in the Platform folder
using Platform;
using Platform.Services;
var builder = WebApplication.CreateBuilder(args);
builder.Services.AddScoped<IResponseFormatter, GuidService>();
var app = builder.Build();
app.UseMiddleware<WeatherMiddleware>();
app.MapEndpoint<WeatherEndpoint>("endpoint/class");
app.MapGet("endpoint/function",
async (HttpContext context, IResponseFormatter formatter) => {
await formatter.Format(context,
"Endpoint Function: It is sunny in LA");
});
app.Run();
Restart ASP.NET Core and request http://localhost:5000/middleware/class again, and you will see that the same GUID is used to resolve all three dependencies declared by the middleware component, as shown in figure 14.10. When the browser is reloaded, the HTTP request sent to ASP.NET Core creates a new scope and a new service object.
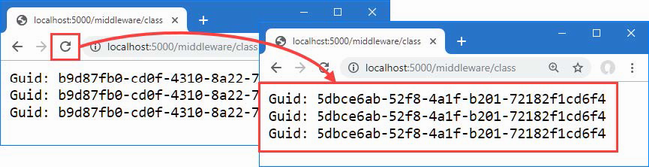
Figure 14.10 Using a scoped service
Avoiding the scoped service validation pitfall
Service consumers are unaware of the lifecycle that has been selected for singleton and transient services: they declare a dependency or request a service and get the object they require.
Scoped services can be used only within a scope. A new scope is created automatically for each request that was received. Requesting a scoped service outside of a scope causes an exception. To see the problem, request http://localhost:5000/endpoint/class, which will generate the exception response shown in figure 14.11.
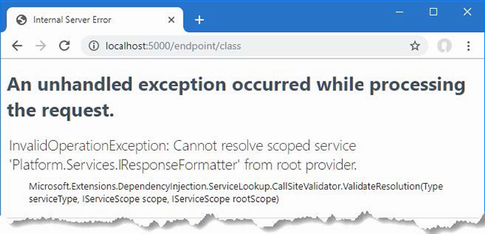
Figure 14.11 Requesting a scoped service
The extension method that configures the endpoint resolves services through an IServiceProvider object obtained from the routing middleware, like this:
... app.ServiceProvider.GetService(p.ParameterType)) ...
Accessing scoped services through the context object
The HttpContext class defines a RequestServices property that returns an IServiceProvider object that allows access to scoped services, as well as singleton and transient services. This fits well with the most common use of scoped services, which is to use a single service object for each HTTP request. Listing 14.28 revises the endpoint extension method so that dependencies are resolved using the services provided through the HttpContext.
Listing 14.28 Using a service in the EndpointExtensions.cs file in the Services folder
using System.Reflection;
namespace Microsoft.AspNetCore.Builder {
public static class EndpointExtensions {
public static void MapEndpoint<T>(this IEndpointRouteBuilder app,
string path, string methodName = "Endpoint") {
MethodInfo? methodInfo = typeof(T).GetMethod(methodName);
if (methodInfo?.ReturnType != typeof(Task)) {
throw new System.Exception("Method cannot be used");
}
T endpointInstance =
ActivatorUtilities.CreateInstance<T>(app.ServiceProvider);
ParameterInfo[] methodParams = methodInfo!.GetParameters();
app.MapGet(path, context =>
(Task)methodInfo.Invoke(endpointInstance,
methodParams.Select(p =>
p.ParameterType == typeof(HttpContext) ? context
: context.RequestServices
.GetService(p.ParameterType))
.ToArray())!);
}
}
}
Using the HttpContext.RequestServices property ensures that services are resolved within the scope of the current HTTP request, which ensures that endpoints don’t use scoped services inappropriately.
Creating new handlers for each request
Notice that the ActivatorUtilities.CreateInstance<T> method is still used to create an instance of the endpoint class in listing 14.28.
This presents a problem because it requires endpoint classes to know the lifecycles of the services on which they depend. The WeatherEndpoint class depends on the IResponseFormatter service and must know that a dependency can be declared only through the Endpoint method and not the constructor.
To remove the need for this knowledge, a new instance of the endpoint class can be created to handle each request, as shown in listing 14.29, which allows constructor and method dependencies to be resolved without needing to know which services are scoped.
Listing 14.29 Instantiating in the EndpointExtensions.cs file in the Services folder
using System.Reflection;
namespace Microsoft.AspNetCore.Builder {
public static class EndpointExtensions {
public static void MapEndpoint<T>(this IEndpointRouteBuilder app,
string path, string methodName = "Endpoint") {
MethodInfo? methodInfo = typeof(T).GetMethod(methodName);
if (methodInfo?.ReturnType != typeof(Task)) {
throw new System.Exception("Method cannot be used");
}
//T endpointInstance =
//ActivatorUtilities.CreateInstance<T> (app.ServiceProvider);
ParameterInfo[] methodParams = methodInfo!.GetParameters();
app.MapGet(path, context => {
T endpointInstance =
ActivatorUtilities.CreateInstance<T>
(context.RequestServices);
return (Task)methodInfo.Invoke(endpointInstance!,
methodParams.Select(p =>
p.ParameterType == typeof(HttpContext)
? context
: context.RequestServices.GetService(p.ParameterType))
.ToArray())!;
});
}
}
}
This approach requires a new instance of the endpoint class to handle each request, but it ensures that no knowledge of service lifecycles is required.
Restart ASP.NET Core and request http://localhost:5000/endpoint/class. The scoped service will be obtained from the context, producing the responses shown in figure 14.12.
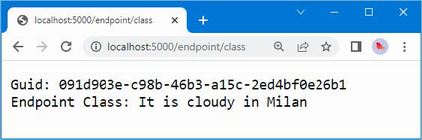
Figure 14.12 Using scoped services in lambda functions
In the sections that follow, I describe some additional features available when using dependency injection. These are not required for all projects, but they are worth understanding because they provide context for how dependency injection works and can be helpful when the standard features are not quite what a project requires.
When a class is instantiated to resolve a service dependency, its constructor is inspected, and any dependencies on services are resolved. This allows one service to declare a dependency on another service, creating a chain that is resolved automatically. To demonstrate, add a class file called TimeStamping.cs to the Platform/Services folder with the code shown in listing 14.30.
Listing 14.30 The contents of the TimeStamping.cs file in the Services folder
namespace Platform.Services {
public interface ITimeStamper {
string TimeStamp { get; }
}
public class DefaultTimeStamper : ITimeStamper {
public string TimeStamp {
get => DateTime.Now.ToShortTimeString();
}
}
}
The class file defines an interface named ITimeStamper and an implementation class named DefaultTimeStamper. Next, add a file called TimeResponseFormatter.cs to the Platform/Services folder with the code shown in listing 14.31.
Listing 14.31 The contents of the TimeResponseFormatter.cs file in the Services folder
namespace Platform.Services {
public class TimeResponseFormatter : IResponseFormatter {
private ITimeStamper stamper;
public TimeResponseFormatter(ITimeStamper timeStamper) {
stamper = timeStamper;
}
public async Task Format(HttpContext context, string content) {
await context.Response.WriteAsync($"{stamper.TimeStamp}: "
+ content);
}
}
}
The TimeResponseFormatter class is an implementation of the IResponseFormatter interface that declares a dependency on the ITimeStamper interface with a constructor parameter. Listing 14.32 defines services for both interfaces in the Program.cs file.
Listing 14.32 Configuring services in the Program.cs file in the Platform folder
using Platform;
using Platform.Services;
var builder = WebApplication.CreateBuilder(args);
builder.Services.AddScoped<IResponseFormatter, TimeResponseFormatter>();
builder.Services.AddScoped<ITimeStamper, DefaultTimeStamper>();
var app = builder.Build();
app.UseMiddleware<WeatherMiddleware>();
app.MapEndpoint<WeatherEndpoint>("endpoint/class");
app.MapGet("endpoint/function",
async (HttpContext context, IResponseFormatter formatter) => {
await formatter.Format(context,
"Endpoint Function: It is sunny in LA");
});
app.Run();
When a dependency on the IResponseFormatter service is resolved, the TimeResponseFormatter constructor will be inspected, and its dependency on the ITimeStamper service will be detected. A DefaultTimeStamper object will be created and injected into the TimeResponseFormatter constructor, which allows the original dependency to be resolved. To see the dependency chain in action, restart ASP.NET Core and request http://localhost:5000/endpoint/class, and you will see the timestamp generated by the DefaultTimeStamper class included in the response produced by the TimeResponseFormatter class, as shown in figure 14.13.
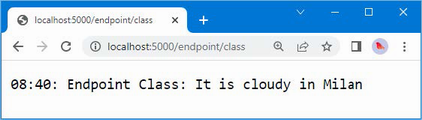
Figure 14.13 Creating a chain of dependencies
A common requirement is to use the application’s configuration settings to alter the set of services that are created in the Program.cs file. This presents a problem because the configuration is presented as a service and services cannot normally be accessed until after the WebApplicationBuilder.Build method is invoked.
To address this issue, the WebApplication and WebApplicationBuilder classes define properties that provide access to the built-in services that provide access to the application configuration, as described in table 14.6.
Table 14.6 The WebApplication and WebApplicationBuilder properties for configuration services
|
Name |
Description |
|---|---|
|
|
This property returns an implementation of the |
|
|
This property returns an implementation of the |
These services are described in chapter 15, but what’s important for this chapter is that they can be used to customize which services are configured in the Program.cs file, as shown in listing 14.33.
Listing 14.33 Accessing configuration data in the Program.cs file in the Platform folder
using Platform;
using Platform.Services;
var builder = WebApplication.CreateBuilder(args);
IWebHostEnvironment env = builder.Environment;
if (env.IsDevelopment()) {
builder.Services.AddScoped<IResponseFormatter,
TimeResponseFormatter>();
builder.Services.AddScoped<ITimeStamper, DefaultTimeStamper>();
} else {
builder.Services.AddScoped<IResponseFormatter,
HtmlResponseFormatter>();
}
var app = builder.Build();
app.UseMiddleware<WeatherMiddleware>();
app.MapEndpoint<WeatherEndpoint>("endpoint/class");
app.MapGet("endpoint/function",
async (HttpContext context, IResponseFormatter formatter) => {
await formatter.Format(context,
"Endpoint Function: It is sunny in LA");
});
app.Run();
This example uses the Environment property to get an implementation of the IWebHostEnvironment interface and uses its IsDevelopment extension method to decide which services are set up for the application.
Factory functions allow you to take control of the way that service implementation objects are created, rather than relying on ASP.NET Core to create instances for you. There are factory versions of the AddSingleton, AddTransient, and AddScoped methods, all of which are used with a function that receives an IServiceProvider object and returns an implementation object for the service.
One use for factory functions is to define the implementation class for a service as a configuration setting, which is read through the IConfguration service. This requires the WebApplicationBuilder properties described in the previous section. Listing 14.34 adds a factory function for the IResponseFormatter service that gets the implementation class from the configuration data.
Listing 14.34 Using a factory function in the Program.cs file in the Platform folder
using Platform;
using Platform.Services;
var builder = WebApplication.CreateBuilder(args);
//IWebHostEnvironment env = builder.Environment;
IConfiguration config = builder.Configuration;
builder.Services.AddScoped<IResponseFormatter>(serviceProvider => {
string? typeName = config["services:IResponseFormatter"];
return (IResponseFormatter)ActivatorUtilities
.CreateInstance(serviceProvider, typeName == null
? typeof(GuidService) : Type.GetType(typeName, true)!);
});
builder.Services.AddScoped<ITimeStamper, DefaultTimeStamper>();
var app = builder.Build();
app.UseMiddleware<WeatherMiddleware>();
app.MapEndpoint<WeatherEndpoint>("endpoint/class");
app.MapGet("endpoint/function",
async (HttpContext context, IResponseFormatter formatter) => {
await formatter.Format(context,
"Endpoint Function: It is sunny in LA");
});
app.Run();
The factory function reads a value from the configuration data, which is converted into a type and passed to the ActivatorUtilities.CreateInstance method. Listing 14.35 adds a configuration setting to the appsettings.Development.json file that selects the HtmlResponseFormatter class as the implementation for the IResponseFormatter service. The JSON configuration file is described in detail in chapter 15.
Listing 14.35 A setting in the appsettings.Development.json file in the Platform folder
{
"Logging": {
"LogLevel": {
"Default": "Information",
"Microsoft.AspNetCore": "Warning"
}
},
"services": {
"IResponseFormatter": "Platform.Services.HtmlResponseFormatter"
}
}
When a dependency on the IResponseFormatter service is resolved, the factory function creates an instance of the type specified in the configuration file. Restart ASP.NET Core and request the http://localhost:5000/endpoint/class URL, which will produce the response shown in figure 14.14.
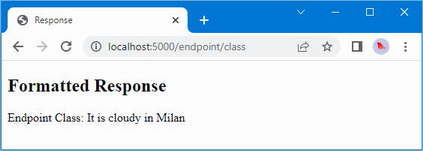
Figure 14.14 Using a service factory
Services can be defined with multiple implementations, which allows a consumer to select an implementation that best suits a specific problem. This is a feature that works best when the service interface provides insight into the capabilities of each implementation class. To provide information about the capabilities of the IResponseFormatter implementation classes, add the default property shown in listing 14.36 to the interface.
Listing 14.36 Adding a property in the IResponseFormatter.cs file in the Services folder
namespace Platform.Services {
public interface IResponseFormatter {
Task Format(HttpContext context, string content);
public bool RichOutput => false;
}
}
This RichOutput property will be false for implementation classes that don’t override the default value. To ensure there is one implementation that returns true, add the property shown in listing 14.37 to the HtmlResponseFormatter class.
Listing 14.37 Overriding in the HtmlResponseFormatter.cs file in the Services folder
namespace Platform.Services {
public class HtmlResponseFormatter : IResponseFormatter {
public async Task Format(HttpContext context, string content) {
context.Response.ContentType = "text/html";
await context.Response.WriteAsync($@"
<!DOCTYPE html>
<html lang=""en"">
<head><title>Response</title></head>
<body>
<h2>Formatted Response</h2>
<span>{content}</span>
</body>
</html>");
}
public bool RichOutput => true;
}
}
Listing 14.38 registers multiple implementations for the IResponseFormatter service, which is done by making repeated calls to the Add<lifecycle> method. The listing also replaces the existing request pipeline with two routes that demonstrate how the service can be used.
Listing 14.38 Defining and using a service in the Program.cs file in the Platform folder
//using Platform;
using Platform.Services;
var builder = WebApplication.CreateBuilder(args);
//IConfiguration config = builder.Configuration;
//builder.Services.AddScoped<IResponseFormatter>(serviceProvider => {
// string? typeName = config["services:IResponseFormatter"];
// return (IResponseFormatter)ActivatorUtilities
// .CreateInstance(serviceProvider, typeName == null
// ? typeof(GuidService) : Type.GetType(typeName, true)!);
//});
//builder.Services.AddScoped<ITimeStamper, DefaultTimeStamper>();
builder.Services.AddScoped<IResponseFormatter, TextResponseFormatter>();
builder.Services.AddScoped<IResponseFormatter, HtmlResponseFormatter>();
builder.Services.AddScoped<IResponseFormatter, GuidService>();
var app = builder.Build();
//app.UseMiddleware<WeatherMiddleware>();
//app.MapEndpoint<WeatherEndpoint>("endpoint/class");
//app.MapGet("endpoint/function",
// async (HttpContext context, IResponseFormatter formatter) => {
// await formatter.Format(context,
// "Endpoint Function: It is sunny in LA");
//});
app.MapGet("single", async context => {
IResponseFormatter formatter = context.RequestServices
.GetRequiredService<IResponseFormatter>();
await formatter.Format(context, "Single service");
});
app.MapGet("/", async context => {
IResponseFormatter formatter = context.RequestServices
.GetServices<IResponseFormatter>().First(f => f.RichOutput);
await formatter.Format(context, "Multiple services");
});
app.Run();
The AddScoped statements register three services for the IResponseFormatter interface, each with a different implementation class. The route for the /single URL uses the IServiceProvider.GetRequiredService<T> method to request a service, like this:
... context.RequestServices.GetRequiredService<IResponseFormatter>(); ...
This is a service consumer that is unaware that there are multiple implementations available. The service is resolved using the most recently registered implementation, which is the GuidService class. Restart ASP.NET Core and request http://localhost:5000/single, and you will see the output on the left side of figure 14.15.
The other endpoint is a service consumer that is aware that multiple implementations may be available and that requests the service using the IServiceProvider.GetServices<T> method.
...
context.RequestServices.GetServices<IResponseFormatter>()
.First(f => f.RichOutput);
...
This method returns an IEnumerable<IResponseFormatter> that enumerates the available implementations. These are filtered using the LINQ First method to select an implementation whose RichOutput property returns true. If you request http://localhost:5000, you will see the output on the right of figure 14.15, showing that the endpoint has selected the service implementation that best suits its needs.

Figure 14.15 Using multiple service implementations
Services can be defined with generic type parameters that are bound to specific types when the service is requested, as shown in listing 14.39
Listing 14.39 Using an unbound type in the Program.cs file in the Platform folder
//using Platform.Services;
var builder = WebApplication.CreateBuilder(args);
//builder.Services.AddScoped<IResponseFormatter, TextResponseFormatter>();
//builder.Services.AddScoped<IResponseFormatter, HtmlResponseFormatter>();
//builder.Services.AddScoped<IResponseFormatter, GuidService>();
builder.Services.AddSingleton(typeof(ICollection<>), typeof(List<>));
var app = builder.Build();
//app.MapGet("single", async context => {
// IResponseFormatter formatter = context.RequestServices
// .GetRequiredService<IResponseFormatter>();
// await formatter.Format(context, "Single service");
//});
//app.MapGet("/", async context => {
// IResponseFormatter formatter = context.RequestServices
// .GetServices<IResponseFormatter>().First(f => f.RichOutput);
// await formatter.Format(context, "Multiple services");
//});
app.MapGet("string", async context => {
ICollection<string> collection = context.RequestServices
.GetRequiredService<ICollection<string>>();
collection.Add($"Request: {DateTime.Now.ToLongTimeString()}");
foreach (string str in collection) {
await context.Response.WriteAsync($"String: {str}\n");
}
});
app.MapGet("int", async context => {
ICollection<int> collection
= context.RequestServices.GetRequiredService<ICollection<int>>();
collection.Add(collection.Count() + 1);
foreach (int val in collection) {
await context.Response.WriteAsync($"Int: {val}\n");
}
});
app.Run();
This feature relies on the versions of the AddSingleton, AddScoped, and AddTransient methods that accept types as conventional arguments and cannot be performed using generic type arguments. The service in listing 14.39 is created with unbound types, like this:
... services.AddSingleton(typeof(ICollection<>), typeof(List<>)); ...
When a dependency on an ICollection<T> service is resolved, a List<T> object will be created so that a dependency on ICollection<string>, for example, will be resolved using a List<string> object. Rather than require separate services for each type, the unbound service allows mappings for all generic types to be created.
The two endpoints in listing 14.39 request ICollection<string> and ICollection<int> services, each of which will be resolved with a different List<T> object. To target the endpoints, restart ASP.NET Core and request http://localhost:5000/string and http://localhost:5000/int. The service has been defined as a singleton, which means that the same List<string> and List<int> objects will be used to resolve all requests for ICollection<string> and ICollection<int>. Each request adds a new item to the collection, which you can see by reloading the web browser, as shown in figure 14.16.
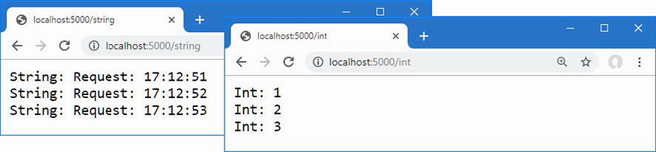
Figure 14.16 Using a singleton service with an unbound type
Dependency injection allows application components to declare dependencies on services by defining constructor parameters.
Services can be defined with a type, an object, or a factory function.
The scope of a service determines when services are instantiated and how they are shared between components.
Dependency injection is integrated into the ASP.NET Core request pipeline.
This chapter covers
ASP.NET Core includes a set of built-in services and middleware components that provide features that are commonly required by web applications. In this chapter, I describe three of the most important and widely used features: application configuration, logging, and serving static content. In chapter 16, I continue to describe the platform features, focusing on the more advanced built-in services and middleware. Table 15.1 puts the chapter in context.
Table 15.1 Putting platform features in context
|
Question |
Answer |
|---|---|
|
What are they? |
The platform features deal with common web application requirements, such as configuration, logging, static files, sessions, authentication, and database access. |
|
Why are they useful? |
Using these features means you don’t have to re-create their functionality in your own projects. |
|
How are they used? |
The built-in middleware components are added to the request pipeline using extension methods whose name starts with |
|
Are there any pitfalls or limitations? |
The most common problems relate to the order in which middleware components are added to the request pipeline. Middleware components form a chain along which requests pass, as described in chapter 12. |
|
Are there any alternatives? |
You don’t have to use any of the services or middleware components that ASP.NET Core provides. |
Table 15.2 provides a guide to the chapter.
Table 15.2 Chapter guide
|
Problem |
Solution |
Listing |
|---|---|---|
|
Accessing the configuration data |
Use the |
4–8 |
|
Setting the application environment |
Use the launch settings file. |
9–11 |
|
Determining the application environment |
Use the |
12 |
|
Keeping sensitive data outside of the project |
Create user secrets. |
13–17 |
|
Logging messages |
Use the |
18–27 |
|
Delivering static content |
Enable the static content middleware. |
28–31 |
|
Delivering client-side packages |
Install the package with LibMan and deliver it with the static content middleware. |
32–35 |
In this chapter, I continue to use the Platform project created in chapter 14. To prepare for this chapter, update the Program.cs file to remove middleware and services, as shown in listing 15.1.
Listing 15.1 The contents of the Program.cs file in the Platform folder
var builder = WebApplication.CreateBuilder(args);
var app = builder.Build();
app.MapGet("/", async context => {
await context.Response.WriteAsync("Hello World!");
});
app.Run();
One of the main topics in this chapter is configuration data. Replace the contents of the appsettings.Development.json file with the contents of listing 15.2 to remove the setting added in chapter 14.
Listing 15.2 The contents of the appsettings.Development.json file in the Platform folder
{
"Logging": {
"LogLevel": {
"Default": "Debug",
"System": "Information",
"Microsoft": "Information"
}
}
}
Start the application by opening a new PowerShell command prompt, navigating to the Platform project folder, and running the command shown in listing 15.3.
Listing 15.3 Starting the ASP.NET Core runtime
dotnet run
Open a new browser tab and navigate to http://localhost:5000; you will see the content shown in figure 15.1.

Figure 15.1 Running the example application
One of the built-in features provided by ASP.NET Core is access to the application’s configuration settings, which is presented as a service.
The main source of configuration data is the appsettings.json file. The appsettings.json file created by the template used in chapter 12 contains the following settings:
{
"Logging": {
"LogLevel": {
"Default": "Information",
"Microsoft.AspNetCore": "Warning"
}
},
"AllowedHosts": "*"
}
The configuration service will process the JSON configuration file and create nested configuration sections that contain individual settings. For the appsettings.json file in the example application, the configuration service will create a Logging configuration section that contains a LogLevel section. The LogLevel section will contain settings for Default and Microsoft.AspnetCore. There will also be an AllowedHosts setting that isn’t part of a configuration section and whose value is an asterisk (the * character).
The configuration service doesn’t understand the meaning of the configuration sections or settings in the appsettings.json file and is just responsible for processing the JSON data file and merging the configuration settings with the values obtained from other sources, such as environment variables or command-line arguments. The result is a hierarchical set of configuration properties, as shown in figure 15.2.

Figure 15.2 The hierarchy of configuration properties in the appsettings.json file
Most projects contain more than one JSON configuration file, allowing different settings to be defined for different parts of the development cycle. There are three predefined environments, named Development, Staging, and Production, each of which corresponds to a commonly used phase of development. During startup, the configuration service looks for a JSON file whose name includes the current environment. The default environment is Development, which means the configuration service will load the appsettings.Development.json file and use its contents to supplement the contents of the main appsettings.json file.
Here are the configuration settings added to the appsettings.Development.json file in listing 15.2:
{
"Logging": {
"LogLevel": {
"Default": "Debug",
"System": "Information",
"Microsoft": "Information"
}
}
}
Where the same setting is defined in both files, the value in the appsettings.Development.json file will replace the one in the appsettings.json file, which means that the contents of the two JSON files will produce the hierarchy of configuration settings shown in figure 15.3.
Figure 15.3 Merging JSON configuration settings
The effect of the additional configuration settings is to increase the detail level of logging messages, which I describe in more detail in the “Using the Logging Service” section.
The configuration data is accessed through a service. If you only require the configuration data to configure middleware, then the dependency on the configuration service can be declared using a parameter, as shown in listing 15.4.
Listing 15.4 Accessing configuration data in the Program.cs file in the Platform folder
var builder = WebApplication.CreateBuilder(args);
var app = builder.Build();
app.MapGet("config", async (HttpContext context,
IConfiguration config) => {
string? defaultDebug = config["Logging:LogLevel:Default"];
await context.Response
.WriteAsync($"The config setting is: {defaultDebug}");
});
app.MapGet("/", async context => {
await context.Response.WriteAsync("Hello World!");
});
app.Run();
Configuration data is provided through the IConfiguration interface; this interface is defined in the Microsoft.Extensions.Configuration namespace and provides an API for navigating through the configuration hierarchy and reading configuration settings. Configuration settings can be read by specifying the path through the configuration sections, like this:
... string? defaultDebug = config["Logging:LogLevel:Default"]; ...
This statement reads the value of the Default setting, which is defined in the LogLevel section of the Logging part of the configuration. The names of the configuration sections and the configuration settings are separated by colons (the : character).
The value of the configuration setting read in listing 15.4 is used to provide a result for a middleware component that handles the /config URL. Restart ASP.NET Core using Control+C at the command prompt and run the command shown in listing 15.5 in the Platform folder.
Listing 15.5 Starting the ASP.NET Core platform
dotnet run
Once the runtime has restarted, navigate to the http://localhost:5000/config URL, and you will see the value of the configuration setting displayed in the browser tab, as shown in figure 15.4.
Figure 15.4 Reading configuration data
As noted in chapter 14, the WebApplication and WebApplicationBuilder classes provide a Configuration property that can be used to obtain an implementation of the IConfiguration interface, which is useful when using configuration data to configure an application’s services. Listing 15.6 shows both uses of configuration data.
Listing 15.6 Configuring services and pipeline in the Program.cs file in the Platform folder
var builder = WebApplication.CreateBuilder(args);
var servicesConfig = builder.Configuration;
// - use configuration settings to set up services
var app = builder.Build();
var pipelineConfig = app.Configuration;
// - use configuration settings to set up pipeline
app.MapGet("config", async (HttpContext context,
IConfiguration config) => {
string? defaultDebug = config["Logging:LogLevel:Default"];
await context.Response
.WriteAsync($"The config setting is: {defaultDebug}");
});
app.MapGet("/", async context => {
await context.Response.WriteAsync("Hello World!");
});
app.Run();
This may seem like an unnecessary step because there is so little code in the Program.cs file in this example application, which makes it obvious that the configuration service isn’t replaced. It isn’t always as obvious in a real project, where services can be defined in groups by methods defined outside of the Program.cs file, making it difficult to see if these methods alter the IConfiguration service.
In chapter 12, I described the options pattern, which is a useful way to configure middleware components. A helpful feature provided by the IConfiguration service is the ability to create options directly from configuration data.
To prepare, add the configuration settings shown in listing 15.7 to the appsettings.json file.
Listing 15.7 Adding configuration data in the appsettings.json file in the Platform folder
{
"Logging": {
"LogLevel": {
"Default": "Information",
"Microsoft.AspNetCore": "Warning"
}
},
"AllowedHosts": "*",
"Location": {
"CityName": "Buffalo"
}
}
The Location section of the configuration file can be used to provide options pattern values, as shown in listing 15.8.
Listing 15.8 Using configuration data in the Program.cs file in the Platform folder
using Platform;
var builder = WebApplication.CreateBuilder(args);
var servicesConfig = builder.Configuration;
builder.Services.Configure<MessageOptions>(
servicesConfig.GetSection("Location"));
var app = builder.Build();
var pipelineConfig = app.Configuration;
// - use configuration settings to set up pipeline
app.UseMiddleware<LocationMiddleware>();
app.MapGet("config", async (HttpContext context,
IConfiguration config) => {
string? defaultDebug = config["Logging:LogLevel:Default"];
await context.Response
.WriteAsync($"The config setting is: {defaultDebug}");
});
app.MapGet("/", async context => {
await context.Response.WriteAsync("Hello World!");
});
app.Run();
The configuration data is obtained using the GetSection method and passed to the Configure method when the options are created. The configuration values in the selected section are inspected and used to replace the default values with the same names in the options class. To see the effect, restart ASP.NET Core and use the browser to navigate to the http://localhost:5000/location URL. You will see the results shown in figure 15.5, where the CityName option is taken from the configuration data and the CountryName option is taken from the default value in the options class.
Figure 15.5 Using configuration data in the options pattern
The launchSettings.json file in the Properties folder contains the configuration settings for starting the ASP.NET Core platform, including the TCP ports that are used to listen for HTTP and HTTPS requests and the environment used to select the additional JSON configuration files.
Here is the content added to the launchSettings.json file when the project was created and then edited to set the HTTP ports:
{
"iisSettings": {
"windowsAuthentication": false,
"anonymousAuthentication": true,
"iisExpress": {
"applicationUrl": "http://localhost:5000",
"sslPort": 0
}
},
"profiles": {
"Platform": {
"commandName": "Project",
"dotnetRunMessages": true,
"launchBrowser": true,
"applicationUrl": "http://localhost:5000",
"environmentVariables": {
"ASPNETCORE_ENVIRONMENT": "Development"
}
},
"IIS Express": {
"commandName": "IISExpress",
"launchBrowser": true,
"environmentVariables": {
"ASPNETCORE_ENVIRONMENT": "Development"
}
}
}
}
The iisSettings section is used to configure the HTTP and HTTPS ports used when the ASP.NET Core platform is started through IIS Express, which is how older versions of ASP.NET Core were deployed.
The profiles section describes a series of launch profiles, which define configuration settings for different ways of running the application. The Platform section defines the configuration used by the dotnet run command. The IIS Express section defines the configuration used when the application is used with IIS Express.
Both profiles contain an environmentVariables section, which is used to define environment variables that are added to the application’s configuration data. There is only one environment variable defined by default: ASPNETCORE_ENVIRONMENT.
During startup, the value of the ASPNETCORE_ENVIRONMENT setting is used to select the additional JSON configuration file so that a value of Development, for example, will cause the appsettings.Development.json file to be loaded.
When the application is started within Visual Studio Code, ASPNETCORE_ENVIRONMENT is set in a different file. Select Run > Open Configurations to open the launch.json file in the .vscode folder, which is created when a project is edited with Visual Studio Code. Here is the default configuration for the example project, showing the current ASPNETCORE_ENVIRONMENT value, with the comments removed for brevity:
{
"version": "0.2.0",
"configurations": [
{
"name": ".NET Core Launch (web)",
"type": "coreclr",
"request": "launch",
"preLaunchTask": "build",
"program": "${workspaceFolder}/bin/Debug/net7.0/Platform.dll",
"args": [],
"cwd": "${workspaceFolder}",
"stopAtEntry": false,
"serverReadyAction": {
"action": "openExternally",
"pattern": "\\bNow listening on:\\s+(https?://\\S+)"
},
"env": {
"ASPNETCORE_ENVIRONMENT": "Development"
},
"sourceFileMap": {
"/Views": "${workspaceFolder}/Views"
}
},
{
"name": ".NET Core Attach",
"type": "coreclr",
"request": "attach"
}
]
}
To display the value of the ASPNETCORE_ENVIRONMENT setting, add the statements to the middleware component that responds to the /config URL, as shown in listing 15.9.
Listing 15.9 Displaying the configuration in the Program.cs file in the Platform folder
using Platform;
var builder = WebApplication.CreateBuilder(args);
var servicesConfig = builder.Configuration;
builder.Services.Configure<MessageOptions>(
servicesConfig.GetSection("Location"));
var app = builder.Build();
var pipelineConfig = app.Configuration;
app.UseMiddleware<LocationMiddleware>();
app.MapGet("config", async (HttpContext context,
IConfiguration config) => {
string? defaultDebug = config["Logging:LogLevel:Default"];
await context.Response
.WriteAsync($"The config setting is: {defaultDebug}");
string? environ = config["ASPNETCORE_ENVIRONMENT"];
await context.Response.WriteAsync($"\nThe env setting is: {environ}");
});
app.MapGet("/", async context => {
await context.Response.WriteAsync("Hello World!");
});
app.Run();
Restart ASP.NET Core and navigate to http://localhost:5000/config, and you will see the value of the ASPNETCORE_ENVIRONMENT setting, as shown in figure 15.6.
Figure 15.6 Displaying the environment configuration setting
To see the effect that the ASPNETCORE_ENVIRONMENT setting has on the overall configuration, change the value in the launchSettings.json file, as shown in listing 15.10.
Listing 15.10 Changing the launchSettings.json file in the Platform/Properties folder
{
"iisSettings": {
"windowsAuthentication": false,
"anonymousAuthentication": true,
"iisExpress": {
"applicationUrl": "http://localhost:5000",
"sslPort": 0
}
},
"profiles": {
"Platform": {
"commandName": "Project",
"dotnetRunMessages": true,
"launchBrowser": true,
"applicationUrl": "http://localhost:5000",
"environmentVariables": {
"ASPNETCORE_ENVIRONMENT": "Production"
}
},
"IIS Express": {
"commandName": "IISExpress",
"launchBrowser": true,
"environmentVariables": {
"ASPNETCORE_ENVIRONMENT": "Development"
}
}
}
}
If you are using Visual Studio, you can change the environment variables by selecting Debug > Launch Profiles. The settings for each launch profile are displayed, and there is support for changing the value of the ASPNETCORE_ENVIRONMENT variable, as shown in figure 15.7.
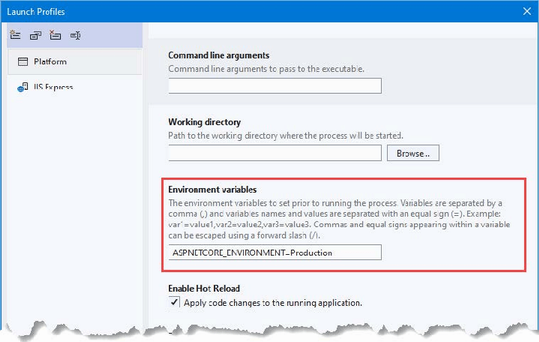
Figure 15.7 Changing an environment variable using Visual Studio
If you are using Visual Studio Code, select Run > Open Configurations and change the value in the env section, as shown in listing 15.11.
Listing 15.11 Changing the launch.json file in the Platform/.vscode folder
{
"version": "0.2.0",
"configurations": [
{
"name": ".NET Core Launch (web)",
"type": "coreclr",
"request": "launch",
"preLaunchTask": "build",
"program": "${workspaceFolder}/bin/Debug/net7.0/Platform.dll",
"args": [],
"cwd": "${workspaceFolder}",
"stopAtEntry": false,
"serverReadyAction": {
"action": "openExternally",
"pattern": "\\bNow listening on:\\s+(https?://\\S+)"
},
"env": {
"ASPNETCORE_ENVIRONMENT": "Production"
},
"sourceFileMap": {
"/Views": "${workspaceFolder}/Views"
}
},
{
"name": ".NET Core Attach",
"type": "coreclr",
"request": "attach"
}
]
}
Save the changes to the property page or configuration file and restart ASP.NET Core. Navigate to http://localhost:5000/config, and you will see the effect of the environment change, as shown in figure 15.8.
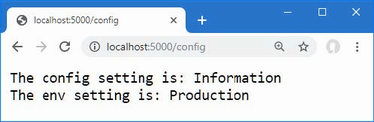
Figure 15.8 The effect of changing the environment configuration setting
Notice that both configuration values displayed in the browser have changed. The appsettings.Development.json file is no longer loaded, and there is no appsettings.Production.json file in the project, so only the configuration settings in the appsettings.json file are used.
The ASP.NET Core platform provides the IWebHostEnvironment service for determining the current environment, which avoids the need to get the configuration setting manually. The IWebHostEnvironment service defines the property and methods shown in table 15.3. The methods are extension methods that are defined in the Microsoft.Extensions.Hosting namespace.
Table 15.3 The IWebHostEnvironment extension methods
|
Name |
Description |
|---|---|
|
|
This property returns the current environment. |
|
|
This method returns |
|
|
This method returns |
|
|
This method returns |
|
|
This method returns |
If you need to access the environment when setting up services, then you can use the WebApplicationBuilder.Environment property. If you need to access the environment when configuring the pipeline, you can use the WebApplication.Environment property. If you need to access the environment within a middleware component or endpoint, then you can define a IWebHostEnvironment parameter. All three approaches are shown in listing 15.12.
Listing 15.12 Accessing the environment in the Program.cs file in the Platform folder
using Platform;
var builder = WebApplication.CreateBuilder(args);
var servicesConfig = builder.Configuration;
builder.Services.Configure<MessageOptions>(
servicesConfig.GetSection("Location"));
var servicesEnv = builder.Environment;
// - use environment to set up services
var app = builder.Build();
var pipelineConfig = app.Configuration;
// - use configuration settings to set up pipeline
var pipelineEnv = app.Environment;
// - use envirionment to set up pipeline
app.UseMiddleware<LocationMiddleware>();
app.MapGet("config", async (HttpContext context,
IConfiguration config, IWebHostEnvironment env) => {
string? defaultDebug = config["Logging:LogLevel:Default"];
await context.Response
.WriteAsync($"The config setting is: {defaultDebug}");
await context.Response
.WriteAsync($"\nThe env setting is: {env.EnvironmentName}");
});
app.MapGet("/", async context => {
await context.Response.WriteAsync("Hello World!");
});
app.Run();
Restart ASP.NET Core and use a browser to request http://localhost:5000/config, which produces the output shown in figure 15.8.
During development, it is often necessary to use sensitive data to work with the services that an application depends on. This data can include API keys, database connection passwords, or default administration accounts, and it is used both to access services and to reinitialize them to test application changes with a fresh database or user configuration.
If the sensitive data is included in the C# classes or JSON configuration files, it will be checked into the source code version control repository and become visible to all developers and to anyone else who can see the code—which may mean visible to the world for projects that have open repositories or repositories that are poorly secured.
The user secrets service allows sensitive data to be stored in a file that isn’t part of the project and won’t be checked into version control, allowing each developer to have sensitive data that won’t be accidentally exposed through a version control check-in.
Storing user secrets
The first step is to prepare the file that will be used to store sensitive data. Run the command shown in listing 15.13 in the Platform folder.
Listing 15.13 Initializing user secrets
dotnet user-secrets init
This command adds an element to the Platform.csproj project file that contains a unique ID for the project that will be associated with the secrets on each developer machine. Next, run the commands shown in listing 15.14 in the Platform folder.
Listing 15.14 Storing a user secret
dotnet user-secrets set "WebService:Id" "MyAccount" dotnet user-secrets set "WebService:Key" "MySecret123$"
Each secret has a key and a value, and related secrets can be grouped together by using a common prefix, followed by a colon (the : character), followed by the secret name. The commands in listing 15.14 create related Id and Key secrets that have the WebService prefix.
After each command, you will see a message confirming that a secret has been added to the secret store. To check the secrets for the project, use the command prompt to run the command shown in listing 15.15 in the Platform folder.
Listing 15.15 Listing the user secrets
dotnet user-secrets list
This command produces the following output:
WebService:Key = MySecret123$ WebService:Id = MyAccount
Behind the scenes, a JSON file has been created in the %APPDATA%\Microsoft\UserSecrets folder (or the ~/.microsoft/usersecrets folder for Linux) to store the secrets. Each project has its own folder (whose name corresponds to the unique ID created by the init command in listing 15.13).
Reading user secrets
User secrets are merged with the normal configuration settings and accessed in the same way. In listing 15.16, I have added a statement that displays the secrets to the middleware component that handles the /config URL.
Listing 15.16 Using user secrets in the Program.cs file in the Platform folder
using Platform;
var builder = WebApplication.CreateBuilder(args);
var servicesConfig = builder.Configuration;
builder.Services.Configure<MessageOptions>(
servicesConfig.GetSection("Location"));
var servicesEnv = builder.Environment;
// - use environment to set up services
var app = builder.Build();
var pipelineConfig = app.Configuration;
// - use configuration settings to set up pipeline
var pipelineEnv = app.Environment;
// - use envirionment to set up pipeline
app.UseMiddleware<LocationMiddleware>();
app.MapGet("config", async (HttpContext context,
IConfiguration config, IWebHostEnvironment env) => {
string? defaultDebug = config["Logging:LogLevel:Default"];
await context.Response
.WriteAsync($"The config setting is: {defaultDebug}");
await context.Response
.WriteAsync($"\nThe env setting is: {env.EnvironmentName}");
string? wsID = config["WebService:Id"];
string? wsKey = config["WebService:Key"];
await context.Response.WriteAsync($"\nThe secret ID is: {wsID}");
await context.Response.WriteAsync($"\nThe secret Key is: {wsKey}");
});
app.MapGet("/", async context => {
await context.Response.WriteAsync("Hello World!");
});
app.Run();
User secrets are loaded only when the application is set to the Development environment. Edit the launchSettings.json file to change the environment to Development, as shown in listing 15.17.
Listing 15.17 Changing the launchSettings.json file in the Platform/Properties folder
{
"iisSettings": {
"windowsAuthentication": false,
"anonymousAuthentication": true,
"iisExpress": {
"applicationUrl": "http://localhost:5000",
"sslPort": 0
}
},
"profiles": {
"Platform": {
"commandName": "Project",
"dotnetRunMessages": true,
"launchBrowser": true,
"applicationUrl": "http://localhost:5000",
"environmentVariables": {
"ASPNETCORE_ENVIRONMENT": "Development"
}
},
"IIS Express": {
"commandName": "IISExpress",
"launchBrowser": true,
"environmentVariables": {
"ASPNETCORE_ENVIRONMENT": "Development"
}
}
}
}
Save the changes, restart the ASP.NET Core runtime using the dotnet run command, and request the http://localhost:5000/config URL to see the user secrets, as shown in figure 15.9.
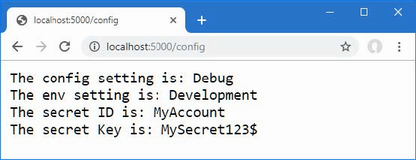
Figure 15.9 Displaying user secrets
ASP.NET Core provides a logging service that can be used to record messages that describe the state of the application to track errors, monitor performance, and help diagnose problems.
Log messages are sent to logging providers, which are responsible for forwarding messages to where they can be seen, stored, and processed. There are built-in providers for basic logging, and there is a range of third-party providers available for feeding messages into logging frameworks that allow messages to be collated and analyzed.
Three of the built-in providers are enabled by default: the console provider, the debug provider, and the EventSource provider. The debug provider forwards messages so they can be processed through the System.Diagnostics.Debug class, and the EventSource provider forwards messages for event tracing tools, such as PerfView (https://github.com/Microsoft/perfview). I use the console provider in this chapter because it is simple and doesn’t require any additional configuration to display logging messages.
To prepare for this section, listing 15.18 reconfigures the application to remove the services, middleware, and endpoints from the previous section.
Listing 15.18 Configuring the application in the Program.cs file in the Platform folder
using Platform;
var builder = WebApplication.CreateBuilder(args);
var app = builder.Build();
app.MapGet("population/{city?}", Population.Endpoint);
app.Run();
Logging messages are generated using the unbounded ILogger<> service, as shown in listing 15.19.
Listing 15.19 Generating logging messages in the Population.cs file in the Platform folder
namespace Platform {
public class Population {
public static async Task Endpoint(HttpContext context,
ILogger<Population> logger) {
logger.LogDebug("Started processing for {path}",
context.Request.Path);
string city = context.Request.RouteValues["city"]
as string ?? "london";
int? pop = null;
switch (city.ToLower()) {
case "london":
pop = 8_136_000;
break;
case "paris":
pop = 2_141_000;
break;
case "monaco":
pop = 39_000;
break;
}
if (pop.HasValue) {
await context.Response
.WriteAsync($"City: {city}, Population: {pop}");
} else {
context.Response.StatusCode
= StatusCodes.Status404NotFound;
}
logger.LogDebug("Finished processing for {path}",
context.Request.Path);
}
}
}
The logging service groups log messages together based on the category assigned to messages. Log messages are written using the ILogger<T> interface, where the generic parameter T is used to specify the category. The convention is to use the type of the class that generates the messages as the category type, which is why listing 15.19 declares a dependency on the service using Population for the type argument, like this:
...
public static async Task Endpoint(HttpContext context,
ILogger<Population> logger) {
...
This ensures that log messages generated by the Endpoint method will be assigned the category Population. Log messages are created using the extension methods shown in table 15.4.
Table 15.4 The ILogger<T> extension methods
|
Name |
Description |
|---|---|
|
|
This method generates a |
|
|
This method generates a |
|
|
This method generates an |
|
|
This method generates a |
|
|
This method generates an |
|
|
This method generates a |
Log messages are assigned a level that reflects their importance and detail. The levels range from Trace, for detailed diagnostics, to Critical, for the most important information that requires an immediate response. There are overloaded versions of each method that allow log messages to be generated using strings or exceptions. In listing 15.19, I used the LogDebug method to generate logging messages when a request is handled.
...
logger.LogDebug("Started processing for {path}", context.Request.Path);
...
The result is log messages at the Debug level that are generated when the response is started and completed. To see the log messages, restart ASP.NET Core and use a browser to request http://localhost:5000/population. Look at the console output, and you will see the log messages in the output from ASP.NET Core, like this:
Building...
info: Microsoft.Hosting.Lifetime[14]
Now listening on: http://localhost:5000
info: Microsoft.Hosting.Lifetime[0]
Application started. Press Ctrl+C to shut down.
info: Microsoft.Hosting.Lifetime[0]
Hosting environment: Development
info: Microsoft.Hosting.Lifetime[0]
Content root path: C:\Platform
dbug: Platform.Population[0]
Started processing for /population
dbug: Platform.Population[0]
Finished processing for /population
Logging messages in the Program.cs file
The Logger<> service is useful for logging in classes but isn’t suited to logging in the Program.cs file, where top-level statements are used to configure the application. The simplest approach is to use the ILogger returned by the Logger property defined by the WebApplication class, as shown in listing 15.20.
Listing 15.20 Logging in the Program.cs file in the Platform folder
using Platform;
var builder = WebApplication.CreateBuilder(args);
var app = builder.Build();
app.Logger.LogDebug("Pipeline configuration starting");
app.MapGet("population/{city?}", Population.Endpoint);
app.Logger.LogDebug("Pipeline configuration complete");
app.Run();
The ILogger interface defines all the methods described in table 15.4. Start ASP.NET Core, and you will see the logging messages in the startup output, like this:
Building...
dbug: Platform[0]
Pipeline configuration starting
dbug: Platform[0]
Pipeline configuration complete
info: Microsoft.Hosting.Lifetime[14]
Now listening on: http://localhost:5000
info: Microsoft.Hosting.Lifetime[0]
Application started. Press Ctrl+C to shut down.
info: Microsoft.Hosting.Lifetime[0]
Hosting environment: Development
info: Microsoft.Hosting.Lifetime[0]
Content root path: C:\Platform
The category for logging messages generated using the ILogger provided by the WebApplication class is the name of the application, which is Platform for this example. If you want to generate log messages with a different category, which can be useful in lambda functions, for example, then you can use the ILoggerFactory interface, which is available as a service, and call the CreateLogger method to obtain an ILogger for a specified category, as shown in listing 15.21.
Listing 15.21 Creating a logger in the Program.cs file in the Platform folder
using Platform;
var builder = WebApplication.CreateBuilder(args);
var app = builder.Build();
var logger = app.Services
.GetRequiredService<ILoggerFactory>().CreateLogger("Pipeline");
logger.LogDebug("Pipeline configuration starting");
app.MapGet("population/{city?}", Population.Endpoint);
logger.LogDebug("Pipeline configuration complete");
app.Run();
Restart ASP.NET Core, and you will see the following messages in the output produced as the application starts:
Building...
dbug: Pipeline[0]
Pipeline configuration starting
dbug: Pipeline[0]
Pipeline configuration complete
info: Microsoft.Hosting.Lifetime[14]
Now listening on: http://localhost:5000
info: Microsoft.Hosting.Lifetime[0]
Application started. Press Ctrl+C to shut down.
info: Microsoft.Hosting.Lifetime[0]
Hosting environment: Development
info: Microsoft.Hosting.Lifetime[0]
Content root path: C:\Platform
An alternative approach to generating log messages is to use the LoggerMessage attribute, as shown in listing 15.22.
Listing 15.22 Using the attribute in the Population.cs file in the Platform folder
namespace Platform {
public partial class Population {
public static async Task Endpoint(HttpContext context,
ILogger<Population> logger) {
//logger.LogDebug("Started processing for {path}",
// context.Request.Path);
StartingResponse(logger, context.Request.Path);
string city = context.Request.RouteValues["city"]
as string ?? "london";
int? pop = null;
switch (city.ToLower()) {
case "london":
pop = 8_136_000;
break;
case "paris":
pop = 2_141_000;
break;
case "monaco":
pop = 39_000;
break;
}
if (pop.HasValue) {
await context.Response
.WriteAsync($"City: {city}, Population: {pop}");
} else {
context.Response.StatusCode
= StatusCodes.Status404NotFound;
}
logger.LogDebug("Finished processing for {path}",
context.Request.Path);
}
[LoggerMessage(0, LogLevel.Debug, "Starting response for {path}")]
public static partial void StartingResponse(ILogger logger,
string path);
}
}
The LoggerMessage attribute is applied to partial methods, which must be defined in partial classes. When the application is compiled, the attribute generates the implementation for the method to which it is applied, resulting in logging, which Microsoft says offers better performance than the other techniques described in this section. Full details of how this feature works can be found at https://docs.microsoft.com/en-us/dotnet/core/extensions/logger-message-generator.
Start ASP.NET Core and use a browser to request http://localhost:5000/population, and the output will include the following log messages:
dbug: Platform.Population[0]
Starting response for /population
dbug: Platform.Population[0]
Finished processing for /population
Earlier in this chapter, I showed you the default contents of the appsettings.json and appsettings.Development.json files and explained how they are merged to create the application’s configuration settings. The settings in the JSON file are used to configure the logging service, which ASP.NET Core provides to record messages about the state of the application.
The Logging:LogLevel section of the appsettings.json file is used to set the minimum level for logging messages. Log messages that are below the minimum level are discarded. The appsettings.json file contains the following levels:
... "Default": "Information", "Microsoft.AspNetCore": "Warning" ...
The category for the log messages—which is set using the generic type argument or using a string—is used to select a minimum filter level.
For the log messages generated by the Population class, for example, the category will be Platform.Population, which means that they can be matched directly by adding a Platform.Population entry to the appsettings.json file or indirectly by specifying just the Platform namespace. Any category for which there is no minimum log level is matched by the Default entry, which is set to Information.
It is common to increase the detail of the log messages displayed during development, which is why the levels in the appsettings.Development.json file specify more detailed logging levels, like this:
... "Default": "Debug", "System": "Information", "Microsoft": "Information" ...
When the application is configured for the Development environment, the default logging level is Debug. The levels for the System and Microsoft categories are set to Information, which affects the logging messages generated by ASP.NET Core and the other packages and frameworks provided by Microsoft.
You can tailor the logging levels to focus the log on those parts of the application that are of interest by setting a level to Trace, Debug, Information, Warning, Error, or Critical. Logging messages can be disabled for a category using the None value.
Listing 15.23 sets the level to Debug for the Microsoft.AspNetCore setting, which will increase the default level of detail and will have the effect of displaying debug-level messages generated by ASP.NET Core.
Listing 15.23 Configuring the appsettings.Development.json file in the Platform folder
{
"Logging": {
"LogLevel": {
"Default": "Debug",
"System": "Information",
"Microsoft": "Information",
"Microsoft.AspNetCore": "Debug"
}
}
}
Restart ASP.NET Core and request the http://localhost:5000/population URL, and you will see a series of messages from the different ASP.NET Core components. You can reduce the detail by being more specific about the namespace for which messages are required, as shown in listing 15.24.
Listing 15.24 Configuring the appsettings.Development.json file in the Platform folder
{
"Logging": {
"LogLevel": {
"Default": "Debug",
"System": "Information",
"Microsoft": "Information",
"Microsoft.AspNetCore": "Warning",
"Microsoft.AspNetCore.Routing": "Debug"
}
}
}
The changes return the Microsoft.AspNetCore category to Warning and set the Microsoft.AspNetCore.Routing category to Debug, which increases the detail level for logging messages by the components responsible for routing. Restart ASP.NET Core and request http://localhost:5000/population again, and you will see fewer messages overall, but still see those that report how the request was matched to a route:
...
dbug: Microsoft.AspNetCore.Routing.Matching.DfaMatcher[1001]
1 candidate(s) found for the request path '/population'
dbug: Microsoft.AspNetCore.Routing.Matching.DfaMatcher[1005]
Endpoint 'HTTP: GET population/{city?} => Endpoint' with route pattern 'population/{city?}' is valid for the request path '/population'
dbug: Microsoft.AspNetCore.Routing.EndpointRoutingMiddleware[1]
Request matched endpoint 'HTTP: GET population/{city?} => Endpoint'
info: Microsoft.AspNetCore.Routing.EndpointMiddleware[0]
Executing endpoint 'HTTP: GET population/{city?} => Endpoint'
dbug: Platform.Population[0]
Starting response for /population
dbug: Platform.Population[0]
Finished processing for /population
info: Microsoft.AspNetCore.Routing.EndpointMiddleware[1]
Executed endpoint 'HTTP: GET population/{city?} => Endpoint'
...
If you are having trouble figuring out a routing scheme, then these messages can be helpful in figuring out what the application is doing with requests.
ASP.NET Core includes built-in middleware for generating log messages that describe the HTTP requests received by an application and the responses it produces. Listing 15.25 adds the HTTP logging middleware to the request pipeline.
Listing 15.25 Adding logging middleware in the Program.cs file in the Platform folder
using Platform;
var builder = WebApplication.CreateBuilder(args);
var app = builder.Build();
app.UseHttpLogging();
//var logger = app.Services
// .GetRequiredService<ILoggerFactory>().CreateLogger("Pipeline");
//logger.LogDebug("Pipeline configuration starting");
app.MapGet("population/{city?}", Population.Endpoint);
//logger.LogDebug("Pipeline configuration complete");
app.Run();
The UseHttpLogging method adds a middleware component that generates logging messages that describe the HTTP requests and responses. These log messages are generated with the Microsoft.AspNetCore.HttpLogging.HttpLoggingMiddleware category and the Information severity, which I have enabled in listing 15.26.
Listing 15.26 Logging in the appsettings.Development.json file in the Platform folder
{
"Logging": {
"LogLevel": {
"Default": "Debug",
"System": "Information",
"Microsoft": "Information",
"Microsoft.AspNetCore": "Warning",
"Microsoft.AspNetCore.HttpLogging.HttpLoggingMiddleware":
"Information"
}
}
}
Restart ASP.NET Core and request http://localhost:5000/population, and you will see logging messages that describe the HTTP request sent by the browser and the response the application produces, similar to the following:
...
info: Microsoft.AspNetCore.HttpLogging.HttpLoggingMiddleware[1]
Request:
Protocol: HTTP/1.1
Method: GET
Scheme: http
PathBase:
Path: /population
Accept: text/html,application/xhtml+xml,application/xml;q=0.9,
image/avif,image/webp,image/apng,*/*;q=0.8,
application/signed-exchange;v=b3;q=0.9
Connection: keep-alive
Host: localhost:5000
User-Agent: Mozilla/5.0 (Windows NT 10.0; Win64; x64)
AppleWebKit/537.36 (KHTML, like Gecko)
Chrome/94.0.4606.71 Safari/537.36
Accept-Encoding: gzip, deflate, br
Accept-Language: en-GB,en-US;q=0.9,en;q=0.8
Cache-Control: [Redacted]
Cookie: [Redacted]
Upgrade-Insecure-Requests: [Redacted]
sec-ch-ua: [Redacted]
sec-ch-ua-mobile: [Redacted]
sec-ch-ua-platform: [Redacted]
Sec-Fetch-Site: [Redacted]
Sec-Fetch-Mode: [Redacted]
Sec-Fetch-User: [Redacted]
Sec-Fetch-Dest: [Redacted]
dbug: Platform.Population[0]
Starting response for /population
dbug: Platform.Population[0]
Finished processing for /population
info: Microsoft.AspNetCore.HttpLogging.HttpLoggingMiddleware[2]
Response:
StatusCode: 200
Date: [Redacted]
Server: [Redacted]
Transfer-Encoding: chunked
...
The details of the HTTP request and response logging messages can be configured using the AddHttpLogging method, as shown in listing 15.27.
Listing 15.27 HTTP logging messages in the Program.cs file in the Platform folder
using Platform;
using Microsoft.AspNetCore.HttpLogging;
var builder = WebApplication.CreateBuilder(args);
builder.Services.AddHttpLogging(opts => {
opts.LoggingFields = HttpLoggingFields.RequestMethod
| HttpLoggingFields.RequestPath
| HttpLoggingFields.ResponseStatusCode;
});
var app = builder.Build();
app.UseHttpLogging();
app.MapGet("population/{city?}", Population.Endpoint);
app.Run();
This method selects the fields and headers that are included in the logging message. The configuration in listing 15.27 selects the method and path from the HTTP request and the status code from the response. See https://docs.microsoft.com/en-us/aspnet/core/fundamentals/http-logging for the complete set of configuration options for HTTP logging.
Restart ASP.NET Core and request http://localhost:5000/population, and you will see the selected details in the output:
...
info: Microsoft.AspNetCore.HttpLogging.HttpLoggingMiddleware[1]
Request:
Method: GET
PathBase:
Path: /population
dbug: Platform.Population[0]
Starting response for /population
dbug: Platform.Population[0]
Finished processing for /population
info: Microsoft.AspNetCore.HttpLogging.HttpLoggingMiddleware[2]
Response:
StatusCode: 200
...
Most web applications rely on a mix of dynamically generated and static content. The dynamic content is generated by the application based on the user’s identity and actions, such as the contents of a shopping cart or the detail of a specific product and is generated fresh for each request. I describe the different ways that dynamic content can be created using ASP.NET Core in part 3.
Static content doesn’t change and is used to provide images, CSS stylesheets, JavaScript files, and anything else on which the application relies but which doesn’t have to be generated for every request. The conventional location for static content in an ASP.NET Core project is the wwwroot folder.
To prepare static content to use in the examples for this section, create the Platform/wwwroot folder and add to it a file called static.xhtml, with the content shown in listing 15.28. You can create the file with the HTML Page template if you are using Visual Studio.
Listing 15.28 The contents of the static.xhtml file in the wwwroot folder
<!DOCTYPE html>
<html lang="en">
<head>
<title>Static Content</title>
</head>
<body>
<h3>This is static content</h3>
</body>
</html>
The file contains a basic HTML document with just the basic elements required to display a message in the browser.
ASP.NET Core provides a middleware component that handles requests for static content, which is added to the request pipeline in listing 15.29.
Listing 15.29 Adding middleware in the Program.cs file in the Platform folder
using Platform;
using Microsoft.AspNetCore.HttpLogging;
var builder = WebApplication.CreateBuilder(args);
builder.Services.AddHttpLogging(opts => {
opts.LoggingFields = HttpLoggingFields.RequestMethod
| HttpLoggingFields.RequestPath
| HttpLoggingFields.ResponseStatusCode;
});
var app = builder.Build();
app.UseHttpLogging();
app.UseStaticFiles();
app.MapGet("population/{city?}", Population.Endpoint);
app.Run();
The UseStaticFiles extension method adds the static file middleware to the request pipeline. This middleware responds to requests that correspond to the names of disk files and passes on all other requests to the next component in the pipeline. This middleware is usually added close to the start of the request pipeline so that other components don’t handle requests that are for static files.
Restart ASP.NET Core and navigate to http://localhost:5000/static.xhtml. The static file middleware will receive the request and respond with the contents of the static.xhtml file in the wwwroot folder, as shown in figure 15.10.
Figure 15.10 Serving static content
The middleware component returns the content of the requested file and sets the response headers, such as Content-Type and Content-Length, that describe the content to the browser.
Changing the default options for the static content middleware
When the UseStaticFiles method is invoked without arguments, the middleware will use the wwwroot folder to locate files that match the path of the requested URL.
This behavior can be adjusted by passing a StaticFileOptions object to the UseStaticFiles method. Table 15.5 describes the properties defined by the StaticFileOptions class.
Table 15.5 The properties defined by the StaticFileOptions class
|
Name |
Description |
|---|---|
|
|
This property is used to get or set the |
|
|
This property is used to set the default content type if the |
|
|
This property is used to locate the content for requests, as shown in the listing below. |
|
|
This property can be used to register an action that will be invoked before the static content response is generated. |
|
|
This property is used to specify the URL path that the middleware will respond to, as shown in the following listing. |
|
|
By default, the static content middleware will not serve files whose content type cannot be determined by the |
The FileProvider and RequestPath properties are the most commonly used. The FileProvider property is used to select a different location for static content, and the RequestPath property is used to specify a URL prefix that denotes requests for static context. Listing 15.30 uses both properties to configure the static file middleware.
Listing 15.30 Configuring the static files in the Program.cs file in the Platform folder
using Platform;
using Microsoft.AspNetCore.HttpLogging;
using Microsoft.Extensions.FileProviders;
var builder = WebApplication.CreateBuilder(args);
builder.Services.AddHttpLogging(opts => {
opts.LoggingFields = HttpLoggingFields.RequestMethod
| HttpLoggingFields.RequestPath
| HttpLoggingFields.ResponseStatusCode;
});
var app = builder.Build();
app.UseHttpLogging();
app.UseStaticFiles();
var env = app.Environment;
app.UseStaticFiles(new StaticFileOptions {
FileProvider = new
PhysicalFileProvider($"{env.ContentRootPath}/staticfiles"),
RequestPath = "/files"
});
app.MapGet("population/{city?}", Population.Endpoint);
app.Run();
Multiple instances of the middleware component can be added to the pipeline, each of which handles a separate mapping between URLs and file locations. In the listing, a second instance of the static files middleware is added to the request pipeline so that requests for URLs that start with /files will be handled using files from a folder named staticfiles. Reading files from the folder is done with an instance of the PhysicalFileProvider class, which is responsible for reading disk files. The PhysicalFileProvider class requires an absolute path to work with, which I based on the value of the ContentRootPath property defined by the IWebHostEnvironment interface, which is the same interface used to determine whether the application is running in the Development or Production environment.
To provide content for the new middleware component to use, create the Platform/staticfiles folder and add to it an HTML file named hello.xhtml with the content shown in listing 15.31.
Listing 15.31 The contents of the hello.xhtml file in the Platform/staticfiles folder
<!DOCTYPE html>
<html lang="en">
<head>
<title>Static Content</title>
</head>
<body>
<h3>This is additional static content</h3>
</body>
</html>
Restart ASP.NET Core and use the browser to request the http://localhost:5000/files/hello.xhtml URL. Requests for URLs that begin with /files and that correspond to files in the staticfiles folder are handled by the new middleware, as shown in figure 15.11.
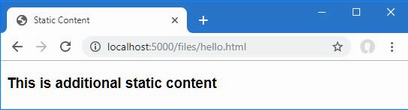
Figure 15.11 Configuring the static files middleware
Most web applications rely on client-side packages to support the content they generate, using CSS frameworks to style content or JavaScript packages to create rich functionality in the browser. Microsoft provides the Library Manager tool, known as LibMan, for downloading and managing client-side packages.
Preparing the project for client-side packages
Use the command prompt to run the commands shown in listing 15.32, which remove any existing LibMan package and install the version required by this chapter as a global .NET Core tool.
Listing 15.32 Installing LibMan
dotnet tool uninstall --global Microsoft.Web.LibraryManager.Cli
dotnet tool install --global Microsoft.Web.LibraryManager.Cli
--version 2.1.175
The next step is to create the LibMan configuration file, which specifies the repository that will be used to get client-side packages and the directory into which packages will be downloaded. Open a PowerShell command prompt and run the command shown in listing 15.33 in the Platform folder.
Listing 15.33 Initializing LibMan
libman init -p cdnjs
The -p argument specifies the provider that will get packages. I have used cdnjs, which selects cdnjs.com. The other option is unpkg, which selects unpkg.com. If you don’t have existing experience with package repositories, then you should start with the cdnjs option.
The command in listing 15.33 creates a file named libman.json in the Platform folder; the file contains the following settings:
...
{
"version": "1.0",
"defaultProvider": "cdnjs",
"libraries": []
}
...
If you are using Visual Studio, you can create and edit the libman.json file directly by selecting Project > Manage Client-Side Libraries.
Installing client-side packages
Packages are installed from the command line. Run the command shown in listing 15.34 in the Platform folder to install the Bootstrap package.
Listing 15.34 Installing the Bootstrap package
libman install bootstrap@5.2.3 -d wwwroot/lib/bootstrap
The required version is separated from the package name by the @ character, and the -d argument is used to specify where the package will be installed. The wwwroot/lib folder is the conventional location for installing client-side packages in ASP.NET Core projects.
Using a client-side package
Once a client-side package has been installed, its files can be referenced by script or link HTML elements or by using the features provided by the higher-level ASP.NET Core features described in later chapters.
For simplicity in this chapter, listing 15.35 adds a link element to the static HTML file created earlier in this section.
Listing 15.35 Using a client package in the static.xhtml file in the Platform/wwwroot folder
<!DOCTYPE html>
<html lang="en">
<head>
<link rel="stylesheet" href="/lib/bootstrap/css/bootstrap.min.css" />
<title>Static Content</title>
</head>
<body>
<h3 class="p-2 bg-primary text-white">This is static content</h3>
</body>
</html>
Restart ASP.NET Core and request http://localhost:5000/static.xhtml. When the browser receives and processes the contents of the static.xhtml file, it will encounter the link element and send an HTTP request to the ASP.NET Core runtime for the /lib/bootstrap/css/bootstrap.min.css URL. The original static file middleware component will receive this request, determine that it corresponds to a file in the wwwroot folder, and return its contents, providing the browser with the Bootstrap CSS stylesheet. The Bootstrap styles are applied through the classes to which the h3 element has been assigned, producing the result shown in figure 15.12.
Figure 15.12 Using a client-side package
The ASP.NET Core platform includes features for common tasks, must of which are presented as services.
The configuration service provides access to the application configuration, which includes the contents of the appsettings.json file and environment variables.
The configuration data is typically used with the options service to configure the services available through dependency injection.
The user secrets feature is used to store sensitive data outside of the project folder, so they are not committed into a version control code repository.
The logging service is used to generate log messages, with different severity levels and with options for sending the log messages to different handlers.
ASP.NET Core includes middleware for serving static content and a tool for adding packages that will be delivered as static content to the project.
In this chapter, I continue to describe the basic features provided by the ASP.NET Core platform. I explain how cookies are used and how the user’s consent for tracking cookies is managed. I describe how sessions provide a robust alternative to basic cookies, how to use and enforce HTTPS requests, how to deal with errors, and how to filter requests based on the Host header. Table 16.1 provides a guide to the chapter.
Table 16.1 Chapter guide
|
Problem |
Solution |
Listing |
|---|---|---|
|
Using cookies |
Use the context objects to read and write cookies. |
1–3 |
|
Managing cookie consent |
Use the consent middleware. |
4–6 |
|
Storing data across requests |
Use sessions. |
7, 8 |
|
Securing HTTP requests |
Use the HTTPS middleware. |
9–13 |
|
Restrict the number of requests handled by the application |
Use the rate limiting middleware |
14 |
|
Handling errors |
Use the error and status code middleware. |
15–20 |
|
Restricting a request with the host header |
Set the |
21 |
In this chapter, I continue to use the Platform project from chapter 15. To prepare for this chapter, replace the contents of the Program.cs file with the contents of listing 16.1, which removes the middleware and services from the previous chapter.
Listing 16.1 Replacing the contents of the Program.cs file in the Platform folder
var builder = WebApplication.CreateBuilder(args);
var app = builder.Build();
app.MapFallback(async context =>
await context.Response.WriteAsync("Hello World!"));
app.Run();
Start the application by opening a new PowerShell command prompt, navigating to the folder that contains the Platform.csproj file, and running the command shown in listing 16.2.
Listing 16.2 Starting the ASP.NET Core runtime
dotnet run
Open a new browser window and use it to request http://localhost:5000, which will produce the response shown in figure 16.1.
Figure 16.1 Running the example application
Cookies are small amounts of text added to responses that the browser includes in subsequent requests. Cookies are important for web applications because they allow features to be developed that span a series of HTTP requests, each of which can be identified by the cookies that the browser sends to the server.
ASP.NET Core provides support for working with cookies through the HttpRequest and HttpResponse objects that are provided to middleware components. To demonstrate, listing 16.3 changes the routing configuration in the example application to add endpoints that implement a counter.
Listing 16.3 Using cookies in the Program.cs file in the Platform folder
var builder = WebApplication.CreateBuilder(args);
var app = builder.Build();
app.MapGet("/cookie", async context => {
int counter1 =
int.Parse(context.Request.Cookies["counter1"] ?? "0") + 1;
context.Response.Cookies.Append("counter1", counter1.ToString(),
new CookieOptions {
MaxAge = TimeSpan.FromMinutes(30)
});
int counter2 =
int.Parse(context.Request.Cookies["counter2"] ?? "0") + 1;
context.Response.Cookies.Append("counter2", counter2.ToString(),
new CookieOptions {
MaxAge = TimeSpan.FromMinutes(30)
});
await context.Response
.WriteAsync($"Counter1: {counter1}, Counter2: {counter2}");
});
app.MapGet("clear", context => {
context.Response.Cookies.Delete("counter1");
context.Response.Cookies.Delete("counter2");
context.Response.Redirect("/");
return Task.CompletedTask;
});
app.MapFallback(async context =>
await context.Response.WriteAsync("Hello World!"));
app.Run();
The new endpoints rely on cookies called counter1 and counter2. When the /cookie URL is requested, the middleware looks for the cookies and parses the values to an int. If there is no cookie, a fallback zero is used.
... int counter1 = int.Parse(context.Request.Cookies["counter1"] ?? "0") + 1; ...
Cookies are accessed through the HttpRequest.Cookies property, where the name of the cookie is used as the key. The value retrieved from the cookie is incremented and used to set a cookie in the response, like this:
...
context.Response.Cookies.Append("counter1", counter1.ToString(),
new CookieOptions {
MaxAge = TimeSpan.FromMinutes(30)
});
...
Cookies are set through the HttpResponse.Cookies property and the Append method creates or replaces a cookie in the response. The arguments to the Append method are the name of the cookie, its value, and a CookieOptions object, which is used to configure the cookie. The CookieOptions class defines the properties described in table 16.2, each of which corresponds to a cookie field.
Table 16.2 The CookieOptions properties
|
Name |
Description |
|---|---|
|
|
This property specifies the hosts to which the browser will send the cookie. By default, the cookie will be sent only to the host that created the cookie. |
|
|
This property sets the expiry for the cookie. |
|
|
When |
|
|
This property is used to indicate that a cookie is essential, as described in the "Managing Cookie Consent" section. |
|
|
This property specifies the number of seconds until the cookie expires. Older browsers do not support cookies with this setting. |
|
|
This property is used to set a URL path that must be present in the request before the cookie will be sent by the browser. |
|
|
This property is used to specify whether the cookie should be included in cross-site requests. The values are |
|
|
When |
The only cookie option set in listing 16.3 is MaxAge, which tells the browser that the cookies expire after 30 minutes. The middleware in listing 16.3 deletes the cookies when the /clear URL is requested, which is done using the HttpResponse.Cookie.Delete method, after which the browser is redirected to the / URL.
...
app.MapGet("clear", context => {
context.Response.Cookies.Delete("counter1");
context.Response.Cookies.Delete("counter2");
context.Response.Redirect("/");
return Task.CompletedTask;
});
...
Restart ASP.NET Core and navigate to http://localhost:5000/cookie. The response will contain cookies that are included in subsequent requests, and the counters will be incremented each time the browser is reloaded, as shown in figure 16.2. A request for http://localhost:5000/clear will delete the cookies, and the counters will be reset.
Figure 16.2 Using a cookie
The EU General Data Protection Regulation (GDPR) requires the user’s consent before nonessential cookies can be used. ASP.NET Core provides support for obtaining consent and preventing nonessential cookies from being sent to the browser when consent has not been granted. The options pattern is used to create a policy for cookies, which is applied by a middleware component, as shown in listing 16.4.
Listing 16.4 Enabling cookie consent in the Program.cs file in the Platform folder
var builder = WebApplication.CreateBuilder(args);
builder.Services.Configure<CookiePolicyOptions>(opts => {
opts.CheckConsentNeeded = context => true;
});
var app = builder.Build();
app.UseCookiePolicy();
app.MapGet("/cookie", async context => {
int counter1 =
int.Parse(context.Request.Cookies["counter1"] ?? "0") + 1;
context.Response.Cookies.Append("counter1", counter1.ToString(),
new CookieOptions {
MaxAge = TimeSpan.FromMinutes(30),
IsEssential = true
});
int counter2 =
int.Parse(context.Request.Cookies["counter2"] ?? "0") + 1;
context.Response.Cookies.Append("counter2", counter2.ToString(),
new CookieOptions {
MaxAge = TimeSpan.FromMinutes(30)
});
await context.Response
.WriteAsync($"Counter1: {counter1}, Counter2: {counter2}");
});
app.MapGet("clear", context => {
context.Response.Cookies.Delete("counter1");
context.Response.Cookies.Delete("counter2");
context.Response.Redirect("/");
return Task.CompletedTask;
});
app.MapFallback(async context =>
await context.Response.WriteAsync("Hello World!"));
app.Run();
The options pattern is used to configure a CookiePolicyOptions object, which sets the overall policy for cookies in the application using the properties described in table 16.3.
Table 16.3 The CookiePolicyOptions properties
|
Name |
Description |
|---|---|
|
|
This property is assigned a function that receives an |
|
|
This property returns an object that is used to configure the cookie sent to the browser to record the user’s cookie consent. |
|
|
This property sets the default value for the |
|
|
This property sets the lowest level of security for the |
|
|
This property sets the default value for the |
To enable consent checking, I assigned a new function to the CheckConsentNeeded property that always returns true. The function is called for every request that ASP.NET Core receives, which means that sophisticated rules can be defined to select the requests for which consent is required. For this application, I have taken the most cautious approach and required consent for all requests.
The middleware that enforces the cookie policy is added to the request pipeline using the UseCookiePolicy method. The result is that only cookies whose IsEssential property is true will be added to responses. Listing 16.4 sets the IsEssential property on cookie1 only, and you can see the effect by restarting ASP.NET Core, requesting http://localhost:5000/cookie, and reloading the browser. Only the counter whose cookie is marked as essential updates, as shown in figure 16.3.
Figure 16.3 Using cookie consent
Unless the user has given consent, only cookies that are essential to the core features of the web application are allowed. Consent is managed through a request feature, which provides middleware components with access to the implementation details of how requests and responses are handled by ASP.NET Core. Features are accessed through the HttpRequest.Features property, and each feature is represented by an interface whose properties and methods deal with one aspect of low-level request handling.
Features deal with aspects of request handling that rarely need to be altered, such as the structure of responses. The exception is the management of cookie consent, which is handled through the ITrackingConsentFeature interface, which defines the methods and properties described in table 16.4.
Table 16.4 The ITrackingConsentFeature members
|
Name |
Description |
|---|---|
|
|
This property returns |
|
|
This method returns a cookie that can be used by JavaScript clients to indicate consent. |
|
|
Calling this method adds a cookie to the response that grants consent for nonessential cookies. |
|
|
This property returns |
|
|
This property returns |
|
|
This method deletes the consent cookie. |
To deal with consent, add a class file named ConsentMiddleware.cs to the Platform folder and the code shown in listing 16.5. Managing cookie consent can be done using lambda expressions, but I have used a class in this example to keep the Program.cs method uncluttered.
Listing 16.5 The contents of the ConsentMiddleware.cs file in the Platform folder
using Microsoft.AspNetCore.Http.Features;
namespace Platform {
public class ConsentMiddleware {
private RequestDelegate next;
public ConsentMiddleware(RequestDelegate nextDelgate) {
next = nextDelgate;
}
public async Task Invoke(HttpContext context) {
if (context.Request.Path == "/consent") {
ITrackingConsentFeature? consentFeature
= context.Features.Get<ITrackingConsentFeature>();
if (consentFeature != null) {
if (!consentFeature.HasConsent) {
consentFeature.GrantConsent();
} else {
consentFeature.WithdrawConsent();
}
await context.Response.WriteAsync(
consentFeature.HasConsent ? "Consent Granted \n"
: "Consent Withdrawn\n");
}
} else {
await next(context);
}
}
}
}
Request features are obtained using the Get method, where the generic type argument specifies the feature interface that is required, like this:
...
ITrackingConsentFeature? consentFeature
= context.Features.Get<ITrackingConsentFeature>();
...
Using the properties and methods described in table 16.4, the new middleware component responds to the /consent URL to determine and change the cookie consent. Listing 16.6 adds the new middleware to the request pipeline.
Listing 16.6 Adding middleware in the Program.cs file in the Platform folder
var builder = WebApplication.CreateBuilder(args);
builder.Services.Configure<CookiePolicyOptions>(opts => {
opts.CheckConsentNeeded = context => true;
});
var app = builder.Build();
app.UseCookiePolicy();
app.UseMiddleware<Platform.ConsentMiddleware>();
app.MapGet("/cookie", async context => {
// ...statments omitted for brevity...
To see the effect, restart ASP.NET Core and request http://localhost:5000/consent and then http://localhost:5000/cookie. When consent is granted, nonessential cookies are allowed, and both the counters in the example will work, as shown in figure 16.4. Repeat the process to withdraw consent, and you will find that only the counter whose cookie has been denoted as essential works.

Figure 16.4 Managing cookie consent
The example in the previous section used cookies to store the application’s state data, providing the middleware component with the data required. The problem with this approach is that the contents of the cookie are stored at the client, where it can be manipulated and used to alter the behavior of the application.
A better approach is to use the ASP.NET Core session feature. The session middleware adds a cookie to responses, which allows related requests to be identified and which is also associated with data stored at the server.
When a request containing the session cookie is received, the session middleware component retrieves the server-side data associated with the session and makes it available to other middleware components through the HttpContext object. Using sessions means that the application’s data remains at the server and only the identifier for the session is sent to the browser.
Setting up sessions requires configuring services and adding a middleware component to the request pipeline. Listing 16.7 adds the statements to the Program.cs file to set up sessions for the example application and removes the endpoints from the previous section.
Listing 16.7 Configuring sessions in the Program.cs file in the Platform folder
var builder = WebApplication.CreateBuilder(args);
builder.Services.AddDistributedMemoryCache();
builder.Services.AddSession(opts => {
opts.IdleTimeout = TimeSpan.FromMinutes(30);
opts.Cookie.IsEssential = true;
});
var app = builder.Build();
app.UseSession();
app.MapFallback(async context =>
await context.Response.WriteAsync("Hello World!"));
app.Run();
When you use sessions, you must decide how to store the associated data. ASP.NET Core provides three options for session data storage, each of which has its own method to register a service, as described in table 16.5.
Table 16.5 The session storage methods
|
Name |
Description |
|---|---|
|
|
This method sets up an in-memory cache. Despite the name, the cache is not distributed and is responsible only for storing data for the instance of the ASP.NET Core runtime where it is created. |
|
|
This method sets up a cache that stores data in SQL Server and is available when the |
|
|
This method sets up a Redis cache and is available when the |
Caching is described in detail in chapter 17, but for this chapter, I used the in-memory cache:
... builder.Services.AddDistributedMemoryCache(); ...
Despite its name, the cache service created by the AddDistributedMemoryCache method isn’t distributed and stores the session data for a single instance of the ASP.NET Core runtime. If you scale an application by deploying multiple instances of the runtime, then you should use one of the other caches, such as the SQL Server cache, which is demonstrated in chapter 17.
The next step is to use the options pattern to configure the session middleware, like this:
...
builder.Services.AddSession(opts => {
opts.IdleTimeout = TimeSpan.FromMinutes(30);
opts.Cookie.IsEssential = true;
});
...
Table 16.6 shows that the options class for sessions is SessionOptions and describes the key properties it defines.
Table 16.6 Properties defined by the SessionOptions class
|
Name |
Description |
|---|---|
|
|
This property is used to configure the session cookie. |
|
|
This property is used to configure the time span after which a session expires. |
The Cookie property returns an object that can be used to configure the session cookie. Table 16.7 describes the most useful cookie configuration properties for session data.
Table 16.7 Cookie configuration properties
|
Name |
Description |
|---|---|
|
|
This property specifies whether the browser will prevent the cookie from being included in HTTP requests sent by JavaScript code. This property should be set to |
|
|
This property specifies whether the cookie is required for the application to function and should be used even when the user has specified that they don’t want the application to use cookies. The default value is |
|
|
This property sets the security policy for the cookie, using a value from the |
The options set in listing 16.7 allow the session cookie to be included in requests started by JavaScript and flag the cookie as essential so that it will be used even when the user has expressed a preference not to use cookies (see the “Managing Cookie Consent” section for more details about essential cookies). The IdleTimeout option has been set so that sessions expire if no request containing the sessions cookie is received for 30 minutes.
The final step is to add the session middleware component to the request pipeline, which is done with the UseSession method. When the middleware processes a request that contains a session cookie, it retrieves the session data from the cache and makes it available through the HttpContext object, before passing the request along the request pipeline and providing it to other middleware components. When a request arrives without a session cookie, a new session is started, and a cookie is added to the response so that subsequent requests can be identified as being part of the session.
The session middleware provides access to details of the session associated with a request through the Session property of the HttpContext object. The Session property returns an object that implements the ISession interface, which provides the methods shown in table 16.8 for accessing session data.
Table 16.8 Useful ISession methods and extension methods
|
Name |
Description |
|---|---|
|
|
This method removes all the data in the session. |
|
|
This asynchronous method commits changed session data to the cache. |
|
|
This method retrieves a string value using the specified key. |
|
|
This method retrieves an integer value using the specified key. |
|
|
This property returns the unique identifier for the session. |
|
|
This returns |
|
|
This enumerates the keys for the session data items. |
|
|
This method removes the value associated with the specified key. |
|
|
This method stores a string using the specified key. |
|
|
This method stores an integer using the specified key. |
Session data is stored in key-value pairs, where the keys are strings and the values are strings or integers. This simple data structure allows session data to be stored easily by each of the caches listed in table 16.5. Applications that need to store more complex data can use serialization, which is the approach I took for the SportsStore. Listing 16.8 uses session data to re-create the counter example.
Listing 16.8 Using session data in the Program.cs file in the Platform folder
var builder = WebApplication.CreateBuilder(args);
builder.Services.AddDistributedMemoryCache();
builder.Services.AddSession(opts => {
opts.IdleTimeout = TimeSpan.FromMinutes(30);
opts.Cookie.IsEssential = true;
});
var app = builder.Build();
app.UseSession();
app.MapGet("/session", async context => {
int counter1 = (context.Session.GetInt32("counter1") ?? 0) + 1;
int counter2 = (context.Session.GetInt32("counter2") ?? 0) + 1;
context.Session.SetInt32("counter1", counter1);
context.Session.SetInt32("counter2", counter2);
await context.Session.CommitAsync();
await context.Response
.WriteAsync($"Counter1: {counter1}, Counter2: {counter2}");
});
app.MapFallback(async context =>
await context.Response.WriteAsync("Hello World!"));
app.Run();
The GetInt32 method is used to read the values associated with the keys counter1 and counter2. If this is the first request in a session, no value will be available, and the null-coalescing operator is used to provide an initial value. The value is incremented and then stored using the SetInt32 method and used to generate a simple result for the client.
The use of the CommitAsync method is optional, but it is good practice to use it because it will throw an exception if the session data can’t be stored in the cache. By default, no error is reported if there are caching problems, which can lead to unpredictable and confusing behavior.
All changes to the session data must be made before the response is sent to the client, which is why I read, update, and store the session data before calling the Response.WriteAsync method in listing 16.8.
Notice that the statements in listing 16.8 do not have to deal with the session cookie, detect expired sessions, or load the session data from the cache. All this work is done automatically by the session middleware, which presents the results through the HttpContext.Session property. One consequence of this approach is that the HttpContext.Session property is not populated with data until after the session middleware has processed a request, which means that you should attempt to access session data only in middleware or endpoints that are added to the request pipeline after the UseSession method is called.
Restart ASP.NET Core and navigate to the http://localhost:5000/session URL, and you will see the value of the counter. Reload the browser, and the counter values will be incremented, as shown in figure 16.5. The sessions and session data will be lost when ASP.NET Core is stopped because I chose the in-memory cache. The other storage options operate outside of the ASP.NET Core runtime and survive application restarts.

Figure 16.5 Using session data
Users increasingly expect web applications to use HTTPS connections, even for requests that don’t contain or return sensitive data. ASP.NET Core supports both HTTP and HTTPS connections and provides middleware that can force HTTP clients to use HTTPS.
HTTPS is enabled and configured in the launchSettings.json file in the Properties folder, as shown in listing 16.9.
Listing 16.9 Changes in the launchSettings.json file in the Platform/Properties folder
{
"iisSettings": {
"windowsAuthentication": false,
"anonymousAuthentication": true,
"iisExpress": {
"applicationUrl": "http://localhost:5000",
"sslPort": 0
}
},
"profiles": {
"Platform": {
"commandName": "Project",
"dotnetRunMessages": true,
"launchBrowser": true,
"applicationUrl": "http://localhost:5000;https://localhost:5500",
"environmentVariables": {
"ASPNETCORE_ENVIRONMENT": "Development"
}
},
"IIS Express": {
"commandName": "IISExpress",
"launchBrowser": true,
"environmentVariables": {
"ASPNETCORE_ENVIRONMENT": "Development"
}
}
}
}
The new applicationUrl setting sets the URLs to which the application will respond, and HTTPS is enabled by adding an HTTPS URL to the configuration setting. Note that the URLs are separated by a semicolon and no spaces are allowed.
The .NET Core runtime includes a test certificate that is used for HTTPS requests. Run the commands shown in listing 16.10 in the Platform folder to regenerate and trust the test certificate.
Listing 16.10 Regenerating the Development Certificates
dotnet dev-certs https --clean dotnet dev-certs https --trust
Select Yes to the prompts to delete the existing certificate that has already been trusted and select Yes to trust the new certificate, as shown in figure 16.6.
Figure 16.6 Regenerating the HTTPS certificate
Requests made using HTTPS can be detected through the HttpRequest.IsHttps property. In listing 16.11, I added a message to the fallback response that reports whether a request is made using HTTPS.
Listing 16.11 Detecting HTTPS in the Program.cs file in the Platform folder
var builder = WebApplication.CreateBuilder(args);
builder.Services.AddDistributedMemoryCache();
builder.Services.AddSession(opts => {
opts.IdleTimeout = TimeSpan.FromMinutes(30);
opts.Cookie.IsEssential = true;
});
var app = builder.Build();
app.UseSession();
app.MapGet("/session", async context => {
int counter1 = (context.Session.GetInt32("counter1") ?? 0) + 1;
int counter2 = (context.Session.GetInt32("counter2") ?? 0) + 1;
context.Session.SetInt32("counter1", counter1);
context.Session.SetInt32("counter2", counter2);
await context.Session.CommitAsync();
await context.Response
.WriteAsync($"Counter1: {counter1}, Counter2: {counter2}");
});
app.MapFallback(async context => {
await context.Response
.WriteAsync($"HTTPS Request: {context.Request.IsHttps} \n");
await context.Response.WriteAsync("Hello World!");
});
app.Run();
To test HTTPS, restart ASP.NET Core and navigate to http://localhost:5000. This is a regular HTTP request and will produce the result shown on the left of figure 16.7. Next, navigate to https://localhost:5500, paying close attention to the URL scheme, which is https and not http, as it has been in previous examples. The new middleware will detect the HTTPS connection and produce the output on the right of figure 16.7.
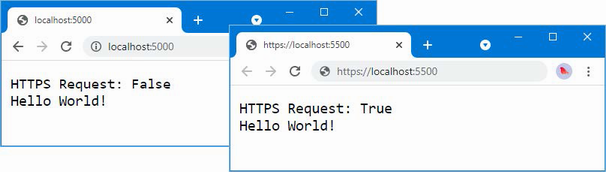
Figure 16.7 Detecting an HTTPS request
ASP.NET Core provides a middleware component that enforces the use of HTTPS by sending a redirection response for requests that arrive over HTTP. Listing 16.12 adds this middleware to the request pipeline.
Listing 16.12 Enforcing HTTPS in the Program.cs file in the Platform folder
var builder = WebApplication.CreateBuilder(args);
builder.Services.AddDistributedMemoryCache();
builder.Services.AddSession(opts => {
opts.IdleTimeout = TimeSpan.FromMinutes(30);
opts.Cookie.IsEssential = true;
});
var app = builder.Build();
app.UseHttpsRedirection();
app.UseSession();
app.MapGet("/session", async context => {
int counter1 = (context.Session.GetInt32("counter1") ?? 0) + 1;
int counter2 = (context.Session.GetInt32("counter2") ?? 0) + 1;
context.Session.SetInt32("counter1", counter1);
context.Session.SetInt32("counter2", counter2);
await context.Session.CommitAsync();
await context.Response
.WriteAsync($"Counter1: {counter1}, Counter2: {counter2}");
});
app.MapFallback(async context => {
await context.Response
.WriteAsync($"HTTPS Request: {context.Request.IsHttps} \n");
await context.Response.WriteAsync("Hello World!");
});
app.Run();
The UseHttpsRedirection method adds the middleware component, which appears at the start of the request pipeline so that the redirection to HTTPS occurs before any other component can short-circuit the pipeline and produce a response using regular HTTP.
Restart ASP.NET Core and request http://localhost:5000, which is the HTTP URL for the application. The HTTPS redirection middleware will intercept the request and redirect the browser to the HTTPS URL, as shown in figure 16.8.
Figure 16.8 Forcing HTTPS requests
One limitation of HTTPS redirection is that the user can make an initial request using HTTP before being redirected to a secure connection, presenting a security risk.
The HTTP Strict Transport Security (HSTS) protocol is intended to help mitigate this risk and works by including a header in responses that tells browsers to use HTTPS only when sending requests to the web application’s host. After an HSTS header has been received, browsers that support HSTS will send requests to the application using HTTPS even if the user specifies an HTTP URL. Listing 16.13 shows the addition of the HSTS middleware to the request pipeline.
Listing 16.13 Enabling HSTS in the Program.cs file in the Platform folder
var builder = WebApplication.CreateBuilder(args);
builder.Services.AddDistributedMemoryCache();
builder.Services.AddSession(opts => {
opts.IdleTimeout = TimeSpan.FromMinutes(30);
opts.Cookie.IsEssential = true;
});
builder.Services.AddHsts(opts => {
opts.MaxAge = TimeSpan.FromDays(1);
opts.IncludeSubDomains = true;
});
var app = builder.Build();
if (app.Environment.IsProduction()) {
app.UseHsts();
}
app.UseHttpsRedirection();
app.UseSession();
app.MapGet("/session", async context => {
int counter1 = (context.Session.GetInt32("counter1") ?? 0) + 1;
int counter2 = (context.Session.GetInt32("counter2") ?? 0) + 1;
context.Session.SetInt32("counter1", counter1);
context.Session.SetInt32("counter2", counter2);
await context.Session.CommitAsync();
await context.Response
.WriteAsync($"Counter1: {counter1}, Counter2: {counter2}");
});
app.MapFallback(async context => {
await context.Response
.WriteAsync($"HTTPS Request: {context.Request.IsHttps} \n");
await context.Response.WriteAsync("Hello World!");
});
app.Run();
The middleware is added to the request pipeline using the UseHsts method. The HSTS middleware can be configured with the AddHsts method, using the properties described in table 16.9.
Table 16.9 The HSTS configuration properties
|
Name |
Description |
|---|---|
|
|
This property returns a |
|
|
When |
|
|
This property specifies the period for which the browser should make only HTTPS requests. The default value is 30 days. |
|
|
This property is set to |
HSTS is disabled during development and enabled only in production, which is why the UseHsts method is called only for that environment.
...
if (app.Environment.IsProduction()) {
app.UseHsts();
}
...
HSTS must be used with care because it is easy to create a situation where clients cannot access the application, especially when nonstandard ports are used for HTTP and HTTPS.
If the example application is deployed to a server named myhost, for example, and the user requests http://myhost:5000, the browser will be redirected to https://myhost:5500 and sent the HSTS header, and the application will work as expected. But the next time the user requests http://myhost:5000, they will receive an error stating that a secure connection cannot be established.
This problem arises because some browsers take a simplistic approach to HSTS and assume that HTTP requests are handled on port 80 and HTTPS requests on port 443.
When the user requests http://myhost:5000, the browser checks its HSTS data and sees that it previously received an HSTS header for myhost. Instead of the HTTP URL that the user entered, the browser sends a request to https://myhost:5000. ASP.NET Core doesn’t handle HTTPS on the port it uses for HTTP, and the request fails. The browser doesn’t remember or understand the redirection it previously received for port 5001.
This isn’t an issue where port 80 is used for HTTP and 443 is used for HTTPS. The URL http://myhost is equivalent to http://myhost:80, and https://myhost is equivalent to https://myhost:443, which means that changing the scheme targets the right port.
Once a browser has received an HSTS header, it will continue to honor it for the duration of the header’s MaxAge property. When you first deploy an application, it is a good idea to set the HSTS MaxAge property to a relatively short duration until you are confident that your HTTPS infrastructure is working correctly, which is why I have set MaxAge to one day in listing 16.13. Once you are sure that clients will not need to make HTTP requests, you can increase the MaxAge property. A MaxAge value of one year is commonly used.
ASP.NET Core includes middleware components that limit the rate at which requests are processed, which can be a good way to ensure that a large number of requests doesn’t overwhelm the application. The .NET framework provides a general API for rate limiting, which is integrated into ASP.NET Core through extension methods used in the Program.cs file. Listing 16.14 defines a rate limit and applies it to an endpoint.
Listing 16.14 Defining a rate limit in the Program.cs file in the Platform folder
using Microsoft.AspNetCore.RateLimiting;
var builder = WebApplication.CreateBuilder(args);
builder.Services.AddDistributedMemoryCache();
builder.Services.AddSession(opts => {
opts.IdleTimeout = TimeSpan.FromMinutes(30);
opts.Cookie.IsEssential = true;
});
builder.Services.AddHsts(opts => {
opts.MaxAge = TimeSpan.FromDays(1);
opts.IncludeSubDomains = true;
});
builder.Services.AddRateLimiter(opts => {
opts.AddFixedWindowLimiter("fixedWindow", fixOpts => {
fixOpts.PermitLimit = 1;
fixOpts.QueueLimit = 0;
fixOpts.Window = TimeSpan.FromSeconds(15);
});
});
var app = builder.Build();
if (app.Environment.IsProduction()) {
app.UseHsts();
}
app.UseHttpsRedirection();
app.UseRateLimiter();
app.UseSession();
app.MapGet("/session", async context => {
int counter1 = (context.Session.GetInt32("counter1") ?? 0) + 1;
int counter2 = (context.Session.GetInt32("counter2") ?? 0) + 1;
context.Session.SetInt32("counter1", counter1);
context.Session.SetInt32("counter2", counter2);
await context.Session.CommitAsync();
await context.Response
.WriteAsync($"Counter1: {counter1}, Counter2: {counter2}");
}).RequireRateLimiting("fixedWindow");
app.MapFallback(async context => {
await context.Response
.WriteAsync($"HTTPS Request: {context.Request.IsHttps} \n");
await context.Response.WriteAsync("Hello World!");
});
app.Run();
The AddRateLimiter extension method is used to configure rate limiting, which is done using the options pattern. In this example, I have used the AddFixedWindowLimiter method to create a rate-limiting policy that limits the number of requests that will be handled in a specified duration. The AddFixedWindowLimiter method is one of four extension methods that are available for rate limiting, described in table 16.10. Full details of how each of these rate limits works can be found at https://learn.microsoft.com/en-us/aspnet/core/performance/rate-limit.
Table 16.10 The rate limiting extension methods
|
Name |
Description |
|---|---|
|
|
This method creates a rate limiter that allows a specified number of requests in a fixed period. |
|
|
This method creates a rate limiter that allows a specified number of requests in a fixed period, with the addition of a sliding window to smooth the rate limits. |
|
|
This method creates a rate limiter that maintains a pool of tokens that are allocated to requests. Requests can be allocated different amounts of tokens, and requests are only handled when there are sufficient free tokens in the pool. |
|
|
This method creates a rate limiter that allows a specific number of concurrent requests. |
This is the least flexible of the time-based rate limiters, but it is the easiest to demonstrate and test:
...
opts.AddFixedWindowLimiter("fixedWindow", fixOpts => {
fixOpts.PermitLimit = 1;
fixOpts.QueueLimit = 0;
fixOpts.Window = TimeSpan.FromSeconds(15);
});
...
Each extension method is configured with an instance of its own options class, but they all share the most important properties. The PermitLimit property is used to specify the maximum number of requests, and the QueueLimit property is used to specify the maximum number of requests that will be queued waiting for available capacity. If there is no available capacity and no available slots in the queue, then requests will be rejected. The combination of properties is given a name, which is used to apply the rate limit to endpoints.
These options are supplemented by additional properties which are specific to each rate limiter. In the case of the AddFixedWindowLimiter method, the Window property is used to specify the duration to which the rate is applied.
In listing 16.14, I specified a PermitLimit of 1, a QueueLimit of 0, and a Window of 15 seconds. This means that one request will be accepted every 15 seconds, without any queue, meaning that any additional requests will be rejected. This rate limit is assigned the name fixedWindow.
The rate limiting middleware is added to the pipeline using the UseRateLimiter method and applied to an endpoint with the RequireRateLimiting method. An application can define multiple rate limits and so a name is used to select the rate limit that is required:
...
}).RequireRateLimiting("fixedWindow");
...
Endpoints can be con configured with different rate limits, or no rate limit, and each rate limit will be managed independently.
It can be difficult to test rate limits effectively because browsers will often apply their own restrictions on the requests they send. Microsoft provides recommendations for testing tools at https://learn.microsoft.com/en-us/aspnet/core/performance/rate-limit#testing-endpoints-with-rate-limiting, but a policy as simple as the one defined in listing 16.14 is easy to test.
Restart ASP.NET Core and request https://localhost:5500/session. Click the Reload button within 15 seconds, and the new request will exceed the rate limit and ASP.NET Core will respond with a 503 status code, as shown in figure 16.9. Wait until the 15-second period has elapsed and click the Reload button again; the rate limit should reset and the request will be processed normally.
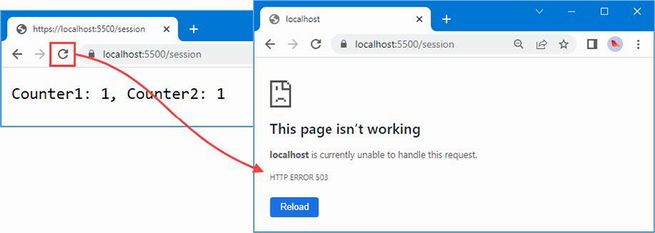
Figure 16.9 The effect of a rate limit.
When the request pipeline is created, the WebApplicationBuilder class uses the development environment to enable middleware that handles exceptions by producing HTTP responses that are helpful to developers. Here is a fragment of code from the WebApplicationBuilder class:
...
if (context.HostingEnvironment.IsDevelopment()) {
app.UseDeveloperExceptionPage();}
...
The UseDeveloperExceptionPage method adds the middleware component that intercepts exceptions and presents a more useful response. To demonstrate the way that exceptions are handled, listing 16.15 replaces the middleware and endpoints used in earlier examples with a new component that deliberately throws an exception.
Listing 16.15 Adding Middleware in the Program.cs File in the Platform Folder
var builder = WebApplication.CreateBuilder(args);
var app = builder.Build();
app.Run(context => {
throw new Exception("Something has gone wrong");
});
app.Run();
Restart ASP.NET Core and navigate to http://localhost:5000 to see the response that the middleware component generates, which is shown in figure 16.10. The page presents a stack trace and details about the request, including details of the headers and cookies it contained.
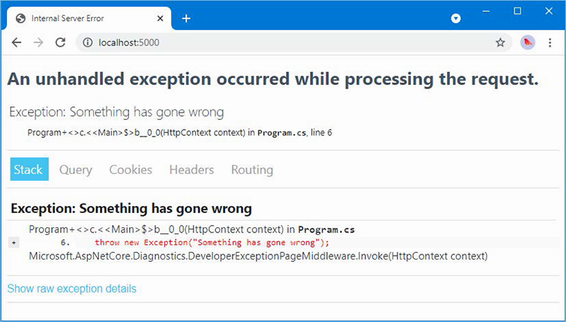
Figure 16.10 The developer exception page
When the developer exception middleware is disabled, as it will be when the application is in production, ASP.NET Core deals with unhandled exceptions by sending a response that contains just an error code. Listing 16.16 changes the environment to production.
Listing 16.16 Changes in the launchSettings.json file in the Platform/Properties folder
{
"iisSettings": {
"windowsAuthentication": false,
"anonymousAuthentication": true,
"iisExpress": {
"applicationUrl": "http://localhost:5000",
"sslPort": 0
}
},
"profiles": {
"Platform": {
"commandName": "Project",
"dotnetRunMessages": true,
"launchBrowser": true,
"applicationUrl": "http://localhost:5000;https://localhost:5500",
"environmentVariables": {
"ASPNETCORE_ENVIRONMENT": "Production"
}
},
"IIS Express": {
"commandName": "IISExpress",
"launchBrowser": true,
"environmentVariables": {
"ASPNETCORE_ENVIRONMENT": "Development"
}
}
}
}
Start ASP.NET Core using the dotnet run command and navigate to http://localhost:5000. The response you see will depend on your browser because ASP.NET Core has only provided it with a response containing status code 500, without any content to display. Figure 16.11 shows how this is handled by Google Chrome.
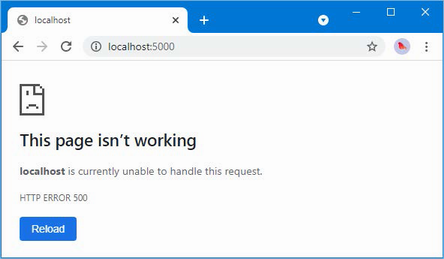
Figure 16.11 Returning an error response
As an alternative to returning just status codes, ASP.NET Core provides middleware that intercepts unhandled exceptions and sends a redirection to the browser instead, which can be used to show a friendlier response than the raw status code. The exception redirection middleware is added with the UseExceptionHandler method, as shown in listing 16.17.
Listing 16.17 Returning an error response in the Program.cs file in the Platform folder
var builder = WebApplication.CreateBuilder(args);
var app = builder.Build();
if (!app.Environment.IsDevelopment()) {
app.UseExceptionHandler("/error.xhtml");
app.UseStaticFiles();
}
app.Run(context => {
throw new Exception("Something has gone wrong");
});
app.Run();
When an exception is thrown, the exception handler middleware will intercept the response and redirect the browser to the URL provided as the argument to the UseExceptionHandler method. For this example, the redirection is to a URL that will be handled by a static file, so the UseStaticFiles middleware has also been added to the pipeline.
To add the file that the browser will receive, create an HTML file named error.xhtml in the wwwroot folder and add the content shown in listing 16.18.
Listing 16.18 The contents of the error.xhtml file in the Platform/wwwroot folder
<!DOCTYPE html>
<html lang="en">
<head>
<link rel="stylesheet" href="/lib/bootstrap/css/bootstrap.min.css" />
<title>Error</title>
</head>
<body class="text-center">
<h3 class="p-2">Something went wrong...</h3>
<h6>You can go back to the <a href="/">homepage</a> and try again</h6>
</body>
</html>
Restart ASP.NET Core and navigate to http://localhost:5000 to see the effect of the new middleware. Instead of the raw status code, the browser will be sent the content of the /error.xhtml URL, as shown in figure 16.12.
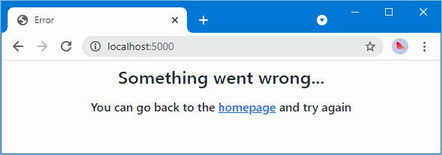
Figure 16.12 Displaying an HTML error
There are versions of the UseExceptionHandler method that allow more complex responses to be composed, but my advice is to keep error handling as simple as possible because you can’t anticipate all of the problems an application may encounter, and you run the risk of encountering another exception when trying to handle the one that triggered the handler, resulting in a confusing response or no response at all.
Not all error responses will be the result of uncaught exceptions. Some requests cannot be processed for reasons other than software defects, such as requests for URLs that are not supported or that require authentication. For this type of problem, redirecting the client to a different URL can be problematic because some clients rely on the error code to detect problems. You will see examples of this in later chapters when I show you how to create and consume RESTful web applications.
ASP.NET Core provides middleware that adds user-friendly content to error responses without requiring redirection. This preserves the error status code while providing a human-readable message that helps users make sense of the problem.
The simplest approach is to define a string that will be used as the body for the response. This is more awkward than simply pointing at a file, but it is a more reliable technique, and as a rule, simple and reliable techniques are preferable when handling errors. To create the string response for the example project, add a class file named ResponseStrings.cs to the Platform folder with the code shown in listing 16.19.
Listing 16.19 The contents of the ResponseStrings.cs file in the Platform folder
namespace Platform {
public static class Responses {
public static string DefaultResponse = @"
<!DOCTYPE html>
<html lang=""en"">
<head>
<link rel=""stylesheet""
href=""/lib/bootstrap/css/bootstrap.min.css"" />
<title>Error</title>
</head>
<body class=""text-center"">
<h3 class=""p-2"">Error {0}</h3>
<h6>
You can go back to the <a href=""/"">homepage</a>
and try again
</h6>
</body>
</html>";
}
}
The Responses class defines a DefaultResponse property to which I have assigned a multiline string containing a simple HTML document. There is a placeholder—{0}—into which the response status code will be inserted when the response is sent to the client.
Listing 16.20 adds the status code middleware to the request pipeline and adds a new middleware component that will return a 404 status code, indicating that the requested URL was not found.
Listing 16.20 Adding middleware in the Program.cs file in the Platform folder
var builder = WebApplication.CreateBuilder(args);
var app = builder.Build();
if (!app.Environment.IsDevelopment()) {
app.UseExceptionHandler("/error.xhtml");
app.UseStaticFiles();
}
app.UseStatusCodePages("text/html", Platform.Responses.DefaultResponse);
app.Use(async (context, next) => {
if (context.Request.Path == "/error") {
context.Response.StatusCode = StatusCodes.Status404NotFound;
await Task.CompletedTask;
} else {
await next();
}
});
app.Run(context => {
throw new Exception("Something has gone wrong");
});
app.Run();
The UseStatusCodePages method adds the response-enriching middleware to the request pipeline. The first argument is the value that will be used for the response’s Content-Type header, which is text/html in this example. The second argument is the string that will be used as the body of the response, which is the HTML string from listing 16.19.
The custom middleware component sets the HttpResponse.StatusCode property to specify the status code for the response, using a value defined by the StatusCode class. Middleware components are required to return a Task, so I have used the Task.CompletedTask property because there is no work for this middleware component to do.
To see how the 404 status code is handled, restart ASP.NET Core and request http://localhost:5000/error. The status code middleware will intercept the result and add the content shown in figure 16.13 to the response. The string used as the second argument to UseStatusCodePages is interpolated using the status code to resolve the placeholder.
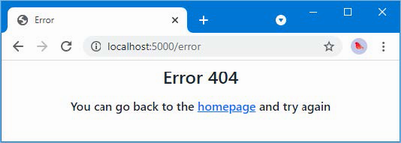
Figure 16.13 Using the status code middleware
The status code middleware responds only to status codes between 400 and 600 and doesn’t alter responses that already contain content, which means you won’t see the response in the figure if an error occurs after another middleware component has started to generate a response. The status code middleware won’t respond to unhandled exceptions because exceptions disrupt the flow of a request through the pipeline, meaning that the status code middleware isn’t given the opportunity to inspect the response before it is sent to the client. As a result, the UseStatusCodePages method is typically used in conjunction with the UseExceptionHandler or UseDeveloperExceptionPage method.
The HTTP specification requires requests to include a Host header that specifies the hostname the request is intended for, which makes it possible to support virtual servers where one HTTP server receives requests on a single port and handles them differently based on the hostname that was requested.
The default set of middleware that is added to the request pipeline by the Program class includes middleware that filters requests based on the Host header so that only requests that target a list of approved hostnames are handled and all other requests are rejected.
The default configuration for the Hosts header middleware is included in the appsettings.json file, as follows:
...
{
"Logging": {
"LogLevel": {
"Default": "Information",
"Microsoft.AspNetCore": "Warning"
}
},
"AllowedHosts": "*",
"Location": {
"CityName": "Buffalo"
}
}
...
The AllowedHosts configuration property is added to the JSON file when the project is created, and the default value accepts requests regardless of the Host header value. You can change the configuration by editing the JSON file. The configuration can also be changed using the options pattern, as shown in listing 16.21.
Listing 16.21 Configuring host filtering in the Program.cs file in the Platform folder
using Microsoft.AspNetCore.HostFiltering;
var builder = WebApplication.CreateBuilder(args);
builder.Services.Configure<HostFilteringOptions>(opts => {
opts.AllowedHosts.Clear();
opts.AllowedHosts.Add("*.example.com");
});
var app = builder.Build();
if (!app.Environment.IsDevelopment()) {
app.UseExceptionHandler("/error.xhtml");
app.UseStaticFiles();
}
app.UseStatusCodePages("text/html", Platform.Responses.DefaultResponse);
app.Use(async (context, next) => {
if (context.Request.Path == "/error") {
context.Response.StatusCode = StatusCodes.Status404NotFound;
await Task.CompletedTask;
} else {
await next();
}
});
app.Run(context => {
throw new Exception("Something has gone wrong");
});
app.Run();
The HostFilteringOptions class is used to configure the host filtering middleware using the properties described in table 16.11.
Table 16.11 The HostFilteringOptions properties
|
Name |
Description |
|---|---|
|
|
This property returns a |
|
|
When |
|
|
When |
In listing 16.21, I called the Clear method to remove the wildcard entry that has been loaded from the appsettings.json file and then called the Add method to accept all hosts in the example.com domain. Requests sent from the browser to localhost will no longer contain an acceptable Host header. You can see what happens by restarting ASP.NET Core and using the browser to request http://localhost:5000. The Host header middleware checks the Host header in the request, determines that the request hostname doesn’t match the AllowedHosts list, and terminates the request with the 400 status code, which indicates a bad request. Figure 16.14 shows the error message.
Figure 16.14 A request rejected based on the Host header
ASP.NET Core provides support for adding cookies to responses and reading those cookies when the client includes them in subsequent requests.
Sessions allow related requests to be identified to provide continuity across requests.
ASP.NET Core supports HTTPS requests and can be configured to disallow regular HTTP requests.
Limits can be applied to the rate of requests handled by endpoints.
All the examples in the earlier chapters in this part of the book have generated fresh responses for each request, which is easy to do when dealing with simple strings or small fragments of HTML. Most real projects deal with data that is expensive to produce and needs to be used as efficiently as possible. In this chapter, I describe the features that ASP.NET Core provides for caching data and caching entire responses. I also show you how to create and configure the services required to access data in a database using Entity Framework Core. Table 17.1 puts the ASP.NET Core features for working with data in context.
Table 17.1 Putting the ASP.NET Core data features in context
|
Question |
Answer |
|---|---|
|
What are they? |
The features described in this chapter allow responses to be produced using data that has been previously created, either because it was created for an earlier request or because it has been stored in a database. |
|
Why are they useful? |
Most web applications deal with data that is expensive to re-create for every request. The features in this chapter allow responses to be produced more efficiently and with fewer resources. |
|
How are they used? |
Data values are cached using a service. Responses are cached by a middleware component based on the |
|
Are there any pitfalls or limitations? |
For caching, it is important to test the effect of your cache policy before deploying the application to ensure you have found the right balance between efficiency and responsiveness. For Entity Framework Core, it is important to pay attention to the queries sent to the database to ensure that they are not retrieving large amounts of data that is processed and then discarded by the application. |
|
Are there any alternatives? |
All the features described in this chapter are optional. You can elect not to cache data or responses or to use an external cache. You can choose not to use a database or to access a database using a framework other than Entity Framework Core. |
Table 17.2 provides a guide to the chapter.
Table 17.2 Chapter guide
|
Problem |
Solution |
Listing |
|---|---|---|
|
Caching data values |
Set up a cache service and use it in endpoints and middleware components to store data values. |
3–6 |
|
Creating a persistent cache |
Use the database-backed cache. |
7–13 |
|
Caching entire responses |
Enable the response or output caching middleware. |
14-19 |
|
Storing application data |
Use Entity Framework Core. |
20-26, 29-31 |
|
Creating a database schema |
Create and apply migrations. |
27, 28 |
|
Accessing data in endpoints |
Consume the database context service. |
32 |
|
Including all request details in logging messages |
Enable the sensitive data logging feature. |
33 |
In this chapter, I continue to use the Platform project from chapter 16. To prepare for this chapter, replace the contents of the Program.cs file with the code shown in listing 17.1.
Listing 17.1 Replacing the contents of the Program.cs file in the Platform folder
var builder = WebApplication.CreateBuilder(args);
var app = builder.Build();
app.MapGet("/", async context => {
await context.Response.WriteAsync("Hello World!");
});
app.Run();
Start the application by opening a new PowerShell command prompt, navigating to the Platform project folder (which contains the Platform.csproj file), and running the command shown in listing 17.2.
Listing 17.2 Starting the ASP.NET Core runtime
dotnet run
Open a new browser tab, navigate to https://localhost:5000, and you will see the content shown in figure 17.1.
Figure 17.1 Running the example application
In most web applications, there will be some items of data that are relatively expensive to generate but are required repeatedly. The exact nature of the data is specific to each project, but repeatedly performing the same set of calculations can increase the resources required to host the application. To represent an expensive response, add a class file called SumEndpoint.cs to the Platform folder with the code shown in listing 17.3.
Listing 17.3 The contents of the SumEndpoint.cs file in the Platform folder
namespace Platform {
public class SumEndpoint {
public async Task Endpoint(HttpContext context) {
int count;
int.TryParse((string?)context.Request.RouteValues["count"],
out count);
long total = 0;
for (int i = 1; i <= count; i++) {
total += i;
}
string totalString = $"({DateTime.Now.ToLongTimeString()}) "
+ total;
await context.Response.WriteAsync(
$"({DateTime.Now.ToLongTimeString()}) Total for {count}"
+ $" values:\n{totalString}\n");
}
}
}
Listing 17.4 creates a route that uses the endpoint, which is applied using the MapEndpoint extension methods created in chapter 14.
Listing 17.4 Adding an endpoint in the Program.cs file in the Platform folder
var builder = WebApplication.CreateBuilder(args);
var app = builder.Build();
app.MapEndpoint<Platform.SumEndpoint>("/sum/{count:int=1000000000}");
app.MapGet("/", async context => {
await context.Response.WriteAsync("Hello World!");
});
app.Run();
Restart ASP.NET Core and use a browser to request http://localhost:5000/sum. The endpoint will sum 1,000,000,000 integer values and produce the result shown in figure 17.2.
Reload the browser window, and the endpoint will repeat the calculation. Both the timestamps change in the response, as shown in the figure, indicating that every part of the response was produced fresh for each request.
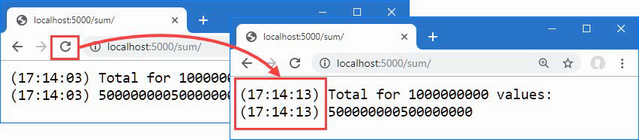
Figure 17.2 An expensive response
ASP.NET Core provides a service that can be used to cache data values through the IDistributedCache interface. Listing 17.5 revises the endpoint to declare a dependency on the service and use it to cache calculated values.
Listing 17.5 Using the cache service in the SumEndpoint.cs file in the Platform folder
using Microsoft.Extensions.Caching.Distributed;
namespace Platform {
public class SumEndpoint {
public async Task Endpoint(HttpContext context,
IDistributedCache cache) {
int count;
int.TryParse((string?)context.Request.RouteValues["count"],
out count);
string cacheKey = $"sum_{count}";
string? totalString = await cache.GetStringAsync(cacheKey);
if (totalString == null) {
long total = 0;
for (int i = 1; i <= count; i++) {
total += i;
}
totalString = $"({DateTime.Now.ToLongTimeString()}) "
+ total;
await cache.SetStringAsync(cacheKey, totalString,
new DistributedCacheEntryOptions {
AbsoluteExpirationRelativeToNow =
TimeSpan.FromMinutes(2)
});
}
await context.Response.WriteAsync(
$"({DateTime.Now.ToLongTimeString()}) Total for {count}"
+ $" values:\n{totalString}\n");
}
}
}
The cache service can store only byte arrays, which can be restrictive but allows for a range of IDistributedCache implementations to be used. There are extension methods available that allow strings to be used, which is a more convenient way of caching most data. Table 17.3 describes the most useful methods for using the cache.
Table 17.3 Useful IDistributedCache methods
|
Name |
Description |
|---|---|
|
|
This method returns the cached string associated with the specified key, or |
|
|
This method returns a |
|
|
This method stores a string in the cache using the specified key. The cache entry can be configured with an optional |
|
|
This method asynchronously stores a string in the cache using the specified key. The cache entry can be configured with an optional |
|
|
This method resets the expiry interval for the value associated with the key, preventing it from being flushed from the cache. |
|
|
This method asynchronously resets the expiry interval for the value associated with the key, preventing it from being flushed from the cache. |
|
|
This method removes the cached item associated with the key. |
|
|
This method asynchronously removes the cached item associated with the key. |
By default, entries remain in the cache indefinitely, but the SetString and SetStringAsync methods accept an optional DistributedCacheEntryOptions argument that is used to set an expiry policy, which tells the cache when to eject the item. Table 17.4 shows the properties defined by the DistributedCacheEntryOptions class.
Table 17.4 The DistributedCacheEntryOptions properties
|
Name |
Description |
|---|---|
|
|
This property is used to specify an absolute expiry date. |
|
|
This property is used to specify a relative expiry date. |
|
|
This property is used to specify a period of inactivity, after which the item will be ejected from the cache if it hasn’t been read. |
In listing 17.5, the endpoint uses the GetStringAsync to see whether there is a cached result available from a previous request. If there is no cached value, the endpoint performs the calculation and caches the result using the SetStringAsync method, with the AbsoluteExpirationRelativeToNow property to tell the cache to eject the item after two minutes.
...
await cache.SetStringAsync(cacheKey, totalStr,
new DistributedCacheEntryOptions {
AbsoluteExpirationRelativeToNow = TimeSpan.FromMinutes(2)
});
...
The next step is to set up the cache service, as shown in listing 17.6.
Listing 17.6 Adding a service in the Program.cs file in the Platform folder
var builder = WebApplication.CreateBuilder(args);
builder.Services.AddDistributedMemoryCache(opts => {
opts.SizeLimit = 200;
});
var app = builder.Build();
app.MapEndpoint<Platform.SumEndpoint>("/sum/{count:int=1000000000}");
app.MapGet("/", async context => {
await context.Response.WriteAsync("Hello World!");
});
app.Run();
AddDistributedMemoryCache is the same method I used in chapter 16 to provide the data store for session data. This is one of the three methods used to select an implementation for the IDistributedCache service, as described in table 17.5.
Table 17.5 The cache service implementation methods
|
Name |
Description |
|---|---|
|
|
This method sets up an in-memory cache. |
|
|
This method sets up a cache that stores data in SQL Server and is available when the |
|
|
This method sets up a Redis cache and is available when the |
Listing 17.6 uses the AddDistributedMemoryCache method to create an in-memory cache as the implementation for the IDistributedCache service. This cache is configured using the MemoryDistributedCacheOptions class, whose most useful properties are described in table 17.6.
Table 17.6 Useful MemoryCacheOptions properties
|
Name |
Description |
|---|---|
|
|
This property is used to set a |
|
|
This property specifies the maximum number of items in the cache. When the size is reached, the cache will eject items. |
|
|
This property specifies the percentage by which the size of the cache is reduced when |
The statement in listing 17.6 uses the SizeLimit property to restrict the cache to 200 items. Care must be taken when using an in-memory cache to find the right balance between allocating enough memory for the cache to be effective without exhausting server resources.
To see the effect of the cache, restart ASP.NET Core and request the http://localhost:5000/sum URL. Reload the browser, and you will see that only one of the timestamps will change, as shown in figure 17.3. This is because the cache has provided the calculation response, which allows the endpoint to produce the result without having to repeat the calculation.
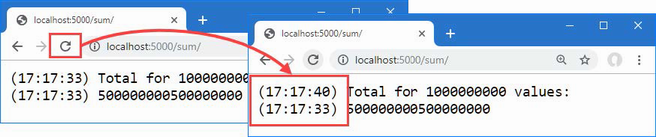
Figure 17.3 Caching data values
If you wait for two minutes and then reload the browser, then both timestamps will change because the cached result will have been ejected, and the endpoint will have to perform the calculation to produce the result.
The cache created by the AddDistributedMemoryCache method isn’t distributed, despite the name. The items are stored in memory as part of the ASP.NET Core process, which means that applications that run on multiple servers or containers don’t share cached data. It also means that the contents of the cache are lost when ASP.NET Core is stopped.
The AddDistributedSqlServerCache method stores the cache data in a SQL Server database, which can be shared between multiple ASP.NET Core servers and which stores the data persistently.
The first step is to create a database that will be used to store the cached data. You can store the cached data alongside the application’s other data, but for this chapter, I am going to use a separate database, which will be named CacheDb. You can create the database using Azure Data Studio or SQL Server Management Studio, both of which are available for free from Microsoft. Databases can also be created from the command line using sqlcmd. Open a new PowerShell command prompt and run the command shown in listing 17.7 to connect to the LocalDB server.
Listing 17.7 Connecting to the database server
sqlcmd -S "(localdb)\MSSQLLocalDB"
Pay close attention to the argument that specifies the database. There is one backslash, which is followed by MSSQLLocalDB. It can be hard to spot the repeated letters: MS-SQL-LocalDB (but without the hyphens).
When the connection has been established, you will see a 1> prompt. Enter the commands shown in listing 17.8 and press the Enter key after each command.
Listing 17.8 Creating the database
CREATE DATABASE CacheDb GO
If no errors are reported, then enter exit and press Enter to terminate the connection.
Run the commands shown in listing 17.9 to install the package required to create a cache.
Listing 17.9 Installing the SQL cache package
dotnet tool uninstall --global dotnet-sql-cache dotnet tool install --global dotnet-sql-cache --version 7.0.0
The first command removes any existing version of the dotnet-sql-cache package, and the second command installs the version required for the examples in this book. The next step is to run the command shown in listing 17.10 to create a table in the new database, using the command installed by the dotnet-sql-cache package.
Listing 17.10 Creating the cache database table
dotnet sql-cache create "Server=(localdb)\MSSQLLocalDB;Database=CacheDb" dbo DataCache
The arguments for this command are the connection string that specifies the database, the schema, and the name of the table that will be used to store the cached data. Enter the command on a single line and press Enter. It will take a few seconds for the tool to connect to the database. If the process is successful, you will see the following message:
Table and index were created successfully.
Creating the persistent cache service
Now that the database is ready, I can create the service that will use it to store cached data. To add the NuGet package required for SQL Server caching support, open a new PowerShell command prompt, navigate to the Platform project folder, and run the command shown in listing 17.11. (If you are using Visual Studio, you can add the package by selecting Project > Manage NuGet Packages.)
Listing 17.11 Adding a package to the project
dotnet add package Microsoft.Extensions.Caching.SqlServer --version 7.0.0
The next step is to define a connection string, which describes the database connection in the JSON configuration file, as shown in listing 17.12.
Listing 17.12 A connection string in the appsettings.json file in the Platform folder
{
"Logging": {
"LogLevel": {
"Default": "Information",
"Microsoft.AspNetCore": "Warning"
}
},
"AllowedHosts": "*",
"Location": {
"CityName": "Buffalo"
},
"ConnectionStrings": {
"CacheConnection": "Server=(localdb)\\MSSQLLocalDB;Database=CacheDb"
}
}
Notice that the connection string uses two backslash characters (\\) to escape the character in the JSON file. Listing 17.13 changes the implementation for the cache service to use SQL Server with the connection string from listing 17.12.
Listing 17.13 Using a persistent data cache in the Program.cs file in the Platform folder
var builder = WebApplication.CreateBuilder(args);
//builder.Services.AddDistributedMemoryCache(opts => {
// opts.SizeLimit = 200;
//});
builder.Services.AddDistributedSqlServerCache(opts => {
opts.ConnectionString
= builder.Configuration["ConnectionStrings:CacheConnection"];
opts.SchemaName = "dbo";
opts.TableName = "DataCache";
});
var app = builder.Build();
app.MapEndpoint<Platform.SumEndpoint>("/sum/{count:int=1000000000}");
app.MapGet("/", async context => {
await context.Response.WriteAsync("Hello World!");
});
app.Run();
The IConfiguration service is used to access the connection string from the application’s configuration data. The cache service is created using the AddDistributedSqlServerCache method and is configured using an instance of the SqlServerCacheOptions class, whose most useful properties are described in table 17.7.
Table 17.7 Useful SqlServerCacheOptions properties
|
Name |
Description |
|---|---|
|
|
This property specifies the connection string, which is conventionally stored in the JSON configuration file and accessed through the |
|
|
This property specifies the schema name for the cache table. |
|
|
This property specifies the name of the cache table. |
|
|
This property specifies how often the table is scanned for expired items. The default is 30 minutes. |
|
|
This property specifies how long an item remains unread in the cache before it expires. The default is 20 minutes. |
The listing uses the ConnectionString, SchemaName, and TableName properties to configure the cache middleware to use the database table. Restart ASP.NET Core and use a browser to request the http://localhost:5000/sum URL. There is no change in the response produced by the application, which is shown in figure 17.4, but you will find that the cached responses are persistent and will be used even when you restart ASP.NET Core.
An alternative to caching individual data items is to cache entire responses, which can be a useful approach if a response is expensive to compose and is likely to be repeated. Caching responses requires the addition of a service and a middleware component, as shown in listing 17.14.
Listing 17.14 Configuring Caching in the Program.cs File in the Platform Folder
using Platform.Services;
var builder = WebApplication.CreateBuilder(args);
builder.Services.AddDistributedSqlServerCache(opts => {
opts.ConnectionString
= builder.Configuration["ConnectionStrings:CacheConnection"];
opts.SchemaName = "dbo";
opts.TableName = "DataCache";
});
builder.Services.AddResponseCaching();
builder.Services.AddSingleton<IResponseFormatter,
HtmlResponseFormatter>();
var app = builder.Build();
app.UseResponseCaching();
app.MapEndpoint<Platform.SumEndpoint>("/sum/{count:int=1000000000}");
app.MapGet("/", async context => {
await context.Response.WriteAsync("Hello World!");
});
app.Run();
The AddResponseCaching method is used to set up the service used by the cache. The middleware component is added with the UseResponseCaching method, which should be called before any endpoint or middleware that needs its responses cached.
I have also defined the IResponseFormatter service, which I used to explain how dependency injection works in chapter 14. Response caching is used only in certain circumstances, and, as I explain shortly, demonstrating the feature requires an HTML response.
In listing 17.15, I have updated the SumEndpoint class so that it requests response caching instead of caching just a data value.
Listing 17.15 Using response caching in the SumEndpoint.cs file in the Platform folder
//using Microsoft.Extensions.Caching.Distributed;
using Platform.Services;
namespace Platform {
public class SumEndpoint {
public async Task Endpoint(HttpContext context,
IResponseFormatter formatter, LinkGenerator generator) {
int count;
int.TryParse((string?)context.Request.RouteValues["count"],
out count);
long total = 0;
for (int i = 1; i <= count; i++) {
total += i;
}
string totalString = $"({DateTime.Now.ToLongTimeString()}) "
+ total;
context.Response.Headers["Cache-Control"]
= "public, max-age=120";
string? url = generator.GetPathByRouteValues(context, null,
new { count = count });
await formatter.Format(context,
$"<div>({DateTime.Now.ToLongTimeString()}) Total for "
+ $"{count} values:</div><div>{totalString}</div>"
+ $"<a href={url}>Reload</a>");
}
}
}
Some of the changes to the endpoint enable response caching, but others are just to demonstrate that it is working. For enabling response caching, the important statement is the one that adds a header to the response, like this:
... context.Response.Headers["Cache-Control"] = "public, max-age=120"; ...
The Cache-Control header is used to control response caching. The middleware will only cache responses that have a Cache-Control header that contains the public directive. The max-age directive is used to specify the period that the response can be cached for, expressed in seconds. The Cache-Control header used in listing 17.15 enables caching and specifies that responses can be cached for two minutes.
Enabling response caching is simple, but checking that it is working requires care. When you reload the browser window or press Return in the URL bar, browsers will include a Cache-Control header in the request that sets the max-age directive to zero, which bypasses the response cache and causes a new response to be generated by the endpoint. The only reliable way to request a URL without the Cache-Control header is to navigate using an HTML anchor element, which is why the endpoint in listing 17.15 uses the IResponseFormatter service to generate an HTML response and uses the LinkGenerator service to create a URL that can be used in the anchor element’s href attribute.
To check the response cache, restart ASP.NET Core and use the browser to request http://localhost:5000/sum. Once the response has been generated, click the Reload link to request the same URL. You will see that neither of the timestamps in the response change, indicating that the entire response has been cached, as shown in figure 17.4.
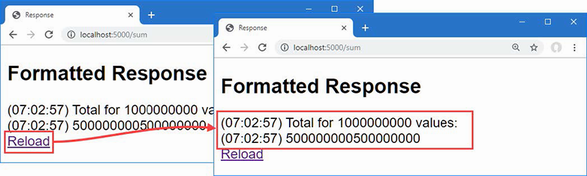
Figure 17.4 Caching responses
The Cache-Control header can be combined with the Vary header to provide fine-grained control over which requests are cached. See https://developer.mozilla.org/en-US/docs/Web/HTTP/Headers/Cache-Control and https://developer.mozilla.org/en-US/docs/Web/HTTP/Headers/Vary for details of the features provided by both headers.
The use of the Cache-Control header follows the intended design of HTTP but limits the benefits of caching responses. ASP.NET Core includes an alternative approach to caching, known as output caching, which overcomes these problems and provides a more configurable—albeit complex—set of features. Caching is applied to endpoints and to prepare for this example, I need to update the code written in chapter 14 so that it produces a result on which the caching extension method can be invoked, as shown in listing 17.16.
Listing 17.16 A result in the EndpointExtensions.cs file in the Platform/Services folder
using System.Reflection;
namespace Microsoft.AspNetCore.Builder {
public static class EndpointExtensions {
public static IEndpointConventionBuilder MapEndpoint<T>(
this IEndpointRouteBuilder app,
string path, string methodName = "Endpoint") {
MethodInfo? methodInfo = typeof(T).GetMethod(methodName);
if (methodInfo?.ReturnType != typeof(Task)) {
throw new System.Exception("Method cannot be used");
}
ParameterInfo[] methodParams = methodInfo!.GetParameters();
return app.MapGet(path, context => {
T endpointInstance =
ActivatorUtilities.CreateInstance<T>
(context.RequestServices);
return (Task)methodInfo.Invoke(endpointInstance!,
methodParams.Select(p =>
p.ParameterType == typeof(HttpContext)
? context
: context.RequestServices.GetService(p.ParameterType))
.ToArray())!;
});
}
}
}
This change alters the MapEndpoint<T> extension method to produce an implementation of the IEndpointConventionBuilder interface, which is the result produced by the built-in MapGet method and the other methods used to create endpoints. Listing 17.17 replaces the response caching from the previous section with output caching.
Listing 17.17 Using output caching in the Program.cs file in the Platform folder
using Platform.Services;
var builder = WebApplication.CreateBuilder(args);
//builder.Services.AddDistributedSqlServerCache(opts => {
// opts.ConnectionString
// = builder.Configuration["ConnectionStrings:CacheConnection"];
// opts.SchemaName = "dbo";
// opts.TableName = "DataCache";
//});
builder.Services.AddOutputCache();
//builder.Services.AddResponseCaching();
builder.Services.AddSingleton<IResponseFormatter,
HtmlResponseFormatter>();
var app = builder.Build();
//app.UseResponseCaching();
app.UseOutputCache();
app.MapEndpoint<Platform
.SumEndpoint>("/sum/{count:int=1000000000}")
.CacheOutput();
app.MapGet("/", async context => {
await context.Response.WriteAsync("Hello World!");
});
app.Run();
This is the simplest output caching configuration, and it is applied in three parts. First, the AddOutputCache method is called to set up the services required for caching. Second, the UseOutputCache method is called to register the caching middleware, which will short-circuit the pipeline where requests are received that can be handled using cached content. The final step enables caching for a specific endpoint, which is done using the CacheOutput extension method:
...
app.MapEndpoint<Platform
.SumEndpoint>("/sum/{count:int=1000000000}")
.CacheOutput();
...
This extension method enables caching for the sum endpoint. The final step is to update the endpoint so that it doesn’t set the caching header, as shown in listing 17.18.
Listing 17.18 Disabling the header in the SumEndpoint.cs file in the Platform folder
//using Microsoft.Extensions.Caching.Distributed;
using Platform.Services;
namespace Platform {
public class SumEndpoint {
public async Task Endpoint(HttpContext context,
IResponseFormatter formatter, LinkGenerator generator) {
int count;
int.TryParse((string?)context.Request.RouteValues["count"],
out count);
long total = 0;
for (int i = 1; i <= count; i++) {
total += i;
}
string totalString = $"({DateTime.Now.ToLongTimeString()}) "
+ total;
//context.Response.Headers["Cache-Control"]
// = "public, max-age=120";
string? url = generator.GetPathByRouteValues(context, null,
new { count = count });
await formatter.Format(context,
$"<div>({DateTime.Now.ToLongTimeString()}) Total for "
+ $"{count} values:</div><div>{totalString}</div>"
+ $"<a href={url}>Reload</a>");
}
}
}
The endpoint doesn’t need to manage the caching of its content directly, which means that the cache settings can be altered without needing to change the code that generates responses.
The configuration used in listing 17.18 applies the default caching policy, which caches content for one minute and caches only HTTP GET or HEAD requests that produce HTTP 200 responses, and which are not authenticated or set cookies.
To check the output cache, restart ASP.NET Core and use the browser to request http://localhost:5000/sum. You will see the same output as in earlier examples, but now the cache is applied when the browser is reloaded and not just when the user clicks on the link, as shown in figure 17.5.
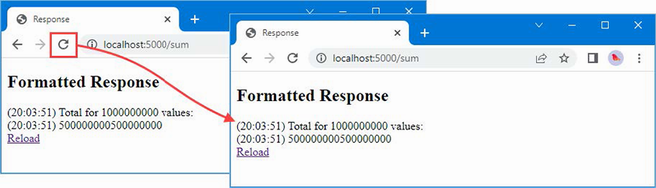
Figure 17.5 Output caching applies to all requests for a given URL
The output caching feature supports custom caching policies and allows different policies to be applied to endpoints. Caching policies are defined using the options pattern, as shown in listing 17.19.
Listing 17.19 A custom configuration in the Program.cs file in the Platform folder
using Platform.Services;
var builder = WebApplication.CreateBuilder(args);
builder.Services.AddOutputCache(opts => {
opts.AddBasePolicy(policy => {
policy.Cache();
policy.Expire(TimeSpan.FromSeconds(10));
});
opts.AddPolicy("30sec", policy => {
policy.Cache();
policy.Expire(TimeSpan.FromSeconds(30));
});
});
builder.Services.AddSingleton<IResponseFormatter,
HtmlResponseFormatter>();
var app = builder.Build();
app.UseOutputCache();
app.MapEndpoint<Platform
.SumEndpoint>("/sum/{count:int=1000000000}")
.CacheOutput();
app.MapEndpoint<Platform
.SumEndpoint>("/sum30/{count:int=1000000000}")
.CacheOutput("30sec");
app.MapGet("/", async context => {
await context.Response.WriteAsync("Hello World!");
});
app.Run();
The options pattern is applied to an OutputCacheOptions object, whose most useful methods are described in table 17.8.
Table 17.8 Useful OutputCacheOptions methods
|
Name |
Description |
|---|---|
|
|
This method is used to define the default policy |
|
|
This method is used to create a policy that can be applied to specific endpoints. |
The methods described in table 17.8 define policies using the methods defined by the OutputCachePolicyBuilder class. The basic methods are described in table 17.9.
Table 17.9 The basic OutputCachePolicyBuilder methods
|
Name |
Description |
|---|---|
|
|
This method sets the expiry interval for cached output, expressed as a |
|
|
This method is used to enable or disable locking in the cache. Locking is enabled by default and should only be disabled with caution since it can lead to unexpected behavior. |
|
|
This method disables caching in the policy. |
|
|
This method enables caching in the policy. |
The policies in listing 17.19 use the Cache and Expire methods. The AddBasePolicy method is used to change the cache duration for the default policy. The AddPolicy method is used to create a new cache policy named 30sec, which caches output for 30 seconds:
...
opts.AddPolicy("30sec", policy => {
policy.Cache();
policy.Expire(TimeSpan.FromSeconds(30));
});
...
The name given to a policy created with the AddPolicy method is used to apply the policy to an endpoint, like this:
...
app.MapEndpoint<Platform
.SumEndpoint>("/sum30/{count:int=1000000000}")
.CacheOutput("30sec");
...
The result is that requests to the /sum URL are cached using the default policy, while requests to the /sum30 URL are cached using the 30sec policy, causing the output from the endpoints to be cached for a different duration.
Not all data values are produced directly by the application, and most projects will need to access data in a database. Entity Framework Core is well-integrated into the ASP.NET Core platform, with good support for creating a database from C# classes and for creating C# classes to represent an existing database. In the sections that follow, I demonstrate the process for creating a simple data model, using it to create a database, and querying that database in an endpoint.
Entity Framework Core requires a global tool package that is used to manage databases from the command line and to manage packages for the project that provides data access. To install the tools package, open a new PowerShell command prompt and run the commands shown in listing 17.20.
Listing 17.20 Installing the Entity Framework Core Global Tool Package
dotnet tool uninstall --global dotnet-ef dotnet tool install --global dotnet-ef --version 7.0.0
The first command removes any existing version of the dotnet-ef package, and the second command installs the version required for the examples in this book. This package provides the dotnet ef commands that you will see in later examples. To ensure the package is working as expected, run the command shown in listing 17.21.
Listing 17.21 Testing the Entity Framework Core Global Tool
dotnet ef --help
This command shows the help message for the global tool and produces the following output:
Entity Framework Core .NET Command-line Tools 7.0.0 Usage: dotnet ef [options] [command] Options: --version Show version information -h|--help Show help information -v|--verbose Show verbose output. --no-color Don't colorize output. --prefix-output Prefix output with level. Commands: database Commands to manage the database. dbcontext Commands to manage DbContext types. migrations Commands to manage migrations. Use "dotnet ef [command] --help" for more information about a command.
Entity Framework Core also requires packages to be added to the project. If you are using Visual Studio Code or prefer working from the command line, navigate to the Platform project folder (the folder that contains the Platform.csproj file) and run the commands shown in listing 17.22.
Listing 17.22 Adding Entity Framework Core Packages to the Project
dotnet add package Microsoft.EntityFrameworkCore.Design --version 7.0.0 dotnet add package Microsoft.EntityFrameworkCore.SqlServer --version 7.0.0
For this chapter, I am going to define the data model using C# classes and use Entity Framework Core to create the database and schema. Create the Platform/Models folder and add to it a class file called Calculation.cs with the contents shown in listing 17.23.
Listing 17.23 The contents of the Calculation.cs file in the Platform/Models folder
namespace Platform.Models {
public class Calculation {
public long Id { get; set; }
public int Count { get; set; }
public long Result { get; set; }
}
}
You can see more complex data models in other chapters, but for this example, I am going to keep with the theme of this chapter and model the calculation performed in earlier examples. The Id property will be used to create a unique key for each object stored in the database, and the Count and Result properties will describe a calculation and its result.
Entity Framework Core uses a context class that provides access to the database. Add a file called CalculationContext.cs to the Platform/Models folder with the content shown in listing 17.24.
Listing 17.24 The CalculationContext.cs file in the Platform/Models folder
using Microsoft.EntityFrameworkCore;
namespace Platform.Models {
public class CalculationContext : DbContext {
public CalculationContext(
DbContextOptions<CalculationContext> opts) : base(opts) { }
public DbSet<Calculation> Calculations => Set<Calculation>();
}
}
The CalculationContext class defines a constructor that is used to receive an options object that is passed on to the base constructor. The Calculations property provides access to the Calculation objects that Entity Framework Core will retrieve from the database.
Access to the database is provided through a service, as shown in listing 17.25.
Listing 17.25 Configuring the data service in the Program.cs file in the Platform folder
using Platform.Services;
using Platform.Models;
using Microsoft.EntityFrameworkCore;
var builder = WebApplication.CreateBuilder(args);
builder.Services.AddOutputCache(opts => {
opts.AddBasePolicy(policy => {
policy.Cache();
policy.Expire(TimeSpan.FromSeconds(10));
});
opts.AddPolicy("30sec", policy => {
policy.Cache();
policy.Expire(TimeSpan.FromSeconds(30));
});
});
builder.Services.AddSingleton<IResponseFormatter,
HtmlResponseFormatter>();
builder.Services.AddDbContext<CalculationContext>(opts => {
opts.UseSqlServer(
builder.Configuration["ConnectionStrings:CalcConnection"]);
});
var app = builder.Build();
app.UseOutputCache();
app.MapEndpoint<Platform
.SumEndpoint>("/sum/{count:int=1000000000}")
.CacheOutput();
app.MapEndpoint<Platform
.SumEndpoint>("/sum30/{count:int=1000000000}")
.CacheOutput("30sec");
app.MapGet("/", async context => {
await context.Response.WriteAsync("Hello World!");
});
app.Run();
The AddDbContext method creates a service for an Entity Framework Core context class. The method receives an options object that is used to select the database provider, which is done with the UseSqlServer method. The IConfiguration service is used to get the connection string for the database, which is defined in listing 17.26.
Listing 17.26 A connection string in the appsettings.json file in the Platform folder
{
"Logging": {
"LogLevel": {
"Default": "Information",
"Microsoft.AspNetCore": "Warning",
"Microsoft.EntityFrameworkCore": "Information"
}
},
"AllowedHosts": "*",
"Location": {
"CityName": "Buffalo"
},
"ConnectionStrings": {
"CacheConnection": "Server=(localdb)\\MSSQLLocalDB;Database=CacheDb",
"CalcConnection": "Server=(localdb)\\MSSQLLocalDB;Database=CalcDb"
}
}
The listing also sets the logging level for the Microsoft.EntityFrameworkCore category, which will show the SQL statements that are used by Entity Framework Core to query the database.
Entity Framework Core manages the relationship between data model classes and the database using a feature called migrations. When changes are made to the model classes, a new migration is created that modifies the database to match those changes. To create the initial migration, which will create a new database and prepare it to store Calculation objects, open a new PowerShell command prompt, navigate to the folder that contains the Platform.csproj file, and run the command shown in listing 17.27.
Listing 17.27 Creating a migration
dotnet ef migrations add Initial
The dotnet ef commands relate to Entity Framework Core. The command in listing 17.27 creates a new migration named Initial, which is the name conventionally given to the first migration for a project. You will see that a Migrations folder has been added to the project and that it contains class files whose statements prepare the database so that it can store the objects in the data model. To apply the migration, run the command shown in listing 17.28 in the Platform project folder.
Listing 17.28 Applying a migration
dotnet ef database update
This command executes the commands in the migration and uses them to prepare the database, which you can see in the SQL statements written to the command prompt.
Most applications require some seed data, especially during development. Entity Framework Core does provide a database seeding feature, but it is of limited use for most projects because it doesn’t allow data to be seeded where the database allocates unique keys to the objects it stores. This is an important feature in most data models because it means the application doesn’t have to worry about allocating unique key values.
A more flexible approach is to use the regular Entity Framework Core features to add seed data to the database. Create a file called SeedData.cs in the Platform/Models folder with the code shown in listing 17.29.
Listing 17.29 The contents of the SeedData.cs file in the Platform/Models folder
using Microsoft.EntityFrameworkCore;
namespace Platform.Models {
public class SeedData {
private CalculationContext context;
private ILogger<SeedData> logger;
private static Dictionary<int, long> data
= new Dictionary<int, long>() {
{1, 1}, {2, 3}, {3, 6}, {4, 10}, {5, 15},
{6, 21}, {7, 28}, {8, 36}, {9, 45}, {10, 55}
};
public SeedData(CalculationContext dataContext,
ILogger<SeedData> log) {
context = dataContext;
logger = log;
}
public void SeedDatabase() {
context.Database.Migrate();
if (context.Calculations?.Count() == 0) {
logger.LogInformation("Preparing to seed database");
context.Calculations.AddRange(
data.Select(kvp => new Calculation() {
Count = kvp.Key, Result = kvp.Value
}));
context.SaveChanges();
logger.LogInformation("Database seeded");
} else {
logger.LogInformation("Database not seeded");
}
}
}
}
The SeedData class declares constructor dependencies on the CalculationContext and ILogger<T> types, which are used in the SeedDatabase method to prepare the database. The context’s Database.Migrate method is used to apply any pending migrations to the database, and the Calculations property is used to store new data using the AddRange method, which accepts a sequence of Calculation objects.
The new objects are stored in the database using the SaveChanges method. To use the SeedData class, make the changes shown in listing 17.30 to the Program.cs file.
Listing 17.30 Enabling database seeding in the Program.cs file in the Platform folder
using Microsoft.EntityFrameworkCore;
using Platform.Models;
using Platform.Services;
var builder = WebApplication.CreateBuilder(args);
builder.Services.AddOutputCache(opts => {
opts.AddBasePolicy(policy => {
policy.Cache();
policy.Expire(TimeSpan.FromSeconds(10));
});
opts.AddPolicy("30sec", policy => {
policy.Cache();
policy.Expire(TimeSpan.FromSeconds(30));
});
});
builder.Services.AddSingleton<IResponseFormatter,
HtmlResponseFormatter>();
builder.Services.AddDbContext<CalculationContext>(opts => {
opts.UseSqlServer(
builder.Configuration["ConnectionStrings:CalcConnection"]);
});
builder.Services.AddTransient<SeedData>();
var app = builder.Build();
app.UseOutputCache();
app.MapEndpoint<Platform
.SumEndpoint>("/sum/{count:int=1000000000}")
.CacheOutput();
app.MapEndpoint<Platform
.SumEndpoint>("/sum30/{count:int=1000000000}")
.CacheOutput("30sec");
app.MapGet("/", async context => {
await context.Response.WriteAsync("Hello World!");
});
bool cmdLineInit = (app.Configuration["INITDB"] ?? "false") == "true";
if (app.Environment.IsDevelopment() || cmdLineInit) {
var seedData = app.Services.GetRequiredService<SeedData>();
seedData.SeedDatabase();
}
if (!cmdLineInit) {
app.Run();
}
I create a service for the SeedData class, which means that it will be instantiated, and its dependencies will be resolved, which is more convenient than working directly with the class constructor.
If the hosting environment is Development, the database will be seeded automatically as the application starts. It can also be useful to seed the database explicitly, especially when setting up the application for staging or production testing. This statement checks for a configuration setting named INITDB:
...
bool cmdLineInit = (app.Configuration["INITDB"] ?? "false") == "true";
...
This setting can be supplied on the command line to seed the database, after which the application will terminate because the Run method, which starts listening for HTTP requests, is never called.
To seed the database, open a new PowerShell command prompt, navigate to the project folder, and run the command shown in listing 17.31.
Listing 17.31 Seeding the database
dotnet run INITDB=true
The application will start, and the database will be seeded with the results for the ten calculations defined by the SeedData class, after which the application will terminate. During the seeding process, you will see the SQL statements that are sent to the database, which check to see whether there are any pending migrations, count the number of rows in the table used to store Calculation data, and, if the table is empty, add the seed data.
Endpoints and middleware components access Entity Framework Core data by declaring a dependency on the context class and using its DbSet<T> properties to perform LINQ queries. The LINQ queries are translated into SQL and sent to the database. The row data received from the database is used to create data model objects that are used to produce responses. Listing 17.32 updates the SumEndpoint class to use Entity Framework Core.
Listing 17.32 Using a database in the SumEndpoint.cs file in the Platform folder
//using Platform.Services;
using Platform.Models;
namespace Platform {
public class SumEndpoint {
public async Task Endpoint(HttpContext context,
CalculationContext dataContext) {
int count;
int.TryParse((string?)context.Request.RouteValues["count"],
out count);
long total = dataContext.Calculations?
.FirstOrDefault(c => c.Count == count)?.Result ?? 0;
if (total == 0) {
for (int i = 1; i <= count; i++) {
total += i;
}
dataContext.Calculations?.Add(new() {
Count = count, Result = total
});
await dataContext.SaveChangesAsync();
}
string totalString = $"({DateTime.Now.ToLongTimeString()}) "
+ total;
await context.Response.WriteAsync(
$"({DateTime.Now.ToLongTimeString()}) Total for {count}"
+ $" values:\n{totalString}\n");
}
}
}
The endpoint uses the LINQ FirstOrDefault to search for a stored Calculation object for the calculation that has been requested like this:
...
dataContext.Calculations?
.FirstOrDefault(c => c.Count == count)?.Result ?? 0;
...
If an object has been stored, it is used to prepare the response. If not, then the calculation is performed, and a new Calculation object is stored by these statements:
...
dataContext.Calculations?.Add(new () { Count = count, Result = total});
await dataContext.SaveChangesAsync();
...
The Add method is used to tell Entity Framework Core that the object should be stored, but the update isn’t performed until the SaveChangesAsync method is called. To see the effect of the changes, restart ASP.NET Core MVC (without the INITDB argument if you are using the command line) and request the http://localhost:5000/sum/10 URL. This is one of the calculations with which the database has been seeded, and you will be able to see the query sent to the database in the logging messages produced by the application.
...
Executing DbCommand [Parameters=[@__count_0='?' (DbType = Int32)],
CommandType='Text', CommandTimeout='30']
SELECT TOP(1) [c].[Id], [c].[Count], [c].[Result]
FROM [Calculations] AS [c]
WHERE [c].[Count] = @__count_0
...
If you request http://localhost:5000/sum/100, the database will be queried, but no result will be found. The endpoint performs the calculation and stores the result in the database before producing the result shown in figure 17.6.
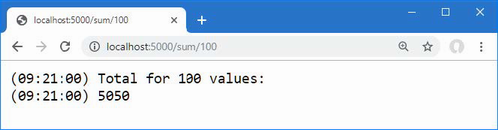
Figure 17.6 Performing a calculation
Once a result has been stored in the database, subsequent requests for the same URL will be satisfied using the stored data. You can see the SQL statement used to store the data in the logging output produced by Entity Framework Core.
...
Executing DbCommand [Parameters=[@p0='?' (DbType = Int32),
@p1='?' (DbType = Int64)],
CommandType='Text', CommandTimeout='30']
SET NOCOUNT ON;
INSERT INTO [Calculations] ([Count], [Result])
VALUES (@p0, @p1);
SELECT [Id]
FROM [Calculations]
WHERE @@ROWCOUNT = 1 AND [Id] = scope_identity();
...
Enabling sensitive data logging
Entity Framework Core doesn’t include parameter values in the logging messages it produces, which is why the logging output contains question marks, like this:
...
Executing DbCommand [Parameters=[@__count_0='?' (DbType = Int32)],
CommandType='Text', CommandTimeout='30']
...
The data is omitted as a precaution to prevent sensitive data from being stored in logs. If you are having problems with queries and need to see the values sent to the database, then you can use the EnableSensitiveDataLogging method when configuring the database context, as shown in listing 17.33.
Listing 17.33 Sensitive data logging in the Program.cs file in the Platform folder
...
builder.Services.AddDbContext<CalculationContext>(opts => {
opts.UseSqlServer(
builder.Configuration["ConnectionStrings:CalcConnection"]);
opts.EnableSensitiveDataLogging(true);
});
...
Restart ASP.NET Core MVC and request the http://localhost:5000/sum/100 URL again. When the request is handled, Entity Framework Core will include parameter values in the logging message it creates to show the SQL query, like this:
...
Executed DbCommand (40ms) [Parameters=[@__count_0='100'],
CommandType='Text', CommandTimeout='30']
SELECT TOP(1) [c].[Id], [c].[Count], [c].[Result]
FROM [Calculations] AS [c]
WHERE [c].[Count] = @__count_0
...
This is a feature that should be used with caution because logs are often accessible by people who would not usually have access to the sensitive data that applications handle, such as credit card numbers and account details.
ASP.NET Core provides support for caching individual data values, which can be accessed by endpoints.
Entire responses can be cached, which means that requests are serviced from the cache without using the endpoint.
ASP.NET Core provides two different middleware components for caching responses. The response cache requires a header to be set and only uses cached responses for some requests. The output cache is more complex, but more comprehensive, and uses cached responses more widely.
Entity Framework Core provides access to relational data. Entity Framework Core is configured as a service and consumed by endpoints via dependency injection. Entity Framework Core can be used to create a database from a set of model classes and is queried using LINQ.
In this chapter, you will create the example project used throughout this part of the book. The project contains a simple data model, a client-side package for formatting HTML content, and a simple request pipeline.
Open a new PowerShell command prompt and run the commands shown in listing 18.1.
Listing 18.1 Creating the project
dotnet new globaljson --sdk-version 7.0.100 --output WebApp dotnet new web --no-https --output WebApp --framework net7.0 dotnet new sln -o WebApp dotnet sln WebApp add WebApp
If you are using Visual Studio, open the WebApp.sln file in the WebApp folder. If you are using Visual Studio Code, open the WebApp folder. Click the Yes button when prompted to add the assets required for building and debugging the project, as shown in figure 18.1.
Figure 18.1 Adding project assets
Open the launchSettings.json file in the WebApp/Properties folder, change the HTTP port, and disable automatic browser launching, as shown in listing 18.2.
Listing 18.2 Setting the port in the launchSettings.json file in the Properties folder
{
"iisSettings": {
"windowsAuthentication": false,
"anonymousAuthentication": true,
"iisExpress": {
"applicationUrl": "http://localhost:5000",
"sslPort": 0
}
},
"profiles": {
"WebApp": {
"commandName": "Project",
"dotnetRunMessages": true,
"launchBrowser": false,
"applicationUrl": "http://localhost:5000",
"environmentVariables": {
"ASPNETCORE_ENVIRONMENT": "Development"
}
},
"IIS Express": {
"commandName": "IISExpress",
"launchBrowser": true,
"environmentVariables": {
"ASPNETCORE_ENVIRONMENT": "Development"
}
}
}
}
A data model helps demonstrate the different ways that web applications can be built using ASP.NET Core, showing how complex responses can be composed and how data can be submitted by the user. In the sections that follow, I create a simple data model and use it to create the database schema that will be used to store the application’s data.
The data model will use Entity Framework Core to store and query data in a SQL Server LocalDB database. To add the NuGet packages for Entity Framework Core, use a PowerShell command prompt to run the commands shown in listing 18.3 in the WebApp project folder.
Listing 18.3 Adding packages to the project
dotnet add package Microsoft.EntityFrameworkCore.Design --version 7.0.0 dotnet add package Microsoft.EntityFrameworkCore.SqlServer --version 7.0.0
If you are using Visual Studio, you can add the packages by selecting Project > Manage NuGet Packages. Take care to choose the correct version of the packages to add to the project.
If you have not followed the examples in earlier chapters, you will need to install the global tool package that is used to create and manage Entity Framework Core migrations. Run the commands shown in listing 18.4 to remove any existing version of the package and install the version required for this book. (You can skip these commands if you installed this version of the tools package in earlier chapters.)
Listing 18.4 Installing a global tool package
dotnet tool uninstall --global dotnet-ef dotnet tool install --global dotnet-ef --version 7.0.0
The data model for this part of the book will consist of three related classes: Product, Supplier, and Category. Create a new folder named Models and add to it a class file named Category.cs, with the contents shown in listing 18.5.
Listing 18.5 The contents of the Category.cs file in the Models folder
namespace WebApp.Models {
public class Category {
public long CategoryId { get; set; }
public required string Name { get; set; }
public IEnumerable<Product>? Products { get; set; }
}
}
Add a class called Supplier.cs to the Models folder and use it to define the class shown in listing 18.6.
Listing 18.6 The contents of the Supplier.cs file in the Models folder
namespace WebApp.Models {
public class Supplier {
public long SupplierId { get; set; }
public required string Name { get; set; }
public required string City { get; set; }
public IEnumerable<Product>? Products { get; set; }
}
}
Next, add a class named Product.cs to the Models folder and use it to define the class shown in listing 18.7.
Listing 18.7 The contents of the Product.cs file in the Models folder
using System.ComponentModel.DataAnnotations.Schema;
namespace WebApp.Models {
public class Product {
public long ProductId { get; set; }
public required string Name { get; set; }
[Column(TypeName = "decimal(8, 2)")]
public decimal Price { get; set; }
public long CategoryId { get; set; }
public Category? Category { get; set; }
public long SupplierId { get; set; }
public Supplier? Supplier { get; set; }
}
}
Each of the three data model classes defines a key property whose value will be allocated by the database when new objects are stored. There are also navigation properties that will be used to query for related data so that it will be possible, for example, to query for all the products in a specific category.
The Price property has been decorated with the Column attribute, which specifies the precision of the values that will be stored in the database. There isn’t a one-to-one mapping between C# and SQL numeric types, and the Column attribute tells Entity Framework Core which SQL type should be used in the database to store Price values. In this case, the decimal(8, 2) type will allow a total of eight digits, including two following the decimal point.
To create the Entity Framework Core context class that will provide access to the database, add a file called DataContext.cs to the Models folder and add the code shown in listing 18.8.
Listing 18.8 The contents of the DataContext.cs file in the Models folder
using Microsoft.EntityFrameworkCore;
namespace WebApp.Models {
public class DataContext : DbContext {
public DataContext(DbContextOptions<DataContext> opts)
: base(opts) { }
public DbSet<Product> Products => Set<Product>();
public DbSet<Category> Categories => Set<Category>();
public DbSet<Supplier> Suppliers => Set<Supplier>();
}
}
The context class defines properties that will be used to query the database for Product, Category, and Supplier data.
Add a class called SeedData.cs to the Models folder and add the code shown in listing 18.9 to define the seed data that will be used to populate the database.
Listing 18.9 The contents of the SeedData.cs file in the Models folder
using Microsoft.EntityFrameworkCore;
namespace WebApp.Models {
public static class SeedData {
public static void SeedDatabase(DataContext context) {
context.Database.Migrate();
if (context.Products.Count() == 0
&& context.Suppliers.Count() == 0
&& context.Categories.Count() == 0) {
Supplier s1 = new Supplier
{ Name = "Splash Dudes", City = "San Jose"};
Supplier s2 = new Supplier
{ Name = "Soccer Town", City = "Chicago"};
Supplier s3 = new Supplier
{ Name = "Chess Co", City = "New York"};
Category c1 = new Category { Name = "Watersports" };
Category c2 = new Category { Name = "Soccer" };
Category c3 = new Category { Name = "Chess" };
context.Products.AddRange(
new Product { Name = "Kayak", Price = 275,
Category = c1, Supplier = s1},
new Product { Name = "Lifejacket", Price = 48.95m,
Category = c1, Supplier = s1},
new Product { Name = "Soccer Ball", Price = 19.50m,
Category = c2, Supplier = s2},
new Product { Name = "Corner Flags", Price = 34.95m,
Category = c2, Supplier = s2},
new Product { Name = "Stadium", Price = 79500,
Category = c2, Supplier = s2},
new Product { Name = "Thinking Cap", Price = 16,
Category = c3, Supplier = s3},
new Product { Name = "Unsteady Chair", Price = 29.95m,
Category = c3, Supplier = s3},
new Product { Name = "Human Chess Board", Price = 75,
Category = c3, Supplier = s3},
new Product { Name = "Bling-Bling King", Price = 1200,
Category = c3, Supplier = s3}
);
context.SaveChanges();
}
}
}
}
The static SeedDatabase method ensures that all pending migrations have been applied to the database. If the database is empty, it is seeded with categories, suppliers, and products. Entity Framework Core will take care of mapping the objects into the tables in the database, and the key properties will be assigned automatically when the data is stored.
Make the changes to the Program.cs file shown in listing 18.10, which configure Entity Framework Core and set up the DataContext services that will be used throughout this part of the book to access the database.
Listing 18.10 Services and middleware in the Program.cs file in the WebApp folder
using Microsoft.EntityFrameworkCore;
using WebApp.Models;
var builder = WebApplication.CreateBuilder(args);
builder.Services.AddDbContext<DataContext>(opts => {
opts.UseSqlServer(builder.Configuration[
"ConnectionStrings:ProductConnection"]);
opts.EnableSensitiveDataLogging(true);
});
var app = builder.Build();
app.MapGet("/", () => "Hello World!");
var context = app.Services.CreateScope().ServiceProvider
.GetRequiredService<DataContext>();
SeedData.SeedDatabase(context);
app.Run();
The DataContext service is scoped, which means that I have to create a scope to get the service required by the SeedDatabase method.
To define the connection string that will be used for the application’s data, add the configuration settings shown in listing 18.11 in the appsettings.json file. The connection string should be entered on a single line.
Listing 18.11 A connection string in the appsettings.json file in the WebApp folder
{
"Logging": {
"LogLevel": {
"Default": "Information",
"Microsoft.AspNetCore": "Warning",
"Microsoft.EntityFrameworkCore": "Information"
}
},
"AllowedHosts": "*",
"ConnectionStrings": {
"ProductConnection": "Server=(localdb)\\MSSQLLocalDB;Database=Products;
➥MultipleActiveResultSets=True"
}
}
In addition to the connection string, listing 18.11 sets the logging detail for Entity Framework Core so that the SQL queries sent to the database are logged.
To create the migration that will set up the database schema, use a PowerShell command prompt to run the command shown in listing 18.12 in the WebApp project folder.
Listing 18.12 Creating an Entity Framework Core migration
dotnet ef migrations add Initial
Once the migration has been created, apply it to the database using the command shown in listing 18.13.
Listing 18.13 Applying the migration to the database
dotnet ef database update
The logging messages displayed by the application will show the SQL commands that are sent to the database.
Later chapters will demonstrate the different ways that HTML responses can be generated. Run the commands shown in listing 18.14 to remove any existing version of the LibMan package and install the version used in this book. (You can skip these commands if you installed this version of LibMan in earlier chapters.)
Listing 18.14 Installing the LibMan tool package
dotnet tool uninstall --global Microsoft.Web.LibraryManager.Cli
dotnet tool install --global Microsoft.Web.LibraryManager.Cli
--version 2.1.175
To add the Bootstrap CSS framework so that the HTML responses can be styled, run the commands shown in listing 18.15 in the WebApp project folder.
Listing 18.15 Installing the Bootstrap CSS framework
libman init -p cdnjs libman install bootstrap@5.2.3 -d wwwroot/lib/bootstrap
To define a simple middleware component that will be used to make sure the example project has been set up correctly, add a class file called TestMiddleware.cs to the WebApp folder and add the code shown in listing 18.16.
Listing 18.16 The contents of the TestMiddleware.cs file in the WebApp folder
using WebApp.Models;
namespace WebApp {
public class TestMiddleware {
private RequestDelegate nextDelegate;
public TestMiddleware(RequestDelegate next) {
nextDelegate = next;
}
public async Task Invoke(HttpContext context,
DataContext dataContext) {
if (context.Request.Path == "/test") {
await context.Response.WriteAsync($"There are "
+ dataContext.Products.Count() + " products\n");
await context.Response.WriteAsync("There are "
+ dataContext.Categories.Count() + " categories\n");
await context.Response.WriteAsync($"There are "
+ dataContext.Suppliers.Count() + " suppliers\n");
} else {
await nextDelegate(context);
}
}
}
}
Add the middleware component to the request pipeline, as shown in listing 18.17.
Listing 18.17 A middleware component in the Program.cs file in the WebApp folder
using Microsoft.EntityFrameworkCore;
using WebApp.Models;
var builder = WebApplication.CreateBuilder(args);
builder.Services.AddDbContext<DataContext>(opts => {
opts.UseSqlServer(builder.Configuration[
"ConnectionStrings:ProductConnection"]);
opts.EnableSensitiveDataLogging(true);
});
var app = builder.Build();
app.UseMiddleware<WebApp.TestMiddleware>();
app.MapGet("/", () => "Hello World!");
var context = app.Services.CreateScope().ServiceProvider
.GetRequiredService<DataContext>();
SeedData.SeedDatabase(context);
app.Run();
Start the application by running the command shown in listing 18.18 in the WebApp project folder.
Listing 18.18 Running the example application
dotnet run
Use a new browser tab and request http://localhost:5000/test, and you will see the response shown in figure 18.2.
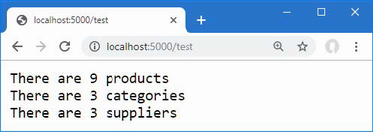
Figure 18.2 Running the example application
This chapter covers
Web services accept HTTP requests and generate responses that contain data. In this chapter, I explain how the features provided by the MVC Framework, which is an integral part of ASP.NET Core, can be used to build on the capabilities described in part 2 to create web services.
The nature of web services means that some of the examples in this chapter are tested using command-line tools provided by PowerShell, and it is important to enter the commands exactly as shown. Chapter 20 introduces more sophisticated tools for working with web services, but the command-line approach is better suited to following examples in a book chapter, even if they can feel a little awkward as you type them in. Table 19.1 puts RESTful web services in context.
Table 19.1 Putting RESTful web services in context
|
Question |
Answer |
|---|---|
|
What are they? |
Web services provide access to an application's data, typically expressed in the JSON format. |
|
Why are they useful? |
Web services are most often used to provide rich client-side applications with data. |
|
How are they used? |
The combination of the URL and an HTTP method describes an operation that is handled by an endpoint, or an action method defined by a controller. |
|
Are there any pitfalls or limitations? |
There is no widespread agreement about how web services should be implemented, and care must be taken to produce just the data the client expects. |
|
Are there any alternatives? |
There are several different approaches to providing clients with data, although RESTful web services are the most common. |
Table 19.2 provides a guide to the chapter.
Table 19.2 Chapter guide
|
Problem |
Solution |
Listing |
|---|---|---|
|
Defining a web service |
Define endpoints in the |
3-13 |
|
Generating data sequences over time |
Use the |
14 |
|
Preventing request values from being used for sensitive data properties |
Use a binding target to restrict the model binding process to only safe properties. |
15-17 |
|
Expressing nondata outcomes |
Use action results to describe the response that ASP.NET Core should send. |
18-23 |
|
Validating data |
Use the ASP.NET Core model binding and model validation features. |
24-26 |
|
Automatically validating requests |
Use the |
27 |
|
Omitting null values from data responses |
Map the data objects to filter out properties or configure the JSON serializer to ignore |
28-32 |
|
Apply a rate limit |
Use the |
33, 34 |
In this chapter, I continue to use the WebApp project created in chapter 18. To prepare for this chapter, drop the database by opening a new PowerShell command prompt, navigating to the folder that contains the WebApp.csproj file, and running the command shown in listing 19.1.
Listing 19.1 Dropping the database
dotnet ef database drop --force
Start the application by running the command shown in listing 19.2 in the project folder.
Listing 19.2 Starting the example application
dotnet run
Request the URL http://localhost:5000/test once ASP.NET Core has started, and you will see the response shown in figure 19.1.
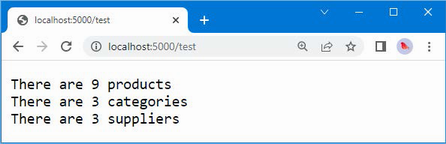
Figure 19.1 Running the example application
Web services respond to HTTP requests with data that can be consumed by clients, such as JavaScript applications. There are no hard-and-fast rules for how web services should work, but the most common approach is to adopt the Representational State Transfer (REST) pattern. There is no authoritative specification for REST, and there is no consensus about what constitutes a RESTful web service, but there are some common themes that are widely used for web services.The lack of a detailed specification leads to endless disagreement about what REST means and how RESTful web services should be created, all of which can be safely ignored if the web services you create work for your projects.
The core premise of REST-and the only aspect for which there is broad agreement-is that a web service defines an API through a combination of URLs and HTTP methods such as GET and POST, which are also known as the HTTP verbs. The method specifies the type of operation, while the URL specifies the data object or objects that the operation applies to.
As an example, here is a URL that might identify a Product object in the example application:
/api/products/1
This URL may identify the Product object that has a value of 1 for its ProductId property. The URL identifies the Product, but it is the HTTP method that specifies what should be done with it. Table 19.3 lists the HTTP methods that are commonly used in web services and the operations they conventionally represent.
Table 19.3 HTTP methods and operations
|
HTTP Method |
Description |
|---|---|
|
GET |
This method is used to retrieve one or more data objects. |
|
POST |
This method is used to create a new object. |
|
PUT |
This method is used to update an existing object. |
|
PATCH |
This method is used to update part of an existing object. |
|
DELETE |
This method is used to delete an object. |
Most RESTful web services format the response data using the JavaScript Object Notation (JSON) format. JSON has become popular because it is simple and easily consumed by JavaScript clients. JSON is described in detail at www.json.org, but you don't need to understand every aspect of JSON to create web services because ASP.NET Core provides all the features required to create JSON responses.
As you learn about the facilities that ASP.NET Core provides for web services, it can be easy to forget they are built on the features described in part 2. To create a simple web service, add the statements shown in listing 19.3 to the Program.cs file.
Listing 19.3 Creating a web service in the Program.cs file in the Platform folder
using Microsoft.EntityFrameworkCore;
using WebApp.Models;
using System.Text.Json;
var builder = WebApplication.CreateBuilder(args);
builder.Services.AddDbContext<DataContext>(opts => {
opts.UseSqlServer(builder.Configuration[
"ConnectionStrings:ProductConnection"]);
opts.EnableSensitiveDataLogging(true);
});
var app = builder.Build();
const string BASEURL = "api/products";
app.MapGet($"{BASEURL}/{{id}}", async (HttpContext context,
DataContext data) => {
string? id = context.Request.RouteValues["id"] as string;
if (id != null) {
Product? p = data.Products.Find(long.Parse(id));
if (p == null) {
context.Response.StatusCode = StatusCodes.Status404NotFound;
} else {
context.Response.ContentType = "application/json";
await context.Response
.WriteAsync(JsonSerializer.Serialize<Product>(p));
}
}
});
app.MapGet(BASEURL, async (HttpContext context, DataContext data) => {
context.Response.ContentType = "application/json";
await context.Response.WriteAsync(JsonSerializer
.Serialize<IEnumerable<Product>>(data.Products));
});
app.MapPost(BASEURL, async (HttpContext context, DataContext data) => {
Product? p = await
JsonSerializer.DeserializeAsync<Product>(context.Request.Body);
if (p != null) {
await data.AddAsync(p);
await data.SaveChangesAsync();
context.Response.StatusCode = StatusCodes.Status200OK;
}
});
app.MapGet("/", () => "Hello World!");
var context = app.Services.CreateScope().ServiceProvider
.GetRequiredService<DataContext>();
SeedData.SeedDatabase(context);
app.Run();
The same API that I used to register endpoints in earlier chapters can be used to create a web service, using only features that you have seen before. The MapGet and MapPost methods are used to create three routes, all of which match URLs that start with /api, which is the conventional prefix for web services.
The endpoint for the first route receives a value from a segment variable that is used to locate a single Product object in the database. The endpoint for the second route retrieves all the Product objects in the database. The third endpoint handles POST requests and reads the request body to get a JSON representation of a new object to add to the database.
There are better ASP.NET Core features for creating web services, which you will see shortly, but the code in listing 19.3 shows how the HTTP method and the URL can be combined to describe an operation, which is the key concept in creating web services.
To test the web service, restart ASP.NET Core and request http://localhost:5000/api/products/1. The request will be matched by the first route defined in listing 19.3 and will produce the response shown on the left of figure 19.2. Next, request http://localhost:5000/api/products, which will be matched by the second route and produce the response shown on the right of figure 19.2.
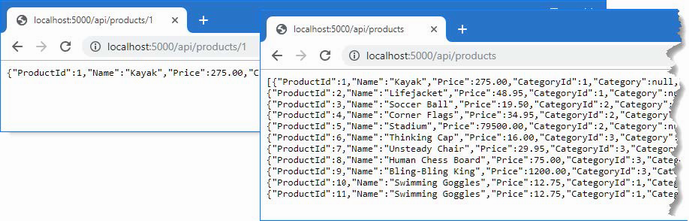
Figure 19.2 Web service response
Testing the third route requires a different approach because it isn't possible to send HTTP POST requests using the browser. Open a new PowerShell command prompt and run the command shown in listing 19.4. It is important to enter the command exactly as shown because the Invoke-RestMethod command is fussy about the syntax of its arguments.
Listing 19.4 Sending a POST request
Invoke-RestMethod http://localhost:5000/api/products -Method POST -Body ➥(@{ Name="Swimming Goggles"; Price=12.75; CategoryId=1; SupplierId=1} | ➥ ConvertTo-Json) -ContentType "application/json"
The command sends an HTTP POST command that is matched by the third route defined in listing 19.3. The body of the request is a JSON-formatted object that is parsed to create a Product, which is then stored in the database. The JSON object included in the request contains values for the Name, Price, CategoryId, and SupplierId properties. The unique key for the object, which is associated with the ProductId property, is assigned by the database when the object is stored. Use the browser to request the http://localhost:5000/api/products URL again, and you will see that the JSON response contains the new object, as shown in figure 19.3.
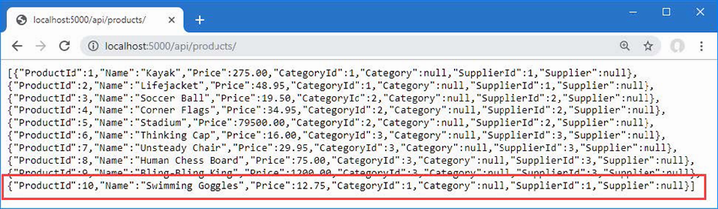
Figure 19.3 Storing new data using the web service
The drawback of using individual endpoints to create a web service is that each endpoint has to duplicate a similar set of steps to produce a response: get the Entity Framework Core service so that it can query the database, set the Content-Type header for the response, serialize the objects into JSON, and so on. As a result, web services created with endpoints are difficult to understand and awkward to maintain, and the Program.cs file quickly becomes unwieldy.
A more elegant and robust approach is to use a controller, which allows a web service to be defined in a single class. Controllers are part of the MVC Framework, which builds on the ASP.NET Core platform and takes care of handling data in the same way that endpoints take care of processing URLs.
The first step to creating a web service using a controller is to configure the MVC framework, which requires a service and an endpoint, as shown in listing 19.5. This listing also removes the endpoints defined in the previous section.
Listing 19.5 Enabling the MVC Framework in the Program.cs File in the WebApp folder
using Microsoft.EntityFrameworkCore;
using WebApp.Models;
var builder = WebApplication.CreateBuilder(args);
builder.Services.AddDbContext<DataContext>(opts => {
opts.UseSqlServer(builder.Configuration[
"ConnectionStrings:ProductConnection"]);
opts.EnableSensitiveDataLogging(true);
});
builder.Services.AddControllers();
var app = builder.Build();
app.MapControllers();
app.MapGet("/", () => "Hello World!");
var context = app.Services.CreateScope().ServiceProvider
.GetRequiredService<DataContext>();
SeedData.SeedDatabase(context);
app.Run();
The AddControllers method defines the services that are required by the MVC framework, and the MapControllers method defines routes that will allow controllers to handle requests. You will see other methods used to configure the MVC framework used in later chapters, which provide access to different features, but the methods used in listing 19.5 are the ones that configure the MVC framework for web services.
Controllers are classes whose methods, known as actions, can process HTTP requests. Controllers are discovered automatically when the application is started. The basic discovery process is simple: any public class whose name ends with Controller is a controller, and any public method a controller defines is an action. To demonstrate how simple a controller can be, create the WebApp/Controllers folder and add to it a file named ProductsController.cs with the code shown in listing 19.6.
Listing 19.6 The contents of the ProductsController.cs file in the Controllers folder
using Microsoft.AspNetCore.Mvc;
using WebApp.Models;
namespace WebApp.Controllers {
[Route("api/[controller]")]
public class ProductsController : ControllerBase {
[HttpGet]
public IEnumerable<Product> GetProducts() {
return new Product[] {
new Product() { Name = "Product #1" },
new Product() { Name = "Product #2" },
};
}
[HttpGet("{id}")]
public Product GetProduct() {
return new Product() {
ProductId = 1, Name = "Test Product"
};
}
}
}
The ProductsController class meets the criteria that the MVC framework looks for in a controller. It defines public methods named GetProducts and GetProduct, which will be treated as actions.
Understanding the base class
Controllers are derived from the ControllerBase class, which provides access to features provided by the MVC Framework and the underlying ASP.NET Core platform. Table 19.4 describes the most useful properties provided by the ControllerBase class.
Table 19.4 Useful ControllerBase properties
|
Name |
Description |
|---|---|
|
|
This property returns the |
|
|
This property returns details of the data validation process, as demonstrated in the "Validating Data" section later in the chapter and described in detail in chapter 29. |
|
|
This property returns the |
|
|
This property returns the |
|
|
This property returns the data extracted from the request URL by the routing middleware, as described in chapter 13. |
|
|
This property returns an object that describes the user associated with the current request, as described in chapter 38. |
A new instance of the controller class is created each time one of its actions is used to handle a request, which means the properties in table 19.4 describe only the current request.
Understanding the controller attributes
The HTTP methods and URLs supported by the action methods are determined by the combination of attributes that are applied to the controller. The URL for the controller is specified by the Route attribute, which is applied to the class, like this:
...
[Route("api/[controller]")]
public class ProductsController: ControllerBase {
...
The [controller] part of the attribute argument is used to derive the URL from the name of the controller class. The Controller part of the class name is dropped, which means that the attribute in listing 19.6 sets the URL for the controller to /api/products.
Each action is decorated with an attribute that specifies the HTTP method that it supports, like this:
...
[HttpGet]
public Product[] GetProducts() {
...
The name given to action methods doesn't matter in controllers used for web services. There are other uses for controllers, described in chapter 21, where the name does matter, but for web services, it is the HTTP method attributes and the route patterns that are important.
The HttpGet attribute tells the MVC framework that the GetProducts action method will handle HTTP GET requests. Table 19.5 describes the full set of attributes that can be applied to actions to specify HTTP methods.
Table 19.5 The HTTP method attributes
|
Name |
Description |
|---|---|
|
|
This attribute specifies that the action can be invoked only by HTTP requests that use the GET verb. |
|
|
This attribute specifies that the action can be invoked only by HTTP requests that use the POST verb. |
|
|
This attribute specifies that the action can be invoked only by HTTP requests that use the DELETE verb. |
|
|
This attribute specifies that the action can be invoked only by HTTP requests that use the PUT verb. |
|
|
This attribute specifies that the action can be invoked only by HTTP requests that use the PATCH verb. |
|
|
This attribute specifies that the action can be invoked only by HTTP requests that use the HEAD verb. |
|
|
This attribute is used to specify multiple HTTP verbs. |
The attributes applied to actions to specify HTTP methods can also be used to build on the controller's base URL.
...
[HttpGet("{id}")]
public Product GetProduct() {
...
This attribute tells the MVC framework that the GetProduct action method handles GET requests for the URL pattern api/products/{id}. During the discovery process, the attributes applied to the controller are used to build the set of URL patterns that the controller can handle, summarized in table 19.6.
Table 19.6 The URL patterns
|
HTTP Method |
URL Pattern |
Action Method Name |
|---|---|---|
|
GET |
|
|
|
GET |
|
|
You can see how the combination of attributes is equivalent to the MapGet methods I used for the same URL patterns when I used endpoints to create a web service earlier in the chapter.
Understanding action method results
One of the main benefits provided by controllers is that the MVC Framework takes care of setting the response headers and serializing the data objects that are sent to the client. You can see this in the results defined by the action methods, like this:
...
[HttpGet("{id}")]
public Product GetProduct() {
...
When I used an endpoint, I had to work directly with the JSON serializer to create a string that can be written to the response and set the Content-Type header to tell the client that the response contained JSON data. The action method returns a Product object, which is processed automatically.
To see how the results from the action methods are handled, restart ASP.NET Core and request http://localhost:5000/api/products, which will produce the response shown on the left of figure 19.4, which is produced by the GetProducts action method. Next, request http://localhost:5000/api/products/1, which will be handled by the GetProduct method and produce the result shown on the right side of figure 19.4.
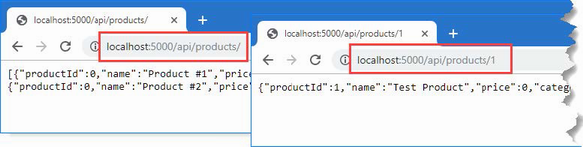
Figure 19.4 Using a controller
Using dependency injection in controllers
A new instance of the controller class is created each time one of its actions is used to handle a request. The application's services are used to resolve any dependencies the controller declares through its constructor and any dependencies that the action method defines. This allows services that are required by all actions to be handled through the constructor while still allowing individual actions to declare their own dependencies, as shown in listing 19.7.
Listing 19.7 Using services in the ProductsController.cs file in the Controllers folder
using Microsoft.AspNetCore.Mvc;
using WebApp.Models;
namespace WebApp.Controllers {
[Route("api/[controller]")]
public class ProductsController : ControllerBase {
private DataContext context;
public ProductsController(DataContext ctx) {
context = ctx;
}
[HttpGet]
public IEnumerable<Product> GetProducts() {
return context.Products;
}
[HttpGet("{id}")]
public Product? GetProduct([FromServices]
ILogger<ProductsController> logger) {
logger.LogInformation("GetProduct Action Invoked");
return context.Products
.OrderBy(p => p.ProductId).FirstOrDefault();
}
}
}
The constructor declares a dependency on the DataContext service, which provides access to the application's data. The services are resolved using the request scope, which means that a controller can request all services, without needing to understand their lifecycle.
The GetProducts action method uses the DataContext to request all the Product objects in the database. The GetProduct method also uses the DataContext service, but it declares a dependency on ILogger<T>, which is the logging service described in chapter 15. Dependencies that are declared by action methods must be decorated with the FromServices attribute, like this:
...
public Product GetProduct([FromServices]
ILogger<ProductsController> logger)
...
By default, the MVC Framework attempts to find values for action method parameters from the request URL, and the FromServices attribute overrides this behavior. The FromServices attribute can often be omitted, and ASP.NET Core will try to resolve parameters using dependency injection, but this doesn't work for all parameter types, and I prefer to use the attribute to clearly denote that the value for the parameter will be provided by dependency injection.
To see the use of the services in the controller, restart ASP.NET Core and request http://localhost:5000/api/products/1, which will produce the response shown in figure 19.5. You will also see the following logging message in the application's output:
...
info: WebApp.Controllers.ProductsController[0]
GetProduct Action Invoked
...
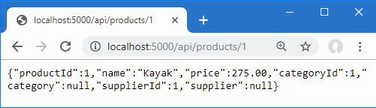
Figure 19.5 Using services in a controller
Using model binding to access route data
In the previous section, I noted that the MVC Framework uses the request URL to find values for action method parameters, a process known as model binding. Model binding is described in detail in chapter 28, but listing 19.8 shows a simple example.
Listing 19.8 Model binding in the ProductsController.cs file in the Controllers folder
using Microsoft.AspNetCore.Mvc;
using WebApp.Models;
namespace WebApp.Controllers {
[Route("api/[controller]")]
public class ProductsController : ControllerBase {
private DataContext context;
public ProductsController(DataContext ctx) {
context = ctx;
}
[HttpGet]
public IEnumerable<Product> GetProducts() {
return context.Products;
}
[HttpGet("{id}")]
public Product? GetProduct(long id,
[FromServices] ILogger<ProductsController> logger) {
logger.LogDebug("GetProduct Action Invoked");
return context.Products.Find(id);
}
}
}
The listing adds a long parameter named id to the GetProduct method. When the action method is invoked, the MVC Framework injects the value with the same name from the routing data, automatically converting it to a long value, which is used by the action to query the database using the LINQ Find method. The result is that the action method responds to the URL, which you can see by restarting ASP.NET Core and requesting http://localhost:5000/api/products/5, which will produce the response shown in figure 19.6.
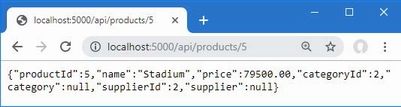
Figure 19.6 Using model binding in an action
Model binding from the request body
The model binding feature can also be used on the data in the request body, which allows clients to send data that is easily received by an action method. Listing 19.9 adds a new action method that responds to POST requests and allows clients to provide a JSON representation of the Product object in the request body.
Listing 19.9 Adding an action in the ProductsController.cs file in the Controllers folder
using Microsoft.AspNetCore.Mvc;
using WebApp.Models;
namespace WebApp.Controllers {
[Route("api/[controller]")]
public class ProductsController : ControllerBase {
private DataContext context;
public ProductsController(DataContext ctx) {
context = ctx;
}
[HttpGet]
public IEnumerable<Product> GetProducts() {
return context.Products;
}
[HttpGet("{id}")]
public Product? GetProduct(long id,
[FromServices] ILogger<ProductsController> logger) {
logger.LogDebug("GetProduct Action Invoked");
return context.Products.Find(id);
}
[HttpPost]
public void SaveProduct([FromBody] Product product) {
context.Products.Add(product);
context.SaveChanges();
}
}
}
The new action relies on two attributes. The HttpPost attribute is applied to the action method and tells the MVC Framework that the action can process POST requests. The FromBody attribute is applied to the action's parameter, and it specifies that the value for this parameter should be obtained by parsing the request body. When the action method is invoked, the MVC Framework will create a new Product object and populate its properties with the values in the request body. The model binding process can be complex and is usually combined with data validation, as described in chapter 29, but for a simple demonstration, restart ASP.NET Core, open a new PowerShell command prompt, and run the command shown in listing 19.10.
Listing 19.10 Sending a POST request to the example application
Invoke-RestMethod http://localhost:5000/api/products -Method POST -Body (@ ➥{ Name="Soccer Boots"; Price=89.99; CategoryId=2; SupplierId=2} | ➥ ConvertTo-Json) -ContentType "application/json"
Once the command has executed, use a web browser to request http://localhost:5000/api/products, and you will see the new object that has been stored in the database, as shown in figure 19.7.
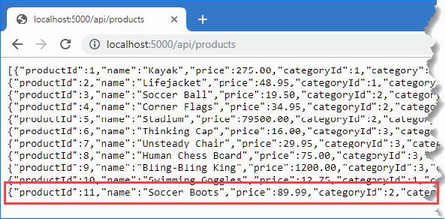
Figure 19.7 Storing new data using a controller
Adding additional actions
Now that the basic features are in place, I can add actions that allow clients to replace and delete Product objects using the HTTP PUT and DELETE methods, as shown in listing 19.11.
Listing 19.11 Adding actions in the ProductsController.cs file in the Controllers folder
using Microsoft.AspNetCore.Mvc;
using WebApp.Models;
namespace WebApp.Controllers {
[Route("api/[controller]")]
public class ProductsController : ControllerBase {
private DataContext context;
public ProductsController(DataContext ctx) {
context = ctx;
}
[HttpGet]
public IEnumerable<Product> GetProducts() {
return context.Products;
}
[HttpGet("{id}")]
public Product? GetProduct(long id,
[FromServices] ILogger<ProductsController> logger) {
logger.LogDebug("GetProduct Action Invoked");
return context.Products.Find(id);
}
[HttpPost]
public void SaveProduct([FromBody] Product product) {
context.Products.Add(product);
context.SaveChanges();
}
[HttpPut]
public void UpdateProduct([FromBody] Product product) {
context.Products.Update(product);
context.SaveChanges();
}
[HttpDelete("{id}")]
public void DeleteProduct(long id) {
context.Products.Remove(new Product() {
ProductId = id, Name = string.Empty
});
context.SaveChanges();
}
}
}
The UpdateProduct action is similar to the SaveProduct action and uses model binding to receive a Product object from the request body. The DeleteProduct action receives a primary key value from the URL and uses it to create a Product that has a value for the ProductId property, which is required because Entity Framework Core works only with objects, but web service clients typically expect to be able to delete objects using just a key value. (The empty string is assigned to the Name property, to which the required keyword has been applied and without which a Product object cannot be created. Entity Framework Core ignores the empty string when identifying the data to delete).
Restart ASP.NET Core and then use a different PowerShell command prompt to run the command shown in listing 19.12, which tests the UpdateProduct action.
Listing 19.12 Updating an object
Invoke-RestMethod http://localhost:5000/api/products -Method PUT -Body (@{
ProductId=1; Name="Green Kayak"; Price=275; CategoryId=1; SupplierId=1} |
ConvertTo-Json) -ContentType "application/json"
The command sends an HTTP PUT request whose body contains a replacement object. The action method receives the object through the model binding feature and updates the database. Next, run the command shown in listing 19.13 to test the DeleteProduct action.
Listing 19.13 Deleting an object
Invoke-RestMethod http://localhost:5000/api/products/2 -Method DELETE
This command sends an HTTP DELETE request, which will delete the object whose ProductId property is 2. To see the effect of the changes, use the browser to request http://localhost:5000/api/products, which will send a GET request that is handled by the GetProducts action and produce the response shown in figure 19.8.
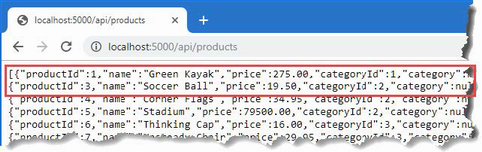
Figure 19.8 Updating and deleting objects
The controller in listing 19.11 re-creates the functionality provided by the separate endpoints, but there are still improvements that can be made, as described in the following sections.
The ASP.NET Core platform processes each request by assigning a thread from a pool. The number of requests that can be processed concurrently is limited to the size of the pool, and a thread can't be used to process any other request while it is waiting for an action to produce a result.
Actions that depend on external resources can cause a request thread to wait for an extended period. A database server, for example, may have its own concurrency limits and may queue up queries until they can be executed. The ASP.NET Core request thread is unavailable to process any other requests until the database produces a result for the action, which then produces a response that can be sent to the HTTP client.
This problem can be addressed by defining asynchronous actions, which allow ASP.NET Core threads to process other requests when they would otherwise be blocked, increasing the number of HTTP requests that the application can process simultaneously. Listing 19.14 revises the controller to use asynchronous actions.
Listing 19.14 Async actions in the ProductsController.cs file in the Controllers folder
using Microsoft.AspNetCore.Mvc;
using WebApp.Models;
namespace WebApp.Controllers {
[Route("api/[controller]")]
public class ProductsController : ControllerBase {
private DataContext context;
public ProductsController(DataContext ctx) {
context = ctx;
}
[HttpGet]
public IAsyncEnumerable<Product> GetProducts() {
return context.Products.AsAsyncEnumerable();
}
[HttpGet("{id}")]
public async Task<Product?> GetProduct(long id) {
return await context.Products.FindAsync(id);
}
[HttpPost]
public async Task SaveProduct([FromBody] Product product) {
await context.Products.AddAsync(product);
await context.SaveChangesAsync();
}
[HttpPut]
public async Task UpdateProduct([FromBody] Product product) {
context.Update(product);
await context.SaveChangesAsync();
}
[HttpDelete("{id}")]
public async Task DeleteProduct(long id) {
context.Products.Remove(new Product() {
ProductId = id, Name = string.Empty
});
await context.SaveChangesAsync();
}
}
}
Entity Framework Core provides asynchronous versions of some methods, such as FindAsync, AddAsync, and SaveChangesAsync, and I have used these with the await keyword. Not all operations can be performed asynchronously, which is why the Update and Remove methods are unchanged within the UpdateProduct and DeleteProduct actions.
For some operations-including LINQ queries to the database-the IAsyncEnumerable<T> interface can be used, which denotes a sequence of objects that should be enumerated asynchronously and prevents the ASP.NET Core request thread from waiting for each object to be produced by the database, as explained in chapter 5.
There is no change to the responses produced by the controller, but the threads that ASP.NET Core assigns to process each request are not necessarily blocked by the action methods.
Some of the action methods use the model binding feature to get data from the request body so that it can be used to perform database operations. There is a problem with the SaveProduct action, which can be seen by using a PowerShell prompt to run the command shown in listing 19.15.
Listing 19.15 Saving a product
Invoke-RestMethod http://localhost:5000/api/products -Method POST -Body (@ ➥{ ProductId=100; Name="Swim Buoy"; Price=19.99; CategoryId=1; ➥SupplierId=1} | ConvertTo-Json) -ContentType "application/json"
This command fails with an error. Unlike the command that was used to test the POST method, this command includes a value for the ProductId property. When Entity Framework Core sends the data to the database, the following exception is thrown:
... Microsoft.Data.SqlClient.SqlException (0x80131904): Cannot insert explicit value for identity column in table 'Products' when IDENTITY_INSERT is set to OFF. ...
By default, Entity Framework Core configures the database to assign primary key values when new objects are stored. This means the application doesn't have to worry about keeping track of which key values have already been assigned and allows multiple applications to share the same database without the need to coordinate key allocation. The Product data model class needs a ProductId property, but the model binding process doesn't understand the significance of the property and adds any values that the client provides to the objects it creates, which causes the exception in the SaveProduct action method.
This is known as over-binding, and it can cause serious problems when a client provides values that the developer didn't expect. At best, the application will behave unexpectedly, but this technique has been used to subvert application security and grant users more access than they should have.
The safest way to prevent over-binding is to create separate data model classes that are used only for receiving data through the model binding process. Add a class file named ProductBindingTarget.cs to the WebApp/Models folder and use it to define the class shown in listing 19.16.
Listing 19.16 The ProductBindingTarget.cs file in the WebApp/Models folder
namespace WebApp.Models {
public class ProductBindingTarget {
public required string Name { get; set; }
public decimal Price { get; set; }
public long CategoryId { get; set; }
public long SupplierId { get; set; }
public Product ToProduct() => new Product() {
Name = this.Name, Price = this.Price,
CategoryId = this.CategoryId, SupplierId = this.SupplierId
};
}
}
The ProductBindingTarget class defines only the properties that the application wants to receive from the client when storing a new object. The ToProduct method creates a Product that can be used with the rest of the application, ensuring that the client can provide properties only for the Name, Price, CategoryId, and SupplierId properties. Listing 19.17 uses the binding target class in the SaveProduct action to prevent over-binding.
Listing 19.17 A binding target in the ProductsController.cs file in the Controllers folder
...
[HttpPost]
public async Task SaveProduct([FromBody] ProductBindingTarget target) {
await context.Products.AddAsync(target.ToProduct());
await context.SaveChangesAsync();
}
...
Restart ASP.NET Core and repeat the command from listing 19.15, and you will see the response shown in figure 19.9. The client has included the ProductId value, but it is ignored by the model binding process, which discards values for read-only properties. (You may see a different value for the ProductId property when you run this example depending on the changes you made to the database before running the command.)
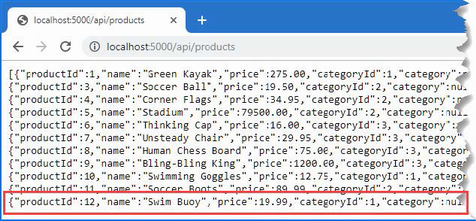
Figure 19.9 Discarding unwanted data values
ASP.NET Core sets the status code for responses automatically, but you won't always get the result you desire, in part because there are no firm rules for RESTful web services, and the assumptions that Microsoft makes may not match your expectations. To see an example, use a PowerShell command prompt to run the command shown in listing 19.18, which sends a GET request to the web service.
Listing 19.18 Sending a GET request
Invoke-WebRequest http://localhost:5000/api/products/1000 | Select-Object
➥StatusCode
The Invoke-WebRequest command is similar to the Invoke-RestMethod command used in earlier examples but makes it easier to get the status code from the response. The URL requested in listing 19.18 will be handled by the GetProduct action method, which will query the database for an object whose ProductId value is 1000, and the command produces the following output:
StatusCode
----------
204
There is no matching object in the database, which means that the GetProduct action method returns null. When the MVC Framework receives null from an action method, it returns the 204 status code, which indicates a successful request that has produced no data. Not all web services behave this way, and a common alternative is to return a 404 response, indicating not found.
Similarly, the SaveProducts action will return a 200 response when it stores an object, but since the primary key isn't generated until the data is stored, the client doesn't know what key value was assigned.
Action methods can direct the MVC Framework to send a specific response by returning an object that implements the IActionResult interface, which is known as an action result. This allows the action method to specify the type of response that is required without having to produce it directly using the HttpResponse object.
The ControllerBase class provides a set of methods that are used to create action result objects, which can be returned from action methods. Table 19.7 describes the most useful action result methods.
Table 19.7 Useful ControllerBase action result methods
|
Name |
Description |
|---|---|
|
|
The |
|
|
The |
|
|
The |
|
|
The |
|
|
The |
|
|
The |
|
|
The |
|
|
The |
|
|
The |
|
|
The |
|
|
The |
When an action method returns an object, it is equivalent to passing the object to the Ok method and returning the result. When an action returns null, it is equivalent to returning the result from the NoContent method. Listing 19.19 revises the behavior of the GetProduct and SaveProduct actions so they use the methods from table 19.7 to override the default behavior for web service controllers.
Listing 19.19 Action results in the ProductsController.cs file in the Controllers folder
using Microsoft.AspNetCore.Mvc;
using WebApp.Models;
namespace WebApp.Controllers {
[Route("api/[controller]")]
public class ProductsController : ControllerBase {
private DataContext context;
public ProductsController(DataContext ctx) {
context = ctx;
}
[HttpGet]
public IAsyncEnumerable<Product> GetProducts() {
return context.Products.AsAsyncEnumerable();
}
[HttpGet("{id}")]
public async Task<IActionResult> GetProduct(long id) {
Product? p = await context.Products.FindAsync(id);
if (p == null) {
return NotFound();
}
return Ok(p);
}
[HttpPost]
public async Task<IActionResult>
SaveProduct([FromBody] ProductBindingTarget target) {
Product p = target.ToProduct();
await context.Products.AddAsync(p);
await context.SaveChangesAsync();
return Ok(p);
}
[HttpPut]
public async Task UpdateProduct([FromBody] Product product) {
context.Update(product);
await context.SaveChangesAsync();
}
[HttpDelete("{id}")]
public async Task DeleteProduct(long id) {
context.Products.Remove(new Product() {
ProductId = id, Name = string.Empty
});
await context.SaveChangesAsync();
}
}
}
Restart ASP.NET Core and repeat the command from listing 19.18, and you will see an exception, which is how the Invoke-WebRequest command responds to error status codes, such as the 404 Not Found returned by the GetProduct action method.
To see the effect of the change to the SaveProduct action method, use a PowerShell command prompt to run the command shown in listing 19.20, which sends a POST request to the web service.
Listing 19.20 Sending a POST request
Invoke-RestMethod http://localhost:5000/api/products -Method POST -Body ➥(@{Name="Boot Laces"; Price=19.99; CategoryId=2; SupplierId=2} | ➥ConvertTo-Json) -ContentType "application/json"
The command will produce the following output, showing the values that were parsed from the JSON data received from the web service:
productId : 13 name : Boot Laces price : 19.99 categoryId : 2 category : supplierId : 2 supplier :
Performing redirections
Many of the action result methods in table 19.7 relate to redirections, which redirect the client to another URL. The most basic way to perform a redirection is to call the Redirect method, as shown in listing 19.21.
Listing 19.21 Redirecting in the ProductsController.cs file in the Controllers folder
using Microsoft.AspNetCore.Mvc;
using WebApp.Models;
namespace WebApp.Controllers {
[Route("api/[controller]")]
public class ProductsController : ControllerBase {
private DataContext context;
public ProductsController(DataContext ctx) {
context = ctx;
}
// ...other action methods omitted for brevity...
[HttpGet("redirect")]
public IActionResult Redirect() {
return Redirect("/api/products/1");
}
}
}
The redirection URL is expressed as a string argument to the Redirect method, which produces a temporary redirection. Restart ASP.NET Core and use a PowerShell command prompt to run the command shown in listing 19.22, which sends a GET request that will be handled by the new action method.
Listing 19.22 Testing redirection
Invoke-RestMethod http://localhost:5000/api/products/redirect
The Invoke-RestMethod command will receive the redirection response from the web service and send a new request to the URL it is given, producing the following response:
productId : 1 name : Green Kayak price : 275.00 categoryId : 1 category : supplierId : 1 supplier :
Redirecting to an action method
You can redirect to another action method using the RedirectToAction method (for temporary redirections) or the RedirectToActionPermanent method (for permanent redirections). Listing 19.23 changes the Redirect action method so that the client will be redirected to another action method defined by the controller.
Listing 19.23 Redirecting in the ProductsController.cs file in the Controllers folder
...
[HttpGet("redirect")]
public IActionResult Redirect() {
return RedirectToAction(nameof(GetProduct), new { Id = 1 });
}
...
The action method is specified as a string, although the nameof expression can be used to select an action method without the risk of a typo. Any additional values required to create the route are supplied using an anonymous object. Restart ASP.NET Core and use a PowerShell command prompt to repeat the command in listing 19.22. The routing system will be used to create a URL that targets the specified action method, producing the following response:
productId : 1 name : Green Kayak price : 275.00 categoryId : 1 category : supplierId : 1 supplier :
If you specify only an action method name, then the redirection will target the current controller. There is an overload of the RedirectToAction method that accepts action and controller names.
When you accept data from clients, you must assume that a lot of the data will be invalid and be prepared to filter out values that the application can't use. The data validation features provided for MVC Framework controllers are described in detail in chapter 29, but for this chapter, I am going to focus on only one problem: ensuring that the client provides values for the properties that are required to store data in the database. The first step in model binding is to apply attributes to the properties of the data model class, as shown in listing 19.24.
Listing 19.24 Attributes in the ProductBindingTarget.cs file in the Models folder
using System.ComponentModel.DataAnnotations;
namespace WebApp.Models {
public class ProductBindingTarget {
[Required]
public required string Name { get; set; }
[Range(1, 1000)]
public decimal Price { get; set; }
[Range(1, long.MaxValue)]
public long CategoryId { get; set; }
[Range(1, long.MaxValue)]
public long SupplierId { get; set; }
public Product ToProduct() => new Product() {
Name = this.Name, Price = this.Price,
CategoryId = this.CategoryId, SupplierId = this.SupplierId
};
}
}
The Required attribute denotes properties for which the client must provide a value and can be applied to properties that are assigned null when there is no value in the request. The Range attribute requires a value between upper and lower limits and is used for primitive types that will default to zero when there is no value in the request.
Listing 19.25 updates the SaveProduct action to perform validation before storing the object that is created by the model binding process, ensuring that only objects that contain values for all four properties decorated with the validation attributes are accepted.
Listing 19.25 Validation in the ProductsController.cs file in the Controllers folder
...
[HttpPost]
public async Task<IActionResult>
SaveProduct([FromBody] ProductBindingTarget target) {
if (ModelState.IsValid) {
Product p = target.ToProduct();
await context.Products.AddAsync(p);
await context.SaveChangesAsync();
return Ok(p);
}
return BadRequest(ModelState);
}
...
The ModelState property is inherited from the ControllerBase class, and the IsValid property returns true if the model binding process has produced data that meets the validation criteria. If the data received from the client is valid, then the action result from the Ok method is returned. If the data sent by the client fails the validation check, then the IsValid property will be false, and the action result from the BadRequest method is used instead. The BadRequest method accepts the object returned by the ModelState property, which is used to describe the validation errors to the client. (There is no standard way to describe validation errors, so the client may rely only on the 400 status code to determine that there is a problem.)
To test the validation, restart ASP.NET Core and use a new PowerShell command prompt to run the command shown in listing 19.26.
Listing 19.26 Testing validation
Invoke-WebRequest http://localhost:5000/api/products -Method POST -Body
➥(@{Name="Boot Laces"} | ConvertTo-Json) -ContentType "application/json"
The command will throw an exception that shows the web service has returned a 400 Bad Request response. Details of the validation errors are not shown because neither the Invoke-WebRequest command nor the Invoke-RestMethod command provides access to error response bodies. Although you can't see it, the body contains a JSON object that has properties for each data property that has failed validation, like this:
{
"Price":["The field Price must be between 1 and 1000."],
"CategoryId":["The field CategoryId must be between 1
and 9.223372036854776E+18."],
"SupplierId":["The field SupplierId must be between 1
and 9.223372036854776E+18."]
}
You can see examples of working with validation messages in chapter 29 where the validation feature is described in detail.
The ApiController attribute can be applied to web service controller classes to change the behavior of the model binding and validation features. The use of the FromBody attribute to select data from the request body and explicitly check the ModelState.IsValid property is not required in controllers that have been decorated with the ApiController attribute. Getting data from the body and validating data are required so commonly in web services that they are applied automatically when the attribute is used, restoring the focus of the code in the controller's action to dealing with the application features, as shown in listing 19.27.
Listing 19.27 The ProductsController.cs file in the Controllers folder
using Microsoft.AspNetCore.Mvc;
using WebApp.Models;
namespace WebApp.Controllers {
[ApiController]
[Route("api/[controller]")]
public class ProductsController : ControllerBase {
private DataContext context;
public ProductsController(DataContext ctx) {
context = ctx;
}
[HttpGet]
public IAsyncEnumerable<Product> GetProducts() {
return context.Products.AsAsyncEnumerable();
}
[HttpGet("{id}")]
public async Task<IActionResult> GetProduct(long id) {
Product? p = await context.Products.FindAsync(id);
if (p == null) {
return NotFound();
}
return Ok(p);
}
[HttpPost]
public async Task<IActionResult>
SaveProduct(ProductBindingTarget target) {
Product p = target.ToProduct();
await context.Products.AddAsync(p);
await context.SaveChangesAsync();
return Ok(p);
}
[HttpPut]
public async Task UpdateProduct(Product product) {
context.Update(product);
await context.SaveChangesAsync();
}
[HttpDelete("{id}")]
public async Task DeleteProduct(long id) {
context.Products.Remove(new Product() {
ProductId = id, Name = string.Empty
});
await context.SaveChangesAsync();
}
[HttpGet("redirect")]
public IActionResult Redirect() {
return RedirectToAction(nameof(GetProduct), new { Id = 1 });
}
}
}
Using the ApiController attribute is optional, but it helps produce concise web service controllers.
The final change I am going to make in this chapter is to remove the null values from the data returned by the web service. The data model classes contain navigation properties that are used by Entity Framework Core to associate related data in complex queries, as explained in chapter 20. For the simple queries that are performed in this chapter, no values are assigned to these navigation properties, which means that the client receives properties for which values are never going to be available. To see the problem, use a PowerShell command prompt to run the command shown in listing 19.28.
Listing 19.28 Sending a GET request
Invoke-WebRequest http://localhost:5000/api/products/1 |
➥Select-Object Content
The command sends a GET request and displays the body of the response from the web service, producing the following output:
Content
-------
{"productId":1,"name":"Green Kayak","price":275.00,
"categoryId":1,"category":null,"supplierId":1,"supplier":null}
The request was handled by the GetProduct action method, and the category and supplier values in the response will always be null because the action doesn't ask Entity Framework Core to populate these properties.
Projecting selected properties
The first approach is to return just the properties that the client requires. This gives you complete control over each response, but it can become difficult to manage and confusing for client developers if each action returns a different set of values. Listing 19.29 shows how the Product object obtained from the database can be projected so that the navigation properties are omitted.
Listing 19.29 Omit properties in the ProductsController.cs file in the Controllers folder
...
[HttpGet("{id}")]
public async Task<IActionResult> GetProduct(long id) {
Product? p = await context.Products.FindAsync(id);
if (p == null) {
return NotFound();
}
return Ok(new {
p.ProductId, p.Name, p.Price, p.CategoryId, p.SupplierId
});
}
...
The properties that the client requires are selected and added to an object that is passed to the Ok method. Restart ASP.NET Core and run the command from listing 19.28, and you will receive a response that omits the navigation properties and their null values, like this:
Content
-------
{"productId":1,"name":"Green Kayak","price":275.00,
"categoryId":1,"supplierId":1}
Configuring the JSON serializer
The JSON serializer can be configured to omit properties when it serializes objects. One way to configure the serializer is with the JsonIgnore attribute, as shown in listing 19.30.
Listing 19.30 Configuring the serializer in the Product.cs file in the Models folder
using System.ComponentModel.DataAnnotations.Schema;
using System.Text.Json.Serialization;
namespace WebApp.Models {
public class Product {
public long ProductId { get; set; }
public required string Name { get; set; }
[Column(TypeName = "decimal(8, 2)")]
public decimal Price { get; set; }
public long CategoryId { get; set; }
public Category? Category { get; set; }
public long SupplierId { get; set; }
[JsonIgnore(Condition = JsonIgnoreCondition.WhenWritingNull)]
public Supplier? Supplier { get; set; }
}
}
The Condition property is assigned a JsonIgnoreCondition value, as described in table 19.8.
Table 19.8 The values defined by the JsonIgnoreCondition enum
|
Name |
Description |
|---|---|
|
|
The property will always be ignored when serializing an object. |
|
|
The property will always be included when serializing an object. |
|
|
The property will be ignored if the value is |
|
|
The property will be ignored if the value is |
The JsonIgnore attribute has been applied using the WhenWritingNull value, which means that the Supplier property will be ignored if its value is null. Listing 19.31 updates the controller to use the Product class directly in the GetProduct action method.
Listing 19.31 A model class in the ProductController.cs file in the Controllers folder
...
[HttpGet("{id}")]
public async Task<IActionResult> GetProduct(long id) {
Product? p = await context.Products.FindAsync(id);
if (p == null) {
return NotFound();
}
return Ok(p);
}
...
Restart ASP.NET Core and run the command from listing 19.28, and you will receive a response that omits the supplier property, like this:
Content
-------
{"productId":1,"name":"Green Kayak","price":275.00,"categoryId":1,
"category":null,
"supplierId":1}
The attribute has to be applied to model classes and is useful when a small number of properties should be ignored, but this can be difficult to manage for more complex data models. A general policy can be defined for serialization using the options pattern, as shown in listing 19.32.
Listing 19.32 Configuring the serializer in the Program.cs file in the WebApp folder
using Microsoft.EntityFrameworkCore;
using WebApp.Models;
using Microsoft.AspNetCore.Mvc;
using System.Text.Json.Serialization;
var builder = WebApplication.CreateBuilder(args);
builder.Services.AddDbContext<DataContext>(opts => {
opts.UseSqlServer(builder.Configuration[
"ConnectionStrings:ProductConnection"]);
opts.EnableSensitiveDataLogging(true);
});
builder.Services.AddControllers();
builder.Services.Configure<JsonOptions>(opts => {
opts.JsonSerializerOptions.DefaultIgnoreCondition
= JsonIgnoreCondition.WhenWritingNull;
});
var app = builder.Build();
app.MapControllers();
app.MapGet("/", () => "Hello World!");
var context = app.Services.CreateScope().ServiceProvider
.GetRequiredService<DataContext>();
SeedData.SeedDatabase(context);
app.Run();
The JSON serializer is configured using the JsonSerializerOptions property of the JsonOptions class, and null values are managed using the DefaultIgnoreCondition property, which is assigned one of the JsonIgnoreCondition values described in table 19.8. (The Always value does not make sense when using the options pattern and will cause an exception when ASP.NET Core is started.)
This configuration change affects all JSON responses and should be used with caution, especially if your data model classes use null values to impart information to the client. To see the effect of the change, restart ASP.NET Core and use a browser to request http://localhost:5000/api/products, which will produce the response shown in figure 19.10.
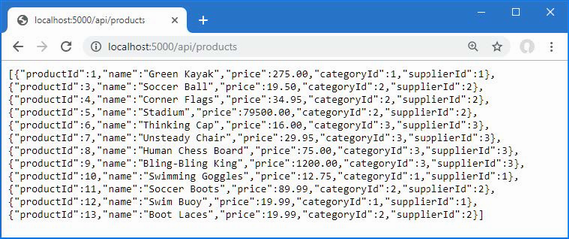
Figure 19.10 Configuring the JSON serializer
In chapter 16, I demonstrated the rate limiting feature and showed you how it is applied to individual endpoints. This feature also works for controllers, using an attribute to select the rate limit that will be applied. In preparation, listing 19.33 defines a rate limiting policy and enables rate limits on controllers.
Listing 19.33 Rate limits in the Program.cs file in the WebApp folder
using Microsoft.EntityFrameworkCore;
using WebApp.Models;
using Microsoft.AspNetCore.Mvc;
using System.Text.Json.Serialization;
using Microsoft.AspNetCore.RateLimiting;
var builder = WebApplication.CreateBuilder(args);
builder.Services.AddDbContext<DataContext>(opts => {
opts.UseSqlServer(builder.Configuration[
"ConnectionStrings:ProductConnection"]);
opts.EnableSensitiveDataLogging(true);
});
builder.Services.AddControllers();
builder.Services.AddRateLimiter(opts => {
opts.AddFixedWindowLimiter("fixedWindow", fixOpts => {
fixOpts.PermitLimit = 1;
fixOpts.QueueLimit = 0;
fixOpts.Window = TimeSpan.FromSeconds(15);
});
});
builder.Services.Configure<JsonOptions>(opts => {
opts.JsonSerializerOptions.DefaultIgnoreCondition
= JsonIgnoreCondition.WhenWritingNull;
});
var app = builder.Build();
app.UseRateLimiter();
app.MapControllers();
app.MapGet("/", () => "Hello World!");
var context = app.Services.CreateScope().ServiceProvider
.GetRequiredService<DataContext>();
SeedData.SeedDatabase(context);
app.Run();
This listing sets up the same policy I used in chapter 16, which limits requests to one every 15 seconds with no queue. Listing 19.34 applies the policy to the controller using the EnableRateLimiting and DisableRateLimiting attributes.
Listing 19.34 Limits in the ProductsController.cs file in the WebApp/Controllers folder
using Microsoft.AspNetCore.Mvc;
using WebApp.Models;
using Microsoft.AspNetCore.RateLimiting;
namespace WebApp.Controllers {
[ApiController]
[Route("api/[controller]")]
[EnableRateLimiting("fixedWindow")]
public class ProductsController : ControllerBase {
private DataContext context;
public ProductsController(DataContext ctx) {
context = ctx;
}
[HttpGet]
public IAsyncEnumerable<Product> GetProducts() {
return context.Products.AsAsyncEnumerable();
}
[HttpGet("{id}")]
[DisableRateLimiting]
public async Task<IActionResult> GetProduct(long id) {
Product? p = await context.Products.FindAsync(id);
if (p == null) {
return NotFound();
}
return Ok(p);
}
// ...other action methods omitted for brevity...
}
}
The EnableRateLimiting attribute is used to apply a rate limiting policy to the controller, specifying the name of the policy as an argument. This policy will apply to all of the action methods defined by the controller, except the GetProduct method, to which the DisableRateLimiting attribute has been applied and to which no limits will be enforced.
Restart ASP.NET Core and use a browser to request http://localhost:5000/api/products. Click the browser's reload button and you will exceed the request limit and see a 503 error, as shown in figure 19.11. You can request the URL http://localhost:5000/api/products/1 as often as you wish without producing an error.
Figure 19.11 An error caused by a rate limit
RESTful web services use the HTTP method and URL to specify an operation to perform.Web services can be created using top-level statements but using controller scales is better for most projects.
The base class for controllers defines properties that access the request data.
Action methods are decorated with attributes to specify the HTTP methods they accept.
ASP.NET Core will perform model binding to extract data from the request and pass it to an action method as an object.
Care must be taken to receive only the data that is required from the user.
Data validation can be performed on the data that is produced by model binding, ensuring that clients provide data in a way the ASP.NET Core application can work with.
The rate limiting features described in chapter 16 can also be applied to web services.
This chapter covers
In this chapter, I describe advanced features that can be used to create RESTful web services. I explain how to deal with related data in Entity Framework Core queries, how to add support for the HTTP PATCH method, how to use content negotiations, and how to use OpenAPI to describe your web services. Table 20.1 puts this chapter in context.
Table 20.1 Putting advanced web service features in context
|
Question |
Answer |
|---|---|
|
What are they? |
The features described in this chapter provide greater control over how ASP.NET Core web services work, including managing the data sent to the client and the format used for that data. |
|
Why are they useful? |
The default behaviors provided by ASP.NET Core don’t meet the needs of every project, and the features described in this chapter allow web services to be reshaped to fit specific requirements. |
|
How are they used? |
The common theme for the features in this chapter is altering the responses produced by action methods. |
|
Are there any pitfalls or limitations? |
It can be hard to decide how to implement web services, especially if they are consumed by third-party clients. The behavior of a web service becomes fixed as soon as clients start using a web service, which means that careful thought is required when using the features described in this chapter. |
|
Are there any alternatives? |
The features described in this chapter are optional, and you can rely on the default behaviors of ASP.NET Core web services. |
Table 20.2 provides a guide to the chapter.
Table 20.2 Chapter guide
|
Problem |
Solution |
Listing |
|---|---|---|
|
Using relational data |
Use the |
4 |
|
Breaking circular references |
Explicitly set navigation properties to |
5 |
|
Allowing clients to selectively update data |
Support the HTTP PATCH method. |
6–9 |
|
Supporting a range of response data types |
Support content formatting and negotiation. |
10–24 |
|
Cache output |
Use the output caching middleware and the |
25, 26 |
|
Documenting a web service |
Use OpenAPI to describe the web service. |
27–29 |
This chapter uses the WebApp project created in chapter 18 and modified in chapter 19. To prepare for this chapter, add a file named SuppliersController.cs to the WebApp/Controllers folder with the content shown in listing 20.1.
Listing 20.1 The contents of the SuppliersController.cs file in the Controllers folder
using Microsoft.AspNetCore.Mvc;
using WebApp.Models;
namespace WebApp.Controllers {
[ApiController]
[Route("api/[controller]")]
public class SuppliersController : ControllerBase {
private DataContext context;
public SuppliersController(DataContext ctx) {
context = ctx;
}
[HttpGet("{id}")]
public async Task<Supplier?> GetSupplier(long id) {
return await context.Suppliers.FindAsync(id);
}
}
}
The controller extends the ControllerBase class, declares a dependency on the DataContext service, and defines an action named GetSupplier that handles GET requests for the /api/[controller]/{id} URL pattern.
Open a new PowerShell command prompt, navigate to the folder that contains the WebApp.csproj file, and run the command shown in listing 20.2 to drop the database.
Listing 20.2 Dropping the database
dotnet ef database drop --force
Once the database has been dropped, use the PowerShell command prompt to run the command shown in listing 20.3.
Listing 20.3 Running the example application
dotnet run
The database will be seeded as part of the application startup. Once ASP.NET Core is running, use a web browser to request http://localhost:5000/api/suppliers/1, which will produce the response shown in figure 20.1.
Figure 20.1 Running the example application
The response shows the Supplier object whose primary key matches the last segment of the request URL. In chapter 19, the JSON serializer was configured to ignore properties with null values, which is why the response doesn’t include the navigation property defined by the Supplier data model class.
Although this isn’t a book about Entity Framework Core, there is one aspect of querying for data that most web services encounter. The data model classes defined in chapter 18 include navigation properties, which Entity Framework Core can populate by following relationships in the database when the Include method is used, as shown in listing 20.4.
Listing 20.4 Related data in the SuppliersController.cs file in the Controllers folder
using Microsoft.AspNetCore.Mvc;
using WebApp.Models;
using Microsoft.EntityFrameworkCore;
namespace WebApp.Controllers {
[ApiController]
[Route("api/[controller]")]
public class SuppliersController : ControllerBase {
private DataContext context;
public SuppliersController(DataContext ctx) {
context = ctx;
}
[HttpGet("{id}")]
public async Task<Supplier?> GetSupplier(long id) {
return await context.Suppliers
.Include(s => s.Products)
.FirstAsync(s => s.SupplierId == id);
}
}
}
The Include method tells Entity Framework Core to follow a relationship in the database and load the related data. In this case, the Include method selects the Products navigation property defined by the Supplier class, which causes Entity Framework Core to load the Product objects associated with the selected Supplier and assign them to the Products property.
Restart ASP.NET Core and use a browser to request http://localhost:5000/api/suppliers/1, which will target the GetSupplier action method. The request fails, and you will see the exception shown in figure 20.2.
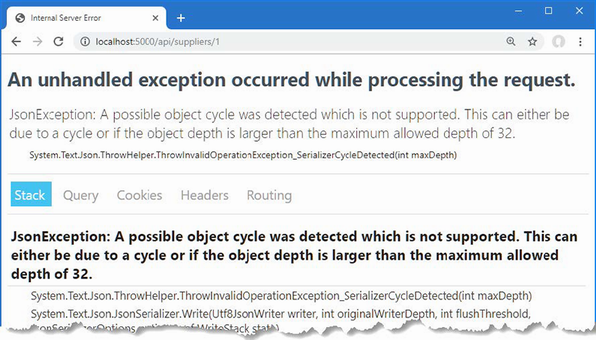
Figure 20.2 An exception caused by querying for related data
The JSON serializer has reported an “object cycle,” which means there is a circular reference in the data that is being serialized for the response.
Looking at the code in listing 20.4, you might struggle to see why using the Include method has created a circular reference. The problem is caused by an Entity Framework Core feature that attempts to minimize the amount of data read from the database but that causes problems in ASP.NET Core applications.
When Entity Framework Core creates objects, it populates navigation properties with objects that have already been created by the same database context. This can be a useful feature in some kinds of applications, such as desktop apps, where a database context object has a long life and is used to make many requests over time. It isn’t useful for ASP.NET Core applications, where a new context object is created for each HTTP request.
Entity Framework Core queries the database for the Product objects associated with the selected Supplier and assigns them to the Supplier.Products navigation property. The problem is that Entity Framework Core then looks at each Product object it has created and uses the query response to populate the Product.Supplier navigation property as well. For an ASP.NET Core application, this is an unhelpful step to take because it creates a circular reference between the navigation properties of the Supplier and Product objects, as shown in figure 20.3.
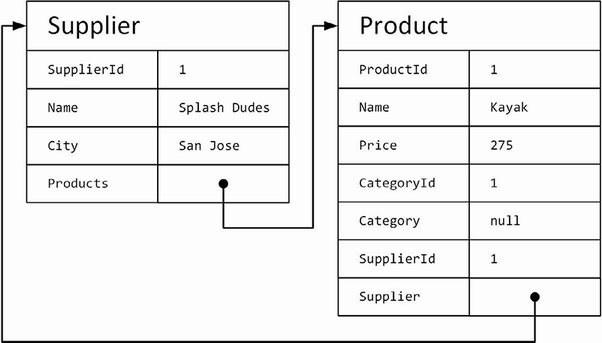
Figure 20.3 Understanding how Entity Framework Core uses related data
When the Supplier object is returned by the controller’s action method, the JSON serializer works its way through the properties and follows the references to the Product objects, each of which has a reference back to the Supplier object, which it follows in a loop until the maximum depth is reached and the exception shown in figure 20.2 is thrown.
There is no way to stop Entity Framework Core from creating circular references in the data it loads in the database. Preventing the exception means presenting the JSON serializer with data that doesn’t contain circular references, which is most easily done by altering the objects after they have been created by Entity Framework Core and before they are serialized, as shown in listing 20.5.
Listing 20.5 References in the SuppliersController.cs file in the Controllers folder
using Microsoft.AspNetCore.Mvc;
using WebApp.Models;
using Microsoft.EntityFrameworkCore;
namespace WebApp.Controllers {
[ApiController]
[Route("api/[controller]")]
public class SuppliersController : ControllerBase {
private DataContext context;
public SuppliersController(DataContext ctx) {
context = ctx;
}
[HttpGet("{id}")]
public async Task<Supplier?> GetSupplier(long id) {
Supplier supplier = await context.Suppliers
.Include(s => s.Products)
.FirstAsync(s => s.SupplierId == id);
if (supplier.Products != null) {
foreach (Product p in supplier.Products) {
p.Supplier = null;
};
}
return supplier;
}
}
}
The foreach loop sets the Supplier property of each Product object to null, which breaks the circular references. Restart ASP.NET Core and request http://localhost:5000/api/suppliers/1 to query for a supplier and its related products, which produces the response shown in figure 20.4.
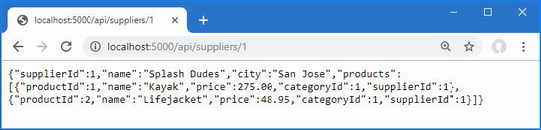
Figure 20.4 Querying for related data
For simple data types, edit operations can be handled by replacing the existing object using the PUT method, which is the approach I took in chapter 19. Even if you only need to change a single property value in the Product class, for example, it isn’t too much trouble to use a PUT method and include the values for all the other Product properties, too.
Not all data types are as easy to work with, either because they define too many properties or because the client has received values only for selected properties. The solution is to use a PATCH request, which sends just the changes to the web service rather than a complete replacement object.
ASP.NET Core has support for working with the JSON Patch standard, which allows changes to be specified in a uniform way. The JSON Patch standard allows for a complex set of changes to be described, but for this chapter, I am going to focus on just the ability to change the value of a property.
I am not going to go into the details of the JSON Patch standard, which you can read at https://tools.ietf.org/html/rfc6902, but the client is going to send the web service JSON data like this in its HTTP PATCH requests:
[
{ "op": "replace", "path": "Name", "value": "Surf Co"},
{ "op": "replace", "path": "City", "value": "Los Angeles"},
]
A JSON Patch document is expressed as an array of operations. Each operation has an op property, which specifies the type of operation, and a path property, which specifies where the operation will be applied.
For the example application—and, in fact, for most applications—only the replace operation is required, which is used to change the value of a property. This JSON Patch document sets new values for the Name and City properties. The properties defined by the Supplier class not mentioned in the JSON Patch document will not be modified.
Support for JSON Patch isn’t installed when a project is created with the Empty template. To install the JSON Patch package, open a new PowerShell command prompt, navigate to the folder that contains the WebApp.csproj file, and run the command shown in listing 20.6. If you are using Visual Studio, you can install the package by selecting Project > Manage NuGet Packages.
Listing 20.6 Installing the JSON Patch package
dotnet add package Microsoft.AspNetCore.Mvc.NewtonsoftJson --version 7.0.0
The Microsoft implementation of JSON Patch relies on the third-party Newtonsoft JSON.NET serializer. Add the statements shown in listing 20.7 to the Program.cs file to enable the JSON.NET serializer.
Listing 20.7 Enabling the serializer in the Program.cs file in the WebApp folder
using Microsoft.EntityFrameworkCore;
using WebApp.Models;
using Microsoft.AspNetCore.Mvc;
//using System.Text.Json.Serialization;
using Microsoft.AspNetCore.RateLimiting;
var builder = WebApplication.CreateBuilder(args);
builder.Services.AddDbContext<DataContext>(opts => {
opts.UseSqlServer(builder.Configuration[
"ConnectionStrings:ProductConnection"]);
opts.EnableSensitiveDataLogging(true);
});
builder.Services.AddControllers().AddNewtonsoftJson();
builder.Services.AddRateLimiter(opts => {
opts.AddFixedWindowLimiter("fixedWindow", fixOpts => {
fixOpts.PermitLimit = 1;
fixOpts.QueueLimit = 0;
fixOpts.Window = TimeSpan.FromSeconds(15);
});
});
//builder.Services.Configure<JsonOptions>(opts => {
// opts.JsonSerializerOptions.DefaultIgnoreCondition
// = JsonIgnoreCondition.WhenWritingNull;
//});
builder.Services.Configure<MvcNewtonsoftJsonOptions>(opts => {
opts.SerializerSettings.NullValueHandling
= Newtonsoft.Json.NullValueHandling.Ignore;
});
var app = builder.Build();
app.UseRateLimiter();
app.MapControllers();
app.MapGet("/", () => "Hello World!");
var context = app.Services.CreateScope().ServiceProvider
.GetRequiredService<DataContext>();
SeedData.SeedDatabase(context);
app.Run();
The AddNewtonsoftJson method enables the JSON.NET serializer, which replaces the standard ASP.NET Core serializer. The JSON.NET serializer has its own configuration class, MvcNewtonsoftJsonOptions, which is applied through the options pattern. Listing 20.7 sets the NullValueHandling value, which tells the serializer to discard properties with null values.
To add support for the PATCH method, add the action method shown in listing 20.8 to the SuppliersController class.
Listing 20.8 Adding an action in the SuppliersController.cs file in the Controllers folder
using Microsoft.AspNetCore.Mvc;
using WebApp.Models;
using Microsoft.EntityFrameworkCore;
using Microsoft.AspNetCore.JsonPatch;
namespace WebApp.Controllers {
[ApiController]
[Route("api/[controller]")]
public class SuppliersController : ControllerBase {
private DataContext context;
public SuppliersController(DataContext ctx) {
context = ctx;
}
[HttpGet("{id}")]
public async Task<Supplier?> GetSupplier(long id) {
Supplier supplier = await context.Suppliers
.Include(s => s.Products)
.FirstAsync(s => s.SupplierId == id);
if (supplier.Products != null) {
foreach (Product p in supplier.Products) {
p.Supplier = null;
};
}
return supplier;
}
[HttpPatch("{id}")]
public async Task<Supplier?> PatchSupplier(long id,
JsonPatchDocument<Supplier> patchDoc) {
Supplier? s = await context.Suppliers.FindAsync(id);
if (s != null) {
patchDoc.ApplyTo(s);
await context.SaveChangesAsync();
}
return s;
}
}
}
The action method is decorated with the HttpPatch attribute, which denotes that it will handle HTTP PATCH requests. The model binding feature is used to process the JSON Patch document through a JsonPatchDocument<T> method parameter. The JsonPatchDocument<T> class defines an ApplyTo method, which applies each operation to an object. The action method in listing 20.8 retrieves a Supplier object from the database, applies the JSON PATCH, and stores the modified object.
Restart ASP.NET Core and use a separate PowerShell command prompt to run the command shown in listing 20.9, which sends an HTTP PATCH request with a JSON PATCH document that changes the value of the City property to Los Angeles.
Listing 20.9 Sending an HTTP PATCH request
Invoke-RestMethod http://localhost:5000/api/suppliers/1 -Method PATCH ➥-ContentType "application/json" -Body '[{"op":"replace","path":"City", ➥"value":"Los Angeles"}]'
The PatchSupplier action method returns the modified Supplier object as its result, which is serialized and sent to the client in the HTTP response. You can also see the effect of the change by using a web browser to request http://localhost:5000/suppliers/1, which produces the response shown in figure 20.5.
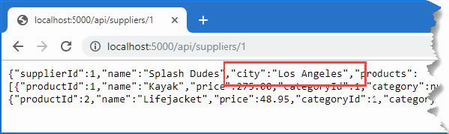
Figure 20.5 Updating using a PATCH request
The web service examples so far have produced JSON results, but this is not the only data format that action methods can produce. The content format selected for an action result depends on four factors: the formats that the client will accept, the formats that the application can produce, the content policy specified by the action method, and the type returned by the action method. Figuring out how everything fits together can be daunting, but the good news is that the default policy works just fine for most applications, and you only need to understand what happens behind the scenes when you need to make a change or when you are not getting results in the format that you expect.
The best way to get acquainted with content formatting is to understand what happens when neither the client nor the action method applies any restrictions to the formats that can be used. In this situation, the outcome is simple and predictable.
If the action method returns a string, the string is sent unmodified to the client, and the Content-Type header of the response is set to text/plain.
For all other data types, including other simple types such as int, the data is formatted as JSON, and the Content-Type header of the response is set to application/json.
Strings get special treatment because they cause problems when they are encoded as JSON. When you encode other simple types, such as the C# int value 2, then the result is a quoted string, such as "2". When you encode a string, you end up with two sets of quotes so that "Hello" becomes ""Hello"". Not all clients cope well with this double encoding, so it is more reliable to use the text/plain format and sidestep the issue entirely. This is rarely an issue because few applications send string values; it is more common to send objects in the JSON format. To see the default policy, add a class file named ContentController.cs to the WebApps/Controllers folder with the code shown in listing 20.10.
Listing 20.10 The contents of the ContentController.cs file in the Controllers folder
using Microsoft.AspNetCore.Mvc;
using Microsoft.EntityFrameworkCore;
using WebApp.Models;
namespace WebApp.Controllers {
[ApiController]
[Route("/api/[controller]")]
public class ContentController : ControllerBase {
private DataContext context;
public ContentController(DataContext dataContext) {
context = dataContext;
}
[HttpGet("string")]
public string GetString() => "This is a string response";
[HttpGet("object")]
public async Task<Product> GetObject() {
return await context.Products.FirstAsync();
}
}
}
The controller defines actions that return string and object results. Restart ASP.NET Core and use a separate PowerShell prompt to run the command shown in listing 20.11; this command sends a request that invokes the GetString action method, which returns a string.
Listing 20.11 Requesting a string response
Invoke-WebRequest http://localhost:5000/api/content/string | select
➥@{n='Content-Type';e={ $_.Headers."Content-Type" }}, Content
This command sends a GET request to the /api/content/string URL and processes the response to display the Content-Type header and the content from the response. The command produces the following output, which shows the Content-Type header for the response:
Content-Type Content ------------ ------- text/plain; charset=utf-8 This is a string response
Next, run the command shown in listing 20.12, which sends a request that will be handled by the GetObject action method.
Listing 20.12 Requesting an object response
Invoke-WebRequest http://localhost:5000/api/content/object | select
➥@{n='Content-Type';e={ $_.Headers."Content-Type" }}, Content
This command produces the following output, formatted for clarity, that shows that the response has been encoded as JSON:
Content-Type Content
------------ -------
application/json; charset=utf-8 {"productId":1,"name":"Kayak",
"price":275.00,"categoryId":1,"supplierId":1}
Most clients include an Accept header in a request, which specifies the set of formats that they are willing to receive in the response, expressed as a set of MIME types. Here is the Accept header that Google Chrome sends in requests:
Accept: text/html,application/xhtml+xml,application/xml;q=0.9,image/avif,
image/webp,image/apng,*/*;q=0.8,application/signed-exchange;v=b3;q=0.9
This header indicates that Chrome can handle the HTML and XHTML formats (XHTML is an XML-compliant dialect of HTML), XML, and the AVIF, WEBP, and APNG formats. Chrome also supports the application/signed-exchange, which is the data type used for signed exchanges, which allow the origin of content to be validated regardless of how it has been delivered.
The q values in the header specify relative preference, where the value is 1.0 by default. Specifying a q value of 0.9 for application/xml tells the server that Chrome will accept XML data but prefers to deal with HTML or XHTML. The */* item tells the server that Chrome will accept any format, but its q value specifies that it is the lowest preference of the specified types. Putting this together means that the Accept header sent by Chrome provides the server with the following information:
Chrome prefers to receive HTML or XHTML data and AVIF, WEBP, and APNG images.
If those formats are not available, then the next most preferred format is XML or a signed exchange.
If none of the preferred formats is available, then Chrome will accept any format.
You might assume from this that you can change the format produced by the ASP.NET Core application by setting the Accept header, but it doesn’t work that way—or, rather, it doesn’t work that way just yet because there is some preparation required.
To see what happens when the Accept header is changed, use a PowerShell prompt to run the command shown in listing 20.13, which sets the Accept header to tell ASP.NET Core that the client is willing to receive only XML data.
Listing 20.13 Requesting XML data
Invoke-WebRequest http://localhost:5000/api/content/object ➥-Headers @{Accept="application/xml"} | select @{n='Content-Type';e={ ➥$_.Headers."Content-Type" }}, Content
Here are the results, which show that the application has sent an application/json response:
Content-Type Content
------------ -------
application/json; charset=utf-8 {"productId":1,"name":"Kayak",
"price":275.00,"categoryId":1,"supplierId":1}
Including the Accept header has no effect on the format, even though the ASP.NET Core application sent the client a format that it hasn’t specified. The problem is that, by default, the MVC Framework is configured to only use JSON. Rather than return an error, the MVC Framework sends JSON data in the hope that the client can process it, even though it was not one of the formats specified by the request Accept header.
Enabling XML formatting
For content negotiation to work, the application must be configured so there is some choice in the formats that can be used. Although JSON has become the default format for web applications, the MVC Framework can also support encoding data as XML, as shown in listing 20.14.
Listing 20.14 Enabling XML formatting in the Program.cs file in the WebApp folder
using Microsoft.EntityFrameworkCore;
using WebApp.Models;
using Microsoft.AspNetCore.Mvc;
using Microsoft.AspNetCore.RateLimiting;
var builder = WebApplication.CreateBuilder(args);
builder.Services.AddDbContext<DataContext>(opts => {
opts.UseSqlServer(builder.Configuration[
"ConnectionStrings:ProductConnection"]);
opts.EnableSensitiveDataLogging(true);
});
builder.Services.AddControllers()
.AddNewtonsoftJson().AddXmlDataContractSerializerFormatters();
builder.Services.AddRateLimiter(opts => {
opts.AddFixedWindowLimiter("fixedWindow", fixOpts => {
fixOpts.PermitLimit = 1;
fixOpts.QueueLimit = 0;
fixOpts.Window = TimeSpan.FromSeconds(15);
});
});
builder.Services.Configure<MvcNewtonsoftJsonOptions>(opts => {
opts.SerializerSettings.NullValueHandling
= Newtonsoft.Json.NullValueHandling.Ignore;
});
var app = builder.Build();
app.UseRateLimiter();
app.MapControllers();
app.MapGet("/", () => "Hello World!");
var context = app.Services.CreateScope().ServiceProvider
.GetRequiredService<DataContext>();
SeedData.SeedDatabase(context);
app.Run();
The XML Serializer has some limitations, including the inability to deal with Entity Framework Core navigation properties because they are defined through an interface. To create an object that can be serialized, listing 20.15 uses ProductBindingTarget defined in chapter 19.
Listing 20.15 Creating an object in the ContentController.cs file in the Controllers folder
using Microsoft.AspNetCore.Mvc;
using Microsoft.EntityFrameworkCore;
using WebApp.Models;
namespace WebApp.Controllers {
[ApiController]
[Route("/api/[controller]")]
public class ContentController : ControllerBase {
private DataContext context;
public ContentController(DataContext dataContext) {
context = dataContext;
}
[HttpGet("string")]
public string GetString() => "This is a string response";
[HttpGet("object")]
public async Task<ProductBindingTarget> GetObject() {
Product p = await context.Products.FirstAsync();
return new ProductBindingTarget() {
Name = p.Name, Price = p.Price, CategoryId = p.CategoryId,
SupplierId = p.SupplierId
};
}
}
}
When the MVC Framework had only the JSON format available, it had no choice but to encode responses as JSON. Now that there is a choice, you can see the content negotiation process working more fully. Restart ASP.NET Core MVC and run the command in listing 20.13 again to request XML data, and you will see the following output (from which I have omitted the namespace attributes for brevity):
Content-Type Content
------------ -------
application/xml; charset=utf-8 <ProductBindingTarget>
<Name>Kayak</Name>
<Price>275.00</Price>
<CategoryId>1</CategoryId>
<SupplierId>1</SupplierId>
</ProductBindingTarget>
Fully respecting accept headers
The MVC Framework will always use the JSON format if the Accept header contains */*, indicating any format, even if there are other supported formats with a higher preference. This is an odd feature that is intended to deal with requests from browsers consistently, although it can be a source of confusion. Run the command shown in listing 20.16 to send a request with an Accept header that requests XML but will accept any other format if XML isn’t available.
Listing 20.16 Requesting an XML response with a fallback
Invoke-WebRequest http://localhost:5000/api/content/object -Headers ➥@{Accept="application/xml,*/*;q=0.8"} | select @{n='Content-Type'; ➥e={ $_.Headers."Content-Type" }}, Content
Even though the Accept header tells the MVC Framework that the client prefers XML, the presence of the */* fallback means that a JSON response is sent. A related problem is that a JSON response will be sent when the client requests a format that the MVC Framework hasn’t been configured to produce, which you can see by running the command shown in listing 20.17.
Listing 20.17 Requesting a PNG response
Invoke-WebRequest http://localhost:5000/api/content/object -Headers ➥@{Accept="img/png"} | select @{n='Content-Type';e={ $_.Headers. ➥"Content-Type" }}, Content
The commands in listing 20.16 and listing 20.17 both produce this response:
Content-Type Content
------------ -------
application/json; charset=utf-8 {"name":"Kayak","price":275.00,
"categoryId":1,"supplierId":1}
In both cases, the MVC Framework returns JSON data, which may not be what the client is expecting. Two configuration settings are used to tell the MVC Framework to respect the Accept setting sent by the client and not send JSON data by default. To change the configuration, add the statements shown in listing 20.18 to the Program.cs file.
Listing 20.18 Configuring negotiation in the Program.cs file in the WebApp folder
using Microsoft.EntityFrameworkCore;
using WebApp.Models;
using Microsoft.AspNetCore.Mvc;
using Microsoft.AspNetCore.RateLimiting;
var builder = WebApplication.CreateBuilder(args);
builder.Services.AddDbContext<DataContext>(opts => {
opts.UseSqlServer(builder.Configuration[
"ConnectionStrings:ProductConnection"]);
opts.EnableSensitiveDataLogging(true);
});
builder.Services.AddControllers()
.AddNewtonsoftJson().AddXmlDataContractSerializerFormatters();
builder.Services.AddRateLimiter(opts => {
opts.AddFixedWindowLimiter("fixedWindow", fixOpts => {
fixOpts.PermitLimit = 1;
fixOpts.QueueLimit = 0;
fixOpts.Window = TimeSpan.FromSeconds(15);
});
});
builder.Services.Configure<MvcNewtonsoftJsonOptions>(opts => {
opts.SerializerSettings.NullValueHandling
= Newtonsoft.Json.NullValueHandling.Ignore;
});
builder.Services.Configure<MvcOptions>(opts => {
opts.RespectBrowserAcceptHeader = true;
opts.ReturnHttpNotAcceptable = true;
});
var app = builder.Build();
app.UseRateLimiter();
app.MapControllers();
app.MapGet("/", () => "Hello World!");
var context = app.Services.CreateScope().ServiceProvider
.GetRequiredService<DataContext>();
SeedData.SeedDatabase(context);
app.Run();
The options pattern is used to set the properties of an MvcOptions object. Setting RespectBrowserAcceptHeader to true disables the fallback to JSON when the Accept header contains */*. Setting ReturnHttpNotAcceptable to true disables the fallback to JSON when the client requests an unsupported data format.
Restart ASP.NET Core and repeat the command from listing 20.16. Instead of a JSON response, the format preferences specified by the Accept header will be respected, and an XML response will be sent. Repeat the command from listing 20.17, and you will receive a response with the 406 status code.
...
Invoke-WebRequest : The remote server returned an error:
(406) Not Acceptable.
...
Sending a 406 code indicates there is no overlap between the formats the client can handle and the formats that the MVC Framework can produce, ensuring that the client doesn’t receive a data format it cannot process.
The data formats that the MVC Framework can use for an action method result can be constrained using the Produces attribute, as shown in listing 20.19.
Listing 20.19 Data formats in the ContentController.cs file in the Controllers folder
using Microsoft.AspNetCore.Mvc;
using Microsoft.EntityFrameworkCore;
using WebApp.Models;
namespace WebApp.Controllers {
[ApiController]
[Route("/api/[controller]")]
public class ContentController : ControllerBase {
private DataContext context;
public ContentController(DataContext dataContext) {
context = dataContext;
}
[HttpGet("string")]
public string GetString() => "This is a string response";
[HttpGet("object")]
[Produces("application/json")]
public async Task<ProductBindingTarget> GetObject() {
Product p = await context.Products.FirstAsync();
return new ProductBindingTarget() {
Name = p.Name, Price = p.Price, CategoryId = p.CategoryId,
SupplierId = p.SupplierId
};
}
}
}
The argument for the attribute specifies the format that will be used for the result from the action, and more than one type can be specified. The Produces attribute restricts the types that the MVC Framework will consider when processing an Accept header. To see the effect of the Produces attribute, use a PowerShell prompt to run the command shown in listing 20.20.
Listing 20.20 Requesting data
Invoke-WebRequest http://localhost:5000/api/content/object -Headers ➥@{Accept="application/xml,application/json;q=0.8"} | select ➥@{n='Content-Type';e={ $_.Headers."Content-Type" }}, Content
The Accept header tells the MVC Framework that the client prefers XML data but will accept JSON. The Produces attribute means that XML data isn’t available as the data format for the GetObject action method and so the JSON serializer is selected, which produces the following response:
Content-Type Content
------------ -------
application/json; charset=utf-8 {"name":"Kayak","price":275.00,
"categoryId":1,"supplierId":1}
The Accept header isn’t always under the control of the programmer who is writing the client. In such situations, it can be helpful to allow the data format for the response to be requested using the URL. This feature is enabled by decorating an action method with the FormatFilter attribute and ensuring there is a format segment variable in the action method’s route, as shown in listing 20.21.
Listing 20.21 Formatting in the ContentController.cs file in the Controllers folder
using Microsoft.AspNetCore.Mvc;
using Microsoft.EntityFrameworkCore;
using WebApp.Models;
namespace WebApp.Controllers {
[ApiController]
[Route("/api/[controller]")]
public class ContentController : ControllerBase {
private DataContext context;
public ContentController(DataContext dataContext) {
context = dataContext;
}
[HttpGet("string")]
public string GetString() => "This is a string response";
[HttpGet("object/{format?}")]
[FormatFilter]
[Produces("application/json", "application/xml")]
public async Task<ProductBindingTarget> GetObject() {
Product p = await context.Products.FirstAsync();
return new ProductBindingTarget() {
Name = p.Name, Price = p.Price, CategoryId = p.CategoryId,
SupplierId = p.SupplierId
};
}
}
}
The FormatFilter attribute is an example of a filter, which is an attribute that can modify requests and responses, as described in chapter 30. This filter gets the value of the format segment variable from the route that matched the request and uses it to override the Accept header sent by the client. I have also expanded the range of types specified by the Produces attribute so that the action method can return both JSON and XML responses.
Each data format supported by the application has a shorthand: xml for XML data, and json for JSON data. When the action method is targeted by a URL that contains one of these shorthand names, the Accept header is ignored, and the specified format is used. To see the effect, restart ASP.NET Core and use the browser to request http://localhost:5000/api/content/object/json and http://localhost:5000/api/content/object/xml, which produce the responses shown in figure 20.6.
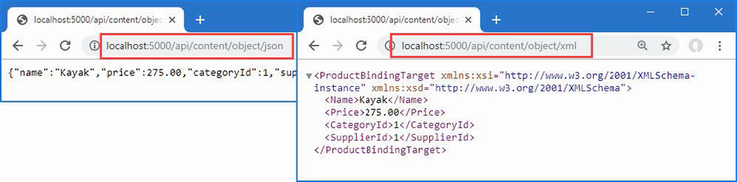
Figure 20.6 Requesting data formats in the URL
Most content formatting decisions focus on the data formats the ASP.NET Core application sends to the client, but the same serializers that deal with results are used to deserialize the data sent by clients in request bodies. The deserialization process happens automatically, and most applications will be happy to accept data in all the formats they are configured to send. The example application is configured to send JSON and XML data, which means that clients can send JSON and XML data in requests.
The Consumes attribute can be applied to action methods to restrict the data types it will handle, as shown in listing 20.22.
Listing 20.22 Adding actions in the ContentController.cs file in the Controllers folder
using Microsoft.AspNetCore.Mvc;
using Microsoft.EntityFrameworkCore;
using WebApp.Models;
namespace WebApp.Controllers {
[ApiController]
[Route("/api/[controller]")]
public class ContentController : ControllerBase {
private DataContext context;
public ContentController(DataContext dataContext) {
context = dataContext;
}
[HttpGet("string")]
public string GetString() => "This is a string response";
[HttpGet("object/{format?}")]
[FormatFilter]
[Produces("application/json", "application/xml")]
public async Task<ProductBindingTarget> GetObject() {
Product p = await context.Products.FirstAsync();
return new ProductBindingTarget() {
Name = p.Name, Price = p.Price, CategoryId = p.CategoryId,
SupplierId = p.SupplierId
};
}
[HttpPost]
[Consumes("application/json")]
public string SaveProductJson(ProductBindingTarget product) {
return $"JSON: {product.Name}";
}
[HttpPost]
[Consumes("application/xml")]
public string SaveProductXml(ProductBindingTarget product) {
return $"XML: {product.Name}";
}
}
}
The new action methods are decorated with the Consumes attribute, restricting the data types that each can handle. The combination of attributes means that HTTP POST attributes whose Content-Type header is application/json will be handled by the SaveProductJson action method. HTTP POST requests whose Content-Type header is application/xml will be handled by the SaveProductXml action method. Restart ASP.NET Core and use a PowerShell command prompt to run the command shown in listing 20.23 to send JSON data to the example application.
Listing 20.23 Sending JSON data
Invoke-RestMethod http://localhost:5000/api/content -Method POST -Body ➥(@{ Name="Swimming Goggles"; Price=12.75; CategoryId=1; SupplierId=1} | ➥ConvertTo-Json) -ContentType "application/json"
The request is automatically routed to the correct action method, which produces the following response:
JSON: Swimming Goggles
Run the command shown in listing 20.24 to send XML data to the example application.
Listing 20.24 Sending XML data
Invoke-RestMethod http://localhost:5000/api/content -Method POST -Body ➥"<ProductBindingTarget xmlns=`"http://schemas.datacontract.org/2004/07/ ➥WebApp.Models`"> <CategoryId>1</CategoryId><Name>Kayak</Name><Price> ➥275.00</Price> <SupplierId>1</SupplierId></ProductBindingTarget>" ➥ -ContentType "application/xml"
The request is routed to the SaveProductXml action method and produces the following response:
XML: Kayak
The MVC Framework will send a 415 - Unsupported Media Type response if a request is sent with a Content-Type header that doesn’t match the data types that the application supports.
In chapter 7, I demonstrated the output caching middleware, which allows caching policies to be defined and applied to endpoints. This feature can be extended to controllers using attributes, allowing fine-grained control over how responses from controllers are cached. To prepare, listing 20.25 configures the example application to set up a caching policy.
Listing 20.25 Configuring caching in the Program.cs file in the WebApp folder
using Microsoft.EntityFrameworkCore;
using WebApp.Models;
using Microsoft.AspNetCore.Mvc;
using Microsoft.AspNetCore.RateLimiting;
var builder = WebApplication.CreateBuilder(args);
// ...statements omitted for brevity...
builder.Services.Configure<MvcOptions>(opts => {
opts.RespectBrowserAcceptHeader = true;
opts.ReturnHttpNotAcceptable = true;
});
builder.Services.AddOutputCache(opts => {
opts.AddPolicy("30sec", policy => {
policy.Cache();
policy.Expire(TimeSpan.FromSeconds(30));
});
});
var app = builder.Build();
app.UseRateLimiter();
app.UseOutputCache();
app.MapControllers();
app.MapGet("/", () => "Hello World!");
var context = app.Services.CreateScope().ServiceProvider
.GetRequiredService<DataContext>();
SeedData.SeedDatabase(context);
app.Run();
This configuration creates an output caching policy named 30sec, which caches content for 30 seconds. The caching policy is applied to the controller using the OutputCache attribute, as shown in listing 20.26.
Listing 20.26 Caching in the ContentController.cs file in the WebApp/Controllers folder
using Microsoft.AspNetCore.Mvc;
using Microsoft.AspNetCore.OutputCaching;
using Microsoft.EntityFrameworkCore;
using WebApp.Models;
namespace WebApp.Controllers
[ApiController]
[Route("/api/[controller]")]
public class ContentController : ControllerBase {
private DataContext context;
public ContentController(DataContext dataContext) {
context = dataContext;
}
[HttpGet("string")]
[OutputCache(PolicyName = "30sec")]
[Produces("application/json")]
public string GetString() =>
$"{DateTime.Now.ToLongTimeString()} String response";
// ...other actions omitted for brevity...
}
}
The OutputCache attribute can be applied to the entire controller, which causes the responses for all action methods, or applied to individual actions. The attribute accepts a policy name as an argument or can be used to create a custom policy. The attribute in listing 20.26 has been applied a single action and applies the policy created in listing 20.25. (I added the Produces attribute to force a JSON response, which is not required for caching but makes the response easier to see in the browser window).
Restart ASP.NET Core and use a browser to request http://localhost:5000/api/content/string. Reload the browser and you will see the same time displayed, illustrating that output is cached for 30 seconds, as shown in figure 20.7.
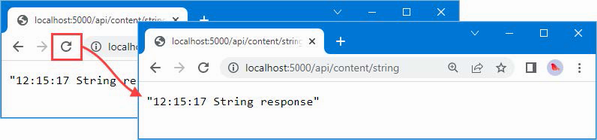
Figure 20.7 Cached output from a controller action
When you are responsible for developing both the web service and its client, the purpose of each action and its results are obvious and are usually written at the same time. If you are responsible for a web service that is consumed by third-party developers, then you may need to provide documentation that describes how the web service works. The OpenAPI specification, which is also known as Swagger, describes web services in a way that can be understood by other programmers and consumed programmatically. In this section, I demonstrate how to use OpenAPI to describe a web service and show you how to fine-tune that description.
The OpenAPI discovery process requires a unique combination of the HTTP method and URL pattern for each action method. The process doesn’t support the Consumes attribute, so a change is required to the ContentController to remove the separate actions for receiving XML and JSON data, as shown in listing 20.27.
Listing 20.27 Removing actions in the ContentController.cs file in the Controllers folder
using Microsoft.AspNetCore.Mvc;
using Microsoft.AspNetCore.OutputCaching;
using Microsoft.EntityFrameworkCore;
using WebApp.Models;
namespace WebApp.Controllers {
[ApiController]
[Route("/api/[controller]")]
public class ContentController : ControllerBase {
private DataContext context;
// ...methods omitted for brevity...
[HttpPost]
[Consumes("application/json")]
public string SaveProductJson(ProductBindingTarget product) {
return $"JSON: {product.Name}";
}
//[HttpPost]
//[Consumes("application/xml")]
//public string SaveProductXml(ProductBindingTarget product) {
// return $"XML: {product.Name}";
//}
}
}
Commenting out one of the action methods ensures that each remaining action has a unique combination of HTTP method and URL.
The Swashbuckle package is the most popular ASP.NET Core implementation of the OpenAPI specification and will automatically generate a description for the web services in an ASP.NET Core application. The package also includes tools that consume that description to allow the web service to be inspected and tested.
Open a new PowerShell command prompt, navigate to the folder that contains the WebApp.csproj file, and run the commands shown in listing 20.28 to install the NuGet package.
Listing 20.28 Adding a package to the project
dotnet add package Swashbuckle.AspNetCore --version 6.4.0
Add the statements shown in listing 20.29 to the Program.cs file to add the services and middleware provided by the Swashbuckle package.
Listing 20.29 Configuring Swashbuckle in the Program.cs file in the WebApp folder
using Microsoft.EntityFrameworkCore;
using WebApp.Models;
using Microsoft.AspNetCore.Mvc;
using Microsoft.AspNetCore.RateLimiting;
using Microsoft.OpenApi.Models;
var builder = WebApplication.CreateBuilder(args);
builder.Services.AddDbContext<DataContext>(opts => {
opts.UseSqlServer(builder.Configuration[
"ConnectionStrings:ProductConnection"]);
opts.EnableSensitiveDataLogging(true);
});
builder.Services.AddControllers()
.AddNewtonsoftJson().AddXmlDataContractSerializerFormatters();
builder.Services.AddRateLimiter(opts => {
opts.AddFixedWindowLimiter("fixedWindow", fixOpts => {
fixOpts.PermitLimit = 1;
fixOpts.QueueLimit = 0;
fixOpts.Window = TimeSpan.FromSeconds(15);
});
});
builder.Services.Configure<MvcNewtonsoftJsonOptions>(opts => {
opts.SerializerSettings.NullValueHandling
= Newtonsoft.Json.NullValueHandling.Ignore;
});
builder.Services.Configure<MvcOptions>(opts => {
opts.RespectBrowserAcceptHeader = true;
opts.ReturnHttpNotAcceptable = true;
});
builder.Services.AddOutputCache(opts => {
opts.AddPolicy("30sec", policy => {
policy.Cache();
policy.Expire(TimeSpan.FromSeconds(30));
});
});
builder.Services.AddSwaggerGen(c => {
c.SwaggerDoc("v1", new OpenApiInfo {
Title = "WebApp", Version = "v1"
});
});
var app = builder.Build();
app.UseRateLimiter();
app.UseOutputCache();
app.MapControllers();
app.MapGet("/", () => "Hello World!");
app.UseSwagger();
app.UseSwaggerUI(options => {
options.SwaggerEndpoint("/swagger/v1/swagger.json", "WebApp");
});
var context = app.Services.CreateScope().ServiceProvider
.GetRequiredService<DataContext>();
SeedData.SeedDatabase(context);
app.Run();
There are two features set up by the statements in listing 20.29. The feature generates an OpenAPI description of the web services that the application contains. You can see the description by restarting ASP.NET Core and using the browser to request the URL http://localhost:5000/swagger/v1/swagger.json, which produces the response shown in figure 20.8. The OpenAPI format is verbose, but you can see each URL that the web service controllers support, along with details of the data each expects to receive and the range of responses that it will generate.
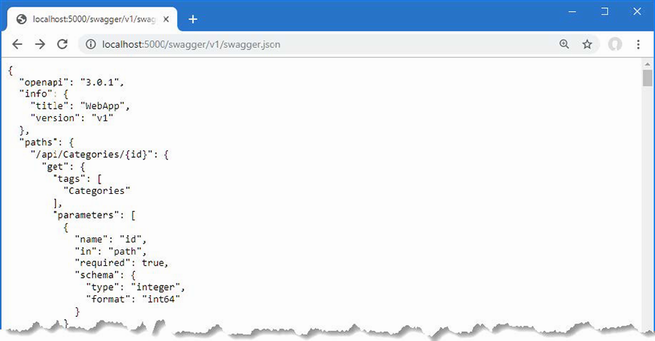
Figure 20.8 The OpenAPI description of the web service
The second feature is a UI that consumes the OpenAPI description of the web service and presents the information in a more easily understood way, along with support for testing each action. Use the browser to request http://localhost:5000/swagger, and you will see the interface shown in figure 20.9. You can expand each action to see details, including the data that is expected in the request and the different responses that the client can expect.
Figure 20.9 The OpenAPI explorer interface
Relying on the API discovery process can produce a result that doesn’t truly capture the web service. You can see this by examining the entry in the Products section that describes GET requests matched by the /api/Products/{id} URL pattern. Expand this item and examine the response section, and you will see there is only one status code response that will be returned, as shown in figure 20.10.
Figure 20.10 The data formats listed in the OpenAPI web service description
The API discovery process makes assumptions about the responses produced by an action method and doesn’t always reflect what can really happen. In this case, the GetProduct action method in the ProductsController class can return another response that the discovery process hasn’t detected.
...
[HttpGet("{id}")]
[DisableRateLimiting]
public async Task<IActionResult> GetProduct(long id) {
Product? p = await context.Products.FindAsync(id);
if (p == null) {
return NotFound();
}
return Ok(p);
}
...
If a third-party developer attempts to implement a client for the web service using the OpenAPI data, they won’t be expecting the 404 - Not Found response that the action sends when it can’t find an object in the database.
Running the API analyzer
ASP.NET Core includes an analyzer that inspects web service controllers and highlights problems like the one described in the previous section. To enable the analyzer, add the elements shown in listing 20.30 to the WebApp.csproj file. (If you are using Visual Studio, right-click the WebApp project item in the Solution Explorer and select Edit Project File from the pop-up menu.)
Listing 20.30 Enabling the analyzer in the WebApp.csproj file in the WebApp folder
<Project Sdk="Microsoft.NET.Sdk.Web">
<PropertyGroup>
<TargetFramework>net7.0</TargetFramework>
<Nullable>enable</Nullable>
<ImplicitUsings>enable</ImplicitUsings>
</PropertyGroup>
<ItemGroup>
<PackageReference Include="Microsoft.AspNetCore.Mvc.NewtonsoftJson"
Version="7.0.0" />
<PackageReference Include="Microsoft.EntityFrameworkCore.Design"
Version="7.0.0">
<IncludeAssets>
runtime; build; native; contentfiles; analyzers;
buildtransitive
</IncludeAssets>
<PrivateAssets>all</PrivateAssets>
</PackageReference>
<PackageReference Include="Microsoft.EntityFrameworkCore.SqlServer"
Version="7.0.0" />
<PackageReference Include="Swashbuckle.AspNetCore" Version="6.4.0" />
</ItemGroup>
<PropertyGroup>
<IncludeOpenAPIAnalyzers>true</IncludeOpenAPIAnalyzers>
</PropertyGroup>
</Project>
If you are using Visual Studio, you will see any problems detected by the API analyzer shown in the controller class file, as shown in figure 20.11.
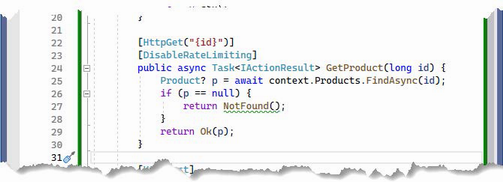
Figure 20.11 A problem detected by the API analyzer
If you are using Visual Studio Code, you will see warning messages when the project is compiled, either using the dotnet build command or when it is executed using the dotnet run command. When the project is compiled, you will see this message that describes the issue in the ProductController class:
Controllers\ProductsController.cs(27,24): warning API1000:
Action method returns undeclared status code '404'.
[C:\WebApp\WebApp.csproj]
1 Warning(s)
0 Error(s)
Declaring the action method result type
To fix the problem detected by the analyzer, the ProducesResponseType attribute can be used to declare each of the response types that the action method can produce, as shown in listing 20.31.
Listing 20.31 Declaring results in the ProductsController.cs file in the Controllers folder
...
[HttpGet("{id}")]
[DisableRateLimiting]
[ProducesResponseType(StatusCodes.Status200OK)]
[ProducesResponseType(StatusCodes.Status404NotFound)]
public async Task<IActionResult> GetProduct(long id) {
Product? p = await context.Products.FindAsync(id);
if (p == null) {
return NotFound();
}
return Ok(p);
}
...
Restart ASP.NET Core and use a browser to request http://localhost:5000/swagger, and you will see the description for the action method has been updated to reflect the 404 response, as shown in figure 20.12.
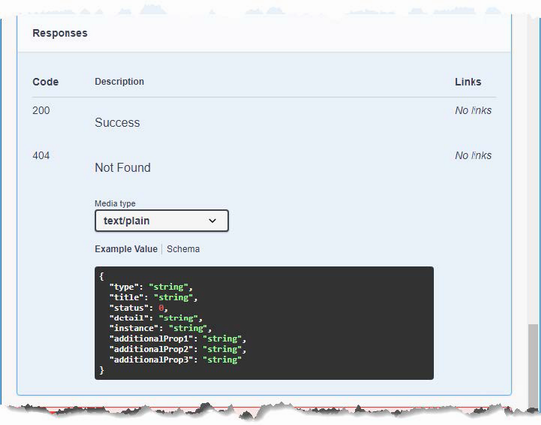
Figure 20.12 Reflecting all the status codes produced by an action method
The Entity Framework Core-related data feature can cause serialization problems when used in web service results.
Cycles in object data must be broken before serialization.
The PATCH method is used to specify fine-grained changes to data and is supported by ASP.NET Core.
ASP.NET Core uses JSON to serialize data by default but supports a content negotiation process that allows clients to specify the formats they can accept.
The output from web services can be cached, using the caching middleware that can be applied to any endpoint.
Documentation for a web service can be generated using the OpenAPI specification.
In this chapter, I introduce the Razor view engine, which is responsible for generating HTML responses that can be displayed directly to the user (as opposed to the JSON and XML responses, which are typically consumed by other applications). Views are files that contain C# expressions and HTML fragments that are processed by the view engine to generate HTML responses. I show how views work, explain how they are used in action methods, and describe the different types of C# expressions they contain. In chapter 22, I describe some of the other features that views support. Table 21.1 puts Razor views in context.
Table 21.1 Putting Razor Views in context
|
Question |
Answer |
|---|---|
|
What are they? |
Views are files that contain a mix of static HTML content and C# expressions. |
|
Why are they useful? |
Views are used to create HTML responses for HTTP requests. The C# expressions are evaluated and combined with the HTML content to create a response. |
|
How are they used? |
The |
|
Are there any pitfalls or limitations? |
It can take a little time to get used to the syntax of view files and the way they combine code and content. |
|
Are there any alternatives? |
There are third-party view engines that can be used in ASP.NET Core MVC, but their use is limited. |
Table 21.2 provides a guide to the chapter
Table 21.2 Chapter guide
|
Problem |
Solution |
Listing |
|---|---|---|
|
Enabling views |
Use the |
4, 6 |
|
Returning an HTML response from a controller action method |
Use the |
5 |
|
Creating dynamic HTML content |
Create a Razor View that uses expressions for dynamic content. |
7, 8, 19, 20 |
|
Selecting a view by name |
Provide the view name as an argument to the |
9, 10 |
|
Creating a view that can be used by multiple controllers |
Create a shared view. |
11–13 |
|
Specifying a model type for a view |
Use an |
14–18 |
|
Allow for null view model values |
Use a nullable type in the |
19–21 |
|
Generating content selectively |
Use |
22–28 |
|
Including C# code in a view |
Use a code block. |
29 |
This chapter uses the WebApp project from chapter 20. To prepare for this chapter, replace the contents of the Program.cs file with the statements shown in listing 21.1, which removes some of the services and middleware used in earlier chapters.
Listing 21.1 Replacing the contents of the Program.cs file in the WebApp folder
using Microsoft.EntityFrameworkCore;
using WebApp.Models;
var builder = WebApplication.CreateBuilder(args);
builder.Services.AddDbContext<DataContext>(opts => {
opts.UseSqlServer(builder.Configuration[
"ConnectionStrings:ProductConnection"]);
opts.EnableSensitiveDataLogging(true);
});
builder.Services.AddControllers();
var app = builder.Build();
app.UseStaticFiles();
app.MapControllers();
var context = app.Services.CreateScope().ServiceProvider
.GetRequiredService<DataContext>();
SeedData.SeedDatabase(context);
app.Run();
Open a new PowerShell command prompt, navigate to the folder that contains the WebApp.csproj file, and run the command shown in listing 21.2 to drop the database.
Listing 21.2 Dropping the database
dotnet ef database drop --force
Use the PowerShell command prompt to run the command shown in listing 21.3.
Listing 21.3 Running the example application
dotnet watch
The database will be seeded as part of the application startup. Once ASP.NET Core is running, use a web browser to request http://localhost:5000/api/products, which will produce the response shown in figure 21.1.
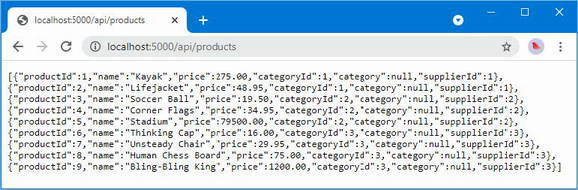
Figure 21.1 Running the example application
This chapter uses dotnet watch, rather than the dotnet run command used in earlier chapters. The dotnet watch command is useful when working with views because changes are pushed to the browser automatically. At some point, however, you will make a change that cannot be processed by the dotnet watch command, and you will see a message like this at the command prompt:
watch : Unable to apply hot reload because of a rude edit.
watch : Do you want to restart your app - Yes (y) / No (n) /
Always (a) / Never (v)?
The point at which this arises depends on the editor you have chosen, but when this happens, select the Always option so that the application will always be restarted when a reload cannot be performed.
I started this chapter with a web service controller to demonstrate the similarity with a controller that uses views. It is easy to think about web service and view controllers as being separate, but it is important to understand that the same underlying features are used for both types of response. In the sections that follow, I configure the application to support HTML applications and repurpose the Home controller so that it produces an HTML response.
The first step is to configure ASP.NET Core to enable HTML responses, as shown in listing 21.4.
Listing 21.4 Changing the configuration in the Program.cs file in the WebApp folder
using Microsoft.EntityFrameworkCore;
using WebApp.Models;
var builder = WebApplication.CreateBuilder(args);
builder.Services.AddDbContext<DataContext>(opts => {
opts.UseSqlServer(builder.Configuration[
"ConnectionStrings:ProductConnection"]);
opts.EnableSensitiveDataLogging(true);
});
builder.Services.AddControllersWithViews();
var app = builder.Build();
app.UseStaticFiles();
app.MapControllers();
app.MapControllerRoute("Default",
"{controller=Home}/{action=Index}/{id?}");
var context = app.Services.CreateScope().ServiceProvider
.GetRequiredService<DataContext>();
SeedData.SeedDatabase(context);
app.Run();
HTML responses are created using views, which are files containing a mix of HTML elements and C# expressions. The AddControllers method I used in chapter 19 to enable the MVC Framework only supports web service controllers. To enable support for views, the AddControllersWithViews method is used.
The second change is the addition of the MapControllerRoute method in the endpoint routing configuration. Controllers that generate HTML responses don’t use the same routing attributes that are applied to web service controllers and rely on a feature named convention routing, which I describe in the next section.
Controllers for HTML applications are similar to those used for web services but with some important differences. To create an HTML controller, add a class file named HomeController.cs to the Controllers folder with the statements shown in listing 21.5.
Listing 21.5 The contents of the HomeController.cs file in the Controllers folder
using Microsoft.AspNetCore.Mvc;
using WebApp.Models;
namespace WebApp.Controllers {
public class HomeController : Controller {
private DataContext context;
public HomeController(DataContext ctx) {
context = ctx;
}
public async Task<IActionResult> Index(long id = 1) {
return View(await context.Products.FindAsync(id));
}
}
}
The base class for HTML controllers is Controller, which is derived from the ControllerBase class used for web service controllers and provides additional methods that are specific to working with views.
...
public class HomeController: Controller {
...
Action methods in HTML controllers return objects that implement the IActionResult interface, which is the same result type used in chapter 19 to return specific status code responses. The Controller base class provides the View method, which is used to select a view that will be used to create a response.
... return View(await context.Products.FindAsync(id)); ...
The View method creates an instance of the ViewResult class, which implements the IActionResult interface and tells the MVC Framework that a view should be used to produce the response for the client. The argument to the View method is called the view model and provides the view with the data it needs to generate a response.
There are no views for the MVC Framework to use at the moment, but if you restart ASP.NET Core and use a browser to request http://localhost:5000, you will see an error message that shows how the MVC Framework responds to the ViewResult it received from the Index action method, as shown in figure 21.2.
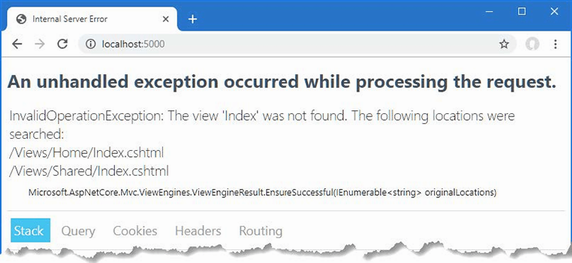
Figure 21.2 Using a view result
Behind the scenes, there are two important conventions at work, which are described in the following sections.
Understanding convention routing
HTML controllers rely on convention routing instead of the Route attribute. The convention in this term refers to the use of the controller class name and the action method name used to configure the routing system, which was done in listing 21.5 by adding this statement to the endpoint routing configuration:
...
app.MapControllerRoute("Default",
"{controller=Home}/{action=Index}/{id?}");
...
The route that this statement sets up matches two- and three-segment URLs. The value of the first segment is used as the name of the controller class, without the Controller suffix, so that Home refers to the HomeController class. The second segment is the name of the action method, and the optional third segment allows action methods to receive a parameter named id. Default values are used to select the Index action method on the Home controller for URLs that do not contain all the segments. This is such a common convention that the same routing configuration can be set up without having to specify the URL pattern, as shown in listing 21.6.
Listing 21.6 The default routing convention in the Program.cs file in the WebApp folder
using Microsoft.EntityFrameworkCore;
using WebApp.Models;
var builder = WebApplication.CreateBuilder(args);
builder.Services.AddDbContext<DataContext>(opts => {
opts.UseSqlServer(builder.Configuration[
"ConnectionStrings:ProductConnection"]);
opts.EnableSensitiveDataLogging(true);
});
builder.Services.AddControllersWithViews();
var app = builder.Build();
app.UseStaticFiles();
app.MapControllers();
app.MapDefaultControllerRoute();
var context = app.Services.CreateScope().ServiceProvider
.GetRequiredService<DataContext>();
SeedData.SeedDatabase(context);
app.Run();
The MapDefaultControllerRoute method avoids the risk of mistyping the URL pattern and sets up the convention-based routing. I have configured one route in this chapter, but an application can define as many routes as it needs, and later chapters expand the routing configuration to make examples easier to follow.
Understanding the Razor View convention
When the Index action method defined by the Home controller is invoked, it uses the value of the id parameter to retrieve an object from the database and passes it to the View method.
...
public async Task<IActionResult> Index(long id = 1) {
return View(await context.Products.FindAsync(id));
}
...
When an action method invokes the View method, it creates a ViewResult that tells the MVC Framework to use the default convention to locate a view. The Razor view engine looks for a view with the same name as the action method, with the addition of the cshtml file extension, which is the file type used by the Razor view engine. Views are stored in the Views folder, grouped by the controller they are associated with. The first location searched is the Views/Home folder, since the action method is defined by the Home controller (the name of which is taken by dropping Controller from the name of the controller class). If the Index.cshtml file cannot be found in the Views/Home folder, then the Views/Shared folder is checked, which is the location where views that are shared between controllers are stored.
While most controllers have their own views, views can also be shared so that common functionality doesn’t have to be duplicated, as demonstrated in the “Using Shared Views” section.
The exception response in figure 21.2 shows the result of both conventions. The routing conventions are used to process the request using the Index action method defined by the Home controller, which tells the Razor view engine to use the view search convention to locate a view. The view engine uses the name of the action method and controller to build its search pattern and checks for the Views/Home/Index.cshtml and Views/Shared/Index.cshtml files.
To provide the MVC Framework with a view to display, create the Views/Home folder and add to it a file named Index.cshtml with the content shown in listing 21.7. If you are using Visual Studio, create the view by right-clicking the Views/Home folder, selecting Add > New Item from the pop-up menu, and selecting the Razor View - Empty item in the ASP.NET Core > Web category, as shown in figure 21.3.
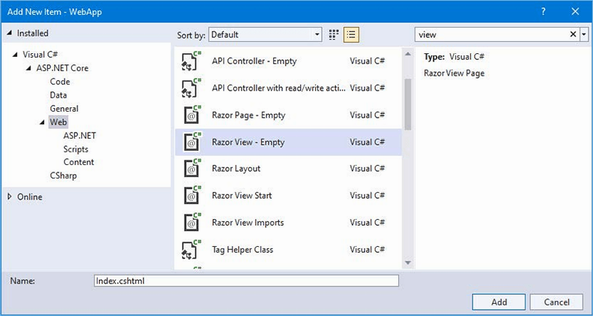
Figure 21.3 Creating a view using Visual Studio
Listing 21.7 The contents of the Index.cshtml file in the Views/Home folder
<!DOCTYPE html>
<html>
<head>
<link href="/lib/bootstrap/css/bootstrap.min.css" rel="stylesheet" />
</head>
<body>
<h6 class="bg-primary text-white text-center m-2 p-2">
Product Table
</h6>
<div class="m-2">
<table class="table table-sm table-striped table-bordered">
<tbody>
<tr><th>Name</th><td>@Model.Name</td></tr>
<tr>
<th>Price</th>
<td>@Model.Price.ToString("c")</td>
</tr>
</tbody>
</table>
</div>
</body>
</html>
The view file contains standard HTML elements that are styled using the Bootstrap CSS framework, which is applied through the class attribute. The key view feature is the ability to generate content using C# expressions, like this:
...
<tr><th>Name</th><td>@Model.Name</td></tr>
<tr><th>Price</th><td>@Model.Price.ToString("c")</td></tr>
...
I explain how these expressions work in the “Understanding the Razor Syntax” section, but for now, it is enough to know that these expressions insert the value of the Name and Price properties from the Product view model passed to the View method by the action method in listing 21.5. Restart ASP.NET Core and use a browser to request http://localhost:5000, and you will see the HTML response shown in figure 21.4.
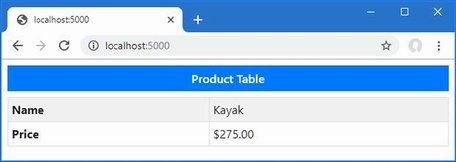
Figure 21.4 A view response
Modifying a Razor View
The dotnet watch command detects and recompiles Razor Views automatically, meaning that the ASP.NET Core runtime doesn’t have to be restarted when views are edited. To demonstrate the recompilation process, listing 21.8 adds new elements to the Index view.
Listing 21.8 Adding Elements in the Index.cshtml File in the Views/Home Folder
<!DOCTYPE html>
<html>
<head>
<link href="/lib/bootstrap/css/bootstrap.min.css" rel="stylesheet" />
</head>
<body>
<h6 class="bg-primary text-white text-center m-2 p-2">
Product Table
</h6>
<div class="m-2">
<table class="table table-sm table-striped table-bordered">
<tbody>
<tr><th>Name</th><td>@Model.Name</td></tr>
<tr>
<th>Price</th>
<td>@Model.Price.ToString("c")</td>
</tr>
<tr><th>Category ID</th><td>@Model.CategoryId</td></tr>
</tbody>
</table>
</div>
</body>
</html>
Save the changes to the view; the change will be detected, and the browser will be automatically reloaded to display the change, as shown in figure 21.5.
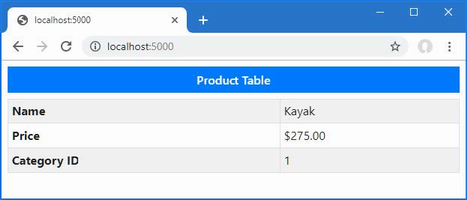
Figure 21.5 Modifying a Razor View
The action method in listing 21.5 relies entirely on convention, leaving Razor to select the view that is used to generate the response. Action methods can select a view by providing a name as an argument to the View method, as shown in listing 21.9.
Listing 21.9 Selecting a view in the HomeController.cs file in the Controllers folder
using Microsoft.AspNetCore.Mvc;
using WebApp.Models;
namespace WebApp.Controllers {
public class HomeController : Controller {
private DataContext context;
public HomeController(DataContext ctx) {
context = ctx;
}
public async Task<IActionResult> Index(long id = 1) {
Product? prod = await context.Products.FindAsync(id);
if (prod?.CategoryId == 1) {
return View("Watersports", prod);
} else {
return View(prod);
}
}
}
}
The action method selects the view based on the CategoryId property of the Product object that is retrieved from the database. If the CategoryId is 1, the action method invokes the View method with an additional argument that selects a view named Watersports.
...
return View("Watersports", prod);
...
Notice that the action method doesn’t specify the file extension or the location for the view. It is the job of the view engine to translate Watersports into a view file.
If you save the HomeController.cs file, dotnet watch will detect the change and reload the browser, which will cause an error because the view file doesn’t exist. To create the view, add a Razor View file named Watersports.cshtml to the Views/Home folder with the content shown in listing 21.10.
Listing 21.10 The contents of the Watersports.cshtml file in the Views/Home folder
<!DOCTYPE html>
<html>
<head>
<link href="/lib/bootstrap/css/bootstrap.min.css" rel="stylesheet" />
</head>
<body>
<h6 class="bg-secondary text-white text-center m-2 p-2">
Watersports
</h6>
<div class="m-2">
<table class="table table-sm table-striped table-bordered">
<tbody>
<tr><th>Name</th><td>@Model.Name</td></tr>
<tr>
<th>Price</th>
<td>@Model.Price.ToString("c")</td>
</tr>
<tr><th>Category ID</th><td>@Model.CategoryId</td></tr>
</tbody>
</table>
</div>
</body>
</html>
The new view follows the same pattern as the Index view but has a different title above the table. Save the change and request http://localhost:5000/home/index/1 and http://localhost:5000/home/index/4. The action method selects the Watersports view for the first URL and the default view for the second URL, producing the two responses shown in figure 21.6.
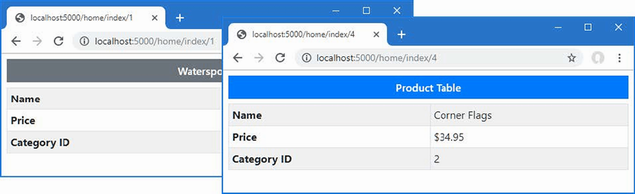
Figure 21.6 Selecting views
Using shared views
When the Razor view engine locates a view, it looks in the Views/[controller] folder and then the Views/Shared folder. This search pattern means that views that contain common content can be shared between controllers, avoiding duplication. To see how this process works, add a Razor View file named Common.cshtml to the Views/Shared folder with the content shown in listing 21.11.
Listing 21.11 The contents of the Common.cshtml file in the Views/Shared folder
<!DOCTYPE html>
<html>
<head>
<link href="/lib/bootstrap/css/bootstrap.min.css" rel="stylesheet" />
</head>
<body>
<h6 class="bg-secondary text-white text-center m-2 p-2">
Shared View
</h6>
</body>
</html>
Next, add an action method to the Home controller that uses the new view, as shown in listing 21.12.
Listing 21.12 Adding an action in the HomeController.cs file in the Controllers folder
using Microsoft.AspNetCore.Mvc;
using WebApp.Models;
namespace WebApp.Controllers {
public class HomeController : Controller {
private DataContext context;
public HomeController(DataContext ctx) {
context = ctx;
}
public async Task<IActionResult> Index(long id = 1) {
Product? prod = await context.Products.FindAsync(id);
if (prod?.CategoryId == 1) {
return View("Watersports", prod);
} else {
return View(prod);
}
}
public IActionResult Common() {
return View();
}
}
}
The new action relies on the convention of using the method name as the name of the view. When a view doesn’t require any data to display to the user, the View method can be called without arguments. Next, create a new controller by adding a class file named SecondController.cs to the Controllers folder, with the code shown in listing 21.13.
Listing 21.13 The contents of the SecondController.cs file in the Controllers folder
using Microsoft.AspNetCore.Mvc;
namespace WebApp.Controllers {
public class SecondController : Controller {
public IActionResult Index() {
return View("Common");
}
}
}
The new controller defines a single action, named Index, which invokes the View method to select the Common view. Wait for the application to be built and navigate to http://localhost:5000/home/common and http://localhost:5000/second, both of which will render the Common view, producing the responses shown in figure 21.7.
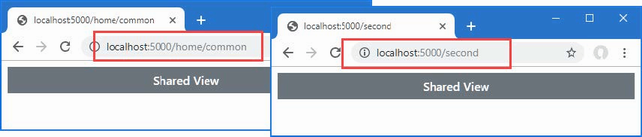
Figure 21.7 Using a shared view
Razor Views contain HTML elements and C# expressions. Expressions are mixed in with the HTML elements and denoted with the @ character, like this:
... <tr><th>Name</th><td>@Model.Name</td></tr> ...
When the view is used to generate a response, the expressions are evaluated, and the results are included in the content sent to the client. This expression gets the name of the Product view model object provided by the action method and produces output like this:
... <tr><th>Name</th><td>Corner Flags</td></tr> ...
This transformation can seem like magic, but Razor is simpler than it first appears. Razor Views are converted into C# classes that inherit from the RazorPage class, which are then compiled like any other C# class.
The view from listing 21.10, for example, would be transformed into a class like this:
namespace AspNetCoreGeneratedDocument {
using System;
using System.Collections.Generic;
using System.Linq;
using System.Threading.Tasks;
using Microsoft.AspNetCore.Mvc;
using Microsoft.AspNetCore.Mvc.Rendering;
using Microsoft.AspNetCore.Mvc.ViewFeatures;
internal sealed class Views_Home_Watersports : RazorPage<dynamic> {
public async override Task ExecuteAsync() {
WriteLiteral("<!DOCTYPE html>\r\n<html>\r\n");
WriteLiteral("<link href=\"");
WriteLiteral("/lib/bootstrap/css/bootstrap.min.css\"");
WriteLiteral("rel=\"stylesheet\" />\r\n");
HeadTagHelper = CreateTagHelper<TagHelpers.HeadTagHelper>();
__tagHelperExecutionContext.Add(HeadTagHelper);
Write(__tagHelperExecutionContext.Output);
WriteLiteral("\r\n");
__tagHelperExecutionContext =
__tagHelperScopeManager.Begin("body",
TagMode.StartTagAndEndTag, "76ad69...", async() => {
WriteLiteral("<h6 class=\"bg-secondary text-white ");
WriteLiteral("text-center m-2 p-2\">Watersports</h6>\n");
WriteLiteral("<div class=\"m-2\"><table class=\"table ");
WriteLiteral("table-sm table-striped table-bordered\">");
WriteLiteral("<tbody>\r\n <tr>");
WriteLiteral("<th>Name</th><td>");
Write(Model.Name);
WriteLiteral("</td></tr>\r\n<tr><th>Price</th><td>");
Write(Model.Price.ToString("c"));
WriteLiteral("</td></tr>\r\n<tr><th>Category ID</th><td>");
Write(Model.CategoryId);
WriteLiteral("</td></tr>\r\n</tbody>\r\n</table>\r\n");
WriteLiteral("</div>\r\n");
});
BodyTagHelper = CreateTagHelper<TagHelpers.BodyTagHelper>();
__tagHelperExecutionContext.Add(BodyTagHelper);
Write(__tagHelperExecutionContext.Output);
WriteLiteral("\r\n</html>\r\n");
}
public IModelExpressionProvider ModelExpressionProvider
{ get; private set; }
public IUrlHelper Url { get; private set; }
public IViewComponentHelper Component { get; private set; }
public IJsonHelper Json { get; private set; }
public IHtmlHelper<dynamic> Html { get; private set; }
}
}
This class is a simplification of the code that is generated so that I can focus on the features that are most important for this chapter. The first point to note is that the class generated from the view inherits from the RazorPage<T> class.
...
internal sealed class Views_Home_Watersports : RazorPage<dynamic> {
...
Table 21.3 describes the most useful properties and methods defined by RazorPage<T>.
Table 21.3 Useful RazorPage<T> members
|
Name |
Description |
|---|---|
|
|
This property returns the |
|
|
This method is used to generate the output from the view. |
|
|
This property is used to set the view layout, as described in chapter 22. |
|
|
This property returns the view model passed to the |
|
|
This method is used in layouts to include content from a view, as described in chapter 22. |
|
|
This method is used in layouts to include content from a section in a view, as described in chapter 22. |
|
|
This property is used to access the temp data feature, which is described in chapter 22. |
|
|
This property is used to access the view bag, which is described in chapter 22. |
|
|
This property returns a |
|
|
This property returns the view data, which I used for unit testing controllers in the SportsStore application. |
|
|
This method writes a string, which will be safely encoded for use in HTML. |
|
|
This method writes a string without encoding it for safe use in HTML. |
The expressions in the view are translated into calls to the Write method, which encodes the result of the expression so that it can be included safely in an HTML document. The WriteLiteral method is used to deal with the static HTML regions of the view, which don’t need further encoding. The result is a fragment like this from the CSHTML file:
... <tr><th>Name</th><td>@Model.Name</td></tr> ...
This is converted into a series of C# statements like these in the ExecuteAsync method:
...
WriteLiteral("<th>Name</th><td>");
Write(Model.Name);
WriteLiteral("</td></tr>");
...
When the ExecuteAsync method is invoked, the response is generated with a mix of the static HTML and the expressions contained in the view. The results from evaluating the expressions are written to the response, producing HTML like this:
... <th>Name</th><td>Kayak</td></tr> ...
In addition to the properties and methods inherited from the RazorPage<T> class, the generated view class defines the properties described in table 21.4, some of which are used for features described in later chapters.
Table 21.4 The additional View properties
|
Name |
Description |
|---|---|
|
|
This property returns a helper for working with view components, which is accessed through the |
|
|
This property returns an implementation of the |
|
|
This property returns an implementation of the |
|
|
This property provides access to expressions that select properties from the model, which is used through tag helpers, described in chapters 25–27. |
|
|
This property returns a helper for working with URLs, as described in chapter 26. |
The generated class for the Watersports.cshtml file is derived from RazorPage<T>, but Razor doesn’t know what type will be used by the action method for the view model, so it has selected dynamic as the generic type argument. This means that the @Model expression can be used with any property or method name, which is evaluated at runtime when a response is generated. To demonstrate what happens when a nonexistent member is used, add the content shown in listing 21.14 to the Watersports.cshtml file.
Listing 21.14 Adding content in the Watersports.cshtml file in the Views/Home folder
<!DOCTYPE html>
<html>
<head>
<link href="/lib/bootstrap/css/bootstrap.min.css" rel="stylesheet" />
</head>
<body>
<h6 class="bg-secondary text-white text-center m-2 p-2">
Watersports
</h6>
<div class="m-2">
<table class="table table-sm table-striped table-bordered">
<tbody>
<tr><th>Name</th><td>@Model.Name</td></tr>
<tr>
<th>Price</th>
<td>@Model.Price.ToString("c")</td>
</tr>
<tr><th>Category ID</th><td>@Model.CategoryId</td></tr>
<tr><th>Tax Rate</th><td>@Model.TaxRate</td></tr>
</tbody>
</table>
</div>
</body>
</html>
Use a browser to request http://localhost:5000, and you will see the exception shown in figure 21.8. You may need to start ASP.NET Core to see this error because the dotnet watch command can be confused when it is unable to load the compiled view.
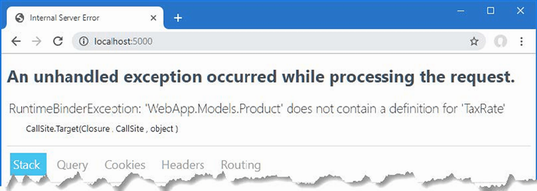
Figure 21.8 Using a nonexistent property in a view expression
To check expressions during development, the type of the Model object can be specified using the model keyword, as shown in listing 21.15.
Listing 21.15 Declaring the type in the Watersports.cshtml file in the Views/Home folder
@model WebApp.Models.Product
<!DOCTYPE html>
<html>
<head>
<link href="/lib/bootstrap/css/bootstrap.min.css" rel="stylesheet" />
</head>
<body>
<h6 class="bg-secondary text-white text-center m-2 p-2">
Watersports
</h6>
<div class="m-2">
<table class="table table-sm table-striped table-bordered">
<tbody>
<tr><th>Name</th><td>@Model.Name</td></tr>
<tr>
<th>Price</th>
<td>@Model.Price.ToString("c")</td>
</tr>
<tr><th>Category ID</th><td>@Model.CategoryId</td></tr>
<tr><th>Tax Rate</th><td>@Model.TaxRate</td></tr>
</tbody>
</table>
</div>
</body>
</html>
An error warning will appear in the editor after a few seconds, as Visual Studio or Visual Studio Code checks the view in the background, as shown in figure 21.9. When the dotnet watch command is used, an error will be displayed in the browser, also shown in figure 21.9. The compiler will also report an error if you build the project or use the dotnet build or dotnet run command.
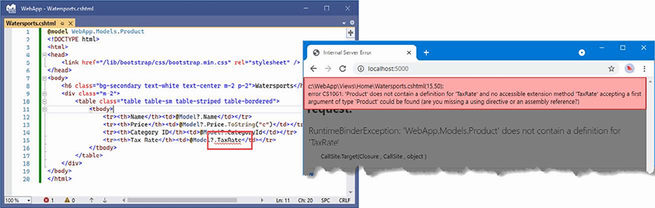
Figure 21.9 An error warning in a view file
When the C# class for the view is generated, the view model type is used as the generic type argument for the base class, like this:
...
internal sealed class Views_Home_Watersports :
RazorPage<WebApp.Models.Product> {
...
Specifying a view model type allows Visual Studio and Visual Studio Code to suggest property and method names as you edit views. Replace the nonexistent property with the one shown in listing 21.16.
Listing 21.16 Using a property in the Watersports.cshtml file in the Views/Home folder
@model WebApp.Models.Product
<!DOCTYPE html>
<html>
<head>
<link href="/lib/bootstrap/css/bootstrap.min.css" rel="stylesheet" />
</head>
<body>
<h6 class="bg-secondary text-white text-center m-2 p-2">
Watersports
</h6>
<div class="m-2">
<table class="table table-sm table-striped table-bordered">
<tbody>
<tr><th>Name</th><td>@Model.Name</td></tr>
<tr>
<th>Price</th>
<td>@Model.Price.ToString("c")</td>
</tr>
<tr><th>Category ID</th><td>@Model.CategoryId</td></tr>
<tr><th>Supplier ID</th><td>@Model.SupplierId</td></tr>
</tbody>
</table>
</div>
</body>
</html>
As you type, the editor will prompt you with the possible member names defined by the view model class, as shown in figure 21.10. This figure shows the Visual Studio code editor, but Visual Studio Code has a comparable feature.
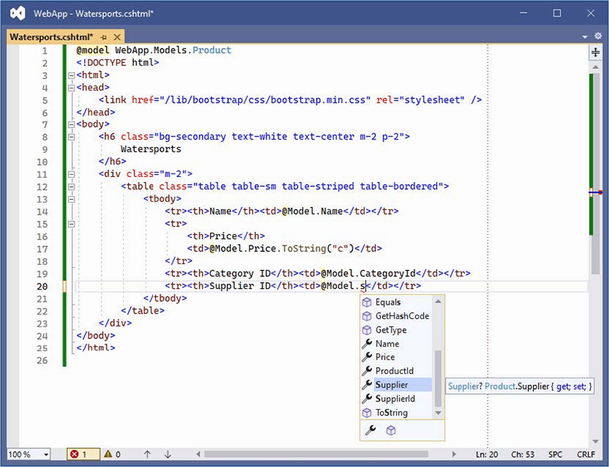
Figure 21.10 Editor suggestions when using a view model type
Using a View Imports file
When I declared the view model object at the start of the Watersports.cshtml file, I had to include the namespace that contains the class, like this:
... @model WebApp.Models.Product ...
By default, all types that are referenced in a Razor View must be qualified with a namespace. This isn’t a big deal when the only type reference is for the model object, but it can make a view more difficult to read when writing more complex Razor expressions such as the ones I describe later in this chapter.
You can specify a set of namespaces that should be searched for types by adding a view imports file to the project. The view imports file is placed in the Views folder and is named _ViewImports.cshtml.
If you are using Visual Studio, right-click the Views folder in the Solution Explorer, select Add > New Item from the pop-up menu, and select the Razor View Imports template from the ASP.NET Core category, as shown in figure 21.11.
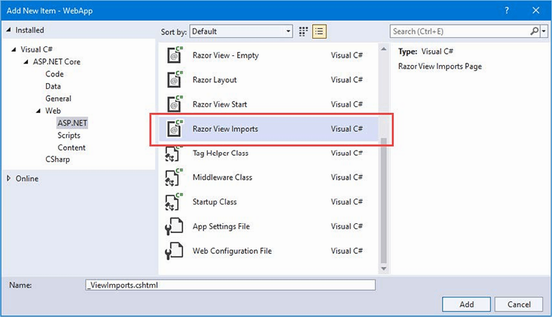
Figure 21.11 Creating a view imports file
Visual Studio will automatically set the name of the file to _ViewImports.cshtml, and clicking the Add button will create the file, which will be empty. If you are using Visual Studio Code, simply select the Views folder and add a new file called _ViewImports.cshtml. Regardless of which editor you used, add the expression shown listing 21.17.
Listing 21.17 The contents of the _ViewImports.cshtml file in the Views folder
@using WebApp.Models
The namespaces that should be searched for classes used in Razor Views are specified using the @using expression, followed by the namespace. In listing 21.17, I have added an entry for the WebApp.Models namespace that contains the view model class used in the Watersports.cshtml view.
Now that the namespace is included in the view imports file, I can remove the namespace from the view, as shown in listing 21.18.
Listing 21.18 Changing type in the Watersports.cshtml file in the Views/Home folder
@model Product
<!DOCTYPE html>
<html>
<head>
<link href="/lib/bootstrap/css/bootstrap.min.css" rel="stylesheet" />
</head>
<body>
<h6 class="bg-secondary text-white text-center m-2 p-2">
Watersports
</h6>
<div class="m-2">
<table class="table table-sm table-striped table-bordered">
<tbody>
<tr><th>Name</th><td>@Model.Name</td></tr>
<tr>
<th>Price</th>
<td>@Model.Price.ToString("c")</td>
</tr>
<tr><th>Category ID</th><td>@Model.CategoryId</td></tr>
<tr><th>Supplier ID</th><td>@Model.SupplierId</td></tr>
</tbody>
</table>
</div>
</body>
</html>
Save the view file and use a browser to request http://localhost:5000, and you will see the response shown in figure 21.12.
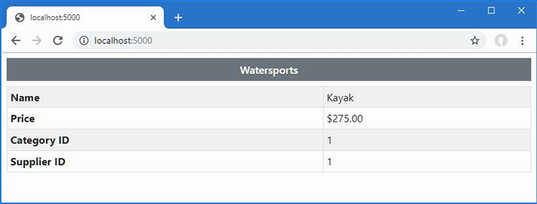
Figure 21.12 Using a view imports file
There is a pitfall waiting for the unwary, which is that the object passed to the View method to set the view model isn’t type checked before it is used. Here is the definition of the View method in the Controller class:
...
public virtual ViewResult View(object? model) {
return View(viewName: null, model: model);
}
...
When the @model expression is used to set the view model type, it changes the base class for the view, and allows the expressions in the view to be checked by the compiler, but it doesn’t prevent a controller from using an object with a completely different as the view model. As a simple demonstration, listing 21.19 defines an action method that uses the Watersports view but doesn’t use the Product model type the view expects.
Listing 21.19 Adding an action in the HomeController.cs file in the Controllers folder
using Microsoft.AspNetCore.Mvc;
using WebApp.Models;
namespace WebApp.Controllers {
public class HomeController : Controller {
private DataContext context;
public HomeController(DataContext ctx) {
context = ctx;
}
// ...other actions omitted for brevity...
public IActionResult WrongModel() {
return View("Watersports", "Hello, World!");
}
}
}
This mistake isn’t detected by the compiler because the WrongModel action method is able to pass any object to the View method. The problem will only become apparent at runtime, which you can see by using a browser to request http://localhost:5000/home/wrongmodel. When the view is rendered, the mismatch between type of view model and the type expected by the view is detected, producing the error shown in figure 21.13.
Figure 21.13 A view model type mismatch
Understanding the nullable type pitfall
A complete type mismatch produces the kind of error shown in figure 21.13. This kind of problem is easy to detect and fix because the error is displayed as soon as the action method is invoked. There is, however, a more subtle mismatch, which can be harder to detect because it doesn’t always produce an error. To help illustrate the issue, listing 21.20 sets the view model type in the Index view.
Listing 21.20 Setting the model type in the Index.cshtml file in the Views/Home folder
@model Product
<!DOCTYPE html>
<html>
<head>
<link href="/lib/bootstrap/css/bootstrap.min.css" rel="stylesheet" />
</head>
<body>
<h6 class="bg-primary text-white text-center m-2 p-2">
Product Table
</h6>
<div class="m-2">
<table class="table table-sm table-striped table-bordered">
<tbody>
<tr><th>Name</th><td>@Model.Name</td></tr>
<tr>
<th>Price</th>
<td>@Model.Price.ToString("c")</td>
</tr>
<tr><th>Category ID</th><td>@Model.CategoryId</td></tr>
</tbody>
</table>
</div>
</body>
</html>
Restart ASP.NET Core and use a browser to request two URLs: http://localhost:5000/home/index/1 and http://localhost:5000/home/index/100. These URLs target the same action method, which renders the same view, but the second one produces an error, as shown in figure 21.14.
Figure 21.14 An error caused by a view model type mismatch
This issue arises when an action method uses a nullable type as the view model, which is how I wrote the Index action method in the Home controller in listing 21.9:
...
public async Task<IActionResult> Index(long id = 1) {
Product? prod = await context.Products.FindAsync(id);
if (prod?.CategoryId == 1) {
return View("Watersports", prod);
} else {
return View(prod);
}
}
...
The result of the LINQ query is a nullable Product, which allows for queries for which there is no data in the database. The action method passes on the result to the View method without filtering out the null values, which mean that requests for which the database contains data work, because they product a Product object, but requests for which there is no data fail, because they produce a null value.
One way to deal with this is to ensure that the action method doesn’t pass null values to the View method. But another approach is to update the view so that expects a nullable view model type, as shown in listing 21.21.
Listing 21.21 Changing type in the Index.cshtml file in the Views/Home folder
@model Product?
<!DOCTYPE html>
<html>
<head>
<link href="/lib/bootstrap/css/bootstrap.min.css" rel="stylesheet" />
</head>
<body>
<h6 class="bg-primary text-white text-center m-2 p-2">
Product Table
</h6>
<div class="m-2">
<table class="table table-sm table-striped table-bordered">
<tbody>
<tr><th>Name</th><td>@Model?.Name</td></tr>
<tr>
<th>Price</th>
<td>@Model?.Price.ToString("c")</td>
</tr>
<tr><th>Category ID</th><td>@Model?.CategoryId</td></tr>
</tbody>
</table>
</div>
</body>
</html>
The listing changes the view model type to Product?, which is a nullable type. This change requires the use of the null conditional operator to safely deal with null values, like this:
... <tr><th>Name</th><td>@Model?.Name</td></tr> ...
This technique is useful when you want to render the view even when the action method produces a null value. Save the changes to the view and use the browser to request http://localhost:5000/home/index/100. The view will be rendered without an exception, but the null conditional operator will produce an empty table, because the null values the operator produces are discarded, as shown in figure 21.15.
Figure 21.15 Using a nullable view model type
The Razor compiler separates the static fragments of HTML from the C# expressions, which are then handled separately in the generated class file. There are several types of expression that can be included in views, which I describe in the sections that follow.
Directives are expressions that give instructions to the Razor view engine. The @model expression is a directive, for example, that tells the view engine to use a specific type for the view model, while the @using directive tells the view engine to import a namespace. Table 21.5 describes the most useful Razor directives.
Table 21.5 Useful Razor directives
|
Name |
Description |
|---|---|
|
|
This directive specifies the type of the view model. |
|
|
This directive imports a namespace. |
|
|
This directive denotes a Razor Page, described in chapter 23. |
|
|
This directive denotes a layout section, as described in chapter 22. |
|
|
This directive adds tag helpers to a view, as described in chapter 25. |
|
|
This directive sets the namespace for the C# class generated from a view. |
|
|
This directive adds C# properties and methods to the C# class generated from a view and is commonly used in Razor Pages, as described in chapter 23. |
|
|
This directive adds an attribute to the C# class generated from a view. I use this feature to apply authorization restrictions in chapter 38. |
|
|
This directive declares that the C# class generated from a view implements an interface. This feature is demonstrated in chapter 36. |
|
|
This directive sets the base class for the C# class generated from a view. This feature is demonstrated in chapter 36. |
|
|
This directive provides a view with direct access to a service through dependency injection. This feature is demonstrated in chapter 23. |
Razor content expressions produce content that is included in the output generated by a view. Table 21.6 describes the most useful content expressions, which are demonstrated in the sections that follow.
Table 21.6 Useful Razor content expressions
|
Name |
Description |
|---|---|
|
|
This is the basic Razor expression, which is evaluated, and the result it produces is inserted into the response. |
|
|
This expression is used to select regions of content based on the result of an expression. See the “Using Conditional Expressions” section for examples. |
|
|
This expression is used to select regions of content based on the result of an expression. See the “Using Conditional Expressions” section for examples. |
|
|
This expression generates the same region of content for each element in a sequence. See the “Enumerating Sequences” for examples. |
|
|
This expression defines a code block. See the “Using Razor Code Blocks” section for an example. |
|
|
This expression denotes a section of content that is not enclosed in HTML elements. See the “Using Conditional Expressions” section for an example. |
|
|
This expression is used to catch exceptions. |
|
|
This expression is used to perform an asynchronous operation, the result of which is inserted into the response. See chapter 24 for examples. |
The simplest expressions are evaluated to produce a single value that is used as the content for an HTML element in the response sent to the client. The most common type of expression inserts a value from the view model object, like these expressions from the Watersports.cshtml view file:
...
<tr><th>Name</th><td>@Model.Name</td></tr>
<tr><th>Price</th><td>@Model.Price.ToString("c")</td></tr>
...
This type of expression can read property values or invoke methods, as these examples demonstrate. Views can contain more complex expressions, but these need to be enclosed in parentheses so that the Razor compiler can differentiate between the code and static content, as shown in listing 21.22.
Listing 21.22 Expressions in the Watersports.cshtml file in the Views/Home folder
@model Product
<!DOCTYPE html>
<html>
<head>
<link href="/lib/bootstrap/css/bootstrap.min.css" rel="stylesheet" />
</head>
<body>
<h6 class="bg-secondary text-white text-center m-2 p-2">
Watersports
</h6>
<div class="m-2">
<table class="table table-sm table-striped table-bordered">
<tbody>
<tr><th>Name</th><td>@Model.Name</td></tr>
<tr>
<th>Price</th>
<td>@Model.Price.ToString("c")</td>
</tr>
<tr><th>Tax</th><td>@Model.Price * 0.2m</td></tr>
<tr><th>Tax</th><td>@(Model.Price * 0.2m)</td></tr>
</tbody>
</table>
</div>
</body>
</html>
Use a browser to request http://localhost:5000; the response, shown in figure 21.16, shows why parentheses are important.
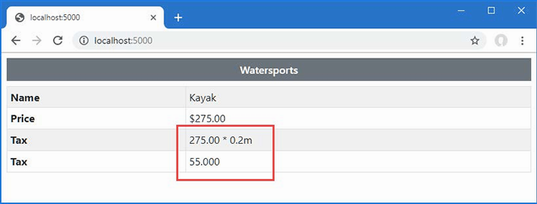
Figure 21.16 Expressions with and without parentheses
The Razor View compiler matches expressions conservatively and has assumed that the asterisk and the numeric value in the first expression are static content. This problem is avoided by parentheses for the second expression.
An expression can be used to set the values of element attributes, as shown in listing 21.23.
Listing 21.23 Setting Attributes in the Watersports.cshtml File in the Views/Home Folder
@model Product
<!DOCTYPE html>
<html>
<head>
<link href="/lib/bootstrap/css/bootstrap.min.css" rel="stylesheet" />
</head>
<body>
<h6 class="bg-secondary text-white text-center m-2 p-2">
Watersports
</h6>
<div class="m-2">
<table class="table table-sm table-striped table-bordered"
data-id="@Model.ProductId">
<tbody>
<tr><th>Name</th><td>@Model.Name</td></tr>
<tr>
<th>Price</th>
<td>@Model.Price.ToString("c")</td>
</tr>
<tr><th>Tax</th><td>@Model.Price * 0.2m</td></tr>
<tr><th>Tax</th><td>@(Model.Price * 0.2m)</td></tr>
</tbody>
</table>
</div>
</body>
</html>
I used the Razor expressions to set the value for a data attribute on the table element.
If you request http://localhost:5000 and look at the HTML source that is sent to the browser, you will see that Razor has set the values of the attribute, like this:
...
<table class="table table-sm table-striped table-bordered" data-id="1">
<tbody>
<tr><th>Name</th><td>Kayak</td></tr>
<tr><th>Price</th><td>$275.00</td></tr>
<tr><th>Tax</th><td>275.00 * 0.2m</td></tr>
<tr><th>Tax</th><td>55.000</td></tr>
</tbody>
</table>
...
Razor supports conditional expressions, which means that the output can be tailored based on the view model. This technique is at the heart of Razor and allows you to create complex and fluid responses from views that are simple to read and maintain. In listing 21.24, I have added a conditional statement to the Watersports view.
Listing 21.24 An if expression in the Watersports.cshtml file in the Views/Home folder
@model Product
<!DOCTYPE html>
<html>
<head>
<link href="/lib/bootstrap/css/bootstrap.min.css" rel="stylesheet" />
</head>
<body>
<h6 class="bg-secondary text-white text-center m-2 p-2">
Watersports
</h6>
<div class="m-2">
<table class="table table-sm table-striped table-bordered"
data-id="@Model.ProductId">
<tbody>
@if (Model.Price > 200) {
<tr><th>Name</th><td>Luxury @Model.Name</td></tr>
} else {
<tr><th>Name</th><td>Basic @Model.Name</td></tr>
}
<tr>
<th>Price</th>
<td>@Model.Price.ToString("c")</td>
</tr>
<tr><th>Tax</th><td>@Model.Price * 0.2m</td></tr>
<tr><th>Tax</th><td>@(Model.Price * 0.2m)</td></tr>
</tbody>
</table>
</div>
</body>
</html>
The @ character is followed by the if keyword and a condition that will be evaluated at runtime. The if expression supports optional else and elseif clauses and is terminated with a close brace (the } character). If the condition is met, then the content in the if clause is inserted into the response; otherwise, the content in the else clause is used instead.
Notice that the @ prefix isn’t required to access a Model property in the condition.
...
@if (Model.Price > 200) {
...
But the @ prefix is required inside the if and else clauses, like this:
... <tr><th>Name</th><td>Luxury @Model.Name</td></tr> ...
To see the effect of the conditional statement, use a browser to request http://localhost:5000/home/index/1 and http://localhost:5000/home/index/2. The conditional statement will produce different HTML elements for these URLs, as shown in figure 21.17.
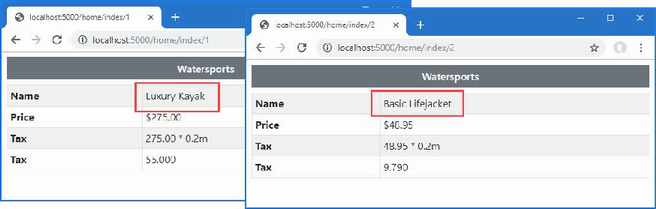
Figure 21.17 Using a conditional statement
Razor also supports @switch expressions, which can be a more concise way of handling multiple conditions, as shown in listing 21.25.
Listing 21.25 A switch in the Watersports.cshtml file in the Views/Home folder
@model Product
<!DOCTYPE html>
<html>
<head>
<link href="/lib/bootstrap/css/bootstrap.min.css" rel="stylesheet" />
</head>
<body>
<h6 class="bg-secondary text-white text-center m-2 p-2">
Watersports
</h6>
<div class="m-2">
<table class="table table-sm table-striped table-bordered"
data-id="@Model.ProductId">
<tbody>
@switch (Model.Name) {
case "Kayak":
<tr><th>Name</th><td>Small Boat</td></tr>
break;
case "Lifejacket":
<tr><th>Name</th><td>Flotation Aid</td></tr>
break;
default:
<tr><th>Name</th><td>@Model.Name</td></tr>
break;
}
<tr>
<th>Price</th>
<td>@Model.Price.ToString("c")</td>
</tr>
<tr><th>Tax</th><td>@Model.Price * 0.2m</td></tr>
<tr><th>Tax</th><td>@(Model.Price * 0.2m)</td></tr>
</tbody>
</table>
</div>
</body>
</html>
Conditional expressions can lead to the same blocks of content being duplicated for each result clause. In the switch expression, for example, each case clause differs only in the content of the td element, while the tr and th elements remain the same. To remove this duplication, conditional expressions can be used within an element, as shown in listing 21.26.
Listing 21.26 Setting content in the Watersports.cshtml file in the Views/Home folder
@model Product
<!DOCTYPE html>
<html>
<head>
<link href="/lib/bootstrap/css/bootstrap.min.css" rel="stylesheet" />
</head>
<body>
<h6 class="bg-secondary text-white text-center m-2 p-2">
Watersports
</h6>
<div class="m-2">
<table class="table table-sm table-striped table-bordered"
data-id="@Model.ProductId">
<tbody>
<tr><th>Name</th><td>
@switch (Model.Name) {
case "Kayak":
@:Small Boat
break;
case "Lifejacket":
@:Flotation Aid
break;
default:
@Model.Name
break;
}
</td></tr>
<tr>
<th>Price</th>
<td>@Model.Price.ToString("c")</td>
</tr>
<tr><th>Tax</th><td>@Model.Price * 0.2m</td></tr>
<tr><th>Tax</th><td>@(Model.Price * 0.2m)</td></tr>
</tbody>
</table>
</div>
</body>
</html>
The Razor compiler needs help with literal values that are not enclosed in HTML elements, requiring the @: prefix, like this:
... @:Small Boat ...
The compiler copes with HTML elements because it detects the open tag, but this additional help is required for text content. To see the effect of the switch statement, use a web browser to request http://localhost:5000/home/index/2, which produces the response shown in figure 21.18.
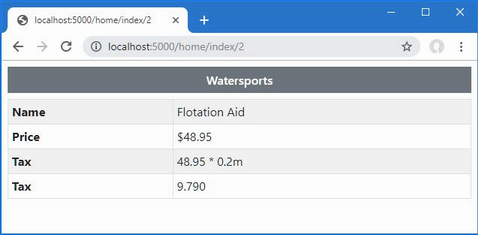
Figure 21.18 Using a switch expression with literal content
The Razor @foreach expression generates content for each object in an array or a collection, which is a common requirement when processing data. Listing 21.27 adds an action method to the Home controller that produces a sequence of objects.
Listing 21.27 Adding an action in the HomeController.cs file in the Controllers folder
using Microsoft.AspNetCore.Mvc;
using WebApp.Models;
namespace WebApp.Controllers {
public class HomeController : Controller {
private DataContext context;
public HomeController(DataContext ctx) {
context = ctx;
}
public async Task<IActionResult> Index(long id = 1) {
Product? prod = await context.Products.FindAsync(id);
if (prod?.CategoryId == 1) {
return View("Watersports", prod);
} else {
return View(prod);
}
}
public IActionResult Common() {
return View();
}
public IActionResult WrongModel() {
return View("Watersports", "Hello, World!");
}
public IActionResult List() {
return View(context.Products);
}
}
}
The new action is called List, and it provides its view with the sequence of Product objects obtained from the Entity Framework Core data context. Add a Razor View file named List.cshtml to the Views/Home folder and add the content shown in listing 21.28.
Listing 21.28 The contents of the List.cshtml file in the Views/Home folder
@model IEnumerable<Product>
<!DOCTYPE html>
<html>
<head>
<link href="/lib/bootstrap/css/bootstrap.min.css" rel="stylesheet" />
</head>
<body>
<h6 class="bg-secondary text-white text-center m-2 p-2">Products</h6>
<div class="m-2">
<table class="table table-sm table-striped table-bordered">
<thead>
<tr><th>Name</th><th>Price</th></tr>
</thead>
<tbody>
@foreach (Product p in Model) {
<tr><td>@p.Name</td><td>@p.Price</td></tr>
}
</tbody>
</table>
</div>
</body>
</html>
The foreach expression follows the same format as the C# foreach statement, and I used the ?? operator to fall back to an empty collection when the model is null. In the example, the variable p is assigned each object in the sequence provided by the action method. The content within the expression is duplicated for each object and inserted into the response after the expressions it contains are evaluated. In this case, the content in the foreach expression generates a table row with cells that have their own expressions.
... <td>@p.Name</td><td>@p.Price</td> ...
Restart ASP.NET Core so that the new action method will be available and use a browser to request http://localhost:5000/home/list, which produces the result shown in figure 21.19, showing how the foreach expression populates a table body.
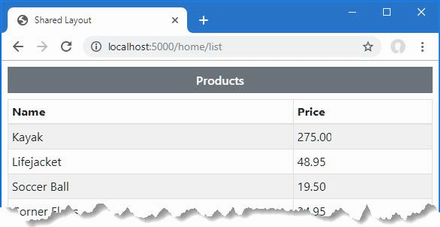
Figure 21.19 Using a foreach expression
Code blocks are regions of C# content that do not generate content but that can be useful to perform tasks that support the expressions that do. Listing 21.29 adds a code block that calculates an average value.
Listing 21.29 Using a code block in the List.cshtml file in the Views/Home folder
@model IEnumerable<Product>
@{
decimal average = Model.Average(p => p.Price);
}
<!DOCTYPE html>
<html>
<head>
<link href="/lib/bootstrap/css/bootstrap.min.css" rel="stylesheet" />
</head>
<body>
<h6 class="bg-secondary text-white text-center m-2 p-2">Products</h6>
<div class="m-2">
<table class="table table-sm table-striped table-bordered">
<thead>
<tr><th>Name</th><th>Price</th></tr>
</thead>
<tbody>
@foreach (Product p in Model) {
<tr>
<td>@p.Name</td><td>@p.Price</td>
<td>@((p.Price / average * 100).ToString("F1"))
% of average
</td>
</tr>
}
</tbody>
</table>
</div>
</body>
</html>
The code block is denoted by @{ and } and contains standard C# statements. The code block in listing 21.29 uses LINQ to calculate a value that is assigned to a variable named average, which is used in an expression to set the contents of a table cell, avoiding the need to repeat the average calculation for each object in the view model sequence. Use a browser to request http://localhost:5000/home/list, and you will see the response shown in figure 21.20.

Figure 21.20 Using a code block
Razor views are files that combine HTML and code expressions.
Views are compiled into C# classes whose methods are invoked to generate HTML content.
Views are selected as results in action methods, optionally passing data that will be used to generate the HTML result.
Views can be defined with a view model, which allows the code expressions in the view to be type-checked.
In this chapter, I describe more of the features provided by Razor Views. I show you how to pass additional data to a view using the view bag and how to use layouts and layout sections to reduce duplication. I also explain how the results from expressions are encoded and how to disable the encoding process. Table 22.1 provides a guide to the chapter.
Table 22.1 Chapter guide
|
Problem |
Solution |
Listing |
|---|---|---|
|
Providing unstructured data to a view |
Use the view bag. |
5, 6 |
|
Providing temporary data to a view |
Use temp data. |
7, 8 |
|
Using the same content in multiple views |
Use a layout. |
9–12, 15–18 |
|
Selecting the default layout for views |
Use a view start file. |
13, 14 |
|
Interleaving unique and common content |
Use layout sections. |
19–24 |
|
Creating reusable sections of content |
Use a partial view. |
25–29 |
|
Inserting HTML into a response using a Razor expression |
Encode the HTML. |
30–32 |
|
Including JSON in a view |
Use the JSON encoder. |
33 |
This chapter uses the WebApp project from chapter 21. To prepare for this chapter, replace the contents of the HomeController.cs file with the code shown in listing 22.1.
Listing 22.1 The contents of the HomeController.cs file in the Controllers folder
using Microsoft.AspNetCore.Mvc;
using WebApp.Models;
namespace WebApp.Controllers {
public class HomeController : Controller {
private DataContext context;
public HomeController(DataContext ctx) {
context = ctx;
}
public async Task<IActionResult> Index(long id = 1) {
return View(await context.Products.FindAsync(id));
}
public IActionResult List() {
return View(context.Products);
}
}
}
One of the features used in this chapter requires the session feature, which was described in chapter 16. To enable sessions, add the statements shown in listing 22.2 to the Program.cs file.
Listing 22.2 Enabling sessions in the Program.cs file in the WebApp folder
using Microsoft.EntityFrameworkCore;
using WebApp.Models;
var builder = WebApplication.CreateBuilder(args);
builder.Services.AddDbContext<DataContext>(opts => {
opts.UseSqlServer(builder.Configuration[
"ConnectionStrings:ProductConnection"]);
opts.EnableSensitiveDataLogging(true);
});
builder.Services.AddControllersWithViews();
builder.Services.AddDistributedMemoryCache();
builder.Services.AddSession(options => {
options.Cookie.IsEssential = true;
});
var app = builder.Build();
app.UseStaticFiles();
app.UseSession();
app.MapControllers();
app.MapDefaultControllerRoute();
var context = app.Services.CreateScope().ServiceProvider
.GetRequiredService<DataContext>();
SeedData.SeedDatabase(context);
app.Run();
Open a new PowerShell command prompt, navigate to the folder that contains the WebApp.csproj file, and run the command shown in listing 22.3 to drop the database.
Listing 22.3 Dropping the database
dotnet ef database drop --force
Once the database has been dropped, use the PowerShell command prompt to run the command shown in listing 22.4.
Listing 22.4 Running the example application
dotnet watch
The database will be seeded as part of the application startup. Once ASP.NET Core is running, use a web browser to request http://localhost:5000, which will produce the response shown in figure 22.1.
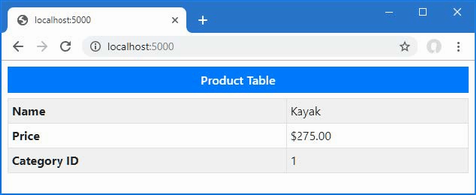
Figure 22.1 Running the example application
As noted in chapter 21, the dotnet watch command is useful when working with views, but when you make a change that cannot be handled without restarting ASP.NET Core, you will see a message like this at the command prompt:
watch : Unable to apply hot reload because of a rude edit.
watch : Do you want to restart your app - Yes (y) / No (n) /
Always (a) / Never (v)?
The point at which this arises depends on the editor you have chosen, but when this happens, select the Always option so that the application will always be restarted when a reload cannot be performed.
Action methods provide views with data to display with a view model, but sometimes additional information is required. Action methods can use the view bag to provide a view with extra data, as shown in listing 22.5.
Listing 22.5 Using the view bag in the HomeController.cs file in the Controllers folder
using Microsoft.AspNetCore.Mvc;
using WebApp.Models;
using Microsoft.EntityFrameworkCore;
namespace WebApp.Controllers {
public class HomeController : Controller {
private DataContext context;
public HomeController(DataContext ctx) {
context = ctx;
}
public async Task<IActionResult> Index(long id = 1) {
ViewBag.AveragePrice =
await context.Products.AverageAsync(p => p.Price);
return View(await context.Products.FindAsync(id));
}
public IActionResult List() {
return View(context.Products);
}
}
}
The ViewBag property is inherited from the Controller base class and returns a dynamic object. This allows action methods to create new properties just by assigning values to them, as shown in the listing. The values assigned to the ViewBag property by the action method are available to the view through a property also called ViewBag, as shown in listing 22.6.
Listing 22.6 Using the view bag in the Index.cshtml file in the Views/Home folder
@model Product?
<!DOCTYPE html>
<html>
<head>
<link href="/lib/bootstrap/css/bootstrap.min.css" rel="stylesheet" />
</head>
<body>
<h6 class="bg-primary text-white text-center m-2 p-2">
Product Table
</h6>
<div class="m-2">
<table class="table table-sm table-striped table-bordered">
<tbody>
<tr><th>Name</th><td>@Model?.Name</td></tr>
<tr>
<th>Price</th>
<td>
@Model?.Price.ToString("c")
(@(((Model?.Price / ViewBag.AveragePrice)
* 100).ToString("F2"))% of average price)
</td>
</tr>
<tr><th>Category ID</th><td>@Model?.CategoryId</td></tr>
</tbody>
</table>
</div>
</body>
</html>
The ViewBag property conveys the object from the action to the view, alongside the view model object. In the listing, the action method queries for the average of the Product.Price properties in the database and assigns it to a view bag property named AveragePrice, which the view uses in an expression. Use a browser to request http://localhost:5000, which produces the response shown in figure 22.2.
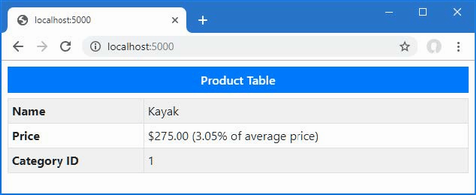
Figure 22.2 Using the view bag
The temp data feature allows a controller to preserve data from one request to another, which is useful when performing redirections. Temp data is stored using a cookie unless session state is enabled when it is stored as session data. Unlike session data, temp data values are marked for deletion when they are read and removed when the request has been processed.
Add a class file called CubedController.cs to the WebApp/Controllers folder and use it to define the controller shown in listing 22.7.
Listing 22.7 The contents of the CubedController.cs file in the Controllers folder
using Microsoft.AspNetCore.Mvc;
namespace WebApp.Controllers {
public class CubedController: Controller {
public IActionResult Index() {
return View("Cubed");
}
public IActionResult Cube(double num) {
TempData["value"] = num.ToString();
TempData["result"] = Math.Pow(num, 3).ToString();
return RedirectToAction(nameof(Index));
}
}
}
The Cubed controller defines an Index method that selects a view named Cubed. There is also a Cube action, which relies on the model binding process to obtain a value for its num parameter from the request (a process described in detail in chapter 28). The Cubed action method performs its calculation and stores the num value and the calculation result using TempData property, which returns a dictionary that is used to store key-value pairs. Since the temp data feature is built on top of the sessions feature, only values that can be serialized to strings can be stored, which is why I convert both double values to strings in listing 22.7. Once the values are stored as temp data, the Cube method performs a redirection to the Index method. To provide the controller with a view, add a Razor View file named Cubed.cshtml to the WebApp/Views/Shared folder with the content shown in listing 22.8.
Listing 22.8 The contents of the Cubed.cshtml file in the Views/Shared folder
<!DOCTYPE html>
<html>
<head>
<link href="/lib/bootstrap/css/bootstrap.min.css" rel="stylesheet" />
</head>
<body>
<h6 class="bg-secondary text-white text-center m-2 p-2">Cubed</h6>
<form method="get" action="/cubed/cube" class="m-2">
<div class="form-group">
<label>Value</label>
<input name="num" class="form-control"
value="@(TempData["value"])" />
</div>
<button class="btn btn-primary mt-1" type="submit">
Submit
</button>
</form>
@if (TempData["result"] != null) {
<div class="bg-info text-white m-2 p-2">
The cube of @TempData["value"] is @TempData["result"]
</div>
}
</body>
</html>
The base class used for Razor Views provides access to the temp data through a TempData property, allowing values to be read within expressions. In this case, temp data is used to set the content of an input element and display a results summary. Reading a temp data value doesn’t remove it immediately, which means that values can be read repeatedly in the same view. It is only once the request has been processed that the marked values are removed.
To see the effect, use a browser to navigate to http://localhost:5000/cubed, enter a value into the form field, and click the Submit button. The browser will send a request that will set the temp data and trigger the redirection. The temp data values are preserved for the new request, and the results are displayed to the user. But reading the data values marks them for deletion, and if you reload the browser, the contents of the input element and the results summary are no longer displayed, as shown in figure 22.3.
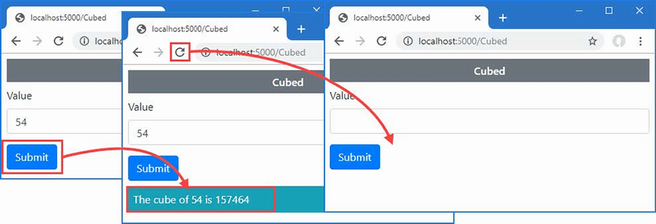
Figure 22.3 Using temp data
The views in the example application contain duplicate elements that deal with setting up the HTML document, defining the head section, loading the Bootstrap CSS file, and so on. Razor supports layouts, which consolidate common content in a single file that can be used by any view.
Layouts are typically stored in the Views/Shared folder because they are usually used by the action methods of more than one controller. If you are using Visual Studio, right-click the Views/Shared folder, select Add > New Item from the pop-up menu, and choose the Razor Layout template, as shown in figure 22.4. Make sure the name of the file is _Layout.cshtml and click the Add button to create the new file. Replace the content added to the file by Visual Studio with the elements shown in listing 22.9.
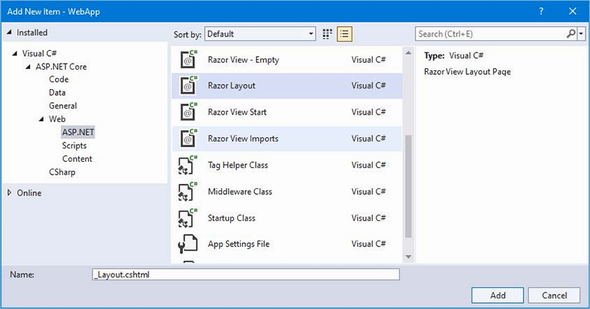
Figure 22.4 Creating a layout
If you are using Visual Studio Code, create a file named _Layout.cshtml in the Views/Shared folder and add the content shown in listing 22.9.
Listing 22.9 The contents of the _Layout.cshtml file in the Views/Shared folder
<!DOCTYPE html>
<html>
<head>
<link href="/lib/bootstrap/css/bootstrap.min.css" rel="stylesheet" />
</head>
<body>
<h6 class="bg-primary text-white text-center m-2 p-2">Shared View</h6>
@RenderBody()
</body>
</html>
The layout contains the common content that will be used by multiple views. The content that is unique to each view is inserted into the response by calling the RenderBody method, which is inherited by the RazorPage<T> class, as described in chapter 21. Views that use layouts can focus on just their unique content, as shown in listing 22.10.
Listing 22.10 Using a layout in the Index.cshtml file in the Views/Home folder
@model Product?
@{
Layout = "_Layout";
}
<div class="m-2">
<table class="table table-sm table-striped table-bordered">
<tbody>
<tr><th>Name</th><td>@Model?.Name</td></tr>
<tr>
<th>Price</th>
<td>
@Model?.Price.ToString("c")
(@(((Model?.Price / ViewBag.AveragePrice)
* 100).ToString("F2"))% of average price)
</td>
</tr>
<tr><th>Category ID</th><td>@Model?.CategoryId</td></tr>
</tbody>
</table>
</div>
The layout is selected by adding a code block, denoted by the @{ and } characters, that sets the Layout property inherited from the RazorPage<T> class. In this case, the Layout property is set to the name of the layout file. As with normal views, the layout is specified without a path or file extension, and the Razor engine will search in the /Views/[controller] and /Views/Shared folders to find a matching file. Restart ASP.NET Core and use the browser to request http://localhost:5000, and you will see the response shown in figure 22.5.
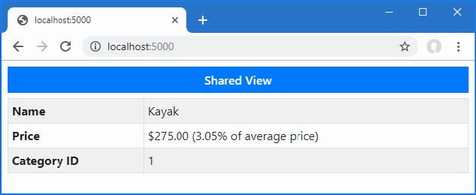
Figure 22.5 Using a layout
The view can provide the layout with data values, allowing the common content provided by the view to be customized. The view bag properties are defined in the code block that selects the layout, as shown in listing 22.11.
Listing 22.11 Setting a property in the Index.cshtml file in the Views/Home folder
@model Product?
@{
Layout = "_Layout";
ViewBag.Title = "Product Table";
}
<div class="m-2">
<table class="table table-sm table-striped table-bordered">
<tbody>
<tr><th>Name</th><td>@Model?.Name</td></tr>
<tr>
<th>Price</th>
<td>
@Model?.Price.ToString("c")
(@(((Model?.Price / ViewBag.AveragePrice)
* 100).ToString("F2"))% of average price)
</td>
</tr>
<tr><th>Category ID</th><td>@Model?.CategoryId</td></tr>
</tbody>
</table>
</div>
The view sets a Title property, which can be used in the layout, as shown in listing 22.12.
Listing 22.12 Using a property in the _Layout.cshtml file in the Views/Shared folder
<!DOCTYPE html>
<html>
<head>
<title>@ViewBag.Title</title>
<link href="/lib/bootstrap/css/bootstrap.min.css" rel="stylesheet" />
</head>
<body>
<h6 class="bg-primary text-white text-center m-2 p-2">
@(ViewBag.Title ?? "Layout")
</h6>
@RenderBody()
</body>
</html>
The Title property is used to set the content of the title element and h6 element in the body section. Layouts cannot rely on view bag properties being defined, which is why the expression in the h6 element provides a fallback value if the view doesn’t define a Title property. To see the effect of the view bag property, use a browser to request http://localhost:5000, which produces the response shown in figure 22.6.
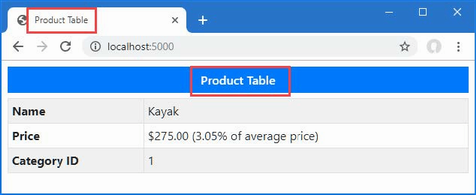
Figure 22.6 Using a view bag property to configure a layout
Instead of setting the Layout property in every view, you can add a view start file to the project that provides a default Layout value. If you are using Visual Studio, right-click the Views folder item in the Solution Explorer, select Add > New Item, and locate the Razor View Start template, as shown in figure 22.7. Make sure the name of the file is _ViewStart.cshtml and click the Add button to create the file, which will have the content shown in listing 22.13.
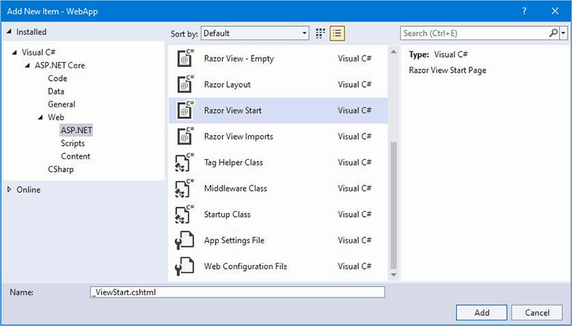
Figure 22.7 Creating a view start file
If you are using Visual Studio Code, then add a file named _ViewStart.cshtml to the Views folder and add the content shown in listing 22.13.
Listing 22.13 The contents of the _ViewStart.cshtml file in the Views folder
@{
Layout = "_Layout";
}
The file sets the Layout property, and the value will be used as the default. Listing 22.14 simplifies the Common.cshtml file, leaving just content that is unique to the view.
Listing 22.14 Removing content in the Common.cshtml file in the Views/Shared folder
<h6 class="bg-secondary text-white text-center m-2 p-2">Shared View</h6>
The view doesn’t define a view model type and doesn’t need to set the Layout property because the project contains a view start file. The result is that the content in listing 22.14 will be added to the body section of the HTML content of the response. Use a browser to navigate to http://localhost:5000/second, and you will see the response in figure 22.8.
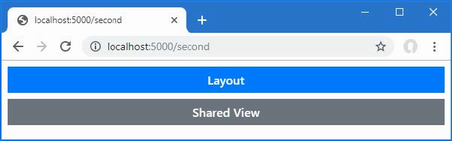
Figure 22.8 Using a view start file
There are two situations where you may need to define a Layout property in a view even when there is a view start file in the project. In the first situation, a view requires a different layout from the one specified by the view start file. To demonstrate, add a Razor layout file named _ImportantLayout.cshtml to the Views/Shared folder with the content shown in listing 22.15.
Listing 22.15 The _ImportantLayout.cshtml file in the Views/Shared folder
<!DOCTYPE html>
<html>
<head>
<title>@ViewBag.Title</title>
<link href="/lib/bootstrap/css/bootstrap.min.css" rel="stylesheet" />
</head>
<body>
<h3 class="bg-warning text-white text-center p-2 m-2">Important</h3>
@RenderBody()
</body>
</html>
In addition to the HTML document structure, this file contains a header element that displays Important in large text. Views can select this layout by assigning its name to the Layout property, as shown in listing 22.16.
Listing 22.16 Using a specific layout in the Index.cshtml file in the Views/Home folder
@model Product?
@{
Layout = "_ImportantLayout";
ViewBag.Title = "Product Table";
}
<div class="m-2">
<table class="table table-sm table-striped table-bordered">
<tbody>
<tr><th>Name</th><td>@Model?.Name</td></tr>
<tr>
<th>Price</th>
<td>
@Model?.Price.ToString("c")
(@(((Model?.Price / ViewBag.AveragePrice)
* 100).ToString("F2"))% of average price)
</td>
</tr>
<tr><th>Category ID</th><td>@Model?.CategoryId</td></tr>
</tbody>
</table>
</div>
The Layout value in the view start file is overridden by the value in the view, allowing different layouts to be applied. Restart ASP.NET Core and use a browser to request http://localhost:5000, and the response will be produced using the new layout, as shown in figure 22.9.
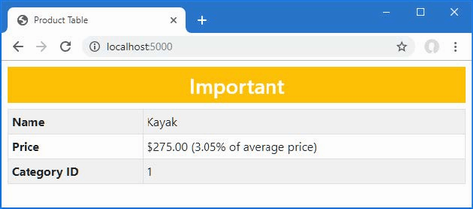
Figure 22.9 Specifying a layout in a view
The second situation where a Layout property can be needed is when a view contains a complete HTML document and doesn’t require a layout at all. To see the problem, open a new PowerShell command prompt and run the command shown in listing 22.17.
Listing 22.17 Sending an HTTP request
Invoke-WebRequest http://localhost:5000/home/list |
Select-Object -expand Content
This command sends an HTTP GET request whose response will be produced using the List.cshtml file in the Views/Home folder. This view contains a complete HTML document, which is combined with the content in the view specified by the view start file, producing a malformed HTML document, like this:
<!DOCTYPE html>
<html>
<head>
<title></title>
<link href="/lib/bootstrap/css/bootstrap.min.css" rel="stylesheet" />
</head>
<body>
<h6 class="bg-primary text-white text-center m-2 p-2">Layout</h6>
<!DOCTYPE html>
<html>
<head>
<link href="/lib/bootstrap/css/bootstrap.min.css" rel="stylesheet" />
</head>
<body>
<h6 class="bg-secondary text-white text-center m-2 p-2">Products</h6>
<div class="m-2">
<table class="table table-sm table-striped table-bordered">
<thead><tr><th>Name</th><th>Price</th></tr></thead>
<tbody>
<!-- ...table rows omitted for brevity... >
</tbody>
</table>
</div>
</body>
</html>
</body>
</html>
The structural elements for the HTML document are duplicated, so there are two html, head, body, and link elements. Browsers are adept at handling malformed HTML but don’t always cope with poorly structured content. Where a view contains a complete HTML document, the Layout property can be set to null, as shown in listing 22.18.
Listing 22.18 Disabling layouts in the List.cshtml file in the Views/Home folder
@model IEnumerable<Product>
@{
Layout = null;
decimal average = Model.Average(p => p.Price);
}
<!DOCTYPE html>
<html>
<head>
<link href="/lib/bootstrap/css/bootstrap.min.css" rel="stylesheet" />
</head>
<body>
<h6 class="bg-secondary text-white text-center m-2 p-2">Products</h6>
<div class="m-2">
<table class="table table-sm table-striped table-bordered">
<thead>
<tr><th>Name</th><th>Price</th></tr>
</thead>
<tbody>
@foreach (Product p in Model) {
<tr>
<td>@p.Name</td><td>@p.Price</td>
<td>@((p.Price / average * 100).ToString("F1"))
% of average
</td>
</tr>
}
</tbody>
</table>
</div>
</body>
</html>
Save the view and run the command shown in listing 22.17 again, and you will see that the response contains only the elements in the view and that the layout has been disabled.
<!DOCTYPE html>
<html>
<head>
<link href="/lib/bootstrap/css/bootstrap.min.css" rel="stylesheet" />
</head>
<body>
<h6 class="bg-secondary text-white text-center m-2 p-2">Products</h6>
<div class="m-2">
<table class="table table-sm table-striped table-bordered">
<thead><tr><th>Name</th><th>Price</th></tr></thead>
<tbody>
<!-- ...table rows omitted for brevity... >
</tbody>
</table>
</div>
</body>
</html>
The Razor View engine supports the concept of sections, which allow you to provide regions of content within a layout. Razor sections give greater control over which parts of the view are inserted into the layout and where they are placed. To demonstrate the sections feature, I have edited the /Views/Home/Index.cshtml file, as shown in listing 22.19. The browser will display an error when you save the changes in this listing, which will be resolved when you make corresponding changes in the next listing.
Listing 22.19 Defining sections in the Index.cshtml file in the Views/Home folder
@model Product?
@{
Layout = "_Layout";
ViewBag.Title = "Product Table";
}
@section Header {
Product Information
}
<tr><th>Name</th><td>@Model?.Name</td></tr>
<tr>
<th>Price</th>
<td>@Model?.Price.ToString("c")</td>
</tr>
<tr><th>Category ID</th><td>@Model?.CategoryId</td></tr>
@section Footer {
@(((Model?.Price / ViewBag.AveragePrice)
* 100).ToString("F2"))% of average price
}
Sections are defined using the Razor @section expression followed by a name for the section. Listing 22.19 defines sections named Header and Footer, and sections can contain the same mix of HTML content and expressions, just like the main part of the view. Sections are applied in a layout with the @RenderSection expression, as shown in listing 22.20.
Listing 22.20 Using sections in the _Layout.cshtml file in the Views/Shared folder
<!DOCTYPE html>
<html>
<head>
<title>@ViewBag.Title</title>
<link href="/lib/bootstrap/css/bootstrap.min.css" rel="stylesheet" />
</head>
<body>
<div class="bg-info text-white m-2 p-1">
This is part of the layout
</div>
<h6 class="bg-primary text-white text-center m-2 p-2">
@RenderSection("Header")
</h6>
<div class="bg-info text-white m-2 p-1">
This is part of the layout
</div>
<div class="m-2">
<table class="table table-sm table-striped table-bordered">
<tbody>
@RenderBody()
</tbody>
</table>
</div>
<div class="bg-info text-white m-2 p-1">
This is part of the layout
</div>
<h6 class="bg-primary text-white text-center m-2 p-2">
@RenderSection("Footer")
</h6>
<div class="bg-info text-white m-2 p-1">
This is part of the layout
</div>
</body>
</html>
When the layout is applied, the RenderSection expression inserts the content of the specified section into the response. The regions of the view that are not contained within a section are inserted into the response by the RenderBody method. To see how the sections are applied, use a browser to request http://localhost:5000, which provides the response shown in figure 22.10.

Figure 22.10 Using sections in a layout
Sections allow views to provide fragments of content to the layout without specifying how they are used. As an example, listing 22.21 redefines the layout to consolidate the body and sections into a single HTML table.
Listing 22.21 Using a table in the _Layout.cshtml file in the Views/Shared folder
<!DOCTYPE html>
<html>
<head>
<title>@ViewBag.Title</title>
<link href="/lib/bootstrap/css/bootstrap.min.css" rel="stylesheet" />
</head>
<body>
<div class="m-2">
<table class="table table-sm table-striped table-bordered">
<thead>
<tr>
<th class="bg-primary text-white text-center"
colspan="2">
@RenderSection("Header")
</th>
</tr>
</thead>
<tbody>
@RenderBody()
</tbody>
<tfoot>
<tr>
<th class="bg-primary text-white text-center"
colspan="2">
@RenderSection("Footer")
</th>
</tr>
</tfoot>
</table>
</div>
</body>
</html>
To see the effect of the change to the view, use a browser to request http://localhost:5000, which will produce the response shown in figure 22.11.
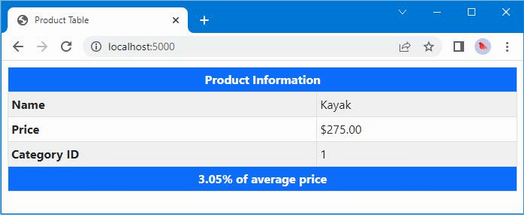
Figure 22.11 Changing how sections are displayed in a layout
Using optional layout sections
By default, a view must contain all the sections for which there are RenderSection calls in the layout, and an exception will be thrown if the layout requires a section that the view hasn’t defined. Listing 22.22 adds a call to the RenderSection method that requires a section named Summary.
Listing 22.22 Adding a section in the _Layout.cshtml file in the Views/Shared folder
<!DOCTYPE html>
<html>
<head>
<title>@ViewBag.Title</title>
<link href="/lib/bootstrap/css/bootstrap.min.css" rel="stylesheet" />
</head>
<body>
<div class="m-2">
<table class="table table-sm table-striped table-bordered">
<thead>
<tr>
<th class="bg-primary text-white text-center"
colspan="2">
@RenderSection("Header")
</th>
</tr>
</thead>
<tbody>
@RenderBody()
</tbody>
<tfoot>
<tr>
<th class="bg-primary text-white text-center"
colspan="2">
@RenderSection("Footer")
</th>
</tr>
</tfoot>
</table>
</div>
@RenderSection("Summary")
</body>
</html>
Restart ASP.NET Core and use a browser to request http://localhost:5000, and you will see the exception shown in figure 22.12. You may have to restart the dotnet watch command to see this error.
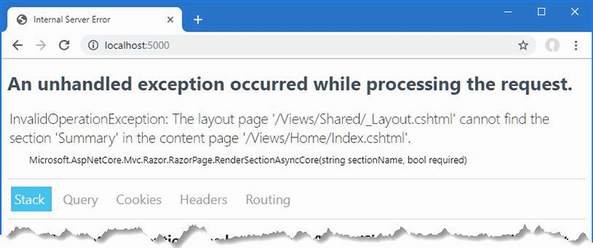
Figure 22.12 Attempting to render a nonexistent view section
There are two ways to solve this problem. The first is to create an optional section, which will be rendered only if it is defined by the view. Optional sections are created by passing a second argument to the RenderSection method, as shown in listing 22.23.
Listing 22.23 An optional section in the _Layout.cshtml file in the Views/Shared folder
<!DOCTYPE html>
<html>
<head>
<title>@ViewBag.Title</title>
<link href="/lib/bootstrap/css/bootstrap.min.css" rel="stylesheet" />
</head>
<body>
<div class="m-2">
<table class="table table-sm table-striped table-bordered">
<thead>
<tr>
<th class="bg-primary text-white text-center"
colspan="2">
@RenderSection("Header", false)
</th>
</tr>
</thead>
<tbody>
@RenderBody()
</tbody>
<tfoot>
<tr>
<th class="bg-primary text-white text-center"
colspan="2">
@RenderSection("Footer", false)
</th>
</tr>
</tfoot>
</table>
</div>
@RenderSection("Summary", false)
</body>
</html>
The second argument specifies whether a section is required, and using false prevents an exception when the view doesn’t define the section.
Testing for layout sections
The IsSectionDefined method is used to determine whether a view defines a specified section and can be used in an if expression to render fallback content, as shown in listing 22.24.
Listing 22.24 Checking a section in the _Layout.cshtml file in the Views/Shared folder
<!DOCTYPE html>
<html>
<head>
<title>@ViewBag.Title</title>
<link href="/lib/bootstrap/css/bootstrap.min.css" rel="stylesheet" />
</head>
<body>
<div class="m-2">
<table class="table table-sm table-striped table-bordered">
<thead>
<tr>
<th class="bg-primary text-white text-center"
colspan="2">
@RenderSection("Header", false)
</th>
</tr>
</thead>
<tbody>
@RenderBody()
</tbody>
<tfoot>
<tr>
<th class="bg-primary text-white text-center"
colspan="2">
@RenderSection("Footer", false)
</th>
</tr>
</tfoot>
</table>
</div>
@if (IsSectionDefined("Summary")) {
@RenderSection("Summary", false)
} else {
<div class="bg-info text-center text-white m-2 p-2">
This is the default summary
</div>
}
</body>
</html>
The IsSectionDefined method is invoked with the name of the section you want to check and returns true if the view defines that section. In the example, I used this helper to render fallback content when the view does not define the Summary section. To see the fallback content, use a browser to request http://localhost:5000, which produces the response shown in figure 22.13.
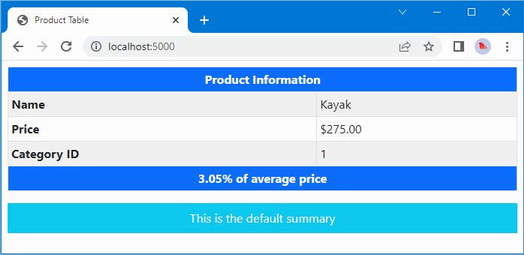
Figure 22.13 Displaying fallback content for a view section
You will often need to use the same set of HTML elements and expressions in several different places. Partial views are views that contain fragments of content that will be included in other views to produce complex responses without duplication.
Partial views are applied using a feature called tag helpers, which are described in detail in chapter 25; tag helpers are configured in the view imports file, which was added to the project in chapter 21. To enable the feature required for partial views, add the statement shown in listing 22.25 to the _ViewImports.cshtml file.
Listing 22.25 Enabling tag helpers in the _ViewImports.cshtml file in the Views folder
@using WebApp.Models @addTagHelper *, Microsoft.AspNetCore.Mvc.TagHelpers
Partial views are just regular CSHTML files, and it is only the way they are used that differentiates them from standard views. If you are using Visual Studio, right-click the Views/Home folder, select Add > New Item, and use the Razor View template to create a file named _RowPartial.cshtml. Once the file has been created, replace the contents with those shown in listing 22.26. If you are using Visual Studio Code, add a file named _RowPartial.cshtml to the Views/Home folder and add to it the content shown in listing 22.26.
Listing 22.26 The contents of the _RowPartial.cshtml file in the Views/Home folder
@model Product
<tr>
<td>@Model.Name</td>
<td>@Model.Price</td>
</tr>
The model expression is used to define the view model type for the partial view, which contains the same mix of expressions and HTML elements as regular views. The content of this partial view creates a table row, using the Name and Price properties of a Product object to populate the table cells.
Partial views are applied by adding a partial element in another view or layout. In listing 22.27, I have added the element to the List.cshtml file so the partial view is used to generate the rows in the table.
Listing 22.27 Using a partial view in the List.cshtml file in the Views/Home folder
@model IEnumerable<Product>
@{
Layout = null;
decimal average = Model.Average(p => p.Price);
}
<!DOCTYPE html>
<html>
<head>
<link href="/lib/bootstrap/css/bootstrap.min.css" rel="stylesheet" />
</head>
<body>
<h6 class="bg-secondary text-white text-center m-2 p-2">Products</h6>
<div class="m-2">
<table class="table table-sm table-striped table-bordered">
<thead>
<tr><th>Name</th><th>Price</th></tr>
</thead>
<tbody>
@foreach (Product p in Model) {
<partial name="_RowPartial" model="p" />
}
</tbody>
</table>
</div>
</body>
</html>
The attributes applied to the partial element control the selection and configuration of the partial view, as described in table 22.2.
Table 22.2 The partial element attributes
|
Name |
Description |
|---|---|
|
|
This property specifies the name of the partial view, which is located using the same search process as regular views. |
|
|
This property specifies the value that will be used as the view model object for the partial view. |
|
|
This property is used to define an expression that selects the view model object for the partial view, as explained next. |
|
|
This property is used to provide the partial view with additional data. |
The partial element in listing 22.27 uses the name attribute to select the _RowPartial view and the model attribute to select the Product object that will be used as the view model object. The partial element is applied within the @foreach expression, which means that it will be used to generate each row in the table, which you can see by using a browser to request http://localhost:5000/home/list to produce the response shown in figure 22.14.
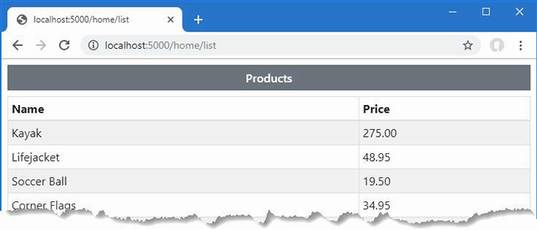
Figure 22.14 Using a partial view
Selecting the partial view model using an expression
The for attribute is used to set the partial view’s model using an expression that is applied to the view’s model, which is a feature more easily demonstrated than described. Add a partial view named _CellPartial.cshtml to the Views/Home folder with the content shown in listing 22.28.
Listing 22.28 The contents of the _CellPartial.cshtml file in the Views/Home folder
@model string <td class="bg-info text-white">@Model</td>
This partial view has a string view model object, which it uses as the contents of a table cell element; the table cell element is styled using the Bootstrap CSS framework. In listing 22.29, I have added a partial element to the _RowPartial.cshtml file that uses the _CellPartial partial view to display the table cell for the name of the Product object.
Listing 22.29 Using a partial in the _RowPartial.cshtml file in the Views/Home folder
@model Product
<tr>
<partial name="_CellPartial" for="Name" />
<td>@Model.Price</td>
</tr>
The for attribute selects the Name property as the model for the _CellPartial partial view. To see the effect, use a browser to request http://localhost:5000/home/list, which will produce the response shown in figure 22.15.
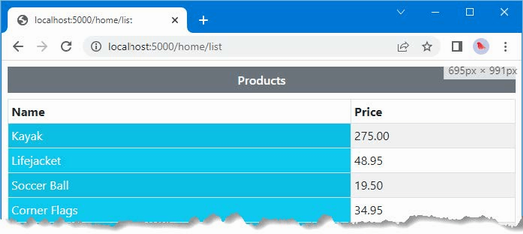
Figure 22.15 Selecting a model property for use in a partial view
Razor Views provide two useful features for encoding content. The HTML content-encoding feature ensures that expression responses don’t change the structure of the response sent to the browser, which is an important security feature. The JSON encoding feature encodes an object as JSON and inserts it into the response, which can be a useful debugging feature and can also be useful when providing data to JavaScript applications. Both encoding features are described in the following sections.
The Razor View engine encodes expression results to make them safe to include in an HTML document without changing its structure. This is an important feature when dealing with content that is provided by users, who may try to subvert the application or accidentally enter dangerous content. Listing 22.30 adds an action method to the Home controller that passes a fragment of HTML to the View method.
Listing 22.30 Adding an action in the HomeController.cs file in the Controllers folder
using Microsoft.AspNetCore.Mvc;
using WebApp.Models;
using Microsoft.EntityFrameworkCore;
namespace WebApp.Controllers {
public class HomeController : Controller {
private DataContext context;
public HomeController(DataContext ctx) {
context = ctx;
}
public async Task<IActionResult> Index(long id = 1) {
ViewBag.AveragePrice =
await context.Products.AverageAsync(p => p.Price);
return View(await context.Products.FindAsync(id));
}
public IActionResult List() {
return View(context.Products);
}
public IActionResult Html() {
return View((object)"This is a <h3><i>string</i></h3>");
}
}
}
The new action passes a string that contains HTML elements. To create the view for the new action method, add a Razor View file named Html.cshtml to the Views/Home folder with the content shown in listing 22.31.
Listing 22.31 The contents of the Html.cshtml file in the Views/Home folder
@model string
@{
Layout = null;
}
<!DOCTYPE html>
<html>
<head>
<link href="/lib/bootstrap/css/bootstrap.min.css" rel="stylesheet" />
</head>
<body>
<div class="bg-secondary text-white text-center m-2 p-2">
@Model
</div>
</body>
</html>
Save the file and use a browser to request http://localhost:5000/home/html. The response, which is shown on the left of figure 22.16, shows how the potentially dangerous characters in the view model string have been escaped.
To include the result of an expression without safe encoding, you can invoke the Html.Raw method. The Html property is one of the properties added to the generated view class, described in chapter 21, which returns an object that implements the IHtmlHelper interface, as shown in listing 22.32.
Listing 22.32 Disabling encoding in the Html.cshtml file in the Views/Home folder
@model string
@{
Layout = null;
}
<!DOCTYPE html>
<html>
<head>
<link href="/lib/bootstrap/css/bootstrap.min.css" rel="stylesheet" />
</head>
<body>
<div class="bg-secondary text-white text-center m-2 p-2">
@Html.Raw(Model)
</div>
</body>
</html>
Save the changes, and you will see that the view model string is passed on without being encoded and is then interpreted by the browser as part of the HTML document, as shown on the right of figure 22.16.
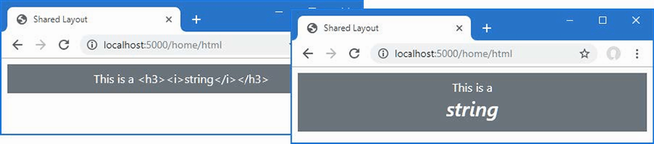
Figure 22.16 HTML result encoding
The Json property, which is added to the class generated from the view, as described in chapter 21, can be used to encode an object as JSON. The most common use for JSON data is in RESTful web services, as described in earlier chapters, but I find the Razor JSON encoding feature useful as a debugging aid when I don’t get the output I expect from a view. Listing 22.33 adds a JSON representation of the view model object to the output produced by the Index.cshtml view.
Listing 22.33 Using JSON encoding in the Index.cshtml file in the Views/Home folder
@model Product?
@{
Layout = "_Layout";
ViewBag.Title = "Product Table";
}
@section Header {
Product Information
}
<tr><th>Name</th><td>@Model?.Name</td></tr>
<tr>
<th>Price</th>
<td>@Model?.Price.ToString("c")</td>
</tr>
<tr><th>Category ID</th><td>@Model?.CategoryId</td></tr>
@section Footer {
@(((Model?.Price / ViewBag.AveragePrice)
* 100).ToString("F2"))% of average price
}
@section Summary {
<div class="bg-info text-white m-2 p-2">
@Json.Serialize(Model)
</div>
}
The Json property returns an implementation of the IJsonHelper interface, whose Serialize method produces a JSON representation of an object. Use a browser to request http://localhost:5000, and you will see the response shown in figure 22.17, which includes JSON in the Summary section of the view.
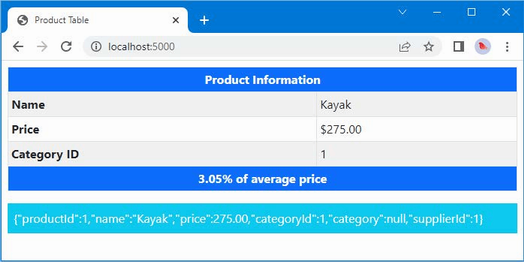
Figure 22.17 Encoding an expression result as JSON
The view bag is used to pass unstructured data to a view, in addition to the view model.
Temp data is similar to the view bag but is deleted once the data values have been read.
Layouts define common content, such as the header of an HTML document.
The default layout can be specified by creating a view start file.
Layouts can contain sections, which can be optional or mandatory.
Partial views define sections of content that can be reused within views.
In this chapter, I introduce how to use Razor Pages, which is a simpler approach to generating HTML content, intended to capture some of the enthusiasm for the legacy ASP.NET Web Pages framework. I explain how Razor Pages work, explain how they differ from the controllers and views approach taken by the MVC Framework, and show you how they fit into the wider ASP.NET Core platform.
The process of explaining how Razor Pages work can minimize the differences from the controllers and views described in earlier chapters. You might form the impression that Razor Pages are just MVC-lite and dismiss them, which would be a shame. Razor Pages are interesting because of the developer experience and not the way they are implemented.
My advice is to give Razor Pages a chance, especially if you are an experienced MVC developer. Although the technology used will be familiar, the process of creating application features is different and is well-suited to small and tightly focused features that don’t require the scale and complexity of controllers and views. I have been using the MVC Framework since it was first introduced, and I admit to ignoring the early releases of Razor Pages. Now, however, I find myself mixing Razor Pages and the MVC Framework in most projects, much as I did in the SportsStore example in part 1. Table 23.1 puts Razor Pages in context.
Table 23.1 Putting Razor Pages in context
|
Question |
Answer |
|---|---|
|
What are they? |
Razor Pages are a simplified way of generating HTML responses. |
|
Why are they useful? |
The simplicity of Razor Pages means you can start getting results sooner than with the MVC Framework, which can require a relatively complex preparation process. Razor Pages are also easier for less experienced web developers to understand because the relationship between the code and content is more obvious. |
|
How are they used? |
Razor Pages associate a single view with the class that provides it with features and use a file-based routing system to match URLs. |
|
Are there any pitfalls or limitations? |
Razor Pages are less flexible than the MVC Framework, which makes them unsuitable for complex applications. Razor Pages can be used only to generate HTML responses and cannot be used to create RESTful web services. |
|
Are there any alternatives? |
The MVC Framework’s approach of controllers and views can be used instead of Razor Pages. |
Table 23.2 provides a guide to the chapter.
Table 23.2 Chapter guide
|
Problem |
Solution |
Listing |
|---|---|---|
|
Enabling Razor Pages |
Use |
3 |
|
Creating a self-contained endpoint |
Create a Razor Page. |
4, 26, 27 |
|
Routing requests to a Razor Page |
Use the name of the page or specify a route using the |
5–8 |
|
Providing logic to support the view section of a Razor Page |
Use a page model class. |
9–12 |
|
Creating results that are not rendered using the view section of a Razor Page |
Define a handler method that returns an action result. |
13–15 |
|
Handling multiple HTTP methods |
Define handlers in the page model class. |
16–18 |
|
Avoiding duplication of content |
Use a layout or a partial view. |
19–25 |
This chapter uses the WebApp project from chapter 22. Open a new PowerShell command prompt, navigate to the folder that contains the WebApp.csproj file, and run the command shown in listing 23.1 to drop the database.
Listing 23.1 Dropping the database
dotnet ef database drop --force
Once the database has been dropped, use the PowerShell command prompt to run the command shown in listing 23.2.
Listing 23.2 Running the example application
dotnet run
The database will be seeded as part of the application startup. Once ASP.NET Core is running, use a web browser to request http://localhost:5000, which will produce the response shown in figure 23.1.
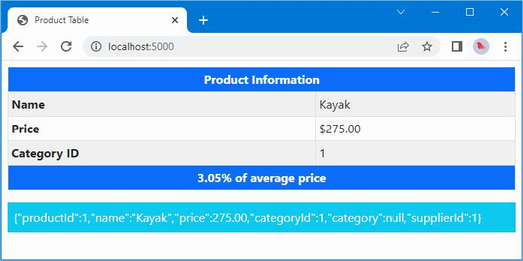
Figure 23.1 Running the example application
The dotnet watch command can be useful with Razor Pages development, but it doesn’t handle the initial configuration of the services and middleware or changes to the routing configuration, which is why I have returned to the dotnet run command in this chapter.
As you learn how Razor Pages work, you will see they share functionality with the MVC Framework. In fact, Razor Pages are typically described as a simplification of the MVC Framework—which is true—but that doesn’t give any sense of why Razor Pages can be useful.
The MVC Framework solves every problem in the same way: a controller defines action methods that select views to produce responses. It is a solution that works because it is so flexible: the controller can define multiple action methods that respond to different requests, the action method can decide which view will be used as the request is being processed, and the view can depend on private or shared partial views to produce its response.
Not every feature in web applications needs the flexibility of the MVC Framework. For many features, a single action method will be used to handle a wide range of requests, all of which are dealt with using the same view. Razor Pages offer a more focused approach that ties together markup and C# code, sacrificing flexibility for focus.
But Razor Pages have limitations. Razor Pages tend to start out focusing on a single feature but slowly grow out of control as enhancements are made. And, unlike MVC controllers, Razor Pages cannot be used to create web services.
You don’t have to choose just one model because the MVC Framework and Razor Pages coexist, as demonstrated in this chapter. This means that self-contained features can be easily developed with Razor Pages, leaving the more complex aspects of an application to be implemented using the MVC controllers and actions.
In the sections that follow, I show you how to configure and use Razor Pages, and then I explain how they work and demonstrate the common foundation they share with MVC controllers and actions.
To prepare the application for Razor Pages, statements must be added to the Program.cs file to set up services and configure the endpoint routing system, as shown in listing 23.3.
Listing 23.3 Configuring the application in the Program.cs file in the WebApp folder
using Microsoft.EntityFrameworkCore;
using WebApp.Models;
var builder = WebApplication.CreateBuilder(args);
builder.Services.AddDbContext<DataContext>(opts => {
opts.UseSqlServer(builder.Configuration[
"ConnectionStrings:ProductConnection"]);
opts.EnableSensitiveDataLogging(true);
});
builder.Services.AddControllersWithViews();
builder.Services.AddRazorPages();
builder.Services.AddDistributedMemoryCache();
builder.Services.AddSession(options => {
options.Cookie.IsEssential = true;
});
var app = builder.Build();
app.UseStaticFiles();
app.UseSession();
app.MapControllers();
app.MapDefaultControllerRoute();
app.MapRazorPages();
var context = app.Services.CreateScope().ServiceProvider
.GetRequiredService<DataContext>();
SeedData.SeedDatabase(context);
app.Run();
The AddRazorPages method sets up the service that is required to use Razor Pages, and the MapRazorPages method creates the routing configuration that matches URLs to pages, which is explained later in the chapter.
Razor Pages are defined in the Pages folder. If you are using Visual Studio, create the WebApp/Pages folder, right-click it in the Solution Explorer, select Add > New Item from the pop-up menu, and select the Razor Page template, as shown in figure 23.2. Set the Name field to Index.cshtml and click the Add button to create the file and replace the contents of the file with those shown in listing 23.4.
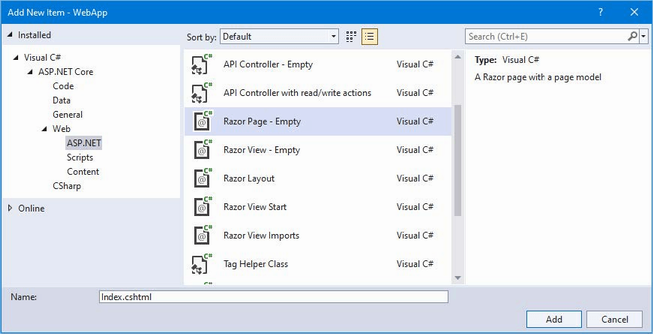
Figure 23.2 Creating a Razor Page
If you are using Visual Studio Code, create the WebApp/Pages folder and add to it a new file named Index.cshtml with the content shown in listing 23.4.
Listing 23.4 The contents of the Index.cshtml file in the Pages folder
@page
@model IndexModel
@using Microsoft.AspNetCore.Mvc.RazorPages
@using WebApp.Models;
<!DOCTYPE html>
<html>
<head>
<link href="/lib/bootstrap/css/bootstrap.min.css" rel="stylesheet" />
</head>
<body>
<div class="bg-primary text-white text-center m-2 p-2">
@Model.Product?.Name
</div>
</body>
</html>
@functions {
public class IndexModel : PageModel {
private DataContext context;
public Product? Product { get; set; }
public IndexModel(DataContext ctx) {
context = ctx;
}
public async Task OnGetAsync(long id = 1) {
Product = await context.Products.FindAsync(id);
}
}
}
Razor Pages use the Razor syntax that I described in chapters 21 and 22, and Razor Pages even use the same CSHTML file extension. But there are some important differences.
The @page directive must be the first thing in a Razor Page, which ensures that the file is not mistaken for a view associated with a controller. But the most important difference is that the @functions directive is used to define the C# code that supports the Razor content in the same file. I explain how Razor Pages work shortly, but to see the output generated by the Razor Page, restart ASP.NET Core and use a browser to request http://localhost:5000/index, which produces the response shown in figure 23.3.
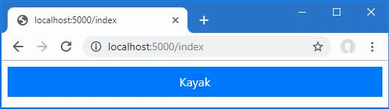
Figure 23.3 Using a Razor Page
Understanding the URL routing convention
URL routing for Razor Pages is based on the file name and location, relative to the Pages folder. The Razor Page in listing 23.4 is in a file named Index.cshtml, in the Pages folder, which means that it will handle requests for the /index. The routing convention can be overridden, as described in the “Understanding Razor Pages Routing” section, but, by default, it is the location of the Razor Page file that determines the URLs that it responds to.
Understanding the page model
In a Razor Page, the @model directive is used to select a page model class, rather than identifying the type of the object provided by an action method. The @model directive in listing 23.4 selects the IndexModel class.
... @model IndexModel ...
The page model is defined within the @functions directive and is derived from the PageModel class, like this:
...
@functions {
public class IndexModel: PageModel {
...
When the Razor Page is selected to handle an HTTP request, a new instance of the page model class is created, and dependency injection is used to resolve any dependencies that have been declared using constructor parameters, using the features described in chapter 14. The IndexModel class declares a dependency on the DataContext service created in chapter 18, which allows it to access the data in the database.
...
public IndexModel(DataContext ctx) {
context = ctx;
}
...
After the page model object has been created, a handler method is invoked. The name of the handler method is On, followed by the HTTP method for the request so that the OnGet method is invoked when the Razor Page is selected to handle an HTTP GET request. Handler methods can be asynchronous, in which case a GET request will invoke the OnGetAsync method, which is the method implemented by the IndexModel class.
...
public async Task OnGetAsync(long id = 1) {
Product = await context.Products.FindAsync(id);
}
...
Values for the handler method parameters are obtained from the HTTP request using the model binding process, which is described in detail in chapter 28. The OnGetAsync method receives the value for its id parameters from the model binder, which it uses to query the database and assign the result to its Product property.
Understanding the page view
Razor Pages use the same mix of HTML fragments and code expressions to generate content, which defines the view presented to the user. The page model’s methods and properties are accessible in the Razor Page through the @Model expression. The Product property defined by the IndexModel class is used to set the content of an HTML element, like this:
...
<div class="bg-primary text-white text-center m-2 p-2">
@Model.Product?.Name
</div>
...
The @Model expression returns an IndexModel object, and this expression reads the Name property of the object returned by the Product property.
The null conditional operator (?) isn’t required for the Model property because it will always be assigned an instance of the page model class and cannot be null. The properties defined by the page model class can be null, however, which is why I have used the operator for the Product property in the Razor expression:
...
<div class="bg-primary text-white text-center m-2 p-2">
@Model.Product?.Name
</div>
...
Understanding the generated C# class
Behind the scenes, Razor Pages are transformed into C# classes, just like regular Razor views. Here is a simplified version of the C# class that is produced from the Razor Page in listing 23.4:
namespace AspNetCoreGeneratedDocument {
using System;
using System.Collections.Generic;
using System.Linq;
using System.Threading.Tasks;
using Microsoft.AspNetCore.Mvc;
using Microsoft.AspNetCore.Mvc.Rendering;
using Microsoft.AspNetCore.Mvc.ViewFeatures;
using Microsoft.AspNetCore.Mvc.RazorPages;
using WebApp.Models;
internal sealed class Pages_Index :
Microsoft.AspNetCore.Mvc.RazorPages.Page {
public async override global::System.Threading.Tasks.Task
ExecuteAsync() {
WriteLiteral("\r\n<!DOCTYPE html>\r\n<html>\r\n");
__tagHelperExecutionContext =
__tagHelperScopeManager.Begin("head",
TagMode.StartTagAndEndTag, "7d534...",
async() => {
WriteLiteral("\r\n<link href=\"" +
"/lib/bootstrap/css/bootstrap.min.css\"" +
"rel=\"stylesheet\" />\r\n");
});
HeadTagHelper = CreateTagHelper<TagHelpers.HeadTagHelper>();
__tagHelperExecutionContext.Add(HeadTagHelper);
Write(__tagHelperExecutionContext.Output);
WriteLiteral("\r\n");
__tagHelperExecutionContext =
__tagHelperScopeManager.Begin("body",
TagMode.StartTagAndEndTag, "7d534...", async() => {
WriteLiteral("\r\n<div class=\"bg-primary text-white " +
"text-center m-2 p-2\">");
Write(Model.Product?.Name);
WriteLiteral("</div>\r\n");
});
BodyTagHelper = CreateTagHelper<TagHelpers.BodyTagHelper>();
__tagHelperExecutionContext.Add(BodyTagHelper);
Write(__tagHelperExecutionContext.Output);
WriteLiteral("\r\n</html>\r\n\r\n");
}
public class IndexModel: PageModel {
private DataContext context;
public Product? Product { get; set; }
public IndexModel(DataContext ctx) {
context = ctx;
}
public async Task OnGetAsync(long id = 1) {
Product = await context.Products.FindAsync(id);
}
}
public IModelExpressionProvider ModelExpressionProvider
{ get; private set; }
public IUrlHelper Url { get; private set; }
public IViewComponentHelper Component { get; private set; }
public IJsonHelper Json { get; private set; }
public IHtmlHelper<IndexModel> Html { get; private set; }
public ViewDataDictionary<IndexModel> ViewData =>
(ViewDataDictionary<IndexModel>)PageContext?.ViewData;
public IndexModel Model => ViewData.Model;
}
}
If you compare this code with the equivalent shown in chapter 21, you can see how Razor Pages rely on the same features used by the MVC Framework. The HTML fragments and view expressions are transformed into calls to the WriteLiteral and Write methods.
Razor Pages rely on the location of the CSHTML file for routing so that a request for http://localhost:5000/index is handled by the Pages/Index.cshtml file. Adding a more complex URL structure for an application is done by adding folders whose names represent the segments in the URL you want to support. As an example, create the WebApp/Pages/Suppliers folder and add to it a Razor Page named List.cshtml with the contents shown in listing 23.5.
Listing 23.5 The contents of the List.cshtml file in the Pages/Suppliers folder
@page
@model ListModel
@using Microsoft.AspNetCore.Mvc.RazorPages
@using WebApp.Models;
<!DOCTYPE html>
<html>
<head>
<link href="/lib/bootstrap/css/bootstrap.min.css" rel="stylesheet" />
</head>
<body>
<h5 class="bg-primary text-white text-center m-2 p-2">Suppliers</h5>
<ul class="list-group m-2">
@foreach (string s in Model.Suppliers) {
<li class="list-group-item">@s</li>
}
</ul>
</body>
</html>
@functions {
public class ListModel : PageModel {
private DataContext context;
public IEnumerable<string> Suppliers { get; set; }
= Enumerable.Empty<string>();
public ListModel(DataContext ctx) {
context = ctx;
}
public void OnGet() {
Suppliers = context.Suppliers.Select(s => s.Name);
}
}
}
The new page model class defines a Suppliers property that is set to the sequence of Name values for the Supplier objects in the database. The database operation in this example is synchronous, so the page model class defined the OnGet method, rather than OnGetAsync. The supplier names are displayed in a list using an @foreach expression. To use the new Razor Page, restart ASP.NET Core and use a browser to request http://localhost:5000/suppliers/list, which produces the response shown in figure 23.4. The path segments of the request URL correspond to the folder and file name of the List.cshtml Razor Page.
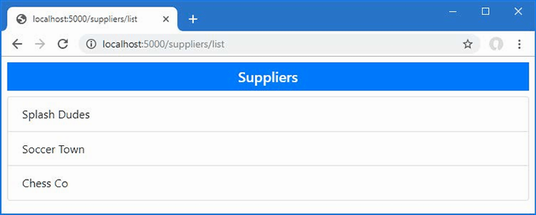
Figure 23.4 Using a folder structure to route requests
Using the folder and file structure to perform routing means there are no segment variables for the model binding process to use. Instead, values for the request handler methods are obtained from the URL query string, which you can see by using a browser to request http://localhost:5000/index?id=2, which produces the response shown in figure 23.5.
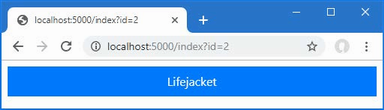
Figure 23.5 Using a query string parameter
The query string provides a parameter named id, which the model binding process uses to satisfy the id parameter defined by the OnGetAsync method in the Index Razor Page.
...
public async Task OnGetAsync(long id = 1) {
...
I explain how model binding works in detail in chapter 28, but for now, it is enough to know that the query string parameter in the request URL is used to provide the id argument when the OnGetAsync method is invoked, which is used to query the database for a product.
The @page directive can be used with a routing pattern, which allows segment variables to be defined, as shown in listing 23.6.
Listing 23.6 Defining a segment variable in the Index.cshtml file in the Pages folder
@page "{id:long?}"
@model IndexModel
@using Microsoft.AspNetCore.Mvc.RazorPages
@using WebApp.Models;
<!DOCTYPE html>
<html>
<head>
<link href="/lib/bootstrap/css/bootstrap.min.css" rel="stylesheet" />
</head>
<body>
<div class="bg-primary text-white text-center m-2 p-2">
@Model.Product?.Name
</div>
</body>
</html>
@functions {
// ...statements omitted for brevity...
}
All the URL pattern features that are described in chapter 13 can be used with the @page directive. The route pattern used in listing 23.6 adds an optional segment variable named id, which is constrained so that it will match only those segments that can be parsed to a long value. To see the change, restart ASP.NET Core and use a browser to request http://localhost:5000/index/4, which produces the response shown on the left of figure 23.6.
The @page directive can also be used to override the file-based routing convention for a Razor Page, as shown in listing 23.7.
Listing 23.7 Changing the route in the List.cshtml file in the Pages/Suppliers folder
@page "/lists/suppliers"
@model ListModel
@using Microsoft.AspNetCore.Mvc.RazorPages
@using WebApp.Models;
<!DOCTYPE html>
<html>
<head>
<link href="/lib/bootstrap/css/bootstrap.min.css" rel="stylesheet" />
</head>
<body>
<h5 class="bg-primary text-white text-center m-2 p-2">Suppliers</h5>
<ul class="list-group m-2">
@foreach (string s in Model.Suppliers) {
<li class="list-group-item">@s</li>
}
</ul>
</body>
</html>
@functions {
// ...statements omitted for brevity...
}
The directive changes the route for the List page so that it matches URLs whose path is /lists/suppliers. To see the effect of the change, restart ASP.NET Core and request http://localhost:5000/lists/suppliers, which produces the response shown on the right of figure 23.6.
Figure 23.6 Changing routes using the @page directive
Using the @page directive replaces the default file-based route for a Razor Page. If you want to define multiple routes for a page, then configuration statements can be added to the Program.cs file, as shown in listing 23.8.
Listing 23.8 Adding Razor Page routes in the Program.cs file in the WebApp folder
using Microsoft.EntityFrameworkCore;
using WebApp.Models;
using Microsoft.AspNetCore.Mvc.RazorPages;
var builder = WebApplication.CreateBuilder(args);
builder.Services.AddDbContext<DataContext>(opts => {
opts.UseSqlServer(builder.Configuration[
"ConnectionStrings:ProductConnection"]);
opts.EnableSensitiveDataLogging(true);
});
builder.Services.AddControllersWithViews();
builder.Services.AddRazorPages();
builder.Services.AddDistributedMemoryCache();
builder.Services.AddSession(options => {
options.Cookie.IsEssential = true;
});
builder.Services.Configure<RazorPagesOptions>(opts => {
opts.Conventions.AddPageRoute("/Index", "/extra/page/{id:long?}");
});
var app = builder.Build();
app.UseStaticFiles();
app.UseSession();
app.MapControllers();
app.MapDefaultControllerRoute();
app.MapRazorPages();
var context = app.Services.CreateScope().ServiceProvider
.GetRequiredService<DataContext>();
SeedData.SeedDatabase(context);
app.Run();
The options pattern is used to add additional routes for a Razor Page using the RazorPageOptions class. The AddPageRoute extension method is called on the Conventions property to add a route for a page. The first argument is the path to the page, without the file extension and relative to the Pages folder. The second argument is the URL pattern to add to the routing configuration. To test the new route, restart ASP.NET Core and use a browser to request http://localhost:5000/extra/page/2, which is matched by the URL pattern added in listing 23.8 and produces the response shown on the left of figure 23.7. The route added in listing 23.8 supplements the route defined by the @page attribute, which you can test by requesting http://localhost:5000/index/2, which will produce the response shown on the right of figure 23.7.
Figure 23.7 Adding a route for a Razor Page
Page models are derived from the PageModel class, which provides the link between the rest of ASP.NET Core and the view part of the Razor Page. The PageModel class provides methods for managing how requests are handled and properties that provide context data, the most useful of which are described in table 23.3. I have listed these properties for completeness, but they are not often required in Razor Page development, which focuses more on selecting the data that is required to render the view part of the page.
Table 23.3 Selected PageModel properties for context data
|
Name |
Description |
|---|---|
|
|
This property returns an |
|
|
This property provides access to the model binding and validation features described in chapters 28 and 29. |
|
|
This property returns a |
|
|
This property returns an |
|
|
This property returns an |
|
|
This property provides access to the data matched by the routing system, as described in chapter 13. |
|
|
This property provides access to the temp data feature, which is used to store data until it can be read by a subsequent request. See chapter 22 for details. |
|
|
This property returns an object that describes the user associated with the request, as described in chapter 38. |
The @functions directive allows the page-behind class and the Razor content to be defined in the same file, which is a development approach used by popular client-side frameworks, such as React or Vue.js.
Defining code and markup in the same file is convenient but can become difficult to manage for more complex applications. Razor Pages can also be split into separate view and code files, which is similar to the MVC examples in previous chapters and is reminiscent of ASP.NET Web Pages, which defined C# classes in files known as code-behind files. The first step is to remove the page model class from the CSHTML file, as shown in listing 23.9. I have also removed the @using expressions, which are no longer required.
Listing 23.9 Removing the Page model class in the Index.cshtml file in the Pages folder
@page "{id:long?}"
@model WebApp.Pages.IndexModel
<!DOCTYPE html>
<html>
<head>
<link href="/lib/bootstrap/css/bootstrap.min.css" rel="stylesheet" />
</head>
<body>
<div class="bg-primary text-white text-center m-2 p-2">
@Model.Product?.Name
</div>
</body>
</html>
The @model expression has been modified to specify the namespace of the page model, which wasn’t required previously because the @functions expression defined the IndexModel class within the namespace of the view. When defining the separate page model class, I define the class in the WebApp.Pages namespace. This isn’t a requirement, but it makes the C# class consistent with the rest of the application.
The convention for naming Razor Pages code-behind files is to append the .cs file extension to the name of the view file. If you are using Visual Studio, the code-behind file was created by the Razor Page template when the Index.cshtml file was added to the project. Expand the Index.cshtml item in the Solution Explorer, and you will see the code-behind file, as shown in figure 23.8. Open the file for editing and replace the contents with the statements shown in listing 23.10.

Figure 23.8 Revealing the code-behind file in the Visual Studio Solution Explorer
If you are using Visual Studio Code, add a file named Index.cshtml.cs to the WebApp/Pages folder with the content shown in listing 23.10.
Listing 23.10 The contents of the Index.cshtml.cs file in the Pages folder
using Microsoft.AspNetCore.Mvc.RazorPages;
using WebApp.Models;
namespace WebApp.Pages {
public class IndexModel : PageModel {
private DataContext context;
public Product? Product { get; set; }
public IndexModel(DataContext ctx) {
context = ctx;
}
public async Task OnGetAsync(long id = 1) {
Product = await context.Products.FindAsync(id);
}
}
}
Restart ASP.NET Core and request http://localhost:5000/index to ensure the code-behind file is used, producing the response shown in figure 23.9.
Figure 23.9 Using a code-behind file
Adding a view imports file
A view imports file can be used to avoid using the fully qualified name for the page model class in the view file, performing the same role as the one I used in chapter 22 for the MVC Framework. If you are using Visual Studio, use the Razor View Imports template to add a file named _ViewImports.cshtml to the WebApp/Pages folder, with the content shown in listing 23.11. If you are using Visual Studio Code, add the file directly.
Listing 23.11 The contents of the _ViewImports.cshtml file in the Pages folder
@namespace WebApp.Pages @using WebApp.Models
The @namespace directive sets the namespace for the C# class that is generated by a view, and using the directive in the view imports file sets the default namespace for all the Razor Pages in the application, with the effect that the view and its page model class are in the same namespace and the @model directive does not require a fully qualified type, as shown in listing 23.12.
Listing 23.12 Removing the namespace in the Index.cshtml file in the Pages folder
@page "{id:long?}"
@model IndexModel
<!DOCTYPE html>
<html>
<head>
<link href="/lib/bootstrap/css/bootstrap.min.css" rel="stylesheet" />
</head>
<body>
<div class="bg-primary text-white text-center m-2 p-2">
@Model.Product?.Name
</div>
</body>
</html>
Restart ASP.NET Core and use the browser to request http://localhost:5000/index. There is no difference in the response produced by the Razor Page, which is shown in figure 23.9.
Although it is not obvious, Razor Page handler methods use the same IActionResult interface to control the responses they generate. To make page model classes easier to develop, handler methods have an implied result that displays the view part of the page. Listing 23.13 makes the result explicit.
Listing 23.13 Using an explicit result in the Index.cshtml.cs file in the Pages folder
using Microsoft.AspNetCore.Mvc.RazorPages;
using WebApp.Models;
using Microsoft.AspNetCore.Mvc;
namespace WebApp.Pages {
public class IndexModel : PageModel {
private DataContext context;
public Product? Product { get; set; }
public IndexModel(DataContext ctx) {
context = ctx;
}
public async Task<IActionResult> OnGetAsync(long id = 1) {
Product = await context.Products.FindAsync(id);
return Page();
}
}
}
The Page method is inherited from the PageModel class and creates a PageResult object, which tells the framework to render the view part of the page. Unlike the View method used in MVC action methods, the Razor Pages Page method doesn’t accept arguments and always renders the view part of the page that has been selected to handle the request.
The PageModel class provides other methods that create different action results to produce different outcomes, as described in table 23.4.
Table 23.4 The PageModel action result methods
|
Name |
Description |
|---|---|
|
|
This |
|
|
The |
|
|
The |
|
|
The |
|
|
The |
|
|
The |
|
|
The |
|
|
The |
Using an action result
Except for the Page method, the methods in table 23.4 are the same as those available in action methods. However, care must be taken with these methods because sending a status code response is unhelpful in Razor Pages because they are used only when a client expects the content of the view.
Instead of using the NotFound method when requested data cannot be found, for example, a better approach is to redirect the client to another URL that can display an HTML message for the user. The redirection can be to a static HTML file, to another Razor Page, or to an action defined by a controller. Add a Razor Page named NotFound.cshtml to the Pages folder and add the content shown in listing 23.14.
Listing 23.14 The contents of the NotFound.cshtml file in the Pages folder
@page "/noid"
@model NotFoundModel
@using Microsoft.AspNetCore.Mvc.RazorPages
@using WebApp.Models;
<!DOCTYPE html>
<html>
<head>
<link href="/lib/bootstrap/css/bootstrap.min.css" rel="stylesheet" />
<title>Not Found</title>
</head>
<body>
<div class="bg-primary text-white text-center m-2 p-2">
No Matching ID
</div>
<ul class="list-group m-2">
@foreach (Product p in Model.Products) {
<li class="list-group-item">
@p.Name (ID: @p.ProductId)
</li>
}
</ul>
</body>
</html>
@functions {
public class NotFoundModel : PageModel {
private DataContext context;
public IEnumerable<Product> Products { get; set; }
= Enumerable.Empty<Product>();
public NotFoundModel(DataContext ctx) {
context = ctx;
}
public void OnGetAsync(long id = 1) {
Products = context.Products;
}
}
}
The @page directive overrides the route convention so that this Razor Page will handle the /noid URL path. The page model class uses an Entity Framework Core context object to query the database and displays a list of the product names and key values that are in the database.
In listing 23.15, I have updated the handle method of the IndexModel class to redirect the user to the NotFound page when a request is received that doesn’t match a Product object in the database.
Listing 23.15 Using a redirection in the Index.cshtml.cs file in the Pages folder
using Microsoft.AspNetCore.Mvc.RazorPages;
using WebApp.Models;
using Microsoft.AspNetCore.Mvc;
namespace WebApp.Pages {
public class IndexModel : PageModel {
private DataContext context;
public Product? Product { get; set; }
public IndexModel(DataContext ctx) {
context = ctx;
}
public async Task<IActionResult> OnGetAsync(long id = 1) {
Product = await context.Products.FindAsync(id);
if (Product == null) {
return RedirectToPage("NotFound");
}
return Page();
}
}
}
The RedirectToPage method produces an action result that redirects the client to a different Razor Page. The name of the target page is specified without the file extension, and any folder structure is specified relative to the Pages folder. To test the redirection, restart ASP.NET Core and request http://localhost:5000/index/500, which provides a value of 500 for the id segment variable and does not match anything in the database. The browser will be redirected and produce the result shown in figure 23.10.
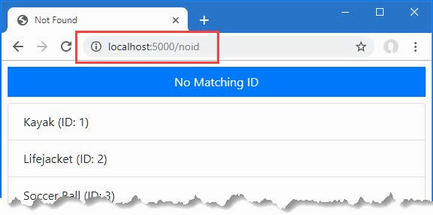
Figure 23.10 Redirecting to a different Razor Page
Notice that the routing system is used to produce the URL to which the client is redirected, which uses the routing pattern specified with the @page directive. In this example, the argument to the RedirectToPage method was NotFound, but this has been translated into a redirection to the /noid path specified by the @page directive in listing 23.14.
Razor Pages can define handler methods that respond to different HTTP methods. The most common combination is to support the GET and POST methods that allow users to view and edit data. To demonstrate, add a Razor Page called Editor.cshtml to the Pages folder and add the content shown in listing 23.16.
Listing 23.16 The contents of the Editor.cshtml file in the Pages folder
@page "{id:long}"
@model EditorModel
<!DOCTYPE html>
<html>
<head>
<link href="/lib/bootstrap/css/bootstrap.min.css" rel="stylesheet" />
</head>
<body>
<div class="bg-primary text-white text-center m-2 p-2">Editor</div>
<div class="m-2">
<table class="table table-sm table-striped table-bordered">
<tbody>
<tr><th>Name</th><td>@Model.Product?.Name</td></tr>
<tr><th>Price</th><td>@Model.Product?.Price</td></tr>
</tbody>
</table>
<form method="post">
@Html.AntiForgeryToken()
<div class="form-group">
<label>Price</label>
<input name="price" class="form-control"
value="@Model.Product?.Price" />
</div>
<button class="btn btn-primary mt-2" type="submit">
Submit
</button>
</form>
</div>
</body>
</html>
The elements in the Razor Page view create a simple HTML form that presents the user with an input element containing the value of the Price property for a Product object. The form element is defined without an action attribute, which means the browser will send a POST request to the Razor Page’s URL when the user clicks the Submit button.
If you are using Visual Studio, expand the Editor.cshtml item in the Solution Explorer to reveal the Editor.cshtml.cs class file and replace its contents with the code shown in listing 23.17. If you are using Visual Studio Code, add a file named Editor.cshtml.cs to the WebApp/Pages folder and use it to define the class shown in listing 23.17.
Listing 23.17 The contents of the Editor.cshtml.cs file in the Pages folder
using Microsoft.AspNetCore.Mvc;
using Microsoft.AspNetCore.Mvc.RazorPages;
using WebApp.Models;
namespace WebApp.Pages {
public class EditorModel : PageModel {
private DataContext context;
public Product? Product { get; set; }
public EditorModel(DataContext ctx) {
context = ctx;
}
public async Task OnGetAsync(long id) {
Product = await context.Products.FindAsync(id);
}
public async Task<IActionResult> OnPostAsync(long id,
decimal price) {
Product? p = await context.Products.FindAsync(id);
if (p != null) {
p.Price = price;
}
await context.SaveChangesAsync();
return RedirectToPage();
}
}
}
The page model class defines two handler methods, and the name of the method tells the Razor Pages framework which HTTP method each handles. The OnGetAsync method is used to handle GET requests, which it does by locating a Product, whose details are displayed by the view.
The OnPostAsync method is used to handle POST requests, which will be sent by the browser when the user submits the HTML form. The parameters for the OnPostAsync method are obtained from the request so that the id value is obtained from the URL route and the price value is obtained from the form. (The model binding feature that extracts data from forms is described in chapter 28.)
To see how the page model class handles different HTTP methods, restart ASP.NET Core and use a browser to navigate to http://localhost:5000/editor/1. Edit the field to set the price to 100 and click the Submit button. The browser will send a POST request that is handled by the OnPostAsync method. The database will be updated, and the browser will be redirected so that the updated data is displayed, as shown in figure 23.11.
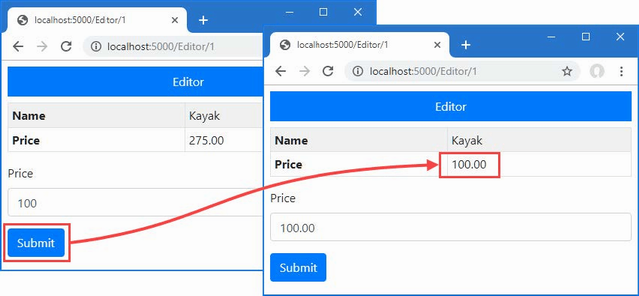
Figure 23.11 Handling multiple HTTP methods
The page model class can define multiple handler methods, allowing the request to select a method using a handler query string parameter or routing segment variable. To demonstrate this feature, add a Razor Page file named HandlerSelector.cshtml to the Pages folder with the content shown in listing 23.18.
Listing 23.18 The contents of the HandlerSelector.cshtml file in the Pages folder
@page
@model HandlerSelectorModel
@using Microsoft.AspNetCore.Mvc.RazorPages
@using Microsoft.EntityFrameworkCore
<!DOCTYPE html>
<html>
<head>
<link href="/lib/bootstrap/css/bootstrap.min.css" rel="stylesheet" />
</head>
<body>
<div class="bg-primary text-white text-center m-2 p-2">Selector</div>
<div class="m-2">
<table class="table table-sm table-striped table-bordered">
<tbody>
<tr><th>Name</th><td>@Model.Product?.Name</td></tr>
<tr><th>Price</th><td>@Model.Product?.Price</td></tr>
<tr>
<th>Category</th>
<td>@Model.Product?.Category?.Name</td>
</tr>
<tr>
<th>Supplier</th>
<td>@Model.Product?.Supplier?.Name</td>
</tr>
</tbody>
</table>
<a href="/handlerselector" class="btn btn-primary">Standard</a>
<a href="/handlerselector?handler=related"
class="btn btn-primary">
Related
</a>
</div>
</body>
</html>
@functions {
public class HandlerSelectorModel : PageModel {
private DataContext context;
public Product? Product { get; set; }
public HandlerSelectorModel(DataContext ctx) {
context = ctx;
}
public async Task OnGetAsync(long id = 1) {
Product = await context.Products.FindAsync(id);
}
public async Task OnGetRelatedAsync(long id = 1) {
Product = await context.Products
.Include(p => p.Supplier)
.Include(p => p.Category)
.FirstOrDefaultAsync(p => p.ProductId == id);
if (Product != null && Product.Supplier != null) {
Product.Supplier.Products = null;
}
if (Product != null && Product.Category != null) {
Product.Category.Products = null;
}
}
}
}
The page model class in this example defines two handler methods: OnGetAsync and OnGetRelatedAsync. The OnGetAsync method is used by default, which you can see by restarting ASP.NET Core and using a browser to request http://localhost:5000/handlerselector. The handler method queries the database and presents the result to the user, as shown on the left of figure 23.12.
One of the anchor elements rendered by the page targets a URL with a handler query string parameter, like this:
...
<a href="/handlerselector?handler=related" class="btn btn-primary">
Related</a>
...
The name of the handler method is specified without the On[method] prefix and without the Async suffix so that the OnGetRelatedAsync method is selected using a handler value of related. This alternative handler method includes related data in its query and presents additional data to the user, as shown on the right of figure 23.12.
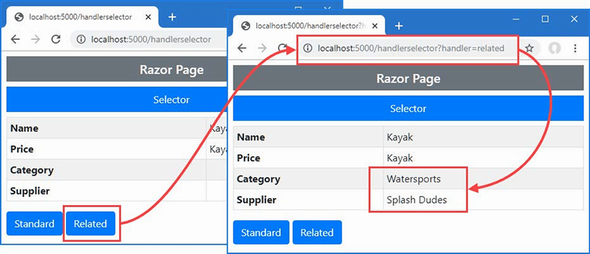
Figure 23.12 Selecting handler methods
The view part of a Razor Page uses the same syntax and has the same features as the views used with controllers. Razor Pages can use the full range of expressions and features such as sessions, temp data, and layouts. Aside from the use of the @page directive and the page model classes, the only differences are a certain amount of duplication to configure features such as layouts and partial views, as described in the sections that follow.
Layouts for Razor Pages are created in the same way as for controller views but in the Pages/Shared folder. If you are using Visual Studio, create the Pages/Shared folder and add to it a file named _Layout.cshtml using the Razor Layout template with the contents shown in listing 23.19. If you are using Visual Studio Code, create the Pages/Shared folder, create the _Layout.cshtml file in the new folder, and add the content shown in listing 23.19.
Listing 23.19 The contents of the _Layout.cshtml file in the Pages/Shared folder
<!DOCTYPE html>
<html>
<head>
<link href="/lib/bootstrap/css/bootstrap.min.css" rel="stylesheet" />
<title>@ViewBag.Title</title>
</head>
<body>
<h5 class="bg-secondary text-white text-center m-2 p-2">
Razor Page
</h5>
@RenderBody()
</body>
</html>
The layout doesn’t use any features that are specific to Razor Pages and contains the same elements and expressions used in chapter 22 when I created a layout for the controller views.
Next, use the Razor View Start template to add a file named _ViewStart.cshtml to the Pages folder. Visual Studio will create the file with the content shown in listing 23.20. If you are using Visual Studio Code, create the _ViewStart.cshtml file and add the content shown in listing 23.20.
Listing 23.20 The contents of the _ViewStart.cshtml file in the Pages folder
@{
Layout = "_Layout";
}
The C# classes generated from Razor Pages are derived from the Page class, which provides the Layout property used by the view start file, which has the same purpose as the one used by controller views. In listing 23.21, I have updated the Index page to remove the elements that will be provided by the layout.
Listing 23.21 Removing elements in the Index.cshtml file in the Pages folder
@page "{id:long?}"
@model IndexModel
<div class="bg-primary text-white text-center m-2 p-2">
@Model.Product?.Name
</div>
Using a view start file applies the layout to all pages that don’t override the value assigned to the Layout property. In listing 23.22, I have added a code block to the Editor page so that it doesn’t use a layout.
Listing 23.22 Disabling layouts in the Editor.cshtml file in the Pages folder
@page "{id:long}"
@model EditorModel
@{
Layout = null;
}
<!DOCTYPE html>
<html>
<head>
<link href="/lib/bootstrap/css/bootstrap.min.css" rel="stylesheet" />
</head>
<body>
<! ...elements omitted for brevity ... />
</body>
</html>
Restart ASP.NET Core and use a browser to request http://localhost:5000/index, and you will see the effect of the new layout, which is shown on the left of figure 23.13. Use the browser to request http://localhost:5000/editor/1, and you will receive content that is generated without the layout, as shown on the right of figure 23.13.
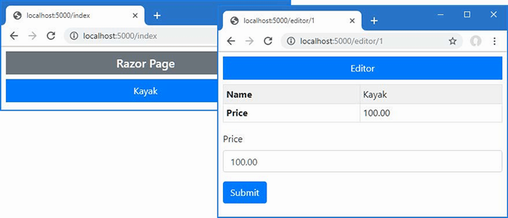
Figure 23.13 Using a layout in Razor Pages
Razor Pages can use partial views so that common content isn’t duplicated. The example in this section relies on the tag helpers feature, which I describe in detail in chapter 25. For this chapter, add the directive shown in listing 23.23 to the view imports file, which enables the custom HTML element used to apply partial views.
Listing 23.23 Enabling tag helpers in the _ViewImports.cshtml file in the Pages folder
@namespace WebApp.Pages @using WebApp.Models @addTagHelper *, Microsoft.AspNetCore.Mvc.TagHelpers
Next, add a Razor view named _ProductPartial.cshtml in the Pages/Shared folder and add the content shown in listing 23.24.
Listing 23.24 The _ProductPartial.cshtml File in the Pages/Shared Folder
@model Product
<div class="m-2">
<table class="table table-sm table-striped table-bordered">
<tbody>
<tr><th>Name</th><td>@Model?.Name</td></tr>
<tr><th>Price</th><td>@Model?.Price</td></tr>
</tbody>
</table>
</div>
Notice there is nothing specific to Razor Pages in the partial view. Partial views use the @model directive to receive a view model object and do not use the @page directive or have page models, both of which are specific to Razor Pages. This allows Razor Pages to share partial views with MVC controllers, as described in the sidebar.
Partial views are applied using the partial element, as shown in listing 23.25, with the name attribute specifying the name of the view and the model attribute providing the view model.
Listing 23.25 Using a partial view in the Index.cshtml file in the Pages folder
@page "{id:long?}"
@model IndexModel
<div class="bg-primary text-white text-center m-2 p-2">
@Model.Product?.Name
</div>
<partial name="_ProductPartial" model="Model.Product" />
When the Razor Page is used to handle a response, the contents of the partial view are incorporated into the response. Restart ASP.NET Core and use a browser to request http://localhost:5000/index, and the response includes the table defined in the partial view, as shown in figure 23.14.
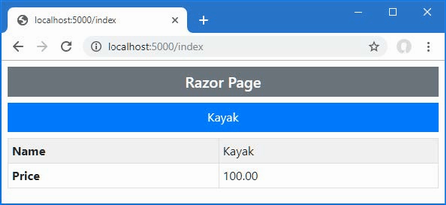
Figure 23.14 Using a partial view
If a Razor Page is simply presenting data to the user, the result can be a page model class that simply declares a constructor dependency to set a property that is consumed in the view. To understand this pattern, add a Razor Page named Data.cshtml to the WebApp/Pages folder with the content shown in listing 23.26.
Listing 23.26 The contents of the Data.cshtml file in the Pages folder
@page
@model DataPageModel
@using Microsoft.AspNetCore.Mvc.RazorPages
<h5 class="bg-primary text-white text-center m-2 p-2">Categories</h5>
<ul class="list-group m-2">
@foreach (Category c in Model.Categories) {
<li class="list-group-item">@c.Name</li>
}
</ul>
@functions {
public class DataPageModel : PageModel {
private DataContext context;
public IEnumerable<Category> Categories { get; set; }
= Enumerable.Empty<Category>();
public DataPageModel(DataContext ctx) {
context = ctx;
}
public void OnGet() {
Categories = context.Categories;
}
}
}
The page model in this example doesn’t transform data, perform calculations, or do anything other than giving the view access to the data through dependency injection. To avoid this pattern, where a page model class is used only to access a service, the @inject directive can be used to obtain the service in the view, without the need for a page model, as shown in listing 23.27.
Listing 23.27 Accessing a service in the Data.cshtml file in the Pages folder
@page
@inject DataContext context;
<h5 class="bg-primary text-white text-center m-2 p-2">Categories</h5>
<ul class="list-group m-2">
@foreach (Category c in context.Categories) {
<li class="list-group-item">@c.Name</li>
}
</ul>
The @inject expression specifies the service type and the name by which the service is accessed. In this example, the service type is DataContext, and the name by which it is accessed is context. Within the view, the @foreach expression generates elements for each object returned by the DataContext.Categories properties. Since there is no page model in this example, I have removed the @model and @using directives. Restart ASP.NET Core and use a browser to navigate to http://localhost:5000/data, and you will see the response shown in figure 23.15.
Figure 23.15 Using a Razor Page without a page model
Razor Pages combines markup and code to generate HTML responses without the setup required by the MVC Framework.
Razor Pages use the same syntax as regular Razor views, with additional expressions to define the page model.
The page model is usually embedded within the markup using the @functions expression but can be defined in a separate C# class file.
The routes supported by Razor Pages are defined using the @page expression.
Razor Pages can use regular Razor features, such as layouts, view start files, and partial views.
I describe view components in this chapter, which are classes that provide action-style logic to support partial views; this means view components provide complex content to be embedded in views while allowing the C# code that supports it to be easily maintained. Table 24.1 puts view components in context.
Table 24.1 Putting view components in context
|
Question |
Answer |
|---|---|
|
What are they? |
View components are classes that provide application logic to support partial views or to inject small fragments of HTML or JSON data into a parent view. |
|
Why are they useful? |
Without view components, it is hard to create embedded functionality such as shopping baskets or login panels in a way that is easy to maintain. |
|
How are they used? |
View components are typically derived from the |
|
Are there any pitfalls or limitations? |
View components are a simple and predictable feature. The main pitfall is not using them and trying to include application logic within views where it is difficult to test and maintain. |
|
Are there any alternatives? |
You could put the data access and processing logic directly in a partial view, but the result is difficult to work with and hard to maintain. |
Table 24.2 provides a guide to the chapter.
Table 24.2 Chapter guide
|
Problem |
Solution |
Listing |
|---|---|---|
|
Creating a reusable unit of code and content |
Define a view component. |
7–13 |
|
Creating a response from a view component |
Use one of the |
14–18 |
|
Getting context data |
Use the properties inherited from the base class or use the parameters of the |
19–25 |
|
Generating view component responses asynchronously |
Override the |
26–28 |
|
Integrating a view component into another endpoint |
Create a hybrid controller or Razor Page. |
29–36 |
This chapter uses the WebApp project from chapter 23. To prepare for this chapter, add a class file named City.cs to the WebApp/Models folder with the content shown in listing 24.1.
Listing 24.1 The contents of the City.cs file in the Models folder
namespace WebApp.Models {
public class City {
public string? Name { get; set; }
public string? Country { get; set; }
public int? Population { get; set; }
}
}
Add a class named CitiesData.cs to the WebApp/Models folder with the content shown in listing 24.2.
Listing 24.2 The contents of the CitiesData.cs file in the WebApp/Models folder
namespace WebApp.Models {
public class CitiesData {
private List<City> cities = new List<City> {
new City {
Name = "London",
Country = "UK",
Population = 8539000
},
new City {
Name = "New York",
Country = "USA",
Population = 8406000
},
new City {
Name = "San Jose",
Country = "USA",
Population = 998537
},
new City {
Name = "Paris",
Country = "France",
Population = 2244000
}
};
public IEnumerable<City> Cities => cities;
public void AddCity(City newCity) {
cities.Add(newCity);
}
}
}
The CitiesData class provides access to a collection of City objects and provides an AddCity method that adds a new object to the collection. Add the statement shown in listing 24.3 to the Program.cs file to create a service for the CitiesData class.
Listing 24.3 Defining a service in the Program.cs file in the WebApp folder
using Microsoft.EntityFrameworkCore;
using WebApp.Models;
using Microsoft.AspNetCore.Mvc.RazorPages;
var builder = WebApplication.CreateBuilder(args);
builder.Services.AddDbContext<DataContext>(opts => {
opts.UseSqlServer(builder.Configuration[
"ConnectionStrings:ProductConnection"]);
opts.EnableSensitiveDataLogging(true);
});
builder.Services.AddControllersWithViews();
builder.Services.AddRazorPages();
builder.Services.AddDistributedMemoryCache();
builder.Services.AddSession(options => {
options.Cookie.IsEssential = true;
});
builder.Services.Configure<RazorPagesOptions>(opts => {
opts.Conventions.AddPageRoute("/Index", "/extra/page/{id:long?}");
});
builder.Services.AddSingleton<CitiesData>();
var app = builder.Build();
app.UseStaticFiles();
app.UseSession();
app.MapControllers();
app.MapDefaultControllerRoute();
app.MapRazorPages();
var context = app.Services.CreateScope().ServiceProvider
.GetRequiredService<DataContext>();
SeedData.SeedDatabase(context);
app.Run();
The new statement uses the AddSingleton method to create a CitiesData service. There is no interface/implementation separation in this service, which I have created to easily distribute a shared CitiesData object. Add a Razor Page named Cities.cshtml to the WebApp/Pages folder and add the content shown in listing 24.4.
Listing 24.4 The contents of the Cities.cshtml file in the Pages folder
@page
@inject CitiesData Data
<div class="m-2">
<table class="table table-sm table-striped table-bordered">
<tbody>
@foreach (City c in Data.Cities) {
<tr>
<td>@c.Name</td>
<td>@c.Country</td>
<td>@c.Population</td>
</tr>
}
</tbody>
</table>
</div>
Open a new PowerShell command prompt, navigate to the folder that contains the WebApp.csproj file, and run the command shown in listing 24.5 to drop the database.
Listing 24.5 Dropping the database
dotnet ef database drop --force
Use the PowerShell command prompt to run the command shown in listing 24.6.
Listing 24.6 Running the example application
dotnet run
The database will be seeded as part of the application startup. Once ASP.NET Core is running, use a web browser to request http://localhost:5000/cities, which will produce the response shown in figure 24.1.
Figure 24.1 Running the example application
Applications commonly need to embed content in views that isn’t related to the main purpose of the application. Common examples include site navigation tools and authentication panels that let the user log in without visiting a separate page.
The data for this type of feature isn’t part of the model data passed from the action method or page model to the view. It is for this reason that I have created two sources of data in the example project: I am going to display some content generated using City data, which isn’t easily done in a view that receives data from the Entity Framework Core repository and the Product, Category, and Supplier objects it contains.
Partial views are used to create reusable markup that is required in views, avoiding the need to duplicate the same content in multiple places in the application. Partial views are a useful feature, but they just contain fragments of HTML and Razor directives, and the data they operate on is received from the parent view. If you need to display different data, then you run into a problem. You could access the data you need directly from the partial view, but this breaks the development model and produces an application that is difficult to understand and maintain. Alternatively, you could extend the view models used by the application so that it includes the data you require, but this means you have to change every action method, which makes it hard to isolate the functionality of action methods for effective maintenance and testing.
This is where view components come in. A view component is a C# class that provides a partial view with the data that it needs, independently from the action method or Razor Page. In this regard, a view component can be thought of as a specialized action or page, but one that is used only to provide a partial view with data; it cannot receive HTTP requests, and the content that it provides will always be included in the parent view.
A view component is any class whose name ends with ViewComponent and that defines an Invoke or InvokeAsync method or any class that is derived from the ViewComponent base class or that has been decorated with the ViewComponent attribute. I demonstrate the use of the attribute in the “Getting Context Data” section, but the other examples in this chapter rely on the base class.
View components can be defined anywhere in a project, but the convention is to group them in a folder named Components. Create the WebApp/Components folder and add to it a class file named CitySummary.cs with the content shown in listing 24.7.
Listing 24.7 The contents of the CitySummary.cs file in the Components folder
using Microsoft.AspNetCore.Mvc;
using WebApp.Models;
namespace WebApp.Components {
public class CitySummary : ViewComponent {
private CitiesData data;
public CitySummary(CitiesData cdata) {
data = cdata;
}
public string Invoke() {
return $"{data.Cities.Count()} cities, "
+ $"{data.Cities.Sum(c => c.Population)} people";
}
}
}
View components can take advantage of dependency injection to receive the services they require. In this example, the view component declares a dependency on the CitiesData class, which is then used in the Invoke method to create a string that contains the number of cities and the population total.
View components can be applied in two different ways. The first technique is to use the Component property that is added to the C# classes generated from views and Razor Pages. This property returns an object that implements the IViewComponentHelper interface, which provides the InvokeAsync method. Listing 24.8 uses this technique to apply the view component in the Index.cshtml file in the Views/Home folder.
Listing 24.8 Using a view component in the Index.cshtml file in the Views/Home folder
@model Product?
@{
Layout = "_Layout";
ViewBag.Title = "Product Table";
}
@section Header {
Product Information
}
<tr><th>Name</th><td>@Model?.Name</td></tr>
<tr>
<th>Price</th>
<td>@Model?.Price.ToString("c")</td>
</tr>
<tr><th>Category ID</th><td>@Model?.CategoryId</td></tr>
@section Footer {
@(((Model?.Price / ViewBag.AveragePrice)
* 100).ToString("F2"))% of average price
}
@section Summary {
<div class="bg-info text-white m-2 p-2">
@await Component.InvokeAsync("CitySummary")
</div>
}
View components are applied using the Component.InvokeAsync method, using the name of the view component class as the argument. The syntax for this technique can be confusing. View component classes define either an Invoke or InvokeAsync method, depending on whether their work is performed synchronously or asynchronously. But the Component.InvokeAsync method is always used, even to apply view components that define the Invoke method and whose operations are entirely synchronous.
To add the namespace for the view components to the list that are included in views, I added the statement shown in listing 24.9 to the _ViewImports.cshtml file in the Views folder.
Listing 24.9 Adding a namespace in the _ViewImports.cshtml file in the Views folder
@using WebApp.Models @addTagHelper *, Microsoft.AspNetCore.Mvc.TagHelpers @using WebApp.Components
Restart ASP.NET Core and use a browser to request http://localhost:5000/home/index/1, which will produce the result shown in figure 24.2.
Figure 24.2 Using a view component
Applying view components using a tag helper
Razor Views and Pages can contain tag helpers, which are custom HTML elements that are managed by C# classes. I explain how tag helpers work in detail in chapter 25, but view components can be applied using an HTML element that is implemented as a tag helper. To enable this feature, add the directive shown in listing 24.10 to the _ViewImports.cshtml file in the Views folder.
Listing 24.10 Adding tag helper in the _ViewImports.cshtml file in the Views folder
@using WebApp.Models @addTagHelper *, Microsoft.AspNetCore.Mvc.TagHelpers @using WebApp.Components @addTagHelper *, WebApp
The new directive adds tag helper support for the example project, which is specified by name, and which is WebApp for this example. In listing 24.11, I have used the custom HTML element to apply the view component.
Listing 24.11 Applying a component in the Index.cshtml file in the Views/Home folder
@model Product?
@{
Layout = "_Layout";
ViewBag.Title = "Product Table";
}
@section Header {
Product Information
}
<tr><th>Name</th><td>@Model?.Name</td></tr>
<tr>
<th>Price</th>
<td>@Model?.Price.ToString("c")</td>
</tr>
<tr><th>Category ID</th><td>@Model?.CategoryId</td></tr>
@section Footer {
@(((Model?.Price / ViewBag.AveragePrice)
* 100).ToString("F2"))% of average price
}
@section Summary {
<div class="bg-info text-white m-2 p-2">
<vc:city-summary />
</div>
}
The tag for the custom element is vc, followed by a colon, followed by the name of the view component class, which is transformed into kebab-case. Each capitalized word in the class name is converted to lowercase and separated by a hyphen so that CitySummary becomes city-summary, and the CitySummary view component is applied using the vc:city-summary element.
Applying view components in razor pages
Razor Pages use view components in the same way, either through the Component property or through the custom HTML element. Since Razor Pages have their own view imports file, a separate @addTagHelper directive is required, as shown in listing 24.12.
Listing 24.12 Adding a directive in the _ViewImports.cshtml file in the Pages folder
@namespace WebApp.Pages @using WebApp.Models @addTagHelper *, Microsoft.AspNetCore.Mvc.TagHelpers @addTagHelper *, WebApp
Listing 24.13 applies the CitySummary view component to the Data page.
Listing 24.13 Using a view component in the Data.cshtml file in the Pages folder
@page
@inject DataContext context;
<h5 class="bg-primary text-white text-center m-2 p-2">Categories</h5>
<ul class="list-group m-2">
@foreach (Category c in context.Categories) {
<li class="list-group-item">@c.Name</li>
}
</ul>
<div class="bg-info text-white m-2 p-2">
<vc:city-summary />
</div>
Use a browser to request http://localhost:5000/data, and you will see the response shown in figure 24.3, which displays the city data alongside the categories in the database.
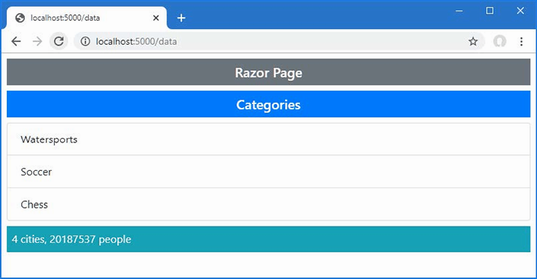
Figure 24.3 Using a view component in a Razor Page
The ability to insert simple string values into a view or page isn’t especially useful, but fortunately, view components are capable of much more. More complex effects can be achieved by having the Invoke or InvokeAsync method return an object that implements the IViewComponentResult interface. There are three built-in classes that implement the IViewComponentResult interface, and they are described in table 24.3, along with the convenience methods for creating them provided by the ViewComponent base class. I describe the use of each result type in the sections that follow.
Table 24.3 The built-in IViewComponentResult implementation classes
|
Name |
Description |
|---|---|
|
|
This class is used to specify a Razor View, with optional view model data. Instances of this class are created using the |
|
|
This class is used to specify a text result that will be safely encoded for inclusion in an HTML document. Instances of this class are created using the |
|
|
This class is used to specify a fragment of HTML that will be included in the HTML document without further encoding. There is no |
There is special handling for two result types. If a view component returns a string, then it is used to create a ContentViewComponentResult object, which is what I relied on in earlier examples. If a view component returns an IHtmlContent object, then it is used to create an HtmlContentViewComponentResult object.
The most useful response is the awkwardly named ViewViewComponentResult object, which tells Razor to render a partial view and include the result in the parent view. The ViewComponent base class provides the View method for creating ViewViewComponentResult objects, and four versions of the method are available, described in table 24.4.
Table 24.4 The ViewComponent.View methods
|
Name |
Description |
|---|---|
|
|
Using this method selects the default view for the view component and does not provide a view model. |
|
|
Using the method selects the default view and uses the specified object as the view model. |
|
|
Using this method selects the specified view and does not provide a view model. |
|
|
Using this method selects the specified view and uses the specified object as the view model. |
These methods correspond to those provided by the Controller base class and are used in much the same way. To create a view model class that the view component can use, add a class file named CityViewModel.cs to the WebApp/Models folder and use it to define the class shown in listing 24.14.
Listing 24.14 The contents of the CityViewModel.cs file in the Models folder
namespace WebApp.Models {
public class CityViewModel {
public int? Cities { get; set; }
public int? Population { get; set; }
}
}
Listing 24.15 modifies the Invoke method of the CitySummary view component so it uses the View method to select a partial view and provides view data using a CityViewModel object.
Listing 24.15 Selecting a view in the CitySummary.cs file in the Components folder
using Microsoft.AspNetCore.Mvc;
using WebApp.Models;
namespace WebApp.Components {
public class CitySummary : ViewComponent {
private CitiesData data;
public CitySummary(CitiesData cdata) {
data = cdata;
}
public IViewComponentResult Invoke() {
return View(new CityViewModel {
Cities = data.Cities.Count(),
Population = data.Cities.Sum(c => c.Population)
});
}
}
}
There is no view available for the view component currently, but the error message this produces reveals the locations that are searched. Restart ASP.NET Core and use a browser to request http://localhost:5000/home/index/1 to see the locations that are searched when the view component is used with a controller. Request http://localhost:5000/data to see the locations searched when a view component is used with a Razor Page. Figure 24.4 shows both responses.
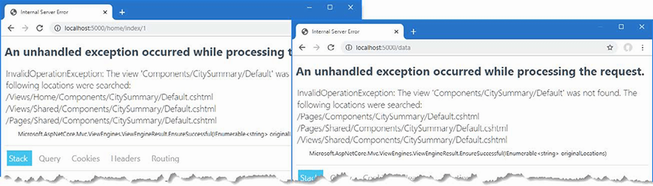
Figure 24.4 The search locations for view component views
Razor searches for a view named Default.cshtml when a view component invokes the View method without specifying a name. If the view component is used with a controller, then the search locations are as follows:
/Views/[controller]/Components/[viewcomponent]/Default.cshtml
/Views/Shared/Components/[viewcomponent]/Default.cshtml
/Pages/Shared/Components/[viewcomponent]/Default.cshtml
When the CitySummary component is rendered by a view selected through the Home controller, for example, [controller] is Home and [viewcomponent] is CitySummary, which means the first search location is /Views/Home/Components/CitySummary/Default.cshtml. If the view component is used with a Razor Page, then the search locations are as follows:
/Pages/Components/[viewcomponent]/Default.cshtml
/Pages/Shared/Components/[viewcomponent]/Default.cshtml
/Views/Shared/Components/[viewcomponent]/Default.cshtml
If the search paths for Razor Pages do not include the page name but a Razor Page is defined in a subfolder, then the Razor view engine will look for a view in the Components/[viewcomponent] folder, relative to the location in which the Razor Page is defined, working its way up the folder hierarchy until it finds a view or reaches the Pages folder.
Create the WebApp/Views/Shared/Components/CitySummary folder and add to it a Razor View named Default.cshtml with the content shown in listing 24.16.
Listing 24.16 The Default.cshtml file in the Views/Shared/Components/CitySummary folder
@model CityViewModel
<table class="table table-sm table-bordered text-white bg-secondary">
<thead>
<tr><th colspan="2">Cities Summary</th></tr>
</thead>
<tbody>
<tr>
<td>Cities:</td>
<td class="text-right">
@Model?.Cities
</td>
</tr>
<tr>
<td>Population:</td>
<td class="text-right">
@Model?.Population?.ToString("#,###")
</td>
</tr>
</tbody>
</table>
Views for view components are similar to partial views and use the @model directive to set the type of the view model object. This view receives a CityViewModel object from its view component, which is used to populate the cells in an HTML table. Restart ASP.NET Core and a browser to request http://localhost:5000/home/index/1 and http://localhost:5000/data, and you will see the view incorporated into the responses, as shown in figure 24.5.
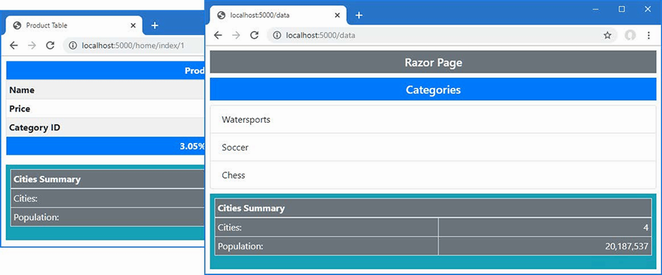
Figure 24.5 Using a view with a view component
The ContentViewComponentResult class is used to include fragments of HTML in the parent view without using a view. Instances of the ContentViewComponentResult class are created using the Content method inherited from the ViewComponent base class, which accepts a string value. Listing 24.17 demonstrates the use of the Content method.
Listing 24.17 Using the content method in the CitySummary.cs file in the Components folder
using Microsoft.AspNetCore.Mvc;
using WebApp.Models;
namespace WebApp.Components {
public class CitySummary : ViewComponent {
private CitiesData data;
public CitySummary(CitiesData cdata) {
data = cdata;
}
public IViewComponentResult Invoke() {
return Content("This is a <h3><i>string</i></h3>");
}
}
}
The string received by the Content method is encoded to make it safe to include in an HTML document. This is particularly important when dealing with content that has been provided by users or external systems because it prevents JavaScript content from being embedded into the HTML generated by the application.
In this example, the string that I passed to the Content method contains some basic HTML tags. Restart ASP.NET Core and use a browser to request http://localhost:5000/home/index/1. The response will include the encoded HTML fragment, as shown in figure 24.6.
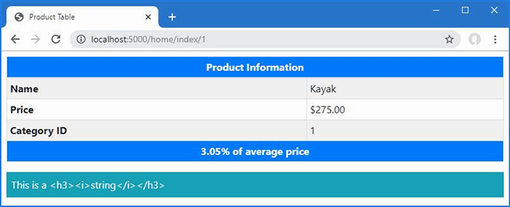
Figure 24.6 Returning an encoded HTML fragment using a view component
If you look at the HTML that the view component produced, you will see that the angle brackets have been replaced so that the browser doesn’t interpret the content as HTML elements, as follows:
...
<div class="bg-info text-white m-2 p-2">
This is a <h3><i>string</i></h3>
</div>
...
You don’t need to encode content if you trust its source and want it to be interpreted as HTML. The Content method always encodes its argument, so you must create the HtmlContentViewComponentResult object directly and provide its constructor with an HtmlString object, which represents a string that you know is safe to display, either because it comes from a source that you trust or because you are confident that it has already been encoded, as shown in listing 24.18.
Listing 24.18 Returning a fragment in the CitySummary.cs file in the Components folder
using Microsoft.AspNetCore.Mvc;
using WebApp.Models;
using Microsoft.AspNetCore.Mvc.ViewComponents;
using Microsoft.AspNetCore.Html;
namespace WebApp.Components {
public class CitySummary : ViewComponent {
private CitiesData data;
public CitySummary(CitiesData cdata) {
data = cdata;
}
public IViewComponentResult Invoke() {
return new HtmlContentViewComponentResult(
new HtmlString("This is a <h3><i>string</i></h3>"));
}
}
}
This technique should be used with caution and only with sources of content that cannot be tampered with and that perform their own encoding. Restart ASP.NET Core and use a browser to request http://localhost:5000/home/index/1, and you will see the response isn’t encoded and is interpreted as HTML elements, as shown in figure 24.7.
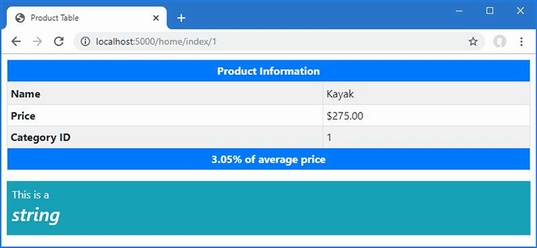
Figure 24.7 Returning an unencoded HTML fragment using a view component
Details about the current request and the parent view are provided to a view component through properties defined by the ViewComponent base class, as described in table 24.5.
Table 24.5 The ViewComponentContext properties
|
Name |
Description |
|---|---|
|
|
This property returns an |
|
|
This property returns an |
|
|
This property returns an |
|
|
This property returns a |
|
|
This property returns the |
|
|
This property returns a |
|
|
This property returns a |
The context data can be used in whatever way helps the view component do its work, including varying the way that data is selected or rendering different content or views. It is hard to devise a representative example of using context data in a view component because the problems it solves are specific to each project. In listing 24.19, I check the route data for the request to determine whether the routing pattern contains a controller segment variable, which indicates a request that will be handled by a controller and view.
Listing 24.19 Using request data in the CitySummary.cs file in the Components folder
using Microsoft.AspNetCore.Mvc;
using WebApp.Models;
using Microsoft.AspNetCore.Mvc.ViewComponents;
using Microsoft.AspNetCore.Html;
namespace WebApp.Components {
public class CitySummary : ViewComponent {
private CitiesData data;
public CitySummary(CitiesData cdata) {
data = cdata;
}
public string Invoke() {
if (RouteData.Values["controller"] != null) {
return "Controller Request";
} else {
return "Razor Page Request";
}
}
}
}
Restart ASP.NET Core and use a browser to request http://localhost:5000/home/index/1 and http://localhost:5000/data, and you will see that the view component alters its output, as shown in figure 24.8.
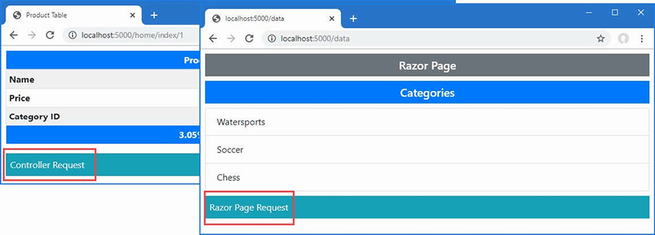
Figure 24.8 Using context data in a view component
Parent views can provide additional context data to view components, providing them with either data or guidance about the content that should be produced. The context data is received through the Invoke or InvokeAsync method, as shown in listing 24.20.
Listing 24.20 Receiving a value in the CitySummary.cs file in the Components folder
using Microsoft.AspNetCore.Mvc;
using WebApp.Models;
using Microsoft.AspNetCore.Mvc.ViewComponents;
using Microsoft.AspNetCore.Html;
namespace WebApp.Components {
public class CitySummary : ViewComponent {
private CitiesData data;
public CitySummary(CitiesData cdata) {
data = cdata;
}
public IViewComponentResult Invoke(string themeName) {
ViewBag.Theme = themeName;
return View(new CityViewModel {
Cities = data.Cities.Count(),
Population = data.Cities.Sum(c => c.Population)
});
}
}
}
The Invoke method defines a themeName parameter that is passed on to the partial view using the view bag, which was described in chapter 22. Listing 24.21 updates the Default view to use the received value to style the content it produces.
Listing 24.21 Styling content in the Default.cshtml file in the Views/Shared/Components/CitySummary folder
@model CityViewModel
<table class="table table-sm table-bordered text-white bg-@ViewBag.Theme">
<thead>
<tr><th colspan="2">Cities Summary</th></tr>
</thead>
<tbody>
<tr>
<td>Cities:</td>
<td class="text-right">
@Model?.Cities
</td>
</tr>
<tr>
<td>Population:</td>
<td class="text-right">
@Model?.Population?.ToString("#,###")
</td>
</tr>
</tbody>
</table>
A value for all parameters defined by a view component’s Invoke or InvokeAsync method must always be provided. Listing 24.22 provides a value for themeName parameter in the view selected by the Home controller.
Listing 24.22 Supplying a value in the Index.cshtml file in the Views/Home folder
@model Product?
@{
Layout = "_Layout";
ViewBag.Title = "Product Table";
}
@section Header {
Product Information
}
<tr><th>Name</th><td>@Model?.Name</td></tr>
<tr>
<th>Price</th>
<td>@Model?.Price.ToString("c")</td>
</tr>
<tr><th>Category ID</th><td>@Model?.CategoryId</td></tr>
@section Footer {
@(((Model?.Price / ViewBag.AveragePrice)
* 100).ToString("F2"))% of average price
}
@section Summary {
<div class="bg-info text-white m-2 p-2">
<vc:city-summary theme-name="secondary" />
</div>
}
The name of each parameter is expressed an attribute using kebab-case so that the theme-name attribute provides a value for the themeName parameter. Listing 24.23 sets a value in the Data.cshtml Razor Page.
Listing 24.23 Supplying a value in the Data.cshtml file in the Pages folder
@page
@inject DataContext context;
<h5 class="bg-primary text-white text-center m-2 p-2">Categories</h5>
<ul class="list-group m-2">
@foreach (Category c in context.Categories) {
<li class="list-group-item">@c.Name</li>
}
</ul>
<div class="bg-info text-white m-2 p-2">
<vc:city-summary theme-name="danger" />
</div>
Restart ASP.NET Core and use a browser to request http://localhost:5000/home/index/1 and http://localhost:5000/data. The view component is provided with different values for the themeName parameter, producing the responses shown in figure 24.9.
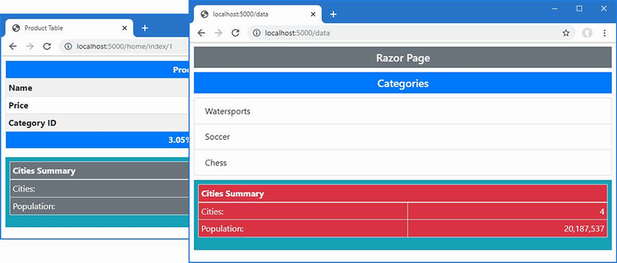
Figure 24.9 Using context data in a view component
Using a default parameter value
Default values can be defined for the Invoke method parameters, as shown in listing 24.24, which provides a fallback if the parent view doesn’t provide a value.
Listing 24.24 A default value in the CitySummary.cs file in the Components folder
using Microsoft.AspNetCore.Mvc;
using WebApp.Models;
using Microsoft.AspNetCore.Mvc.ViewComponents;
using Microsoft.AspNetCore.Html;
namespace WebApp.Components {
public class CitySummary : ViewComponent {
private CitiesData data;
public CitySummary(CitiesData cdata) {
data = cdata;
}
public IViewComponentResult Invoke(string themeName="success") {
ViewBag.Theme = themeName;
return View(new CityViewModel {
Cities = data.Cities.Count(),
Population = data.Cities.Sum(c => c.Population)
});
}
}
}
The default value is success, and it will be used if the view component is applied without a theme-name attribute, as shown in Listing 24.25.
Listing 24.25 Omitting the attribute in the Data.cshtml file in the Pages folder
@page
@inject DataContext context;
<h5 class="bg-primary text-white text-center m-2 p-2">Categories</h5>
<ul class="list-group m-2">
@foreach (Category c in context.Categories) {
<li class="list-group-item">@c.Name</li>
}
</ul>
<div class="bg-info text-white m-2 p-2">
<vc:city-summary />
</div>
Restart ASP.NET Core and use a browser to request http://localhost:5000/data. The default value is used to select the theme, as shown in figure 24.10.
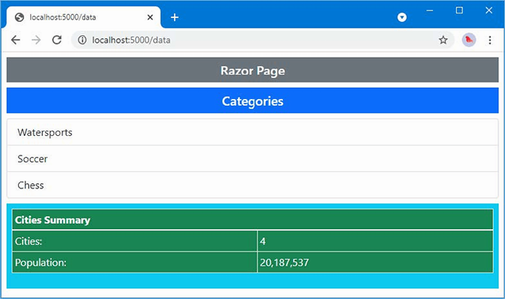
Figure 24.10 Using a default value
All the examples so far in this chapter have been synchronous view components, which can be recognized because they define the Invoke method. If your view component relies on asynchronous APIs, then you can create an asynchronous view component by defining an InvokeAsync method that returns a Task. When Razor receives the Task from the InvokeAsync method, it will wait for it to complete and then insert the result into the main view. To create a new component, add a class file named PageSize.cs to the Components folder and use it to define the class shown in listing 24.26.
Listing 24.26 The contents of the PageSize.cs file in the Components folder
using Microsoft.AspNetCore.Mvc;
namespace WebApp.Components {
public class PageSize : ViewComponent {
public async Task<IViewComponentResult> InvokeAsync() {
HttpClient client = new HttpClient();
HttpResponseMessage response
= await client.GetAsync("http://microsoft.com");
return View(response.Content.Headers.ContentLength);
}
}
}
The InvokeAsync method uses the async and await keywords to consume the asynchronous API provided by the HttpClient class and get the length of the content returned by sending a GET request to microsoft.com. The length is passed to the View method, which selects the default partial view associated with the view component.
Create the Views/Shared/Components/PageSize folder and add to it a Razor View named Default.cshtml with the content shown in listing 24.27.
Listing 24.27 The Default.cshtml file in the Views/Shared/Components/PageSize folder
@model long <div class="m-1 p-1 bg-light text-dark">Page size: @Model</div>
The final step is to use the component, which I have done in the Index view used by the Home controller, as shown in listing 24.28. No change is required in the way that asynchronous view components are used.
Listing 24.28 Using an asynchronous component in the Index.cshtml file in the Views/Home folder
@model Product?
@{
Layout = "_Layout";
ViewBag.Title = "Product Table";
}
@section Header {
Product Information
}
<tr><th>Name</th><td>@Model?.Name</td></tr>
<tr>
<th>Price</th>
<td>@Model?.Price.ToString("c")</td>
</tr>
<tr><th>Category ID</th><td>@Model?.CategoryId</td></tr>
@section Footer {
@(((Model?.Price / ViewBag.AveragePrice)
* 100).ToString("F2"))% of average price
}
@section Summary {
<div class="bg-info text-white m-2 p-2">
<vc:city-summary theme-name="secondary" />
<vc:page-size />
</div>
}
Restart ASP.NET Core and use a browser to request http://localhost:5000/home/index/1, which will produce a response that includes the size of the Microsoft home page, as shown in figure 24.11. At the time of writing, the response sent by the Microsoft website is a concise message used for requests that don’t include a browser user-agent header, but you may see a different response.
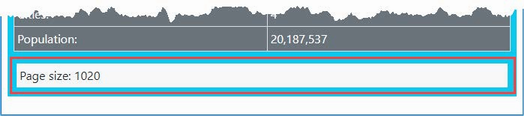
Figure 24.11 Using an asynchronous component
View components often provide a summary or snapshot of functionality that is handled in-depth by a controller or Razor Page. For a view component that summarizes a shopping basket, for example, there will often be a link that targets a controller that provides a detailed list of the products in the basket and that can be used to check out and complete the purchase.
In this situation, you can create a class that is a view component as well as a controller or Razor Page. If you are using Visual Studio, expand the Cities.cshtml item in the Solution Explorer to show the Cities.cshtml.cs file and replace its contents with those shown in listing 24.29. If you are using Visual Studio Code, add a file named Cities.cshtml.cs to the Pages folder with the content shown in listing 24.29.
Listing 24.29 The contents of the Cities.cshtml.cs file in the Pages folder
using Microsoft.AspNetCore.Mvc;
using Microsoft.AspNetCore.Mvc.RazorPages;
using Microsoft.AspNetCore.Mvc.ViewComponents;
using Microsoft.AspNetCore.Mvc.ViewFeatures;
using WebApp.Models;
namespace WebApp.Pages {
[ViewComponent(Name = "CitiesPageHybrid")]
public class CitiesModel : PageModel {
public CitiesModel(CitiesData cdata) {
Data = cdata;
}
public CitiesData? Data { get; set; }
[ViewComponentContext]
public ViewComponentContext Context { get; set; } = new();
public IViewComponentResult Invoke() {
return new ViewViewComponentResult() {
ViewData = new ViewDataDictionary<CityViewModel>(
Context.ViewData,
new CityViewModel {
Cities = Data?.Cities.Count(),
Population = Data?.Cities.Sum(c => c.Population)
})
};
}
}
}
This page model class is decorated with the ViewComponent attribute, which allows it to be used as a view component. The Name argument specifies the name by which the view component will be applied. Since a page model cannot inherit from the ViewComponent base class, a property whose type is ViewComponentContext is decorated with the ViewComponentContext attribute, which signals that it should be assigned an object that defines the properties described in table 24.5 before the Invoke or InvokeAsync method is invoked. The View method isn’t available, so I have to create a ViewViewComponentResult object, which relies on the context object received through the decorated property. Listing 24.30 updates the view part of the page to use the new page model class.
Listing 24.30 Updating the view in the Cities.cshtml file in the Pages folder
@page
@model WebApp.Pages.CitiesModel
<div class="m-2">
<table class="table table-sm table-striped table-bordered">
<tbody>
@foreach (City c in Model.Data?.Cities ??
Enumerable.Empty<City>()) {
<tr>
<td>@c.Name</td>
<td>@c.Country</td>
<td>@c.Population</td>
</tr>
}
</tbody>
</table>
</div>
The changes update the directives to use the page model class. To create the view for the hybrid view component, create the Pages/Shared/Components/CitiesPageHybrid folder and add to it a Razor View named Default.cshtml with the content shown in listing 24.31.
Listing 24.31 The Default.cshtml file in the Pages/Shared/Components/CitiesPageHybrid folder
@model CityViewModel
<table class="table table-sm table-bordered text-white bg-dark">
<thead><tr><th colspan="2">Hybrid Page Summary</th></tr></thead>
<tbody>
<tr>
<td>Cities:</td>
<td class="text-right">@Model?.Cities</td>
</tr>
<tr>
<td>Population:</td>
<td class="text-right">
@Model?.Population?.ToString("#,###")
</td>
</tr>
</tbody>
</table>
Listing 24.32 applies the view component part of the hybrid class in another page.
Listing 24.32 Using a view component in the Data.cshtml file in the Pages folder
@page
@inject DataContext context;
<h5 class="bg-primary text-white text-center m-2 p-2">Categories</h5>
<ul class="list-group m-2">
@foreach (Category c in context.Categories) {
<li class="list-group-item">@c.Name</li>
}
</ul>
<div class="bg-info text-white m-2 p-2">
<vc:cities-page-hybrid />
</div>
Hybrids are applied just like any other view component. Restart ASP.NET Core and request http://localhost:5000/cities and http://localhost:5000/data. Both URLs are processed by the same class. For the first URL, the class acts as a page model; for the second URL, the class acts as a view component. Figure 24.12 shows the output for both URLs.
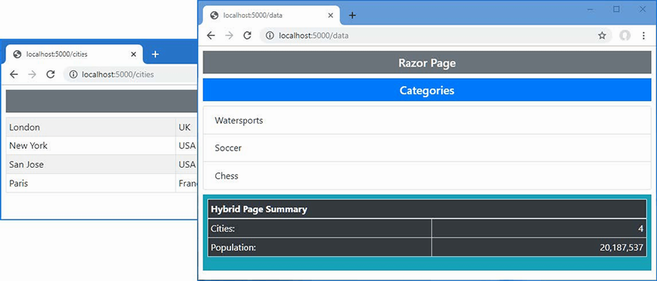
Figure 24.12 A hybrid page model and view component class
The same technique can be applied to controllers. Add a class file named CitiesController.cs to the Controllers folder and add the statements shown in listing 24.33.
Listing 24.33 The contents of the CitiesController.cs file in the Controllers folder
using Microsoft.AspNetCore.Mvc;
using Microsoft.AspNetCore.Mvc.ViewComponents;
using Microsoft.AspNetCore.Mvc.ViewFeatures;
using WebApp.Models;
namespace WebApp.Controllers {
[ViewComponent(Name = "CitiesControllerHybrid")]
public class CitiesController : Controller {
private CitiesData data;
public CitiesController(CitiesData cdata) {
data = cdata;
}
public IActionResult Index() {
return View(data.Cities);
}
public IViewComponentResult Invoke() {
return new ViewViewComponentResult() {
ViewData = new ViewDataDictionary<CityViewModel>(
ViewData,
new CityViewModel {
Cities = data.Cities.Count(),
Population = data.Cities.Sum(c => c.Population)
})
};
}
}
}
A quirk in the way that controllers are instantiated means that a property decorated with the ViewComponentContext attribute isn’t required and the ViewData property inherited from the Controller base class can be used to create the view component result.
To provide a view for the action method, create the Views/Cities folder and add to it a file named Index.cshtml with the content shown in listing 24.34.
Listing 24.34 The contents of the Index.cshtml file in the Views/Cities folder
@model IEnumerable<City>
@{
Layout = "_ImportantLayout";
}
<div class="m-2">
<table class="table table-sm table-striped table-bordered">
<tbody>
@foreach (City c in Model) {
<tr>
<td>@c.Name</td>
<td>@c.Country</td>
<td>@c.Population</td>
</tr>
}
</tbody>
</table>
</div>
To provide a view for the view component, create the Views/Shared/Components/CitiesControllerHybrid folder and add to it a Razor View named Default.cshtml with the content shown in listing 24.35.
Listing 24.35 The Default.cshtml file in the Views/Shared/Components/CitiesControllerHybrid folder
@model CityViewModel
<table class="table table-sm table-bordered text-white bg-dark">
<thead><tr><th colspan="2">Hybrid Controller Summary</th></tr></thead>
<tbody>
<tr>
<td>Cities:</td>
<td class="text-right">@Model.Cities</td>
</tr>
<tr>
<td>Population:</td>
<td class="text-right">
@Model.Population?.ToString("#,###")
</td>
</tr>
</tbody>
</table>
Listing 24.36 applies the hybrid view component in the Data.cshtml Razor Page, replacing the hybrid class created in the previous section.
Listing 24.36 Applying the view component in the Data.cshtml file in the Pages folder
@page
@inject DataContext context;
<h5 class="bg-primary text-white text-center m-2 p-2">Categories</h5>
<ul class="list-group m-2">
@foreach (Category c in context.Categories) {
<li class="list-group-item">@c.Name</li>
}
</ul>
<div class="bg-info text-white m-2 p-2">
<vc:cities-controller-hybrid />
</div>
Restart ASP.NET Core and use a browser to request http://localhost:5000/cities/index and http://localhost:5000/data. For the first URL, the class in listing 24.36 is used as a controller; for the second URL, the class is used as a view component. Figure 24.13 shows the responses for both URLs.
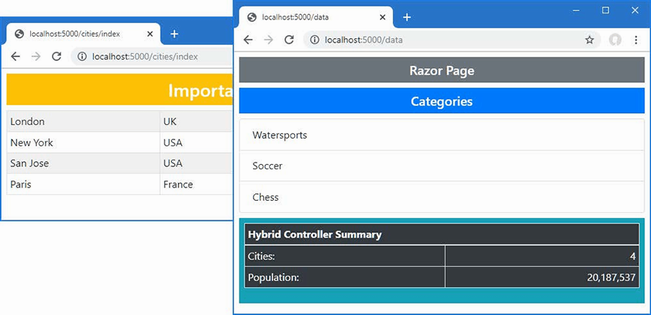
Figure 24.13 A hybrid controller and view component class
View components are self-contained and generate content that isn’t related to the main purpose of the application.
View components are C# classes that are derived from ViewComponent and whose Invoke method is called to generate content.
View components are applied using the Component property, which returns a helper or using the vc tag helper.
View components can use partial views to generate HTML content.
View components can receive data from the view in which they are applied and can use standard platform features such as dependency injection.
This chapter covers
Tag helpers are C# classes that transform HTML elements in a view or page. Common uses for tag helpers include generating URLs for forms using the application’s routing configuration, ensuring that elements of a specific type are styled consistently, and replacing custom shorthand elements with commonly used fragments of content. In this chapter, I describe how tag helpers work and how custom tag helpers are created and applied. In chapter 26, I describe the built-in tag helpers, and in chapter 27, I use tag helpers to explain how HTML forms are created. Table 25.1 puts tag helpers in context.
Table 25.1 Putting tag helpers in context
|
Question |
Answer |
|---|---|
|
What are they? |
Tag helpers are classes that manipulate HTML elements, either to change them in some way, to supplement them with additional content, or to replace them entirely with new content. |
|
Why are they useful? |
Tag helpers allow view content to be generated or transformed using C# logic, ensuring that the HTML sent to the client reflects the state of the application. |
|
How are they used? |
The HTML elements to which tag helpers are applied are selected based on the name of the class or with the |
|
Are there any pitfalls or limitations? |
It can be easy to get carried away and generate complex sections of HTML content using tag helpers, which is something that is more readily achieved using view components, described in chapter 24. |
|
Are there any alternatives? |
You don’t have to use tag helpers, but they make it easy to generate complex HTML in ASP.NET Core applications. |
Table 25.2 provides a guide to the chapter.
Table 25.2 Chapter guide
|
Problem |
Solution |
Listing |
|---|---|---|
|
Creating a tag helper |
Define a class that is derived from the |
1–7 |
|
Controlling the scope of a tag helper |
Alter the range of elements specified by the |
8–11 |
|
Creating custom HTML elements that are replaced with content |
Use shorthand elements. |
12, 13 |
|
Creating elements programmatically |
Use the |
14 |
|
Controlling where content is inserted |
Use the prepend and append features. |
15–18 |
|
Getting context data |
Use the context object. |
19, 20 |
|
Operating on the view model or page model |
Use a model expression. |
21–25 |
|
Creating coordinating tag helpers |
Use the |
26, 27 |
|
Suppressing content |
Use the |
28, 29 |
|
Defining tag helper as services |
Create tag helper components. |
30–33 |
This chapter uses the WebApp project from chapter 24. To prepare for this chapter, replace the contents of the Program.cs file with those in listing 25.1, removing some of the configuration statements used in earlier chapters.
Listing 25.1 The contents of the Program.cs file in the WebApp folder
using Microsoft.EntityFrameworkCore;
using WebApp.Models;
var builder = WebApplication.CreateBuilder(args);
builder.Services.AddDbContext<DataContext>(opts => {
opts.UseSqlServer(builder.Configuration[
"ConnectionStrings:ProductConnection"]);
opts.EnableSensitiveDataLogging(true);
});
builder.Services.AddControllersWithViews();
builder.Services.AddRazorPages();
builder.Services.AddSingleton<CitiesData>();
var app = builder.Build();
app.UseStaticFiles();
app.MapControllers();
app.MapDefaultControllerRoute();
app.MapRazorPages();
var context = app.Services.CreateScope().ServiceProvider
.GetRequiredService<DataContext>();
SeedData.SeedDatabase(context);
app.Run();
Next, replace the contents of the Index.cshtml file in the Views/Home folder with the content shown in listing 25.2.
Listing 25.2 The contents of the Index.cshtml file in the Views/Home folder
@model Product?
@{
Layout = "_SimpleLayout";
}
<table class="table table-striped table-bordered table-sm">
<thead>
<tr>
<th colspan="2">Product Summary</th>
</tr>
</thead>
<tbody>
<tr><th>Name</th><td>@Model?.Name</td></tr>
<tr><th>Price</th><td>@Model?.Price.ToString("c")</td></tr>
<tr><th>Category ID</th><td>@Model?.CategoryId</td></tr>
</tbody>
</table>
The view in listing 25.2 relies on a new layout. Add a Razor View file named _SimpleLayout.cshtml in the Views/Shared folder with the content shown in listing 25.3.
Listing 25.3 The contents of the _SimpleLayout.cshtml file in the Views/Shared folder
<!DOCTYPE html>
<html>
<head>
<title>@ViewBag.Title</title>
<link href="/lib/bootstrap/css/bootstrap.min.css" rel="stylesheet" />
</head>
<body>
<div class="m-2">
@RenderBody()
</div>
</body>
</html>
Open a new PowerShell command prompt, navigate to the folder that contains the WebApp.csproj file, and run the command shown in listing 25.4 to drop the database.
Listing 25.4 Dropping the database
dotnet ef database drop --force
Use the PowerShell command prompt to run the command shown in listing 25.5.
Listing 25.5 Running the example application
dotnet run
Use a browser to request http://localhost:5000/home, which will produce the response shown in figure 25.1.
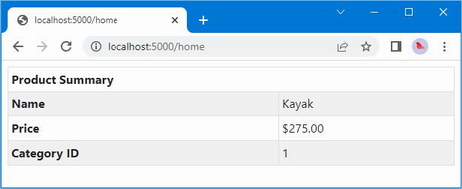
Figure 25.1 Running the example application
The best way to understand tag helpers is to create one, which reveals how they operate and how they fit into an ASP.NET Core application. In the sections that follow, I go through the process of creating and applying a tag helper that will set the Bootstrap CSS classes for a tr element so that an element like this:
...
<tr bg-color="primary">
<th colspan="2">Product Summary</th>
</tr>
...
will be transformed into this:
...
<tr class="bg-primary text-white text-center">
<th colspan="2">Product Summary</th>
</tr>
...
The tag helper will recognize the tr-color attribute and use its value to set the class attribute on the element sent to the browser. This isn’t the most dramatic—or useful—transformation, but it provides a foundation for explaining how tag helpers work.
Tag helpers can be defined anywhere in the project, but it helps to keep them together because they need to be registered before they can be used. Create the WebApp/TagHelpers folder and add to it a class file named TrTagHelper.cs with the code shown in listing 25.6.
Listing 25.6 The contents of the TrTagHelper.cs file in the TagHelpers folder
using Microsoft.AspNetCore.Razor.TagHelpers;
namespace WebApp.TagHelpers {
public class TrTagHelper: TagHelper {
public string BgColor { get; set; } = "dark";
public string TextColor { get; set; } = "white";
public override void Process(TagHelperContext context,
TagHelperOutput output) {
output.Attributes.SetAttribute("class",
$"bg-{BgColor} text-center text-{TextColor}");
}
}
}
Tag helpers are derived from the TagHelper class, which is defined in the Microsoft.AspNetCore.Razor.TagHelpers namespace. The TagHelper class defines a Process method, which is overridden by subclasses to implement the behavior that transforms elements.
The name of the tag helper combines the name of the element it transforms followed by TagHelper. In the case of the example, the class name TrTagHelper indicates this is a tag helper that operates on tr elements. The range of elements to which a tag helper can be applied can be broadened or narrowed using attributes, as described later in this chapter, but the default behavior is defined by the class name.
Receiving context data
Tag helpers receive information about the element they are transforming through an instance of the TagHelperContext class, which is received as an argument to the Process method and which defines the properties described in table 25.3.
Table 25.3 The TagHelperContext properties
|
Name |
Description |
|---|---|
|
|
This property returns a read-only dictionary of the attributes applied to the element being transformed, indexed by name and by index. |
|
|
This property returns a dictionary that is used to coordinate between tag helpers, as described in the “Coordinating Between Tag Helpers” section. |
|
|
This property returns a unique identifier for the element being transformed. |
Although you can access details of the element’s attributes through the AllAttributes dictionary, a more convenient approach is to define a property whose name corresponds to the attribute you are interested in, like this:
...
public string BgColor { get; set; } = "dark";
public string TextColor { get; set; } = "white";
...
When a tag helper is being used, the properties it defines are inspected and assigned the value of any whose name matches attributes applied to the HTML element. As part of this process, the attribute value will be converted to match the type of the C# property so that bool properties can be used to receive true and false attribute values and so int properties can be used to receive numeric attribute values such as 1 and 2.
Properties for which there are no corresponding HTML element attributes are not set, which means you should check to ensure that you are not dealing with null or provide default values, which is the approach taken in listing 25.6.
The name of the attribute is automatically converted from the default HTML style, bg-color, to the C# style, BgColor. You can use any attribute prefix except asp- (which Microsoft uses) and data- (which is reserved for custom attributes that are sent to the client). The example tag helper will be configured using bg-color and text-color attributes, which will provide values for the BgColor and TextColor properties and be used to configure the tr element in the Process method, as follows:
...
output.Attributes.SetAttribute("class",
$"bg-{BgColor} text-center text-{TextColor}");
...
Producing output
The Process method transforms an element by configuring the TagHelperOutput object that is received as an argument. The TagHelperOuput object starts by describing the HTML element as it appears in the view and is modified through the properties and methods described in table 25.4.
Table 25.4 The TagHelperOutput properties and methods
|
Name |
Description |
|---|---|
|
|
This property is used to get or set the tag name for the output element. |
|
|
This property returns a dictionary containing the attributes for the output element. |
|
|
This property returns a |
|
|
This asynchronous method provides access to the content of the element that will be transformed, as demonstrated in the “Creating Shorthand Elements” section. |
|
|
This property returns a |
|
|
This property returns a |
|
|
This property returns a |
|
|
This property returns a |
|
|
This property specifies how the output element will be written, using a value from the |
|
|
Calling this method excludes an element from the view. See the “Suppressing the Output Element” section. |
In the TrTagHelper class, I used the Attributes dictionary to add a class attribute to the HTML element that specifies Bootstrap styles, including the value of the BgColor and TextColor properties. The effect is that the background color for tr elements can be specified by setting bg-color and text-color attributes to Bootstrap names, such as primary, info, and danger.
Tag helper classes must be registered with the @addTagHelper directive before they can be used. The set of views or pages to which a tag helper can be applied depends on where the @addTagHelper directive is used.
For a single view or page, the directive appears in the CSHTML file itself. To make a tag helper available more widely, it can be added to the view imports file, which is defined in the Views folder for controllers and the Pages folder for Razor Pages.
I want the tag helpers that I create in this chapter to be available anywhere in the application, which means that the @addTagHelper directive is added to the _ViewImports.cshtml files in the Views and Pages folders. The vc element used in chapter 24 to apply view components is a tag helper, which is why the directive required to enable tag helpers is already in the _ViewImports.cshtml file.
@using WebApp.Models @addTagHelper *, Microsoft.AspNetCore.Mvc.TagHelpers @using WebApp.Components @addTagHelper *, WebApp
The first part of the argument specifies the names of the tag helper classes, with support for wildcards, and the second part specifies the name of the assembly in which they are defined. This @addTagHelper directive uses the wildcard to select all namespaces in the WebApp assembly, with the effect that tag helpers defined anywhere in the project can be used in any controller view. There is an identical statement in the Razor Pages _ViewImports.cshtml file in the Pages folder.
@namespace WebApp.Pages @using WebApp.Models @addTagHelper *, Microsoft.AspNetCore.Mvc.TagHelpers @addTagHelper *, WebApp
The other @addTagHelper directive enables the built-in tag helpers that Microsoft provides, which are described in chapter 26.
The final step is to use the tag helper to transform an element. In listing 25.7, I have added the attribute to the tr element, which will apply the tag helper.
Listing 25.7 Using a tag helper in the Index.cshtml file in the Views/Home folder
@model Product?
@{
Layout = "_SimpleLayout";
}
<table class="table table-striped table-bordered table-sm">
<thead>
<tr bg-color="info" text-color="white">
<th colspan="2">Product Summary</th>
</tr>
</thead>
<tbody>
<tr><th>Name</th><td>@Model?.Name</td></tr>
<tr><th>Price</th><td>@Model?.Price.ToString("c")</td></tr>
<tr><th>Category ID</th><td>@Model?.CategoryId</td></tr>
</tbody>
</table>
Restart ASP.NET Core and use a browser to request http://localhost:5000/home, which produces the response shown in figure 25.2.
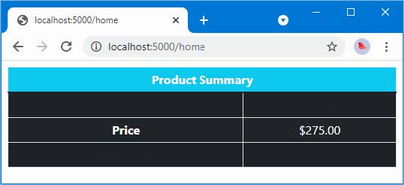
Figure 25.2 Using a tag helper
The tr element to which the attributes were applied in listing 25.7 has been transformed, but that isn’t the only change shown in the figure. By default, tag helpers apply to all elements of a specific type, which means that all the tr elements in the view have been transformed using the default values defined in the tag helper class, since no attributes were defined. (The reason that some table rows show no text is because of the Bootstrap table-striped class, which applies different styles to alternate rows.)
In fact, the problem is more serious because the @addTagHelper directives in the view import files mean that the example tag helper is applied to all tr elements used in any view rendered by controllers and Razor Pages. Use a browser to request http://localhost:5000/cities, for example, and you will see the tr elements in the response from the Cities Razor Page have also been transformed, as shown in figure 25.3.
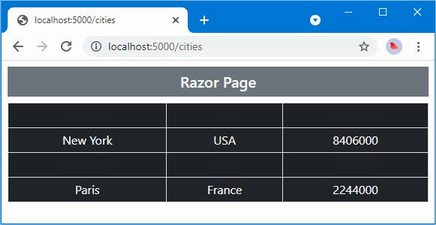
Figure 25.3 Unexpectedly modifying elements with a tag helper
The range of elements that are transformed by a tag helper can be controlled using the HtmlTargetElement element, as shown in listing 25.8.
Listing 25.8 Narrowing scope in the TrTagHelper.cs file in the TagHelpers folder
using Microsoft.AspNetCore.Razor.TagHelpers;
namespace WebApp.TagHelpers {
[HtmlTargetElement("tr", Attributes = "bg-color,text-color",
ParentTag = "thead")]
public class TrTagHelper : TagHelper {
public string BgColor { get; set; } = "dark";
public string TextColor { get; set; } = "white";
public override void Process(TagHelperContext context,
TagHelperOutput output) {
output.Attributes.SetAttribute("class",
$"bg-{BgColor} text-center text-{TextColor}");
}
}
}
The HtmlTargetElement attribute describes the elements to which the tag helper applies. The first argument specifies the element type and supports the additional named properties described in table 25.5.
Table 25.5 The HtmlTargetElement properties
|
Name |
Description |
|---|---|
|
|
This property is used to specify that a tag helper should be applied only to elements that have a given set of attributes, supplied as a comma-separated list. An attribute name that ends with an asterisk will be treated as a prefix so that |
|
|
This property is used to specify that a tag helper should be applied only to elements that are contained within an element of a given type. |
|
|
This property is used to specify that a tag helper should be applied only to elements whose tag structure corresponds to the given value from the |
The Attributes property supports CSS attribute selector syntax so that [bg-color] matches elements that have a bg-color attribute, [bg-color=primary] matches elements that have a bg-color attribute whose value is primary, and [bg-color^=p] matches elements with a bg-color attribute whose value begins with p. The attribute applied to the tag helper in listing 25.8 matches tr elements with both bg-color and text-color attributes that are children of a thead element. Restart ASP.NET Core and use a browser to request http://localhost:5000/home/index/1, and you will see the scope of the tag helper has been narrowed, as shown in figure 25.4.
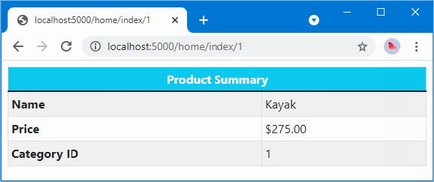
Figure 25.4 Narrowing the scope of a tag helper
The HtmlTargetElement attribute can also be used to widen the scope of a tag helper so that it matches a broader range of elements. This is done by setting the attribute’s first argument to an asterisk (the * character), which matches any element. Listing 25.9 changes the attribute applied to the example tag helper so that it matches any element that has bg-color and text-color attributes.
Listing 25.9 Widening scope in the TrTagHelper.cs file in the TagHelpers folder
using Microsoft.AspNetCore.Razor.TagHelpers;
namespace WebApp.TagHelpers {
[HtmlTargetElement("*", Attributes = "bg-color,text-color")]
public class TrTagHelper : TagHelper {
public string BgColor { get; set; } = "dark";
public string TextColor { get; set; } = "white";
public override void Process(TagHelperContext context,
TagHelperOutput output) {
output.Attributes.SetAttribute("class",
$"bg-{BgColor} text-center text-{TextColor}");
}
}
}
Care must be taken when using the asterisk because it is easy to match too widely and select elements that should not be transformed. A safer middle ground is to apply the HtmlTargetElement attribute for each type of element, as shown in listing 25.10.
Listing 25.10 Balancing scope in the TrTagHelper.cs file in the TagHelpers folder
using Microsoft.AspNetCore.Razor.TagHelpers;
namespace WebApp.TagHelpers {
[HtmlTargetElement("tr", Attributes = "bg-color,text-color")]
[HtmlTargetElement("td", Attributes = "bg-color")]
public class TrTagHelper : TagHelper {
public string BgColor { get; set; } = "dark";
public string TextColor { get; set; } = "white";
public override void Process(TagHelperContext context,
TagHelperOutput output) {
output.Attributes.SetAttribute("class",
$"bg-{BgColor} text-center text-{TextColor}");
}
}
}
Each instance of the attribute can use different selection criteria. This tag helper matches tr elements with bg-color and text-color attributes and matches td elements with bg-color attributes. Listing 25.11 adds an element to be transformed to the Index view to demonstrate the revised scope.
Listing 25.11 Adding attributes in the Index.cshtml file in the Views/Home folder
@model Product?
@{
Layout = "_SimpleLayout";
}
<table class="table table-striped table-bordered table-sm">
<thead>
<tr bg-color="info" text-color="white">
<th colspan="2">Product Summary</th>
</tr>
</thead>
<tbody>
<tr><th>Name</th><td>@Model?.Name</td></tr>
<tr>
<th>Price</th>
<td bg-color="dark">@Model?.Price.ToString("c")</td>
</tr>
<tr><th>Category ID</th><td>@Model?.CategoryId</td></tr>
</tbody>
</table>
Restart ASP.NET Core and use a browser to request http://localhost:5000/home/index/1. The response will contain two transformed elements, as shown in figure 25.5.

Figure 25.5 Managing the scope of a tag helper
The previous section demonstrated how to create a basic tag helper, but that just scratches the surface of what’s possible. In the sections that follow, I show more advanced uses for tag helpers and the features they provide.
Tag helpers are not restricted to transforming the standard HTML elements and can also be used to replace custom elements with commonly used content. This can be a useful feature for making views more concise and making their intent more obvious. To demonstrate, listing 25.12 replaces the thead element in the Index view with a custom HTML element.
Listing 25.12 Adding a custom element in the Index.cshtml file in the Views/Home folder
@model Product?
@{
Layout = "_SimpleLayout";
}
<table class="table table-striped table-bordered table-sm">
<tablehead bg-color="dark">Product Summary</tablehead>
<tbody>
<tr><th>Name</th><td>@Model?.Name</td></tr>
<tr>
<th>Price</th>
<td bg-color="dark">@Model?.Price.ToString("c")</td>
</tr>
<tr><th>Category ID</th><td>@Model?.CategoryId</td></tr>
</tbody>
</table>
The tablehead element isn’t part of the HTML specification and won’t be understood by browsers. Instead, I am going to use this element as shorthand for generating the thead element and its content for the HTML table. Add a class named TableHeadTagHelper.cs to the TagHelpers folder and use it to define the class shown in listing 25.13.
Listing 25.13 The contents of TableHeadTagHelper.cs file in the TagHelpers folder
using Microsoft.AspNetCore.Razor.TagHelpers;
namespace WebApp.TagHelpers {
[HtmlTargetElement("tablehead")]
public class TableHeadTagHelper : TagHelper {
public string BgColor { get; set; } = "light";
public override async Task ProcessAsync(TagHelperContext context,
TagHelperOutput output) {
output.TagName = "thead";
output.TagMode = TagMode.StartTagAndEndTag;
output.Attributes.SetAttribute("class",
$"bg-{BgColor} text-white text-center");
string content =
(await output.GetChildContentAsync()).GetContent();
output.Content.SetHtmlContent(
$"<tr><th colspan=\"2\">{content}</th></tr>");
}
}
}
This tag helper is asynchronous and overrides the ProcessAsync method so that it can access the existing content of the elements it transforms. The ProcessAsync method uses the properties of the TagHelperOuput object to generate a completely different element: the TagName property is used to specify a thead element, the TagMode property is used to specify that the element is written using start and end tags, the Attributes.SetAttribute method is used to define a class attribute, and the Content property is used to set the element content.
The existing content of the element is obtained through the asynchronous GetChildContentAsync method, which returns a TagHelperContent object. This is the same object that is returned by the TagHelperOutput.Content property and allows the content of the element to be inspected and changed using the same type, through the methods described in table 25.6.
Table 25.6 Useful TagHelperContent methods
|
Name |
Description |
|---|---|
|
|
This method returns the contents of the HTML element as a string. |
|
|
This method sets the content of the output element. The |
|
|
This method sets the content of the output element. The |
|
|
This method safely encodes the specified |
|
|
This method adds the specified |
|
|
This method removes the content of the output element. |
In listing 25.13, the existing content of the element is read through the GetContent element and then set using the SetHtmlContent method. The effect is to wrap the existing content in the transformed element in tr and th elements.
Restart ASP.NET Core and navigate to http://localhost:5000/home/index/1, and you will see the effect of the tag helper, which is shown in figure 25.6.
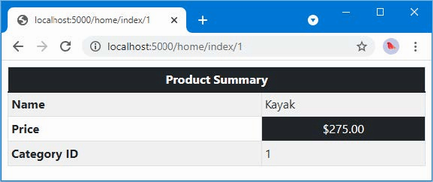
Figure 25.6 Using a shorthand element
The tag helper transforms this shorthand element:
... <tablehead bg-color="dark">Product Summary</tablehead> ...
into these elements:
...
<thead class="bg-dark text-white text-center">
<tr>
<th colspan="2">Product Summary</th>
</tr>
</thead>
...
Notice that the transformed elements do not include the bg-color attribute. Attributes matched to properties defined by the tag helper are removed from the output element and must be explicitly redefined if they are required.
When generating new HTML elements, you can use standard C# string formatting to create the content you require, which is the approach I took in listing 25.13. This works, but it can be awkward and requires close attention to avoid typos. A more robust approach is to use the TagBuilder class, which is defined in the Microsoft.AspNetCore.Mvc.Rendering namespace and allows elements to be created in a more structured manner. The TagHelperContent methods described in table 25.6 accept TagBuilder objects, which makes it easy to create HTML content in tag helpers, as shown in listing 25.14.
Listing 25.14 HTML elements in the TableHeadTagHelper.cs file in the TagHelpers folder
using Microsoft.AspNetCore.Razor.TagHelpers;
using Microsoft.AspNetCore.Mvc.Rendering;
namespace WebApp.TagHelpers {
[HtmlTargetElement("tablehead")]
public class TableHeadTagHelper: TagHelper {
public string BgColor { get; set; } = "light";
public override async Task ProcessAsync(TagHelperContext context,
TagHelperOutput output) {
output.TagName = "thead";
output.TagMode = TagMode.StartTagAndEndTag;
output.Attributes.SetAttribute("class",
$"bg-{BgColor} text-white text-center");
string content =
(await output.GetChildContentAsync()).GetContent();
TagBuilder header = new TagBuilder("th");
header.Attributes["colspan"] = "2";
header.InnerHtml.Append(content);
TagBuilder row = new TagBuilder("tr");
row.InnerHtml.AppendHtml(header);
output.Content.SetHtmlContent(row);
}
}
}
This example creates each new element using a TagBuilder object and composes them to produce the same HTML structure as the string-based version in listing 25.13.
The TagHelperOutput class provides four properties that make it easy to inject new content into a view so that it surrounds an element or the element’s content, as described in table 25.7. In the sections that follow, I explain how you can insert content around and inside the target element.
Table 25.7 The TagHelperOutput properties for appending context and elements
|
Name |
Description |
|---|---|
|
|
This property is used to insert elements into the view before the target element. |
|
|
This property is used to insert elements into the view after the target element. |
|
|
This property is used to insert content into the target element, before any existing content. |
|
|
This property is used to insert content into the target element, after any existing content. |
Inserting content around the output element
The first TagHelperOuput properties are PreElement and PostElement, which are used to insert elements into the view before and after the output element. To demonstrate the use of these properties, add a class file named ContentWrapperTagHelper.cs to the WebApp/TagHelpers folder with the content shown in listing 25.15.
Listing 25.15 The contents of the WrapperTagHelper.cs file in the TagHelpers folder
using Microsoft.AspNetCore.Mvc.Rendering;
using Microsoft.AspNetCore.Razor.TagHelpers;
namespace WebApp.TagHelpers {
[HtmlTargetElement("*", Attributes = "[wrap=true]")]
public class ContentWrapperTagHelper: TagHelper {
public override void Process(TagHelperContext context,
TagHelperOutput output) {
TagBuilder elem = new TagBuilder("div");
elem.Attributes["class"] = "bg-primary text-white p-2 m-2";
elem.InnerHtml.AppendHtml("Wrapper");
output.PreElement.AppendHtml(elem);
output.PostElement.AppendHtml(elem);
}
}
}
This tag helper transforms elements that have a wrap attribute whose value is true, which it does using the PreElement and PostElement properties to add a div element before and after the output element. Listing 25.16 adds an element to the Index view that is transformed by the tag helper.
Listing 25.16 Adding an element in the Index.cshtml file in the Views/Home folder
@model Product?
@{
Layout = "_SimpleLayout";
}
<div class="m-2" wrap="true">Inner Content</div>
<table class="table table-striped table-bordered table-sm">
<tablehead bg-color="dark">Product Summary</tablehead>
<tbody>
<tr><th>Name</th><td>@Model?.Name</td></tr>
<tr>
<th>Price</th>
<td bg-color="dark">@Model?.Price.ToString("c")</td>
</tr>
<tr><th>Category ID</th><td>@Model?.CategoryId</td></tr>
</tbody>
</table>
Restart ASP.NET Core and use a browser to request http://localhost:5000/home/index/1. The response includes the transformed element, as shown in figure 25.7.
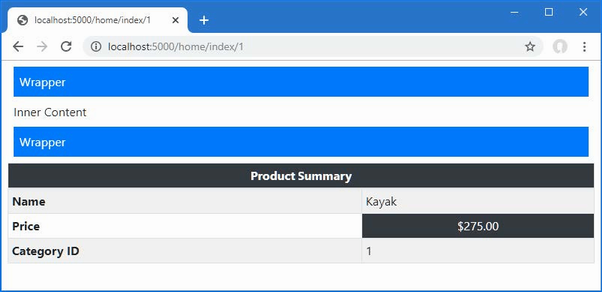
Figure 25.7 Inserting content around the output element
If you examine the HTML sent to the browser, you will see that this element:
... <div class="m-2" wrap="true">Inner Content</div> ...
has been transformed into these elements:
... <div class="bg-primary text-white p-2 m-2">Wrapper</div> <div class="m-2" wrap="true">Inner Content</div> <div class="bg-primary text-white p-2 m-2">Wrapper</div> ...
Notice that the wrap attribute has been left on the output element. This is because I didn’t define a property in the tag helper class that corresponds to this attribute. If you want to prevent attributes from being included in the output, then define a property for them in the tag helper class, even if you don’t use the attribute value.
Inserting content inside the output element
The PreContent and PostContent properties are used to insert content inside the output element, surrounding the original content. To demonstrate this feature, add a class file named HighlightTagHelper.cs to the TagHelpers folder and use it to define the tag helper shown in listing 25.17.
Listing 25.17 The contents of the HighlightTagHelper.cs file in the TagHelpers folder
using Microsoft.AspNetCore.Razor.TagHelpers;
namespace WebApp.TagHelpers {
[HtmlTargetElement("*", Attributes = "[highlight=true]")]
public class HighlightTagHelper: TagHelper {
public override void Process(TagHelperContext context,
TagHelperOutput output) {
output.PreContent.SetHtmlContent("<b><i>");
output.PostContent.SetHtmlContent("</i></b>");
}
}
}
This tag helper inserts b and i elements around the output element’s content. Listing 25.18 adds the wrap attribute to one of the table cells in the Index view.
Listing 25.18 Adding an attribute in the Index.cshtml file in the Views/Home folder
@model Product?
@{
Layout = "_SimpleLayout";
}
<div class="m-2" wrap="true">Inner Content</div>
<table class="table table-striped table-bordered table-sm">
<tablehead bg-color="dark">Product Summary</tablehead>
<tbody>
<tr><th>Name</th><td highlight="true">@Model?.Name</td></tr>
<tr>
<th>Price</th>
<td bg-color="dark">@Model?.Price.ToString("c")</td>
</tr>
<tr><th>Category ID</th><td>@Model?.CategoryId</td></tr>
</tbody>
</table>
Restart ASP.NET Core and use a browser to request http://localhost:5000/home/index/1. The response includes the transformed element, as shown in figure 25.8.
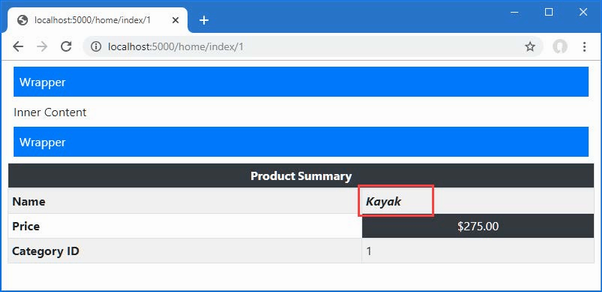
Figure 25.8 Inserting content inside an element
If you examine the HTML sent to the browser, you will see that this element:
... <td highlight="true">@Model?.Name</td> ...
has been transformed into these elements:
... <td highlight="true"><b><i>Kayak</i></b></td> ...
A common use for tag helpers is to transform elements so they contain details of the current request or the view model/page model, which requires access to context data. To create this type of tag helper, add a file named RouteDataTagHelper.cs to the TagHelpers folder, with the content shown in listing 25.19.
Listing 25.19 The contents of the RouteDataTagHelper.cs file in the TagHelpers folder
using Microsoft.AspNetCore.Mvc.Rendering;
using Microsoft.AspNetCore.Mvc.ViewFeatures;
using Microsoft.AspNetCore.Razor.TagHelpers;
namespace WebApp.TagHelpers {
[HtmlTargetElement("div", Attributes = "[route-data=true]")]
public class RouteDataTagHelper : TagHelper {
[ViewContext]
[HtmlAttributeNotBound]
public ViewContext Context { get; set; } = new();
public override void Process(TagHelperContext context,
TagHelperOutput output) {
output.Attributes.SetAttribute("class", "bg-primary m-2 p-2");
TagBuilder list = new TagBuilder("ul");
list.Attributes["class"] = "list-group";
RouteValueDictionary rd = Context.RouteData.Values;
if (rd.Count > 0) {
foreach (var kvp in rd) {
TagBuilder item = new TagBuilder("li");
item.Attributes["class"] = "list-group-item";
item.InnerHtml.Append($"{kvp.Key}: {kvp.Value}");
list.InnerHtml.AppendHtml(item);
}
output.Content.AppendHtml(list);
} else {
output.Content.Append("No route data");
}
}
}
}
The tag helper transforms div elements that have a route-data attribute whose value is true and populates the output element with a list of the segment variables obtained by the routing system.
To get the route data, I added a property called Context and decorated it with two attributes, like this:
...
[ViewContext]
[HtmlAttributeNotBound]
public ViewContext Context { get; set; } = new();
...
The ViewContext attribute denotes that the value of this property should be assigned a ViewContext object when a new instance of the tag helper class is created, which provides details of the view that is being rendered, including the routing data, as described in chapter 13.
The HtmlAttributeNotBound attribute prevents a value from being assigned to this property if there is a matching attribute defined on the div element. This is good practice, especially if you are writing tag helpers for other developers to use.
Listing 25.20 adds an element to the Home controller’s Index view that will be transformed by the new tag helper.
Listing 25.20 Adding an element in the Index.cshtml file in the Views/Home folder
@model Product?
@{
Layout = "_SimpleLayout";
}
<div route-data="true"></div>
<table class="table table-striped table-bordered table-sm">
<tablehead bg-color="dark">Product Summary</tablehead>
<tbody>
<tr><th>Name</th><td highlight="true">@Model?.Name</td></tr>
<tr>
<th>Price</th>
<td bg-color="dark">@Model?.Price.ToString("c")</td>
</tr>
<tr><th>Category ID</th><td>@Model?.CategoryId</td></tr>
</tbody>
</table>
Restart ASP.NET Core and use a browser to request http://localhost:5000/home/index/1. The response will include a list of the segment variables the routing system has matched, as shown in figure 25.9.
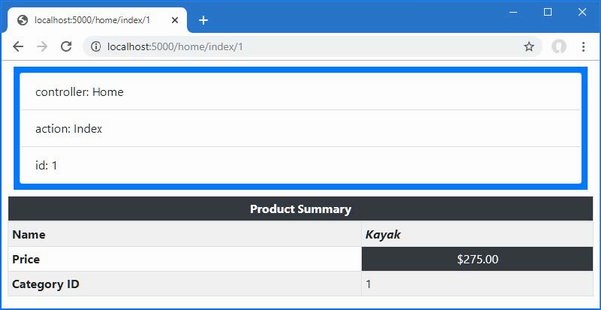
Figure 25.9 Displaying context data with a tag helper
Tag helpers can operate on the view model, tailoring the transformations they perform or the output they create. To see how this feature works, add a class file named ModelRowTagHelper.cs to the TagHelpers folder, with the code shown in listing 25.21.
Listing 25.21 The contents of the ModelRowTagHelper.cs file in the TagHelpers folder
using Microsoft.AspNetCore.Mvc.Rendering;
using Microsoft.AspNetCore.Mvc.ViewFeatures;
using Microsoft.AspNetCore.Razor.TagHelpers;
namespace WebApp.TagHelpers {
[HtmlTargetElement("tr", Attributes = "for")]
public class ModelRowTagHelper : TagHelper {
public string Format { get; set; } = "";
public ModelExpression? For { get; set; }
public override void Process(TagHelperContext context,
TagHelperOutput output) {
output.TagMode = TagMode.StartTagAndEndTag;
TagBuilder th = new TagBuilder("th");
th.InnerHtml.Append(For?.Name ?? String.Empty);
output.Content.AppendHtml(th);
TagBuilder td = new TagBuilder("td");
if (Format != null &&
For?.Metadata.ModelType == typeof(decimal)) {
td.InnerHtml.Append(((decimal)For.Model)
.ToString(Format));
} else {
td.InnerHtml.Append(For?.Model.ToString()
?? String.Empty);
}
output.Content.AppendHtml(td);
}
}
}
This tag helper transforms tr elements that have a for attribute. The important part of this tag helper is the type of the For property, which is used to receive the value of the for attribute.
...
public ModelExpression? For { get; set; }
...
The ModelExpression class is used when you want to operate on part of the view model, which is most easily explained by jumping forward and showing how the tag helper is applied in the view, as shown in listing 25.22.
Listing 25.22 Using the tag helper in the Index.cshtml file in the Views/Home folder
@model Product
@{
Layout = "_SimpleLayout";
}
<div route-data="true"></div>
<table class="table table-striped table-bordered table-sm">
<tablehead bg-color="dark">Product Summary</tablehead>
<tbody>
<tr for="Name" />
<tr for="Price" format="c" />
<tr for="CategoryId" />
</tbody>
</table>
The value of the for attribute is the name of a property defined by the view model class. When the tag helper is created, the type of the For property is detected and assigned a ModelExpression object that describes the selected property.
Notice that I have changed the view model type in listing 25.22. This is important because the ModelExpression feature works on non-nullable types. This is a useful feature, but it presents the problems with null values that I described in chapter 21.
I am not going to describe the ModelExpression class in any detail because any introspection on types leads to endless lists of classes and properties. Further, ASP.NET Core provides a useful set of built-in tag helpers that use the view model to transform elements, as described in chapter 26, which means you don’t need to create your own.
For the example tag helper, I use three basic features that are worth describing. The first is to get the name of the model property so that I can include it in the output element, like this:
... th.InnerHtml.Append(For?.Name ?? String.Empty); ...
The Name property returns the name of the model property. The second feature is to get the type of the model property so that I can determine whether to format the value, like this:
...
if (Format != null && For?.Metadata.ModelType == typeof(decimal)) {
...
The third feature is to get the value of the property so that it can be included in the response.
... td.InnerHtml.Append(For?.Model.ToString() ?? String.Empty); ...
Restart ASP.NET Core and use a browser to request http://localhost:5000/home/index/2, and you will see the response shown in figure 25.10.
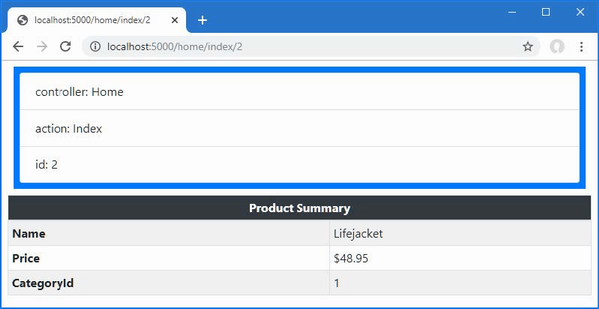
Figure 25.10 Using the view model in a tag helper
Working with the page model
Tag helpers with model expressions can be applied in Razor Pages, although the expression that selects the property must account for the way that the Model property returns the page model class. Listing 25.23 applies the tag helper to the Editor Razor Page, whose page model defines a Product property.
Listing 25.23 Applying a tag helper in the Editor.cshtml file in the Pages folder
@page "{id:long}"
@model EditorModel
@{
Layout = null;
}
<!DOCTYPE html>
<html>
<head>
<link href="/lib/bootstrap/css/bootstrap.min.css" rel="stylesheet" />
</head>
<body>
<div class="bg-primary text-white text-center m-2 p-2">Editor</div>
<div class="m-2">
<table class="table table-sm table-striped table-bordered">
<tbody>
<tr for="Product.Name" />
<tr for="Product.Price" format="c" />
</tbody>
</table>
<form method="post">
@Html.AntiForgeryToken()
<div class="form-group">
<label>Price</label>
<input name="price" class="form-control"
value="@Model.Product?.Price" />
</div>
<button class="btn btn-primary mt-2" type="submit">
Submit
</button>
</form>
</div>
</body>
</html>
The value for the for attribute selects the nested properties through the Product property, which provides the tag helper with the ModelExpression it requires.
Model expressions cannot be used with the null conditional operator, which presents a problem for this example because the type of the Product property is Product?. Listing 25.24 changes the property type to Product and assigns a default value. (I demonstrate a different way of resolving this issue in chapter 27.)
Listing 25.24 Changing a property type in the Editor.cshtml.cs file in the Pages folder
using Microsoft.AspNetCore.Mvc;
using Microsoft.AspNetCore.Mvc.RazorPages;
using WebApp.Models;
namespace WebApp.Pages {
public class EditorModel : PageModel {
private DataContext context;
public Product Product { get; set; }
= new() { Name = string.Empty };
public EditorModel(DataContext ctx) {
context = ctx;
}
public async Task OnGetAsync(long id) {
Product = await context.Products.FindAsync(id)
?? new() { Name = string.Empty };
}
public async Task<IActionResult> OnPostAsync(long id,
decimal price) {
Product? p = await context.Products.FindAsync(id);
if (p != null) {
p.Price = price;
}
await context.SaveChangesAsync();
return RedirectToPage();
}
}
}
Restart ASP.NET Core and a browser to request http://localhost:5000/editor/1 to see the response from the page, which is shown on the left of figure 25.11.
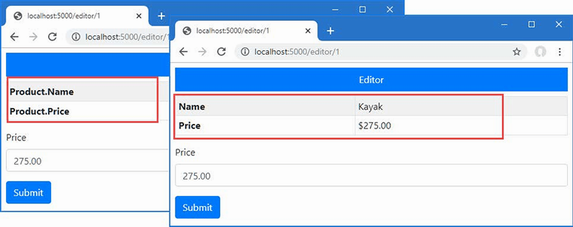
Figure 25.11 Using a model expression tag helper with a Razor Page
One consequence of the page model is that the ModelExpression.Name property will return Product.Name, for example, instead of just Name. Listing 25.25 updates the tag helper so that it will display just the last part of the model expression name.
Listing 25.25 Handling names in the ModelRowTagHelper.cs file in the TagHelpers folder
using Microsoft.AspNetCore.Mvc.Rendering;
using Microsoft.AspNetCore.Mvc.ViewFeatures;
using Microsoft.AspNetCore.Razor.TagHelpers;
namespace WebApp.TagHelpers {
[HtmlTargetElement("tr", Attributes = "for")]
public class ModelRowTagHelper : TagHelper {
public string Format { get; set; } = "";
public ModelExpression? For { get; set; }
public override void Process(TagHelperContext context,
TagHelperOutput output) {
output.TagMode = TagMode.StartTagAndEndTag;
TagBuilder th = new TagBuilder("th");
th.InnerHtml.Append(For?.Name.Split(".").Last()
?? String.Empty);
output.Content.AppendHtml(th);
TagBuilder td = new TagBuilder("td");
if (Format != null &&
For?.Metadata.ModelType == typeof(decimal)) {
td.InnerHtml.Append(((decimal)For.Model)
.ToString(Format));
} else {
td.InnerHtml.Append(For?.Model.ToString()
?? String.Empty);
}
output.Content.AppendHtml(td);
}
}
}
Restart ASP.NET Core and use a browser to request http://localhost:5000/editor/1; you will see the revised response, which is shown on the right of figure 25.11.
The TagHelperContext.Items property provides a dictionary used by tag helpers that operate on elements and those that operate on their descendants. To demonstrate the use of the Items collection, add a class file named CoordinatingTagHelpers.cs to the WebApp/TagHelpers folder and add the code shown in listing 25.26.
Listing 25.26 The CoordinatingTagHelpers.cs file in the TagHelpers folder
using Microsoft.AspNetCore.Razor.TagHelpers;
namespace WebApp.TagHelpers {
[HtmlTargetElement("tr", Attributes = "theme")]
public class RowTagHelper : TagHelper {
public string Theme { get; set; } = String.Empty;
public override void Process(TagHelperContext context,
TagHelperOutput output) {
context.Items["theme"] = Theme;
}
}
[HtmlTargetElement("th")]
[HtmlTargetElement("td")]
public class CellTagHelper : TagHelper {
public override void Process(TagHelperContext context,
TagHelperOutput output) {
if (context.Items.ContainsKey("theme")) {
output.Attributes.SetAttribute("class",
$"bg-{context.Items["theme"]} text-white");
}
}
}
}
The first tag helper operates on tr elements that have a theme attribute. Coordinating tag helpers can transform their own elements, but this example simply adds the value of the theme attribute to the Items dictionary so that it is available to tag helpers that operate on elements contained within the tr element. The second tag helper operates on th and td elements and uses the theme value from the Items dictionary to set the Bootstrap style for its output elements.
Listing 25.27 adds elements to the Home controller’s Index view that apply the coordinating tag helpers.
Listing 25.27 Applying a tag helper in the Index.cshtml file in the Views/Home folder
@model Product
@{
Layout = "_SimpleLayout";
}
<div route-data="true"></div>
<table class="table table-striped table-bordered table-sm">
<tablehead bg-color="dark">Product Summary</tablehead>
<tbody>
<tr theme="primary">
<th>Name</th><td>@Model?.Name</td>
</tr>
<tr theme="secondary">
<th>Price</th><td>@Model?.Price.ToString("c")</td>
</tr>
<tr theme="info">
<th>Category</th><td>@Model?.CategoryId</td>
</tr>
</tbody>
</table>
Restart ASP.NET Core and use a browser to request http://localhost:5000/home, which produces the response shown in figure 25.12. The value of the theme element has been passed from one tag helper to another, and a color theme is applied without needing to define attributes on each of the elements that is transformed.
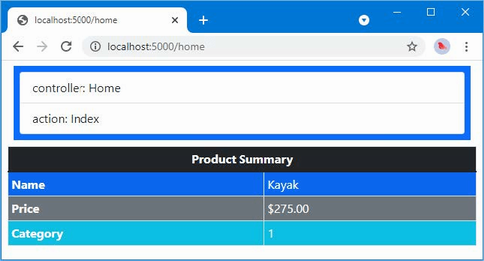
Figure 25.12 Coordination between tag helpers
Tag helpers can be used to prevent an element from being included in the HTML response by calling the SuppressOuput method on the TagHelperOutput object that is received as an argument to the Process method. In listing 25.28, I have added an element to the Home controller’s Index view that should be displayed only if the Price property of the view model exceeds a specified value.
Listing 25.28 Adding an element in the Index.cshtml file in the Views/Home folder
@model Product
@{
Layout = "_SimpleLayout";
}
<div show-when-gt="500" for="Price">
<h5 class="bg-danger text-white text-center p-2">
Warning: Expensive Item
</h5>
</div>
<table class="table table-striped table-bordered table-sm">
<tablehead bg-color="dark">Product Summary</tablehead>
<tbody>
<tr theme="primary">
<th>Name</th><td>@Model?.Name</td>
</tr>
<tr theme="secondary">
<th>Price</th><td>@Model?.Price.ToString("c")</td>
</tr>
<tr theme="info">
<th>Category</th><td>@Model?.CategoryId</td>
</tr>
</tbody>
</table>
The show-when-gt attribute specifies the value above which the div element should be displayed, and the for property selects the model property that will be inspected. To create the tag helper that will manage the elements, including the response, add a class file named SelectiveTagHelper.cs to the WebApp/TagHelpers folder with the code shown in listing 25.29.
Listing 25.29 The contents of the SelectiveTagHelper.cs file in the TagHelpers folder
using Microsoft.AspNetCore.Mvc.ViewFeatures;
using Microsoft.AspNetCore.Razor.TagHelpers;
namespace WebApp.TagHelpers {
[HtmlTargetElement("div", Attributes = "show-when-gt, for")]
public class SelectiveTagHelper : TagHelper {
public decimal ShowWhenGt { get; set; }
public ModelExpression? For { get; set; }
public override void Process(TagHelperContext context,
TagHelperOutput output) {
if (For?.Model.GetType() == typeof(decimal)
&& (decimal)For.Model <= ShowWhenGt) {
output.SuppressOutput();
}
}
}
}
The tag helper uses the model expression to access the property and calls the SuppressOutput method unless the threshold is exceeded. To see the effect, restart ASP.NET Core and use a browser to request http://localhost:5000/home/index/1 and http://localhost:5000/home/index/5. The value for the Price property of the Product selected by the first URL is less than the threshold, so the element is suppressed. The value for the Price property of the Product selected by the second URL is more than the threshold, so the element is displayed. figure 25.13 shows both responses.
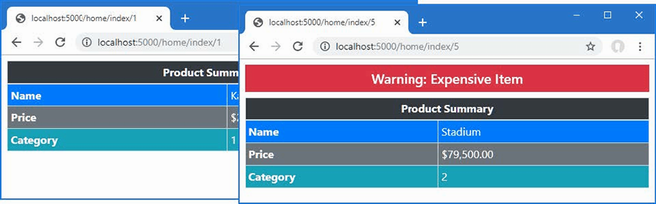
Figure 25.13 Suppressing output elements
Tag helper components provide an alternative approach to applying tag helpers as services. This feature can be useful when you need to set up tag helpers to support another service or middleware component, which is typically the case for diagnostic tools or functionality that has both a client-side component and a server-side component, such as Blazor, which is described in part 4. In the sections that follow, I show you how to create and apply tag helper components.
Tag helper components are derived from the TagHelperComponent class, which provides a similar API to the TagHelper base class used in earlier examples. To create a tag helper component, add a class file called TimeTagHelperComponent.cs in the TagHelpers folder with the content shown in listing 25.30.
Listing 25.30 The TimeTagHelperComponent.cs file in the TagHelpers folder
using Microsoft.AspNetCore.Mvc.Rendering;
using Microsoft.AspNetCore.Razor.TagHelpers;
namespace WebApp.TagHelpers {
public class TimeTagHelperComponent : TagHelperComponent {
public override void Process(TagHelperContext context,
TagHelperOutput output) {
string timestamp = DateTime.Now.ToLongTimeString();
if (output.TagName == "body") {
TagBuilder elem = new TagBuilder("div");
elem.Attributes.Add("class",
"bg-info text-white m-2 p-2");
elem.InnerHtml.Append($"Time: {timestamp}");
output.PreContent.AppendHtml(elem);
}
}
}
}
Tag helper components do not specify the elements they transform, and the Process method is invoked for every element for which the tag helper component feature has been configured. By default, tag helper components are applied to transform head and body elements. This means that tag helper component classes must check the TagName property of the output element to ensure they perform only their intended transformations. The tag helper component in listing 25.30 looks for body elements and uses the PreContent property to insert a div element containing a timestamp before the rest of the element’s content.
Tag helper components are registered as services that implement the ITagHelperComponent interface, as shown in listing 25.31.
Listing 25.31 Registering a component in the Program.cs file in the WebApp folder
using Microsoft.EntityFrameworkCore;
using WebApp.Models;
using Microsoft.AspNetCore.Razor.TagHelpers;
using WebApp.TagHelpers;
var builder = WebApplication.CreateBuilder(args);
builder.Services.AddDbContext<DataContext>(opts => {
opts.UseSqlServer(builder.Configuration[
"ConnectionStrings:ProductConnection"]);
opts.EnableSensitiveDataLogging(true);
});
builder.Services.AddControllersWithViews();
builder.Services.AddRazorPages();
builder.Services.AddSingleton<CitiesData>();
builder.Services.AddTransient<ITagHelperComponent,
TimeTagHelperComponent>();
var app = builder.Build();
app.UseStaticFiles();
app.MapControllers();
app.MapDefaultControllerRoute();
app.MapRazorPages();
var context = app.Services.CreateScope().ServiceProvider
.GetRequiredService<DataContext>();
SeedData.SeedDatabase(context);
app.Run();
The AddTransient method is used to ensure that each request is handled using its own instance of the tag helper component class. To see the effect of the tag helper component, restart ASP.NET Core and use a browser to request http://localhost:5000/home. This response—and all other HTML responses from the application—contain the content generated by the tag helper component, as shown in figure 25.14.
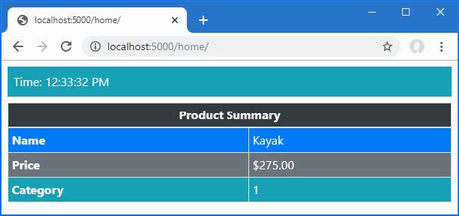
Figure 25.14 Using a tag helper component
By default, only the head and body elements are processed by the tag helper components, but additional elements can be selected by creating a class derived from the terribly named TagHelperComponentTagHelper class. Add a class file named TableFooterTagHelperComponent.cs to the TagHelpers folder and use it to define the classes shown in listing 25.32.
Listing 25.32 The TableFooterTagHelperComponent.cs file in the TagHelpers folder
using Microsoft.AspNetCore.Mvc.Razor.TagHelpers;
using Microsoft.AspNetCore.Mvc.Rendering;
using Microsoft.AspNetCore.Razor.TagHelpers;
namespace WebApp.TagHelpers {
[HtmlTargetElement("table")]
public class TableFooterSelector : TagHelperComponentTagHelper {
public TableFooterSelector(ITagHelperComponentManager mgr,
ILoggerFactory log) : base(mgr, log) { }
}
public class TableFooterTagHelperComponent : TagHelperComponent {
public override void Process(TagHelperContext context,
TagHelperOutput output) {
if (output.TagName == "table") {
TagBuilder cell = new TagBuilder("td");
cell.Attributes.Add("colspan", "2");
cell.Attributes.Add("class",
"bg-dark text-white text-center");
cell.InnerHtml.Append("Table Footer");
TagBuilder row = new TagBuilder("tr");
row.InnerHtml.AppendHtml(cell);
TagBuilder footer = new TagBuilder("tfoot");
footer.InnerHtml.AppendHtml(row);
output.PostContent.AppendHtml(footer);
}
}
}
}
The TableFooterSelector class is derived from TagHelperComponentTagHelper, and it is decorated with the HtmlTargetElement attribute that expands the range of elements processed by the application’s tag helper components. In this case, the attribute selects table elements.
The TableFooterTagHelperComponent class, defined in the same file, is a tag helper component that transforms table elements by adding a tfoot element, which represents a table footer.
The tag helper component must be registered as a service to receive elements for transformation, but the tag helper component tag helper (which is one of the worst naming choices I have seen for some years) is discovered and applied automatically. Listing 25.33 adds the tag helper component service.
Listing 25.33 Registering a component in the Program.cs file in the WebApp folder
...
builder.Services.AddControllersWithViews();
builder.Services.AddRazorPages();
builder.Services.AddSingleton<CitiesData>();
builder.Services.AddTransient<ITagHelperComponent,
TimeTagHelperComponent>();
builder.Services.AddTransient<ITagHelperComponent,
TableFooterTagHelperComponent>();
...
Restart ASP.NET Core and use a browser to request a URL that renders a table, such as http://localhost:5000/home or http://localhost:5000/cities. Each table will contain a table footer, as shown in figure 25.15.
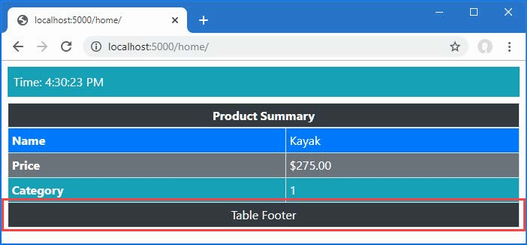
Figure 25.15 Expanding tag helper component element selection
Tag helpers are C# classes that transform HTML elements in a response or replace a shorthand element with standard HTML content.
Tag helpers can be configured using attributes, which are received through a TagHelperContext object.
Tag helpers must be registered in the view imports file using the @addTagHelper directive.
The scope of a tag helper can be controlled with the HTMLTargetElement attribute, which allows the elements that are transformed to be specified precisely.
Tag helpers can use model expressions to generate content for the view model of the view to which they are applied.
Tag helpers can be registered as services for dependency injection, using the tag helper component function.
This chapter covers
ASP.NET Core provides a set of built-in tag helpers that apply the most commonly required element transformations. In this chapter, I explain those tag helpers that deal with anchor, script, link, and image elements, as well as features for caching content and selecting content based on the environment. In chapter 27, I describe the tag helpers that support HTML forms. Table 26.1 puts the built-in tag helpers in context.
Table 26.1 Putting the built-in tag helpers in context
|
Question |
Answer |
|---|---|
|
What are they? |
The built-in tag helpers perform commonly required transformations on HTML elements. |
|
Why are they useful? |
Using the built-in tag helpers means you don’t have to create custom helpers using the techniques in chapter 25. |
|
How are they used? |
The tag helpers are applied using attributes on standard HTML elements or through custom HTML elements. |
|
Are there any pitfalls or limitations? |
No, these tag helpers are well-tested and easy to use. Unless you have unusual needs, using these tag helpers is preferable to custom implementation. |
|
Are there any alternatives? |
These tag helpers are optional, and their use is not required. |
Table 26.2 provides a guide to the chapter.
Table 26.2 Chapter guide
|
Problem |
Solution |
Listing |
|---|---|---|
|
Creating elements that target endpoints |
Use the anchor element tag helper attributes. |
7, 8 |
|
Including JavaScript files in a response |
Use the JavaScript tag helper attributes. |
9–13 |
|
Including CSS files in a response |
Use the CSS tag helper attributes. |
14, 15 |
|
Managing image caching |
Use the image tag helper attributes. |
16 |
|
Caching sections of a view |
Use the caching tag helper. |
17–21 |
|
Varying content based on the application environment |
Use the environment tag helper. |
22 |
This chapter uses the WebApp project from chapter 25. To prepare for this chapter, comment out the statements that register the tag component helpers, as shown in listing 26.1.
Listing 26.1 The contents of the Program.cs file in the WebApp folder
using Microsoft.EntityFrameworkCore;
using WebApp.Models;
//using Microsoft.AspNetCore.Razor.TagHelpers;
//using WebApp.TagHelpers;
var builder = WebApplication.CreateBuilder(args);
builder.Services.AddDbContext<DataContext>(opts => {
opts.UseSqlServer(builder.Configuration[
"ConnectionStrings:ProductConnection"]);
opts.EnableSensitiveDataLogging(true);
});
builder.Services.AddControllersWithViews();
builder.Services.AddRazorPages();
builder.Services.AddSingleton<CitiesData>();
//builder.Services.AddTransient<ITagHelperComponent,
// TimeTagHelperComponent>();
//builder.Services.AddTransient<ITagHelperComponent,
// TableFooterTagHelperComponent>();
var app = builder.Build();
app.UseStaticFiles();
app.MapControllers();
app.MapDefaultControllerRoute();
app.MapRazorPages();
var context = app.Services.CreateScope().ServiceProvider
.GetRequiredService<DataContext>();
SeedData.SeedDatabase(context);
app.Run();
Next, update the _RowPartial.cshtml partial view in the Views/Home folder, making the changes shown in listing 26.2.
Listing 26.2 Making changes in the _RowPartial.cshtml file in the Views/Home folder
@model Product
<tr>
<td>@Model.Name</td>
<td>@Model.Price.ToString("c")</td>
<td>@Model.CategoryId</td>
<td>@Model.SupplierId</td>
<td></td>
</tr>
Replace the contents of the List.cshtml file in the Views/Home folder, which applies a layout and adds additional columns to the table rendered by the view, as shown in listing 26.3.
Listing 26.3 Making changes in the List.cshtml file in the Views/Home folder
@model IEnumerable<Product>
@{ Layout = "_SimpleLayout"; }
<h6 class="bg-secondary text-white text-center m-2 p-2">Products</h6>
<div class="m-2">
<table class="table table-sm table-striped table-bordered">
<thead>
<tr>
<th>Name</th><th>Price</th>
<th>Category</th><th>Supplier</th><th></th>
</tr>
</thead>
<tbody>
@foreach (Product p in Model) {
<partial name="_RowPartial" model="p" />
}
</tbody>
</table>
</div>
One of the tag helpers described in this chapter provides services for images. I created the wwwroot/images folder and added an image file called city.png. This is a public domain panorama of the New York City skyline, as shown in figure 26.1.

Figure 26.1 Adding an image to the project
This image file is included in the source code for this chapter, which is available in the GitHub repository for this book. You can substitute your own image if you don’t want to download the example project.
Some of the examples in this chapter demonstrate the tag helper support for working with JavaScript files, for which I use the jQuery package. Use a PowerShell command prompt to run the command shown in listing 26.4 in the project folder, which contains the WebApp.csproj file.
Listing 26.4 Installing a package
libman install jquery@3.6.3 -d wwwroot/lib/jquery
Open a new PowerShell command prompt, navigate to the folder that contains the WebApp.csproj file, and run the command shown in listing 26.5 to drop the database.
Listing 26.5 Dropping the database
dotnet ef database drop --force
Use the PowerShell command prompt to run the command shown in listing 26.6.
Listing 26.6 Running the example application
dotnet run
Use a browser to request http://localhost:5000/home/list, which will display a list of products, as shown in figure 26.2.
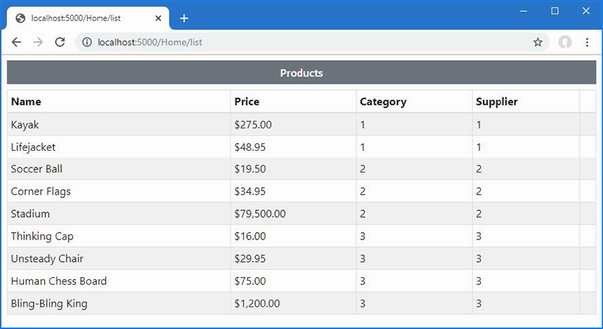
Figure 26.2 Running the example application
The built-in tag helpers are all defined in the Microsoft.AspNetCore.Mvc.TagHelpers namespace and are enabled by adding an @addTagHelpers directive to individual views or pages or, as in the case of the example project, to the view imports file. Here is the required directive from the _ViewImports.cshtml file in the Views folder, which enables the built-in tag helpers for controller views:
@using WebApp.Models @addTagHelper *, Microsoft.AspNetCore.Mvc.TagHelpers @using WebApp.Components @addTagHelper *, WebApp
Here is the corresponding directive in the _ViewImports.cshtml file in the Pages folder, which enables the built-in tag helpers for Razor Pages:
@namespace WebApp.Pages @using WebApp.Models @addTagHelper *, Microsoft.AspNetCore.Mvc.TagHelpers @addTagHelper *, WebApp
These directives were added to the example project in chapter 24 to enable the view components feature.
The a element is the basic tool for navigating around an application and sending GET requests to the application. The AnchorTagHelper class is used to transform the href attributes of a elements so they target URLs generated using the routing system, which means that hard-coded URLs are not required and a change in the routing configuration will be automatically reflected in the application’s anchor elements. Table 26.3 describes the attributes the AnchorTagHelper class supports.
Table 26.3 The built-in tag helper attributes for anchor elements
|
Name |
Description |
|---|---|
|
|
This attribute specifies the action method that the URL will target. |
|
|
This attribute specifies the controller that the URL will target. If this attribute is omitted, then the URL will target the controller or page that rendered the current view. |
|
|
This attribute specifies the Razor Page that the URL will target. |
|
|
This attribute specifies the Razor Page handler function that will process the request, as described in chapter 23. |
|
|
This attribute is used to specify the URL fragment (which appears after the |
|
|
This attribute specifies the name of the host that the URL will target. |
|
|
This attribute specifies the protocol that the URL will use. |
|
|
This attribute specifies the name of the route that will be used to generate the URL. |
|
|
Attributes whose name begins with |
|
|
This attribute provides values used for routing as a single value, rather than using individual attributes. |
The AnchorTagHelper is simple and predictable and makes it easy to generate URLs in a elements that use the application’s routing configuration. Listing 26.7 adds an anchor element that uses attributes from the table to create a URL that targets another action defined by the Home controller.
Listing 26.7 Transforming an element in the Views/Home/_RowPartial.cshtml file
@model Product
<tr>
<td>@Model.Name</td>
<td>@Model.Price.ToString("c")</td>
<td>@Model.CategoryId</td>
<td>@Model.SupplierId</td>
<td>
<a asp-action="index" asp-controller="home"
asp-route-id="@Model?.ProductId"
class="btn btn-sm btn-info text-white">
Select
</a>
</td>
</tr>
The asp-action and asp-controller attributes specify the name of the action method and the controller that defines it. Values for segment variables are defined using asp-route-[name] attributes, such that the asp-route-id attribute provides a value for the id segment variable that is used to provide an argument for the action method selected by the asp-action attribute.
To see the anchor element transformations, restart ASP.NET Core and use a browser to request http://localhost:5000/home/list, which will produce the response shown in figure 26.3.
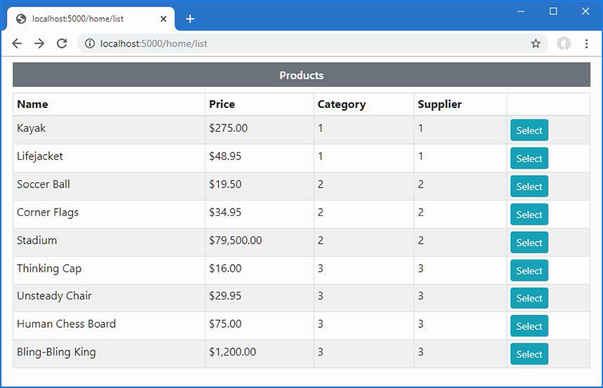
Figure 26.3 Transforming anchor elements
If you examine the Select anchor elements, you will see that each href attribute includes the ProductId value of the Product object it relates to, like this:
... <a class="btn btn-sm btn-info text-white" href="/Home/index/3">Select</a> ...
In this case, the value provided by the asp-route-id attribute means the default URL cannot be used, so the routing system has generated a URL that includes segments for the controller and action name, as well as a segment that will be used to provide a parameter to the action method. Clicking the anchor elements will send an HTTP GET request that targets the Home controller’s Index method.
The asp-page attribute is used to specify a Razor Page as the target for an anchor element’s href attribute. The path to the page is prefixed with the / character, and values for route segments defined by the @page directive are defined using asp-route-[name] attributes. Listing 26.8 adds an anchor element that targets the List page defined in the Pages/Suppliers folder.
Listing 26.8 Targeting a Razor Page in the List.cshtml file in the Views/Home folder
@model IEnumerable<Product>
@{ Layout = "_SimpleLayout"; }
<h6 class="bg-secondary text-white text-center m-2 p-2">Products</h6>
<div class="m-2">
<table class="table table-sm table-striped table-bordered">
<thead>
<tr>
<th>Name</th><th>Price</th>
<th>Category</th><th>Supplier</th><th></th>
</tr>
</thead>
<tbody>
@foreach (Product p in Model) {
<partial name="_RowPartial" model="p" />
}
</tbody>
</table>
<a asp-page="/suppliers/list" class="btn btn-secondary">Suppliers</a>
</div>
Restart ASP.NET Core and a browser to request http://localhost:5000/home/list, and you will see the anchor element, which is styled to appear as a button. If you examine the HTML sent to the client, you will see the anchor element has been transformed like this:
... <a class="btn btn-secondary" href="/lists/suppliers">Suppliers</a> ...
This URL used in the href attribute reflects the @page directive, which has been used to override the default routing convention in this page. Click the element, and the browser will display the Razor Page, as shown in figure 26.4.
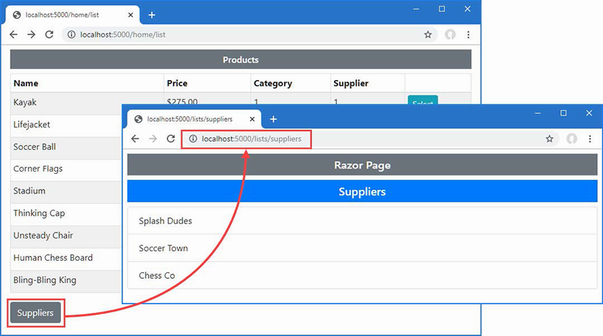
Figure 26.4 Targeting a Razor Page with an anchor element
ASP.NET Core provides tag helpers that are used to manage JavaScript files and CSS stylesheets through the script and link elements. As you will see in the sections that follow, these tag helpers are powerful and flexible but require close attention to avoid creating unexpected results.
The ScriptTagHelper class is the built-in tag helper for script elements and is used to manage the inclusion of JavaScript files in views using the attributes described in table 26.4, which I describe in the sections that follow.
Table 26.4 The built-in tag helper attributes for script elements
|
Name |
Description |
|---|---|
|
|
This attribute is used to specify JavaScript files that will be included in the view. |
|
|
This attribute is used to specify JavaScript files that will be excluded from the view. |
|
|
This attribute is used for cache busting, as described in the “Understanding Cache Busting” sidebar. |
|
|
This attribute is used to specify a fallback JavaScript file to use if there is a problem with a content delivery network. |
|
|
This attribute is used to select JavaScript files that will be used if there is a content delivery network problem. |
|
|
This attribute is used to exclude JavaScript files to present their use when there is a content delivery network problem. |
|
|
This attribute is used to specify a fragment of JavaScript that will be used to determine whether JavaScript code has been correctly loaded from a content delivery network. |
Selecting JavaScript files
The asp-src-include attribute is used to include JavaScript files in a view using globbing patterns. Globbing patterns support a set of wildcards that are used to match files, and table 26.5 describes the most common globbing patterns.
Table 26.5 Common globbing patterns
|
Pattern |
Example |
Description |
|---|---|---|
|
|
|
This pattern matches any single character except |
|
|
|
This pattern matches any number of characters except |
|
|
|
This pattern matches any number of characters including |
Globbing is a useful way of ensuring that a view includes the JavaScript files that the application requires, even when the exact path to the file changes, which usually happens when the version number is included in the file name or when a package adds additional files.
Listing 26.9 uses the asp-src-include attribute to include all the JavaScript files in the wwwroot/lib/jquery folder, which is the location of the jQuery package installed with the command in listing 26.4.
Listing 26.9 Selecting files in the _SimpleLayout.cshtml file in the Views/Shared folder
<!DOCTYPE html>
<html>
<head>
<title>@ViewBag.Title</title>
<link href="/lib/bootstrap/css/bootstrap.min.css" rel="stylesheet" />
<script asp-src-include="lib/jquery/**/*.js"></script>
</head>
<body>
<div class="m-2">
@RenderBody()
</div>
</body>
</html>
Patterns are evaluated within the wwwroot folder, and the pattern I used locates any file with the js file extension, regardless of its location within the wwwroot folder; this means that any JavaScript package added to the project will be included in the HTML sent to the client.
Restart ASP.NET Core and a browser to request http://localhost:5000/home/list and examine the HTML sent to the browser. You will see the single script element in the layout has been transformed into a script element for each JavaScript file, like this:
... <head> <title></title> <link href="/lib/bootstrap/css/bootstrap.min.css" rel="stylesheet"> <script src="/lib/jquery/jquery.js"></script> <script src="/lib/jquery/jquery.min.js"></script> <script src="/lib/jquery/jquery.slim.js"></script> <script src="/lib/jquery/jquery.slim.min.js"></script> </head> ...
If you are using Visual Studio, you may not have realized that the jQuery packages contain so many JavaScript files because Visual Studio hides them in the Solution Explorer. To reveal the full contents of the client-side package folders, you can either expand the individual nested entries in the Solution Explorer window or disable file nesting by clicking the button at the top of the Solution Explorer window, as shown in figure 26.5. (Visual Studio Code does not nest files.)
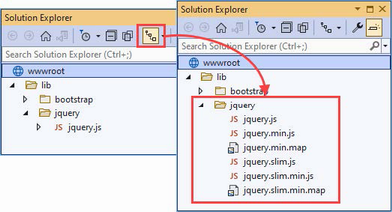
Figure 26.5 Disabling file nesting in the Visual Studio Solution Explorer
Narrowing the globbing pattern
No application would require all the files selected by the pattern in listing 26.9. Many packages include multiple JavaScript files that contain similar content, often removing less popular features to save bandwidth. The jQuery package includes the jquery.slim.js file, which contains the same code as the jquery.js file but without the features that handle asynchronous HTTP requests and animation effects.
Each of these files has a counterpart with the min.js file extension, which denotes a minified file. Minification reduces the size of a JavaScript file by removing all whitespace and renaming functions and variables to use shorter names.
Only one JavaScript file is required for each package and if you only require the minified versions, which will be the case in most projects, then you can restrict the set of files that the globbing pattern matches, as shown in listing 26.10.
Listing 26.10 Selecting files in the _SimpleLayout.cshtml file in the Views/Shared folder
<!DOCTYPE html>
<html>
<head>
<title>@ViewBag.Title</title>
<link href="/lib/bootstrap/css/bootstrap.min.css" rel="stylesheet" />
<script asp-src-include="lib/jquery/**/*.min.js"></script>
</head>
<body>
<div class="m-2">
@RenderBody()
</div>
</body>
</html>
Restart ASP.NET Core and a browser to request http://localhost:5000/home/list again and examine the HTML sent by the application. You will see that only the minified files have been selected.
... <head> <title></title> <link href="/lib/bootstrap/css/bootstrap.min.css" rel="stylesheet"> <script src="/lib/jquery/jquery.min.js"></script> <script src="/lib/jquery/jquery.slim.min.js"></script> </head> ...
Narrowing the pattern for the JavaScript files has helped, but the browser will still end up with the normal and slim versions of jQuery and the bundled and unbundled versions of the Bootstrap JavaScript files. To narrow the selection further, I can include slim in the pattern, as shown in listing 26.11.
Listing 26.11 Narrowing the focus in the Views/Shared/_SimpleLayout.cshtml file
<!DOCTYPE html>
<html>
<head>
<title>@ViewBag.Title</title>
<link href="/lib/bootstrap/css/bootstrap.min.css" rel="stylesheet" />
<script asp-src-include="lib/jquery**/*slim.min.js"></script>
</head>
<body>
<div class="m-2">
@RenderBody()
</div>
</body>
</html>
Restart ASP.NET Core and use the browser to request http://localhost:5000/home/list and examine the HTML the browser receives. The script element has been transformed like this:
... <head> <title></title> <link href="/lib/bootstrap/css/bootstrap.min.css" rel="stylesheet"> <script src="/lib/jquery/jquery.slim.min.js"></script> </head> ...
Only one version of the jQuery file will be sent to the browser while preserving the flexibility for the location of the file.
Excluding files
Narrowing the pattern for the JavaScript files helps when you want to select a file whose name contains a specific term, such as slim. It isn’t helpful when the file you want doesn’t have that term, such as when you want the full version of the minified file. Fortunately, you can use the asp-src-exclude attribute to remove files from the list matched by the asp-src-include attribute, as shown in listing 26.12.
Listing 26.12 Excluding files in the _SimpleLayout.cshtml file in the Views/Shared folder
<!DOCTYPE html>
<html>
<head>
<title>@ViewBag.Title</title>
<link href="/lib/bootstrap/css/bootstrap.min.css" rel="stylesheet" />
<script asp-src-include="/lib/jquery/**/*.min.js"
asp-src-exclude="**.slim.**">
</script>
</head>
<body>
<div class="m-2">
@RenderBody()
</div>
</body>
</html>
If you restart ASP.NET Core and use the browser to request http://localhost:5000/home/list and examine the HTML response, you will see that the script element links only to the full minified version of the jQuery library, like this:
...
<head>
<title></title>
<link href="/lib/bootstrap/css/bootstrap.min.css" rel="stylesheet">
<script src="/lib/jquery/jquery.min.js"></script>
</head>
...
Working with content delivery networks
Content delivery networks (CDNs) are used to offload requests for application content to servers that are closer to the user. Rather than requesting a JavaScript file from your servers, the browser requests it from a hostname that resolves to a geographically local server, which reduces the amount of time required to load files and reduces the amount of bandwidth you have to provision for your application. If you have a large, geographically disbursed set of users, then it can make commercial sense to sign up to a CDN, but even the smallest and simplest application can benefit from using the free CDNs operated by major technology companies to deliver common JavaScript packages, such as jQuery.
For this chapter, I am going to use CDNJS, which is the same CDN used by the Library Manager tool to install client-side packages in the ASP.NET Core project. You can search for packages at https://cdnjs.com; for jQuery 3.6.3, which is the package and version installed in listing 26.4, there are six CDNJS URLs, all of which are accessible via HTTPS.
cdnjs.cloudflare.com/ajax/libs/jquery/3.6.3/jquery.js
cdnjs.cloudflare.com/ajax/libs/jquery/3.6.3/jquery.min.js
cdnjs.cloudflare.com/ajax/libs/jquery/3.6.3/jquery.min.map
cdnjs.cloudflare.com/ajax/libs/jquery/3.6.3/jquery.slim.js
cdnjs.cloudflare.com/ajax/libs/jquery/3.6.3/jquery.slim.min.js
cdnjs.cloudflare.com/ajax/libs/jquery/3.6.3/jquery.slim.min.map
These URLs provide the regular JavaScript file, the minified JavaScript file, and the source map for the minified file for both the full and slim versions of jQuery.
The problem with CDNs is that they are not under your organization’s control, and that means they can fail, leaving your application running but unable to work as expected because the CDN content isn’t available. The ScriptTagHelper class provides the ability to fall back to local files when the CDN content cannot be loaded by the client, as shown in listing 26.13.
Listing 26.13 CDN fallback in the _SimpleLayout.cshtml file in the Views/Shared folder
<!DOCTYPE html>
<html>
<head>
<title>@ViewBag.Title</title>
<link href="/lib/bootstrap/css/bootstrap.min.css" rel="stylesheet" />
<script src=
"https://cdnjs.cloudflare.com/ajax/libs/jquery/3.6.0/jquery.min.js"
asp-fallback-src="/lib/jquery/jquery.min.js"
asp-fallback-test="window.jQuery">
</script>
</head>
<body>
<div class="m-2">
@RenderBody()
</div>
</body>
</html>
The src attribute is used to specify the CDN URL. The asp-fallback-src attribute is used to specify a local file that will be used if the CDN is unable to deliver the file specified by the regular src attribute. To figure out whether the CDN is working, the asp-fallback-test attribute is used to define a fragment of JavaScript that will be evaluated at the browser. If the fragment evaluates as false, then the fallback files will be requested.
Restart ASP.NET Core and a browser to request http://localhost:5000/home/list, and you will see that the HTML response contains two script elements, like this:
...
<head>
<title></title>
<link href="/lib/bootstrap/css/bootstrap.min.css" rel="stylesheet" />
<script src=
"https://cdnjs.cloudflare.com/ajax/libs/jquery/3.6.0/jquery.min.js">
</script>
<script>
(window.jQuery||document.write(
"\u003Cscript src=\u0022/lib/jquery/jquery.min.js\u0022\
u003E\u003C/script\u003E"));
</script>
</head>
...
The first script element requests the JavaScript file from the CDN. The second script element evaluates the JavaScript fragment specified by the asp-fallback-test attribute, which checks to see whether the first script element has worked. If the fragment evaluates to true, then no action is taken because the CDN worked. If the fragment evaluates to false, a new script element is added to the HTML document that instructs the browser to load the JavaScript file from the fallback URL.
It is important to test your fallback settings because you won’t find out if they fail until the CDN has stopped working and your users cannot access your application. The simplest way to check the fallback is to change the name of the file specified by the src attribute to something that you know doesn’t exist (I append the word FAIL to the file name) and then look at the network requests that the browser makes using the F12 developer tools. You should see an error for the CDN file followed by a request for the fallback file.
The LinkTagHelper class is the built-in tag helper for link elements and is used to manage the inclusion of CSS style sheets in a view. This tag helper supports the attributes described in table 26.6, which I demonstrate in the following sections.
Table 26.6. The built-in tag helper attributes for link elements
|
Name |
Description |
|---|---|
|
|
This attribute is used to select files for the |
|
|
This attribute is used to exclude files from the |
|
|
This attribute is used to enable cache busting, as described in the “Understanding Cache Busting” sidebar. |
|
|
This attribute is used to specify a fallback file if there is a problem with a CDN. |
|
|
This attribute is used to select files that will be used if there is a CDN problem. |
|
|
This attribute is used to exclude files from the set that will be used when there is a CDN problem. |
|
|
This attribute is used to specify the CSS class that will be used to test the CDN. |
|
|
This attribute is used to specify the CSS property that will be used to test the CDN. |
|
|
This attribute is used to specify the CSS value that will be used to test the CDN. |
Selecting stylesheets
The LinkTagHelper shares many features with the ScriptTagHelper, including support for globbing patterns to select or exclude CSS files so they do not have to be specified individually. Being able to accurately select CSS files is as important as it is for JavaScript files because stylesheets can come in regular and minified versions and support source maps. The popular Bootstrap package, which I have been using to style HTML elements throughout this book, includes its CSS stylesheets in the wwwroot/lib/bootstrap/css folder. These will be visible in Visual Studio Code, but you will have to expand each item in the Solution Explorer or disable nesting to see them in the Visual Studio Solution Explorer, as shown in figure 26.6.
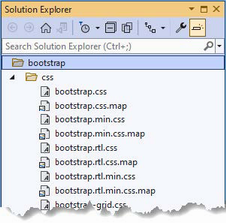
Figure 26.6 The Bootstrap CSS files
The bootstrap.css file is the regular stylesheet, the bootstrap.min.css file is the minified version, and the bootstrap.css.map file is a source map. The other files contain subsets of the CSS features to save bandwidth in applications that don’t use them.
Listing 26.14 replaces the regular link element in the layout with one that uses the asp-href-include and asp-href-exclude attributes. (I removed the script element for jQuery, which is no longer required.)
Listing 26.14 Selecting a stylesheet in the Views/Shared/_SimpleLayout.cshtml file
<!DOCTYPE html>
<html>
<head>
<title>@ViewBag.Title</title>
<link asp-href-include="/lib/bootstrap/css/*.min.css"
asp-href-exclude=
"**/*-reboot*,**/*-grid*,**/*-utilities*, **/*.rtl.*"
rel="stylesheet" />
</head>
<body>
<div class="m-2">
@RenderBody()
</div>
</body>
</html>
The same attention to detail is required as when selecting JavaScript files because it is easy to generate link elements for multiple versions of the same file or files that you don’t want. Restart ASP.NET Core and use a browser to request http://localhost:5000/home/list. Inspect the HTML received by the browser, and you will see that there is one link element, like this:
...
<head>
<title></title>
<link rel="stylesheet" href="/lib/bootstrap/css/bootstrap.min.css" />
</head>
...
Working with content delivery networks
The LinkTag helper class provides a set of attributes for falling back to local content when a CDN isn’t available, although the process for testing to see whether a stylesheet has loaded is more complex than testing for a JavaScript file. Listing 26.15 uses the CDNJS URL for the Bootstrap CSS stylesheet.(The CDN URL is too long to fit on the printed page, but should be on a single line in the code file).
Listing 26.15 Using a CDN for CSS in the Views/Shared/_SimpleLayout.cshtml file
<!DOCTYPE html>
<html>
<head>
<title>@ViewBag.Title</title>
<link href="https://cdnjs.cloudflare.com/ajax/libs/bootstrap/5.2.3/
css/bootstrap.min.css"
asp-fallback-href="/lib/bootstrap/css/bootstrap.min.css"
asp-fallback-test-class="btn"
asp-fallback-test-property="display"
asp-fallback-test-value="inline-block"
rel="stylesheet" />
</head>
<body>
<div class="m-2">
@RenderBody()
</div>
</body>
</html>
The href attribute is used to specify the CDN URL, and I have used the asp-fallback-href attribute to select the file that will be used if the CDN is unavailable. Testing whether the CDN works, however, requires the use of three different attributes and an understanding of the CSS classes defined by the CSS stylesheet that is being used.
Use a browser to request http://localhost:5000/home/list and examine the HTML elements in the response. You will see that the link element from the layout has been transformed into three separate elements, like this:
...
<head>
<title></title>
<link href="https://cdnjs.cloudflare.com/.../bootstrap.min.css"
rel="stylesheet"/>
<meta name="x-stylesheet-fallback-test" content="" class="btn" />
<script>
!function(a,b,c,d){var e,f=document,
g=f.getElementsByTagName("SCRIPT"),
h=g[g.length1].previousElementSibling,
i=f.defaultView&&f.defaultView.getComputedStyle ?
f.defaultView.getComputedStyle(h) : h.currentStyle;
if(i&&i[a]!==b)for(e=0;e<c.length;e++)
f.write('<link href="'+c[e]+'" '+d+"/>")}(
"display","inline-block",
["/lib/bootstrap/css/bootstrap.min.css"],
"rel=\u0022stylesheet\u0022 ");
</script>
</head>
...
To make the transformation easier to understand, I have formatted the JavaScript code and shortened the URL.
The first element is a regular link whose href attribute specifies the CDN file. The second element is a meta element, which specifies the class from the asp-fallback-test-class attribute in the view. I specified the btn class in the listing, which means that an element like this is added to the HTML sent to the browser:
<meta name="x-stylesheet-fallback-test" content="" class="btn">
The CSS class that you specify must be defined in the stylesheet that will be loaded from the CDN. The btn class that I specified provides the basic formatting for Bootstrap button elements.
The asp-fallback-test-property attribute is used to specify a CSS property that is set when the CSS class is applied to an element, and the asp-fallback-test-value attribute is used to specify the value that it will be set to.
The script element created by the tag helper contains JavaScript code that adds an element to the specified class and then tests the value of the CSS property to determine whether the CDN stylesheet has been loaded. If not, a link element is created for the fallback file. The Bootstrap btn class sets the display property to inline-block, and this provides the test to see whether the browser has been able to load the Bootstrap stylesheet from the CDN.
The ImageTagHelper class is used to provide cache busting for images through the src attribute of img elements, allowing an application to take advantage of caching while ensuring that modifications to images are reflected immediately. The ImageTagHelper class operates in img elements that define the asp-append-version attribute, which is described in table 26.7 for quick reference.
Table 26.7 The built-in tag helper attribute for image elements
|
Name |
Description |
|---|---|
|
|
This attribute is used to enable cache busting, as described in the “Understanding Cache Busting” sidebar. |
In listing 26.16, I have added an img element to the shared layout for the city skyline image that I added to the project at the start of the chapter. I have also reset the link element to use a local file for brevity.
Listing 26.16 Adding an image in the Views/Shared/_SimpleLayout.cshtml file
<!DOCTYPE html>
<html>
<head>
<title>@ViewBag.Title</title>
<link href="/lib/bootstrap/css/bootstrap.min.css" rel="stylesheet" />
</head>
<body>
<div class="m-2">
<img src="/images/proaspnetcore7/city.png" asp-append-version="true"
class="m-2" />
@RenderBody()
</div>
</body>
</html>
Restart ASP.NET Core and a browser to request http://localhost:5000/home/list, which will produce the response shown in figure 26.7.
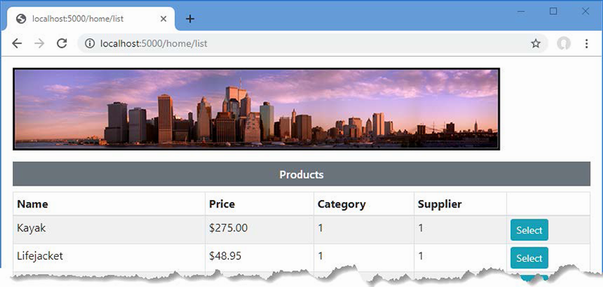
Figure 26.7 Using an image
Examine the HTML response, and you will see that the URL used to request the image file includes a version checksum, like this:
... <img src="/images/proaspnetcore7/city.png?v=KaMNDSZFAJufRcRDpKh0K_IIPNc7E" class="m-2"> ...
The addition of the checksum ensures that any changes to the file will pass through any caches, avoiding stale content.
The CacheTagHelper class allows fragments of content to be cached to speed up rendering of views or pages. The content to be cached is denoted using the cache element, which is configured using the attributes shown in table 26.8.
Table 26.8 The built-in tag helper attributes for cache elements
|
Name |
Description |
|---|---|
|
|
This |
|
|
This attribute is used to specify an absolute time at which the cached content will expire, expressed as a |
|
|
This attribute is used to specify a relative time at which the cached content will expire, expressed as a |
|
|
This attribute is used to specify the period since it was last used when the cached content will expire, expressed as a |
|
|
This attribute is used to specify the name of a request header that will be used to manage different versions of the cached content. |
|
|
This attribute is used to specify the name of a query string key that will be used to manage different versions of the cached content. |
|
|
This attribute is used to specify the name of a routing variable that will be used to manage different versions of the cached content. |
|
|
This attribute is used to specify the name of a cookie that will be used to manage different versions of the cached content. |
|
|
This |
|
|
This attribute is evaluated to provide a key used to manage different versions of the content. |
|
|
This attribute is used to specify a relative priority that will be taken into account when the memory cache runs out of space and purges unexpired cached content. |
Listing 26.17 replaces the img element from the previous section with content that contains timestamps.
Listing 26.17 Caching in the _SimpleLayout.cshtml file in the Views/Shared folder
<!DOCTYPE html>
<html>
<head>
<title>@ViewBag.Title</title>
<link href="/lib/bootstrap/css/bootstrap.min.css" rel="stylesheet" />
</head>
<body>
<div class="m-2">
<h6 class="bg-primary text-white m-2 p-2">
Uncached timestamp: @DateTime.Now.ToLongTimeString()
</h6>
<cache>
<h6 class="bg-primary text-white m-2 p-2">
Cached timestamp: @DateTime.Now.ToLongTimeString()
</h6>
</cache>
@RenderBody()
</div>
</body>
</html>
The cache element is used to denote a region of content that should be cached and has been applied to one of the h6 elements that contains a timestamp. Restart ASP.NET Core and a browser to request http://localhost:5000/home/list, and both timestamps will be the same. Reload the browser, and you will see that the cached content is used for one of the h6 elements and the timestamp doesn’t change, as shown in figure 26.8.
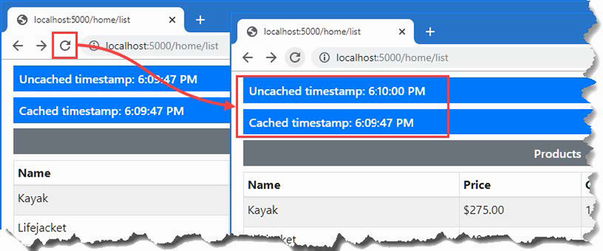
Figure 26.8 Using the caching tag helper
The expires-* attributes allow you to specify when cached content will expire, expressed either as an absolute time or as a time relative to the current time, or to specify a duration during which the cached content isn’t requested. In listing 26.18, I have used the expires-after attribute to specify that the content should be cached for 15 seconds.
Listing 26.18 Setting expiry in the _SimpleLayout.cshtml file in the Views/Shared folder
<!DOCTYPE html>
<html>
<head>
<title>@ViewBag.Title</title>
<link href="/lib/bootstrap/css/bootstrap.min.css" rel="stylesheet" />
</head>
<body>
<div class="m-2">
<h6 class="bg-primary text-white m-2 p-2">
Uncached timestamp: @DateTime.Now.ToLongTimeString()
</h6>
<cache expires-after="@TimeSpan.FromSeconds(15)">
<h6 class="bg-primary text-white m-2 p-2">
Cached timestamp: @DateTime.Now.ToLongTimeString()
</h6>
</cache>
@RenderBody()
</div>
</body>
</html>
Restart ASP.NET Core and use a browser to request http://localhost:5000/home/list and then reload the page. After 15 seconds the cached content will expire, and a new section of content will be created.
Setting a fixed expiry point
You can specify a fixed time at which cached content will expire using the expires-on attribute, which accepts a DateTime value, as shown in listing 26.19.
Listing 26.19 Setting expiry in the _SimpleLayout.cshtml file in the Views/Shared folder
<!DOCTYPE html>
<html>
<head>
<title>@ViewBag.Title</title>
<link href="/lib/bootstrap/css/bootstrap.min.css" rel="stylesheet" />
</head>
<body>
<div class="m-2">
<h6 class="bg-primary text-white m-2 p-2">
Uncached timestamp: @DateTime.Now.ToLongTimeString()
</h6>
<cache expires-on="@DateTime.Parse("2100-01-01")">
<h6 class="bg-primary text-white m-2 p-2">
Cached timestamp: @DateTime.Now.ToLongTimeString()
</h6>
</cache>
@RenderBody()
</div>
</body>
</html>
I have specified that that data should be cached until the year 2100. This isn’t a useful caching strategy since the application is likely to be restarted before the next century starts, but it does illustrate how you can specify a fixed point in the future rather than expressing the expiry point relative to the moment when the content is cached.
Setting a last-used expiry period
The expires-sliding attribute is used to specify a period after which content is expired if it hasn’t been retrieved from the cache. In listing 26.20, I have specified a sliding expiry of 10 seconds.
Listing 26.20 Sliding expiry in the _SimpleLayout.cshtml file in the Views/Shared folder
<!DOCTYPE html>
<html>
<head>
<title>@ViewBag.Title</title>
<link href="/lib/bootstrap/css/bootstrap.min.css" rel="stylesheet" />
</head>
<body>
<div class="m-2">
<h6 class="bg-primary text-white m-2 p-2">
Uncached timestamp: @DateTime.Now.ToLongTimeString()
</h6>
<cache expires-sliding="@TimeSpan.FromSeconds(10)">
<h6 class="bg-primary text-white m-2 p-2">
Cached timestamp: @DateTime.Now.ToLongTimeString()
</h6>
</cache>
@RenderBody()
</div>
</body>
</html>
You can see the effect of the express-sliding attribute by restarting ASP.NET Core and requesting http://localhost:5000/home/list and periodically reloading the page. If you reload the page within 10 seconds, the cached content will be used. If you wait longer than 10 seconds to reload the page, then the cached content will be discarded, the view component will be used to generate new content, and the process will begin anew.
Using cache variations
By default, all requests receive the same cached content. The CacheTagHelper class can maintain different versions of cached content and use them to satisfy different types of HTTP requests, specified using one of the attributes whose name begins with vary-by. Listing 26.21 shows the use of the vary-by-route attribute to create cache variations based on the action value matched by the routing system.
Listing 26.21 Variation in the _SimpleLayout.cshtml file in the Views/Shared folder
<!DOCTYPE html>
<html>
<head>
<title>@ViewBag.Title</title>
<link href="/lib/bootstrap/css/bootstrap.min.css" rel="stylesheet" />
</head>
<body>
<div class="m-2">
<h6 class="bg-primary text-white m-2 p-2">
Uncached timestamp: @DateTime.Now.ToLongTimeString()
</h6>
<cache expires-sliding="@TimeSpan.FromSeconds(10)"
vary-by-route="action">
<h6 class="bg-primary text-white m-2 p-2">
Cached timestamp: @DateTime.Now.ToLongTimeString()
</h6>
</cache>
@RenderBody()
</div>
</body>
</html>
If you restart ASP.NET Core and use two browser tabs to request http://localhost:5000/home/index and http://localhost:5000/home/list, you will see that each window receives its own cached content with its own expiration, since each request produces a different action routing value.
The EnvironmentTagHelper class is applied to the custom environment element and determines whether a region of content is included in the HTML sent to the browser-based on the hosting environment, which I described in chapters 15 and 16. The environment element relies on the names attribute, which I have described in table 26.9.
Table 26.9 The built-in tag helper attribute for environment elements
|
Name |
Description |
|---|---|
|
|
This attribute is used to specify a comma-separated list of hosting environment names for which the content contained within the |
In listing 26.22, I have added environment elements to the shared layout including different content in the view for the development and production hosting environments.
Listing 26.22 Using environment in the Views/Shared/_SimpleLayout.cshtml file
<!DOCTYPE html>
<html>
<head>
<title>@ViewBag.Title</title>
<link href="/lib/bootstrap/css/bootstrap.min.css" rel="stylesheet" />
</head>
<body>
<div class="m-2">
<environment names="development">
<h2 class="bg-info text-white m-2 p-2">
This is Development
</h2>
</environment>
<environment names="production">
<h2 class="bg-danger text-white m-2 p-2">
This is Production
</h2>
</environment>
@RenderBody()
</div>
</body>
</html>
The environment element checks the current hosting environment name and either includes the content it contains or omits it (the environment element itself is always omitted from the HTML sent to the client). Figure 26.9 shows the output for the development and production environments. (See chapter 15 for details of how to set the environment.)
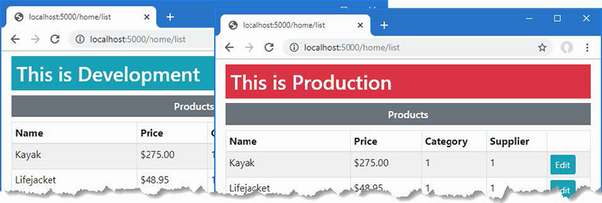
Figure 26.9 Managing content using the hosting environment
The built-in tag helpers are enabled using the view imports files.
The AnchorTagHelper class transforms anchor elements to target action methods or Razor Pages.
The ScriptTagHelper and LinkTagHelper classes transform script and link elements, using local files or those provided by a content delivery network.
The ImageTagHelper class transforms img elements, introducing cache-busting values to file names.
The CacheTagHelper class is used to cache fragments of content.
The EnvironmentTagHelper class incorporates content into the response for specific hosting environments.
This chapter covers
In this chapter, I describe the built-in tag helpers that are used to create HTML forms. These tag helpers ensure forms are submitted to the correct action or page handler method and that elements accurately represent specific model properties. Table 27.1 puts the form tag helpers in context.
Table 27.1 Putting form tag helpers in context
|
Question |
Answer |
|---|---|
|
What are they? |
These built-in tag helpers transform HTML form elements. |
|
Why are they useful? |
These tag helpers ensure that HTML forms reflect the application’s routing configuration and data model. |
|
How are they used? |
Tag helpers are applied to HTML elements using |
|
Are there any pitfalls or limitations? |
These tag helpers are reliable and predictable and present no serious issues. |
|
Are there any alternatives? |
You don’t have to use tag helpers and can define forms without them if you prefer. |
Table 27.2 provides a guide to the chapter.
Table 27.2 Chapter guide
|
Problem |
Solution |
Listing |
|---|---|---|
|
Specifying how a form will be submitted |
Use the form tag helper attributes. |
10–13 |
|
Transforming |
Use the input tag helper attributes. |
14–22 |
|
Transforming |
Use the label tag helper attributes. |
23 |
|
Populating |
Use the select tag helper attributes. |
24–26 |
|
Transforming text areas |
Use the text area tag helper attributes. |
27 |
|
Protecting against cross-site request forgery |
Enable the anti-forgery feature. |
28–32 |
This chapter uses the WebApp project from chapter 26. To prepare for this chapter, replace the contents of the _SimpleLayout.cshtml file in the Views/Shared folder with those shown in listing 27.1.
Listing 27.1 The contents of the _SimpleLayout.cshtml file in the Views/Shared folder
<!DOCTYPE html>
<html>
<head>
<title>@ViewBag.Title</title>
<link href="/lib/bootstrap/css/bootstrap.min.css" rel="stylesheet" />
</head>
<body>
<div class="m-2">
@RenderBody()
</div>
</body>
</html>
This chapter uses controller views and Razor Pages to present similar content. To differentiate more readily between controllers and pages, add the route shown in listing 27.2 to the Program.cs file.
Listing 27.2 Adding a route in the Program.cs file in the WebApp folder
using Microsoft.EntityFrameworkCore;
using WebApp.Models;
var builder = WebApplication.CreateBuilder(args);
builder.Services.AddDbContext<DataContext>(opts => {
opts.UseSqlServer(builder.Configuration[
"ConnectionStrings:ProductConnection"]);
opts.EnableSensitiveDataLogging(true);
});
builder.Services.AddControllersWithViews();
builder.Services.AddRazorPages();
builder.Services.AddSingleton<CitiesData>();
var app = builder.Build();
app.UseStaticFiles();
//app.MapControllers();
//app.MapDefaultControllerRoute();
app.MapControllerRoute("forms",
"controllers/{controller=Home}/{action=Index}/{id?}");
app.MapRazorPages();
var context = app.Services.CreateScope().ServiceProvider
.GetRequiredService<DataContext>();
SeedData.SeedDatabase(context);
app.Run();
The new route introduces a static path segment that makes it obvious that a URL targets a controller.
Open a new PowerShell command prompt, navigate to the folder that contains the WebApp.csproj file, and run the command shown in listing 27.3 to drop the database.
Listing 27.3 Dropping the database
dotnet ef database drop --force
Use the PowerShell command prompt to run the command shown in listing 27.4.
Listing 27.4 Running the example application
dotnet run
Use a browser to request http://localhost:5000/controllers/home/list, which will display a list of products, as shown in figure 27.1.
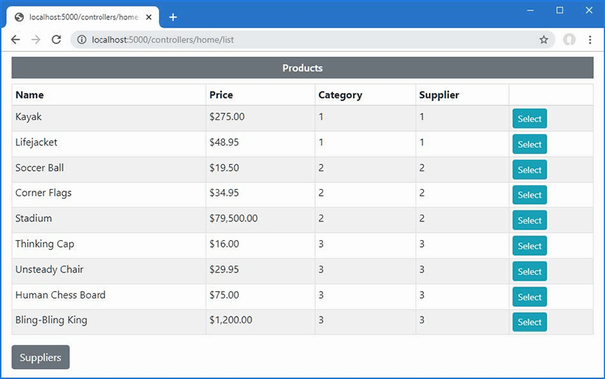
Figure 27.1 Running the example application
Most HTML forms exist within a well-defined pattern, shown in figure 27.2. First, the browser sends an HTTP GET request, which results in an HTML response containing a form, making it possible for the user to provide the application with data. The user clicks a button that submits the form data with an HTTP POST request, which allows the application to receive and process the user’s data. Once the data has been processed, a response is sent that redirects the browser to a URL that confirms the user’s actions.
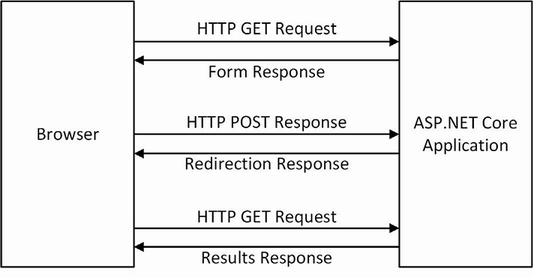
Figure 27.2 The HTML Post/Redirect/Get pattern
This is known as the Post/Redirect/Get pattern, and the redirection is important because it means the user can click the browser’s reload button without sending another POST request, which can lead to inadvertently repeating an operation.
In the sections that follow, I show how to follow the pattern with controllers and Razor Pages. I start with a basic implementation of the pattern and then demonstrate improvements using tag helpers and, in chapter 28, the model binding feature.
Controllers that handle forms are created by combining features described in earlier chapters. Add a class file named FormController.cs to the Controllers folder with the code shown in listing 27.5.
Listing 27.5 The contents of the FormController.cs file in the Controllers folder
using Microsoft.AspNetCore.Mvc;
using WebApp.Models;
namespace WebApp.Controllers {
public class FormController : Controller {
private DataContext context;
public FormController(DataContext dbContext) {
context = dbContext;
}
public async Task<IActionResult> Index(long id = 1) {
return View("Form", await context.Products.FindAsync(id)
?? new () { Name = string.Empty });
}
[HttpPost]
public IActionResult SubmitForm() {
foreach (string key in
Request.Form.Keys.Where(k => !k.StartsWith("_"))) {
TempData[key] = string.Join(", ",
(string?)Request.Form[key]);
}
return RedirectToAction(nameof(Results));
}
public IActionResult Results() {
return View();
}
}
}
The Index action method selects a view named Form, which will render an HTML form to the user. When the user submits the form, it will be received by the SubmitForm action, which has been decorated with the HttpPost attribute so that it can only receive HTTP POST requests. This action method processes the HTML form data available through the HttpRequest.Form property so that it can be stored using the temp data feature. The temp data feature can be used to pass data from one request to another but can be used only to store simple data types. Each form data value is presented as a string array, which I convert to a single comma-separated string for storage. The browser is redirected to the Results action method, which selects the default view.
To provide the controller with views, create the Views/Form folder and add to it a Razor View file named Form.cshtml with the content shown in listing 27.6.
Listing 27.6 The contents of the Form.cshtml file in the Views/Form folder
@model Product
@{ Layout = "_SimpleLayout"; }
<h5 class="bg-primary text-white text-center p-2">HTML Form</h5>
<form action="/controllers/form/submitform" method="post">
<div class="form-group">
<label>Name</label>
<input class="form-control" name="Name" value="@Model.Name" />
</div>
<button type="submit" class="btn btn-primary mt-2">Submit</button>
</form>
This view contains a simple HTML form that is configured to submit its data to the SubmitForm action method using a POST request. The form contains an input element whose value is set using a Razor expression. Next, add a Razor View named Results.cshtml to the Views/Form folder with the content shown in listing 27.7.
Listing 27.7 The contents of the Results.cshtml file in the Views/Form folder
@{ Layout = "_SimpleLayout"; }
<table class="table table-striped table-bordered table-sm">
<thead>
<tr class="bg-primary text-white text-center">
<th colspan="2">Form Data</th>
</tr>
</thead>
<tbody>
@foreach (string key in TempData.Keys) {
<tr>
<th>@key</th>
<td>@TempData[key]</td>
</tr>
}
</tbody>
</table>
<a class="btn btn-primary" asp-action="Index">Return</a>
This view displays the form data back to the user. I’ll show you how to process form data in more useful ways in chapter 31, but for this chapter the focus is on creating the forms, and seeing the data contained in the form is enough to get started.
Restart ASP.NET Core and use a browser to request http://localhost:5000/controllers/form to see the HTML form. Enter a value into the text field and click Submit to send a POST request, which will be handled by the SubmitForm action. The form data will be stored as temp data, and the browser will be redirected, producing the response shown in figure 27.3.
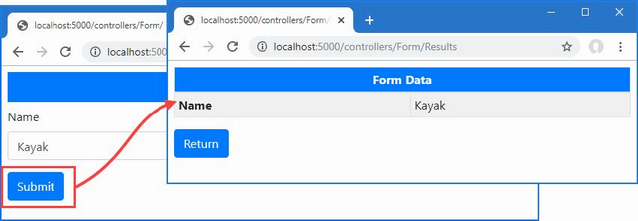
Figure 27.3 Using a controller to render and process an HTML form
The same pattern can be implemented using Razor Pages. One page is required to render and process the form data, and a second page displays the results. Add a Razor Page named FormHandler.cshtml to the Pages folder with the contents shown in listing 27.8.
Listing 27.8 The contents of the FormHandler.cshtml file in the Pages folder
@page "/pages/form/{id:long?}"
@model FormHandlerModel
@using Microsoft.AspNetCore.Mvc.RazorPages
<div class="m-2">
<h5 class="bg-primary text-white text-center p-2">HTML Form</h5>
<form action="/pages/form" method="post">
<div class="form-group">
<label>Name</label>
<input class="form-control" name="Name"
value="@Model.Product?.Name" />
</div>
<button type="submit" class="btn btn-primary mt-2">Submit</button>
</form>
</div>
@functions {
[IgnoreAntiforgeryToken]
public class FormHandlerModel : PageModel {
private DataContext context;
public FormHandlerModel(DataContext dbContext) {
context = dbContext;
}
public Product? Product { get; set; }
public async Task OnGetAsync(long id = 1) {
Product = await context.Products.FindAsync(id);
}
public IActionResult OnPost() {
foreach (string key in Request.Form.Keys
.Where(k => !k.StartsWith("_"))) {
TempData[key] = string.Join(", ",
(string?)Request.Form[key]);
}
return RedirectToPage("FormResults");
}
}
}
The OnGetAsync handler methods retrieves a Product from the database, which is used by the view to set the value for the input element in the HTML form. The form is configured to send an HTTP POST request that will be processed by the OnPost handler method. The form data is stored as temp data, and the browser is sent a redirection to a form named FormResults. To create the page to which the browser will be redirected, add a Razor Page named FormResults.cshtml to the Pages folder with the content shown in listing 27.9.
Listing 27.9 The contents of the FormResults.cshtml file in the Pages folder
@page "/pages/results"
<div class="m-2">
<table class="table table-striped table-bordered table-sm">
<thead>
<tr class="bg-primary text-white text-center">
<th colspan="2">Form Data</th>
</tr>
</thead>
<tbody>
@foreach (string key in TempData.Keys) {
<tr>
<th>@key</th>
<td>@TempData[key]</td>
</tr>
}
</tbody>
</table>
<a class="btn btn-primary" asp-page="FormHandler">Return</a>
</div>
No code is required for this page, which accesses temp data directly and displays it in a table. Restart ASP.NET Core and use a browser to navigate to http://localhost:5000/pages/form, enter a value into the text field, and click the Submit button. The form data will be processed by the OnPost method defined in listing 27.9, and the browser will be redirected to /pages/results, which displays the form data, as shown in figure 27.4.
Figure 27.4 Using Razor Pages to render and process an HTML form
The examples in the previous section show the basic mechanisms for dealing with HTML forms, but ASP.NET Core includes tag helpers that transform form elements. In the sections that follow, I describe the tag helpers and demonstrate their use.
The FormTagHelper class is the built-in tag helper for form elements and is used to manage the configuration of HTML forms so that they target the right action or page handler without the need to hard-code URLs. This tag helper supports the attributes described in table 27.3.
Table 27.3 The built-in tag helper attributes for form elements
|
Name |
Description |
|---|---|
|
|
This attribute is used to specify the |
|
|
This attribute is used to specify the action method for the |
|
|
This attribute is used to specify the name of a Razor Page. |
|
|
This attribute is used to specify the name of the handler method that will be used to process the request. You can see an example of this attribute in the SportsStore application in chapter 9. |
|
|
Attributes whose name begins with |
|
|
This attribute is used to specify the name of the route that will be used to generate the URL for the |
|
|
This attribute controls whether anti-forgery information is added to the view, as described in the “Using the Anti-forgery Feature” section. |
|
|
This attribute specifies a fragment for the generated URL. |
Setting the form target
The FormTagHelper transforms form elements so they target an action method or Razor Page without the need for hard-coded URLs. The attributes supported by this tag helper work in the same way as for anchor elements, described in chapter 26, and use attributes to provide values that help generate URLs through the ASP.NET Core routing system. Listing 27.10 modifies the form element in the Form view to apply the tag helper.
Listing 27.10 Using a tag helper in the Form.cshtml file in the Views/Form folder
@model Product
@{ Layout = "_SimpleLayout"; }
<h5 class="bg-primary text-white text-center p-2">HTML Form</h5>
<form asp-action="submitform" method="post">
<div class="form-group">
<label>Name</label>
<input class="form-control" name="Name" value="@Model.Name" />
</div>
<button type="submit" class="btn btn-primary mt-2">Submit</button>
</form>
The asp-action attribute is used to specify the name of the action that will receive the HTTP request. The routing system is used to generate the URLs, just as for the anchor elements described in chapter 26. The asp-controller attribute has not been used in listing 27.10, which means the controller that rendered the view will be used in the URL.
The asp-page attribute is also used to select a Razor Page as the target for the form, as shown in listing 27.11.
Listing 27.11 Setting the form target in the FormHandler.cshtml file in the Pages folder
...
<div class="m-2">
<h5 class="bg-primary text-white text-center p-2">HTML Form</h5>
<form asp-page="FormHandler" method="post">
<div class="form-group">
<label>Name</label>
<input class="form-control" name="Name"
value="@Model.Product?.Name" />
</div>
<button type="submit" class="btn btn-primary mt-2">Submit</button>
</form>
</div>
...
Restart ASP.NET Core, use a browser to navigate to http://localhost:5000/controllers/form, and examine the HTML received by the browser; you will see that the tag helper has added the action attribute to the form element like this:
... <form method="post" action="/controllers/Form/submitform"> ...
The routing system is used to generate a URL that will target the specified action method, which means that changes to the routing configuration will be reflected automatically in the form URL. Request http://localhost:5000/pages/form, and you will see that the form element has been transformed to target the page URL, like this:
... <form method="post" action="/pages/form"> ...
The buttons that send forms can be defined outside of the form element. In these situations, the button has a form attribute whose value corresponds to the id attribute of the form element it relates to and a formaction attribute that specifies the target URL for the form.
The tag helper will generate the formaction attribute through the asp-action, asp-controller, or asp-page attributes, as shown in listing 27.12.
Listing 27.12 Transforming a button in the Form.cshtml file in the Views/Form folder
@model Product
@{ Layout = "_SimpleLayout"; }
<h5 class="bg-primary text-white text-center p-2">HTML Form</h5>
<form asp-action="submitform" method="post" id="htmlform">
<div class="form-group">
<label>Name</label>
<input class="form-control" name="Name" value="@Model.Name" />
</div>
<button type="submit" class="btn btn-primary mt-2">Submit</button>
</form>
<button form="htmlform" asp-action="submitform"
class="btn btn-primary mt-2">
Submit (Outside Form)
</button>
The value of the id attribute added to the form element is used by the button as the value of the form attribute, which tells the browser which form to submit when the button is clicked. The attributes described in table 27.3 are used to identify the target for the form, and the tag helper will use the routing system to generate a URL when the view is rendered. Listing 27.13 applies the same technique to the Razor Page.
Listing 27.13 Transforming a button in the FormHandler.cshtml file in the Pages folder
...
<div class="m-2">
<h5 class="bg-primary text-white text-center p-2">HTML Form</h5>
<form asp-page="FormHandler" method="post" id="htmlform">
<div class="form-group">
<label>Name</label>
<input class="form-control" name="Name"
value="@Model.Product?.Name" />
</div>
<button type="submit" class="btn btn-primary mt-2">Submit</button>
</form>
<button form="htmlform" asp-page="FormHandler"
class="btn btn-primary mt-2">
Submit (Outside Form)
</button>
</div>
...
Restart ASP.NET Core, use a browser to request http://localhost:5000/controllers/form or http://localhost:5000/pages/form, and inspect the HTML sent to the browser. You will see the button element outside of the form has been transformed like this:
...
<button form="htmlform" class="btn btn-primary mt-2"
formaction="/controller/Form/submitform">
Submit (Outside Form)
</button>
...
Clicking the button submits the form, just as for a button that is defined within the form element, as shown in figure 27.5.
Figure 27.5 Defining a button outside of a form element
The input element is the backbone of HTML forms and provides the main means by which a user can provide an application with unstructured data. The InputTagHelper class is used to transform input elements so they reflect the data type and format of the view model property they are used to gather, using the attributes described in table 27.4.
Table 27.4 The built-in tag helper attributes for input elements
|
Name |
Description |
|---|---|
|
|
This attribute is used to specify the view model property that the |
|
|
This attribute is used to specify a format used for the value of the view model property that the |
The asp-for attribute is set to the name of a view model property, which is then used to set the name, id, type, and value attributes of the input element. Listing 27.14 modifies the input element in the controller view to use the asp-for attribute.
Listing 27.14 Configuring an input element in the Form.cshtml file in the Views/Form folder
@model Product
@{ Layout = "_SimpleLayout"; }
<h5 class="bg-primary text-white text-center p-2">HTML Form</h5>
<form asp-action="submitform" method="post" id="htmlform">
<div class="form-group">
<label>Name</label>
<input class="form-control" asp-for="Name" />
</div>
<button type="submit" class="btn btn-primary mt-2">Submit</button>
</form>
<button form="htmlform" asp-action="submitform"
class="btn btn-primary mt-2">
Submit (Outside Form)
</button>
This tag helper uses a model expression, described in chapter 25, which is why the value for the asp-for attribute is specified without the @ character. If you restart ASP.NET Core and inspect the HTML the application returns when using a browser to request http://localhost:5000/controllers/form, you will see the tag helper has transformed the input element like this:
...
<div class="form-group">
<label>Name</label>
<input class="form-control" type="text" data-val="true"
data-val-required="The Name field is required." id="Name"
name="Name" value="Kayak">
</div>
...
The values for the id and name attributes are obtained through the model expression, ensuring that you don’t introduce typos when creating the form. The other attributes are more complex and are described in the sections that follow or in chapter 29, where I explain the ASP.NET Core support for validating data.
The input element’s type attribute tells the browser how to display the element and how it should restrict the values the user enters. The input element in listing 27.14 is configured to the text type, which is the default input element type and offers no restrictions. Listing 27.15 adds another input element to the form, which will provide a more useful demonstration of how the type attribute is handled.
Listing 27.15 Adding an input element in the Form.cshtml file in the Views/Form folder
@model Product
@{ Layout = "_SimpleLayout"; }
<h5 class="bg-primary text-white text-center p-2">HTML Form</h5>
<form asp-action="submitform" method="post" id="htmlform">
<div class="form-group">
<label>Id</label>
<input class="form-control" asp-for="ProductId" />
</div>
<div class="form-group">
<label>Name</label>
<input class="form-control" asp-for="Name" />
</div>
<button type="submit" class="btn btn-primary mt-2">Submit</button>
</form>
<button form="htmlform" asp-action="submitform"
class="btn btn-primary mt-2">
Submit (Outside Form)
</button>
The new element uses the asp-for attribute to select the view model’s ProductId property. Restart ASP.NET Core and a browser to request http://localhost:5000/controllers/form to see how the tag helper has transformed the element.
...
<div class="form-group">
<label>Id</label>
<input class="form-control" type="number" data-val="true"
data-val-required="The ProductId field is required."
id="ProductId" name="ProductId" value="1">
</div>
...
The value of the type attribute is determined by the type of the view model property specified by the asp-for attribute. The type of the ProductId property is the C# long type, which has led the tag helper to set the input element’s type attribute to number, which restricts the element so it will accept only numeric characters. The data-val and data-val-required attributes are added to the input element to assist with validation, which is described in chapter 29. Table 27.5 describes how different C# types are used to set the type attribute of input elements.
Table 27.5 C# property types and the input type elements they generate
|
C# Type |
input Element type Attribute |
|---|---|
|
|
|
|
|
|
|
|
|
|
|
|
|
|
|
The float, double, and decimal types produce input elements whose type is text because not all browsers allow the full range of characters that can be used to express legal values of this type. To provide feedback to the user, the tag helper adds attributes to the input element that are used with the validation features described in chapter 29.
You can override the default mappings shown in table 27.5 by explicitly defining the type attribute on input elements. The tag helper won’t override the value you define, which allows you to specify a type attribute value.
The drawback of this approach is that you must remember to set the type attribute in all the views where input elements are generated for a given model property. A more elegant—and reliable approach—is to apply one of the attributes described in table 27.6 to the property in the C# model class.
Table 27.6 The input type elements attributes
|
Attribute |
input Element type Attribute |
|---|---|
|
|
|
|
|
|
|
|
|
|
|
|
|
|
|
|
|
|
|
|
|
|
|
|
When the action method provides the view with a view model object, the tag helper uses the value of the property given to the asp-for attribute to set the input element’s value attribute. The asp-format attribute is used to specify how that data value is formatted. To demonstrate the default formatting, listing 27.16 adds a new input element to the Form view.
Listing 27.16 Adding an element in the Form.cshtml file in the Views/Form folder
@model Product
@{ Layout = "_SimpleLayout"; }
<h5 class="bg-primary text-white text-center p-2">HTML Form</h5>
<form asp-action="submitform" method="post" id="htmlform">
<div class="form-group">
<label>Id</label>
<input class="form-control" asp-for="ProductId" />
</div>
<div class="form-group">
<label>Name</label>
<input class="form-control" asp-for="Name" />
</div>
<div class="form-group">
<label>Price</label>
<input class="form-control" asp-for="Price" />
</div>
<button type="submit" class="btn btn-primary mt-2">Submit</button>
</form>
<button form="htmlform" asp-action="submitform"
class="btn btn-primary mt-2">
Submit (Outside Form)
</button>
Restart ASP.NET Core, use a browser to navigate to http://localhost:5000/controllers/form/index/5, and examine the HTML the browser receives. By default, the value of the input element is set using the value of the model property, like this:
...
<input class="form-control" type="text" data-val="true"
data-val-number="The field Price must be a number."
data-val-required="The Price field is required."
id="Price" name="Price" value="79500.00">
...
This format, with two decimal places, is how the value is stored in the database. In chapter 26, I used the Column attribute to select a SQL type to store Price values, like this:
...
[Column(TypeName = "decimal(8, 2)")]
public decimal Price { get; set; }
...
This type specifies a maximum precision of eight digits, two of which will appear after the decimal place. This allows a maximum value of 999,999.99, which is enough to represent prices for most online stores. The asp-format attribute accepts a format string that will be passed to the standard C# string formatting system, as shown in listing 27.17.
Listing 27.17 Formatting a data value in the Form.cshtml file in the Views/Form folder
@model Product
@{ Layout = "_SimpleLayout"; }
<h5 class="bg-primary text-white text-center p-2">HTML Form</h5>
<form asp-action="submitform" method="post" id="htmlform">
<div class="form-group">
<label>Id</label>
<input class="form-control" asp-for="ProductId" />
</div>
<div class="form-group">
<label>Name</label>
<input class="form-control" asp-for="Name" />
</div>
<div class="form-group">
<label>Price</label>
<input class="form-control"
asp-for="Price" asp-format="{0:#,###.00}" />
</div>
<button type="submit" class="btn btn-primary mt-2">Submit</button>
</form>
<button form="htmlform" asp-action="submitform"
class="btn btn-primary mt-2">
Submit (Outside Form)
</button>
The attribute value is used verbatim, which means you must include the curly brace characters and the 0: reference, as well as the format you require. Refresh the browser, and you will see that the value for the input element has been formatted, like this:
...
<input class="form-control" type="text" data-val="true"
data-val-number="The field Price must be a number."
data-val-required="The Price field is required."
id="Price" name="Price" value="79,500.00">
...
This feature should be used with caution because you must ensure that the rest of the application is configured to support the format you use and that the format you create contains only legal characters for the input element type.
Applying formatting via the model class
If you always want to use the same formatting for a model property, then you can decorate the C# class with the DisplayFormat attribute, which is defined in the System.ComponentModel.DataAnnotations namespace. The DisplayFormat attribute requires two arguments to format a data value: the DataFormatString argument specifies the formatting string, and setting the ApplyFormatInEditMode to true specifies that formatting should be used when values are being applied to elements used for editing, including the input element. Listing 27.18 applies the attribute to the Price property of the Product class, specifying a different formatting string from earlier examples.
Listing 27.18 Applying a formatting attribute to the Product.cs file in the Models folder
using System.ComponentModel.DataAnnotations;
using System.ComponentModel.DataAnnotations.Schema;
using System.Text.Json.Serialization;
namespace WebApp.Models {
public class Product {
public long ProductId { get; set; }
public required string Name { get; set; }
[Column(TypeName = "decimal(8, 2)")]
[DisplayFormat(DataFormatString = "{0:c2}",
ApplyFormatInEditMode = true)]
public decimal Price { get; set; }
public long CategoryId { get; set; }
public Category? Category { get; set; }
public long SupplierId { get; set; }
[JsonIgnore(Condition = JsonIgnoreCondition.WhenWritingNull)]
public Supplier? Supplier { get; set; }
}
}
The asp-format attribute takes precedence over the DisplayFormat attribute, so I have removed the attribute from the view, as shown in listing 27.19.
Listing 27.19 Removing an attribute in the Form.cshtml file in the Views/Form folder
@model Product
@{ Layout = "_SimpleLayout"; }
<h5 class="bg-primary text-white text-center p-2">HTML Form</h5>
<form asp-action="submitform" method="post" id="htmlform">
<div class="form-group">
<label>Id</label>
<input class="form-control" asp-for="ProductId" />
</div>
<div class="form-group">
<label>Name</label>
<input class="form-control" asp-for="Name" />
</div>
<div class="form-group">
<label>Price</label>
<input class="form-control" asp-for="Price" />
</div>
<button type="submit" class="btn btn-primary mt-2">Submit</button>
</form>
<button form="htmlform" asp-action="submitform"
class="btn btn-primary mt-2">
Submit (Outside Form)
</button>
Restart ASP.NET Core and use a browser to request http://localhost:5000/controllers/form/index/5, and you will see that the formatting string defined by the attribute has been applied, as shown in figure 27.6.
Figure 27.6 Formatting data values
I chose this format to demonstrate the way the formatting attribute works, but as noted previously, care must be taken to ensure that the application is able to process the formatted values using the model binding and validation features described in chapters 28 and 29.
When using Entity Framework Core, you will often need to display data values that are obtained from related data, which is easily done using the asp-for attribute because a model expression allows the nested navigation properties to be selected. First, listing 27.20 includes related data in the view model object provided to the view.
Listing 27.20 Including related data in the FormController.cs file in the Controllers folder
using Microsoft.AspNetCore.Mvc;
using WebApp.Models;
using Microsoft.EntityFrameworkCore;
namespace WebApp.Controllers {
public class FormController : Controller {
private DataContext context;
public FormController(DataContext dbContext) {
context = dbContext;
}
public async Task<IActionResult> Index(long id = 1) {
return View("Form", await context.Products
.Include(p => p.Category)
.Include(p => p.Supplier)
.FirstAsync(p => p.ProductId == id)
?? new() { Name = string.Empty });
}
[HttpPost]
public IActionResult SubmitForm() {
foreach (string key in
Request.Form.Keys.Where(k => !k.StartsWith("_"))) {
TempData[key] = string.Join(", ",
(string?)Request.Form[key]);
}
return RedirectToAction(nameof(Results));
}
public IActionResult Results() {
return View();
}
}
}
Notice that I don’t need to worry about dealing with circular references in the related data because the view model object isn’t serialized. The circular reference issue is important only for web service controllers. In listing 27.21, I have updated the Form view to include input elements that use the asp-for attribute to select related data.
Listing 27.21 Displaying related data in the Form.cshtml file in the Views/Form folder
@model Product
@{ Layout = "_SimpleLayout"; }
<h5 class="bg-primary text-white text-center p-2">HTML Form</h5>
<form asp-action="submitform" method="post" id="htmlform">
<div class="form-group">
<label>Id</label>
<input class="form-control" asp-for="ProductId" />
</div>
<div class="form-group">
<label>Name</label>
<input class="form-control" asp-for="Name" />
</div>
<div class="form-group">
<label>Price</label>
<input class="form-control" asp-for="Price" />
</div>
<div class="form-group">
<label>Category</label>
@{ #pragma warning disable CS8602 }
<input class="form-control" asp-for="Category.Name" />
@{ #pragma warning restore CS8602 }
</div>
<div class="form-group">
<label>Supplier</label>
@{ #pragma warning disable CS8602 }
<input class="form-control" asp-for="Supplier.Name" />
@{ #pragma warning restore CS8602 }
</div>
<button type="submit" class="btn btn-primary mt-2">Submit</button>
</form>
<button form="htmlform" asp-action="submitform"
class="btn btn-primary mt-2">
Submit (Outside Form)
</button>
The value of the asp-for attribute is expressed relative to the view model object and can include nested properties, allowing me to select the Name properties of the related objects that Entity Framework Core has assigned to the Category and Supplier navigation properties.
As I explained in chapter 25, the null conditional operator cannot be used in model expressions. This presents a problem when selecting nullable-related data properties, such as the Product.Category and Product.Supplier properties. In chapter 25, I addressed this limitation by changing the type of a property so that it was not nullable, but this isn’t always possible, especially when a nullable property has been used to indicate a specific condition.
In listing 27.21, I used the #pragma warning expression to disable code analysis for warning CS8602, which is the warning generated when a nullable value isn’t accessed safely. The tag helper is able to deal with null values when processing the asp-for attribute, which means that the warning doesn’t indicate a potential problem.
The same technique is used in Razor Pages, except that the properties are expressed relative to the page model object, as shown in listing 27.22.
Listing 27.22 Displayed related data in the FormHandler.cshtml file in the Pages folder
@page "/pages/form/{id:long?}"
@model FormHandlerModel
@using Microsoft.AspNetCore.Mvc.RazorPages
@using Microsoft.EntityFrameworkCore
<div class="m-2">
<h5 class="bg-primary text-white text-center p-2">HTML Form</h5>
<form asp-page="FormHandler" method="post" id="htmlform">
<div class="form-group">
<label>Name</label>
<input class="form-control" asp-for="Product.Name" />
</div>
<div class="form-group">
<label>Price</label>
<input class="form-control" asp-for="Product.Price" />
</div>
<div class="form-group">
<label>Category</label>
@{ #pragma warning disable CS8602 }
<input class="form-control" asp-for="Product.Category.Name" />
@{ #pragma warning restore CS8602 }
</div>
<div class="form-group">
<label>Supplier</label>
@{ #pragma warning disable CS8602 }
<input class="form-control" asp-for="Product.Supplier.Name" />
@{ #pragma warning restore CS8602 }
</div>
<button type="submit" class="btn btn-primary mt-2">Submit</button>
</form>
<button form="htmlform" asp-page="FormHandler"
class="btn btn-primary mt-2">
Submit (Outside Form)
</button>
</div>
@functions {
[IgnoreAntiforgeryToken]
public class FormHandlerModel : PageModel {
private DataContext context;
public FormHandlerModel(DataContext dbContext) {
context = dbContext;
}
public Product Product { get; set; }
= new() { Name = string.Empty };
public async Task OnGetAsync(long id = 1) {
Product = await context.Products
.Include(p => p.Category)
.Include(p => p.Supplier)
.FirstAsync(p => p.ProductId == id);
}
public IActionResult OnPost() {
foreach (string key in Request.Form.Keys
.Where(k => !k.StartsWith("_"))) {
TempData[key] = string.Join(", ",
(string?)Request.Form[key]);
}
return RedirectToPage("FormResults");
}
}
}
To see the effect, restart ASP.NET Core so the changes to the controller take effect, and use a browser to request http://localhost:5000/controllers/form, which produces the response shown on the left of figure 27.7. Use the browser to request http://localhost:5000/pages/form, and you will see the same features used by the Razor Page, as shown on the right of figure 27.7.
Figure 27.7 Displaying related data
The LabelTagHelper class is used to transform label elements so the for attribute is set consistently with the approach used to transform input elements. Table 27.7 describes the attribute supported by this tag helper.
Table 27.7 The built-in tag helper attribute for label elements
|
Name |
Description |
|---|---|
|
|
This attribute is used to specify the view model property that the |
The tag helper sets the content of the label element so that it contains the name of the selected view model property. The tag helper also sets the for attribute, which denotes an association with a specific input element. This aids users who rely on screen readers and allows an input element to gain the focus when its associated label is clicked.
Listing 27.23 applies the asp-for attribute to the Form view to associate each label element with the input element that represents the same view model property.
Listing 27.23 Transforming label elements in the Form.cshtml file in the Views/Form folder
@model Product
@{ Layout = "_SimpleLayout"; }
<h5 class="bg-primary text-white text-center p-2">HTML Form</h5>
<form asp-action="submitform" method="post" id="htmlform">
<div class="form-group">
<label asp-for="ProductId"></label>
<input class="form-control" asp-for="ProductId" />
</div>
<div class="form-group">
<label asp-for="Name"></label>
<input class="form-control" asp-for="Name" />
</div>
<div class="form-group">
<label asp-for="Price"></label>
<input class="form-control" asp-for="Price" />
</div>
<div class="form-group">
@{ #pragma warning disable CS8602 }
<label asp-for="Category.Name">Category</label>
<input class="form-control" asp-for="Category.Name" />
@{ #pragma warning restore CS8602 }
</div>
<div class="form-group">
@{ #pragma warning disable CS8602 }
<label asp-for="Supplier.Name">Supplier</label>
<input class="form-control" asp-for="Supplier.Name" />
@{ #pragma warning restore CS8602 }
</div>
<button type="submit" class="btn btn-primary mt-2">Submit</button>
</form>
<button form="htmlform" asp-action="submitform"
class="btn btn-primary mt-2">
Submit (Outside Form)
</button>
You can override the content for a label element by defining it yourself, which is what I have done for the related data properties in listing 27.23. The tag helper would have set the content for both these label elements to be Name, which is not a useful description. Defining the element content means the for attribute will be applied, but a more useful name will be displayed to the user. Restart ASP.NET Core and use a browser to request http://localhost:5000/controllers/form to see the names used for each element, as shown in figure 27.8.
Figure 27.8 Transforming label elements
The select and option elements are used to provide the user with a fixed set of choices, rather than the open data entry that is possible with an input element. The SelectTagHelper is responsible for transforming select elements and supports the attributes described in table 27.8.
Table 27.8 The built-in tag helper attributes for select elements
|
Name |
Description |
|---|---|
|
|
This attribute is used to specify the view or page model property that the |
|
|
This attribute is used to specify a source of values for the option elements contained within the |
The asp-for attribute sets the value of the for and id attributes to reflect the model property that it receives. In listing 27.24, I have replaced the input element for the category with a select element that presents the user with a fixed range of values.
Listing 27.24 Using a select element in the Form.cshtml file in the Views/Form folder
@model Product
@{ Layout = "_SimpleLayout"; }
<h5 class="bg-primary text-white text-center p-2">HTML Form</h5>
<form asp-action="submitform" method="post" id="htmlform">
<div class="form-group">
<label asp-for="ProductId"></label>
<input class="form-control" asp-for="ProductId" />
</div>
<div class="form-group">
<label asp-for="Name"></label>
<input class="form-control" asp-for="Name" />
</div>
<div class="form-group">
<label asp-for="Price"></label>
<input class="form-control" asp-for="Price" />
</div>
<div class="form-group">
@{ #pragma warning disable CS8602 }
<label asp-for="Category.Name">Category</label>
@{ #pragma warning restore CS8602 }
<select class="form-control" asp-for="CategoryId">
<option value="1">Watersports</option>
<option value="2">Soccer</option>
<option value="3">Chess</option>
</select>
</div>
<div class="form-group">
@{ #pragma warning disable CS8602 }
<label asp-for="Supplier.Name">Supplier</label>
<input class="form-control" asp-for="Supplier.Name" />
@{ #pragma warning restore CS8602 }
</div>
<button type="submit" class="btn btn-primary mt-2">Submit</button>
</form>
<button form="htmlform" asp-action="submitform"
class="btn btn-primary mt-2">
Submit (Outside Form)
</button>
I have manually populated the select element with option elements that provide a range of categories for the user to choose from. If you use a browser to request http://localhost:5000/controllers/form/index/5 and examine the HTML response, you will see that the tag helper has transformed the select element like this:
...
<div class="form-group">
<label for="Category_Name">Category</label>
<select class="form-control" data-val="true"
data-val-required="The CategoryId field is required."
id="CategoryId" name="CategoryId">
<option value="1">Watersports</option>
<option value="2" selected="selected">Soccer</option>
<option value="3">Chess</option>
</select>
</div>
...
Notice that selected attribute has been added to the option element that corresponds to the view model’s CategoryId value, like this:
... <option value="2" selected="selected">Soccer</option> ...
The task of selecting an option element is performed by the OptionTagHelper class, which receives instructions from the SelectTagHelper through the TagHelperContext.Items collection, described in chapter 25. The result is that the select element displays the name of the category associated with the Product object’s CategoryId value.
Explicitly defining the option elements for a select element is a useful approach for choices that always have the same possible values but doesn’t help when you need to provide options that are taken from the data model or where you need the same set of options in multiple views and don’t want to manually maintain duplicated content.
The asp-items attribute is used to provide the tag helper with a list sequence of SelectListItem objects for which option elements will be generated. Listing 27.25 modifies the Index action of the Form controller to provide the view with a sequence of SelectListItem objects through the view bag.
Listing 27.25 Providing a sequence in the FormController.cs file in the Controllers folder
using Microsoft.AspNetCore.Mvc;
using WebApp.Models;
using Microsoft.EntityFrameworkCore;
using Microsoft.AspNetCore.Mvc.Rendering;
namespace WebApp.Controllers {
public class FormController : Controller {
private DataContext context;
public FormController(DataContext dbContext) {
context = dbContext;
}
public async Task<IActionResult> Index(long id = 1) {
ViewBag.Categories = new SelectList(context.Categories,
"CategoryId", "Name");
return View("Form", await context.Products
.Include(p => p.Category)
.Include(p => p.Supplier)
.FirstAsync(p => p.ProductId == id)
?? new() { Name = string.Empty });
}
[HttpPost]
public IActionResult SubmitForm() {
foreach (string key in
Request.Form.Keys.Where(k => !k.StartsWith("_"))) {
TempData[key] = string.Join(", ",
(string?)Request.Form[key]);
}
return RedirectToAction(nameof(Results));
}
public IActionResult Results() {
return View();
}
}
}
SelectListItem objects can be created directly, but ASP.NET Core provides the SelectList class to adapt existing data sequences. In this case, I pass the sequence of Category objects obtained from the database to the SelectList constructor, along with the names of the properties that should be used as the values and labels for option elements. In listing 27.26, I have updated the Form view to use the SelectList.
Listing 27.26 Using a SelectList in the Form.cshtml file in the Views/Form folder
@model Product
@{ Layout = "_SimpleLayout"; }
<h5 class="bg-primary text-white text-center p-2">HTML Form</h5>
<form asp-action="submitform" method="post" id="htmlform">
<div class="form-group">
<label asp-for="ProductId"></label>
<input class="form-control" asp-for="ProductId" />
</div>
<div class="form-group">
<label asp-for="Name"></label>
<input class="form-control" asp-for="Name" />
</div>
<div class="form-group">
<label asp-for="Price"></label>
<input class="form-control" asp-for="Price" />
</div>
<div class="form-group">
@{ #pragma warning disable CS8602 }
<label asp-for="Category.Name">Category</label>
@{ #pragma warning restore CS8602 }
<select class="form-control" asp-for="CategoryId"
asp-items="@ViewBag.Categories">
</select>
</div>
<div class="form-group">
@{ #pragma warning disable CS8602 }
<label asp-for="Supplier.Name">Supplier</label>
<input class="form-control" asp-for="Supplier.Name" />
@{ #pragma warning restore CS8602 }
</div>
<button type="submit" class="btn btn-primary mt-2">Submit</button>
</form>
<button form="htmlform" asp-action="submitform"
class="btn btn-primary mt-2">
Submit (Outside Form)
</button>
Restart ASP.NET Core and use a browser to request http://localhost:5000/controllers/form/index/5. There is no visual change to the content presented to the user, but the option elements used to populate the select element have been generated from the database, like this:
...
<div class="form-group">
<label for="Category_Name">Category</label>
<select class="form-control" data-val="true"
data-val-required="The CategoryId field is required."
id="CategoryId" name="CategoryId">
<option value="1">Watersports</option>
<option selected="selected" value="2">Soccer</option>
<option value="3">Chess</option>
</select>
</div>
...
This approach means that the options presented to the user will automatically reflect new categories added to the database.
The textarea element is used to solicit a larger amount of text from the user and is typically used for unstructured data, such as notes or observations. The TextAreaTagHelper is responsible for transforming textarea elements and supports the single attribute described in table 27.9.
Table 27.9 The built-in tag helper attributes for textarea elements
|
Name |
Description |
|---|---|
|
|
This attribute is used to specify the view model property that the |
The TextAreaTagHelper is relatively simple, and the value provided for the asp-for attribute is used to set the id and name attributes on the textarea element. The value of the property selected by the asp-for attribute is used as the content for the textarea element. Listing 27.27 replaces the input element for the Supplier.Name property with a text area to which the asp-for attribute has been applied.
Listing 27.27 Using a text area in the Form.cshtml file in the Views/Form folder
@model Product
@{ Layout = "_SimpleLayout"; }
<h5 class="bg-primary text-white text-center p-2">HTML Form</h5>
<form asp-action="submitform" method="post" id="htmlform">
<div class="form-group">
<label asp-for="ProductId"></label>
<input class="form-control" asp-for="ProductId" />
</div>
<div class="form-group">
<label asp-for="Name"></label>
<input class="form-control" asp-for="Name" />
</div>
<div class="form-group">
<label asp-for="Price"></label>
<input class="form-control" asp-for="Price" />
</div>
<div class="form-group">
@{ #pragma warning disable CS8602 }
<label asp-for="Category.Name">Category</label>
@{ #pragma warning restore CS8602 }
<select class="form-control" asp-for="CategoryId"
asp-items="@ViewBag.Categories">
</select>
</div>
<div class="form-group">
@{ #pragma warning disable CS8602 }
<label asp-for="Supplier.Name">Supplier</label>
<textarea class="form-control" asp-for="Supplier.Name"></textarea>
@{ #pragma warning restore CS8602 }
</div>
<button type="submit" class="btn btn-primary mt-2">Submit</button>
</form>
<button form="htmlform" asp-action="submitform"
class="btn btn-primary mt-2">
Submit (Outside Form)
</button>
Restart ASP.NET Core and use a browser to request http://localhost:5000/controllers/form and examine the HTML received by the browser to see the transformation of the textarea element.
...
<div class="form-group">
<label for="Supplier_Name">Supplier</label>
<textarea class="form-control" data-val="true"
data-val-required="The Name field is required."
id="Supplier_Name"
name="Supplier.Name">
Splash Dudes
</textarea>
</div>
...
The TextAreaTagHelper is relatively simple, but it provides consistency with the rest of the form element tag helpers that I have described in this chapter.
When I defined the controller action method and page handler methods that process form data, I filtered out form data whose name begins with an underscore, like this:
...
[HttpPost]
public IActionResult SubmitForm() {
foreach (string key in Request.Form.Keys
.Where(k => !k.StartsWith("_"))) {
TempData[key] = string.Join(", ", Request.Form[key]);
}
return RedirectToAction(nameof(Results));
}
...
I applied this filter to focus on the values provided by the HTML elements in the form. Listing 27.28 removes the filter from the action method so that all the data received from the HTML form is stored in temp data.
Listing 27.28 Removing a filter in the FormController.cs file in the Controllers folder
using Microsoft.AspNetCore.Mvc;
using WebApp.Models;
using Microsoft.EntityFrameworkCore;
using Microsoft.AspNetCore.Mvc.Rendering;
namespace WebApp.Controllers {
public class FormController : Controller {
private DataContext context;
public FormController(DataContext dbContext) {
context = dbContext;
}
public async Task<IActionResult> Index(long id = 1) {
ViewBag.Categories = new SelectList(context.Categories,
"CategoryId", "Name");
return View("Form", await context.Products
.Include(p => p.Category)
.Include(p => p.Supplier)
.FirstAsync(p => p.ProductId == id)
?? new() { Name = string.Empty });
}
[HttpPost]
public IActionResult SubmitForm() {
foreach (string key in Request.Form.Keys) {
TempData[key] = string.Join(", ",
(string?)Request.Form[key]);
}
return RedirectToAction(nameof(Results));
}
public IActionResult Results() {
return View();
}
}
}
Restart ASP.NET Core and use a browser to request http://localhost:5000/controllers/form. Click the Submit button to send the form to the application, and you will see a new item in the results, as shown in figure 27.9.

Figure 27.9 Showing all form data
The _RequestVerificationToken form value displayed in the results is a security feature that is applied by the FormTagHelper to guard against cross-site request forgery. Cross-site request forgery (CSRF) exploits web applications by taking advantage of the way that user requests are typically authenticated. Most web applications—including those created using ASP.NET Core—use cookies to identify which requests are related to a specific session, with which a user identity is usually associated.
CSRF—also known as XSRF—relies on the user visiting a malicious website after using your web application and without explicitly ending their session. The application still regards the user’s session as being active, and the cookie that the browser has stored has not yet expired. The malicious site contains JavaScript code that sends a form request to your application to perform an operation without the user’s consent—the exact nature of the operation will depend on the application being attacked. Since the JavaScript code is executed by the user’s browser, the request to the application includes the session cookie, and the application performs the operation without the user’s knowledge or consent.
If a form element doesn’t contain an action attribute—because it is being generated from the routing system with the asp-controller, asp-action, and asp-page attributes—then the FormTagHelper class automatically enables an anti-CSRF feature, whereby a security token is added to the response as a cookie. A hidden input element containing the same security token is added to the HTML form, and it is this token that is shown in figure 27.9.
By default, controllers accept POST requests even when they don’t contain the required security tokens. To enable the anti-forgery feature, an attribute is applied to the controller class, as shown in listing 27.29.
Listing 27.29 Enabling the anti-forgery feature in the Controllers/FormController.cs file
using Microsoft.AspNetCore.Mvc;
using WebApp.Models;
using Microsoft.EntityFrameworkCore;
using Microsoft.AspNetCore.Mvc.Rendering;
namespace WebApp.Controllers {
[AutoValidateAntiforgeryToken]
public class FormController : Controller {
private DataContext context;
public FormController(DataContext dbContext) {
context = dbContext;
}
public async Task<IActionResult> Index(long id = 1) {
ViewBag.Categories = new SelectList(context.Categories,
"CategoryId", "Name");
return View("Form", await context.Products
.Include(p => p.Category)
.Include(p => p.Supplier)
.FirstAsync(p => p.ProductId == id)
?? new() { Name = string.Empty });
}
[HttpPost]
public IActionResult SubmitForm() {
foreach (string key in Request.Form.Keys) {
TempData[key] = string.Join(", ",
(string?)Request.Form[key]);
}
return RedirectToAction(nameof(Results));
}
public IActionResult Results() {
return View();
}
}
}
Not all requests require an anti-forgery token, and the AutoValidateAntiforgeryToken ensures that checks are performed for all HTTP methods except GET, HEAD, OPTIONS, and TRACE.
Testing the anti-CSRF feature is a little tricky. I do it by requesting the URL that contains the form (http://localhost:5000/controllers/forms for this example) and then using the browser’s F12 developer tools to locate and remove the hidden input element from the form (or change the element’s value). When I populate and submit the form, it is missing one part of the required data, and the request will fail.
The anti-forgery feature is enabled by default in Razor Pages, which is why I applied the IgnoreAntiforgeryToken attribute to the page handler method in listing 27.29 when I created the FormHandler page. Listing 27.30 removes the attribute to enable the validation feature.
Listing 27.30 Enabling Request Validation in the Pages/FormHandler.cshtml File
...
@functions {
//[IgnoreAntiforgeryToken]
public class FormHandlerModel : PageModel {
private DataContext context;
...
Testing the validation feature is done in the same way as for controllers and requires altering the HTML document using the browser’s developer tools before submitting the form to the application.
By default, the anti-forgery feature relies on the ASP.NET Core application being able to include an element in an HTML form that the browser sends back when the form is submitted. This doesn’t work for JavaScript clients because the ASP.NET Core application provides data and not HTML, so there is no way to insert the hidden element and receive it in a future request.
For web services, the anti-forgery token can be sent as a JavaScript-readable cookie, which the JavaScript client code reads and includes as a header in its POST requests. Some JavaScript frameworks, such as Angular, will automatically detect the cookie and include a header in requests. For other frameworks and custom JavaScript code, additional work is required.
Listing 27.31 shows the changes required to the ASP.NET Core application to configure the anti-forgery feature for use with JavaScript clients.
Listing 27.31 Configuring the anti-forgery token in the WebApp/Program.cs file
using Microsoft.EntityFrameworkCore;
using WebApp.Models;
using Microsoft.AspNetCore.Antiforgery;
var builder = WebApplication.CreateBuilder(args);
builder.Services.AddDbContext<DataContext>(opts => {
opts.UseSqlServer(builder.Configuration[
"ConnectionStrings:ProductConnection"]);
opts.EnableSensitiveDataLogging(true);
});
builder.Services.AddControllersWithViews();
builder.Services.AddRazorPages();
builder.Services.AddSingleton<CitiesData>();
builder.Services.Configure<AntiforgeryOptions>(opts => {
opts.HeaderName = "X-XSRF-TOKEN";
});
var app = builder.Build();
app.UseStaticFiles();
IAntiforgery antiforgery
= app.Services.GetRequiredService<IAntiforgery>();
app.Use(async (context, next) => {
if (!context.Request.Path.StartsWithSegments("/api")) {
string? token =
antiforgery.GetAndStoreTokens(context).RequestToken;
if (token != null) {
context.Response.Cookies.Append("XSRF-TOKEN",
token,
new CookieOptions { HttpOnly = false });
}
}
await next();
});
app.MapControllerRoute("forms",
"controllers/{controller=Home}/{action=Index}/{id?}");
app.MapRazorPages();
var context = app.Services.CreateScope().ServiceProvider
.GetRequiredService<DataContext>();
SeedData.SeedDatabase(context);
app.Run();
The options pattern is used to configure the anti-forgery feature, through the AntiforgeryOptions class. The HeaderName property is used to specify the name of a header through which anti-forgery tokens will be accepted, which is X-XSRF-TOKEN in this case.
A custom middleware component is required to set the cookie, which is named XSRF-TOKEN in this example. The value of the cookie is obtained through the IAntiForgery service and must be configured with the HttpOnly option set to false so that the browser will allow JavaScript code to read the cookie.
To create a simple JavaScript client that uses the cookie and header, add a Razor Page named JavaScriptForm.cshtml to the Pages folder with the content shown in listing 27.32.
Listing 27.32 The contents of the JavaScriptForm.cshtml file in the Pages folder
@page "/pages/jsform"
<script type="text/javascript">
async function sendRequest() {
const token = document.cookie.replace(
/(?:(?:^|.*;\s*)XSRF-TOKEN\s*\=\s*([^;]*).*$)|^.*$/, "$1");
let form = new FormData();
form.append("name", "Paddle");
form.append("price", 100);
form.append("categoryId", 1);
form.append("supplierId", 1);
let response = await fetch("@Url.Page("FormHandler")", {
method: "POST",
headers: { "X-XSRF-TOKEN": token },
body: form
});
document.getElementById("content").innerHTML
= await response.text();
}
document.addEventListener("DOMContentLoaded",
() => document.getElementById("submit").onclick = sendRequest);
</script>
<button class="btn btn-primary m-2" id="submit">
Submit JavaScript Form
</button>
<div id="content"></div>
The JavaScript code in this Razor Page responds to a button click by sending an HTTP POST request to the FormHandler Razor Page. The value of the XSRF-TOKEN cookie is read and included in the X-XSRF-TOKEN request header. The response from the FormHandler page is a redirection to the Results page, which the browser will follow automatically. The response from the Results page is read by the JavaScript code and inserted into an element so it can be displayed to the user. To test the JavaScript code, restart ASP.NET Core, use a browser to request http://localhost:5000/pages/jsform, and click the button. The JavaScript code will submit the form and display the response, as shown in figure 27.10.
Figure 27.10 Using a security token in JavaScript code
The FormTagHelper class transforms form elements so they target specific action methods or Razor pages.
The InputTagHelper class transforms input elements, generating form content from model properties and their values.
The LabelTagHelper class transforms label elements, setting their content from model property names.
The TextAreaTagHelper transforms textarea elements.
The AutoValidateAntiforgeryToken and IgnoreAntiforgeryToken attributes are used to control the anti-cross site request forgery feature.
This chapter covers
Model binding is the process of creating .NET objects using the values from the HTTP request to provide easy access to the data required by action methods and Razor Pages. In this chapter, I describe the way the model binding system works; show how it binds simple types, complex types, and collections; and demonstrate how you can take control of the process to specify which part of the request provides the data values your application requires. Table 28.1 puts model binding in context.
Table 28.1 Putting model binding in context
|
Question |
Answer |
|---|---|
|
What is it? |
Model binding is the process of creating the objects that action methods and page handlers require using data values obtained from the HTTP request. |
|
Why is it useful? |
Model binding lets controllers or page handlers declare method parameters or properties using C# types and automatically receive data from the request without having to inspect, parse, and process the data directly. |
|
How is it used? |
In its simplest form, methods declare parameters, or classes define properties whose names are used to retrieve data values from the HTTP request. The part of the request used to obtain the data can be configured by applying attributes to the method parameters or properties. |
|
Are there any pitfalls or limitations? |
The main pitfall is getting data from the wrong part of the request. I explain the way that requests are searched for data in the “Understanding Model Binding” section, and the search locations can be specified explicitly using the attributes that I describe in the “Specifying a Model Binding Source” section. |
|
Are there any alternatives? |
Data can be obtained without model binding using context objects. However, the result is more complicated code that is hard to read and maintain. |
Table 28.2 provides a guide to the chapter.
Table 28.2 Chapter guide
|
Problem |
Solution |
Listing |
|---|---|---|
|
Binding simple types |
Define method parameters with primitive types. |
5–9 |
|
Binding complex types |
Define method parameters with class types. |
10 |
|
Binding to a property |
Use the |
11, 12 |
|
Binding nested types |
Ensure the form value types follow the dotted notation. |
13–18 |
|
Selecting properties for binding |
Use the |
19–21 |
|
Binding collections |
Follow the sequence binding conventions. |
22–27 |
|
Specifying the source for binding |
Use one of the source attributes. |
28–33 |
|
Manually performing binding |
Use the |
34 |
This chapter uses the WebApp project from chapter 27. To prepare for this chapter, replace the contents of the Form.cshtml file in the Views/Form folder with the content shown in listing 28.1.
Listing 28.1 The contents of the Form.cshtml file in the Views/Form folder
@model Product
@{ Layout = "_SimpleLayout"; }
<h5 class="bg-primary text-white text-center p-2">HTML Form</h5>
<form asp-action="submitform" method="post" id="htmlform">
<div class="form-group">
<label asp-for="Name"></label>
<input class="form-control" asp-for="Name" />
</div>
<div class="form-group">
<label asp-for="Price"></label>
<input class="form-control" asp-for="Price" />
</div>
<button type="submit" class="btn btn-primary mt-2">Submit</button>
</form>
Next, comment out the DisplayFormat attribute that has been applied to the Product model class, as shown in listing 28.2.
Listing 28.2 Removing an attribute in the Product.cs file in the Models folder
using System.ComponentModel.DataAnnotations;
using System.ComponentModel.DataAnnotations.Schema;
using System.Text.Json.Serialization;
namespace WebApp.Models {
public class Product {
public long ProductId { get; set; }
public required string Name { get; set; }
[Column(TypeName = "decimal(8, 2)")]
//[DisplayFormat(DataFormatString = "{0:c2}",
// ApplyFormatInEditMode = true)]
public decimal Price { get; set; }
public long CategoryId { get; set; }
public Category? Category { get; set; }
public long SupplierId { get; set; }
[JsonIgnore(Condition = JsonIgnoreCondition.WhenWritingNull)]
public Supplier? Supplier { get; set; }
}
}
Open a new PowerShell command prompt, navigate to the folder that contains the WebApp.csproj file, and run the command shown in listing 28.3 to drop the database.
Listing 28.3 Dropping the database
dotnet ef database drop --force
Use the PowerShell command prompt to run the command shown in listing 28.4.
Listing 28.4 Running the example application
dotnet run
Use a browser to request http://localhost:5000/controllers/form, which will display an HTML form. Click the Submit button, and the form data will be displayed, as shown in figure 28.1.
Figure 28.1 Running the example application
Model binding is an elegant bridge between the HTTP request and action or page handler methods. Most ASP.NET Core applications rely on model binding to some extent, including the example application for this chapter.
You can see model binding at work by using the browser to request http://localhost:5000/controllers/form/index/5. This URL contains the value of the ProductId property of the Product object that I want to view, like this:
http://localhost:5000/controllers/form/index/5
This part of the URL corresponds to the id segment variable defined by the controller routing pattern and matches the name of the parameter defined by the Form controller’s Index action:
...
public async Task<IActionResult> Index(long id = 1) {
...
A value for the id parameter is required before the MVC Framework can invoke the action method, and finding a suitable value is the responsibility of the model binding system. The model binding system relies on model binders, which are components responsible for providing data values from one part of the request or application. The default model binders look for data values in these four places:
Form data
The request body (only for controllers decorated with ApiController)
Routing segment variables
Query strings
Each source of data is inspected in order until a value for the argument is found. There is no form data in the example application, so no value will be found there, and the Form controller isn’t decorated with the ApiController attribute, so the request body won’t be checked. The next step is to check the routing data, which contains a segment variable named id. This allows the model binding system to provide a value that allows the Index action method to be invoked. The search stops after a suitable data value has been found, which means that the query string isn’t searched for a data value.
Knowing the order in which data values are sought is important because a request can contain multiple values, like this URL:
http://localhost:5000/controllers/Form/Index/5?id=1
The routing system will process the request and match the id segment in the URL template to the value 5, and the query string contains an id value of 1. Since the routing data is searched for data before the query string, the Index action method will receive the value 5, and the query string value will be ignored.
On the other hand, if you request a URL that doesn’t have an id segment, then the query string will be examined, which means that a URL like this one will also allow the model binding system to provide a value for the id argument so that it can invoke the Index method.
http://localhost:5000/controllers/Form/Index?id=4
You can see the effect of both these URLs in figure 28.2.
Figure 28.2 The effect of model binding data source order
Request data values must be converted into C# values so they can be used to invoke action or page handler methods. Simple types are values that originate from one item of data in the request that can be parsed from a string. This includes numeric values, bool values, dates, and, of course, string values.
Data binding for simple types makes it easy to extract single data items from the request without having to work through the context data to find out where it is defined. Listing 28.5 adds parameters to the SubmitForm action method defined by the SubmitForm action method so that the model binder will be used to provide name and price values.
Listing 28.5 Adding parameters in the FormController.cs file in the Controllers folder
using Microsoft.AspNetCore.Mvc;
using WebApp.Models;
using Microsoft.EntityFrameworkCore;
using Microsoft.AspNetCore.Mvc.Rendering;
namespace WebApp.Controllers {
[AutoValidateAntiforgeryToken]
public class FormController : Controller {
private DataContext context;
public FormController(DataContext dbContext) {
context = dbContext;
}
public async Task<IActionResult> Index(long id = 1) {
ViewBag.Categories = new SelectList(context.Categories,
"CategoryId", "Name");
return View("Form", await context.Products
.Include(p => p.Category)
.Include(p => p.Supplier)
.FirstAsync(p => p.ProductId == id)
?? new() { Name = string.Empty });
}
[HttpPost]
public IActionResult SubmitForm(string name, decimal price) {
TempData["name param"] = name;
TempData["price param"] = price.ToString();
return RedirectToAction(nameof(Results));
}
public IActionResult Results() {
return View();
}
}
}
The model binding system will be used to obtain name and price values when ASP.NET Core receives a request that will be processed by the SubmitForm action method. The use of parameters simplifies the action method and takes care of converting the request data into C# data types so that the price value will be converted to the C# decimal type before the action method is invoked. (I had to convert the decimal back to a string to store it as temp data in this example. I demonstrate more useful ways of dealing with form data in chapter 31.) Restart ASP.NET Core and use a browser to request http://localhost:5000/controllers/form. Click the Submit button, and you will see the values that were extracted from the request by the model binding feature, as shown in figure 28.3.
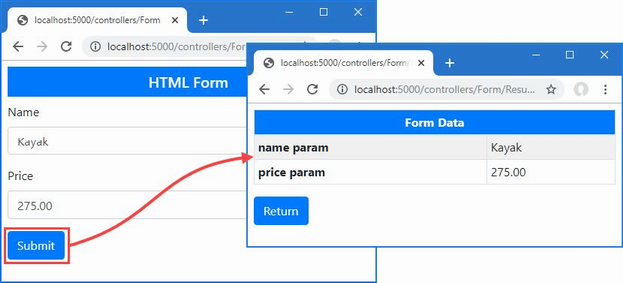
Figure 28.3 Model binding for simple types
Razor Pages can use model binding, but care must be taken to ensure that the value of the form element’s name attribute matches the name of the handler method parameter, which may not be the case if the asp-for attribute has been used to select a nested property. To ensure the names match, the name attribute can be defined explicitly, as shown in listing 28.6, which also simplifies the HTML form so that it matches the controller example.
Listing 28.6 Using model binding in the FormHandler.cshtml file in the Pages folder
@page "/pages/form/{id:long?}"
@model FormHandlerModel
@using Microsoft.AspNetCore.Mvc.RazorPages
@using Microsoft.EntityFrameworkCore
<div class="m-2">
<h5 class="bg-primary text-white text-center p-2">HTML Form</h5>
<form asp-page="FormHandler" method="post" id="htmlform">
<div class="form-group">
<label>Name</label>
<input class="form-control" asp-for="Product.Name"
name="name" />
</div>
<div class="form-group">
<label>Price</label>
<input class="form-control" asp-for="Product.Price"
name="price" />
</div>
<button type="submit" class="btn btn-primary mt-2">Submit</button>
</form>
</div>
@functions {
public class FormHandlerModel : PageModel {
private DataContext context;
public FormHandlerModel(DataContext dbContext) {
context = dbContext;
}
public Product Product { get; set; }
= new() { Name = string.Empty };
public async Task OnGetAsync(long id = 1) {
Product = await context.Products
.Include(p => p.Category)
.Include(p => p.Supplier)
.FirstAsync(p => p.ProductId == id);
}
public IActionResult OnPost(string name, decimal price) {
TempData["name param"] = name;
TempData["price param"] = price.ToString();
return RedirectToPage("FormResults");
}
}
}
The tag helper would have set the name attributes of the input elements to Product.Name and Product.Price, which prevents the model binder from matching the values. Explicitly setting the name attribute overrides the tag helper and ensures the model binding process works correctly. Restart ASP.NET Core, use a browser to request http://localhost:5000/pages/form, and click the Submit button, and you will see the values found by the model binder, as shown in figure 28.4.

Figure 28.4 Model binding in a Razor Page
Model binding is a best-effort feature, which means the model binder will try to get values for method parameters but will still invoke the method if data values cannot be located. You can see how this works by removing the default value for the id parameter in the Form controller’s Index action method, as shown in listing 28.7.
Listing 28.7 Removing a parameter value in the Controllers/FormController.cs file
...
public async Task<IActionResult> Index(long id) {
ViewBag.Categories = new SelectList(context.Categories,
"CategoryId", "Name");
return View("Form", await context.Products
.Include(p => p.Category)
.Include(p => p.Supplier)
.FirstAsync(p => p.ProductId == id)
?? new() { Name = string.Empty });
}
...
Restart ASP.NET Core and request http://localhost:5000/controllers/form. The URL doesn’t contain a value that the model binder can use for the id parameter, and there is no query string or form data, but the method is still invoked, producing the error shown in figure 28.5.
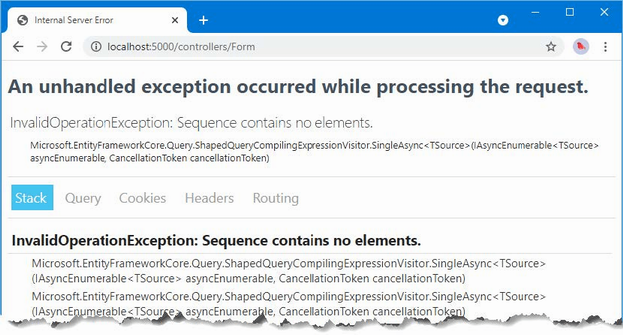
Figure 28.5 An error caused by a missing data value
This exception isn’t reported by the model binding system. Instead, it occurred when the Entity Framework Core query was executed. The MVC Framework must provide some value for the id argument to invoke the Index action method, so it uses a default value and hopes for the best. For long arguments, the default value is 0, and this is what leads to the exception. The Index action method uses the id value as the key to query the database for a Product object, like this:
...
public async Task<IActionResult> Index(long id) {
ViewBag.Categories = new SelectList(context.Categories,
"CategoryId", "Name");
return View("Form", await context.Products
.Include(p => p.Category)
.Include(p => p.Supplier)
.FirstAsync(p => p.ProductId == id)
?? new() { Name = string.Empty });
}
...
When there is no value available for model binding, the action method tries to query the database with an id of zero. There is no such object, which causes the error shown in the figure when Entity Framework Core tries to process the result.
Applications must be written to cope with default argument values, which can be done in several ways. You can add fallback values to the routing URL patterns used by controllers (as shown in chapter 21) or pages (as shown in chapter 23). You can assign default values when defining the parameter in the action or page handler method, which is the approach that I have taken so far in this part of the book. Or you can simply write methods that accommodate the default values without causing an error, as shown in listing 28.8.
Listing 28.8 Avoiding a query error in the FormController.cs file in the Controllers folder
...
public async Task<IActionResult> Index(long id) {
ViewBag.Categories = new SelectList(context.Categories,
"CategoryId", "Name");
return View("Form", await context.Products
.Include(p => p.Category)
.Include(p => p.Supplier)
.FirstOrDefaultAsync(p => p.ProductId == id)
?? new() { Name = string.Empty });
}
...
The Entity Framework Core FirstOrDefaultAsync method will return null if there is no matching object in the database and won’t attempt to load related data. The tag helpers cope with null values and display empty fields, which you can see by restarting ASP.NET Core and requesting http://localhost:5000/controllers/form, which produces the result shown in figure 28.6.
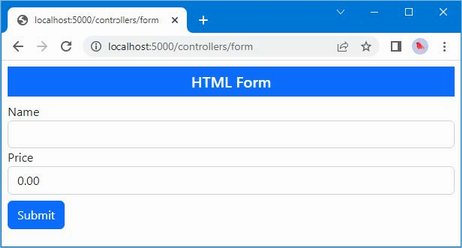
Figure 28.6 Avoiding an error
Some applications need to differentiate between a missing value and any value provided by the user. In these situations, a nullable parameter type can be used, as shown in listing 28.9.
Listing 28.9. A nullable parameter in the FormController.cs file in the Controllers folder
...
public async Task<IActionResult> Index(long? id) {
ViewBag.Categories = new SelectList(context.Categories,
"CategoryId", "Name");
return View("Form", await context.Products.Include(p => p.Category)
.Include(p => p.Supplier)
.FirstOrDefaultAsync(p => id == null || p.ProductId == id));
}
...
The id parameter will be null only if the request doesn’t contain a suitable value, which allows the expression passed to the FirstOrDefaultAsync method to default to the first object in the database when there is no value and to query for any other value. To see the effect, restart ASP.NET Core and request http://localhost:5000/controllers/form and http://localhost:5000/controllers/form/index/0. The first URL contains no id value, so the first object in the database is selected. The second URL provides an id value of zero, which doesn’t correspond to any object in the database. Figure 28.7 shows both results.
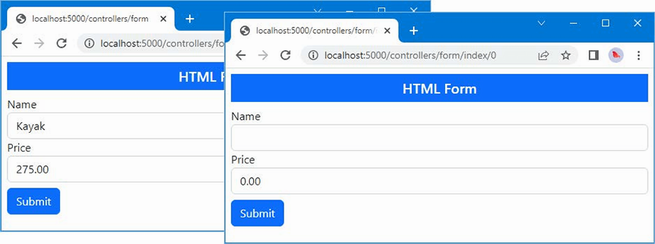
Figure 28.7 Using a nullable type to determine whether a request contains a value
The model binding system shines when dealing with complex types, which are any type that cannot be parsed from a single string value. The model binding process inspects the complex type and performs the binding process on each of the public properties it defines. This means that instead of dealing with individual values such as name and price, I can use the binder to create complete Product objects, as shown in listing 28.10.
Listing 28.10 Binding a complex type in the Controllers/FormController.cs file
using Microsoft.AspNetCore.Mvc;
using WebApp.Models;
using Microsoft.EntityFrameworkCore;
using Microsoft.AspNetCore.Mvc.Rendering;
using System.Text.Json;
namespace WebApp.Controllers {
[AutoValidateAntiforgeryToken]
public class FormController : Controller {
private DataContext context;
public FormController(DataContext dbContext) {
context = dbContext;
}
public async Task<IActionResult> Index(long? id) {
ViewBag.Categories = new SelectList(context.Categories,
"CategoryId", "Name");
return View("Form", await context.Products
.Include(p => p.Category)
.Include(p => p.Supplier)
.FirstOrDefaultAsync(p => id == null || p.ProductId == id)
?? new() { Name = string.Empty });
}
[HttpPost]
public IActionResult SubmitForm(Product product) {
TempData["product"] = JsonSerializer.Serialize(product);
return RedirectToAction(nameof(Results));
}
public IActionResult Results() {
return View();
}
}
}
The listing changes the SubmitForm action method so that it defines a Product parameter. Before the action method is invoked, a new Product object is created, and the model binding process is applied to each of its public properties. The SubmitForm method is then invoked, using the Product object as its argument.
To see the model binding process, restart ASP.NET Core, navigate to http://localhost:5000/controllers/form, and click the Submit button. The model binding process will extract the data values from the request and produce the result shown in figure 28.8. The Product object created by the model binding process is serialized as JSON data so that it can be stored as temp data, making it easy to see the request data.
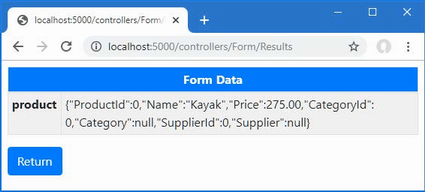
Figure 28.8 Data binding a complex type
The data binding process for complex types remains a best-effort feature, meaning that a value will be sought for each public property defined by the Product class, but missing values won’t prevent the action method from being invoked. Instead, properties for which no value can be located will be left as the default value for the property type. The example provided values for the Name and Price properties, but the ProductId, CategoryId, and SupplierId properties are zero, and the Category and Supplier properties are null.
Using parameters for model binding doesn’t fit with the Razor Pages development style because the parameters often duplicate properties defined by the page model class, as shown in listing 28.11.
Listing 28.11 Binding a complex type in the FormHandler.cshtml file in the Pages folder
...
@functions {
public class FormHandlerModel : PageModel {
private DataContext context;
public FormHandlerModel(DataContext dbContext) {
context = dbContext;
}
public Product Product { get; set; }
= new() { Name = string.Empty };
public async Task OnGetAsync(long id = 1) {
Product = await context.Products
.Include(p => p.Category)
.Include(p => p.Supplier)
.FirstAsync(p => p.ProductId == id);
}
public IActionResult OnPost(Product product) {
TempData["product"] =
System.Text.Json.JsonSerializer.Serialize(product);
return RedirectToPage("FormResults");
}
}
}
...
This code works, but the OnPost handler method has its own version of the Product object, mirroring the property used by the OnGetAsync handler. A more elegant approach is to use the existing property for model binding, as shown in listing 28.12.
Listing 28.12 Using a property for model binding in the Pages/FormHandler.cshtml file
@page "/pages/form/{id:long?}"
@model FormHandlerModel
@using Microsoft.AspNetCore.Mvc.RazorPages
@using Microsoft.EntityFrameworkCore
<div class="m-2">
<h5 class="bg-primary text-white text-center p-2">HTML Form</h5>
<form asp-page="FormHandler" method="post" id="htmlform">
<div class="form-group">
<label>Name</label>
<input class="form-control" asp-for="Product.Name" />
</div>
<div class="form-group">
<label>Price</label>
<input class="form-control" asp-for="Product.Price" />
</div>
<button type="submit" class="btn btn-primary mt-2">Submit</button>
</form>
</div>
@functions {
public class FormHandlerModel : PageModel {
private DataContext context;
public FormHandlerModel(DataContext dbContext) {
context = dbContext;
}
[BindProperty]
public Product Product { get; set; }
= new() { Name = string.Empty };
public async Task OnGetAsync(long id = 1) {
Product = await context.Products
.Include(p => p.Category)
.Include(p => p.Supplier)
.FirstAsync(p => p.ProductId == id);
}
public IActionResult OnPost() {
TempData["product"] =
System.Text.Json.JsonSerializer.Serialize(Product);
return RedirectToPage("FormResults");
}
}
}
Decorating a property with the BindProperty attribute indicates that its properties should be subject to the model binding process, which means the OnPost handler method can get the data it requires without declaring a parameter. When the BindProperty attribute is used, the model binder uses the property name when locating data values, so the explicit name attributes added to the input element are not required. By default, BindProperty won’t bind data for GET requests, but this can be changed by setting the BindProperty attribute’s SupportsGet argument to true.
If a property that is subject to model binding is defined using a complex type, then the model binding process is repeated using the property name as a prefix. For example, the Product class defines the Category property, whose type is the complex Category type. Listing 28.13 adds elements to the HTML form to provide the model binder with values for the properties defined by the Category class.
Listing 28.13 Nested form elements in the Form.cshtml file in the Views/Form folder
@model Product
@{ Layout = "_SimpleLayout"; }
<h5 class="bg-primary text-white text-center p-2">HTML Form</h5>
<form asp-action="submitform" method="post" id="htmlform">
<div class="form-group">
<label asp-for="Name"></label>
<input class="form-control" asp-for="Name" />
</div>
<div class="form-group">
<label asp-for="Price"></label>
<input class="form-control" asp-for="Price" />
</div>
<div class="form-group">
<label>Category Name</label>
@{ #pragma warning disable CS8602 }
<input class="form-control" name="Category.Name"
value="@Model.Category.Name" />
@{ #pragma warning restore CS8602 }
</div>
<button type="submit" class="btn btn-primary mt-2">Submit</button>
</form>
The name attribute combines the property names, separated by periods. In this case, the element is for the Name property of the object assigned to the view model’s Category property, so the name attribute is set to Category.Name. The input element tag helper will automatically use this format for the name attribute when the asp-for attribute is applied, as shown in listing 28.14.
Listing 28.14 Using a tag helper in the Form.cshtml file in the Views/Form folder
@model Product
@{ Layout = "_SimpleLayout"; }
<h5 class="bg-primary text-white text-center p-2">HTML Form</h5>
<form asp-action="submitform" method="post" id="htmlform">
<div class="form-group">
<label asp-for="Name"></label>
<input class="form-control" asp-for="Name" />
</div>
<div class="form-group">
<label asp-for="Price"></label>
<input class="form-control" asp-for="Price" />
</div>
<div class="form-group">
<label>Category Name</label>
@{ #pragma warning disable CS8602 }
<input class="form-control" asp-for="Category.Name" />
@{ #pragma warning restore CS8602 }
</div>
<button type="submit" class="btn btn-primary mt-2">Submit</button>
</form>
The tag helper is a more reliable method of creating elements for nested properties and avoids the risk of typos producing elements that are ignored by the model binding process. To see the effect of the new elements, request http://localhost:5000/controllers/form and click the Submit button, which will produce the response shown in figure 28.9.
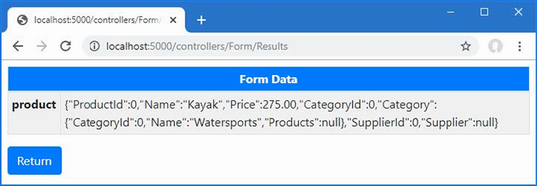
Figure 28.9 Model binding a nested property
During the model binding process, a new Category object is created and assigned to the Category property of the Product object. The model binder locates the value for the Category object’s Name property, which can be seen in the figure, but there is no value for the CategoryId property, which is left as the default value.
Specifying Custom Prefixes for Nested Complex Types
There are occasions when the HTML you generate relates to one type of object but you want to bind it to another. This means that the prefixes containing the view won’t correspond to the structure that the model binder is expecting, and your data won’t be properly processed. Listing 28.15 demonstrates this problem by changing the type of the parameter defined by the controller’s SubmitForm action method.
Listing 28.15 Changing a parameter in the Controllers/FormController.cs file
...
[HttpPost]
public IActionResult SubmitForm(Category category) {
TempData["category"] = JsonSerializer.Serialize(category);
return RedirectToAction(nameof(Results));
}
...
The new parameter is a Category, which means that the model binder will look for form data using the category prefix. This process fails if the form data doesn’t conform to that naming convention. To demonstrate, listing 28.16 overrides the name attribute input element that provides the category name.
Listing 28.16 Setting the name in the Form.cshtml file in the Views/Forms folder
...
@{ #pragma warning disable CS8602 }
<input class="form-control" asp-for="Category.Name" name="cat.name" />
@{ #pragma warning restore CS8602 }
...
This change creates a mismatch between the structure of the form data that is received by the application and the property names used by the model binder. The model binding process isn’t able to identify the modified input element. Instead, the model binder will find the Name value for the Product object and use that instead, which you can see by restarting ASP.NET Core, requesting http://localhost:5000/controllers/form, and submitting the form data, which will produce the first response shown in figure 28.10.
This problem is solved by applying the Bind attribute to the parameter and using the Prefix argument to specify a prefix for the model binder, as shown in listing 28.17.
Listing 28.17 Setting a prefix in the FormController.cs file in the Controllers folder
...
[HttpPost]
public IActionResult SubmitForm([Bind(Prefix ="cat")]Category category) {
TempData["category"] = JsonSerializer.Serialize(category);
return RedirectToAction(nameof(Results));
}
...
The syntax is awkward, but the attribute ensures the model binder can locate the data the action method requires. In this case, setting the prefix to cat ensures the correct data values are used to bind the Category parameter. Restart ASP.NET Core, request http://localhost:5000/controllers/form, and submit the form, which produces the second response shown in figure 28.10.
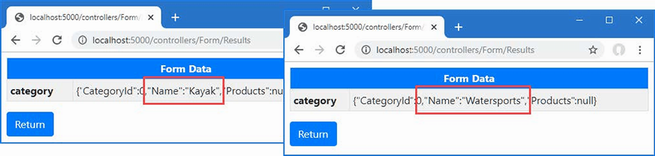
Figure 28.10 Specifying a model binding prefix
When using the BindProperty attribute, the prefix is specified using the Name argument, as shown in listing 28.18.
Listing 28.18 Specifying a model binding prefix in the Pages/FormHandler.cshtml file
@page "/pages/form/{id:long?}"
@model FormHandlerModel
@using Microsoft.AspNetCore.Mvc.RazorPages
@using Microsoft.EntityFrameworkCore
<div class="m-2">
<h5 class="bg-primary text-white text-center p-2">HTML Form</h5>
<form asp-page="FormHandler" method="post" id="htmlform">
<div class="form-group">
<label>Name</label>
<input class="form-control" asp-for="Product.Name" />
</div>
<div class="form-group">
<label>Price</label>
<input class="form-control" asp-for="Product.Price" />
</div>
<div class="form-group">
<label>Category Name</label>
@{ #pragma warning disable CS8602 }
<input class="form-control" asp-for="Product.Category.Name" />
@{ #pragma warning restore CS8602 }
</div>
<button type="submit" class="btn btn-primary mt-2">Submit</button>
</form>
</div>
@functions {
public class FormHandlerModel : PageModel {
private DataContext context;
public FormHandlerModel(DataContext dbContext) {
context = dbContext;
}
[BindProperty]
public Product Product { get; set; }
= new() { Name = string.Empty };
[BindProperty(Name = "Product.Category")]
public Category Category { get; set; }
= new() { Name = string.Empty };
public async Task OnGetAsync(long id = 1) {
Product = await context.Products
.Include(p => p.Category)
.Include(p => p.Supplier)
.FirstAsync(p => p.ProductId == id);
}
public IActionResult OnPost() {
TempData["product"] =
System.Text.Json.JsonSerializer.Serialize(Product);
TempData["category"] =
System.Text.Json.JsonSerializer.Serialize(Category);
return RedirectToPage("FormResults");
}
}
}
This listing adds an input element that uses the asp-for attribute to select the Product.Category property. A page handler class defined a Category property that is decorated with the BindProperty attribute and configured with the Name argument. To see the result of the model binding process, restart ASP.NET Core, use a browser to request http://localhost:5000/pages/form, and click the Submit button. The model binding finds values for both the decorated properties, which produces the response shown in figure 28.11.
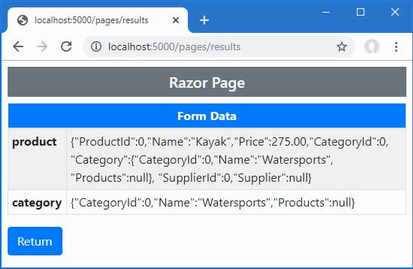
Figure 28.11 Specifying a model binding prefix in a Razor Page
Some model classes define properties that are sensitive and for which the user should not be able to specify values. A user may be able to change the category for a Product object, for example, but should not be able to alter the price.
You might be tempted to simply create views that omit HTML elements for sensitive properties but that won’t prevent malicious users from crafting HTTP requests that contain values anyway, which is known as an over-binding attack. To prevent the model binder from using values for sensitive properties, the list of properties that should be bound can be specified, as shown in listing 28.19.
Listing 28.19 Selectively binding properties in the Controllers/FormController.cs file
using Microsoft.AspNetCore.Mvc;
using WebApp.Models;
using Microsoft.EntityFrameworkCore;
using Microsoft.AspNetCore.Mvc.Rendering;
using System.Text.Json;
namespace WebApp.Controllers {
[AutoValidateAntiforgeryToken]
public class FormController : Controller {
private DataContext context;
public FormController(DataContext dbContext) {
context = dbContext;
}
public async Task<IActionResult> Index(long? id) {
ViewBag.Categories = new SelectList(context.Categories,
"CategoryId", "Name");
return View("Form", await context.Products
.Include(p => p.Category)
.Include(p => p.Supplier)
.FirstOrDefaultAsync(p => id == null || p.ProductId == id)
?? new() { Name = string.Empty });
}
[HttpPost]
public IActionResult SubmitForm([Bind("Name", "Category")]
Product product) {
TempData["name"] = product.Name;
TempData["price"] = product.Price.ToString();
TempData["category name"] = product.Category?.Name;
return RedirectToAction(nameof(Results));
}
public IActionResult Results() {
return View();
}
}
}
I have returned to the Product type for the action method parameter, which has been decorated with the Bind attribute to specify the names of the properties that should be included in the model binding process. This example tells the model binding feature to look for values for the Name and Category properties, which excludes any other property from the process.
Listing 28.20 removes the custom name attribute I added earlier so that the model binder can find the values it needs using the standard naming conventions.
Listing 28.20 Removing an attribute in the Form.cshtml file in the Views/Forms folder
...
@{ #pragma warning disable CS8602 }
<input class="form-control" asp-for="Category.Name" />
@{ #pragma warning restore CS8602 }
...
Restart ASP.NET Core, navigate to http://localhost:5000/controllers/form, and submit the form. Even though the browser sends a value for the Price property as part of the HTTP POST request, it is ignored by the model binder, as shown in figure 28.12.
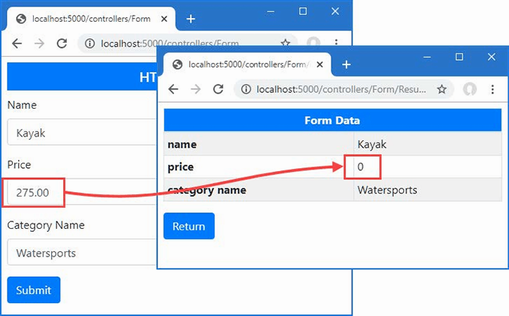
Figure 28.12 Selectively binding properties
Selectively binding in the model class
If you are using Razor Pages or you want to use the same set of properties for model binding throughout the application, you can apply the BindNever attribute directly to the model class, as shown in listing 28.21.
Listing 28.21 Decorating a property in the Product.cs file in the Models folder
using System.ComponentModel.DataAnnotations;
using System.ComponentModel.DataAnnotations.Schema;
using System.Text.Json.Serialization;
using Microsoft.AspNetCore.Mvc.ModelBinding;
namespace WebApp.Models {
public class Product {
public long ProductId { get; set; }
public required string Name { get; set; }
[Column(TypeName = "decimal(8, 2)")]
[BindNever]
public decimal Price { get; set; }
public long CategoryId { get; set; }
public Category? Category { get; set; }
public long SupplierId { get; set; }
[JsonIgnore(Condition = JsonIgnoreCondition.WhenWritingNull)]
public Supplier? Supplier { get; set; }
}
}
The BindNever attribute excludes a property from the model binder, which has the same effect as omitting it from the list used in the previous section. To see the effect, restart ASP.NET Core so the change to the Product class takes effect, request http://localhost:5000/pages/form, and submit the form. Just as with the previous example, the model binder ignores the value for the Price property, as shown in figure 28.13.
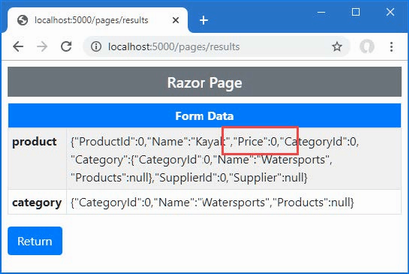
Figure 28.13 Excluding a property from model binding
The model binding process has some nice features for binding request data to arrays and collections, which I demonstrate in the following sections.
One elegant feature of the default model binder is how it supports arrays. To see how this feature works, add a Razor Page named Bindings.cshtml to the Pages folder with the content shown in listing 28.22.
Listing 28.22 The contents of the Bindings.cshtml file in the Pages folder
@page "/pages/bindings"
@model BindingsModel
@using Microsoft.AspNetCore.Mvc
@using Microsoft.AspNetCore.Mvc.RazorPages
<div class="container-fluid">
<div class="row">
<div class="col">
<form asp-page="Bindings" method="post">
<div class="form-group">
<label>Value #1</label>
<input class="form-control" name="Data"
value="Item 1" />
</div>
<div class="form-group">
<label>Value #2</label>
<input class="form-control" name="Data"
value="Item 2" />
</div>
<div class="form-group">
<label>Value #3</label>
<input class="form-control" name="Data"
value="Item 3" />
</div>
<button type="submit" class="btn btn-primary">
Submit
</button>
<a class="btn btn-secondary" asp-page="Bindings">Reset</a>
</form>
</div>
<div class="col">
<ul class="list-group">
@foreach (string s in Model.Data.Where(s => s != null)) {
<li class="list-group-item">@s</li>
}
</ul>
</div>
</div>
</div>
@functions {
public class BindingsModel : PageModel {
[BindProperty(Name = "Data")]
public string[] Data { get; set; } = Array.Empty<string>();
}
}
Model binding for an array requires setting the name attribute to the same value for all the elements that will provide an array value. This page displays three input elements, all of which have a name attribute value of Data. To allow the model binder to find the array values, I have decorated the page model’s Data property with the BindProperty attribute and used the Name argument.
When the HTML form is submitted, a new array is created and populated with the values from all three input elements, which are displayed to the user. To see the binding process, restart ASP.NET Core, request http://localhost:5000/pages/bindings, edit the form fields, and click the Submit button. The contents of the Data array are displayed in a list using an @foreach expression, as shown in figure 28.14.
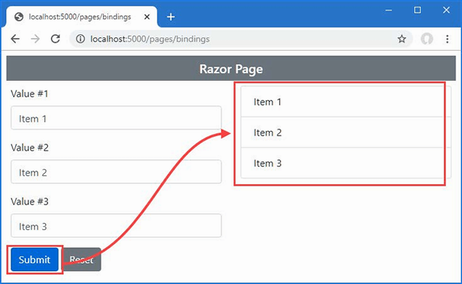
Figure 28.14 Model binding for array values
Notice that I filter out null values when displaying the array contents.
...
@foreach (string s in Model.Data.Where(s => s != null)) {
<li class="list-group-item">@s</li>
}
...
Empty form fields produce null values in the array, which I don’t want to show in the results. In chapter 29, I show you how to ensure that values are provided for model binding properties.
Specifying index positions for array values
By default, arrays are populated in the order in which the form values are received from the browser, which will generally be the order in which the HTML elements are defined. The name attribute can be used to specify the position of values in the array if you need to override the default, as shown in listing 28.23.
Listing 28.23 Specifying array position in the Bindings.cshtml file in the Pages folder
@page "/pages/bindings"
@model BindingsModel
@using Microsoft.AspNetCore.Mvc
@using Microsoft.AspNetCore.Mvc.RazorPages
<div class="container-fluid">
<div class="row">
<div class="col">
<form asp-page="Bindings" method="post">
<div class="form-group">
<label>Value #1</label>
<input class="form-control" name="Data[1]"
value="Item 1" />
</div>
<div class="form-group">
<label>Value #2</label>
<input class="form-control" name="Data[0]"
value="Item 2" />
</div>
<div class="form-group">
<label>Value #3</label>
<input class="form-control" name="Data[2]"
value="Item 3" />
</div>
<button type="submit" class="btn btn-primary">
Submit
</button>
<a class="btn btn-secondary" asp-page="Bindings">Reset</a>
</form>
</div>
<div class="col">
<ul class="list-group">
@foreach (string s in Model.Data.Where(s => s != null)) {
<li class="list-group-item">@s</li>
}
</ul>
</div>
</div>
</div>
@functions {
public class BindingsModel : PageModel {
[BindProperty(Name = "Data")]
public string[] Data { get; set; } = Array.Empty<string>();
}
}
The array index notation is used to specify the position of a value in the data-bound array. Restart ASP.NET Core, use a browser to request http://localhost:5000/pages/bindings, and submit the form; you will see the items appear in the order dictated by the name attributes, as shown in figure 28.15. The index notation must be applied to all the HTML elements that provide array values, and there must not be any gaps in the numbering sequence.

Figure 28.15 Specifying array position
The model binding process can create collections as well as arrays. For sequence collections, such as lists and sets, only the type of the property or parameter that is used by the model binder is changed, as shown in listing 28.24.
Listing 28.24 Binding to a list in the Bindings.cshtml file in the Pages folder
...
@functions {
public class BindingsModel : PageModel {
[BindProperty(Name = "Data")]
public SortedSet<string> Data { get; set; }
= new SortedSet<string>();
}
}
...
I changed the type of the Data property to SortedSet<string>. The model binding process will populate the set with the values from the input elements, which will be sorted alphabetically. I have left the index notation on the input element name attributes, but they have no effect since the collection class will sort its values alphabetically. To see the effect, restart ASP.NET Core, use a browser to request http://localhost:5000/pages/bindings, edit the text fields, and click the Submit button. The model binding process will populate the sorted set with the form values, which will be presented in order, as shown in figure 28.16.
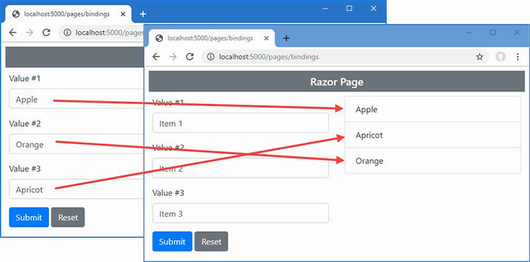
Figure 28.16 Model binding to a collection
For elements whose name attribute is expressed using the index notation, the model binder will use the index as the key when binding to a Dictionary, allowing a series of elements to be transformed into key-value pairs, as shown in listing 28.25.
Listing 28.25 Binding to a dictionary in the Bindings.cshtml file in the Pages folder
@page "/pages/bindings"
@model BindingsModel
@using Microsoft.AspNetCore.Mvc
@using Microsoft.AspNetCore.Mvc.RazorPages
<div class="container-fluid">
<div class="row">
<div class="col">
<form asp-page="Bindings" method="post">
<div class="form-group">
<label>Value #1</label>
<input class="form-control" name="Data[first]"
value="Item 1" />
</div>
<div class="form-group">
<label>Value #2</label>
<input class="form-control" name="Data[second]"
value="Item 2" />
</div>
<div class="form-group">
<label>Value #3</label>
<input class="form-control" name="Data[third]"
value="Item 3" />
</div>
<button type="submit" class="btn btn-primary">
Submit
</button>
<a class="btn btn-secondary" asp-page="Bindings">Reset</a>
</form>
</div>
<div class="col">
<table class="table table-sm table-striped">
<tbody>
@foreach (string key in Model.Data.Keys) {
<tr>
<th>@key</th>
<td>@Model.Data[key]</td>
</tr>
}
</tbody>
</table>
</div>
</div>
</div>
@functions {
public class BindingsModel : PageModel {
[BindProperty(Name = "Data")]
public Dictionary<string, string> Data { get; set; }
= new Dictionary<string, string>();
}
}
All elements that provide values for the collection must share a common prefix, which is Data in this example, followed by the key value in square brackets. The keys for this example are the strings first, second, and third, and they will be used as the keys for the content the user provides in the text fields. To see the binding process, restart ASP.NET Core, request http://localhost:5000/pages/bindings, edit the text fields, and submit the form. The keys and values from the form data will be displayed in a table, as shown in figure 28.17.
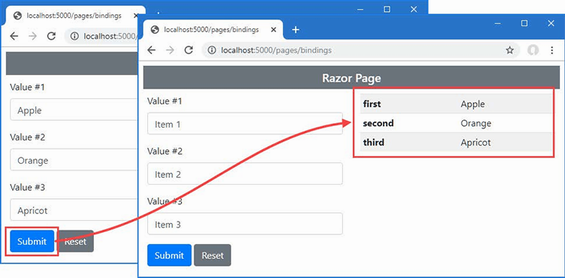
Figure 28.17 Model binding to a dictionary
The examples in this section have all been collections of simple types, but the same process can be used for complex types, too. To demonstrate, listing 28.26 revises the Razor Page to gather details used to bind to an array of Product objects.
Listing 28.26 Binding to complex types in the Bindings.cshtml file in the Pages folder
@page "/pages/bindings"
@model BindingsModel
@using Microsoft.AspNetCore.Mvc
@using Microsoft.AspNetCore.Mvc.RazorPages
<div class="container-fluid">
<div class="row">
<div class="col">
<form asp-page="Bindings" method="post">
@for (int i = 0; i < 2; i++) {
<div class="form-group">
<label>Name #@i</label>
<input class="form-control" name="Data[@i].Name"
value="Product-@i" />
</div>
<div class="form-group">
<label>Price #@i</label>
<input class="form-control" name="Data[@i].Price"
value="@(100 + i)" />
</div>
}
<button type="submit" class="btn btn-primary">
Submit
</button>
<a class="btn btn-secondary" asp-page="Bindings">Reset</a>
</form>
</div>
<div class="col">
<table class="table table-sm table-striped">
<tbody>
<tr><th>Name</th><th>Price</th></tr>
@foreach (Product p in Model.Data) {
<tr>
<td>@p.Name</td>
<td>@p.Price</td>
</tr>
}
</tbody>
</table>
</div>
</div>
</div>
@functions {
public class BindingsModel : PageModel {
[BindProperty(Name = "Data")]
public Product[] Data { get; set; } = Array.Empty<Product>();
}
}
The name attributes for the input elements use the array notation, followed by a period, followed by the name of the complex type properties they represent. To define elements for the Name and Price properties, this requires elements like this:
... <input class="form-control" name="Data[0].Name" /> ... <input class="form-control" name="Data[0].Price" /> ...
During the binding process, the model binder will attempt to locate values for all the public properties defined by the target type, repeating the process for each set of values in the form data.
This example relies on model binding for the Price property defined by the Product class, which was excluded from the binding process with the BindNever attribute. Remove the attribute from the property, as shown in listing 28.27.
Listing 28.27 Removing an attribute in the Product.cs file in the Models folder
using System.ComponentModel.DataAnnotations;
using System.ComponentModel.DataAnnotations.Schema;
using System.Text.Json.Serialization;
using Microsoft.AspNetCore.Mvc.ModelBinding;
namespace WebApp.Models {
public class Product {
public long ProductId { get; set; }
public required string Name { get; set; }
[Column(TypeName = "decimal(8, 2)")]
//[BindNever]
public decimal Price { get; set; }
public long CategoryId { get; set; }
public Category? Category { get; set; }
public long SupplierId { get; set; }
[JsonIgnore(Condition = JsonIgnoreCondition.WhenWritingNull)]
public Supplier? Supplier { get; set; }
}
}
Restart ASP.NET Core and use a browser to request http://localhost:5000/pages/bindings. Enter names and prices into the text fields and submit the form, and you will see the details of the Product objects created from the data displayed in a table, as shown in figure 28.18.
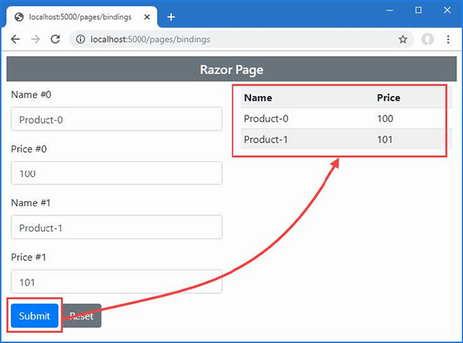
Figure 28.18 Binding to a collection of complex types
As I explained at the start of the chapter, the default model binding process looks for data in four places: the form data values, the request body (for web service controllers only), the routing data, and the request query string.
The default search sequence isn’t always helpful, either because you always want data to come from a specific part of the request or because you want to use a data source that isn’t searched by default. The model binding feature includes a set of attributes used to override the default search behavior, as described in table 28.3.
Table 28.3 The model binding source attributes
|
Name |
Description |
|---|---|
|
|
This attribute is used to select form data as the source of binding data. The name of the parameter is used to locate a form value by default, but this can be changed using the |
|
|
This attribute is used to select the routing system as the source of binding data. The name of the parameter is used to locate a route data value by default, but this can be changed using the |
|
|
This attribute is used to select the query string as the source of binding data. The name of the parameter is used to locate a query string value by default, but this can be changed using the |
|
|
This attribute is used to select a request header as the source of binding data. The name of the parameter is used as the header name by default, but this can be changed using the |
|
|
This attribute is used to specify that the request body should be used as the source of binding data, which is required when you want to receive data from requests that are not form-encoded, such as in API controllers that provide web services. |
The FromForm, FromRoute, and FromQuery attributes allow you to specify that the model binding data will be obtained from one of the standard locations but without the normal search sequence. Earlier in the chapter, I used this URL:
http://localhost:5000/controllers/Form/Index/5?id=1
This URL contains two possible values that can be used for the id parameter of the Index action method on the Form controller. The routing system will assign the final segment of the URL to a variable called id, which is defined in the default URL pattern for controllers, and the query string also contains an id value. The default search pattern means that the model binding data will be taken from the route data and the query string will be ignored.
In listing 28.28, I have applied the FromQuery attribute to the id parameter defined by the Index action method, which overrides the default search sequence.
Listing 28.28 Selecting the query string in the Controllers/FormController.cs file
using Microsoft.AspNetCore.Mvc;
using WebApp.Models;
using Microsoft.EntityFrameworkCore;
using Microsoft.AspNetCore.Mvc.Rendering;
using System.Text.Json;
namespace WebApp.Controllers {
[AutoValidateAntiforgeryToken]
public class FormController : Controller {
private DataContext context;
public FormController(DataContext dbContext) {
context = dbContext;
}
public async Task<IActionResult> Index([FromQuery] long? id) {
ViewBag.Categories = new SelectList(context.Categories,
"CategoryId", "Name");
return View("Form", await context.Products
.Include(p => p.Category)
.Include(p => p.Supplier)
.FirstOrDefaultAsync(p => id == null || p.ProductId == id)
?? new() { Name = string.Empty });
}
[HttpPost]
public IActionResult SubmitForm([Bind("Name", "Category")]
Product product) {
TempData["name"] = product.Name;
TempData["price"] = product.Price.ToString();
TempData["category name"] = product.Category?.Name;
return RedirectToAction(nameof(Results));
}
public IActionResult Results() {
return View();
}
}
}
The attribute specifies the source for the model binding process, which you can see by restarting ASP.NET Core and using a browser to request http://localhost:5000/controllers/form/index/5?id=1. Instead of using the value that has been matched by the routing system, the query string will be used instead, producing the response shown in figure 28.19. No other location will be used if the query string doesn’t contain a suitable value for the model binding process.
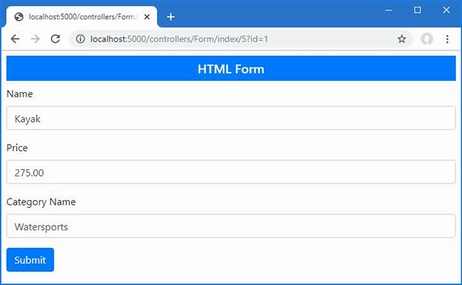
Figure 28.19 Specifying a model binding data source
The same attributes can be used to model bind properties defined by a page model or a controller, as shown in listing 28.29.
Listing 28.29 Selecting the query string in the Bindings.cshtml file in the Pages folder
...
@functions {
public class BindingsModel : PageModel {
//[BindProperty(Name = "Data")]
[FromQuery(Name = "Data")]
public Product[] Data { get; set; } = Array.Empty<Product>();
}
}
...
The use of the FromQuery attribute means the query string is used as the source of values for the model binder as it creates the Product array, which you can see by starting ASP.NET Core and requesting http://localhost:5000/pages/bindings?data[0].name=Skis&data[0].price=500, which produces the response shown in figure 28.20.
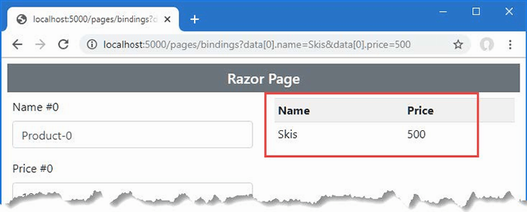
Figure 28.20 Specifying a model binding data source in a Razor Page
The FromHeader attribute allows HTTP request headers to be used as the source for binding data. In listing 28.30, I have added a simple action method to the Form controller that defines a parameter that will be model bound from a standard HTTP request header.
Listing 28.30 Model binding from a header in the Controllers/FormController.cs file
using Microsoft.AspNetCore.Mvc;
using WebApp.Models;
using Microsoft.EntityFrameworkCore;
using Microsoft.AspNetCore.Mvc.Rendering;
using System.Text.Json;
namespace WebApp.Controllers {
[AutoValidateAntiforgeryToken]
public class FormController : Controller {
private DataContext context;
public FormController(DataContext dbContext) {
context = dbContext;
}
// ...other actions omitted for brevity...
public string Header([FromHeader] string accept) {
return $"Header: {accept}";
}
}
}
The Header action method defines an accept parameter, the value for which will be taken from the Accept header in the current request and returned as the method result. Restart ASP.NET Core and request http://localhost:5000/controllers/form/header, and you will see a result like this:
Header: text/html,application/xhtml+xml,application/xml;q=0.9,image/webp, image/apng,*/*;q=0.8,application/signed-exchange;v=b3
Not all HTTP header names can be easily selected by relying on the name of the action method parameter because the model binding system doesn’t convert from C# naming conventions to those used by HTTP headers. In these situations, you must configure the FromHeader attribute using the Name property to specify the name of the header, as shown in listing 28.31.
Listing 28.31 Selecting a header by name in the Controllers/FormController.cs file
using Microsoft.AspNetCore.Mvc;
using WebApp.Models;
using Microsoft.EntityFrameworkCore;
using Microsoft.AspNetCore.Mvc.Rendering;
using System.Text.Json;
namespace WebApp.Controllers {
[AutoValidateAntiforgeryToken]
public class FormController : Controller {
private DataContext context;
public FormController(DataContext dbContext) {
context = dbContext;
}
// ...other actions omitted for brevity...
public string Header([FromHeader(Name = "Accept-Language")]
string accept) {
return $"Header: {accept}";
}
}
}
I can’t use Accept-Language as the name of a C# parameter, and the model binder won’t automatically convert a name like AcceptLanguage into Accept-Language so that it matches the header. Instead, I used the Name property to configure the attribute so that it matches the right header. If you restart ASP.NET Core and request http://localhost:5000/controllers/form/header, you will see a result like this, which will vary based on your locale settings:
Header: en-GB,en-US;q=0.9,en;q=0.8
Not all data sent by clients is sent as form data, such as when a JavaScript client sends JSON data to an API controller. The FromBody attribute specifies that the request body should be decoded and used as a source of model binding data. In listing 28.32, I have added a new action method to the Form controller with a parameter that is decorated with the FromBody attribute.
Listing 28.32 Adding an action method in the FormController.cs file in the Controllers folder
using Microsoft.AspNetCore.Mvc;
using WebApp.Models;
using Microsoft.EntityFrameworkCore;
using Microsoft.AspNetCore.Mvc.Rendering;
using System.Text.Json;
namespace WebApp.Controllers {
[AutoValidateAntiforgeryToken]
public class FormController : Controller {
private DataContext context;
public FormController(DataContext dbContext) {
context = dbContext;
}
// ...other actions omitted for brevity...
[HttpPost]
[IgnoreAntiforgeryToken]
public Product Body([FromBody] Product model) {
return model;
}
}
}
To test the model binding process, restart ASP.NET Core, open a new PowerShell command prompt, and run the command in listing 28.33 to send a request to the application.
Listing 28.33 Sending a request
Invoke-RestMethod http://localhost:5000/controllers/form/body -Method POST ➥-Body (@{ Name="Soccer Boots"; Price=89.99} | ConvertTo-Json) ➥-ContentType "application/json"
The JSON-encoded request body is used to model bind the action method parameter, which produces the following response:
productId : 0 name : Soccer Boots price : 89.99 categoryId : 0 category : supplierId : 0 supplier :
Model binding is applied automatically when you define a parameter for an action or handler method or apply the BindProperty attribute. Automatic model binding works well if you can consistently follow the name conventions and you always want the process to be applied. If you need to take control of the binding process or you want to perform binding selectively, then you can perform model binding manually, as shown in listing 28.34.
Listing 28.34 Manually binding in the Bindings.cshtml file in the Pages folder
@page "/pages/bindings"
@model BindingsModel
@using Microsoft.AspNetCore.Mvc
@using Microsoft.AspNetCore.Mvc.RazorPages
<div class="container-fluid">
<div class="row">
<div class="col">
<form asp-page="Bindings" method="post">
<div class="form-group">
<label>Name</label>
<input class="form-control" asp-for="Data.Name" />
</div>
<div class="form-group">
<label>Price</label>
<input class="form-control" asp-for="Data.Price"
value="@(Model.Data.Price + 1)" />
</div>
<div class="form-check m-2">
<input class="form-check-input" type="checkbox"
name="bind" value="true" checked />
<label class="form-check-label">Model Bind?</label>
</div>
<button type="submit" class="btn btn-primary">
Submit
</button>
<a class="btn btn-secondary" asp-page="Bindings">Reset</a>
</form>
</div>
<div class="col">
<table class="table table-sm table-striped">
<tbody>
<tr><th>Name</th><th>Price</th></tr>
<tr>
<td>@Model.Data.Name</td>
<td>@Model.Data.Price</td>
</tr>
</tbody>
</table>
</div>
</div>
</div>
@functions {
public class BindingsModel : PageModel {
public Product Data { get; set; }
= new Product() { Name = "Skis", Price = 500 };
public async Task OnPostAsync([FromForm] bool bind) {
if (bind) {
await TryUpdateModelAsync<Product>(Data,
"data", p => p.Name, p => p.Price);
}
}
}
}
Manual model binding is performed using the TryUpdateModelAsync method, which is provided by the PageModel and ControllerBase classes, which means it is available for both Razor Pages and MVC controllers.
This example mixes automatic and manual model binding. The OnPostAsync method uses automatic model binding to receive a value for its bind parameter, which has been decorated with the FromForm attribute. If the value of the parameter is true, the TryUpdateModelAsync method is used to apply model binding. The arguments to the TryUpdateModelAsync method are the object that will be model bound, the prefix for the values, and a series of expressions that select the properties that will be included in the process, although there are other versions of the TryUpdateModelAsync method available.
The result is that the model binding process for the Data property is performed only when the user checks the checkbox added to the form in listing 28.34. If the checkbox is unchecked, then no model binding occurs, and the form data is ignored. To make it obvious when model binding is used, the value of the Price property is incremented when the form is rendered. To see the effect, restart ASP.NET Core, request http://localhost:5000/pages/bindings, and submit the form with the checkbox checked and then unchecked, as shown in figure 28.21.
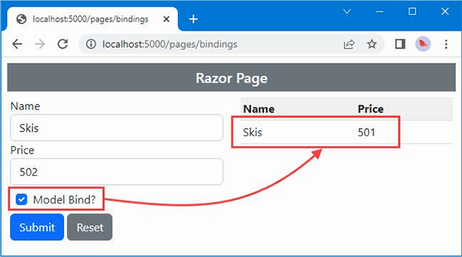
Figure 28.21 Using manual model binding
Model binding is the process by which request data is converted into parameters for action methods or page-handler methods.
The model binder is integrated into ASP.NET Core and follows well-defined conventions to bind to simple and complex data types.
ASP.NET Core provides attributes for fine-tuning the model binding process when the request data doesn’t match the expected conventions.
The model-binding process can read values from form data, the current route, the query string, the request header, and request body.
Model binding is performed automatically but can be performed manually, which provides precise control over the binding process.
This chapter covers
In the previous chapter, I showed you how the model binding process creates objects from HTTP requests. Throughout that chapter, I simply displayed the data that the application received. That’s because the data that users provide should not be used until it has been inspected to ensure that the application is able to use it. The reality is that users will often enter data that isn’t valid and cannot be used, which leads me to the topic of this chapter: model validation.
Model validation is the process of ensuring the data received by the application is suitable for binding to the model and, when this is not the case, providing useful information to the user that will help explain the problem.
The first part of the process, checking the data received, is one of the most important ways to preserve the integrity of an application’s data. Rejecting data that cannot be used can prevent odd and unwanted states from arising in the application. The second part of the validation process is helping the user correct the problem and is equally important. Without the feedback needed to correct the problem, users become frustrated and confused. In public-facing applications, this means users will simply stop using the application. In corporate applications, this means the user’s workflow will be hindered. Neither outcome is desirable, but fortunately, ASP.NET Core provides extensive support for model validation. Table 29.1 puts model validation in context.
Table 29.1 Putting model validation in context
|
Question |
Answer |
|---|---|
|
What is it? |
Model validation is the process of ensuring that the data provided in a request is valid for use in the application. |
|
Why is it useful? |
Users do not always enter valid data, and using unvalidated data can produce unexpected and undesirable errors. |
|
How is it used? |
Controllers and Razor Pages check the outcome of the validation process, and tag helpers are used to include validation feedback in views displayed to the user. Validation can be performed automatically during the model binding process and can be supplemented with custom validation. |
|
Are there any pitfalls or limitations? |
It is important to test the efficacy of your validation code to ensure that it covers the full range of values that the application can receive. |
|
Are there any alternatives? |
Model validation is optional, but it is a good idea to use it whenever using model binding. |
Table 29.2 provides a guide to the chapter.
Table 29.2 Chapter guide
|
Problem |
Solution |
Listing |
|---|---|---|
|
Validating data |
Manually use the |
5, 9, 14–22 |
|
Displaying validation messages |
Use the classes to which form elements are assigned and the validation tag helpers |
6–8, 10–13 |
|
Validating data before the form is submitted |
Use client-side and remote validation |
23–27 |
This chapter uses the WebApp project from chapter 28. To prepare for this chapter, change the contents of the Form controller’s Form view so it contains input elements for each of the properties defined by the Product class, excluding the navigation properties used by Entity Framework Core, as shown in listing 29.1.
Listing 29.1 Changing elements in the Form.cshtml file in the Views/Form folder
@model Product
@{ Layout = "_SimpleLayout"; }
<h5 class="bg-primary text-white text-center p-2">HTML Form</h5>
<form asp-action="submitform" method="post" id="htmlform">
<div class="form-group">
<label asp-for="Name"></label>
<input class="form-control" asp-for="Name" />
</div>
<div class="form-group">
<label asp-for="Price"></label>
<input class="form-control" asp-for="Price" />
</div>
<div class="form-group">
<label>CategoryId</label>
<input class="form-control" asp-for="CategoryId" />
</div>
<div class="form-group">
<label>SupplierId</label>
<input class="form-control" asp-for="SupplierId" />
</div>
<button type="submit" class="btn btn-primary mt-2">Submit</button>
</form>
Replace the contents of the FormController.cs file with those shown in listing 29.2, which adds support for displaying the properties defined in listing 29.1 and removes model binding attributes and action methods that are no longer required.
Listing 29.2 Replacing the FormController.cs file’s contents in the Controllers folder
using Microsoft.AspNetCore.Mvc;
using WebApp.Models;
using Microsoft.EntityFrameworkCore;
namespace WebApp.Controllers {
[AutoValidateAntiforgeryToken]
public class FormController : Controller {
private DataContext context;
public FormController(DataContext dbContext) {
context = dbContext;
}
public async Task<IActionResult> Index(long? id) {
return View("Form", await context.Products
.OrderBy(p => p.ProductId)
.FirstOrDefaultAsync(p => id == null
|| p.ProductId == id));
}
[HttpPost]
public IActionResult SubmitForm(Product product) {
TempData["name"] = product.Name;
TempData["price"] = product.Price.ToString();
TempData["categoryId"] = product.CategoryId.ToString();
TempData["supplierId"] = product.SupplierId.ToString();
return RedirectToAction(nameof(Results));
}
public IActionResult Results() {
return View(TempData);
}
}
}
Open a new PowerShell command prompt, navigate to the folder that contains the WebApp.csproj file, and run the command shown in listing 29.3 to drop the database.
Listing 29.3 Dropping the database
dotnet ef database drop --force
Use the PowerShell command prompt to run the command shown in listing 29.4.
Listing 29.4 Running the example application
dotnet run
Use a browser to request http://localhost:5000/controllers/form, which will display an HTML form. Click the Submit button, and the form data will be displayed, as shown in figure 29.1.
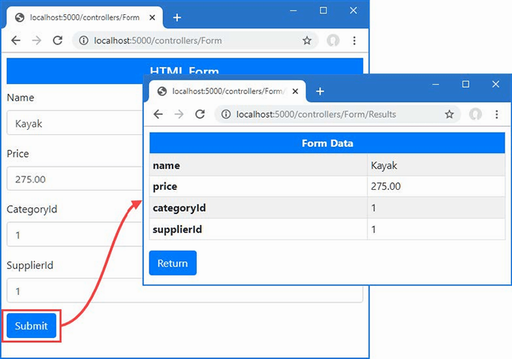
Figure 29.1 Running the example application
Model validation is the process of enforcing the requirements that an application has for the data it receives from clients. Without validation, an application will try to operate on any data it receives, which can lead to exceptions and unexpected behaviors that appear immediately or long-term problems that appear gradually as the database is populated with bad, incomplete, or malicious data.
Currently, the action and handler methods that receive form data will accept any data that the user submits, which is why the examples just display the form data and don’t store it in the database.
Most data values have constraints of some sort. This can involve requiring a value to be provided, requiring the value to be a specific type, and requiring the value to fall within a specific range.
Before I can safely store a Product object in the database, for example, I need to make sure that the user provides values for the Name, Price, CategoryId, and SupplierId properties. The Name value can be any valid string, the Price property must be a valid currency amount, and the CategoryId and SupplierId properties must correspond to existing Supplier and Category products in the database. In the following sections, I demonstrate how model validation can be used to enforce these requirements by checking the data that the application receives and providing feedback to the user when the application cannot use the data the user has submitted.
Although it is not evident, ASP.NET Core is already performing some basic data validation during the model binding process, but the errors it detects are being discarded because ASP.NET Core hasn’t been told how to respond to them. Listing 29.5 checks the outcome of the validation process so that the data values the user has provided will be used only if they are valid.
Listing 29.5 Checking the outcome in the FormController.cs file in the Controllers folder
using Microsoft.AspNetCore.Mvc;
using WebApp.Models;
using Microsoft.EntityFrameworkCore;
namespace WebApp.Controllers {
[AutoValidateAntiforgeryToken]
public class FormController : Controller {
private DataContext context;
public FormController(DataContext dbContext) {
context = dbContext;
}
public async Task<IActionResult> Index(long? id) {
return View("Form", await context.Products
.OrderBy(p => p.ProductId)
.FirstOrDefaultAsync(p => id == null
|| p.ProductId == id));
}
[HttpPost]
public IActionResult SubmitForm(Product product) {
if (ModelState.IsValid) {
TempData["name"] = product.Name;
TempData["price"] = product.Price.ToString();
TempData["categoryId"] = product.CategoryId.ToString();
TempData["supplierId"] = product.SupplierId.ToString();
return RedirectToAction(nameof(Results));
} else {
return View("Form");
}
}
public IActionResult Results() {
return View(TempData);
}
}
}
I determine if the data provided by the user is valid using the ModelStateDictionary object that is returned by the ModelState property inherited from the ControllerBase class.
As its name suggests, the ModelStateDictionary class is a dictionary used to track details of the state of the model object, with an emphasis on validation errors. Table 29.3 describes the most important ModelStateDictionary members.
Table 29.3 Selected ModelStateDictionary members
|
Name |
Description |
|---|---|
|
|
This method is used to record a model validation error for the specified property. |
|
|
This method is used to determine whether there are model validation errors for a specific property, expressed as a value from the |
|
|
This property returns |
|
|
This property clears the validation state. |
If the validation process has detected problems, then the IsValid property will return false. The SubmitForm action method deals with invalid data by returning the same view, like this:
...
if (ModelState.IsValid) {
TempData["name"] = product.Name;
TempData["price"] = product.Price.ToString();
TempData["category name"] = product.Category?.Name;
return RedirectToAction(nameof(Results));
} else {
return View("Form");
}
...
It may seem odd to deal with a validation error by calling the View method, but the context data provided to the view contains details of the model validation errors; these details are used by the tag helper to transform the input elements.
To see how this works, restart ASP.NET Core and use a browser to request http://localhost:5000/controllers/form. Clear the contents of the Name field and click the Submit button. There won’t be any visible change in the content displayed by the browser, but if you examine the input element for the Name field, you will see the element has been transformed. Here is the input element before the form was submitted:
<input class="form-control" type="text" data-val="true"
data-val-required="The Name field is required." id="Name"
name="Name" value="Kayak">
Here is the input element after the form has been submitted:
<input class="form-control input-validation-error" type="text"
data-val="true" data-val-required="The Name field is required."
id="Name" name="Name" value="">
The tag helper adds elements whose values have failed validation to the input-validation-error class, which can then be styled to highlight the problem to the user.
You can do this by defining custom CSS styles in a stylesheet, but a little extra work is required if you want to use the built-in validation styles that CSS libraries like Bootstrap provides. The name of the class added to the input elements cannot be changed, which means that some JavaScript code is required to map between the name used by ASP.NET Core and the CSS error classes provided by Bootstrap.
To define the JavaScript code so that it can be used by both controllers and Razor Pages, use the Razor View - Empty template in Visual Studio to add a file named _Validation.cshtml to the Views/Shared folder with the content shown in listing 29.6. Visual Studio Code doesn’t require templates, and you can just add a file named _Validation.cshtml in the Views/Shared folder with the code shown in the listing.
Listing 29.6 The contents of the _Validation.cshtml file in the Views/Shared folder
<script type="text/javascript">
window.addEventListener("DOMContentLoaded", () => {
document.querySelectorAll("input.input-validation-error")
.forEach((elem) => { elem.classList.add("is-invalid"); }
);
});
</script>
I will use the new file as a partial view, which contains a script element that uses the browser’s JavaScript Document Object Model (DOM) API to locate input elements that are members of the input-validation-error class and adds them to the is-invalid class (which Bootstrap uses to set the error color for form elements). Listing 29.7 uses the partial tag helper to incorporate the new partial view into the HTML form so that fields with validation errors are highlighted.
Listing 29.7 Including a partial view in the Form.cshtml file in the Views/Form folder
@model Product
@{ Layout = "_SimpleLayout"; }
<h5 class="bg-primary text-white text-center p-2">HTML Form</h5>
<partial name="_Validation" />
<form asp-action="submitform" method="post" id="htmlform">
<div class="form-group">
<label asp-for="Name"></label>
<input class="form-control" asp-for="Name" />
</div>
<div class="form-group">
<label asp-for="Price"></label>
<input class="form-control" asp-for="Price" />
</div>
<div class="form-group">
<label>CategoryId</label>
<input class="form-control" asp-for="CategoryId" />
</div>
<div class="form-group">
<label>SupplierId</label>
<input class="form-control" asp-for="SupplierId" />
</div>
<button type="submit" class="btn btn-primary mt-2">Submit</button>
</form>
The JavaScript code runs when the browser has finished parsing all the elements in the HTML document, and the effect is to highlight the input elements that have been assigned to the input-validaton-error class. You can see the effect by restarting ASP.NET Core, navigating to http://localhost:5000/controllers/form, clearing the contents of the Name field, and submitting the form, which produces the response shown in figure 29.2.
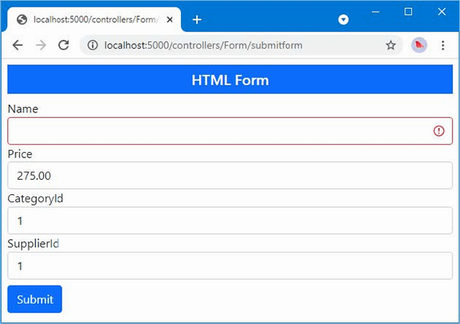
Figure 29.2 Highlighting a validation error
Figure 29.2 makes it clear that something is wrong with the Name field but doesn’t provide any details about what problem has been detected. Providing the user with more information requires the use of a different tag helper, which adds a summary of the problems to the view, as shown in listing 29.8.
Listing 29.8 Displaying a summary in the Form.cshtml file in the Views/Form folder
@model Product
@{ Layout = "_SimpleLayout"; }
<h5 class="bg-primary text-white text-center p-2">HTML Form</h5>
<partial name="_Validation" />
<form asp-action="submitform" method="post" id="htmlform">
<div asp-validation-summary="All" class="text-danger"></div>
<div class="form-group">
<label asp-for="Name"></label>
<input class="form-control" asp-for="Name" />
</div>
<div class="form-group">
<label asp-for="Price"></label>
<input class="form-control" asp-for="Price" />
</div>
<div class="form-group">
<label>CategoryId</label>
<input class="form-control" asp-for="CategoryId" />
</div>
<div class="form-group">
<label>SupplierId</label>
<input class="form-control" asp-for="SupplierId" />
</div>
<button type="submit" class="btn btn-primary mt-2">Submit</button>
</form>
The ValidationSummaryTagHelper class detects the asp-validation-summary attribute on div elements and responds by adding messages that describe any validation errors that have been recorded. The value of the asp-validation-summary attribute is a value from the ValidationSummary enumeration, which defines the values shown in table 29.4 and which I demonstrate shortly.
Table 29.4 The ValidationSummary values
|
Name |
Description |
|---|---|
|
|
This value is used to display all the validation errors that have been recorded. |
|
|
This value is used to display only the validation errors for the entire model, excluding those that have been recorded for individual properties, as described in the "Displaying Model-Level Messages" section. |
|
|
This value is used to disable the tag helper so that it does not transform the HTML element. |
Presenting error messages helps the user understand why the form cannot be processed. Restart ASP.NET Core, request http://localhost:5000/controllers/form, clear the Name field, and submit the form. As figure 29.3 shows, there is now an error message that explains the problem has been detected.
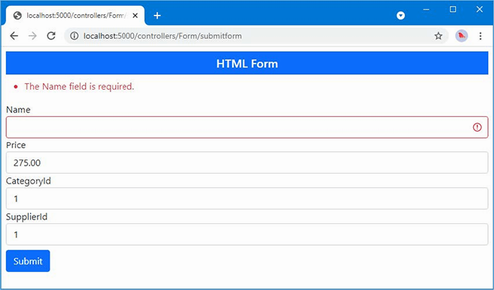
Figure 29.3 Displaying a validation message
The error message displayed in figure 29.3 is generated by the implicit validation process, which is performed automatically during model binding.
Implicit validation is simple but effective, and there are two basic checks: the user must provide a value for all properties that are defined with a non-nullable type, and ASP.NET Core must be able to parse the string values received in the HTTP request into the corresponding property type.
As a reminder, here is the definition of the Product class, which is the class used to receive the form data:
using System.ComponentModel.DataAnnotations;
using System.ComponentModel.DataAnnotations.Schema;
using System.Text.Json.Serialization;
using Microsoft.AspNetCore.Mvc.ModelBinding;
namespace WebApp.Models {
public class Product {
public long ProductId { get; set; }
public required string Name { get; set; }
[Column(TypeName = "decimal(8, 2)")]
//[BindNever]
public decimal Price { get; set; }
public long CategoryId { get; set; }
public Category? Category { get; set; }
public long SupplierId { get; set; }
[JsonIgnore(Condition = JsonIgnoreCondition.WhenWritingNull)]
public Supplier? Supplier { get; set; }
}
}
The required keyword has been applied to the Name property, which is why a validation error was reported when the field was cleared in the previous section. There are no parsing issues for the Name property because the string value received from the HTTP request does not need any type conversion.
Enter ten into the Price field and submit the form; you will see an error that shows that ASP.NET Core cannot parse the string in the HTTP request into the decimal value required by the Price property, as shown in figure 29.4.

Figure 29.4 Displaying a parsing validation message
Implicit validation takes care of the basics, but most applications require additional checks to ensure that they receive useful data. This is known as explicit validation, and it is done using the ModelStateDictionary methods described in table 29.4.
To avoid displaying conflicting error messages, explicit validation is typically done only when the user has provided a value that has passed the implicit checks. The ModelStateDictionary.GetValidationState method is used to see whether there have been any errors recorded for a model property. The GetValidationState method returns a value from the ModelValidationState enumeration, which defines the values described in table 29.5.
Table 29.5 The ModelValidationState values
|
Name |
Description |
|---|---|
|
|
This value means that no validation has been performed on the model property, usually because there was no value in the request that corresponded to the property name. |
|
|
This value means that the request value associated with the property is valid. |
|
|
This value means that the request value associated with the property is invalid and should not be used. |
|
|
This value means that the model property has not been processed, which usually means that there have been so many validation errors that there is no point continuing to perform validation checks. |
Listing 29.9 defines explicit validation checks for some of the properties defined by the Product class.
Listing 29.9 Explicit validation in the FormController.cs file in the Controllers folder
using Microsoft.AspNetCore.Mvc;
using WebApp.Models;
using Microsoft.EntityFrameworkCore;
using Microsoft.AspNetCore.Mvc.ModelBinding;
namespace WebApp.Controllers {
[AutoValidateAntiforgeryToken]
public class FormController : Controller {
private DataContext context;
public FormController(DataContext dbContext) {
context = dbContext;
}
public async Task<IActionResult> Index(long? id) {
return View("Form", await context.Products
.OrderBy(p => p.ProductId)
.FirstOrDefaultAsync(p => id == null
|| p.ProductId == id));
}
[HttpPost]
public IActionResult SubmitForm(Product product) {
if (ModelState.GetValidationState(nameof(Product.Price))
== ModelValidationState.Valid && product.Price <= 0) {
ModelState.AddModelError(nameof(Product.Price),
"Enter a positive price");
}
if (ModelState.GetValidationState(nameof(Product.CategoryId))
== ModelValidationState.Valid &&
!context.Categories.Any(c =>
c.CategoryId == product.CategoryId)) {
ModelState.AddModelError(nameof(Product.CategoryId),
"Enter an existing category ID");
}
if (ModelState.GetValidationState(nameof(Product.SupplierId))
== ModelValidationState.Valid &&
!context.Suppliers.Any(s =>
s.SupplierId == product.SupplierId)) {
ModelState.AddModelError(nameof(Product.SupplierId),
"Enter an existing supplier ID");
}
if (ModelState.IsValid) {
TempData["name"] = product.Name;
TempData["price"] = product.Price.ToString();
TempData["categoryId"] = product.CategoryId.ToString();
TempData["supplierId"] = product.SupplierId.ToString();
return RedirectToAction(nameof(Results));
} else {
return View("Form");
}
}
public IActionResult Results() {
return View(TempData);
}
}
}
As an example of using the ModelStateDictionary, consider how the Price property is validated. One of the validation requirements for the Product class is to ensure the user provides a positive value for the Price property. This is something that ASP.NET Core cannot infer from the Product class and so explicit validation is required.
I start by ensuring that there are no existing validation errors for the Price property:
...
if (ModelState.GetValidationState(nameof(Product.Price))
== ModelValidationState.Valid && product.Price <= 0) {
ModelState.AddModelError(nameof(Product.Price),
"Enter a positive price");
}
...
I want to make sure that the user provides a Price value that is greater than zero, but there is no point in recording an error about zero or negative values if the user has provided a value that the model binder cannot convert into a decimal value. I use the GetValidationState method to determine the validation status of the Price property before performing my own validation check:
...
if (ModelState.GetValidationState(nameof(Product.Price))
== ModelValidationState.Valid && product.Price <= 0) {
ModelState.AddModelError(nameof(Product.Price),
"Enter a positive price");
}
...
If the user has provided a value that is less than or equal to zero, then I use the AddModelError method to record a validation error:
...
if (ModelState.GetValidationState(nameof(Product.Price))
== ModelValidationState.Valid && product.Price <= 0) {
ModelState.AddModelError(nameof(Product.Price),
"Enter a positive price");
}
...
The arguments to the AddModelError method are the name of the property and a string that will be displayed to the user to describe the validation issue.
For the CategoryId and SupplierId properties, I follow a similar process and use Entity Framework Core to ensure that the value the user has provided corresponds to an ID stored in the database.
After performing the explicit validation checks, I use the ModelState.IsValid property to see whether there were errors, which means that implicit or explicit validation errors will be reported in the same way.
To see the effect of explicit validation, restart ASP.NET Core, request http://localhost:5000/controllers/form, and enter 0 into the Price, CategoryId, and SupplierId fields. Submit the form, and you will see the validation errors shown in figure 29.5.
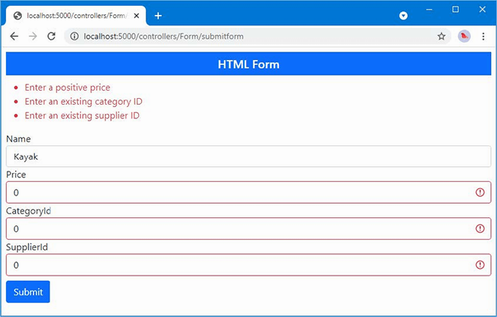
Figure 29.5 Explicit validation messages
The validation process has some inconsistencies when it comes to the validation messages that are displayed. Not all the validation messages produced by the model binder are helpful to the user, which you can see by clearing the Price field and submitting the form. The empty field produces the following message:
The value '' is invalid
This message is added to the ModelStateDictionary by the implicit validation process when it can’t find a value for a property. A missing value for a decimal property, for example, causes a different—and less useful—message than a missing value for a string property. This is because of differences in the way that the validation checks are performed. The default messages for some validation errors can be replaced with custom messages using the methods defined by the DefaultModelBindingMessageProvider class, the most useful of which are described in table 29.6.
Table 29.6 Useful DefaultModelBindingMessageProvider methods
|
Name |
Description |
|---|---|
|
|
The function assigned to this property is used to generate a validation error message when a value is |
|
|
The function assigned to this property is used to generate a validation error message when the request does not contain a value for a required property. |
|
|
The function assigned to this property is used to generate a validation error message when the data required for dictionary model object contains null keys or values. |
|
|
The function assigned to this property is used to generate a validation error message when the model binding system cannot convert the data value into the required C# type. |
|
|
The function assigned to this property is used to generate a validation error message when the model binding system cannot convert the data value into the required C# type. |
|
|
The function assigned to this property is used to generate a validation error message when the data value cannot be parsed into a C# numeric type. |
|
|
The function assigned to this property is used to generate a fallback validation error message that is used as a last resort. |
Each of the methods described in the table accepts a function that is invoked to get the validation message to display to the user. These methods are applied through the options pattern in the Program.cs file, as shown in listing 29.10, in which I have replaced the default message that is displayed when a value is null or cannot be converted.
Listing 29.10 Changing a validation message in the Program.cs file in the WebApp folder
using Microsoft.EntityFrameworkCore;
using WebApp.Models;
using Microsoft.AspNetCore.Antiforgery;
using Microsoft.AspNetCore.Mvc;
var builder = WebApplication.CreateBuilder(args);
builder.Services.AddDbContext<DataContext>(opts => {
opts.UseSqlServer(builder.Configuration[
"ConnectionStrings:ProductConnection"]);
opts.EnableSensitiveDataLogging(true);
});
builder.Services.AddControllersWithViews();
builder.Services.AddRazorPages();
builder.Services.AddSingleton<CitiesData>();
builder.Services.Configure<AntiforgeryOptions>(opts => {
opts.HeaderName = "X-XSRF-TOKEN";
});
builder.Services.Configure<MvcOptions>(opts =>
opts.ModelBindingMessageProvider
.SetValueMustNotBeNullAccessor(value => "Please enter a value"));
var app = builder.Build();
app.UseStaticFiles();
IAntiforgery antiforgery
= app.Services.GetRequiredService<IAntiforgery>();
app.Use(async (context, next) => {
if (!context.Request.Path.StartsWithSegments("/api")) {
string? token =
antiforgery.GetAndStoreTokens(context).RequestToken;
if (token != null) {
context.Response.Cookies.Append("XSRF-TOKEN",
token,
new CookieOptions { HttpOnly = false });
}
}
await next();
});
app.MapControllerRoute("forms",
"controllers/{controller=Home}/{action=Index}/{id?}");
app.MapRazorPages();
var context = app.Services.CreateScope().ServiceProvider
.GetRequiredService<DataContext>();
SeedData.SeedDatabase(context);
app.Run();
The function that you specify receives the value that the user has supplied, although that is not especially useful when dealing with null values. To see the custom message, restart ASP.NET Core, use the browser to request http://localhost:5000/controllers/form, and submit the form with an empty Price field. The response will include the custom error message, as shown in figure 29.6.
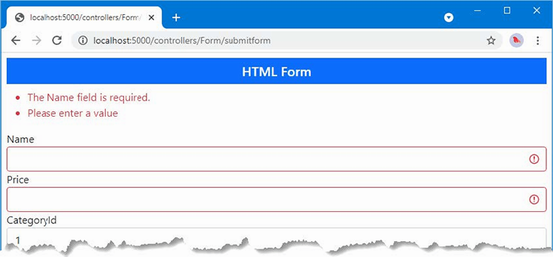
Figure 29.6 Changing the default validation messages
Figure 29.6 also shows the message displayed for a missing Name field, which isn’t affected by the settings in table 29.6. This is a quirk of the way that non-nullable model properties are validated, which behaves as though the Required attribute has been applied to the non-nullable property. I describe the Required attribute later in this chapter and explain how it can be used to change the error message for non-nullable properties.
Although the custom error message is more meaningful than the default one, it still isn’t that helpful because it doesn’t clearly indicate which field the problem relates to. For this kind of error, it is more useful to display the validation error messages alongside the HTML elements that contain the problem data. This can be done using the ValidationMessageTag tag helper, which looks for span elements that have the asp-validation-for attribute, which is used to specify the property for which error messages should be displayed.
In listing 29.11, I have added property-level validation message elements for each of the input elements in the form.
Listing 29.11 Property-level messages in the Form.cshtml file in the Views/Form folder
@model Product
@{
Layout = "_SimpleLayout";
}
<h5 class="bg-primary text-white text-center p-2">HTML Form</h5>
<partial name="_Validation" />
<form asp-action="submitform" method="post" id="htmlform">
<div asp-validation-summary="All" class="text-danger"></div>
<div class="form-group">
<label asp-for="Name"></label>
<div>
<span asp-validation-for="Name" class="text-danger">
</span>
</div>
<input class="form-control" asp-for="Name" />
</div>
<div class="form-group">
<label asp-for="Price"></label>
<div>
<span asp-validation-for="Price" class="text-danger">
</span>
</div>
<input class="form-control" asp-for="Price" />
</div>
<div class="form-group">
<label>CategoryId</label>
<div>
<span asp-validation-for="CategoryId" class="text-danger">
</span>
</div>
<input class="form-control" asp-for="CategoryId" />
</div>
<div class="form-group">
<label>SupplierId</label>
<div>
<span asp-validation-for="SupplierId" class="text-danger">
</span>
</div>
<input class="form-control" asp-for="SupplierId" />
</div>
<button type="submit" class="btn btn-primary mt-2">Submit</button>
</form>
Since span elements are displayed inline, care must be taken to present the validation messages to make it obvious which element the message relates to. You can see the effect of the new validation messages by restarting ASP.NET Core, requesting http://localhost:5000/controllers/form, clearing the Name and Price fields, and submitting the form. The response, shown in figure 29.7, includes validation messages alongside the text fields.
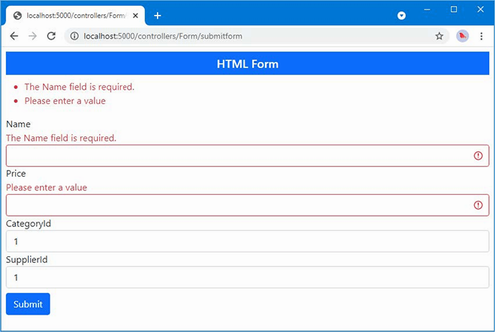
Figure 29.7 Displaying property-level validation messages
It may seem that the validation summary message is superfluous because it duplicates the property-level messages. But the summary has a useful trick, which is the ability to display messages that apply to the entire model and not just individual properties. This means you can report errors that arise from a combination of individual properties, which would otherwise be hard to express with a property-level message.
In listing 29.12, I have added a check to the FormController.SubmitForm action that records a validation error when the Price value exceeds 100 at the time that the Name value starts with Small.
Listing 29.12 Model-level validation in the FormController.cs file in the Controllers folder
...
[HttpPost]
public IActionResult SubmitForm(Product product) {
if (ModelState.GetValidationState(nameof(Product.Price))
== ModelValidationState.Valid && product.Price <= 0) {
ModelState.AddModelError(nameof(Product.Price),
"Enter a positive price");
}
if (ModelState.GetValidationState(nameof(Product.Name))
== ModelValidationState.Valid
&& ModelState.GetValidationState(nameof(Product.Price))
== ModelValidationState.Valid
&& product.Name.ToLower().StartsWith("small")
&& product.Price > 100) {
ModelState.AddModelError("",
"Small products cannot cost more than $100");
}
if (ModelState.GetValidationState(nameof(Product.CategoryId))
== ModelValidationState.Valid &&
!context.Categories.Any(c =>
c.CategoryId == product.CategoryId)) {
ModelState.AddModelError(nameof(Product.CategoryId),
"Enter an existing category ID");
}
if (ModelState.GetValidationState(nameof(Product.SupplierId))
== ModelValidationState.Valid &&
!context.Suppliers.Any(s =>
s.SupplierId == product.SupplierId)) {
ModelState.AddModelError(nameof(Product.SupplierId),
"Enter an existing supplier ID");
}
if (ModelState.IsValid) {
TempData["name"] = product.Name;
TempData["price"] = product.Price.ToString();
TempData["categoryId"] = product.CategoryId.ToString();
TempData["supplierId"] = product.SupplierId.ToString();
return RedirectToAction(nameof(Results));
} else {
return View("Form");
}
}
...
If the user enters a Name value that starts with Small and a Price value that is greater than 100, then a model-level validation error is recorded. I check for the combination of values only if there are no validation problems with the individual property values, which ensures the user doesn’t see conflicting messages. Validation errors that relate to the entire model are recorded using the AddModelError with the empty string as the first argument.
Listing 29.13 changes the value of the asp-validation-summary attribute to ModelOnly, which excludes property-level errors, meaning that the summary will display only those errors that apply to the entire model.
Listing 29.13 Configuring the validation summary in the Views/Form/Form.cshtml file
@model Product
@{
Layout = "_SimpleLayout";
}
<h5 class="bg-primary text-white text-center p-2">HTML Form</h5>
<partial name="_Validation" />
<form asp-action="submitform" method="post" id="htmlform">
<div asp-validation-summary="ModelOnly" class="text-danger"></div>
<div class="form-group">
<label asp-for="Name"></label>
<div>
<span asp-validation-for="Name" class="text-danger">
</span>
</div>
<input class="form-control" asp-for="Name" />
</div>
<div class="form-group">
<label asp-for="Price"></label>
<div>
<span asp-validation-for="Price" class="text-danger">
</span>
</div>
<input class="form-control" asp-for="Price" />
</div>
<div class="form-group">
<label>CategoryId</label>
<div>
<span asp-validation-for="CategoryId" class="text-danger">
</span>
</div>
<input class="form-control" asp-for="CategoryId" />
</div>
<div class="form-group">
<label>SupplierId</label>
<div>
<span asp-validation-for="SupplierId" class="text-danger">
</span>
</div>
<input class="form-control" asp-for="SupplierId" />
</div>
<button type="submit" class="btn btn-primary mt-2">Submit</button>
</form>
Restart ASP.NET Core and request http://localhost:5000/controllers/form. Enter Small Kayak into the Name field and 150 into the Price field and submit the form. The response will include the model-level error message, as shown in figure 29.8.
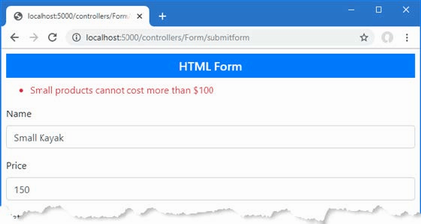
Figure 29.8 Displaying a model-level validation message
Razor Page validation relies on the same features used in the controller in the previous section. Listing 29.14 adds explicit validation checks and error summaries to the FormHandler page.
Listing 29.14 Validating data in the FormHandler.cshtml file in the Pages folder
@page "/pages/form/{id:long?}"
@model FormHandlerModel
@using Microsoft.AspNetCore.Mvc.RazorPages
@using Microsoft.EntityFrameworkCore
@using Microsoft.AspNetCore.Mvc.ModelBinding
<partial name="_Validation" />
<div class="m-2">
<h5 class="bg-primary text-white text-center p-2">HTML Form</h5>
<form asp-page="FormHandler" method="post" id="htmlform">
<div asp-validation-summary="ModelOnly" class="text-danger"></div>
<div class="form-group">
<label>Name</label>
<div>
<span asp-validation-for="Product.Name"
class="text-danger"></span>
</div>
<input class="form-control" asp-for="Product.Name" />
</div>
<div class="form-group">
<label>Price</label>
<div>
<span asp-validation-for="Product.Price"
class="text-danger"></span>
</div>
<input class="form-control" asp-for="Product.Price" />
</div>
<div class="form-group">
<label>CategoryId</label>
<div>
<span asp-validation-for="Product.CategoryId"
class="text-danger">
</span>
</div>
<input class="form-control" asp-for="Product.CategoryId" />
</div>
<div class="form-group">
<label>SupplierId</label>
<div>
<span asp-validation-for="Product.SupplierId"
class="text-danger">
</span>
</div>
<input class="form-control" asp-for="Product.SupplierId" />
</div>
<button type="submit" class="btn btn-primary mt-2">Submit</button>
</form>
</div>
@functions {
public class FormHandlerModel : PageModel {
private DataContext context;
public FormHandlerModel(DataContext dbContext) {
context = dbContext;
}
[BindProperty]
public Product Product { get; set; }
= new() { Name = string.Empty };
//[BindProperty(Name = "Product.Category")]
//public Category Category { get; set; } = new();
public async Task OnGetAsync(long id = 1) {
Product = await context.Products
.OrderBy(p => p.ProductId)
.FirstAsync(p => p.ProductId == id);
}
public IActionResult OnPost() {
if (ModelState.GetValidationState("Product.Price")
== ModelValidationState.Valid && Product.Price < 1) {
ModelState.AddModelError("Product.Price",
"Enter a positive price");
}
if (ModelState.GetValidationState("Product.Name")
== ModelValidationState.Valid
&& ModelState.GetValidationState("Product.Price")
== ModelValidationState.Valid
&& Product.Name.ToLower().StartsWith("small")
&& Product.Price > 100) {
ModelState.AddModelError("",
"Small products cannot cost more than $100");
}
if (ModelState.GetValidationState("Product.CategoryId")
== ModelValidationState.Valid &&
!context.Categories
.Any(c => c.CategoryId == Product.CategoryId)) {
ModelState.AddModelError("Product.CategoryId",
"Enter an existing category ID");
}
if (ModelState.GetValidationState("Product.SupplierId")
== ModelValidationState.Valid &&
!context.Suppliers
.Any(s => s.SupplierId == Product.SupplierId)) {
ModelState.AddModelError("Product.SupplierId",
"Enter an existing supplier ID");
}
if (ModelState.IsValid) {
TempData["name"] = Product.Name;
TempData["price"] = Product.Price.ToString();
TempData["categoryId"] = Product.CategoryId.ToString();
TempData["supplierId"] = Product.SupplierId.ToString();
return RedirectToPage("FormResults");
} else {
return Page();
}
}
}
}
The PageModel class defines a ModelState property that is the equivalent of the one I used in the controller and allows validation errors to be recorded. The process for validation is the same, but you must take care when recording errors to ensure the names match the pattern used by Razor Pages. When I recorded an error in the controller, I used the nameof keyword to select the property to which the error relates, like this:
... ModelState.AddModelError(nameof(Product.Price),"Enter a positive price"); ...
This is a common convention because it ensures that a typo won’t cause errors to be recorded incorrectly. This expression won’t work in the Razor Page, where the error must be recorded against Product.Price, rather than Price, to reflect that @Model expressions in Razor Pages return the page model object, like this:
...
ModelState.AddModelError("Product.Price", "Enter a positive price");
...
To test the validation process, restart ASP.NET Core, use a browser to request http://localhost:5000/pages/form, and submit the form with empty fields or with values that cannot be converted into the C# types required by the Product class. The error messages are displayed just as they are for controllers, as shown in figure 29.9. (The values 1, 2, and 3 are valid for both the CategoryId and SupplierId fields.)
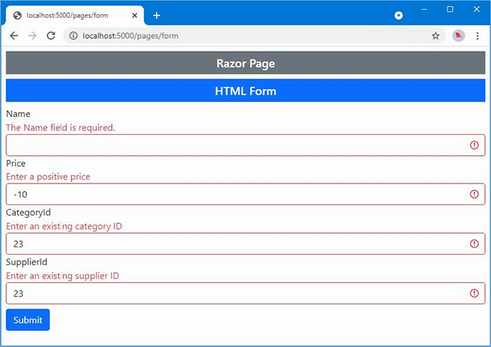
Figure 29.9 Validating data in a Razor Page
One problem with putting validation logic into an action method is that it ends up being duplicated in every action or handler method that receives data from the user. To help reduce duplication, the validation process supports the use of attributes to express model validation rules directly in the model class, ensuring that the same set of validation rules will be applied regardless of which action method is used to process a request. In listing 29.15, I have applied attributes to the Product class to describe the validation required for the Name and Price properties.
Listing 29.15 Applying validation attributes in the Product.cs file in the Models folder
using System.ComponentModel.DataAnnotations;
using System.ComponentModel.DataAnnotations.Schema;
using System.Text.Json.Serialization;
using Microsoft.AspNetCore.Mvc.ModelBinding;
namespace WebApp.Models {
public class Product {
public long ProductId { get; set; }
[Required(ErrorMessage = "Please enter a name")]
public required string Name { get; set; }
[Range(1, 999999, ErrorMessage = "Please enter a positive price")]
[Column(TypeName = "decimal(8, 2)")]
public decimal Price { get; set; }
public long CategoryId { get; set; }
public Category? Category { get; set; }
public long SupplierId { get; set; }
[JsonIgnore(Condition = JsonIgnoreCondition.WhenWritingNull)]
public Supplier? Supplier { get; set; }
}
}
I used two validation attributes in the listing: Required and Range. The Required attribute specifies that it is a validation error if the user doesn’t submit a value for a property, which is useful when you have a nullable property but want to require a value from the user.
I used the Required attribute in listing 29.15 to change the error message that is displayed when the user doesn’t provide a value for the Name property. As noted earlier, the implicit validation checks are inconsistent in the way that non-nullable properties are processed, but this can be corrected using the ErrorMessage argument that all of the validation attributes define.
I also applied the Range attribute in listing 29.15, which allows me to specify the set of acceptable values for the Price property. Table 29.7 shows the set of built-in validation attributes available.
Table 29.7 The Built-in Validation attributes
|
Attribute |
Example |
Description |
|---|---|---|
|
|
|
This attribute ensures that properties must have the same value, which is useful when you ask the user to provide the same information twice, such as an e-mail address or a password. |
|
|
|
This attribute ensures that a numeric value (or any property type that implements |
|
|
|
This attribute ensures that a string value matches the specified regular expression pattern. Note that the pattern must match the entire user-supplied value, not just a substring within it. By default, it matches case sensitively, but you can make it case insensitive by applying the |
|
|
|
This attribute ensures that the value is not empty or a string consisting only of spaces. If you want to treat whitespace as valid, use |
|
|
|
This attribute ensures that a string value is no longer than a specified maximum length. You can also specify a minimum length: |
The use of the validation attribute allows me to remove some of the explicit validation from the action method, as shown in listing 29.16.
Listing 29.16 Removing explicit validation in the Controllers/FormController.cs file
...
[HttpPost]
public IActionResult SubmitForm(Product product) {
//if (ModelState.GetValidationState(nameof(Product.Price))
// == ModelValidationState.Valid && product.Price <= 0) {
// ModelState.AddModelError(nameof(Product.Price),
// "Enter a positive price");
//}
if (ModelState.GetValidationState(nameof(Product.Name))
== ModelValidationState.Valid
&& ModelState.GetValidationState(nameof(Product.Price))
== ModelValidationState.Valid
&& product.Name.ToLower().StartsWith("small")
&& product.Price > 100) {
ModelState.AddModelError("",
"Small products cannot cost more than $100");
}
if (ModelState.GetValidationState(nameof(Product.CategoryId))
== ModelValidationState.Valid &&
!context.Categories.Any(c =>
c.CategoryId == product.CategoryId)) {
ModelState.AddModelError(nameof(Product.CategoryId),
"Enter an existing category ID");
}
if (ModelState.GetValidationState(nameof(Product.SupplierId))
== ModelValidationState.Valid &&
!context.Suppliers.Any(s =>
s.SupplierId == product.SupplierId)) {
ModelState.AddModelError(nameof(Product.SupplierId),
"Enter an existing supplier ID");
}
if (ModelState.IsValid) {
TempData["name"] = product.Name;
TempData["price"] = product.Price.ToString();
TempData["categoryId"] = product.CategoryId.ToString();
TempData["supplierId"] = product.SupplierId.ToString();
return RedirectToAction(nameof(Results));
} else {
return View("Form");
}
}
...
To see the validation attributes in action, restart ASP.NET Core MVC, request http://localhost:5000/controllers/form, clear the Name and Price fields, and submit the form. The response will include the validation errors produced by the attributes for the Price field and the new message for the Name field, as shown in figure 29.10. The validation attributes are applied before the action method is called, which means that I can still rely on the model state to determine whether individual properties are valid when performing model-level validation.
To see the validation attributes in action, restart ASP.NET Core MVC, request http://localhost:5000/controllers/form, clear the Name and Price fields, and submit the form. The response will include the validation errors produced by the attributes, as shown in figure 29.10.
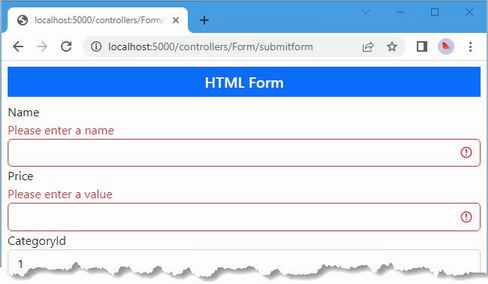
Figure 29.10 Using validation attributes
The validation process can be extended by creating an attribute that extends the ValidationAttribute class. To demonstrate, I created the WebApp/Validation folder and added to it a class file named PrimaryKeyAttribute.cs, which I used to define the class shown in listing 29.17.
Listing 29.17 The contents of the PrimaryKeyAttribute.cs file in the Validation folder
using Microsoft.EntityFrameworkCore;
using System.ComponentModel.DataAnnotations;
namespace WebApp.Validation {
public class PrimaryKeyAttribute : ValidationAttribute {
public Type? ContextType { get; set; }
public Type? DataType { get; set; }
protected override ValidationResult? IsValid(object? value,
ValidationContext validationContext) {
if (ContextType != null && DataType != null) {
DbContext? context =
validationContext.GetRequiredService(ContextType)
as DbContext;
if (context != null
&& context.Find(DataType, value) == null) {
return new ValidationResult(ErrorMessage ??
"Enter an existing key value");
}
}
return ValidationResult.Success;
}
}
}
Custom attributes override the IsValid method, which is called with the value to check, and a ValidationContext object that provides context about the validation process and provides access to the application’s services through its GetService method.
In listing 29.17, the custom attribute receives the type of an Entity Framework Core database context class and the type of a model class. In the IsValid method, the attribute obtains an instance of the context class and uses it to query the database to determine whether the value has been used as a primary key value.
Custom validation attributes can also be used to perform model-level validation. To demonstrate, I added a class file named PhraseAndPriceAttribute.cs to the Validation folder and used it to define the class shown in listing 29.18.
Listing 29.18 The contents of the PhraseAndPriceAttribute.cs file in the Validation folder
using System.ComponentModel.DataAnnotations;
using WebApp.Models;
namespace WebApp.Validation {
public class PhraseAndPriceAttribute : ValidationAttribute {
public string? Phrase { get; set; }
public string? Price { get; set; }
protected override ValidationResult? IsValid(object? value,
ValidationContext validationContext) {
if (value != null && Phrase != null && Price != null) {
Product? product = value as Product;
if (product != null
&& product.Name.StartsWith(Phrase,
StringComparison.OrdinalIgnoreCase)
&& product.Price > decimal.Parse(Price)) {
return new ValidationResult(ErrorMessage ??
$"{Phrase} products cannot cost more than $"
+ Price);
}
}
return ValidationResult.Success;
}
}
}
This attribute is configured with Phrase and Price properties, which are used in the IsValid method to check the Name and Price properties of the model object. Property-level custom validation attributes are applied directly to the properties they validate, and model-level attributes are applied to the entire class, as shown in listing 29.19.
Listing 29.19 Applying validation attributes in the Product.cs file in the Models folder
using System.ComponentModel.DataAnnotations;
using System.ComponentModel.DataAnnotations.Schema;
using System.Text.Json.Serialization;
using Microsoft.AspNetCore.Mvc.ModelBinding;
using WebApp.Validation;
namespace WebApp.Models {
[PhraseAndPrice(Phrase = "Small", Price = "100")]
public class Product {
public long ProductId { get; set; }
[Required(ErrorMessage = "Please enter a name")]
public required string Name { get; set; }
[Range(1, 999999, ErrorMessage = "Please enter a positive price")]
[Column(TypeName = "decimal(8, 2)")]
public decimal Price { get; set; }
[PrimaryKey(ContextType = typeof(DataContext),
DataType = typeof(Category))]
public long CategoryId { get; set; }
public Category? Category { get; set; }
[PrimaryKey(ContextType = typeof(DataContext),
DataType = typeof(Supplier))]
public long SupplierId { get; set; }
[JsonIgnore(Condition = JsonIgnoreCondition.WhenWritingNull)]
public Supplier? Supplier { get; set; }
}
}
The custom attributes allow the remaining explicit validation statements to be removed from the Form controller’s action method, as shown in listing 29.20.
Listing 29.20 Removing explicit validation in the Controllers/FormController.cs file
using Microsoft.AspNetCore.Mvc;
using WebApp.Models;
using Microsoft.EntityFrameworkCore;
using Microsoft.AspNetCore.Mvc.ModelBinding;
namespace WebApp.Controllers {
[AutoValidateAntiforgeryToken]
public class FormController : Controller {
private DataContext context;
public FormController(DataContext dbContext) {
context = dbContext;
}
public async Task<IActionResult> Index(long? id) {
return View("Form", await context.Products
.OrderBy(p => p.ProductId)
.FirstOrDefaultAsync(p => id == null
|| p.ProductId == id));
}
[HttpPost]
public IActionResult SubmitForm(Product product) {
if (ModelState.IsValid) {
TempData["name"] = product.Name;
TempData["price"] = product.Price.ToString();
TempData["categoryId"] = product.CategoryId.ToString();
TempData["supplierId"] = product.SupplierId.ToString();
return RedirectToAction(nameof(Results));
} else {
return View("Form");
}
}
public IActionResult Results() {
return View(TempData);
}
}
}
The validation attributes are applied automatically before the action method is invoked, which means that the validation outcome can be determined simply by reading the ModelState.IsValid property.
Using a custom model validation attribute in a Razor Page
An adaptation is required to support custom model validation attributes in Razor Pages. When the validation attribute is applied in a Razor Page, the errors it generates are associated with the Product property, rather than with the entire model, which means that the errors are not displayed by the validation summary tag helper.
To resolve this issue, add a class file named ModelStateExtensions.cs to the WebApp/Validation folder and use it to define the extension method shown in listing 29.21.
Listing 29.21 The contents of the ModelStateExtensions.cs file in the Validation folder
using Microsoft.AspNetCore.Mvc.ModelBinding;
namespace WebApp.Validation {
public static class ModelStateExtensions {
public static void PromotePropertyErrors(
this ModelStateDictionary modelState,
string propertyName) {
foreach (var err in modelState) {
if (err.Key == propertyName && err.Value.ValidationState
== ModelValidationState.Invalid) {
foreach (var e in err.Value.Errors) {
modelState.AddModelError(string.Empty,
e.ErrorMessage);
}
}
}
}
}
}
The PromotePropertyErrors extension method locates validation errors associated with a specified property and adds corresponding model-level errors. Listing 29.22 removes the explicit validation from the Razor Page and applies the new extension method.
Listing 29.22 Removing explicit validation in the Pages/FormHandler.cshtml file
@page "/pages/form/{id:long?}"
@model FormHandlerModel
@using Microsoft.AspNetCore.Mvc.RazorPages
@using Microsoft.EntityFrameworkCore
@using Microsoft.AspNetCore.Mvc.ModelBinding
@using WebApp.Validation
<partial name="_Validation" />
<div class="m-2">
<!-- ...markup omitted for brevity... -->
</div>
@functions {
public class FormHandlerModel : PageModel {
private DataContext context;
public FormHandlerModel(DataContext dbContext) {
context = dbContext;
}
[BindProperty]
public Product Product { get; set; }
= new() { Name = string.Empty };
public async Task OnGetAsync(long id = 1) {
Product = await context.Products
.OrderBy(p => p.ProductId)
.FirstAsync(p => p.ProductId == id);
}
public IActionResult OnPost() {
if (ModelState.IsValid) {
TempData["name"] = Product.Name;
TempData["price"] = Product.Price.ToString();
TempData["categoryId"] = Product.CategoryId.ToString();
TempData["supplierId"] = Product.SupplierId.ToString();
return RedirectToPage("FormResults");
} else {
ModelState.PromotePropertyErrors(nameof(Product));
return Page();
}
}
}
}
Expressing the validation through the custom attributes removes the code duplication between the controller and the Razor Page and ensures that validation is applied consistently wherever model binding is used for Product objects. To test the validation attributes, restart ASP.NET Core and navigate to http://localhost:5000/controllers/form or http://localhost:5000/pages/form. Clear the form fields or enter bad key values and submit the form, and you will see the error messages produced by the attributes, some of which are shown in figure 29.11. (The values 1, 2, and 3 are valid for both the CategoryId and SupplierId fields.)
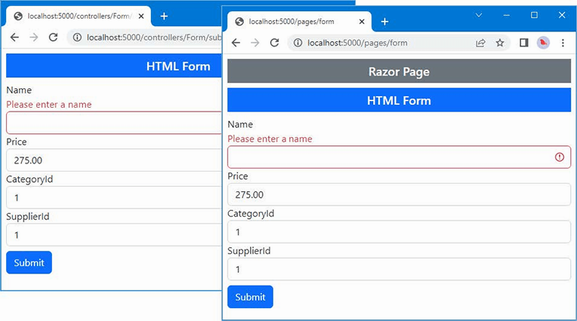
Figure 29.11 Using custom validation attributes
The validation techniques I have demonstrated so far have all been examples of server-side validation. This means the user submits their data to the server, and the server validates the data and sends back the results of the validation (either success in processing the data or a list of errors that need to be corrected).
In web applications, users typically expect immediate validation feedback—without having to submit anything to the server. This is known as client-side validation and is implemented using JavaScript. The data that the user has entered is validated before being sent to the server, providing the user with immediate feedback and an opportunity to correct any problems.
ASP.NET Core supports unobtrusive client-side validation. The term unobtrusive means that validation rules are expressed using attributes added to the HTML elements that views generate. These attributes are interpreted by a JavaScript library distributed by Microsoft that, in turn, configures the jQuery Validation library, which does the actual validation work. In the following sections, I will show you how the built-in validation support works and demonstrate how I can extend the functionality to provide custom client-side validation.
The first step is to install the JavaScript packages that deal with validation. Open a new PowerShell command prompt, navigate to the WebApp project folder, and run the command shown in listing 29.23.
Listing 29.23 Installing the validation packages
libman install jquery-validate@1.19.5 -d wwwroot/lib/jquery-validate
libman install jquery-validation-unobtrusive@4.0.0
-d wwwroot/lib/jquery-validation-unobtrusive
Once the packages are installed, add the elements shown in listing 29.24 to the _Validation.cshtml file in the Views/Shared folder, which provides a convenient way to introduce the validation alongside the existing jQuery code in the application.
Listing 29.24 Adding elements in the _Validation.cshtml file in the Views/Shared folder
<script type="text/javascript">
window.addEventListener("DOMContentLoaded", () => {
document.querySelectorAll("input.input-validation-error")
.forEach((elem) => { elem.classList.add("is-invalid"); }
);
});
</script>
<script src="/lib/jquery/jquery.min.js"></script>
<script src="/lib/jquery-validate/jquery.validate.min.js"></script>
<script src=
"/lib/jquery-validation-unobtrusive/jquery.validate.unobtrusive.min.js">
</script>
The ASP.NET Core form tag helpers add data-val* attributes to input elements that describe validation constraints for fields. Here are the attributes added to the input element for the Name field, for example:
... <input class="form-control input-validation-error is-invalid" type="text" data-val="true" data-val-required="Please enter a value" id="Name" name="Name" value=""> ...
The unobtrusive validation JavaScript code looks for these attributes and performs validation in the browser when the user attempts to submit the form. The form won’t be submitted, and an error will be displayed if there are validation problems. The data won’t be sent to the application until there are no outstanding validation issues.
The JavaScript code looks for elements with the data-val attribute and performs local validation in the browser when the user submits the form, without sending an HTTP request to the server. You can see the effect by running the application and submitting the form while using the F12 tools to note that validation error messages are displayed even though no HTTP request is sent to the server.
One of the nice client-side validation features is that the same attributes that specify validation rules are applied at the client and at the server. This means that data from browsers that do not support JavaScript are subject to the same validation as those that do, without requiring any additional effort.
To test the client-side validation feature, restart ASP.NET Core, request http://localhost:5000/controllers/form or http://localhost:5000/pages/form, clear the Name field, and click the Submit button.
The error message looks like the ones generated by server-side validation, but if you enter text into the field, you will see the error message disappear immediately as the JavaScript code responds to the user interaction, as shown in figure 29.12.
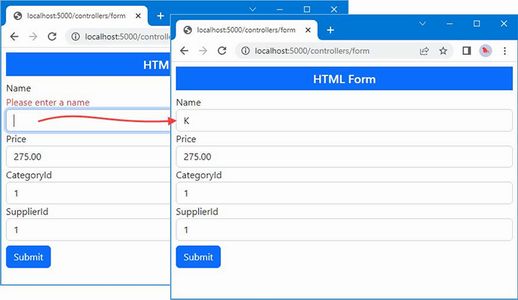
Figure 29.12 Performing client-side validation
Remote validation blurs the line between client- and server-side validation: the validation checks are enforced by the client-side JavaScript code, but the validation checking is performed by sending an asynchronous HTTP request to the application to test the value entered into the form by the user.
A common example of remote validation is to check whether a username is available in applications when such names must be unique, the user submits the data, and the client-side validation is performed. As part of this process, an asynchronous HTTP request is made to the server to validate the username that has been requested. If the username has been taken, a validation error is displayed so that the user can enter another value.
This may seem like regular server-side validation, but there are some benefits to this approach. First, only some properties will be remotely validated; the client-side validation benefits still apply to all the other data values that the user has entered. Second, the request is relatively lightweight and is focused on validation, rather than processing an entire model object.
The third difference is that the remote validation is performed in the background. The user doesn’t have to click the submit button and then wait for a new view to be rendered and returned. It makes for a more responsive user experience, especially when there is a slow network between the browser and the server.
That said, remote validation is a compromise. It strikes a balance between client-side and server-side validation, but it does require requests to the application server, and it is not as quick to validate as normal client-side validation.
For the example application, I am going to use remote validation to ensure the user enters existing key values for the CategoryId and SupplierId properties. The first step is to create a web service controller whose action methods will perform the validation checks. I added a class file named ValidationController.cs to the Controllers folder with the code shown in listing 29.25.
Listing 29.25 The contents of the ValidationController.cs file in the Controllers folder
using Microsoft.AspNetCore.Mvc;
using WebApp.Models;
namespace WebApp.Controllers {
[ApiController]
[Route("api/[controller]")]
public class ValidationController: ControllerBase {
private DataContext dataContext;
public ValidationController(DataContext context) {
dataContext = context;
}
[HttpGet("categorykey")]
public bool CategoryKey(string categoryId) {
long keyVal;
return long.TryParse(categoryId, out keyVal)
&& dataContext.Categories.Find(keyVal) != null;
}
[HttpGet("supplierkey")]
public bool SupplierKey(string supplierId) {
long keyVal;
return long.TryParse(supplierId, out keyVal)
&& dataContext.Suppliers.Find(keyVal) != null;
}
}
}
Validation action methods must define a parameter whose name matches the field they will validate, which allows the model binding process to extract the value to test from the request query string. The response from the action method must be JSON and can be only true or false, indicating whether a value is acceptable. The action methods in listing 29.25 receive candidate values and check they have been used as database keys for Category or Supplier objects.
To use the remote validation method, I apply the Remote attribute to the CategoryId and SupplierId properties in the Product class, as shown in listing 29.26.
Listing 29.26 Using the remote attribute in the Product.cs file in the Models folder
using System.ComponentModel.DataAnnotations;
using System.ComponentModel.DataAnnotations.Schema;
using System.Text.Json.Serialization;
using Microsoft.AspNetCore.Mvc.ModelBinding;
using WebApp.Validation;
using Microsoft.AspNetCore.Mvc;
namespace WebApp.Models {
[PhraseAndPrice(Phrase = "Small", Price = "100")]
public class Product {
public long ProductId { get; set; }
[Required(ErrorMessage = "Please enter a name")]
public required string Name { get; set; }
[Range(1, 999999, ErrorMessage = "Please enter a positive price")]
[Column(TypeName = "decimal(8, 2)")]
public decimal Price { get; set; }
[PrimaryKey(ContextType = typeof(DataContext),
DataType = typeof(Category))]
[Remote("CategoryKey", "Validation",
ErrorMessage = "Enter an existing key")]
public long CategoryId { get; set; }
public Category? Category { get; set; }
[PrimaryKey(ContextType = typeof(DataContext),
DataType = typeof(Supplier))]
[Remote("SupplierKey", "Validation",
ErrorMessage = "Enter an existing key")]
public long SupplierId { get; set; }
[JsonIgnore(Condition = JsonIgnoreCondition.WhenWritingNull)]
public Supplier? Supplier { get; set; }
}
}
The arguments to the Remote attribute specify the name of the validation controller and its action method. I have also used the optional ErrorMessage argument to specify the error message that will be displayed when validation fails. To see the remote validation, restart ASP.NET Core, navigate to http://localhost:5000/controllers/form, enter an invalid key value, and submit the form. You will see an error message, and the value of the input element will be validated after each key press, as shown in figure 29.13. (Only the values 1, 2, and 3 are valid for both the CategoryId and SupplierId fields.)
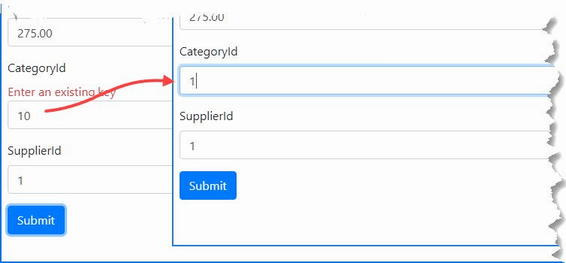
Figure 29.13 Performing remote validation
Remote validation works in Razor Pages, but attention must be paid to the names used in the asynchronous HTTP request used to validate values. For the controller example in the previous section, the browser will send requests to URLs like this:
http://localhost:5000/api/Validation/categorykey?CategoryId=1
But for the example Razor Page, the URL will be like this, reflecting the use of the page model:
http://localhost:5000/api/Validation/categorykey?Product.CategoryId=1
The way I prefer to address this difference is by adding parameters to the validation action methods that will accept both types of request, which is easy to do using the model binding features described in previous chapters, as shown in listing 29.27.
Listing 29.27 Adding parameters in the ValidationController.cs file in the Controllers folder
using Microsoft.AspNetCore.Mvc;
using WebApp.Models;
namespace WebApp.Controllers {
[ApiController]
[Route("api/[controller]")]
public class ValidationController : ControllerBase {
private DataContext dataContext;
public ValidationController(DataContext context) {
dataContext = context;
}
[HttpGet("categorykey")]
public bool CategoryKey(string? categoryId,
[FromQuery] KeyTarget target) {
long keyVal;
return long.TryParse(categoryId ?? target.CategoryId,
out keyVal)
&& dataContext.Categories.Find(keyVal) != null;
}
[HttpGet("supplierkey")]
public bool SupplierKey(string? supplierId,
[FromQuery] KeyTarget target) {
long keyVal;
return long.TryParse(supplierId ?? target.SupplierId,
out keyVal)
&& dataContext.Suppliers.Find(keyVal) != null;
}
}
[Bind(Prefix = "Product")]
public class KeyTarget {
public string? CategoryId { get; set; }
public string? SupplierId { get; set; }
}
}
The KeyTarget class is configured to bind to the Product part of the request, with properties that will match the two types of remote validation request. Each action method has been given a KeyTarget parameter, which is used if no value is received for existing parameters. This allows the same action method to accommodate both types of request, which you can see by restarting ASP.NET Core, navigating to http://localhost:5000/pages/form, entering a nonexistent key value, and clicking the Submit button, which will produce the response shown in figure 29.14.
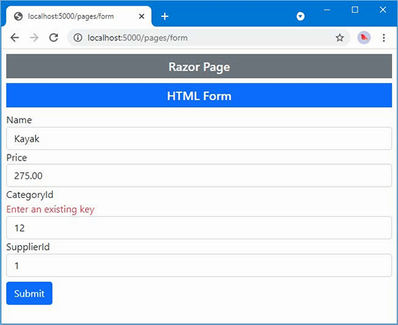
Figure 29.14 Performing remote validation using a Razor Page
ASP.NET Core provides integrated support for validating data to ensure it can be used by the application.
Validation messages can be displayed for the entire model or individual fields.
Basic validation is performed automatically and can be complemented by explicit custom validation.
Validation rules can be specified using attributes applied to model classes.
Validation is usually performed when data is sent to the server, but there is support for client-side validation using a JavaScript library.
Validation can also be performed by using JavaScript code to send individual data values to an ASP.NET Core controller for inspection.
Filters inject extra logic into request processing. Filters are like middleware that is applied to a single endpoint, which can be an action or a page handler method, and they provide an elegant way to manage a specific set of requests. In this chapter, I explain how filters work, describe the different types of filters that ASP.NET Core supports, and demonstrate the use of custom filters and the filters provided by ASP.NET Core. Table 30.1 provides a guide to the chapter.
Table 30.1 Chapter guide
|
Problem |
Solution |
Listing |
|---|---|---|
|
Implementing a security policy |
Use an authorization filter. |
16, 17 |
|
Implementing a resource policy, such as caching |
Use a resource filter. |
18–20 |
|
Altering the request or response for an action method |
Use an action filter. |
21–24 |
|
Altering the request or response for a page handler method |
Use a page filter. |
25–27 |
|
Inspecting or altering the result produced by an endpoint |
Use a result filter. |
28–30 |
|
Inspecting or altering uncaught exceptions |
Use an exception filter. |
31, 32 |
|
Altering the filter lifecycle |
Use a filter factory or define a service. |
33–36 |
|
Applying filters throughout an application |
Use a global filter. |
37, 38 |
|
Changing the order in which filters are applied |
Implement the |
39–43 |
This chapter uses the WebApp project from chapter 29. To prepare for this chapter, open a new PowerShell command prompt, navigate to the WebApp project folder, and run the command shown in listing 30.1 to remove the files that are no longer required.
Listing 30.1 Removing files from the project
Remove-Item -Path Controllers,Views,Pages -Recurse -Exclude _*,Shared
This command removes the controllers, views, and Razor Pages, leaving behind the shared layouts, data model, and configuration files.
Create the WebApp/Controllers folder and add a class file named HomeController.cs to the Controllers folder with the code shown in listing 30.2.
Listing 30.2 The contents of the HomeController.cs file in the Controllers folder
using Microsoft.AspNetCore.Mvc;
namespace WebApp.Controllers {
public class HomeController : Controller {
public IActionResult Index() {
return View("Message",
"This is the Index action on the Home controller");
}
}
}
The action method renders a view called Message and passes a string as the view data. I added a Razor view named Message.cshtml to the Views/Shared folder with the content shown in listing 30.3.
Listing 30.3 The contents of the Message.cshtml file in the Views/Shared folder
@{ Layout = "_SimpleLayout"; }
@if (Model is string) {
@Model
} else if (Model is IDictionary<string, string>) {
var dict = Model as IDictionary<string, string>;
<table class="table table-sm table-striped table-bordered">
<thead><tr><th>Name</th><th>Value</th></tr></thead>
<tbody>
@foreach (var kvp in dict ??
new Dictionary<string, string>()) {
<tr><td>@kvp.Key</td><td>@kvp.Value</td></tr>
}
</tbody>
</table>
}
Add a Razor Page named Message.cshtml to the Pages folder and add the content shown in listing 30.4.
Listing 30.4 The contents of the Message.cshtml file in the Pages folder
@page "/pages/message"
@model MessageModel
@using Microsoft.AspNetCore.Mvc.RazorPages
@if (Model.Message is string) {
@Model.Message
} else if (Model.Message is IDictionary<string, string>) {
var dict = Model.Message as IDictionary<string, string>;
<table class="table table-sm table-striped table-bordered">
<thead><tr><th>Name</th><th>Value</th></tr></thead>
<tbody>
@if (dict != null) {
foreach (var kvp in dict) {
<tr><td>@kvp.Key</td><td>@kvp.Value</td></tr>
}
}
</tbody>
</table>
}
@functions {
public class MessageModel : PageModel {
public object Message { get; set; }
= "This is the Message Razor Page";
}
}
Some of the examples in this chapter require the use of SSL. Add the configuration entries shown in listing 30.5 to the launchSettings.json file in the Properties folder to enable SSL and set the port to 44350.
Listing 30.5 Enabling HTTPS in the launchSettings.json file in the Properties folder
{
"iisSettings": {
"windowsAuthentication": false,
"anonymousAuthentication": true,
"iisExpress": {
"applicationUrl": "http://localhost:5000",
"sslPort": 0
}
},
"profiles": {
"WebApp": {
"commandName": "Project",
"dotnetRunMessages": true,
"launchBrowser": false,
"applicationUrl": "http://localhost:5000;https://localhost:44350",
"environmentVariables": {
"ASPNETCORE_ENVIRONMENT": "Development"
}
},
"IIS Express": {
"commandName": "IISExpress",
"launchBrowser": true,
"environmentVariables": {
"ASPNETCORE_ENVIRONMENT": "Development"
}
}
}
}
The .NET Core runtime includes a test certificate that is used for HTTPS requests. Run the commands shown in listing 30.6 in the WebApp folder to regenerate and trust the test certificate.
Listing 30.6 Regenerating the development certificates
dotnet dev-certs https --clean dotnet dev-certs https --trust
Click Yes to the prompts to delete the existing certificate that has already been trusted and click Yes to trust the new certificate, as shown in figure 30.1.

Figure 30.1 Regenerating the HTTPS certificate
Listing 30.7 replaces the contents of the Program.cs file to use the default controller routes and remove some of the services and components used in earlier chapters.
Listing 30.7 Configuring the platform in the Program.cs file in the WebApp folder
using Microsoft.EntityFrameworkCore;
using WebApp.Models;
var builder = WebApplication.CreateBuilder(args);
builder.Services.AddDbContext<DataContext>(opts => {
opts.UseSqlServer(builder.Configuration[
"ConnectionStrings:ProductConnection"]);
opts.EnableSensitiveDataLogging(true);
});
builder.Services.AddControllersWithViews();
builder.Services.AddRazorPages();
var app = builder.Build();
app.UseStaticFiles();
app.MapDefaultControllerRoute();
app.MapRazorPages();
var context = app.Services.CreateScope().ServiceProvider
.GetRequiredService<DataContext>();
SeedData.SeedDatabase(context);
app.Run();
Open a new PowerShell command prompt, navigate to the folder that contains the WebApp.csproj file, and run the command shown in listing 30.8 to drop the database.
Listing 30.8 Dropping the database
dotnet ef database drop --force
Use the PowerShell command prompt to run the command shown in listing 30.9.
Listing 30.9 Running the example application
dotnet run
Use a browser to request http://localhost:5000 and https://localhost:44350. Both URLs will be handled by the Index action defined by the Home controller, producing the responses shown in figure 30.2.

Figure 30.2 Responses from the Home controller
Request http://localhost:5000/pages/message and https://localhost:44350/pages/message to see the response from the Message Razor Page, delivered over HTTP and HTTPS, as shown in figure 30.3.
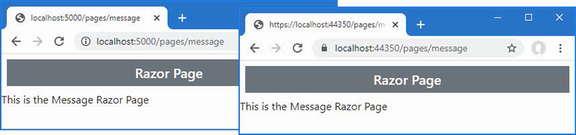
Figure 30.3 Responses from the Message Razor Page
Filters allow logic that would otherwise be applied in a middleware component or action method to be defined in a class where it can be easily reused.
Imagine that you want to enforce HTTPS requests for some action methods. In chapter 16, I showed you how this can be done in middleware by reading the IsHttps property of the HttpRequest object. The problem with this approach is that the middleware would have to understand the configuration of the routing system to know how to intercept requests for specific action methods. A more focused approach would be to read the HttpRequest.IsHttps property within action methods, as shown in listing 30.10.
Listing 30.10 Selective HTTPS in the HomeController.cs file in the Controllers folder
using Microsoft.AspNetCore.Mvc;
namespace WebApp.Controllers {
public class HomeController : Controller {
public IActionResult Index() {
if (Request.IsHttps) {
return View("Message",
"This is the Index action on the Home controller");
} else {
return new StatusCodeResult(
StatusCodes.Status403Forbidden);
}
}
}
}
Restart ASP.NET Core and request http://localhost:5000. This method now requires HTTPS, and you will see an error response. Request https://localhost:44350, and you will see the message output. Figure 30.4 shows both responses.
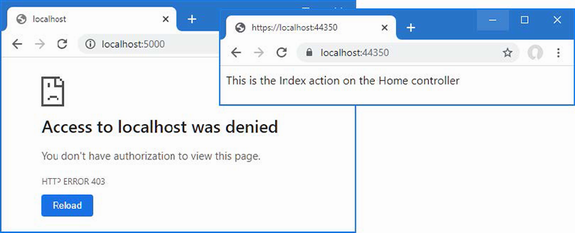
Figure 30.4 Enforcing HTTPS in an action method
This approach works but has problems. The first problem is that the action method contains code that is more about implementing a security policy than about handling the request. A more serious problem is that including the HTTP-detecting code within the action method doesn’t scale well and must be duplicated in every action method in the controller, as shown in listing 30.11.
Listing 30.11 Adding actions in the HomeController.cs file in the Controllers folder
using Microsoft.AspNetCore.Mvc;
namespace WebApp.Controllers {
public class HomeController : Controller {
public IActionResult Index() {
if (Request.IsHttps) {
return View("Message",
"This is the Index action on the Home controller");
} else {
return new StatusCodeResult(
StatusCodes.Status403Forbidden);
}
}
public IActionResult Secure() {
if (Request.IsHttps) {
return View("Message",
"This is the Secure action on the Home controller");
} else {
return new StatusCodeResult(
StatusCodes.Status403Forbidden);
}
}
}
}
I must remember to implement the same check in every action method in every controller for which I want to require HTTPS. The code to implement the security policy is a substantial part of the—admittedly simple—controller, which makes the controller harder to understand, and it is only a matter of time before I forget to add it to a new action method, creating a hole in my security policy.
This is the type of problem that filters address. Listing 30.12 replaces my checks for HTTPS and implements a filter instead.
Listing 30.12 Applying a filter in the HomeController.cs file in the Controllers folder
using Microsoft.AspNetCore.Mvc;
namespace WebApp.Controllers {
public class HomeController : Controller {
[RequireHttps]
public IActionResult Index() {
return View("Message",
"This is the Index action on the Home controller");
}
[RequireHttps]
public IActionResult Secure() {
return View("Message",
"This is the Secure action on the Home controller");
}
}
}
The RequireHttps attribute applies one of the built-in filters provided by ASP.NET Core. This filter restricts access to action methods so that only HTTPS requests are supported and allows me to remove the security code from each method and focus on handling the successful requests.
I must still remember to apply the RequireHttps attribute to each action method, which means that I might forget. But filters have a useful trick: applying the attribute to a controller class has the same effect as applying it to each individual action method, as shown in listing 30.13.
Listing 30.13 Filtering all actions in the HomeController.cs file in the Controllers folder
using Microsoft.AspNetCore.Mvc;
namespace WebApp.Controllers {
[RequireHttps]
public class HomeController : Controller {
public IActionResult Index() {
return View("Message",
"This is the Index action on the Home controller");
}
public IActionResult Secure() {
return View("Message",
"This is the Secure action on the Home controller");
}
}
}
Filters can be applied with differing levels of granularity. If you want to restrict access to some actions but not others, then you can apply the RequireHttps attribute to just those methods. If you want to protect all the action methods, including any that you add to the controller in the future, then the RequireHttps attribute can be applied to the class. If you want to apply a filter to every action in an application, then you can use global filters, which I describe later in this chapter.
Filters can also be used in Razor Pages. To implement the HTTPS-only policy in the Message Razor Pages, for example, I would have to add a handler method that inspects the connection, as shown in listing 30.14.
Listing 30.14 Checking connections in the Message.cshtml file in the Pages folder
@page "/pages/message"
@model MessageModel
@using Microsoft.AspNetCore.Mvc.RazorPages
@if (Model.Message is string) {
@Model.Message
} else if (Model.Message is IDictionary<string, string>) {
var dict = Model.Message as IDictionary<string, string>;
<table class="table table-sm table-striped table-bordered">
<thead><tr><th>Name</th><th>Value</th></tr></thead>
<tbody>
@if (dict != null) {
foreach (var kvp in dict) {
<tr><td>@kvp.Key</td><td>@kvp.Value</td></tr>
}
}
</tbody>
</table>
}
@functions {
public class MessageModel : PageModel {
public object Message { get; set; }
= "This is the Message Razor Page";
public IActionResult OnGet() {
if (!Request.IsHttps) {
return new StatusCodeResult(
StatusCodes.Status403Forbidden);
} else {
return Page();
}
}
}
}
The handler method works, but it is awkward and presents the same problems encountered with action methods. When using filters in Razor Pages, the attribute can be applied to the handler method or, as shown in listing 30.15, to the entire class.
Listing 30.15 Applying a filter in the Message.cshtml file in the Pages folder
...
@functions {
[RequireHttps]
public class MessageModel : PageModel {
public object Message { get; set; }
= "This is the Message Razor Page";
//public IActionResult OnGet() {
// if (!Request.IsHttps) {
// return new StatusCodeResult(
// StatusCodes.Status403Forbidden);
// } else {
// return Page();
// }
//}
}
}
...
You will see a normal response if you request https://localhost:44350/pages/message. If you request the regular HTTP URL, http://localhost:5000/pages/messages, the filter will redirect the request, and you will see an error (as noted earlier, the RequireHttps filter redirects the browser to a port that is not enabled in the example application).
ASP.NET Core supports different types of filters, each of which is intended for a different purpose. Table 30.2 describes the filter categories.
Table 30.2 The filter types
|
Name |
Description |
|---|---|
|
Authorization filters |
This type of filter is used to apply the application’s authorization policy. |
|
Resource filters |
This type of filter is used to intercept requests, typically to implement features such as caching. |
|
Action filters |
This type of filter is used to modify the request before it is received by an action method or to modify the action result after it has been produced. This type of filter can be applied only to controllers and actions. |
|
Page filters |
This type of filter is used to modify the request before it is received by a Razor Page handler method or to modify the action result after it has been produced. This type of filter can be applied only to Razor Pages. |
|
Result filters |
This type of filter is used to alter the action result before it is executed or to modify the result after execution. |
|
Exception filters |
This type of filter is used to handle exceptions that occur during the execution of the action method or page handler. |
Filters have their own pipeline and are executed in a specific order, as shown in figure 30.5.
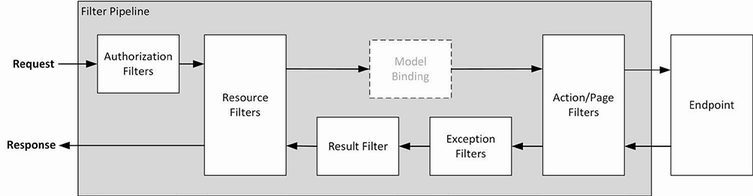
Figure 30.5 The filter pipeline
Filters can short-circuit the filter pipeline to prevent a request from being forwarded to the next filter. For example, an authorization filter can short-circuit the pipeline and return an error response if the user is unauthenticated. The resource, action, and page filters are able to inspect the request before and after it has been handled by the endpoint, allowing these types of filter to short-circuit the pipeline; to alter the request before it is handled; or to alter the response. (I have simplified the flow of filters in figure 30.5. Page filters run before and after the model binding process, as described in the “Understanding Page Filters” section.)
Each type of filter is implemented using interfaces defined by ASP.NET Core, which also provides base classes that make it easy to apply some types of filters as attributes. I describe each interface and the attribute classes in the sections that follow, but they are shown in table 30.3 for quick reference.
Table 30.3 The filter types, interfaces, and attribute base classes
|
Filter Type |
Interfaces |
Attribute Class |
|---|---|---|
|
Authorization filters |
|
No attribute class is provided. |
|
Resource filters |
|
No attribute class is provided. |
|
Action filters |
|
|
|
Page filters |
|
No attribute class is provided. |
|
Result filters |
|
|
|
Exception Filters |
|
|
Filters implement the IFilterMetadata interface, which is in the Microsoft.AspNetCore.Mvc.Filters namespace. Here is the interface:
namespace Microsoft.AspNetCore.Mvc.Filters {
public interface IFilterMetadata { }
}
The interface is empty and doesn’t require a filter to implement any specific behaviors. This is because each of the categories of filter described in the previous section works in a different way. Filters are provided with context data in the form of a FilterContext object. For convenience, Table 30.4 describes the properties that FilterContext provides.
Table 30.4 The FilterContext properties
|
Name |
Description |
|---|---|
|
|
This property returns an |
|
|
This property returns an |
|
|
This property returns a |
|
|
This property returns a |
|
|
This property returns a list of filters that have been applied to the action method, expressed as an |
Authorization filters are used to implement an application’s security policy. Authorization filters are executed before other types of filter and before the endpoint handles the request. Here is the definition of the IAuthorizationFilter interface:
namespace Microsoft.AspNetCore.Mvc.Filters {
public interface IAuthorizationFilter : IFilterMetadata {
void OnAuthorization(AuthorizationFilterContext context);
}
}
The OnAuthorization method is called to provide the filter with the opportunity to authorize the request. For asynchronous authorization filters, here is the definition of the IAsyncAuthorizationFilter interface:
using System.Threading.Tasks;
namespace Microsoft.AspNetCore.Mvc.Filters {
public interface IAsyncAuthorizationFilter : IFilterMetadata {
Task OnAuthorizationAsync(AuthorizationFilterContext context);
}
}
The OnAuthorizationAsync method is called so that the filter can authorize the request. Whichever interface is used, the filter receives context data describing the request through an AuthorizationFilterContext object, which is derived from the FilterContext class and adds one important property, as described in table 30.5.
Table 30.5 The AuthorizationFilterContext property
|
Name |
Description |
|---|---|
|
|
This |
To demonstrate how authorization filters work, I created a Filters folder in the WebApp folder, added a class file called HttpsOnlyAttribute.cs, and used it to define the filter shown in listing 30.16.
Listing 30.16 The contents of the HttpsOnlyAttribute.cs file in the Filters folder
using Microsoft.AspNetCore.Mvc;
using Microsoft.AspNetCore.Mvc.Filters;
namespace WebApp.Filters {
public class HttpsOnlyAttribute : Attribute, IAuthorizationFilter {
public void OnAuthorization(AuthorizationFilterContext context) {
if (!context.HttpContext.Request.IsHttps) {
context.Result =
new StatusCodeResult(StatusCodes.Status403Forbidden);
}
}
}
}
An authorization filter does nothing if a request complies with the authorization policy, and inaction allows ASP.NET Core to move on to the next filter and, eventually, to execute the endpoint. If there is a problem, the filter sets the Result property of the AuthorizationFilterContext object that is passed to the OnAuthorization method. This prevents further execution from happening and provides a result to return to the client. In the listing, the HttpsOnlyAttribute class inspects the IsHttps property of the HttpRequest context object and sets the Result property to interrupt execution if the request has been made without HTTPS. Authorization filters can be applied to controllers, action methods, and Razor Pages. Listing 30.17 applies the new filter to the Home controller.
Listing 30.17 Applying a filter in the HomeController.cs file in the Controllers folder
using Microsoft.AspNetCore.Mvc;
using WebApp.Filters;
namespace WebApp.Controllers {
//[RequireHttps]
[HttpsOnly]
public class HomeController : Controller {
public IActionResult Index() {
return View("Message",
"This is the Index action on the Home controller");
}
public IActionResult Secure() {
return View("Message",
"This is the Secure action on the Home controller");
}
}
}
This filter re-creates the functionality that I included in the action methods in listing 30.11. This is less useful in real projects than doing a redirection like the built-in RequireHttps filter because users won’t understand the meaning of a 403 status code, but it does provide a useful example of how authorization filters work. Restart ASP.NET Core and request http://localhost:5000, and you will see the effect of the filter, as shown in figure 30.6. Request https://localhost:44350, and you will receive the response from the action method, also shown in the figure.

Figure 30.6 Applying a custom authorization filter
Resource filters are executed twice for each request: before the ASP.NET Core model binding process and again before the action result is processed to generate the result. Here is the definition of the IResourceFilter interface:
namespace Microsoft.AspNetCore.Mvc.Filters {
public interface IResourceFilter : IFilterMetadata {
void OnResourceExecuting(ResourceExecutingContext context);
void OnResourceExecuted(ResourceExecutedContext context);
}
}
The OnResourceExecuting method is called when a request is being processed, and the OnResourceExecuted method is called after the endpoint has handled the request but before the action result is executed. For asynchronous resource filters, here is the definition of the IAsyncResourceFilter interface:
namespace Microsoft.AspNetCore.Mvc.Filters {
public interface IAsyncResourceFilter : IFilterMetadata {
Task OnResourceExecutionAsync(ResourceExecutingContext context,
ResourceExecutionDelegate next);
}
}
This interface defines a single method that receives a context object and a delegate to invoke. The resource filter is able to inspect the request before invoking the delegate and inspect the response before it is executed. The OnResourceExecuting method is provided with context using the ResourceExecutingContext class, which defines the properties shown in table 30.6 in addition to those defined by the FilterContext class.
Table 30.6 The properties defined by the ResourceExecutingContext class
|
Name |
Description |
|---|---|
|
|
This |
|
|
This property returns an |
The OnResourceExecuted method is provided with context using the ResourceExecutedContext class, which defines the properties shown in table 30.7, in addition to those defined by the FilterContext class.
Table 30.7 The properties defined by the ResourceExecutedContext class
|
Name |
Description |
|---|---|
|
|
This |
|
|
This |
|
|
This property is used to store an exception thrown during execution. |
|
|
This method returns an |
|
|
Setting this property to |
Creating a resource filter
Resource filters are usually used where it is possible to short-circuit the pipeline and provide a response early, such as when implementing data caching. To create a simple caching filter, add a class file called SimpleCacheAttribute.cs to the Filters folder with the code shown in listing 30.18.
Listing 30.18 The contents of the SimpleCacheAttribute.cs file in the Filters folder
using Microsoft.AspNetCore.Mvc;
using Microsoft.AspNetCore.Mvc.Filters;
namespace WebApp.Filters {
public class SimpleCacheAttribute : Attribute, IResourceFilter {
private Dictionary<PathString, IActionResult> CachedResponses
= new Dictionary<PathString, IActionResult>();
public void OnResourceExecuting(
ResourceExecutingContext context) {
PathString path = context.HttpContext.Request.Path;
if (CachedResponses.ContainsKey(path)) {
context.Result = CachedResponses[path];
CachedResponses.Remove(path);
}
}
public void OnResourceExecuted(ResourceExecutedContext context) {
if (context.Result != null) {
CachedResponses.Add(context.HttpContext.Request.Path,
context.Result);
}
}
}
}
This filter isn’t an especially useful cache, but it does show how a resource filter works. The OnResourceExecuting method provides the filter with the opportunity to short-circuit the pipeline by setting the context object’s Result property to a previously cached action result. If a value is assigned to the Result property, then the filter pipeline is short-circuited, and the action result is executed to produce the response for the client. Cached action results are used only once and then discarded from the cache. If no value is assigned to the Result property, then the request passes to the next step in the pipeline, which may be another filter or the endpoint.
The OnResourceExecuted method provides the filter with the action results that are produced when the pipeline is not short-circuited. In this case, the filter caches the action result so that it can be used for subsequent requests. Resource filters can be applied to controllers, action methods, and Razor Pages. Listing 30.19 applies the custom resource filter to the Message Razor Page and adds a timestamp that will help determine when an action result is cached.
Listing 30.19 Applying a resource filter in the Message.cshtml file in the Pages folder
@page "/pages/message"
@model MessageModel
@using Microsoft.AspNetCore.Mvc.RazorPages
@using WebApp.Filters
@if (Model.Message is string) {
@Model.Message
} else if (Model.Message is IDictionary<string, string>) {
var dict = Model.Message as IDictionary<string, string>;
<table class="table table-sm table-striped table-bordered">
<thead><tr><th>Name</th><th>Value</th></tr></thead>
<tbody>
@if (dict != null) {
foreach (var kvp in dict) {
<tr><td>@kvp.Key</td><td>@kvp.Value</td></tr>
}
}
</tbody>
</table>
}
@functions {
[RequireHttps]
[SimpleCache]
public class MessageModel : PageModel {
public object Message { get; set; } =
DateTime.Now.ToLongTimeString()
+ " This is the Message Razor Page";
}
}
To see the effect of the resource filter, restart ASP.NET Core and request https://localhost:44350/pages/message. Since this is the first request for the path, there will be no cached result, and the request will be forwarded along the pipeline. As the response is processed, the resource filter will cache the action result for future use. Reload the browser to repeat the request, and you will see the same timestamp, indicating that the cached action result has been used. The cached item is removed when it is used, which means that reloading the browser will generate a response with a fresh timestamp, as shown in figure 30.7.
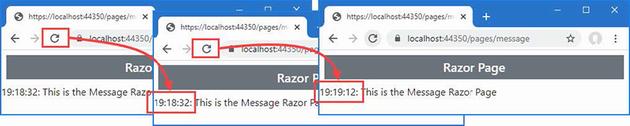
Figure 30.7 Using a resource filter
Creating an asynchronous resource filter
The interface for asynchronous resource filters uses a single method that receives a delegate used to forward the request along the filter pipeline. Listing 30.20 reimplements the caching filter from the previous example so that it implements the IAsyncResourceFilter interface.
Listing 30.20 An asynchronous filter in the Filters/SimpleCacheAttribute.cs file
using Microsoft.AspNetCore.Mvc;
using Microsoft.AspNetCore.Mvc.Filters;
namespace WebApp.Filters {
public class SimpleCacheAttribute : Attribute, IAsyncResourceFilter {
private Dictionary<PathString, IActionResult> CachedResponses
= new Dictionary<PathString, IActionResult>();
public async Task OnResourceExecutionAsync(
ResourceExecutingContext context,
ResourceExecutionDelegate next) {
PathString path = context.HttpContext.Request.Path;
if (CachedResponses.ContainsKey(path)) {
context.Result = CachedResponses[path];
CachedResponses.Remove(path);
} else {
ResourceExecutedContext execContext = await next();
if (execContext.Result != null) {
CachedResponses.Add(context.HttpContext.Request.Path,
execContext.Result);
}
}
}
}
}
The OnResourceExecutionAsync method receives a ResourceExecutingContext object, which is used to determine whether the pipeline can be short-circuited. If it cannot, the delegate is invoked without arguments and asynchronously produces a ResourceExecutedContext object when the request has been handled and is making its way back along the pipeline. Restart ASP.NET Core and repeat the requests described in the previous section, and you will see the same caching behavior, as shown in figure 30.7.
Like resource filters, action filters are executed twice. The difference is that action filters are executed after the model binding process, whereas resource filters are executed before model binding. This means that resource filters can short-circuit the pipeline and minimize the work that ASP.NET Core does on the request. Action filters are used when model binding is required, which means they are used for tasks such as altering the model or enforcing validation. Action filters can be applied only to controllers and action methods, unlike resource filters, which can also be used with Razor Pages. (The Razor Pages equivalent to action filters is the page filter, described in the "Understanding Page Filters" section.) Here is the IActionFilter interface:
namespace Microsoft.AspNetCore.Mvc.Filters {
public interface IActionFilter : IFilterMetadata {
void OnActionExecuting(ActionExecutingContext context);
void OnActionExecuted(ActionExecutedContext context);
}
}
When an action filter has been applied to an action method, the OnActionExecuting method is called just before the action method is invoked, and the OnActionExecuted method is called just after. Action filters are provided with context data through two different context classes: ActionExecutingContext for the OnActionExecuting method and ActionExecutedContext for the OnActionExecuted method.
The ActionExecutingContext class, which is used to describe an action that is about to be invoked, defines the properties described in table 30.8, in addition to the FilterContext properties.
Table 30.8 The ActionExecutingContext properties
|
Name |
Description |
|---|---|
|
|
This property returns the controller whose action method is about to be invoked. (Details of the action method are available through the |
|
|
This property returns a dictionary of the arguments that will be passed to the action method, indexed by name. The filter can insert, remove, or change the arguments. |
|
|
If the filter assigns an |
The ActionExecutedContext class is used to represent an action that has been executed and defines the properties described in table 30.9, in addition to the FilterContext properties.
Table 30.9 The ActionExecutedContext properties
|
Name |
Description |
|---|---|
|
|
This property returns the |
|
|
This |
|
|
This property contains any |
|
|
This method returns an |
|
|
Setting this property to |
|
|
This property returns the |
Asynchronous action filters are implemented using the IAsyncActionFilter interface.
namespace Microsoft.AspNetCore.Mvc.Filters {
public interface IAsyncActionFilter : IFilterMetadata {
Task OnActionExecutionAsync(ActionExecutingContext context,
ActionExecutionDelegate next);
}
}
This interface follows the same pattern as the IAsyncResourceFilter interface described earlier in the chapter. The OnActionExecutionAsync method is provided with an ActionExecutingContext object and a delegate. The ActionExecutingContext object describes the request before it is received by the action method. The filter can short-circuit the pipeline by assigning a value to the ActionExecutingContext.Result property or pass it along by invoking the delegate. The delegate asynchronously produces an ActionExecutedContext object that describes the result from the action method.
Creating an action filter
Add a class file called ChangeArgAttribute.cs to the Filters folder and use it to define the action filter shown in listing 30.21.
Listing 30.21 The contents of the ChangeArgAttribute.cs file in the Filters folder
using Microsoft.AspNetCore.Mvc.Filters;
namespace WebApp.Filters {
public class ChangeArgAttribute : Attribute, IAsyncActionFilter {
public async Task OnActionExecutionAsync(
ActionExecutingContext context,
ActionExecutionDelegate next) {
if (context.ActionArguments.ContainsKey("message1")) {
context.ActionArguments["message1"] = "New message";
}
await next();
}
}
}
The filter looks for an action argument named message1 and changes the value that will be used to invoke the action method. The values that will be used for the action method arguments are determined by the model binding process. Listing 30.22 adds an action method to the Home controller and applies the new filter.
Listing 30.22 Applying a filter in the HomeController.cs file in the Controllers folder
using Microsoft.AspNetCore.Mvc;
using WebApp.Filters;
namespace WebApp.Controllers {
[HttpsOnly]
public class HomeController : Controller {
public IActionResult Index() {
return View("Message",
"This is the Index action on the Home controller");
}
public IActionResult Secure() {
return View("Message",
"This is the Secure action on the Home controller");
}
[ChangeArg]
public IActionResult Messages(string message1,
string message2 = "None") {
return View("Message", $"{message1}, {message2}");
}
}
}
Restart ASP.NET Core and request https://localhost:44350/home/messages?message1=hello&message2=world. The model binding process will locate values for the parameters defined by the action method from the query string. One of those values is then modified by the action filter, producing the response shown in figure 30.8.

Figure 30.8 Using an action filter
Implementing an action filter using the attribute base class
Action attributes can also be implemented by deriving from the ActionFilterAttribute class, which extends Attribute and inherits both the IActionFilter and IAsyncActionFilter interfaces so that implementation classes override just the methods they require. In listing 30.23, I have reimplemented the ChangeArg filter so that it is derived from ActionFilterAttribute.
Listing 30.23 Using a filter base class in the Filters/ChangeArgsAttribute.cs file
using Microsoft.AspNetCore.Mvc.Filters;
namespace WebApp.Filters {
public class ChangeArgAttribute : ActionFilterAttribute {
public override async Task OnActionExecutionAsync(
ActionExecutingContext context,
ActionExecutionDelegate next) {
if (context.ActionArguments.ContainsKey("message1")) {
context.ActionArguments["message1"] = "New message";
}
await next();
}
}
}
This attribute behaves in just the same way as the earlier implementation, and the use of the base class is a matter of preference. Restart ASP.NET Core and request https://localhost:44350/home/messages?message1=hello&message2=world, and you will see the response shown in figure 30.8.
Using the controller filter methods
The Controller class, which is the base for controllers that render Razor views, implements the IActionFilter and IAsyncActionFilter interfaces, which means you can define functionality and apply it to the actions defined by a controller and any derived controllers. Listing 30.24 implements the ChangeArg filter functionality directly in the HomeController class.
Listing 30.24 Using action filter methods in the Controllers/HomeController.cs file
using Microsoft.AspNetCore.Mvc;
using WebApp.Filters;
using Microsoft.AspNetCore.Mvc.Filters;
namespace WebApp.Controllers {
[HttpsOnly]
public class HomeController : Controller {
public IActionResult Index() {
return View("Message",
"This is the Index action on the Home controller");
}
public IActionResult Secure() {
return View("Message",
"This is the Secure action on the Home controller");
}
//[ChangeArg]
public IActionResult Messages(string message1,
string message2 = "None") {
return View("Message", $"{message1}, {message2}");
}
public override void OnActionExecuting(
ActionExecutingContext context) {
if (context.ActionArguments.ContainsKey("message1")) {
context.ActionArguments["message1"] = "New message";
}
}
}
}
The Home controller overrides the Controller implementation of the OnActionExecuting method and uses it to modify the arguments that will be passed to the execution method. Restart ASP.NET Core and request https://localhost:44350/home/messages?message1=hello&message2=world, and you will see the response shown in figure 30.8.
Page filters are the Razor Page equivalent of action filters. Here is the IPageFilter interface, which is implemented by synchronous page filters:
namespace Microsoft.AspNetCore.Mvc.Filters {
public interface IPageFilter : IFilterMetadata {
void OnPageHandlerSelected(PageHandlerSelectedContext context);
void OnPageHandlerExecuting(PageHandlerExecutingContext context);
void OnPageHandlerExecuted(PageHandlerExecutedContext context);
}
}
The OnPageHandlerSelected method is invoked after ASP.NET Core has selected the page handler method but before model binding has been performed, which means the arguments for the handler method have not been determined. This method receives context through the PageHandlerSelectedContext class, which defines the properties shown in table 30.10, in addition to those defined by the FilterContext class. This method cannot be used to short-circuit the pipeline, but it can alter the handler method that will receive the request.
Table 30.10 The PageHandlerSelectedContext properties
|
Name |
Description |
|---|---|
|
|
This property returns the description of the Razor Page. |
|
|
This property returns a |
|
|
This property returns the instance of the Razor Page that will handle the request. |
The OnPageHandlerExecuting method is called after the model binding process has completed but before the page handler method is invoked. This method receives context through the PageHandlerExecutingContext class, which defines the properties shown in table 30.11, in addition to those defined by the PageHandlerSelectedContext class.
Table 30.11 The PageHandlerExecutingContext properties
|
Name |
Description |
|---|---|
|
|
This property returns a dictionary containing the page handler arguments, indexed by name. |
|
|
The filter can short-circuit the pipeline by assigning an |
The OnPageHandlerExecuted method is called after the page handler method has been invoked but before the action result is processed to create a response. This method receives context through the PageHandlerExecutedContext class, which defines the properties shown in table 30.12 in addition to the PageHandlerExecutingContext properties.
Table 30.12 The PageHandlerExecutedContext properties
|
Name |
Description |
|---|---|
|
|
This property returns |
|
|
This property returns an exception if one was thrown by the page handler method. |
|
|
This property is set to |
|
|
This property returns the action result that will be used to create a response for the client. |
Asynchronous page filters are created by implementing the IAsyncPageFilter interface, which is defined like this:
namespace Microsoft.AspNetCore.Mvc.Filters {
public interface IAsyncPageFilter : IFilterMetadata {
Task OnPageHandlerSelectionAsync(
PageHandlerSelectedContext context);
Task OnPageHandlerExecutionAsync(
PageHandlerExecutingContext context,
PageHandlerExecutionDelegate next);
}
}
The OnPageHandlerSelectionAsync is called after the handler method is selected and is equivalent to the synchronous OnPageHandlerSelected method. The OnPageHandlerExecutionAsync is provided with a PageHandlerExecutingContext object that allows it to short-circuit the pipeline and with a delegate that is invoked to pass on the request. The delegate produces a PageHandlerExecutedContext object that can be used to inspect or alter the action result produced by the handler method.
Creating a page filter
To create a page filter, add a class file named ChangePageArgs.cs to the Filters folder and use it to define the class shown in listing 30.25.
Listing 30.25 The contents of the ChangePageArgs.cs file in the Filters folder
using Microsoft.AspNetCore.Mvc.Filters;
namespace WebApp.Filters {
public class ChangePageArgs : Attribute, IPageFilter {
public void OnPageHandlerSelected(
PageHandlerSelectedContext context) {
// do nothing
}
public void OnPageHandlerExecuting(
PageHandlerExecutingContext context) {
if (context.HandlerArguments.ContainsKey("message1")) {
context.HandlerArguments["message1"] = "New message";
}
}
public void OnPageHandlerExecuted(
PageHandlerExecutedContext context) {
// do nothing
}
}
}
The page filter in listing 30.25 performs the same task as the action filter I created in the previous section. In listing 30.26, I have modified the Message Razor Page to define a handler method and have applied the page filter. Page filters can be applied to individual handler methods or, as in the listing, to the page model class, in which case the filter is used for all handler methods. (I also disabled the SimpleCache filter in listing 30.26. Resource filters can work alongside page filters. I disabled this filter because caching responses makes some of the examples more difficult to follow.)
Listing 30.26 Using a page filter in the Message.cshtml file in the Pages folder
@page "/pages/message"
@model MessageModel
@using Microsoft.AspNetCore.Mvc.RazorPages
@using WebApp.Filters
@if (Model.Message is string) {
@Model.Message
} else if (Model.Message is IDictionary<string, string>) {
var dict = Model.Message as IDictionary<string, string>;
<table class="table table-sm table-striped table-bordered">
<thead><tr><th>Name</th><th>Value</th></tr></thead>
<tbody>
@if (dict != null) {
foreach (var kvp in dict) {
<tr><td>@kvp.Key</td><td>@kvp.Value</td></tr>
}
}
</tbody>
</table>
}
@functions {
[RequireHttps]
//[SimpleCache]
[ChangePageArgs]
public class MessageModel : PageModel {
public object Message { get; set; } =
DateTime.Now.ToLongTimeString()
+ " This is the Message Razor Page";
public void OnGet(string message1, string message2) {
Message = $"{message1}, {message2}";
}
}
}
Restart ASP.NET Core and request https://localhost:44350/pages/message?message1=hello&message2=world. The page filter will replace the value of the message1 argument for the OnGet handler method, which produces the response shown in figure 30.9.
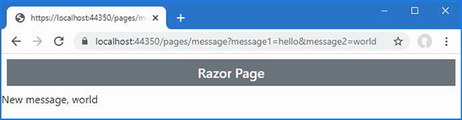
Figure 30.9 Using a page filter
Using the page model filter methods
The PageModel class, which is used as the base for page model classes, implements the IPageFilter and IAsyncPageFilter interfaces, which means you can add filter functionality directly to a page model, as shown in listing 30.27.
Listing 30.27 Using the filter methods in the Message.cshtml file in the Pages folder
@page "/pages/message"
@model MessageModel
@using Microsoft.AspNetCore.Mvc.RazorPages
@using WebApp.Filters
@using Microsoft.AspNetCore.Mvc.Filters
@if (Model.Message is string) {
@Model.Message
} else if (Model.Message is IDictionary<string, string>) {
var dict = Model.Message as IDictionary<string, string>;
<table class="table table-sm table-striped table-bordered">
<thead><tr><th>Name</th><th>Value</th></tr></thead>
<tbody>
@if (dict != null) {
foreach (var kvp in dict) {
<tr><td>@kvp.Key</td><td>@kvp.Value</td></tr>
}
}
</tbody>
</table>
}
@functions {
[RequireHttps]
//[SimpleCache]
//[ChangePageArgs]
public class MessageModel : PageModel {
public object Message { get; set; } =
DateTime.Now.ToLongTimeString()
+ " This is the Message Razor Page";
public void OnGet(string message1, string message2) {
Message = $"{message1}, {message2}";
}
public override void OnPageHandlerExecuting(
PageHandlerExecutingContext context) {
if (context.HandlerArguments.ContainsKey("message1")) {
context.HandlerArguments["message1"] = "New message";
}
}
}
}
Request https://localhost:44350/pages/message?message1=hello&message2=world. The method implemented by the page model class in listing 30.27 will produce the same result as shown in figure 30.9.
Result filters are executed before and after an action result is used to generate a response, allowing responses to be modified after they have been handled by the endpoint. Here is the definition of the IResultFilter interface:
namespace Microsoft.AspNetCore.Mvc.Filters {
public interface IResultFilter : IFilterMetadata {
void OnResultExecuting(ResultExecutingContext context);
void OnResultExecuted(ResultExecutedContext context);
}
}
The OnResultExecuting method is called after the endpoint has produced an action result. This method receives context through the ResultExecutingContext class, which defines the properties described in table 30.13, in addition to those defined by the FilterContext class.
Table 30.13 The ResultExecutingContext class properties
|
Name |
Description |
|---|---|
|
|
This property returns the object that contains the endpoint. |
|
|
Setting this property to |
|
|
This property returns the action result produced by the endpoint. |
The OnResultExecuted method is called after the action result has been executed to generate the response for the client. This method receives context through the ResultExecutedContext class, which defines the properties shown in table 30.14, in addition to those it inherits from the FilterContext class.
Table 30.14 The ResultExecutedContext class
|
Name |
Description |
|---|---|
|
|
This property returns |
|
|
This property returns the object that contains the endpoint. |
|
|
This property returns an exception if one was thrown by the page handler method. |
|
|
This property is set to |
|
|
This property returns the action result that will be used to create a response for the client. This property is read-only. |
Asynchronous result filters implement the IAsyncResultFilter interface, which is defined like this:
namespace Microsoft.AspNetCore.Mvc.Filters {
public interface IAsyncResultFilter : IFilterMetadata {
Task OnResultExecutionAsync(ResultExecutingContext context,
ResultExecutionDelegate next);
}
}
This interface follows the pattern established by the other filter types. The OnResultExecutionAsync method is invoked with a context object whose Result property can be used to alter the response and a delegate that will forward the response along the pipeline.
Understanding always-run result filters
Filters that implement the IResultFilter and IAsyncResultFilter interfaces are used only when a request is handled normally by the endpoint. They are not used if another filter short-circuits the pipeline or if there is an exception. Filters that need to inspect or alter the response, even when the pipeline is short-circuited, can implement the IAlwaysRunResultFilter or IAsyncAlwaysRunResultFilter interface. These interfaces derived from IResultFilter and IAsyncResultFilter but define no new features. Instead, ASP.NET Core detects the always-run interfaces and always applies the filters.
Creating a result filter
Add a class file named ResultDiagnosticsAttribute.cs to the Filters folder and use it to define the filter shown in listing 30.28.
Listing 30.28 The contents of the ResultDiagnosticsAttribute.cs file in the Filters folder
using Microsoft.AspNetCore.Mvc;
using Microsoft.AspNetCore.Mvc.Filters;
using Microsoft.AspNetCore.Mvc.ModelBinding;
using Microsoft.AspNetCore.Mvc.RazorPages;
using Microsoft.AspNetCore.Mvc.ViewFeatures;
namespace WebApp.Filters {
public class ResultDiagnosticsAttribute :
Attribute, IAsyncResultFilter {
public async Task OnResultExecutionAsync(
ResultExecutingContext context,
ResultExecutionDelegate next) {
if (context.HttpContext.Request.Query.ContainsKey("diag")) {
Dictionary<string, string?> diagData =
new Dictionary<string, string?> {
{"Result type", context.Result.GetType().Name }
};
if (context.Result is ViewResult vr) {
diagData["View Name"] = vr.ViewName;
diagData["Model Type"]
= vr.ViewData?.Model?.GetType().Name;
diagData["Model Data"]
= vr.ViewData?.Model?.ToString();
} else if (context.Result is PageResult pr) {
diagData["Model Type"] = pr.Model.GetType().Name;
diagData["Model Data"]
= pr.ViewData?.Model?.ToString();
}
context.Result = new ViewResult() {
ViewName = "/Views/Shared/Message.cshtml",
ViewData = new ViewDataDictionary(
new EmptyModelMetadataProvider(),
new ModelStateDictionary()) {
Model = diagData
}
};
}
await next();
}
}
}
This filter examines the request to see whether it contains a query string parameter named diag. If it does, then the filter creates a result that displays diagnostic information instead of the output produced by the endpoint. The filter in listing 30.28 will work with the actions defined by the Home controller or the Message Razor Page. Listing 30.29 applies the result filter to the Home controller.
Listing 30.29 Applying a result filter in the Controllers/HomeController.cs file
using Microsoft.AspNetCore.Mvc;
using WebApp.Filters;
using Microsoft.AspNetCore.Mvc.Filters;
namespace WebApp.Controllers {
[HttpsOnly]
[ResultDiagnostics]
public class HomeController : Controller {
public IActionResult Index() {
return View("Message",
"This is the Index action on the Home controller");
}
public IActionResult Secure() {
return View("Message",
"This is the Secure action on the Home controller");
}
//[ChangeArg]
public IActionResult Messages(string message1,
string message2 = "None") {
return View("Message", $"{message1}, {message2}");
}
public override void OnActionExecuting(
ActionExecutingContext context) {
if (context.ActionArguments.ContainsKey("message1")) {
context.ActionArguments["message1"] = "New message";
}
}
}
}
Restart ASP.NET Core and request https://localhost:44350/?diag. The query string parameter will be detected by the filter, which will generate the diagnostic information shown in figure 30.10.
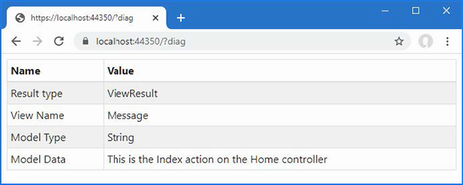
Figure 30.10 Using a result filter
Implementing a result filter using the attribute base class
The ResultFilterAttribute class is derived from Attribute and implements the IResultFilter and IAsyncResultFilter interfaces and can be used as the base class for result filters, as shown in listing 30.30. There is no attribute base class for the always-run interfaces.
Listing 30.30 Using the base class in the Filters/ResultDiagnosticsAttribute.cs file
using Microsoft.AspNetCore.Mvc;
using Microsoft.AspNetCore.Mvc.Filters;
using Microsoft.AspNetCore.Mvc.ModelBinding;
using Microsoft.AspNetCore.Mvc.RazorPages;
using Microsoft.AspNetCore.Mvc.ViewFeatures;
namespace WebApp.Filters {
public class ResultDiagnosticsAttribute : ResultFilterAttribute {
public override async Task OnResultExecutionAsync(
ResultExecutingContext context,
ResultExecutionDelegate next) {
if (context.HttpContext.Request.Query.ContainsKey("diag")) {
Dictionary<string, string?> diagData =
new Dictionary<string, string?> {
{"Result type", context.Result.GetType().Name }
};
if (context.Result is ViewResult vr) {
diagData["View Name"] = vr.ViewName;
diagData["Model Type"]
= vr.ViewData?.Model?.GetType().Name;
diagData["Model Data"]
= vr.ViewData?.Model?.ToString();
} else if (context.Result is PageResult pr) {
diagData["Model Type"] = pr.Model.GetType().Name;
diagData["Model Data"]
= pr.ViewData?.Model?.ToString();
}
context.Result = new ViewResult() {
ViewName = "/Views/Shared/Message.cshtml",
ViewData = new ViewDataDictionary(
new EmptyModelMetadataProvider(),
new ModelStateDictionary()) {
Model = diagData
}
};
}
await next();
}
}
}
Restart ASP.NET Core and request https://localhost:44350/?diag. The filter will produce the output shown in figure 30.10.
Exception filters allow you to respond to exceptions without having to write try...catch blocks in every action method. Exception filters can be applied to controller classes, action methods, page model classes, or handler methods. They are invoked when an exception is not handled by the endpoint or by the action, page, and result filters that have been applied to the endpoint. (Action, page, and result filters can deal with an unhandled exception by setting the ExceptionHandled property of their context objects to true.) Exception filters implement the IExceptionFilter interface, which is defined as follows:
namespace Microsoft.AspNetCore.Mvc.Filters {
public interface IExceptionFilter : IFilterMetadata {
void OnException(ExceptionContext context);
}
}
The OnException method is called if an unhandled exception is encountered. The IAsyncExceptionFilter interface can be used to create asynchronous exception filters. Here is the definition of the asynchronous interface:
using System.Threading.Tasks;
namespace Microsoft.AspNetCore.Mvc.Filters {
public interface IAsyncExceptionFilter : IFilterMetadata {
Task OnExceptionAsync(ExceptionContext context);
}
}
The OnExceptionAsync method is the asynchronous counterpart to the OnException method from the IExceptionFilter interface and is called when there is an unhandled exception. For both interfaces, context data is provided through the ExceptionContext class, which is derived from FilterContext and defines the additional properties shown in table 30.15.
Table 30.15 The ExceptionContext properties
|
Name |
Description |
|---|---|
|
|
This property contains any |
|
|
This |
|
|
This property sets the |
Exception filters can be created by implementing one of the filter interfaces or by deriving from the ExceptionFilterAttribute class, which is derived from Attribute and implements both the IExceptionFilter and IAsyncException filters. The most common use for an exception filter is to present a custom error page for a specific exception type to provide the user with more useful information than the standard error-handling capabilities can provide.
To create an exception filter, add a class file named RangeExceptionAttribute.cs to the Filters folder with the code shown in listing 30.31.
Listing 30.31 The contents of the RangeExceptionAttribute.cs file in the Filters folder
using Microsoft.AspNetCore.Mvc;
using Microsoft.AspNetCore.Mvc.Filters;
using Microsoft.AspNetCore.Mvc.ModelBinding;
using Microsoft.AspNetCore.Mvc.ViewFeatures;
namespace WebApp.Filters {
public class RangeExceptionAttribute : ExceptionFilterAttribute {
public override void OnException(ExceptionContext context) {
if (context.Exception is ArgumentOutOfRangeException) {
context.Result = new ViewResult() {
ViewName = "/Views/Shared/Message.cshtml",
ViewData = new ViewDataDictionary(
new EmptyModelMetadataProvider(),
new ModelStateDictionary()) {
Model = @"The data received by the
application cannot be processed"
}
};
}
}
}
}
This filter uses the ExceptionContext object to get the type of the unhandled exception and, if the type is ArgumentOutOfRangeException, creates an action result that displays a message to the user. Listing 30.32 adds an action method to the Home controller to which I have applied the exception filter.
Listing 30.32 Applying an exception filter in the Controllers/HomeController.cs file
using Microsoft.AspNetCore.Mvc;
using WebApp.Filters;
using Microsoft.AspNetCore.Mvc.Filters;
namespace WebApp.Controllers {
[HttpsOnly]
[ResultDiagnostics]
public class HomeController : Controller {
public IActionResult Index() {
return View("Message",
"This is the Index action on the Home controller");
}
public IActionResult Secure() {
return View("Message",
"This is the Secure action on the Home controller");
}
//[ChangeArg]
public IActionResult Messages(string message1,
string message2 = "None") {
return View("Message", $"{message1}, {message2}");
}
public override void OnActionExecuting(
ActionExecutingContext context) {
if (context.ActionArguments.ContainsKey("message1")) {
context.ActionArguments["message1"] = "New message";
}
}
[RangeException]
public ViewResult GenerateException(int? id) {
if (id == null) {
throw new ArgumentNullException(nameof(id));
} else if (id > 10) {
throw new ArgumentOutOfRangeException(nameof(id));
} else {
return View("Message", $"The value is {id}");
}
}
}
}
The GenerateException action method relies on the default routing pattern to receive a nullable int value from the request URL. The action method throws an ArgumentNullException if there is no matching URL segment and throws an ArgumentOutOfRangeException if its value is greater than 10. If there is a value and it is in range, then the action method returns a ViewResult.
Restart ASP.NET Core and request https://localhost:44350/Home/GenerateException/100. The final segment will exceed the range expected by the action method, which will throw the exception type that is handled by the filter, producing the result shown in figure 30.11. If you request /Home/GenerateException, then the exception thrown by the action method won’t be handled by the filter, and the default error handling will be used.
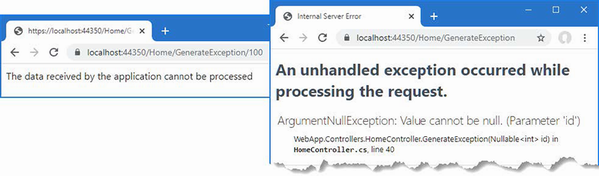
Figure 30.11 Using an exception filter
By default, ASP.NET Core manages the filter objects it creates and will reuse them for subsequent requests. This isn’t always the desired behavior, and in the sections that follow, I describe different ways to take control of how filters are created. To create a filter that will show the lifecycle, add a class file called GuidResponseAttribute.cs to the Filters folder, and use it to define the filter shown in listing 30.33.
Listing 30.33 The contents of the GuidResponseAttribute.cs file in the Filters folder
using Microsoft.AspNetCore.Mvc;
using Microsoft.AspNetCore.Mvc.Filters;
using Microsoft.AspNetCore.Mvc.ModelBinding;
using Microsoft.AspNetCore.Mvc.ViewFeatures;
namespace WebApp.Filters {
[AttributeUsage(AttributeTargets.Method | AttributeTargets.Class,
AllowMultiple = true)]
public class GuidResponseAttribute
: Attribute, IAsyncAlwaysRunResultFilter {
private int counter = 0;
private string guid = Guid.NewGuid().ToString();
public async Task OnResultExecutionAsync(
ResultExecutingContext context,
ResultExecutionDelegate next) {
Dictionary<string, string> resultData;
if (context.Result is ViewResult vr
&& vr.ViewData.Model is Dictionary<string, string> data) {
resultData = data;
} else {
resultData = new Dictionary<string, string>();
context.Result = new ViewResult() {
ViewName = "/Views/Shared/Message.cshtml",
ViewData = new ViewDataDictionary(
new EmptyModelMetadataProvider(),
new ModelStateDictionary()) {
Model = resultData
}
};
}
while (resultData.ContainsKey($"Counter_{counter}")) {
counter++;
}
resultData[$"Counter_{counter}"] = guid;
await next();
}
}
}
This result filter replaces the action result produced by the endpoint with one that will render the Message view and display a unique GUID value. The filter is configured so that it can be applied more than once to the same target and will add a new message if a filter earlier in the pipeline has created a suitable result. Listing 30.34 applies the filter twice to the Home controller. (I have also removed all but one of the action methods for brevity.)
Listing 30.34 Applying a filter in the HomeController.cs file in the Controllers folder
using Microsoft.AspNetCore.Mvc;
using WebApp.Filters;
namespace WebApp.Controllers {
[HttpsOnly]
[ResultDiagnostics]
[GuidResponse]
[GuidResponse]
public class HomeController : Controller {
public IActionResult Index() {
return View("Message",
"This is the Index action on the Home controller");
}
}
}
To confirm that the filter is being reused, restart ASP.NET Core and request https://localhost:44350/?diag. The response will contain GUID values from the two GuidResponse filter attributes. Two instances of the filter have been created to handle the request. Reload the browser, and you will see the same GUID values displayed, indicating that the filter objects created to handle the first request have been reused (Figure 30.12).
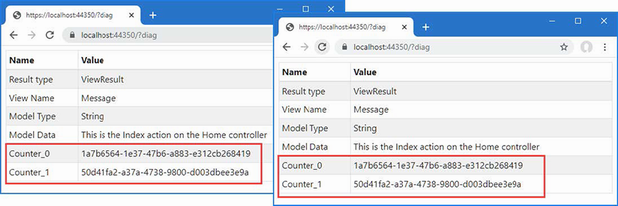
Figure 30.12 Demonstrating filter reuse
Filters can implement the IFilterFactory interface to take responsibility for creating instances of filters and specify whether those instances can be reused. The IFilterFactory interface defines the members described in table 30.16.
Table 30.16 The IFilterFactory members
|
Name |
Description |
|---|---|
|
|
This |
|
|
This method is invoked to create new instances of the filter and is provided with an |
Listing 30.35 implements the IFilterFactory interface and returns false for the IsReusable property, which prevents the filter from being reused.
Listing 30.35 Implementing an interface in the Filters/GuidResponseAttribute.cs file
using Microsoft.AspNetCore.Mvc;
using Microsoft.AspNetCore.Mvc.Filters;
using Microsoft.AspNetCore.Mvc.ModelBinding;
using Microsoft.AspNetCore.Mvc.ViewFeatures;
namespace WebApp.Filters {
[AttributeUsage(AttributeTargets.Method | AttributeTargets.Class,
AllowMultiple = true)]
public class GuidResponseAttribute : Attribute,
IAsyncAlwaysRunResultFilter, IFilterFactory {
private int counter = 0;
private string guid = Guid.NewGuid().ToString();
public bool IsReusable => false;
public IFilterMetadata CreateInstance(
IServiceProvider serviceProvider) {
return ActivatorUtilities
.GetServiceOrCreateInstance
<GuidResponseAttribute>(serviceProvider);
}
public async Task OnResultExecutionAsync(
ResultExecutingContext context,
ResultExecutionDelegate next) {
Dictionary<string, string> resultData;
if (context.Result is ViewResult vr
&& vr.ViewData.Model is Dictionary<string, string> data) {
resultData = data;
} else {
resultData = new Dictionary<string, string>();
context.Result = new ViewResult() {
ViewName = "/Views/Shared/Message.cshtml",
ViewData = new ViewDataDictionary(
new EmptyModelMetadataProvider(),
new ModelStateDictionary()) {
Model = resultData
}
};
}
while (resultData.ContainsKey($"Counter_{counter}")) {
counter++;
}
resultData[$"Counter_{counter}"] = guid;
await next();
}
}
}
I create new filter objects using the GetServiceOrCreateInstance method, defined by the ActivatorUtilities class in the Microsoft.Extensions.DependencyInjection namespace. Although you can use the new keyword to create a filter, this approach will resolve any dependencies on services that are declared through the filter’s constructor.
To see the effect of implementing the IFilterFactory interface, restart ASP.NET Core and request https://localhost:44350/?diag. Reload the browser, and each time the request is handled, new filters will be created, and new GUIDs will be displayed, as shown in figure 30.13.
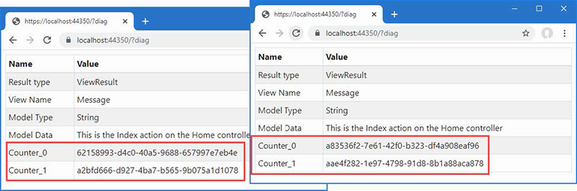
Figure 30.13 Preventing filter reuse
Filters can be registered as services, which allows their lifecycle to be controlled through dependency injection, which I described in chapter 14. Listing 30.36 registers the GuidResponse filter as a scoped service.
Listing 30.36 Creating a filter service in the Program.cs file in the WebApp folder
using Microsoft.EntityFrameworkCore;
using WebApp.Models;
using WebApp.Filters;
var builder = WebApplication.CreateBuilder(args);
builder.Services.AddDbContext<DataContext>(opts => {
opts.UseSqlServer(builder.Configuration[
"ConnectionStrings:ProductConnection"]);
opts.EnableSensitiveDataLogging(true);
});
builder.Services.AddControllersWithViews();
builder.Services.AddRazorPages();
builder.Services.AddScoped<GuidResponseAttribute>();
var app = builder.Build();
app.UseStaticFiles();
app.MapDefaultControllerRoute();
app.MapRazorPages();
var context = app.Services.CreateScope().ServiceProvider
.GetRequiredService<DataContext>();
SeedData.SeedDatabase(context);
app.Run();
By default, ASP.NET Core creates a scope for each request, which means that a single instance of the filter will be created for each request. To see the effect, restart ASP.NET Core and request https://localhost:44350/?diag. Both attributes applied to the Home controller are processed using the same instance of the filter, which means that both GUIDs in the response are the same. Reload the browser; a new scope will be created, and a new filter object will be used, as shown in figure 30.14.
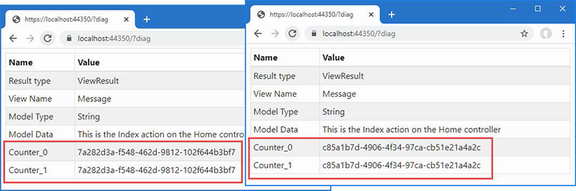
Figure 30.14 Using dependency injection to manage filters
Global filters are applied to every request that ASP.NET Core handles, which means they don’t have to be applied to individual controllers or Razor Pages. Any filter can be used as a global filter; however, action filters will be applied to requests only where the endpoint is an action method, and page filters will be applied to requests only where the endpoint is a Razor Page.
Global filters are set up using the options pattern in the Program.cs file, as shown in listing 30.37.
Listing 30.37 Creating a global filter in the Program.cs file in the WebApp folder
using Microsoft.EntityFrameworkCore;
using WebApp.Models;
using WebApp.Filters;
using Microsoft.AspNetCore.Mvc;
var builder = WebApplication.CreateBuilder(args);
builder.Services.AddDbContext<DataContext>(opts => {
opts.UseSqlServer(builder.Configuration[
"ConnectionStrings:ProductConnection"]);
opts.EnableSensitiveDataLogging(true);
});
builder.Services.AddControllersWithViews();
builder.Services.AddRazorPages();
builder.Services.AddScoped<GuidResponseAttribute>();
builder.Services.Configure<MvcOptions>(opts =>
opts.Filters.Add<HttpsOnlyAttribute>());
var app = builder.Build();
app.UseStaticFiles();
app.MapDefaultControllerRoute();
app.MapRazorPages();
var context = app.Services.CreateScope().ServiceProvider
.GetRequiredService<DataContext>();
SeedData.SeedDatabase(context);
app.Run();
The MvcOptions.Filters property returns a collection to which filters are added to apply them globally, either using the Add<T> method or using the AddService<T> method for filters that are also services. There is also an Add method without a generic type argument that can be used to register a specific object as a global filter.
The statement in listing 30.37 registers the HttpsOnly filter I created earlier in the chapter, which means that it no longer needs to be applied directly to individual controllers or Razor Pages, so listing 30.38 removes the filter from the Home controller.
Listing 30.38 Removing a filter in the HomeController.cs file in the Controllers folder
using Microsoft.AspNetCore.Mvc;
using WebApp.Filters;
namespace WebApp.Controllers {
//[HttpsOnly]
[ResultDiagnostics]
//[GuidResponse]
//[GuidResponse]
public class HomeController : Controller {
public IActionResult Index() {
return View("Message",
"This is the Index action on the Home controller");
}
}
}
Restart ASP.NET Core and request http://localhost:5000 to confirm that the HTTPS-only policy is being applied even though the attribute is no longer used to decorate the controller. The global authorization filter will short-circuit the filter pipeline and produce the response shown in figure 30.15.
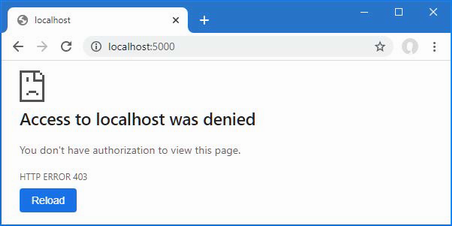
Figure 30.15 Using a global filter
Filters run in a specific sequence: authorization, resource, action, or page, and then result. But if there are multiple filters of a given type, then the order in which they are applied is driven by the scope through which the filters have been applied.
To demonstrate how this works, add a class file named MessageAttribute.cs to the Filters folder and use it to define the filter shown in listing 30.39.
Listing 30.39 The contents of the MessageAttribute.cs file in the Filters folder
using Microsoft.AspNetCore.Mvc;
using Microsoft.AspNetCore.Mvc.Filters;
using Microsoft.AspNetCore.Mvc.ModelBinding;
using Microsoft.AspNetCore.Mvc.ViewFeatures;
namespace WebApp.Filters {
[AttributeUsage(AttributeTargets.Method | AttributeTargets.Class,
AllowMultiple = true)]
public class MessageAttribute
: Attribute, IAsyncAlwaysRunResultFilter {
private int counter = 0;
private string msg;
public MessageAttribute(string message) => msg = message;
public async Task OnResultExecutionAsync(
ResultExecutingContext context,
ResultExecutionDelegate next) {
Dictionary<string, string> resultData;
if (context.Result is ViewResult vr
&& vr.ViewData.Model is Dictionary<string, string> data) {
resultData = data;
} else {
resultData = new Dictionary<string, string>();
context.Result = new ViewResult() {
ViewName = "/Views/Shared/Message.cshtml",
ViewData = new ViewDataDictionary(
new EmptyModelMetadataProvider(),
new ModelStateDictionary()) {
Model = resultData
}
};
}
while (resultData.ContainsKey($"Message_{counter}")) {
counter++;
}
resultData[$"Message_{counter}"] = msg;
await next();
}
}
}
This result filter uses techniques shown in earlier examples to replace the result from the endpoint and allows multiple filters to build up a series of messages that will be displayed to the user. Listing 30.40 applies several instances of the Message filter to the Home controller.
Listing 30.40 Applying a filter in the HomeController.cs file in the Controllers folder
using Microsoft.AspNetCore.Mvc;
using WebApp.Filters;
namespace WebApp.Controllers {
[Message("This is the controller-scoped filter")]
public class HomeController : Controller {
[Message("This is the first action-scoped filter")]
[Message("This is the second action-scoped filter")]
public IActionResult Index() {
return View("Message",
"This is the Index action on the Home controller");
}
}
}
Listing 30.41 registers the Message filter globally.
Listing 30.41 Creating a global filter in the Program.cs file in the WebApp folder
using Microsoft.EntityFrameworkCore;
using WebApp.Models;
using WebApp.Filters;
using Microsoft.AspNetCore.Mvc;
var builder = WebApplication.CreateBuilder(args);
builder.Services.AddDbContext<DataContext>(opts => {
opts.UseSqlServer(builder.Configuration[
"ConnectionStrings:ProductConnection"]);
opts.EnableSensitiveDataLogging(true);
});
builder.Services.AddControllersWithViews();
builder.Services.AddRazorPages();
builder.Services.AddScoped<GuidResponseAttribute>();
builder.Services.Configure<MvcOptions>(opts => {
opts.Filters.Add<HttpsOnlyAttribute>();
opts.Filters.Add(new MessageAttribute(
"This is the globally-scoped filter"));
});
var app = builder.Build();
app.UseStaticFiles();
app.MapDefaultControllerRoute();
app.MapRazorPages();
var context = app.Services.CreateScope().ServiceProvider
.GetRequiredService<DataContext>();
SeedData.SeedDatabase(context);
app.Run();
There are four instances of the same filter. To see the order in which they are applied, restart ASP.NET Core and request https://localhost:44350, which will produce the response shown in figure 30.16.
Figure 30.16 Applying the same filter in different scopes
By default, ASP.NET Core runs global filters, then filters applied to controllers or page model classes, and finally filters applied to action or handler methods.
The default order can be changed by implementing the IOrderedFilter interface, which ASP.NET Core looks for when it is working out how to sequence filters. Here is the definition of the interface:
namespace Microsoft.AspNetCore.Mvc.Filters {
public interface IOrderedFilter : IFilterMetadata {
int Order { get; }
}
}
The Order property returns an int value, and filters with low values are applied before those with higher Order values. In listing 30.42, I have implemented the interface in the Message filter and defined a constructor argument that will allow the value for the Order property to be specified when the filter is applied.
Listing 30.42 Adding ordering in the MessageAttribute.cs file in the Filters folder
using Microsoft.AspNetCore.Mvc;
using Microsoft.AspNetCore.Mvc.Filters;
using Microsoft.AspNetCore.Mvc.ModelBinding;
using Microsoft.AspNetCore.Mvc.ViewFeatures;
namespace WebApp.Filters {
[AttributeUsage(AttributeTargets.Method | AttributeTargets.Class,
AllowMultiple = true)]
public class MessageAttribute : Attribute,
IAsyncAlwaysRunResultFilter,
IOrderedFilter {
private int counter = 0;
private string msg;
public MessageAttribute(string message) => msg = message;
public int Order { get; set; }
public async Task OnResultExecutionAsync(
ResultExecutingContext context,
ResultExecutionDelegate next) {
Dictionary<string, string> resultData;
if (context.Result is ViewResult vr
&& vr.ViewData.Model is Dictionary<string, string> data) {
resultData = data;
} else {
resultData = new Dictionary<string, string>();
context.Result = new ViewResult() {
ViewName = "/Views/Shared/Message.cshtml",
ViewData = new ViewDataDictionary(
new EmptyModelMetadataProvider(),
new ModelStateDictionary()) {
Model = resultData
}
};
}
while (resultData.ContainsKey($"Message_{counter}")) {
counter++;
}
resultData[$"Message_{counter}"] = msg;
await next();
}
}
}
In listing 30.43, I have used the constructor argument to change the order in which the filters are applied.
Listing 30.43 Setting filter order in the HomeController.cs file in the Controllers folder
using Microsoft.AspNetCore.Mvc;
using WebApp.Filters;
namespace WebApp.Controllers {
[Message("This is the controller-scoped filter", Order = 10)]
public class HomeController : Controller {
[Message("This is the first action-scoped filter", Order = 1)]
[Message("This is the second action-scoped filter", Order = -1)]
public IActionResult Index() {
return View("Message",
"This is the Index action on the Home controller");
}
}
}
Order values can be negative, which is a helpful way of ensuring that a filter is applied before any global filters with the default order (although you can also set the order when creating global filters, too). Restart ASP.NET Core and request https://localhost:44350 to see the new filter order, which is shown in figure 30.17.
Figure 30.17 Changing filter order
Filters allow request processing logic to be defined in a class where it can be applied to specific endpoints and easily reused.
Filters have a well-defined lifecycle and can be used to perform the same tasks as middleware components.
There are six types of filters: authorization, resource, action, page, result, and exception.
Authorization filters are used to implement a security policy.
Resource filters are executed before the model-binding process.
Action and page filters are executed after the model-binding process.
Result filters are executed before and after a result is used to generate a response.
Exception filters are executed when an exception is thrown.
The previous chapters have focused on individual features that deal with one aspect of HTML forms, and it can sometimes be difficult to see how they fit together to perform common tasks. In this chapter, I go through the process of creating controllers, views, and Razor Pages that support an application with create, read, update, and delete (CRUD) functionality. There are no new features described in this chapter, and the objective is to demonstrate how features such as tag helpers, model binding, and model validation can be used in conjunction with Entity Framework Core.
This chapter uses the WebApp project from chapter 30. To prepare for this chapter, replace the contents of the HomeController.cs file in the Controllers folder with those shown in listing 31.1.
Listing 31.1 The contents of the HomeController.cs file in the Controllers folder
using Microsoft.AspNetCore.Mvc;
using Microsoft.EntityFrameworkCore;
using WebApp.Models;
namespace WebApp.Controllers {
[AutoValidateAntiforgeryToken]
public class HomeController : Controller {
private DataContext context;
private IEnumerable<Category> Categories => context.Categories;
private IEnumerable<Supplier> Suppliers => context.Suppliers;
public HomeController(DataContext data) {
context = data;
}
public IActionResult Index() {
return View(context.Products.
Include(p => p.Category).Include(p => p.Supplier));
}
}
}
Create the Views/Home folder and add to it a Razor View file named Index.cshtml files, with the content shown in listing 31.2.
Listing 31.2 The contents of the Index.cshtml file in the Views/Home folder
@model IEnumerable<Product>
@{
Layout = "_SimpleLayout";
}
<h4 class="bg-primary text-white text-center p-2">Products</h4>
<table class="table table-sm table-bordered table-striped">
<thead>
<tr>
<th>ID</th>
<th>Name</th>
<th>Price</th>
<th>Category</th>
<th></th>
</tr>
</thead>
<tbody>
@foreach (Product p in Model ?? Enumerable.Empty<Product>()) {
<tr>
<td>@p.ProductId</td>
<td>@p.Name</td>
<td>@p.Price</td>
<td>@p.Category?.Name</td>
<td class="text-center">
<a asp-action="Details" asp-route-id="@p.ProductId"
class="btn btn-sm btn-info">
Details
</a>
<a asp-action="Edit" asp-route-id="@p.ProductId"
class="btn btn-sm btn-warning">
Edit
</a>
<a asp-action="Delete" asp-route-id="@p.ProductId"
class="btn btn-sm btn-danger">
Delete
</a>
</td>
</tr>
}
</tbody>
</table>
<a asp-action="Create" class="btn btn-primary">Create</a>
Next, update the Product class as shown in listing 31.3 to change the validation constraints to remove the model-level checking and disable remote validation.
Listing 31.3 Changing validation in the Product.cs file in the Models folder
using System.ComponentModel.DataAnnotations;
using System.ComponentModel.DataAnnotations.Schema;
using System.Text.Json.Serialization;
using Microsoft.AspNetCore.Mvc.ModelBinding;
using WebApp.Validation;
using Microsoft.AspNetCore.Mvc;
namespace WebApp.Models {
//[PhraseAndPrice(Phrase = "Small", Price = "100")]
public class Product {
public long ProductId { get; set; }
[Required(ErrorMessage = "Please enter a name")]
public required string Name { get; set; }
[Range(1, 999999, ErrorMessage = "Please enter a positive price")]
[Column(TypeName = "decimal(8, 2)")]
public decimal Price { get; set; }
[PrimaryKey(ContextType = typeof(DataContext),
DataType = typeof(Category))]
//[Remote("CategoryKey", "Validation",
// ErrorMessage = "Enter an existing key")]
public long CategoryId { get; set; }
public Category? Category { get; set; }
[PrimaryKey(ContextType = typeof(DataContext),
DataType = typeof(Supplier))]
//[Remote("SupplierKey", "Validation",
// ErrorMessage = "Enter an existing key")]
public long SupplierId { get; set; }
[JsonIgnore(Condition = JsonIgnoreCondition.WhenWritingNull)]
public Supplier? Supplier { get; set; }
}
}
Finally, disable the global filters in the Program.cs file, as shown in listing 31.4. This listing also defines a route that makes it obvious when a URL targets a controller.
Listing 31.4 Disabling filters in the Program.cs file in the WebApp folder
using Microsoft.EntityFrameworkCore;
using WebApp.Models;
using WebApp.Filters;
//using Microsoft.AspNetCore.Mvc;
var builder = WebApplication.CreateBuilder(args);
builder.Services.AddDbContext<DataContext>(opts => {
opts.UseSqlServer(builder.Configuration[
"ConnectionStrings:ProductConnection"]);
opts.EnableSensitiveDataLogging(true);
});
builder.Services.AddControllersWithViews();
builder.Services.AddRazorPages();
builder.Services.AddScoped<GuidResponseAttribute>();
//builder.Services.Configure<MvcOptions>(opts => {
// opts.Filters.Add<HttpsOnlyAttribute>();
// opts.Filters.Add(new MessageAttribute(
// "This is the globally-scoped filter"));
//});
var app = builder.Build();
app.UseStaticFiles();
app.MapDefaultControllerRoute();
app.MapControllerRoute("forms",
"controllers/{controller=Home}/{action=Index}/{id?}");
app.MapRazorPages();
var context = app.Services.CreateScope().ServiceProvider
.GetRequiredService<DataContext>();
SeedData.SeedDatabase(context);
app.Run();
Open a new PowerShell command prompt, navigate to the folder that contains the WebApp.csproj file, and run the command shown in listing 31.5 to drop the database.
Listing 31.5 Dropping the database
dotnet ef database drop --force
Use the PowerShell command prompt to run the command shown in listing 31.6.
Listing 31.6 Running the example application
dotnet run
Use a browser to request http://localhost:5000/controllers, which will display a list of products, as shown in figure 31.1. There are anchor elements styled to appear as buttons, but these will not work until later when I add the features to create, edit, and delete objects.
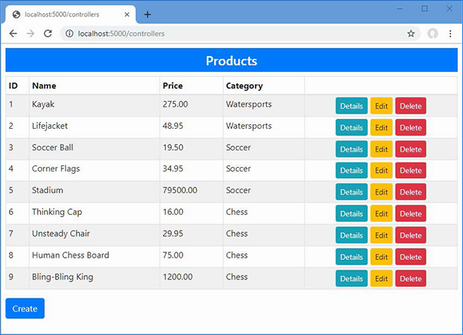
Figure 31.1 Running the example application
In the sections that follow, I show you how to perform the core data operations using MVC controllers and views. Later in the chapter, I create the same functionality using Razor Pages.
I am going to define a single form that will be used for multiple operations, configured through its view model class. To create the view model class, add a class file named ProductViewModel.cs to the Models folder and add the code shown in listing 31.7.
Listing 31.7 The contents of the ProductViewModel.cs file in the Models folder
namespace WebApp.Models {
public class ProductViewModel {
public Product Product { get; set; }
= new () { Name = string.Empty };
public string Action { get; set; } = "Create";
public bool ReadOnly { get; set; } = false;
public string Theme { get; set; } = "primary";
public bool ShowAction { get; set; } = true;
public IEnumerable<Category> Categories { get; set; }
= Enumerable.Empty<Category>();
public IEnumerable<Supplier> Suppliers { get; set; }
= Enumerable.Empty<Supplier>();
}
}
This class will allow the controller to pass data and display settings to its view. The Product property provides the data to display, and the Categories and Suppliers properties provide access to the Category and Suppliers objects when they are required. The other properties configure aspects of how the content is presented to the user: the Action property specifies the name of the action method for the current task, the ReadOnly property specifies whether the user can edit the data, the Theme property specifies the Bootstrap theme for the content, and the ShowAction property is used to control the visibility of the button that submits the form.
To create the view that will allow the user to interact with the application’s data, add a Razor View named ProductEditor.cshtml to the Views/Home folder with the content shown in listing 31.8.
Listing 31.8 The contents of the ProductEditor.cshtml file in the Views/Home folder
@model ProductViewModel
@{
Layout = "_SimpleLayout";
}
<partial name="_Validation" />
<h5 class="bg-@Model?.Theme text-white text-center p-2">
@Model?.Action
</h5>
<form asp-action="@Model?.Action" method="post">
<div class="form-group">
<label asp-for="Product.ProductId"></label>
<input class="form-control"
asp-for="Product.ProductId" readonly />
</div>
<div class="form-group">
<label asp-for="Product.Name"></label>
<div>
<span asp-validation-for="Product.Name" class="text-danger">
</span>
</div>
<input class="form-control" asp-for="Product.Name"
readonly="@Model?.ReadOnly" />
</div>
<div class="form-group">
<label asp-for="Product.Price"></label>
<div>
<span asp-validation-for="Product.Price" class="text-danger">
</span>
</div>
<input class="form-control" asp-for="Product.Price"
readonly="@Model?.ReadOnly" />
</div>
<div class="form-group">
<label asp-for="Product.CategoryId">Category</label>
<div>
<span asp-validation-for="Product.CategoryId"
class="text-danger"></span>
</div>
<select asp-for="Product.CategoryId" class="form-control"
disabled="@Model?.ReadOnly"
asp-items="@(new SelectList(Model?.Categories,
"CategoryId", "Name"))">
<option value="" disabled selected>Choose a Category</option>
</select>
</div>
<div class="form-group">
<label asp-for="Product.SupplierId">Supplier</label>
<div>
<span asp-validation-for="Product.SupplierId"
class="text-danger"></span>
</div>
<select asp-for="Product.SupplierId" class="form-control"
disabled="@Model?.ReadOnly"
asp-items="@(new SelectList(Model?.Suppliers,
"SupplierId", "Name"))">
<option value="" disabled selected>Choose a Supplier</option>
</select>
</div>
@if (Model?.ShowAction == true) {
<button class="btn btn-@Model?.Theme mt-2" type="submit">
@Model?.Action
</button>
}
<a class="btn btn-secondary mt-2" asp-action="Index">Back</a>
</form>
This view can look complicated, but it combines only the features you have seen in earlier chapters and will become clearer once you see it in action. The model for this view is a ProductViewModel object, which provides both the data that is displayed to the user and some direction about how that data should be presented.
For each of the properties defined by the Product class, the view contains a set of elements: a label element that describes the property, an input or select element that allows the value to be edited, and a span element that will display validation messages. Each of the elements is configured with the asp-for attribute, which ensures tag helpers will transform the elements for each property. There are div elements to define the view structure, and all the elements are members of Bootstrap CSS classes to style the form.
The simplest operation is reading data from the database and presenting it to the user. In most applications, this will allow the user to see additional details that are not present in the list view. Each task performed by the application will require a different set of ProductViewModel properties. To manage these combinations, add a class file named ViewModelFactory.cs to the Models folder with the code shown in listing 31.9.
Listing 31.9 The contents of the ViewModelFactory.cs file in the Models folder
namespace WebApp.Models {
public static class ViewModelFactory {
public static ProductViewModel Details(Product p) {
return new ProductViewModel {
Product = p, Action = "Details",
ReadOnly = true, Theme = "info", ShowAction = false,
Categories = p == null || p.Category == null
? Enumerable.Empty<Category>()
: new List<Category> { p.Category },
Suppliers = p == null || p.Supplier == null
? Enumerable.Empty<Supplier>()
: new List<Supplier> { p.Supplier },
};
}
}
}
The Details method produces a ProductViewModel object configured for viewing an object. When the user views the details, the category and supplier details will be read-only, which means that I need to provide only the current category and supplier information.
Next, add an action method to the Home controller that uses the ViewModelFactory.Details method to create a ProductViewModel object and display it to the user with the ProductEditor view, as shown in listing 31.10.
Listing 31.10 Adding an action in the HomeController.cs file in the Controllers folder
using Microsoft.AspNetCore.Mvc;
using Microsoft.EntityFrameworkCore;
using WebApp.Models;
namespace WebApp.Controllers {
[AutoValidateAntiforgeryToken]
public class HomeController : Controller {
private DataContext context;
private IEnumerable<Category> Categories => context.Categories;
private IEnumerable<Supplier> Suppliers => context.Suppliers;
public HomeController(DataContext data) {
context = data;
}
public IActionResult Index() {
return View(context.Products.
Include(p => p.Category).Include(p => p.Supplier));
}
public async Task<IActionResult> Details(long id) {
Product? p = await context.Products.
Include(p => p.Category).Include(p => p.Supplier)
.FirstOrDefaultAsync(p => p.ProductId == id)
?? new () { Name = string.Empty };
ProductViewModel model = ViewModelFactory.Details(p);
return View("ProductEditor", model);
}
}
}
The action method uses the id parameter, which will be model bound from the routing data, to query the database and passes the Product object to the ViewModelFactory.Details method. Most of the operations are going to require the Category and Supplier data, so I have added properties that provide direct access to the data.
To test the details feature, restart ASP.NET Core and request http://localhost:5000/controllers. Click one of the Details buttons, and you will see the selected object presented in read-only form using the ProductEditor view, as shown in figure 31.2.
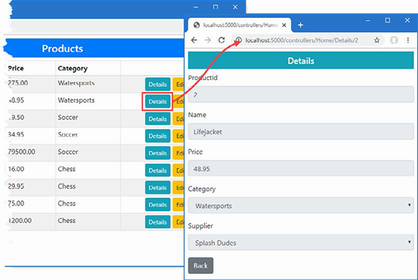
Figure 31.2 Viewing data
If the user navigates to a URL that doesn’t correspond to an object in the database, such as http://localhost:5000/controllers/Home/Details/100, for example, then an empty form will be displayed.
Creating data relies on model binding to get the form data from the request and relies on validation to ensure the data can be stored in the database. The first step is to add a factory method that will create the view model object for creating data, as shown in listing 31.11.
Listing 31.11 Adding a method in the ViewModelFactory.cs file in the Models folder
namespace WebApp.Models {
public static class ViewModelFactory {
public static ProductViewModel Details(Product p) {
return new ProductViewModel {
Product = p, Action = "Details",
ReadOnly = true, Theme = "info", ShowAction = false,
Categories = p == null || p.Category == null
? Enumerable.Empty<Category>()
: new List<Category> { p.Category },
Suppliers = p == null || p.Supplier == null
? Enumerable.Empty<Supplier>()
: new List<Supplier> { p.Supplier },
};
}
public static ProductViewModel Create(Product product,
IEnumerable<Category> categories,
IEnumerable<Supplier> suppliers) {
return new ProductViewModel {
Product = product, Categories = categories,
Suppliers = suppliers
};
}
}
}
The defaults I used for the ProductViewModel properties were set for creating data, so the Create method in listing 31.11 sets only the Product, Categories, and Suppliers properties. Listing 31.12 adds the action methods that will create data to the Home controller.
Listing 31.12 Adding actions in the HomeController.cs file in the Controllers folder
using Microsoft.AspNetCore.Mvc;
using Microsoft.EntityFrameworkCore;
using WebApp.Models;
namespace WebApp.Controllers {
[AutoValidateAntiforgeryToken]
public class HomeController : Controller {
private DataContext context;
private IEnumerable<Category> Categories => context.Categories;
private IEnumerable<Supplier> Suppliers => context.Suppliers;
public HomeController(DataContext data) {
context = data;
}
public IActionResult Index() {
return View(context.Products.
Include(p => p.Category).Include(p => p.Supplier));
}
public async Task<IActionResult> Details(long id) {
Product? p = await context.Products.
Include(p => p.Category).Include(p => p.Supplier)
.FirstOrDefaultAsync(p => p.ProductId == id)
?? new () { Name = string.Empty };
ProductViewModel model = ViewModelFactory.Details(p);
return View("ProductEditor", model);
}
public IActionResult Create() {
return View("ProductEditor",
ViewModelFactory.Create(new () { Name = string.Empty },
Categories, Suppliers));
}
[HttpPost]
public async Task<IActionResult> Create(
[FromForm] Product product) {
if (ModelState.IsValid) {
product.ProductId = default;
product.Category = default;
product.Supplier = default;
context.Products.Add(product);
await context.SaveChangesAsync();
return RedirectToAction(nameof(Index));
}
return View("ProductEditor",
ViewModelFactory.Create(product, Categories, Suppliers));
}
}
}
There are two Create methods, which are differentiated by the HttpPost attribute and method parameters. HTTP GET requests will be handled by the first method, which selects the ProductEditor view and provides it with a ProductViewModel object. When the user submits the form, it will be received by the second method, which relies on model binding to receive the data and model validation to ensure the data is valid.
If the data passes validation, then I prepare the object for storage in the database by resetting three properties, like this:
... product.ProductId = default; product.Category = default; product.Supplier = default; ...
Entity Framework Core configures the database so that primary keys are allocated by the database server when new data is stored. If you attempt to store an object and provide a ProductId value other than zero, then an exception will be thrown.
I reset the Category and Supplier properties to prevent Entity Framework Core from trying to deal with related data when storing an object. Entity Framework Core is capable of processing related data, but it can produce unexpected outcomes. (I show you how to create related data in the “Creating New Related Data Objects” section, later in this chapter.)
Notice I call the View method with arguments when validation fails, like this:
...
return View("ProductEditor",
ViewModelFactory.Create(product, Categories, Suppliers));
...
I do this because the view model object expected by the view isn’t the same data type that I have extracted from the request using model binding. Instead, I create a new view model object that incorporates the model bound data and passes this to the View method.
Restart ASP.NET Core, request http://localhost:5000/controllers, and click Create. Fill out the form and click the Create button to submit the data. The new object will be stored in the database and displayed when the browser is redirected to the Index action, as shown in figure 31.3.
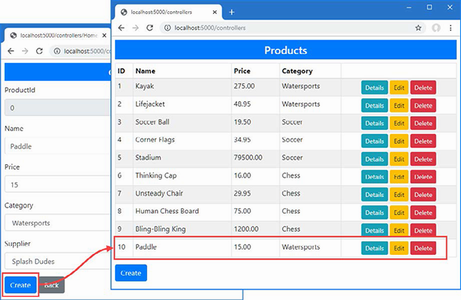
Figure 31.3 Creating a new object
Notice that select elements allow the user to select the values for the CategoryId and SupplierId properties, using the category and supplier names, like this:
...
<select asp-for="Product.SupplierId" class="form-control"
disabled="@Model?.ReadOnly"
asp-items="@(new SelectList(Model?.Suppliers,
"SupplierId", "Name"))">
<option value="" disabled selected>Choose a Supplier</option>
</select>
...
In chapter 30, I used input elements to allow the value of these properties to be set directly, but that was because I wanted to demonstrate different types of validation. In real applications, it is a good idea to provide the user with restricted choices when the application already has the data it expects the user to choose from. Making the user enter a valid primary key, for example, makes no sense in a real project because the application can easily provide the user with a list of those keys to choose from, as shown in figure 31.4.
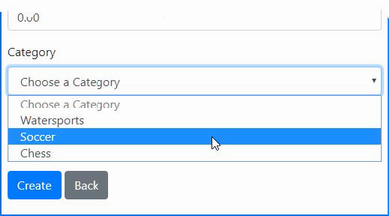
Figure 31.4 Presenting the user with a choice
The process for editing data is similar to creating data. The first step is to add a new method to the view model factory that will configure the way the data is presented to the user, as shown in listing 31.13.
Listing 31.13 Adding a method in the ViewModelFactory.cs file in the Models folder
namespace WebApp.Models {
public static class ViewModelFactory {
public static ProductViewModel Details(Product p) {
return new ProductViewModel {
Product = p, Action = "Details",
ReadOnly = true, Theme = "info", ShowAction = false,
Categories = p == null || p.Category == null
? Enumerable.Empty<Category>()
: new List<Category> { p.Category },
Suppliers = p == null || p.Supplier == null
? Enumerable.Empty<Supplier>()
: new List<Supplier> { p.Supplier },
};
}
public static ProductViewModel Create(Product product,
IEnumerable<Category> categories,
IEnumerable<Supplier> suppliers) {
return new ProductViewModel {
Product = product, Categories = categories,
Suppliers = suppliers
};
}
public static ProductViewModel Edit(Product product,
IEnumerable<Category> categories,
IEnumerable<Supplier> suppliers) {
return new ProductViewModel {
Product = product, Categories = categories,
Suppliers = suppliers,
Theme = "warning", Action = "Edit"
};
}
}
}
The next step is to add the action methods to the Home controller that will display the current properties of a Product object to the user and receive the changes the user makes, as shown in listing 31.14.
Listing 31.14 Adding action methods in the HomeController.cs file in the Controllers folder
using Microsoft.AspNetCore.Mvc;
using Microsoft.EntityFrameworkCore;
using WebApp.Models;
namespace WebApp.Controllers {
[AutoValidateAntiforgeryToken]
public class HomeController : Controller {
private DataContext context;
private IEnumerable<Category> Categories => context.Categories;
private IEnumerable<Supplier> Suppliers => context.Suppliers;
public HomeController(DataContext data) {
context = data;
}
// ...other action methods omitted for brevity...
public async Task<IActionResult> Edit(long id) {
Product? p = await context.Products.FindAsync(id);
if (p != null) {
ProductViewModel model =
ViewModelFactory.Edit(p, Categories, Suppliers);
return View("ProductEditor", model);
}
return NotFound();
}
[HttpPost]
public async Task<IActionResult> Edit(
[FromForm] Product product) {
if (ModelState.IsValid) {
product.Category = default;
product.Supplier = default;
context.Products.Update(product);
await context.SaveChangesAsync();
return RedirectToAction(nameof(Index));
}
return View("ProductEditor",
ViewModelFactory.Edit(product, Categories, Suppliers));
}
}
}
To see the editing feature at work, restart ASP.NET Core, navigate to http://localhost:5000/controllers, and click one of the Edit buttons. Change one or more property values and submit the form. The changes will be stored in the database and reflected in the list displayed when the browser is redirected to the Index action, as shown in figure 31.5.
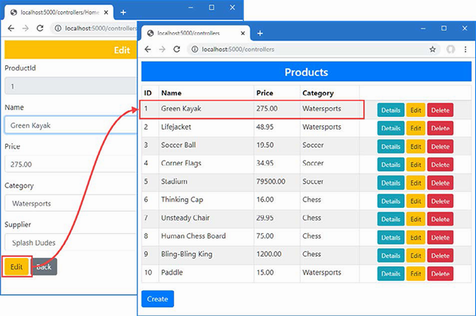
Figure 31.5 Editing a product
Notice that the ProductId property cannot be changed. Attempting to change the primary key of an object should be avoided because it interferes with the Entity Framework Core understanding of the identity of its objects. If you can’t avoid changing the primary key, then the safest approach is to delete the existing object and store a new one.
The final basic operation is removing objects from the database. By now the pattern will be clear, and the first step is to add a method to create a view model object to determine how the data is presented to the user, as shown in listing 31.15.
Listing 31.15 Adding a method in the ViewModelFactory.cs file in the Models folder
namespace WebApp.Models {
public static class ViewModelFactory {
// ...other action methods omitted for brevity...
public static ProductViewModel Delete(Product p,
IEnumerable<Category> categories,
IEnumerable<Supplier> suppliers) {
return new ProductViewModel {
Product = p, Action = "Delete",
ReadOnly = true, Theme = "danger",
Categories = categories, Suppliers = suppliers
};
}
}
}
Listing 31.16 adds the action methods to the Home controller that will respond to the GET request by displaying the selected object and the POST request to remove that object from the database.
Listing 31.16 Adding action methods in the HomeController.cs file in the Controllers folder
using Microsoft.AspNetCore.Mvc;
using Microsoft.EntityFrameworkCore;
using WebApp.Models;
namespace WebApp.Controllers {
[AutoValidateAntiforgeryToken]
public class HomeController : Controller {
private DataContext context;
private IEnumerable<Category> Categories => context.Categories;
private IEnumerable<Supplier> Suppliers => context.Suppliers;
public HomeController(DataContext data) {
context = data;
}
// ...other action methods omitted for brevity...
public async Task<IActionResult> Delete(long id) {
Product? p = await context.Products.FindAsync(id);
if (p != null) {
ProductViewModel model = ViewModelFactory.Delete(
p, Categories, Suppliers);
return View("ProductEditor", model);
}
return NotFound();
}
[HttpPost]
public async Task<IActionResult> Delete(Product product) {
context.Products.Remove(product);
await context.SaveChangesAsync();
return RedirectToAction(nameof(Index));
}
}
}
The model binding process creates a Product object from the form data, which is passed to Entity Framework Core to remove from the database. Once the data has been removed from the database, the browser is redirected to the Index action, as shown in figure 31.6.
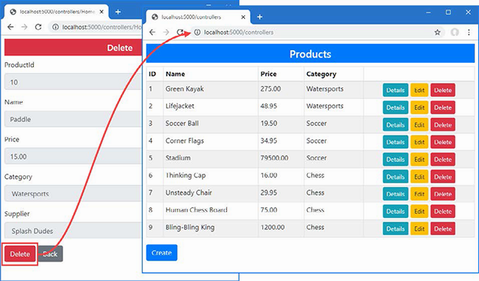
Figure 31.6 Deleting data
Working with Razor Forms relies on similar techniques as the controller examples, albeit broken up into smaller chunks of functionality. As you will see, the main difficulty is preserving the modular nature of Razor Pages without duplicating code and markup. The first step is to create the Razor Page that will display the list of Product objects and provide the links to the other operations. Add a Razor Page named Index.cshtml to the Pages folder with the content shown in listing 31.17.
Listing 31.17 The contents of the Index.cshtml file in the Pages folder
@page "/pages/{id:long?}"
@model IndexModel
@using Microsoft.AspNetCore.Mvc.RazorPages
@using Microsoft.EntityFrameworkCore
<div class="m-2">
<h4 class="bg-primary text-white text-center p-2">Products</h4>
<table class="table table-sm table-bordered table-striped">
<thead>
<tr>
<th>ID</th><th>Name</th><th>Price</th>
<th>Category</th><th></th>
</tr>
</thead>
<tbody>
@foreach (Product p in Model.Products) {
<tr>
<td>@p.ProductId</td>
<td>@p.Name</td>
<td>@p.Price</td>
<td>@p.Category?.Name</td>
<td class="text-center">
<a asp-page="Details" asp-route-id="@p.ProductId"
class="btn btn-sm btn-info">Details</a>
<a asp-page="Edit" asp-route-id="@p.ProductId"
class="btn btn-sm btn-warning">Edit</a>
<a asp-page="Delete" asp-route-id="@p.ProductId"
class="btn btn-sm btn-danger">Delete</a>
</td>
</tr>
}
</tbody>
</table>
<a asp-page="Create" class="btn btn-primary">Create</a>
</div>
@functions {
public class IndexModel: PageModel {
private DataContext context;
public IndexModel(DataContext dbContext) {
context = dbContext;
}
public IEnumerable<Product> Products { get; set; }
= Enumerable.Empty<Product>();
public void OnGetAsync(long id = 1) {
Products = context.Products
.Include(p => p.Category).Include(p => p.Supplier);
}
}
}
This view part of the page displays a table populated with the details of the Product objects obtained from the database by the page model. Use a browser to request http://localhost:5000/pages, and you will see the response shown in figure 31.7. Alongside the details of the Product objects, the page displays anchor elements that navigate to other Razor Pages, which I define in the sections that follow.
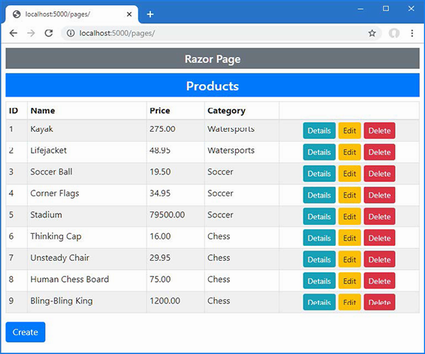
Figure 31.7 Listing data using a Razor Page
I don’t want to duplicate the same HTML form and supporting code in each of the pages required by the example application. Instead, I am going to define a partial view that defines the HTML form and a base class that defines the common code required by the page model classes. For the partial view, add a Razor View named _ProductEditor.cshtml to the Pages folder with the content shown in listing 31.18.
Listing 31.18 The contents of the _ProductEditor.cshtml file in the Pages folder
@model ProductViewModel
<partial name="_Validation" />
<h5 class="bg-@Model?.Theme text-white text-center p-2">@Model?.Action</h5>
<form asp-page="@Model?.Action" method="post">
<div class="form-group">
<label asp-for="Product.ProductId"></label>
<input class="form-control" asp-for="Product.ProductId"
readonly />
</div>
<div class="form-group">
<label asp-for="Product.Name"></label>
<div>
<span asp-validation-for="Product.Name" class="text-danger">
</span>
</div>
<input class="form-control" asp-for="Product.Name"
readonly="@Model?.ReadOnly" />
</div>
<div class="form-group">
<label asp-for="Product.Price"></label>
<div>
<span asp-validation-for="Product.Price" class="text-danger">
</span>
</div>
<input class="form-control" asp-for="Product.Price"
readonly="@Model?.ReadOnly" />
</div>
<div class="form-group">
<label asp-for="Product.CategoryId">Category</label>
<div>
<span asp-validation-for="Product.CategoryId"
class="text-danger">
</span>
</div>
<select asp-for="Product.CategoryId" class="form-control"
disabled="@Model?.ReadOnly"
asp-items="@(new SelectList(Model?.Categories,
"CategoryId", "Name"))">
<option value="" disabled selected>Choose a Category</option>
</select>
</div>
<div class="form-group">
<label asp-for="Product.SupplierId">Supplier</label>
<div>
<span asp-validation-for="Product.SupplierId"
class="text-danger">
</span>
</div>
<select asp-for="Product.SupplierId" class="form-control"
disabled="@Model?.ReadOnly"
asp-items="@(new SelectList(Model?.Suppliers,
"SupplierId", "Name"))">
<option value="" disabled selected>Choose a Supplier</option>
</select>
</div>
@if (Model?.ShowAction == true) {
<button class="btn btn-@Model.Theme mt-2" type="submit">
@Model.Action
</button>
}
<a class="btn btn-secondary mt-2" asp-page="Index">Back</a>
</form>
The partial view uses the ProductViewModel class as its model type and relies on the built-in tag helpers to present input and select elements for the properties defined by the Product class. This is the same content used earlier in the chapter, except with the asp-action attribute replaced with asp-page to specify the target for the form and anchor elements.
To define the page model base class, add a class file named EditorPageModel.cs to the Pages folder and use it to define the class shown in listing 31.19.
Listing 31.19 The contents of the EditorPageModel.cs file in the Pages folder
using Microsoft.AspNetCore.Mvc.RazorPages;
using WebApp.Models;
namespace WebApp.Pages {
public class EditorPageModel : PageModel {
public EditorPageModel(DataContext dbContext) {
DataContext = dbContext;
}
public DataContext DataContext { get; set; }
public IEnumerable<Category> Categories => DataContext.Categories;
public IEnumerable<Supplier> Suppliers => DataContext.Suppliers;
public ProductViewModel? ViewModel { get; set; }
}
}
The properties defined by this class are simple, but they will help simplify the page model classes of the Razor Pages that handle each operation.
All the Razor Pages required for this example depend on the same namespaces. Add the expressions shown in listing 31.20 to the _ViewImports.cshtml file in the Pages folder to avoid duplicate expressions in the individual pages.
Listing 31.20 Adding namespaces in the _ViewImports.cshtml file in the Pages folder
@namespace WebApp.Pages @using WebApp.Models @addTagHelper *, Microsoft.AspNetCore.Mvc.TagHelpers @addTagHelper *, WebApp @using Microsoft.AspNetCore.Mvc.RazorPages @using Microsoft.EntityFrameworkCore @using System.Text.Json @using Microsoft.AspNetCore.Http
With the partial view and shared base class in place, the pages that handle individual operations are simple. Add a Razor Page named Details.cshtml to the Pages folder with the code and content shown in listing 31.21.
Listing 31.21 The contents of the Details.cshtml file in the Pages folder
@page "/pages/details/{id}"
@model DetailsModel
<div class="m-2">
<partial name="_ProductEditor" model="@Model.ViewModel" />
</div>
@functions {
public class DetailsModel : EditorPageModel {
public DetailsModel(DataContext dbContext) : base(dbContext) { }
public async Task OnGetAsync(long id) {
Product? p = await DataContext.Products.
Include(p => p.Category).Include(p => p.Supplier)
.FirstOrDefaultAsync(p => p.ProductId == id);
ViewModel = ViewModelFactory.Details(p
?? new () { Name = string.Empty});
}
}
}
The constructor receives an Entity Framework Core context object, which it passes to the base class. The handler method responds to requests by querying the database and using the response to create a ProductViewModel object using the ViewModelFactory class.
Add a Razor Page named Create.cshtml to the Pages folder with the code and content shown in listing 31.22.
Listing 31.22 The contents of the Create.cshtml file in the Pages folder
@page "/pages/create"
@model CreateModel
<div class="m-2">
<partial name="_ProductEditor" model="@Model.ViewModel" />
</div>
@functions {
public class CreateModel : EditorPageModel {
public CreateModel(DataContext dbContext) : base(dbContext) { }
public void OnGet() {
ViewModel = ViewModelFactory.Create(
new () { Name = string.Empty }, Categories, Suppliers);
}
public async Task<IActionResult> OnPostAsync(
[FromForm] Product product) {
if (ModelState.IsValid) {
product.ProductId = default;
product.Category = default;
product.Supplier = default;
DataContext.Products.Add(product);
await DataContext.SaveChangesAsync();
return RedirectToPage(nameof(Index));
}
ViewModel = ViewModelFactory.Create(product,
Categories, Suppliers);
return Page();
}
}
}
Add a Razor Page named Edit.cshtml to the Pages folder with the code and content shown in listing 31.23.
Listing 31.23 The contents of the Edit.cshtml file in the Pages folder
@page "/pages/edit/{id}"
@model EditModel
<div class="m-2">
<partial name="_ProductEditor" model="@Model.ViewModel" />
</div>
@functions {
public class EditModel : EditorPageModel {
public EditModel(DataContext dbContext) : base(dbContext) { }
public async Task OnGetAsync(long id) {
Product p = await this.DataContext.Products.FindAsync(id)
?? new () { Name = string.Empty };
ViewModel = ViewModelFactory.Edit(p, Categories, Suppliers);
}
public async Task<IActionResult> OnPostAsync(
[FromForm] Product product) {
if (ModelState.IsValid) {
product.Category = default;
product.Supplier = default;
DataContext.Products.Update(product);
await DataContext.SaveChangesAsync();
return RedirectToPage(nameof(Index));
}
ViewModel = ViewModelFactory.Edit(product,
Categories, Suppliers);
return Page();
}
}
}
Add a Razor Page named Delete.cshtml to the Pages folder with the code and content shown in listing 31.24.
Listing 31.24 The contents of the Delete.cshtml file in the Pages folder
@page "/pages/delete/{id}"
@model DeleteModel
<div class="m-2">
<partial name="_ProductEditor" model="@Model.ViewModel" />
</div>
@functions {
public class DeleteModel : EditorPageModel {
public DeleteModel(DataContext dbContext) : base(dbContext) { }
public async Task OnGetAsync(long id) {
ViewModel = ViewModelFactory.Delete(
await DataContext.Products.FindAsync(id)
?? new () { Name = string.Empty },
Categories, Suppliers);
}
public async Task<IActionResult> OnPostAsync(
[FromForm] Product product) {
DataContext.Products.Remove(product);
await DataContext.SaveChangesAsync();
return RedirectToPage(nameof(Index));
}
}
}
Restart ASP.NET Core and navigate to http://localhost:5000/pages, and you will be able to click the links to view, create, edit, and remove data, as shown in figure 31.8.
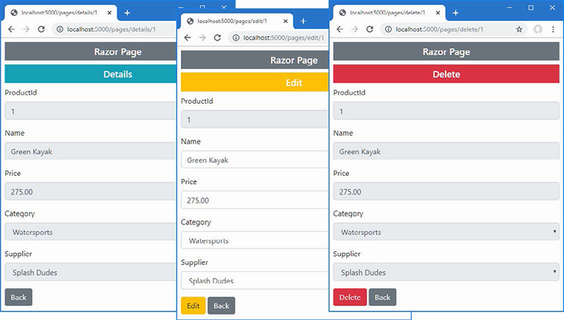
Figure 31.8 Using Razor Pages
Some applications will need to allow the user to create new related data so that, for example, a new Category can be created along with a Product in that Category. There are two ways to approach this problem, as described in the sections that follow.
The first approach is to ask the user to provide the data required to create the related data in the same form. For the example application, this means collecting details for a Category object in the same form that the user enters the values for the Product object.
This can be a useful approach for simple data types, where only a small amount of data is required to create the related object but is not well suited for types with many properties.
I prefer to define the HTML elements for the related data type in their own partial view. Add a Razor View named _CategoryEditor.cshtml to the Pages folder with the content shown in listing 31.25.
Listing 31.25 The contents of the _CategoryEditor.cshtml file in the Pages folder
@model Product
<script type="text/javascript">
window.addEventListener("DOMContentLoaded", () => {
function setVisibility(visible) {
document.getElementById("categoryGroup").hidden = !visible;
input = document.getElementById("categoryInput")
if (visible) {
input.removeAttribute("disabled");
} else {
input.setAttribute("disabled", "disabled");
}
}
setVisibility(false);
document.querySelector("select[name='Product.CategoryId']")
.addEventListener("change", (event) =>
setVisibility(event.target.value === "-1")
);
});
</script>
<div class="form-group bg-info mt-2 p-1" id="categoryGroup">
@{ #pragma warning disable CS8602 }
<label class="text-white" asp-for="Category.Name">
New Category Name
</label>
<input class="form-control" asp-for="Category.Name" value=""
id="categoryInput" />
@{ #pragma warning restore CS8602 }
</div>
The Category type requires only one property, which the user will provide using a standard input element. The script element in the partial view contains JavaScript code that hides the new elements until the user selects an option element that sets a value of -1 for the Product.CategoryId property. (Using JavaScript is entirely optional, but it helps to emphasize the purpose of the new elements.)
Listing 31.26 adds the partial view to the editor, along with the option element that will display the elements for creating a new Category object.
Listing 31.26 Adding elements in the _ProductEditor.cshtml file in the Pages folder
...
<div class="form-group">
<label asp-for="Product.CategoryId">Category</label>
<div>
<span asp-validation-for="Product.CategoryId"
class="text-danger">
</span>
</div>
<select asp-for="Product.CategoryId" class="form-control"
disabled="@Model?.ReadOnly"
asp-items="@(new SelectList(Model?.Categories,
"CategoryId", "Name"))">
<option value="-1">Create New Category...</option>
<option value="" disabled selected>Choose a Category</option>
</select>
</div>
<partial name="_CategoryEditor" for="Product" />
<div class="form-group">
<label asp-for="Product.SupplierId">Supplier</label>
<div>
<span asp-validation-for="Product.SupplierId"
class="text-danger">
</span>
</div>
<select asp-for="Product.SupplierId" class="form-control"
disabled="@Model?.ReadOnly"
asp-items="@(new SelectList(Model?.Suppliers,
"SupplierId", "Name"))">
<option value="" disabled selected>Choose a Supplier</option>
</select>
</div>
...
I need the new functionality in multiple pages, so to avoid code duplication, I have added a method that handles the related data to the page model base class, as shown in listing 31.27.
Listing 31.27 Adding a method in the EditorPageModel.cs file in the Pages folder
using Microsoft.AspNetCore.Mvc.RazorPages;
using WebApp.Models;
namespace WebApp.Pages {
public class EditorPageModel : PageModel {
public EditorPageModel(DataContext dbContext) {
DataContext = dbContext;
}
public DataContext DataContext { get; set; }
public IEnumerable<Category> Categories => DataContext.Categories;
public IEnumerable<Supplier> Suppliers => DataContext.Suppliers;
public ProductViewModel? ViewModel { get; set; }
protected async Task CheckNewCategory(Product product) {
if (product.CategoryId == -1
&& !string.IsNullOrEmpty(product.Category?.Name)) {
DataContext.Categories.Add(product.Category);
await DataContext.SaveChangesAsync();
product.CategoryId = product.Category.CategoryId;
ModelState.Clear();
TryValidateModel(product);
}
}
}
}
The new code creates a Category object using the data received from the user and stores it in the database. The database server assigns a primary key to the new object, which Entity Framework Core uses to update the Category object. This allows me to update the CategoryId property of the Product object and then re-validate the model data, knowing that the value assigned to the CategoryId property will pass validation because it corresponds to the newly allocated key. To integrate the new functionality into the Create page, add the statement shown in listing 31.28.
Listing 31.28 Adding a statement in the Create.cshtml file in the Pages folder
@page "/pages/create"
@model CreateModel
<div class="m-2">
<partial name="_ProductEditor" model="@Model.ViewModel" />
</div>
@functions {
public class CreateModel : EditorPageModel {
public CreateModel(DataContext dbContext) : base(dbContext) { }
public void OnGet() {
ViewModel = ViewModelFactory.Create(
new () { Name = string.Empty }, Categories, Suppliers);
}
public async Task<IActionResult> OnPostAsync(
[FromForm] Product product) {
await CheckNewCategory(product);
if (ModelState.IsValid) {
product.ProductId = default;
product.Category = default;
product.Supplier = default;
DataContext.Products.Add(product);
await DataContext.SaveChangesAsync();
return RedirectToPage(nameof(Index));
}
ViewModel = ViewModelFactory.Create(product,
Categories, Suppliers);
return Page();
}
}
}
Add the same statement to the handler method in the Edit page, as shown in listing 31.29.
Listing 31.29 Adding a statement in the Edit.cshtml file in the Pages folder
@page "/pages/edit/{id}"
@model EditModel
<div class="m-2">
<partial name="_ProductEditor" model="@Model.ViewModel" />
</div>
@functions {
public class EditModel : EditorPageModel {
public EditModel(DataContext dbContext) : base(dbContext) { }
public async Task OnGetAsync(long id) {
Product p = await this.DataContext.Products.FindAsync(id)
?? new () { Name = string.Empty };
ViewModel = ViewModelFactory.Edit(p, Categories, Suppliers);
}
public async Task<IActionResult> OnPostAsync(
[FromForm] Product product) {
await CheckNewCategory(product);
if (ModelState.IsValid) {
product.Category = default;
product.Supplier = default;
DataContext.Products.Update(product);
await DataContext.SaveChangesAsync();
return RedirectToPage(nameof(Index));
}
ViewModel = ViewModelFactory.Edit(product,
Categories, Suppliers);
return Page();
}
}
}
Restart ASP.NET Core so the page model base class is recompiled and use a browser to request http://localhost:5000/pages/edit/1. Click the Category select element and choose Create New Category from the list of options. Enter a new category name into the input element and click the Edit button. When the request is processed, a new Category object will be stored in the database and associated with the Product object, as shown in figure 31.9.
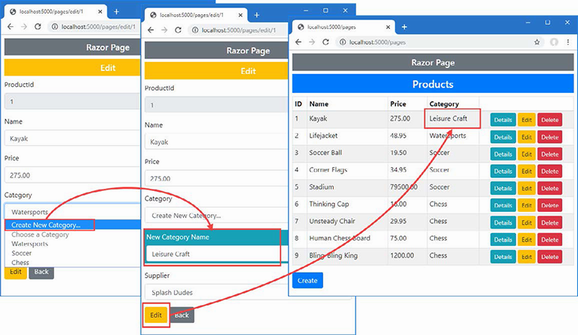
Figure 31.9 Creating related data
For related data types that have their own complex creation process, adding elements to the main form can be overwhelming to the user; a better approach is to navigate away from the main form to another controller or page, let the user create the new object, and then return to complete the original task. I will demonstrate this technique for the creation of Supplier objects, even though the Supplier type is simple and requires only two values from the user.
To create a form that will let the user create Supplier objects, add a Razor Page named SupplierBreakOut.cshtml to the Pages folder with the content shown in listing 31.30.
Listing 31.30 The contents of the SupplierBreakOut.cshtml file in the Pages folder
@page "/pages/supplier"
@model SupplierPageModel
<div class="m-2">
<h5 class="bg-secondary text-white text-center p-2">New Supplier</h5>
<form asp-page="SupplierBreakOut" method="post">
<div class="form-group">
@{ #pragma warning disable CS8602 }
<label asp-for="Supplier.Name"></label>
<input class="form-control" asp-for="Supplier.Name" />
@{ #pragma warning restore CS8602 }
</div>
<div class="form-group">
@{ #pragma warning disable CS8602 }
<label asp-for="Supplier.City"></label>
<input class="form-control" asp-for="Supplier.City" />
@{ #pragma warning restore CS8602 }
</div>
<button class="btn btn-secondary mt-2" type="submit">
Create
</button>
<a class="btn btn-outline-secondary mt-2"
asp-page="@Model.ReturnPage"
asp-route-id="@Model.ProductId">
Cancel
</a>
</form>
</div>
@functions {
public class SupplierPageModel: PageModel {
private DataContext context;
public SupplierPageModel(DataContext dbContext) {
context = dbContext;
}
[BindProperty]
public Supplier? Supplier { get; set; }
public string? ReturnPage { get; set; }
public string? ProductId { get; set; }
public void OnGet([FromQuery(Name="Product")] Product product,
string returnPage) {
TempData["product"] = Serialize(product);
TempData["returnAction"] = ReturnPage = returnPage;
TempData["productId"] = ProductId
= product.ProductId.ToString();
}
public async Task<IActionResult> OnPostAsync() {
if (ModelState.IsValid && Supplier != null) {
context.Suppliers.Add(Supplier);
await context.SaveChangesAsync();
Product? product
= Deserialize(TempData["product"] as string);
if (product != null) {
product.SupplierId = Supplier.SupplierId;
TempData["product"] = Serialize(product);
string? id = TempData["productId"] as string;
return RedirectToPage(TempData["returnAction"]
as string, new { id = id });
}
}
return Page();
}
private string Serialize(Product p) =>
JsonSerializer.Serialize(p);
private Product? Deserialize(string? json) =>
json == null ? null
: JsonSerializer.Deserialize<Product>(json);
}
}
The user will navigate to this page using a GET request that will contain the details of the Product the user has provided and the name of the page that the user should be returned to. This data is stored using the temp data feature.
This page presents the user with a form containing fields for the Name and City properties required to create a new Supplier object. When the form is submitted, the POST handler method stores a new Supplier object and uses the key assigned by the database server to update the Product object, which is then stored as temp data again. The user is redirected back to the page from which they arrived.
Listing 31.31 adds elements to the _ProductEditor partial view that will allow the user to navigate to the new page.
Listing 31.31 Adding elements in the _ProductEditor.cshtml file in the Pages folder
...
<div class="form-group">
<label asp-for="Product.SupplierId">
Supplier
@if (Model?.ReadOnly == false) {
<input type="hidden" name="returnPage"
value="@Model?.Action" />
<button class="btn btn-sm btn-outline-primary ml-3 my-1"
asp-page="SupplierBreakOut" formmethod="get"
formnovalidate>
Create New Supplier
</button>
}
</label>
<div>
<span asp-validation-for="Product.SupplierId"
class="text-danger">
</span>
</div>
<select asp-for="Product.SupplierId" class="form-control"
disabled="@Model?.ReadOnly"
asp-items="@(new SelectList(Model?.Suppliers,
"SupplierId", "Name"))">
<option value="" disabled selected>Choose a Supplier</option>
</select>
</div>
...
The new elements add a hidden input element that captures the page to return to and a button element that submits the form data to the SupplierBreakOut page using a GET request, which means the form values will be encoded in the query string (and is the reason I used the FromQuery attribute in listing 31.30). Listing 31.32 shows the change required to the Create page to add support for retrieving the temp data and using it to populate the Product form.
Listing 31.32 Retrieving data in the Create.cshtml file in the Pages folder
@page "/pages/create"
@model CreateModel
<div class="m-2">
<partial name="_ProductEditor" model="@Model.ViewModel" />
</div>
@functions {
public class CreateModel : EditorPageModel {
public CreateModel(DataContext dbContext) : base(dbContext) { }
public void OnGet() {
Product p = TempData.ContainsKey("product")
? JsonSerializer.Deserialize<Product>(
(TempData["product"] as string)!)!
: new () { Name = string.Empty };
ViewModel = ViewModelFactory.Create(p, Categories, Suppliers);
}
public async Task<IActionResult> OnPostAsync(
[FromForm] Product product) {
await CheckNewCategory(product);
if (ModelState.IsValid) {
product.ProductId = default;
product.Category = default;
product.Supplier = default;
DataContext.Products.Add(product);
await DataContext.SaveChangesAsync();
return RedirectToPage(nameof(Index));
}
ViewModel = ViewModelFactory.Create(product,
Categories, Suppliers);
return Page();
}
}
}
A similar change is required in the Edit page, as shown in listing 31.33. (The other pages do not require a change since the breakout is required only when the user is able to create or edit Product data.)
Listing 31.33 Retrieving data in the Edit.cshtml file in the Pages folder
@page "/pages/edit/{id}"
@model EditModel
<div class="m-2">
<partial name="_ProductEditor" model="@Model.ViewModel" />
</div>
@functions {
public class EditModel : EditorPageModel {
public EditModel(DataContext dbContext) : base(dbContext) { }
public async Task OnGetAsync(long id) {
Product? p = TempData.ContainsKey("product")
? JsonSerializer.Deserialize<Product>(
(TempData["product"] as string)!)
: await this.DataContext.Products.FindAsync(id);
ViewModel = ViewModelFactory.Edit(p
?? new () { Name = string.Empty },
Categories, Suppliers);
}
public async Task<IActionResult> OnPostAsync(
[FromForm] Product product) {
await CheckNewCategory(product);
if (ModelState.IsValid) {
product.Category = default;
product.Supplier = default;
DataContext.Products.Update(product);
await DataContext.SaveChangesAsync();
return RedirectToPage(nameof(Index));
}
ViewModel = ViewModelFactory.Edit(product,
Categories, Suppliers);
return Page();
}
}
}
The effect is that the user is presented with a Create New Supplier button, which sends the browser to a form that can be used to create a Supplier object. Once the Supplier has been stored in the database, the browser is sent back to the originating page, and the form is populated with the data the user had entered, and the Supplier select element is set to the newly created object, as shown in figure 31.10.
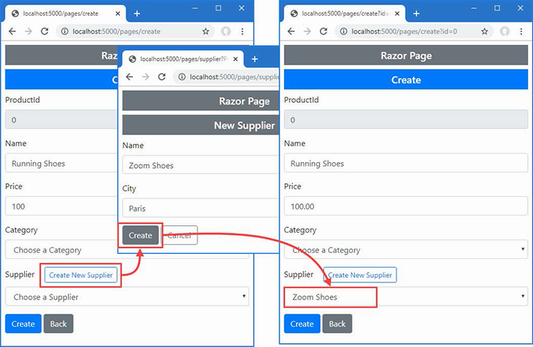
Figure 31.10 Breaking out to create related data
The ASP.NET Core form-handling features can be combined with Entity Framework Core to perform CRUD operations.
Forms can be created using Razor Views and Razor Pages.
Care must be taken to ensure consistency when creating related data.
In this chapter, you will create the example project used throughout this part of the book. The project contains a data model that is displayed using simple controllers and Razor Pages.
Open a new PowerShell command prompt from the Windows Start menu and run the commands shown in listing 32.1.
Listing 32.1 Creating the project
dotnet new globaljson --sdk-version 7.0.100 --output Advanced dotnet new web --no-https --output Advanced --framework net7.0 dotnet new sln -o Advanced dotnet sln Advanced add Advanced
If you are using Visual Studio, open the Advanced.sln file in the Advanced folder. If you are using Visual Studio Code, open the Advanced folder. Click the Yes button when prompted to add the assets required for building and debugging the project, as shown in figure 32.1.
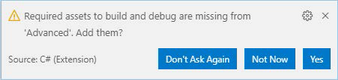
Figure 32.1 Adding project assets
Open the launchSettings.json file in the WebApp/Properties folder and change the HTTP port and disable automatic browser launching, as shown in listing 32.2.
Listing 32.2 Setting the HTTP port in the launchSettings.json file in the Properties folder
{
"iisSettings": {
"windowsAuthentication": false,
"anonymousAuthentication": true,
"iisExpress": {
"applicationUrl": "http://localhost:5000",
"sslPort": 0
}
},
"profiles": {
"WebApp": {
"commandName": "Project",
"dotnetRunMessages": true,
"launchBrowser": false,
"applicationUrl": "http://localhost:5000",
"environmentVariables": {
"ASPNETCORE_ENVIRONMENT": "Development"
}
},
"IIS Express": {
"commandName": "IISExpress",
"launchBrowser": true,
"environmentVariables": {
"ASPNETCORE_ENVIRONMENT": "Development"
}
}
}
}
The data model will use Entity Framework Core to store and query data in a SQL Server LocalDB database. To add the NuGet packages for Entity Framework Core, use a PowerShell command prompt to run the commands shown in listing 32.3 in the Advanced project folder.
Listing 32.3 Adding packages to the project
dotnet add package Microsoft.EntityFrameworkCore.Design --version 7.0.0 dotnet add package Microsoft.EntityFrameworkCore.SqlServer --version 7.0.0
If you have not followed the examples in earlier chapters, you will need to install the global tool package that is used to create and manage Entity Framework Core migrations. Run the commands shown in listing 32.4 to remove any existing version of the package and install the version required for this book.
Listing 32.4 Installing a global tool package
dotnet tool uninstall --global dotnet-ef dotnet tool install --global dotnet-ef --version 7.0.0
The data model for this application will consist of three classes, representing people, the department in which they work, and their location. Create a Models folder and add to it a class file named Person.cs with the code in listing 32.5.
Listing 32.5 The contents of the Person.cs file in the Models folder
namespace Advanced.Models {
public class Person {
public long PersonId { get; set; }
public string Firstname { get; set; } = String.Empty;
public string Surname { get; set; } = String.Empty;
public long DepartmentId { get; set; }
public long LocationId { get; set; }
public Department? Department { get; set; }
public Location? Location { get; set; }
}
}
Add a class file named Department.cs to the Models folder and use it to define the class shown in listing 32.6.
Listing 32.6 The contents of the Department.cs file in the Models folder
namespace Advanced.Models {
public class Department {
public long Departmentid { get; set; }
public string Name { get; set; } = String.Empty;
public IEnumerable<Person>? People { get; set; }
}
}
Add a class file named Location.cs to the Models folder and use it to define the class shown in listing 32.7.
Listing 32.7 The contents of the Location.cs file in the Models folder
namespace Advanced.Models {
public class Location {
public long LocationId { get; set; }
public string City { get; set; } = string.Empty;
public string State { get; set; } = String.Empty;
public IEnumerable<Person>? People { get; set; }
}
}
Each of the three data model classes defines a key property whose value will be allocated by the database when new objects are stored and defines foreign key properties that define the relationships between the classes. These are supplemented by navigation properties that will be used with the Entity Framework Core Include method to incorporate related data into queries.
To create the Entity Framework Core context class that will provide access to the database, add a file called DataContext.cs to the Models folder and add the code shown in listing 32.8.
Listing 32.8 The contents of the DataContext.cs file in the Models folder
using Microsoft.EntityFrameworkCore;
namespace Advanced.Models {
public class DataContext : DbContext {
public DataContext(DbContextOptions<DataContext> opts)
: base(opts) { }
public DbSet<Person> People => Set<Person>();
public DbSet<Department> Departments => Set<Department>();
public DbSet<Location> Locations => Set<Location>();
}
}
The context class defines properties that will be used to query the database for Person, Department, and Location data.
Add a class called SeedData.cs to the Models folder and add the code shown in listing 32.9 to define the seed data that will be used to populate the database.
Listing 32.9 The contents of the SeedData.cs file in the Models folder
using Microsoft.EntityFrameworkCore;
namespace Advanced.Models {
public static class SeedData {
public static void SeedDatabase(DataContext context) {
context.Database.Migrate();
if (context.People.Count() == 0
&& context.Departments.Count() == 0
&& context.Locations.Count() == 0) {
Department d1 = new () { Name = "Sales" };
Department d2 = new () { Name = "Development" };
Department d3 = new () { Name = "Support" };
Department d4 = new () { Name = "Facilities" };
context.Departments.AddRange(d1, d2, d3, d4);
context.SaveChanges();
Location l1 = new () { City = "Oakland", State = "CA" };
Location l2 = new () { City = "San Jose", State = "CA" };
Location l3 = new () { City = "New York", State = "NY" };
context.Locations.AddRange(l1, l2, l3);
context.People.AddRange(
new Person {
Firstname = "Francesca", Surname = "Jacobs",
Department = d2, Location = l1
},
new Person {
Firstname = "Charles", Surname = "Fuentes",
Department = d2, Location = l3
},
new Person {
Firstname = "Bright", Surname = "Becker",
Department = d4, Location = l1
},
new Person {
Firstname = "Murphy", Surname = "Lara",
Department = d1, Location = l3
},
new Person {
Firstname = "Beasley", Surname = "Hoffman",
Department = d4, Location = l3
},
new Person {
Firstname = "Marks", Surname = "Hays",
Department = d4, Location = l1
},
new Person {
Firstname = "Underwood", Surname = "Trujillo",
Department = d2, Location = l1
},
new Person {
Firstname = "Randall", Surname = "Lloyd",
Department = d3, Location = l2
},
new Person {
Firstname = "Guzman", Surname = "Case",
Department = d2, Location = l2
});
context.SaveChanges();
}
}
}
}
The static SeedDatabase method ensures that all pending migrations have been applied to the database. If the database is empty, it is seeded with data. Entity Framework Core will take care of mapping the objects into the tables in the database, and the key properties will be assigned automatically when the data is stored.
Make the changes to the Program.cs file shown in listing 32.10, which configure Entity Framework Core and set up the DataContext services that will be used throughout this part of the book to access the database.
Listing 32.10 Configuring the application in the Program.cs file in the Advanced folder
using Microsoft.EntityFrameworkCore;
using Advanced.Models;
var builder = WebApplication.CreateBuilder(args);
builder.Services.AddDbContext<DataContext>(opts => {
opts.UseSqlServer(
builder.Configuration["ConnectionStrings:PeopleConnection"]);
opts.EnableSensitiveDataLogging(true);
});
var app = builder.Build();
app.MapGet("/", () => "Hello World!");
var context = app.Services.CreateScope().ServiceProvider
.GetRequiredService<DataContext>();
SeedData.SeedDatabase(context);
app.Run();
To define the connection string that will be used for the application’s data, add the configuration settings shown in listing 32.11 in the appsettings.json file. The connection string should be entered on a single line.
Listing 32.11 Defining a connection string in the Advanced/appsettings.json file
{
"Logging": {
"LogLevel": {
"Default": "Information",
"Microsoft.AspNetCore": "Warning",
"Microsoft.EntityFrameworkCore": "Information"
}
},
"AllowedHosts": "*",
"ConnectionStrings": {
"PeopleConnection": "Server=(localdb)\\MSSQLLocalDB;Database=People;
➥MultipleActiveResultSets=True"
}
}
In addition to the connection string, listing 32.11 increases the logging detail for Entity Framework Core so that the SQL queries sent to the database are logged.
To create the migration that will set up the database schema, use a PowerShell command prompt to run the command shown in listing 32.12 in the Advanced project folder.
Listing 32.12 Creating an Entity Framework Core migration
dotnet ef migrations add Initial
Once the migration has been created, apply it to the database using the command shown in listing 32.13.
Listing 32.13 Applying the migration to the database
dotnet ef database update
The logging messages displayed by the application will show the SQL commands that are sent to the database.
Following the pattern established in earlier chapters, I will use the Bootstrap CSS framework to style the HTML elements produced by the example application. To install the Bootstrap package, run the commands shown in listing 32.14 in the Advanced project folder. These commands rely on the Library Manager package.
Listing 32.14 Installing the Bootstrap CSS framework
libman init -p cdnjs libman install bootstrap@5.2.3 -d wwwroot/lib/bootstrap
If you are using Visual Studio, you can install client-side packages by right-clicking the Advanced project item in the Solution Explorer and selecting Add > Client-Side Library from the pop-up menu.
The example application in this part of the book will respond to requests using both MVC controllers and Razor Pages. Add the statements shown in listing 32.15 to the Program.cs file to configure the services and middleware the application will use.
Listing 32.15 Configuring the application in the Program.cs file in the Advanced folder
using Microsoft.EntityFrameworkCore;
using Advanced.Models;
var builder = WebApplication.CreateBuilder(args);
builder.Services.AddControllersWithViews();
builder.Services.AddRazorPages();
builder.Services.AddDbContext<DataContext>(opts => {
opts.UseSqlServer(
builder.Configuration["ConnectionStrings:PeopleConnection"]);
opts.EnableSensitiveDataLogging(true);
});
var app = builder.Build();
//app.MapGet("/", () => "Hello World!");
app.UseStaticFiles();
app.MapControllers();
app.MapControllerRoute("controllers",
"controllers/{controller=Home}/{action=Index}/{id?}");
app.MapRazorPages();
var context = app.Services.CreateScope().ServiceProvider
.GetRequiredService<DataContext>();
SeedData.SeedDatabase(context);
app.Run();
In addition to mapping the controller route, I have added a route that matches URL paths that begin with controllers, which will make it easier to follow the examples in later chapters as they switch between controllers and Razor Pages. This is the same convention I adopted in earlier chapters, and I will route URL paths beginning with /pages to Razor Pages.
To display the application’s data using a controller, create a folder named Controllers in the Advanced project folder and add to it a class file named HomeController.cs, with the content shown in listing 32.16.
Listing 32.16 The contents of the HomeController.cs file in the Controllers folder
using Advanced.Models;
using Microsoft.AspNetCore.Mvc;
using Microsoft.EntityFrameworkCore;
namespace Advanced.Controllers {
public class HomeController : Controller {
private DataContext context;
public HomeController(DataContext dbContext) {
context = dbContext;
}
public IActionResult Index([FromQuery] string selectedCity) {
return View(new PeopleListViewModel {
People = context.People
.Include(p => p.Department).Include(p => p.Location),
Cities = context.Locations.Select(l => l.City).Distinct(),
SelectedCity = selectedCity
});
}
}
public class PeopleListViewModel {
public IEnumerable<Person> People { get; set; }
= Enumerable.Empty<Person>();
public IEnumerable<string> Cities { get; set; }
= Enumerable.Empty<string>();
public string SelectedCity { get; set; } = String.Empty;
public string GetClass(string? city) =>
SelectedCity == city ? "bg-info text-white" : "";
}
}
To provide the controller with a view, create the Views/Home folder and add to it a Razor View named Index.cshtml with the content shown in listing 32.17.
Listing 32.17 The contents of the Index.cshtml file in the Views/Home folder
@model PeopleListViewModel
<h4 class="bg-primary text-white text-center p-2">People</h4>
<table class="table table-sm table-bordered table-striped">
<thead>
<tr>
<th>ID</th>
<th>Name</th>
<th>Dept</th>
<th>Location</th>
</tr>
</thead>
<tbody>
@foreach (Person p in Model.People) {
<tr class="@Model.GetClass(p.Location?.City)">
<td>@p.PersonId</td>
<td>@p.Surname, @p.Firstname</td>
<td>@p.Department?.Name</td>
<td>@p.Location?.City, @p.Location?.State</td>
</tr>
}
</tbody>
</table>
<form asp-action="Index" method="get">
<div class="form-group">
<label for="selectedCity">City</label>
<select name="selectedCity" class="form-control">
<option disabled selected>Select City</option>
@foreach (string city in Model.Cities) {
<option selected="@(city == Model.SelectedCity)">
@city
</option>
}
</select>
</div>
<button class="btn btn-primary mt-2" type="submit">Select</button>
</form>
To enable tag helpers and add the namespaces that will be available by default in views, add a Razor View Imports file named _ViewImports.cshtml to the Views folder with the content shown in listing 32.18.
Listing 32.18 The contents of the _ViewImports.cshtml file in the Views folder
@addTagHelper *, Microsoft.AspNetCore.Mvc.TagHelpers @using Advanced.Models @using Advanced.Controllers
To specify the default layout for controller views, add a Razor View Start start file named _ViewStart.cshtml to the Views folder with the content shown in listing 32.19.
Listing 32.19 The contents of the _ViewStart.cshtml file in the Views folder
@{
Layout = "_Layout";
}
To create the layout, create the Views/Shared folder and add to it a Razor Layout named _Layout.cshtml with the content shown in listing 32.20.
Listing 32.20 The contents of the _Layout.cshtml file in the Views/Shared folder
<!DOCTYPE html>
<html>
<head>
<title>@ViewBag.Title</title>
<link href="/lib/bootstrap/css/bootstrap.min.css" rel="stylesheet" />
</head>
<body>
<div class="m-2">
@RenderBody()
</div>
</body>
</html>
To display the application’s data using a Razor Page, create the Pages folder and add to it a Razor Page named Index.cshtml with the content shown in listing 32.21.
Listing 32.21 The contents of the Index.cshtml file in the Pages folder
@page "/pages"
@model IndexModel
<h4 class="bg-primary text-white text-center p-2">People</h4>
<table class="table table-sm table-bordered table-striped">
<thead>
<tr>
<th>ID</th>
<th>Name</th>
<th>Dept</th>
<th>Location</th>
</tr>
</thead>
<tbody>
@foreach (Person p in Model.People) {
<tr class="@Model.GetClass(p.Location?.City)">
<td>@p.PersonId</td>
<td>@p.Surname, @p.Firstname</td>
<td>@p.Department?.Name</td>
<td>@p.Location?.City, @p.Location?.State</td>
</tr>
}
</tbody>
</table>
<form asp-page="Index" method="get">
<div class="form-group">
<label for="selectedCity">City</label>
<select name="selectedCity" class="form-control">
<option disabled selected>Select City</option>
@foreach (string city in Model.Cities) {
<option selected="@(city == Model.SelectedCity)">
@city
</option>
}
</select>
</div>
<button class="btn btn-primary mt-2" type="submit">Select</button>
</form>
@functions {
public class IndexModel : PageModel {
private DataContext context;
public IndexModel(DataContext dbContext) {
context = dbContext;
}
public IEnumerable<Person> People { get; set; }
= Enumerable.Empty<Person>();
public IEnumerable<string> Cities { get; set; }
= Enumerable.Empty<string>();
[FromQuery]
public string SelectedCity { get; set; } = String.Empty;
public void OnGet() {
People = context.People.Include(p => p.Department)
.Include(p => p.Location);
Cities = context.Locations.Select(l => l.City).Distinct();
}
public string GetClass(string? city) =>
SelectedCity == city ? "bg-info text-white" : "";
}
}
To enable tag helpers and add the namespaces that will be available by default in the view section of the Razor Pages, add a Razor View imports file named _ViewImports.cshtml to the Pages folder with the content shown in listing 32.22.
Listing 32.22 The contents of the _ViewImports.cshtml file in the Pages folder
@addTagHelper *, Microsoft.AspNetCore.Mvc.TagHelpers @using Advanced.Models @using Microsoft.AspNetCore.Mvc.RazorPages @using Microsoft.EntityFrameworkCore
To specify the default layout for Razor Pages, add a Razor View start file named _ViewStart.cshtml to the Pages folder with the content shown in listing 32.23.
Listing 32.23 The contents of the _ViewStart.cshtml file in the Pages folder
@{
Layout = "_Layout";
}
To create the layout, add a Razor Layout named _Layout.cshtml to the Pages folder with the content shown in listing 32.24.
Listing 32.24 The contents of the _Layout.cshtml file in the Pages folder
<!DOCTYPE html>
<html>
<head>
<title>@ViewBag.Title</title>
<link href="/lib/bootstrap/css/bootstrap.min.css" rel="stylesheet" />
</head>
<body>
<div class="m-2">
<h5 class="bg-secondary text-white text-center p-2">Razor Page</h5>
@RenderBody()
</div>
</body>
</html>
Start the application by running the command shown in listing 32.25 in the Advanced project folder.
Listing 32.25 Running the example application
dotnet run
Use a browser to request http://localhost:5000/controllers and http://localhost:5000/pages. Select a city using the select element and click the Select button to highlight rows in the table, as shown in figure 32.2.

Figure 32.2 Running the example application
Blazor adds client-side interactivity to web applications. There are two varieties of Blazor, and in this chapter, I focus on Blazor Server. I explain the problem it solves and how it works. I show you how to configure an ASP.NET Core application to use Blazor Server and describe the basic features available when using Razor Components, which are the building blocks for Blazor Server projects. I describe more advanced Blazor Server features in chapters 34–36, and in chapter 37, I describe Blazor WebAssembly, which is the other variety of Blazor. Table 33.1 puts Blazor Server in context.
Table 33.1 Putting Blazor Server in context
|
Question |
Answer |
|---|---|
|
What is it? |
Blazor Server uses JavaScript to receive browser events, which are forwarded to ASP.NET Core and evaluated using C# code. The effect of the event on the state of the application is sent back to the browser and displayed to the user. |
|
Why is it useful? |
Blazor Server can produce a richer and more responsive user experience compared to standard web applications. |
|
How is it used? |
The building block for Blazor Server is the Razor Component, which uses a syntax similar to Razor Pages. The view section of the Razor Component contains special attributes that specify how the application will respond to user interaction. |
|
Are there any pitfalls or limitations? |
Blazor Server relies on a persistent HTTP connection to the server and cannot function when that connection is interrupted. Blazor Server is not supported by older browsers. |
|
Are there any alternatives? |
The features described in part 3 of this book can be used to create web applications that work broadly but that offer a less responsive experience. You could also consider a client-side JavaScript framework, such as Angular, React, or Vue.js. |
Table 33.2 provides a guide to the chapter.
Table 33.2 Chapter guide
|
Problem |
Solution |
Listing |
|---|---|---|
|
Configuring Blazor |
Use the |
3–6 |
|
Creating a Blazor Component |
Create a |
7 |
|
Applying a component |
Use a |
8, 9 |
|
Handling events |
Use an attribute to specify the method or expression that will handle an event. |
10–15 |
|
Creating a two-way relationship with an element |
Create a data binding. |
16–20 |
|
Defining the code separately from the markup |
Use a code-behind class. |
21–23 |
|
Defining a component without declarative markup |
Use a Razor Component class. |
24, 25 |
This chapter uses the Advanced project from chapter 32. No changes are required to prepare for this chapter.
Open a new PowerShell command prompt, navigate to the folder that contains the Advanced.csproj file, and run the command shown in listing 33.1 to drop the database.
Listing 33.1 Dropping the database
dotnet ef database drop --force
Use the PowerShell command prompt to run the command shown in listing 33.2.
Listing 33.2 Running the example application
dotnet run
Use a browser to request http://localhost:5000/controllers, which will display a list of data items. Pick a city from the drop-down list and click the Select button to highlight elements, as shown in figure 33.1.
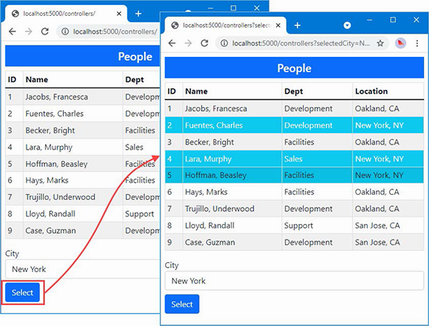
Figure 33.1 Running the example application
Consider what happens when you choose a city and click the Select button presented by the example application. The browser sends an HTTP GET request that submits a form, which is received by either an action method or a handler method, depending on whether you use the controller or Razor Page. The action or handler renders its view, which sends a new HTML document that reflects the selection to the browser, as illustrated by figure 33.2.

Figure 33.2 Interacting with the example application
This cycle is effective but can be inefficient. Each time the Submit button is clicked, the browser sends a new HTTP request to ASP.NET Core. Each request contains a complete set of HTTP headers that describe the request and the types of responses the browser is willing to receive. In its response, the server includes HTTP headers that describe the response and includes a complete HTML document for the browser to display.
The amount of data sent by the example application is about 3KB on my system, and almost all of it is duplicated between requests. The browser only wants to tell the server which city has been selected, and the server only wants to indicate which table rows should be highlighted; however, each HTTP request is self-contained, so the browser must parse a complete HTML document each time. The root issue that every interaction is the same: send a request and get a complete HTML document in return.
Blazor takes a different approach. A JavaScript library is included in the HTML document that is sent to the browser. When the JavaScript code is executed, it opens an HTTP connection back to the server and leaves it open, ready for user interaction. When the user picks a value using the select element, for example, details of the selection are sent to the server, which responds with just the changes to apply to the existing HTML, as shown in figure 33.3.
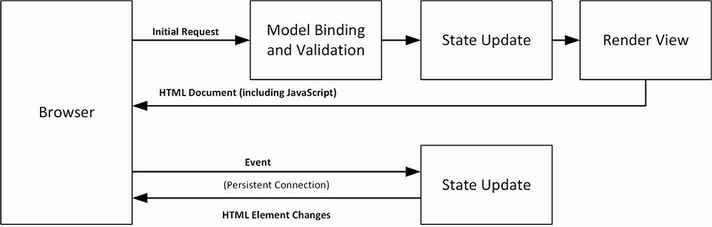
Figure 33.3 Interacting with Blazor
The persistent HTTP connection minimizes the delay, and replying with just the differences reduces the amount of data sent between the browser and the server.
The biggest attraction of Blazor is that it is based on Razor Pages written in C#. This means you can increase efficiency and responsiveness without having to learn a new framework, such as Angular or React, and a new language, such as TypeScript or JavaScript. Blazor is nicely integrated into the rest of ASP.NET Core and is built on features described in earlier chapters, which makes it easy to use (especially when compared to a framework like Angular, which has a dizzyingly steep learning curve).
Blazor requires a modern browser to establish and maintain its persistent HTTP connection. And, because of this connection, applications that use Blazor stop working if the connection is lost, which makes them unsuitable for offline use, where connectivity cannot be relied on or where connections are slow. These issues are addressed by Blazor WebAssembly, described in chapter 36, but, as I explain, this has its own set of limitations.
Decisions between Blazor and one of the JavaScript frameworks should be driven by the development team’s experience and the users’ expected connectivity. If you have no JavaScript expertise and have not used one of the JavaScript frameworks, then you should use Blazor, but only if you can rely on good connectivity and modern browsers. This makes Blazor a good choice for line-of-business applications, for example, where the browser demographic and network quality can be determined in advance.
If you have JavaScript experience and you are writing a public-facing application, then you should use one of the JavaScript frameworks because you won’t be able to make assumptions about browsers or network quality. (It doesn’t matter which framework you choose—I have written books about Angular, React, and Vue.js, and they are all excellent. My advice for choosing a framework is to create a simple app in each of them and pick the one whose development model appeals to you the most.)
If you are writing a public-facing application and you don’t have JavaScript experience, then you have two choices. The safest option is to stick to the ASP.NET Core features described in earlier chapters and accept the inefficiencies this can bring. This isn’t a terrible choice to make, and you can still produce top-quality applications. A more demanding choice is to learn TypeScript or JavaScript and one of Angular, React, or Vue.js—but don’t underestimate the amount of time it takes to master JavaScript or the complexity of these frameworks.
The best way to get started with Blazor is to jump right in. In the sections that follow, I configure the application to enable Blazor and re-create the functionality offered by the controller and Razor Page. After that, I’ll go right back to basics and explain how Razor Components work and the different features they offer.
Preparation is required before Blazor can be used. The first step is to add the services and middleware to the Program.cs file, as shown in listing 33.3.
Listing 33.3 Configuring the application in the Program.cs file in the Advanced folder
using Microsoft.EntityFrameworkCore;
using Advanced.Models;
var builder = WebApplication.CreateBuilder(args);
builder.Services.AddControllersWithViews();
builder.Services.AddRazorPages();
builder.Services.AddServerSideBlazor();
builder.Services.AddDbContext<DataContext>(opts => {
opts.UseSqlServer(
builder.Configuration["ConnectionStrings:PeopleConnection"]);
opts.EnableSensitiveDataLogging(true);
});
var app = builder.Build();
app.UseStaticFiles();
app.MapControllers();
app.MapControllerRoute("controllers",
"controllers/{controller=Home}/{action=Index}/{id?}");
app.MapRazorPages();
app.MapBlazorHub();
var context = app.Services.CreateScope().ServiceProvider
.GetRequiredService<DataContext>();
SeedData.SeedDatabase(context);
app.Run();
The “hub” in the MapBlazorHub method relates to SignalR, which is the part of ASP.NET Core that handles the persistent HTTP request. I don’t describe SignalR in this book because it is rarely used directly, but it can be useful if you need ongoing communication between clients and the server. See https://docs.microsoft.com/en-us/aspnet/core/signalr for details. For this book—and most ASP.NET Core applications—it is enough to know that SignalR is used to manage the connections that Blazor relies on.
Adding the Blazor JavaScript File to the layout
Blazor relies on JavaScript code to communicate with the ASP.NET Core server. Add the elements shown in listing 33.4 to the _Layout.cshtml file in the Views/Shared folder to add the JavaScript file to the layout used by controller views.
Listing 33.4 Adding elements in the _Layout.cshtml file in the Views/Shared folder
<!DOCTYPE html>
<html>
<head>
<title>@ViewBag.Title</title>
<link href="/lib/bootstrap/css/bootstrap.min.css" rel="stylesheet" />
<base href="~/" />
</head>
<body>
<div class="m-2">
@RenderBody()
</div>
<script src="_framework/blazor.server.js"></script>
</body>
</html>
The script element specifies the name of the JavaScript file, and requests for it are intercepted by the middleware added to the request pipeline in listing 33.3 so that no additional package is required to add the JavaScript code to the project. The base element must also be added to specify the root URL for the application. The same elements must be added to the layout used by Razor Pages, as shown in listing 33.5.
Listing 33.5 Adding elements in the _Layout.cshtml file in the Pages folder
<!DOCTYPE html>
<html>
<head>
<title>@ViewBag.Title</title>
<link href="/lib/bootstrap/css/bootstrap.min.css" rel="stylesheet" />
<base href="~/" />
</head>
<body>
<div class="m-2">
<h5 class="bg-secondary text-white text-center p-2">
Razor Page
</h5>
@RenderBody()
</div>
<script src="_framework/blazor.server.js"></script>
</body>
</html>
Creating the Blazor imports file
Blazor requires its own imports file to specify the namespaces that it uses. It is easy to forget to add this file to a project, but, without it, Blazor will silently fail. Add a file named _Imports.razor to the Advanced folder with the content shown in listing 33.6. (If you are using Visual Studio, you can use the Razor View imports template to create this file, but ensure you use the .razor file extension.)
Listing 33.6 The contents of the _Imports.razor file in the Advanced folder
@using Microsoft.AspNetCore.Components @using Microsoft.AspNetCore.Components.Forms @using Microsoft.AspNetCore.Components.Routing @using Microsoft.AspNetCore.Components.Web @using Microsoft.JSInterop @using Microsoft.EntityFrameworkCore @using Advanced.Models
The first five @using expressions are for the namespaces required for Blazor. The last two expressions are for convenience in the examples that follow because they will allow me to use Entity Framework Core and the classes in the Models namespace.
There is a clash in terminology: the technology is Blazor, but the key building block is called a Razor Component. Razor Components are defined in files with the .razor extension and must begin with a capital letter. Components can be defined anywhere, but they are usually grouped together to help keep the project organized. Create a Blazor folder in the Advanced folder and add to it a Razor Component named PeopleList.razor with the content shown in listing 33.7.
Listing 33.7 The contents of the PeopleList.razor file in the Blazor folder
<table class="table table-sm table-bordered table-striped">
<thead>
<tr>
<th>ID</th>
<th>Name</th>
<th>Dept</th>
<th>Location</th>
</tr>
</thead>
<tbody>
@foreach (Person p in People ?? Enumerable.Empty<Person>()) {
<tr class="@GetClass(p?.Location?.City)">
<td>@p?.PersonId</td>
<td>@p?.Surname, @p?.Firstname</td>
<td>@p?.Department?.Name</td>
<td>@p?.Location?.City, @p?.Location?.State</td>
</tr>
}
</tbody>
</table>
<div class="form-group">
<label for="city">City</label>
<select name="city" class="form-control" @bind="SelectedCity">
<option disabled selected value="">Select City</option>
@foreach (string city in Cities ?? Enumerable.Empty<string>()) {
<option value="@city" selected="@(city == SelectedCity)">
@city
</option>
}
</select>
</div>
@code {
[Inject]
public DataContext? Context { get; set; }
public IEnumerable<Person>? People =>
Context?.People.Include(p => p.Department)
.Include(p => p.Location);
public IEnumerable<string>? Cities =>
Context?.Locations.Select(l => l.City);
public string SelectedCity { get; set; } = string.Empty;
public string GetClass(string? city) =>
SelectedCity == city ? "bg-info text-white" : "";
}
Razor Components are similar to Razor Pages. The view section relies on the Razor features you have seen in earlier chapters, with @ expressions to insert data values into the component’s HTML or to generate elements for objects in a sequence, like this:
...
@foreach (string city in Cities ?? Enumerable.Empty<string>()) {
<option value="@city" selected="@(city == SelectedCity)">
@city
</option>
}
...
This @foreach expression generates option elements for each value in the Cities sequence and is identical to the equivalent expression in the controller view and Razor Page created in chapter 32.
Although Razor Components look familiar, there are some important differences. The first is that there is no page model class and no @model expression. The properties and methods that support a component’s HTML are defined directly in an @code expression, which is the counterpart to the Razor Page @functions expression. To define the property that will provide the view section with Person objects, for example, I just define a People property in the @code section, like this:
...
public IEnumerable<Person>? People =>
Context?.People.Include(p => p.Department)
.Include(p => p.Location);
...
And, because there is no page model class, there is no constructor through which to declare service dependencies. Instead, the dependency injection sets the values of properties that have been decorated with the Inject attribute, like this:
...
[Inject]
public DataContext? Context { get; set; }
...
The most significant difference is the use of a special attribute on the select element.
...
<select name="city" class="form-control" @bind="SelectedCity">
<option disabled selected value="">Select City</option>
...
This Blazor attribute creates a data binding between the value of the select element and the SelectedCity property defined in the @code section.
I describe data bindings in more detail in the “Working with Data Bindings” section, but for now, it is enough to know that the value of the SelectedCity will be updated when the user changes the value of the select element.
Razor components are delivered to the browser as part of a Razor Page or a controller view. Listing 33.8 shows how to use a Razor Component in a controller view.
Listing 33.8 Using a Razor Component in the Index.cshtml file in the Views/Home folder
@model PeopleListViewModel
<h4 class="bg-primary text-white text-center p-2">People</h4>
<component type="typeof(Advanced.Blazor.PeopleList)"
render-mode="Server" />
Razor Components are applied using the component element, for which there is a tag helper. The component element is configured using the type and render-mode attributes. The type attribute is used to specify the Razor Component. Razor Components are compiled into classes just like controller views and Razor Pages. The PeopleList component is defined in the Blazor folder in the Advanced project, so the type will be Advanced.Blazor.PeopleList, like this:
...
<component type="typeof(Advanced.Blazor.PeopleList)"
render-mode="Server" />
...
The render-mode attribute is used to select how content is produced by the component, using a value from the RenderMode enum, described in table 33.3.
Table 33.3 The RenderMode values
|
Name |
Description |
|---|---|
|
|
The Razor Component renders its view section as static HTML with no client-side support. |
|
|
The HTML document is sent to the browser with a placeholder for the component. The HTML displayed by the component is sent to the browser over the persistent HTTP connection and displayed to the user. |
|
|
The view section of the component is included in the HTML and displayed to the user immediately. The HTML content is sent again over the persistent HTTP connection. |
For most applications, the Server option is a good choice. The ServerPrerendered includes a static rendition of the Razor Component’s view section in the HTML document sent to the browser. This acts as placeholder content so that the user isn’t presented with an empty browser window while the JavaScript code is loaded and executed. Once the persistent HTTP connection has been established, the placeholder content is deleted and replaced with a dynamic version sent by Blazor. The idea of showing static content to the user is a good one, but it can be confusing because the HTML elements are not wired up to the server-side part of the application, and any interaction from the user either doesn’t work or will be discarded once the live content arrives.
To see Blazor in action, restart ASP.NET Core and use a browser to request http://localhost:5000/controllers. No form submission is required when using Blazor because the data binding will respond as soon as the select element’s value is changed, as shown in figure 33.4. (You may have to reload the browser to see the Blazor component in action.)
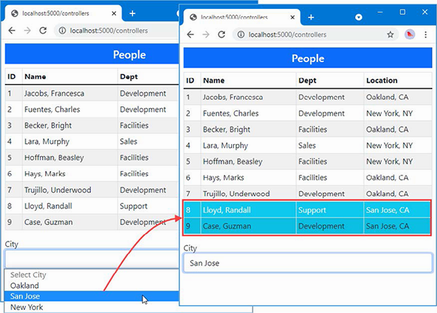
Figure 33.4 Using a Razor Component
When you use the select element, the value you choose is sent over the persistent HTTP connection to the ASP.NET Core server, which updates the Razor Component’s SelectedCity property and re-renders the HTML content. A set of updates is sent to the JavaScript code, which updates the table.
Razor Components can also be used in Razor Pages. Add a Razor Page named Blazor.cshtml to the Pages folder and add the content shown in listing 33.9.
Listing 33.9 The contents of the Blazor.cshtml file in the Pages folder
@page "/pages/blazor"
<script type="text/javascript">
window.addEventListener("DOMContentLoaded", () => {
document.getElementById("markElems").addEventListener("click",
() => {
document.querySelectorAll("td:first-child")
.forEach(elem => {
elem.innerText = `M:${elem.innerText}`
elem.classList.add("border", "border-dark");
});
});
});
</script>
<h4 class="bg-primary text-white text-center p-2">Blazor People</h4>
<button id="markElems" class="btn btn-outline-primary mb-2">
Mark Elements
</button>
<component type="typeof(Advanced.Blazor.PeopleList)"
render-mode="Server" />
The Razor Page in listing 33.9 contains additional JavaScript code that helps demonstrate that only changes are sent, instead of an entirely new HTML table. Restart ASP.NET Core and request http://localhost:5000/pages/blazor. Click the Mark Elements button, and the cells in the ID column will be changed to display different content and a border. Now use the select element to pick a different city, and you will see that the elements in the table are modified without being deleted, as shown in figure 33.5.
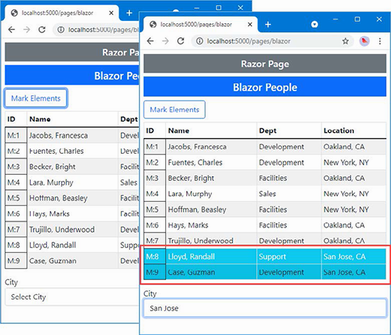
Figure 33.5 Demonstrating that only changes are used
Now that I have demonstrated how Blazor can be used and how it works, it is time to go back to the basics and introduce the features that Razor Components offer. Although the example in the previous section showed how standard ASP.NET Core features can be reproduced using Blazor, there is a much wider set of features available.
Events allow a Razor Component to respond to user interaction, and Blazor uses the persistent HTTP connection to send details of the event to the server where it can be processed. To see Blazor events in action, add a Razor Component named Events.razor to the Blazor folder with the content shown in listing 33.10.
Listing 33.10 The contents of the Events.razor file in the Blazor folder
<div class="m-2 p-2 border">
<button class="btn btn-primary" @onclick="IncrementCounter">
Increment
</button>
<span class="p-2">Counter Value: @Counter</span>
</div>
@code {
public int Counter { get; set; } = 1;
public void IncrementCounter(MouseEventArgs e) {
Counter++;
}
}
You register a handler for an event by adding an attribute to an HTML element, where the attribute name is @on, followed by the event name. In the example, I have set up a handler for the click events generated by a button element, like this:
...
<button class="btn btn-primary" @onclick="IncrementCounter">
Increment
</button>
...
The value assigned to the attribute is the name of the method that will be invoked when the event is triggered. The method can define an optional parameter that is either an instance of the EventArgs class or a class derived from EventArgs that provides additional information about the event.
For the onclick event, the handler method receives a MouseEventArgs object, which provides additional details, such as the screen coordinates of the click. Table 33.4 lists the event description events and the events for which they are used.
Table 33.4 The EventArgs classes and the events they represent
|
Class |
Events |
|---|---|
|
|
|
|
|
|
|
|
|
|
|
|
|
|
|
|
|
|
|
|
|
|
|
|
|
|
|
|
|
|
|
|
|
The Blazor JavaScript code receives the event when it is triggered and forwards it to the server over the persistent HTTP connection. The handler method is invoked, and the state of the component is updated. Any changes to the content produced by the component’s view section will be sent back to the JavaScript code, which will update the content displayed by the browser.
In the example, the click event will be handled by the IncrementCounter method, which changes the value of the Counter property. The value of the Counter property is included in the HTML rendered by the component, so Blazor sends the changes to the browser so that the JavaScript code can update the HTML elements displayed to the user. To display the Events component, replace the contents of the Blazor.cshtml file in the Pages folder, as shown in listing 33.11.
Listing 33.11 Using a new component in the Blazor.cshtml file in the Pages folder
@page "/pages/blazor" <h4 class="bg-primary text-white text-center p-2">Events</h4> <component type="typeof(Advanced.Blazor.Events)" render-mode="Server" />
Listing 33.11 changes the type attribute of the component element and removes the custom JavaScript and the button element I used to mark elements in the previous example. Restart ASP.NET Core and request http://localhost:5000/pages/blazor to see the new component. Click the Increment button, and the click event will be received by the Blazor JavaScript code and sent to the server for processing by the IncrementCounter method, as shown in figure 33.6.
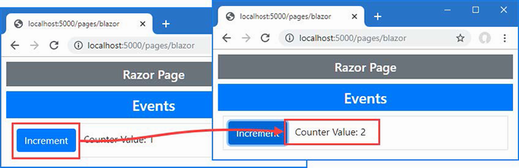
Figure 33.6 Handling an event
Handling events from multiple elements
To avoid code duplication, elements from multiple elements can be received by a single handler method, as shown in listing 33.12.
Listing 33.12 Handling events in the Events.razor file in the Blazor folder
<div class="m-2 p-2 border">
<button class="btn btn-primary"
@onclick="@(e => IncrementCounter(e, 0))">
Increment Counter #1
</button>
<span class="p-2">Counter Value: @Counter[0]</span>
</div>
<div class="m-2 p-2 border">
<button class="btn btn-primary"
@onclick="@(e => IncrementCounter(e, 1))">
Increment Counter #2
</button>
<span class="p-2">Counter Value: @Counter[1]</span>
</div>
@code {
public int[] Counter { get; set; } = new int[] { 1, 1 };
public void IncrementCounter(MouseEventArgs e, int index) {
Counter[index]++;
}
}
Blazor event attributes can be used with lambda functions that receive the EventArgs object and invoke a handler method with additional arguments. In this example, I have added an index parameter to the IncrementCounter method, which is used to determine which counter value should be updated. The value for the argument is defined in the @onclick attribute, like this:
... <button class="btn btn-primary" @onclick="@(e => IncrementCounter(e, 0))"> ...
This technique can also be used when elements are generated programmatically, as shown in listing 33.13. In this example, I use an @for expression to generate elements and use the loop variable as the argument to the handler method. I have also removed the EventArgs parameter from the handler method, which isn’t being used.
Listing 33.13 Generating elements in the Events.razor file in the Blazor folder
@for (int i = 0; i < ElementCount; i++) {
int local = i;
<div class="m-2 p-2 border">
<button class="btn btn-primary"
@onclick="@(() => IncrementCounter(local))">
Increment Counter #@(i + 1)
</button>
<span class="p-2">Counter Value: @GetCounter(i)</span>
</div>
}
@code {
public int ElementCount { get; set; } = 4;
public Dictionary<int, int> Counters { get; }
= new Dictionary<int, int>();
public int GetCounter(int index) =>
Counters.ContainsKey(index) ? Counters[index] : 0;
public void IncrementCounter(int index) =>
Counters[index] = GetCounter(index) + 1;
}
The important point to understand about event handlers is that the @onclick lambda function isn’t evaluated until the server receives the click event from the browser. This means care must be taken not to use the loop variable i as the argument to the IncrementCounter method because it will always be the final value produced by the loop, which would be 4 in this case. Instead, you must capture the loop variable in a local variable, like this:
... int local = i; ...
The local variable is then used as the argument to the event handler method in the attribute, like this:
... <button class="btn btn-primary" @onclick="@(() => IncrementCounter(local))"> ...
The local variable fixes the value for the lambda function for each of the generated elements. Restart ASP.NET Core and use a browser to request http://localhost:5000/pages/blazor, which will produce the response shown in figure 33.7. The click events produced by all the button elements are handled by the same method, but the argument provided by the lambda function ensures that the correct counter is updated.
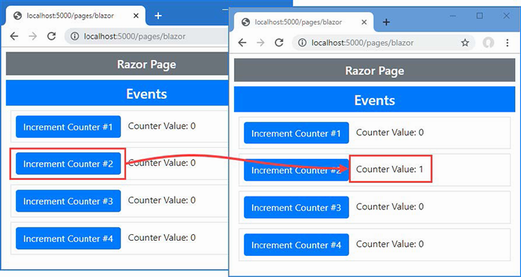
Figure 33.7 Handling events from multiple elements
Processing events without a handler method
Simple event handling can be done directly in a lambda function, without using a handler method, as shown in listing 33.14.
Listing 33.14 Handling events in the Events.razor file in the Blazor folder
@for (int i = 0; i < ElementCount; i++) {
int local = i;
<div class="m-2 p-2 border">
<button class="btn btn-primary"
@onclick="@(() => IncrementCounter(local))">
Increment Counter #@(i + 1)
</button>
<button class="btn btn-info"
@onclick="@(() => Counters.Remove(local))">
Reset
</button>
<span class="p-2">Counter Value: @GetCounter(i)</span>
</div>
}
@code {
public int ElementCount { get; set; } = 4;
public Dictionary<int, int> Counters { get; }
= new Dictionary<int, int>();
public int GetCounter(int index) =>
Counters.ContainsKey(index) ? Counters[index] : 0;
public void IncrementCounter(int index) =>
Counters[index] = GetCounter(index) + 1;
}
Complex handlers should be defined as methods, but this approach is more concise for simple handlers. Restart ASP.NET Core and request http://localhost:5000/pages/blazor. The Reset buttons remove values from the Counters collection without relying on a method in the @code section of the component, as shown in figure 33.8.
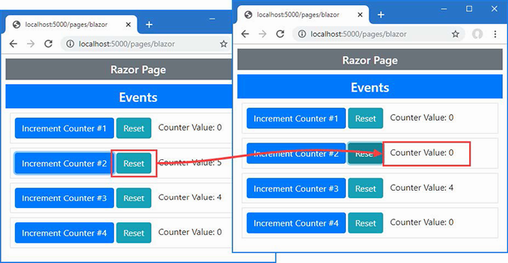
Figure 33.8 Handling events in a lambda expression
Preventing default events and event propagation
Blazor provides two attributes that alter the default behavior of events in the browser, as described in table 33.5. These attributes, where the name of the event is followed by a colon and then a keyword, are known as parameters.
Table 33.5 The event configuration parameters
|
Name |
Description |
|---|---|
|
|
This parameter determines whether the default event for an element is triggered. |
|
|
This parameter determines whether an event is propagated to its ancestor elements. |
Listing 33.15 demonstrates what these parameters do and why they are useful.
Listing 33.15 Overriding event defaults in the Events.razor file in the Blazor folder
<form action="/pages/blazor" method="get">
@for (int i = 0; i < ElementCount; i++) {
int local = i;
<div class="m-2 p-2 border">
<button class="btn btn-primary"
@onclick="@(() => IncrementCounter(local))"
@onclick:preventDefault="EnableEventParams">
Increment Counter #@(i + 1)
</button>
<button class="btn btn-info"
@onclick="@(() => Counters.Remove(local))">
Reset
</button>
<span class="p-2">Counter Value: @GetCounter(i)</span>
</div>
}
</form>
<div class="m-2" @onclick="@(() => IncrementCounter(1))">
<button class="btn btn-primary"
@onclick="@(() => IncrementCounter(0))"
@onclick:stopPropagation="EnableEventParams">
Propagation Test
</button>
</div>
<div class="form-check m-2">
<input class="form-check-input" type="checkbox"
@onchange="@(() => EnableEventParams = !EnableEventParams)" />
<label class="form-check-label">Enable Event Parameters</label>
</div>
@code {
public int ElementCount { get; set; } = 4;
public Dictionary<int, int> Counters { get; }
= new Dictionary<int, int>();
public int GetCounter(int index) =>
Counters.ContainsKey(index) ? Counters[index] : 0;
public void IncrementCounter(int index) =>
Counters[index] = GetCounter(index) + 1;
public bool EnableEventParams { get; set; } = false;
}
This example creates two situations in which the default behavior of events in the browser can cause problems. The first is caused by adding a form element. By default, button elements contained in a form will submit that form when they are clicked, even when the @onclick attribute is present. This means that whenever one of the Increment Counter buttons is clicked, the browser will send the form data to the ASP.NET Core server, which will respond with the contents of the Blazor.cshtml Razor Page.
The second problem is demonstrated by an element whose parent also defines an event handler, like this:
...
<div class="m-2" @onclick="@(() => IncrementCounter(1))">
<button class="btn btn-primary" @onclick="@(() => IncrementCounter(0))"
...
Events go through a well-defined lifecycle in the browser, which includes being passed up the chain of ancestor elements. In the example, this means clicking the button will cause two counters to be updated, once by the @onclick handler for the button element and once by the @onclick handler for the enclosing div element.
To see these problems, restart ASP.NET Core and request http://localhost:5000/pages/blazor. Click an Increment Counter button; you will see that the form is submitted and the page is essentially reloaded. Click the Propagation Test button, and you will see that two counters are updated. Figure 33.9 shows both problems.
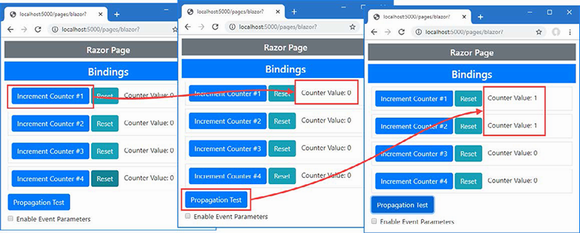
Figure 33.9 Problems caused by the default behavior of events in the browser
The checkbox in listing 33.15 toggles the property that applies the parameters described in table 33.5, with the effect that the form isn’t submitted and only the handler on the button element receives the event. To see the effect, check the checkbox and then click an Increment Counter button and the Propagation Test buttons, which produces the result shown in figure 33.10.
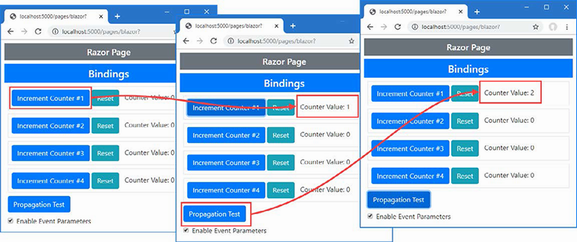
Figure 33.10 Overriding the default behavior of events in the browser
Event handlers and Razor expressions can be used to create a two-way relationship between an HTML element and a C# value, which is useful for elements that allow users to make changes, such as input and select elements. Add a Razor Component named Bindings.razor to the Blazor folder with the content shown in listing 33.16.
Listing 33.16 The contents of the Bindings.razor file in the Blazor folder
<div class="form-group">
<label>City:</label>
<input class="form-control" value="@City" @onchange="UpdateCity" />
</div>
<div class="p-2 mb-2">City Value: @City</div>
<button class="btn btn-primary" @onclick="@(() => City = "Paris")">
Paris
</button>
<button class="btn btn-primary" @onclick="@(() => City = "Chicago")">
Chicago
</button>
@code {
public string? City { get; set; } = "London";
public void UpdateCity(ChangeEventArgs e) {
City = e.Value as string;
}
}
The @onchange attribute registers the UpdateCity method as a handler for the change event from the input element. The events are described using the ChangeEventArgs class, which provides a Value property. Each time a change event is received, the City property is updated with the contents of the input element.
The input element’s value attribute creates a relationship in the other direction so that when the value of the City property changes, so does the element’s value attribute, which changes the text displayed to the user. To apply the new Razor Component, change the component attribute in the Razor Page, as shown in listing 33.17.
Listing 33.17 Using a Razor Component in the Blazor.cshtml file in the Pages folder
@page "/pages/blazor" <h4 class="bg-primary text-white text-center p-2">Events</h4> <component type="typeof(Advanced.Blazor.Bindings)" render-mode="Server" />
To see both parts of the relationship defined by the binding in listing 33.16, restart ASP.NET Core, navigate to http://localhost:5000/pages/blazor, and edit the content of the input element. The change event is triggered only when the input element loses the focus, so once you have finished editing, press the Tab key or click outside of the input element; you will see the value you entered displayed through the Razor expression in the div element, as shown on the left of figure 33.11. Click one of the buttons, and the City property will be changed to Paris or Chicago, and the selected value will be displayed by both the div element and the input element, as shown on the right of the figure.

Figure 33.11 Creating a two-way relationship between an element and a property
Two-way relationships involving the change event can be expressed as data bindings, which allows both the value and the event to be configured with a single attribute, as shown in listing 33.18.
Listing 33.18 Using a data binding in the Bindings.razor file in the Blazor folder
<div class="form-group">
<label>City:</label>
<input class="form-control" @bind="City" />
</div>
<div class="p-2 mb-2">City Value: @City</div>
<button class="btn btn-primary" @onclick="@(() => City = "Paris")">
Paris
</button>
<button class="btn btn-primary" @onclick="@(() => City = "Chicago")">
Chicago
</button>
@code {
public string? City { get; set; } = "London";
//public void UpdateCity(ChangeEventArgs e) {
// City = e.Value as string;
//}
}
The @bind attribute is used to specify the property that will be updated when the change event is triggered and that will update the value attribute when it changes. The effect in listing 33.18 is the same as listing 33.16 but expressed more concisely and without the need for a handler method or a lambda function to update the property.
Changing the binding event
By default, the change event is used in bindings, which provides reasonable responsiveness for the user without requiring too many updates from the server. The event used in a binding can be changed by using the attributes described in table 33.6.
Table 33.6 The binding attributes for specifying an event
|
Attribute |
Description |
|---|---|
|
|
This attribute is used to select the property for the data binding. |
|
|
This attribute is used to select the event for the data binding. |
These attributes are used instead of @bind, as shown in listing 33.19, but can be used only with events that are represented with the ChangeEventArgs class. This means that only the onchange and oninput events can be used, at least in the current release.
Listing 33.19 Specifying an event in the Bindings.razor file in the Blazor folder
<div class="form-group">
<label>City:</label>
<input class="form-control" @bind-value="City"
@bind-value:event="oninput" />
</div>
<div class="p-2 mb-2">City Value: @City</div>
<button class="btn btn-primary" @onclick="@(() => City = "Paris")">
Paris
</button>
<button class="btn btn-primary" @onclick="@(() => City = "Chicago")">
Chicago
</button>
@code {
public string? City { get; set; } = "London";
}
This combination of attributes creates a binding for the City property that is updated when the oninput event is triggered, which happens after every keystroke, rather than only when the input element loses the focus. To see the effect, restart ASP.NET Core, navigate to http://localhost:5000/pages/blazor, and start typing into the input element. The City property will be updated after every keystroke, as shown in figure 33.12.
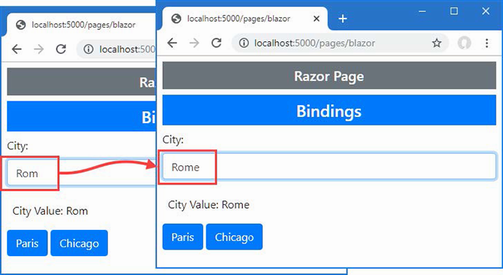
Figure 33.12 Changing the event in a data binding
Creating DateTime bindings
Blazor has special support for creating bindings for DateTime properties, allowing them to be expressed using a specific culture or a format string. This feature is applied using the parameters described in table 33.7.
Table 33.7 The DateTime parameters
|
Name |
Description |
|---|---|
|
|
This attribute is used to select a |
|
|
This attribute is used to specify a data formatting string that will be used to format the |
Listing 33.20 shows the use of these attributes with a DateTime property.
Listing 33.20 Using a DateTime property in the Bindings.razor file in the Blazor folder
@using System.Globalization
<div class="form-group">
<label>City:</label>
<input class="form-control" @bind-value="City"
@bind-value:event="oninput" />
</div>
<div class="p-2 mb-2">City Value: @City</div>
<button class="btn btn-primary" @onclick="@(() => City = "Paris")">
Paris
</button>
<button class="btn btn-primary" @onclick="@(() => City = "Chicago")">
Chicago
</button>
<div class="form-group mt-2">
<label>Time:</label>
<input class="form-control my-1" @bind="Time"
@bind:culture="Culture" @bind:format="MMM-dd" />
<input class="form-control my-1" @bind="Time"
@bind:culture="Culture" />
<input class="form-control" type="date" @bind="Time" />
</div>
<div class="p-2 mb-2">Time Value: @Time</div>
<div class="form-group">
<label>Culture:</label>
<select class="form-control" @bind="Culture">
<option value="@CultureInfo.GetCultureInfo("en-us")">
en-US
</option>
<option value="@CultureInfo.GetCultureInfo("en-gb")">
en-GB
</option>
<option value="@CultureInfo.GetCultureInfo("fr-fr")">
fr-FR
</option>
</select>
</div>
@code {
public string? City { get; set; } = "London";
public DateTime Time { get; set; }
= DateTime.Parse("2050/01/20 09:50");
public CultureInfo Culture { get; set; }
= CultureInfo.GetCultureInfo("en-us");
}
There are three input elements that are used to display the same DataTime value, two of which have been configured using the attributes from table 33.7. The first element has been configured with a culture and a format string, like this:
...
<input class="form-control my-1" @bind="Time" @bind:culture="Culture"
@bind:format="MMM-dd" />
...
The DateTime property is displayed using the culture picked in the select element and with a format string that displays an abbreviated month name and the numeric date. The second input element specifies just a culture, which means the default formatting string will be used.
... <input class="form-control my-1" @bind="Time" @bind:culture="Culture" /> ...
To see how dates are displayed, restart ASP.NET Core, request http://localhost:5000/pages/blazor, and use the select element to pick different culture settings. The settings available represent English as it is used in the United States, English as it used in the United Kingdom, and French as it is used in France. Figure 33.13 shows the formatting each produces.
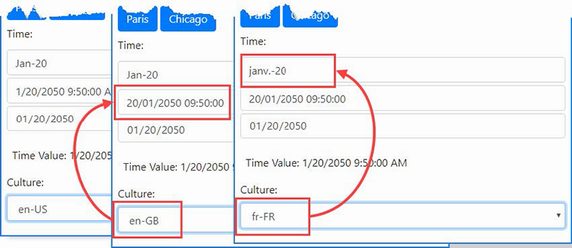
Figure 33.13 Formatting DateTime values
The initial locale in this example is en-US. When you switch to en-GB, the order in which the month and date appear changes. When you switch to en-FR, the abbreviated month name changes.
If you don’t like the mix of code and markup that Razor Components supports, you can use C# class files to define part, or all, of the component.
The @code section of a Razor Component can be defined in a separate class file, known as a code-behind class or code-behind file. Code-behind classes for Razor Components are defined as partial classes with the same name as the component they provide code for.
Add a Razor Component named Split.razor to the Blazor folder with the content shown in listing 33.21.
Listing 33.21 The contents of the Split.razor file in the Blazor folder
<ul class="list-group">
@foreach (string name in Names) {
<li class="list-group-item">@name</li>
}
</ul>
This file contains only HTML content and Razor expressions and renders a list of names that it expects to receive through a Names property. To provide the component with its code, add a class file named Split.razor.cs to the Blazor folder and use it to define the partial class shown in listing 33.22.
Listing 33.22 The contents of the Split.razor.cs file in the Blazor folder
using Advanced.Models;
using Microsoft.AspNetCore.Components;
namespace Advanced.Blazor {
public partial class Split {
[Inject]
public DataContext? Context { get; set; }
public IEnumerable<string> Names =>
Context?.People.Select(p => p.Firstname)
?? Enumerable.Empty<string>();
}
}
The partial class must be defined in the same namespace as its Razor Component and have the same name. For this example, that means the namespace is Advanced.Blazor, and the class name is Splt. Code-behind classes do not define constructors and receive services using the Inject attribute. Listing 33.23 applies the new component.
Listing 33.23 Applying a new component in the Blazor.cshtml file in the Pages folder
@page "/pages/blazor" <h4 class="bg-primary text-white text-center p-2">Code-Behind</h4> <component type="typeof(Advanced.Blazor.Split)" render-mode="Server" />
Restart ASP.NET Core and request http://localhost:5000/pages/blazor, and you will see the response shown in figure 33.14.
Figure 33.14 Using a code behind class to define a Razor Component
Razor Components can be defined entirely in a class file, although this can be less expressive than using Razor expressions. Add a class file named CodeOnly.cs to the Blazor folder and use it to define the class shown in listing 33.24.
Listing 33.24 The contents of the CodeOnly.cs file in the Blazor folder
using Advanced.Models;
using Microsoft.AspNetCore.Components;
using Microsoft.AspNetCore.Components.Rendering;
using Microsoft.AspNetCore.Components.Web;
namespace Advanced.Blazor {
public class CodeOnly : ComponentBase {
[Inject]
public DataContext? Context { get; set; }
public IEnumerable<string> Names =>
Context?.People.Select(p => p.Firstname)
?? Enumerable.Empty<string>();
public bool Ascending { get; set; } = false;
protected override void BuildRenderTree(
RenderTreeBuilder builder) {
IEnumerable<string> data = Ascending
? Names.OrderBy(n => n)
: Names.OrderByDescending(n => n);
builder.OpenElement(1, "button");
builder.AddAttribute(2, "class", "btn btn-primary mb-2");
builder.AddAttribute(3, "onclick",
EventCallback.Factory.Create<MouseEventArgs>(this,
() => Ascending = !Ascending));
builder.AddContent(4, new MarkupString("Toggle"));
builder.CloseElement();
builder.OpenElement(5, "ul");
builder.AddAttribute(6, "class", "list-group");
foreach (string name in data) {
builder.OpenElement(7, "li");
builder.AddAttribute(8, "class", "list-group-item");
builder.AddContent(9, new MarkupString(name));
builder.CloseElement();
}
builder.CloseElement();
}
}
}
The base class for components is ComponentBase. The content that would normally be expressed as annotated HTML elements is created by overriding the BuildRenderTree method and using the RenderTreeBuilder parameter. Creating content can be awkward because each element is created and configured using multiple code statements, and each statement must have a sequence number that the compiler uses to match up code and content. The OpenElement method starts a new element, which is configured using the AddElement and AddContent methods and then completed with the CloseElement method. All the features available in regular Razor Components are available, including events and bindings, which are set up by adding attributes to elements, just as if they were defined literally in a .razor file. The component in listing 33.24 displays a list of sorted names, with the sort direction altered when a button element is clicked. Listing 33.25 applies the component so that it will be displayed to the user.
Listing 33.25 Applying a new component in the Blazor.cshtml file in the Pages folder
@page "/pages/blazor" <h4 class="bg-primary text-white text-center p-2">Class Only</h4> <component type="typeof(Advanced.Blazor.CodeOnly)" render-mode="Server" />
Restart ASP.NET Core and request http://localhost:5000/pages/blazor to see the content produced by the class-based Razor Component. When you click the button, the sort direction of the names in the list is changed, as shown in figure 33.15.
Figure 33.15 Defining a component entirely in code
Blazor adds client-side interactivity to ASP.NET Core by introducing JavaScript to efficiently perform updates.
Blazor functionality is created in Razor Components, which follow a similar syntax to Razor views and Razor Pages.
Razor Components can respond to user interaction by handling JavaScript events, which are used to invoke server-side methods and generate selective updates.
Razor Components are usually defined with the markup and code in a single file but can use a separate class file and even defined entirely in C#.
This chapter covers
In this chapter, I continue to describe Blazor Server, focusing on the way that Razor Components can be used together to create more complex features. Table 34.1 provides a guide to the chapter.
Table 34.1 Chapter guide
|
Problem |
Solution |
Listing |
|---|---|---|
|
Creating complex features using Blazor |
Combine components to reduce duplication. |
3, 4 |
|
Configuring a component |
Use the |
5–10 |
|
Defining custom events and bindings |
Use |
11–14 |
|
Displaying child content in a component |
Use a |
15, 16 |
|
Creating templates |
Use named |
17, 25 |
|
Distributing configuration settings widely |
Use a cascading parameter. |
26, 27 |
|
Responding to connection errors |
Use the connection element and classes. |
28, 29 |
|
Responding to unhandled errors |
Use the error element and classes or define an error boundary. |
30–35 |
This chapter uses the Advanced project from chapter 33. No changes are required to prepare for this chapter.
Open a new PowerShell command prompt, navigate to the folder that contains the Advanced.csproj file, and run the command shown in listing 34.1 to drop the database.
Listing 34.1 Dropping the database
dotnet ef database drop --force
Use the PowerShell command prompt to run the command shown in listing 34.2.
Listing 34.2 Running the example application
dotnet run
Use a browser to request http://localhost:5000/controllers, which will display a list of data items. Request http://localhost:5000/pages/blazor, and you will see the component from chapter 33 I used to demonstrate data bindings. Figure 34.1 shows both responses.
Figure 34.1 Running the example application
Blazor components can be combined to create more complex features. In the sections that follow, I show you how multiple components can be used together and how components can communicate. To get started, add a Razor Component named SelectFilter.razor to the Blazor folder with the content shown in listing 34.3.
Listing 34.3 The contents of the SelectFilter.razor file in the Blazor folder
<div class="form-group">
<label for="select-@Title">@Title</label>
<select name="select-@Title" class="form-control"
@bind="SelectedValue">
<option disabled selected value="">Select @Title</option>
@foreach (string val in Values) {
<option value="@val" selected="@(val == SelectedValue)">
@val
</option>
}
</select>
</div>
@code {
public IEnumerable<string> Values { get; set; }
= Enumerable.Empty<string>();
public string? SelectedValue { get; set; }
public string Title { get; set; } = "Placeholder";
}
The component renders a select element that will allow the user to choose a city. In listing 34.4, I have applied the SelectFilter component, replacing the existing select element.
Listing 34.4 Applying a component in the PeopleList.razor file in the Blazor folder
<table class="table table-sm table-bordered table-striped">
<thead>
<tr><th>ID</th><th>Name</th><th>Dept</th><th>Location</th></tr>
</thead>
<tbody>
@foreach (Person p in People ?? Enumerable.Empty<Person>()) {
<tr class="@GetClass(p?.Location?.City)">
<td>@p?.PersonId</td>
<td>@p?.Surname, @p?.Firstname</td>
<td>@p?.Department?.Name</td>
<td>@p?.Location?.City, @p?.Location?.State</td>
</tr>
}
</tbody>
</table>
<div class="form-group">
<label for="city">City</label>
<select name="city" class="form-control" @bind="SelectedCity">
<option disabled selected value="">Select City</option>
@foreach (string city in Cities ?? Enumerable.Empty<string>()) {
<option value="@city" selected="@(city == SelectedCity)">
@city
</option>
}
</select>
</div>
<SelectFilter />
@code {
[Inject]
public DataContext? Context { get; set; }
public IEnumerable<Person>? People =>
Context?.People.Include(p => p.Department)
.Include(p => p.Location);
public IEnumerable<string>? Cities =>
Context?.Locations.Select(l => l.City);
public string SelectedCity { get; set; } = string.Empty;
public string GetClass(string? city) =>
SelectedCity == city ? "bg-info text-white" : "";
}
When a component is added to the content rendered by a controller view or Razor Page, the component element is used, as shown in chapter 33. When a component is added to the content rendered by another component, then the name of the component is used as an element instead. In this case, I am adding the SelectFilter component to the content rendered by the PeopleList component, which I do with a SelectFilter element. It is important to pay close attention to the capitalization, which must match exactly.
When combining components, the effect is that one component delegates responsibility for part of its layout to another. In this case, I have removed the select element that the PeopleList component used to present the user with a choice of cities and replaced it with the SelectFilter component, which will provide the same feature. The components form a parent-child relationship; the PeopleList component is the parent, and the SelectFilter component is the child.
Additional work is required before everything is properly integrated, but you can see that adding the SelectFilter element displays the SelectFilter component by restarting ASP.NET Core and requesting http://localhost:5000/controllers, which produces the response shown in figure 34.2.
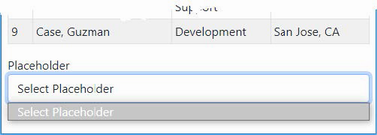
Figure 34.2 Adding one component to the content rendered by another
My goal with the SelectList component is to create a general-purpose feature that I can use throughout the application, configuring the values it displays each time it is used. Razor Components are configured using attributes added to the HTML element that applies them. The values assigned to the HTML element attributes are assigned to the component’s C# properties. The Parameter attribute is applied to the C# properties that a component allows to be configured, as shown in listing 34.5.
Listing 34.5 Configurable properties in the SelectFilter.razor file in the Blazor folder
<div class="form-group">
<label for="select-@Title">@Title</label>
<select name="select-@Title" class="form-control"
@bind="SelectedValue">
<option disabled selected value="">Select @Title</option>
@foreach (string val in Values) {
<option value="@val" selected="@(val == SelectedValue)">
@val
</option>
}
</select>
</div>
@code {
[Parameter]
public IEnumerable<string> Values { get; set; }
= Enumerable.Empty<string>();
public string? SelectedValue { get; set; }
[Parameter]
public string Title { get; set; } = "Placeholder";
}
Components can be selective about the properties they allow to be configured. In this case, the Parameter attribute has been applied to two of the properties defined by the SelectFilter component. In listing 34.6, I have modified the element the PeopleList component uses to apply the SelectFilter component to add configuration attributes.
Listing 34.6 Configuring a Component in the PeopleList.razor File in the Blazor Folder
... <SelectFilter values="@Cities" title="City" /> ...
For each property that should be configured, an attribute of the same name is added to the parent’s HTML element. The attribute values can be fixed values, such as the City string assigned to the title attribute, or Razor expressions, such as @Cities, which assigns the sequence of objects from the Cities property to the values attribute.
Setting and receiving bulk configuration settings
Defining individual properties to receive values can be error-prone if there are many configuration settings, especially if those values are being received by a component so they can be passed on, either to a child component or to a regular HTML element. In these situations, a single property can be designated to receive any attribute values that have not been matched by other properties, which can then be applied as a set, as shown in listing 34.7.
Listing 34.7 Receiving bulk attributes in the SelectFilter.razor file in the Blazor folder
<div class="form-group">
<label for="select-@Title">@Title</label>
<select name="select-@Title" class="form-control"
@bind="SelectedValue" @attributes="Attrs">
<option disabled selected value="">Select @Title</option>
@foreach (string val in Values) {
<option value="@val" selected="@(val == SelectedValue)">
@val
</option>
}
</select>
</div>
@code {
[Parameter]
public IEnumerable<string> Values { get; set; }
= Enumerable.Empty<string>();
public string? SelectedValue { get; set; }
[Parameter]
public string Title { get; set; } = "Placeholder";
[Parameter(CaptureUnmatchedValues = true)]
public Dictionary<string, object>? Attrs { get; set; }
}
Setting the Parameter attribute’s CaptureUnmatchedValues argument to true identifies a property as the catchall for attributes that are not otherwise matched. The type of the property must be Dictionary<string, object>, which allows the attribute names and values to be represented.
Properties whose type is Dictionary<string, object> can be applied to elements using the @attribute expression, like this:
...
<select name="select-@Title" class="form-control" @bind="SelectedValue"
@attributes="Attrs">
...
This is known as attribute splatting, and it allows a set of attributes to be applied in one go. The effect of the changes in listing 34.7 means that the SelectFilter component will receive the Values and Title attribute values and that any other attributes will be assigned to the Attrs property and passed on to the select element. Listing 34.8 adds some attributes to demonstrate the effect.
Listing 34.8 Adding element attributes in the PeopleList.razor file in the Blazor folder
...
<SelectFilter values="@Cities" title="City" autofocus="true" name="city"
required="true" />
...
Restart ASP.NET Core and navigate to http://localhost:5000/controllers. The attributes passed on to the select element do not affect appearance, but if you right-click the select element and select Inspect from the pop-up menu, you will see the attributes added to the SelectFilter element in the PeopleList component have been added to the element rendered by the SelectFilter component, like this:
... <select class="form-control" autofocus="true" name="city" required="true"> ...
Configuring a component in a controller view or Razor Page
Attributes are also used to configure components when they are applied using the component element. In listing 34.9, I have added properties to the PeopleList component that specify how many items from the database should be displayed and a string value that will be passed on to the SelectFilter component.
Listing 34.9 Adding properties in the PeopleList.razor file in the Blazor folder
<table class="table table-sm table-bordered table-striped">
<thead>
<tr><th>ID</th><th>Name</th><th>Dept</th><th>Location</th></tr>
</thead>
<tbody>
@foreach (Person p in People ?? Enumerable.Empty<Person>()) {
<tr class="@GetClass(p?.Location?.City)">
<td>@p?.PersonId</td>
<td>@p?.Surname, @p?.Firstname</td>
<td>@p?.Department?.Name</td>
<td>@p?.Location?.City, @p?.Location?.State</td>
</tr>
}
</tbody>
</table>
<SelectFilter values="@Cities" title="@SelectTitle" />
@code {
[Inject]
public DataContext? Context { get; set; }
public IEnumerable<Person>? People => Context?.People
.Include(p => p.Department)
.Include(p => p.Location).Take(ItemCount);
public IEnumerable<string>? Cities =>
Context?.Locations.Select(l => l.City);
public string SelectedCity { get; set; } = string.Empty;
public string GetClass(string? city) =>
SelectedCity == city ? "bg-info text-white" : "";
[Parameter]
public int ItemCount { get; set; } = 4;
[Parameter]
public string? SelectTitle { get; set; }
}
Values for the C# properties are provided by adding attributes whose name begins with param-, followed by the property name, to the component element, as shown in listing 34.10.
Listing 34.10 Adding attributes in the Index.cshtml file in the Views/Home folder
@model PeopleListViewModel
<h4 class="bg-primary text-white text-center p-2">People</h4>
<component type="typeof(Advanced.Blazor.PeopleList)" render-mode="Server"
param-itemcount="5" param-selecttitle="@("Location")" />
The param-itemcount attribute provides a value for the ItemCount property, and the param-selecttitle attribute provides a value for the SelectTitle property.
When using the component element, attribute values that can be parsed into numeric or bool values are handled as literal values and not Razor expressions, which is why I am able to specify the value for the ItemCount property as 4. Other values are assumed to be Razor expressions and not literal values, even though they are not prefixed with @. This oddity means that since I want to specify the value for the SelectTitle property as a literal string, I need a Razor expression, like this:
...
<component type="typeof(Advanced.Blazor.PeopleList)" render-mode="Server"
param-itemcount="5" param-selecttitle="@("Location")" />
...
To see the effect of the configuration attributes, restart ASP.NET Core and request http://localhost:5000/controllers, which will produce the response shown in figure 34.3.
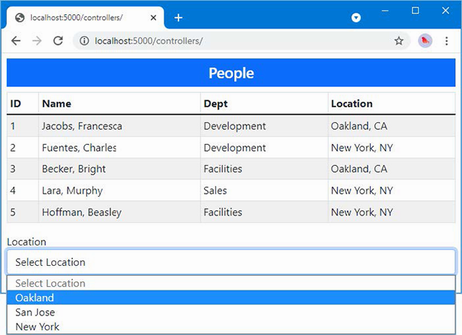
Figure 34.3 Configuring components with attributes
The SelectFilter component receives its data values from its parent component, but it has no way to indicate when the user makes a selection. For this, I need to create a custom event for which the parent component can register a handler method, just as it would for events from regular HTML elements. Listing 34.11 adds a custom event to the SelectFilter component.
Listing 34.11 Creating an event in the SelectFilter.razor file in the Blazor folder
<div class="form-group">
<label for="select-@Title">@Title</label>
<select name="select-@Title" class="form-control"
@onchange="HandleSelect" value="@SelectedValue">
<option disabled selected value="">Select @Title</option>
@foreach (string val in Values) {
<option value="@val" selected="@(val == SelectedValue)">
@val
</option>
}
</select>
</div>
@code {
[Parameter]
public IEnumerable<string> Values { get; set; }
= Enumerable.Empty<string>();
public string? SelectedValue { get; set; }
[Parameter]
public string Title { get; set; } = "Placeholder";
[Parameter(CaptureUnmatchedValues = true)]
public Dictionary<string, object>? Attrs { get; set; }
[Parameter]
public EventCallback<string> CustomEvent { get; set; }
public async Task HandleSelect(ChangeEventArgs e) {
SelectedValue = e.Value as string;
await CustomEvent.InvokeAsync(SelectedValue);
}
}
The custom event is defined by adding a property whose type is EventCallback<T>. The generic type argument is the type that will be received by the parent’s event handler and is string in this case. I have changed the select element so the @onchange attribute registers the HandleSelect method when the select element triggers its onchange event.
The HandleSelect method updates the SelectedValue property and triggers the custom event by invoking the EventCallback<T>.InvokeAsync method, like this:
... await CustomEvent.InvokeAsync(SelectedValue); ...
The argument to the InvokeAsync method is used to trigger the event using the value received from the ChangeEventArgs object that was received from the select element. Listing 34.12 changes the PeopleList component so that it receives the custom event emitted by the SelectList component.
Listing 34.12 Handling an event in the PeopleList.razor file in the Blazor folder
<table class="table table-sm table-bordered table-striped">
<thead>
<tr><th>ID</th><th>Name</th><th>Dept</th><th>Location</th></tr>
</thead>
<tbody>
@foreach (Person p in People ?? Enumerable.Empty<Person>()) {
<tr class="@GetClass(p?.Location?.City)">
<td>@p?.PersonId</td>
<td>@p?.Surname, @p?.Firstname</td>
<td>@p?.Department?.Name</td>
<td>@p?.Location?.City, @p?.Location?.State</td>
</tr>
}
</tbody>
</table>
<SelectFilter values="@Cities" title="@SelectTitle"
CustomEvent="@HandleCustom" />
@code {
[Inject]
public DataContext? Context { get; set; }
public IEnumerable<Person>? People => Context?.People
.Include(p => p.Department)
.Include(p => p.Location).Take(ItemCount);
public IEnumerable<string>? Cities =>
Context?.Locations.Select(l => l.City);
public string SelectedCity { get; set; } = string.Empty;
public string GetClass(string? city) =>
SelectedCity == city ? "bg-info text-white" : "";
[Parameter]
public int ItemCount { get; set; } = 4;
[Parameter]
public string? SelectTitle { get; set; }
public void HandleCustom(string newValue) {
SelectedCity = newValue;
}
}
To set up the event handler, an attribute is added to the element that applies the child component using the name of its EventCallback<T> property. The value of the attribute is a Razor expression that selects a method that receives a parameter of type T.
Restart ASP.NET Core, request http://localhost:5000/controllers, and select a value from the list of cities. The custom event completes the relationship between the parent and child components. The parent configures the child through its attributes to specify the title and the list of data values that will be presented to the user. The child component uses a custom event to tell the parent when the user selects a value, allowing the parent to highlight the corresponding rows in its HTML table, as shown in figure 34.4.
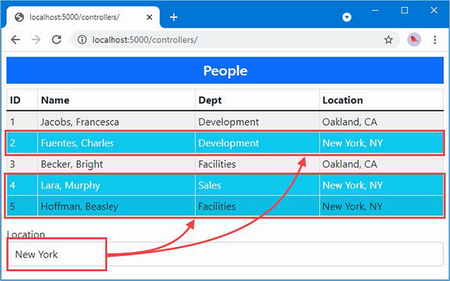
Figure 34.4 Using a custom event
A parent component can create a binding on a child component if it defines a pair of properties, one of which is assigned a data value and the other of which is a custom event. The names of the property are important: the name of the event property must be the same as the data property plus the word Changed. Listing 34.13 updates the SelectFilter component so it presents the properties required for the binding.
Listing 34.13 Preparing for bindings in the SelectFilter.razor file in the Blazor folder
<div class="form-group">
<label for="select-@Title">@Title</label>
<select name="select-@Title" class="form-control"
@onchange="HandleSelect" value="@SelectedValue">
<option disabled selected value="">Select @Title</option>
@foreach (string val in Values) {
<option value="@val" selected="@(val == SelectedValue)">
@val
</option>
}
</select>
</div>
@code {
[Parameter]
public IEnumerable<string> Values { get; set; }
= Enumerable.Empty<string>();
[Parameter]
public string? SelectedValue { get; set; }
[Parameter]
public string Title { get; set; } = "Placeholder";
[Parameter(CaptureUnmatchedValues = true)]
public Dictionary<string, object>? Attrs { get; set; }
[Parameter]
public EventCallback<string> SelectedValueChanged { get; set; }
public async Task HandleSelect(ChangeEventArgs e) {
SelectedValue = e.Value as string;
await SelectedValueChanged.InvokeAsync(SelectedValue);
}
}
Notice that the Parameter attribute must be applied to both the SelectedValue and SelectedValueChanged properties. If either attribute is omitted, the data binding won’t work as expected.
The parent component binds to the child with the @bind-<name> attribute, where <name> corresponds to the property defined by the child component. In this example, the name of the child component’s property is SelectedValue, and the parent can create a binding using @bind-SelectedValue, as shown in listing 34.14.
Listing 34.14 Using a custom binding in the PeopleList.razor file in the Blazor folder
<table class="table table-sm table-bordered table-striped">
<thead>
<tr>
<th>ID</th><th>Name</th><th>Dept</th><th>Location</th>
</tr>
</thead>
<tbody>
@foreach (Person p in People ?? Enumerable.Empty<Person>()) {
<tr class="@GetClass(p?.Location?.City)">
<td>@p?.PersonId</td>
<td>@p?.Surname, @p?.Firstname</td>
<td>@p?.Department?.Name</td>
<td>@p?.Location?.City, @p?.Location?.State</td>
</tr>
}
</tbody>
</table>
<SelectFilter values="@Cities" title="@SelectTitle"
@bind-SelectedValue="SelectedCity" />
<button class="btn btn-primary mt-2"
@onclick="@(() => SelectedCity = "Oakland")">
Change
</button>
@code {
[Inject]
public DataContext? Context { get; set; }
public IEnumerable<Person>? People => Context?.People
.Include(p => p.Department)
.Include(p => p.Location).Take(ItemCount);
public IEnumerable<string>? Cities =>
Context?.Locations.Select(l => l.City);
public string SelectedCity { get; set; } = string.Empty;
public string GetClass(string? city) =>
SelectedCity == city ? "bg-info text-white" : "";
[Parameter]
public int ItemCount { get; set; } = 4;
[Parameter]
public string? SelectTitle { get; set; }
//public void HandleCustom(string newValue) {
// SelectedCity = newValue;
//}
}
Restart ASP.NET Core, request http://localhost:5000/controllers, and select New York from the list of cities. The custom binding will cause the value chosen in the select element to be reflected by the highlighting in the table. Click the Change button to test the binding in the other direction, and you will see the highlighted city change, as shown in figure 34.5.
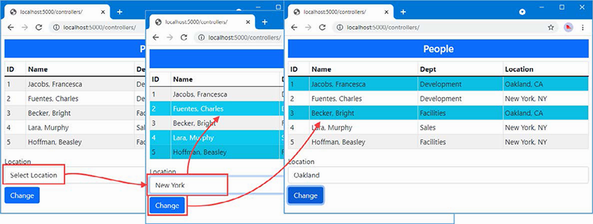
Figure 34.5 Using a custom binding
Components that display child content act as wrappers around elements provided by their parents. To see how child content is managed, add a Razor Component named ThemeWrapper.razor to the Blazor folder with the content shown in listing 34.15.
Listing 34.15 The contents of the ThemeWrapper.razor file in the Blazor folder
<div class="p-2 bg-@Theme border text-white">
<h5 class="text-center">@Title</h5>
@ChildContent
</div>
@code {
[Parameter]
public string? Theme { get; set; }
[Parameter]
public string? Title { get; set; }
[Parameter]
public RenderFragment? ChildContent { get; set; }
}
To receive child content, a component defines a property named ChildContent whose type is RenderFragment and that has been decorated with the Parameter attribute. The @ChildContent expression includes the child content in the component’s HTML output. The component in the listing wraps its child content in a div element that is styled using a Bootstrap theme color and that displays a title. The name of the theme color and the text of the title are also received as parameters.
Child content is defined by adding HTML elements between the start and end tags when applying the component, as shown in listing 34.16.
Listing 34.16 Defining child content in the PeopleList.razor file in the Blazor folder
<table class="table table-sm table-bordered table-striped">
<thead>
<tr>
<th>ID</th><th>Name</th><th>Dept</th><th>Location</th>
</tr>
</thead>
<tbody>
@foreach (Person p in People ?? Enumerable.Empty<Person>()) {
<tr class="@GetClass(p?.Location?.City)">
<td>@p?.PersonId</td>
<td>@p?.Surname, @p?.Firstname</td>
<td>@p?.Department?.Name</td>
<td>@p?.Location?.City, @p?.Location?.State</td>
</tr>
}
</tbody>
</table>
<ThemeWrapper Theme="info" Title="Location Selector">
<SelectFilter values="@Cities" title="@SelectTitle"
@bind-SelectedValue="SelectedCity" />
<button class="btn btn-primary mt-2"
@onclick="@(() => SelectedCity = "Oakland")">
Change
</button>
</ThemeWrapper>
@code {
// ...statements omitted for brevity...
}
No additional attributes are required to configure the child content, which is processed and assigned to the ChildContent property automatically. To see how the ThemeWrapper component presents its child content, restart ASP.NET Core and request http://localhost:5000/controllers. You will see the configuration attributes that selected the theme and the title text used to produce the response shown in figure 34.6.
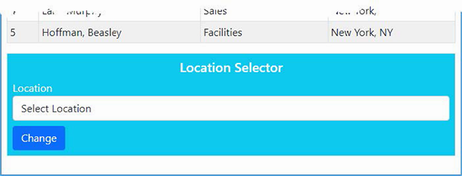
Figure 34.6 Using child content
Template components bring more structure to the presentation of child content, allowing multiple sections of content to be displayed. Template components are a good way of consolidating features that are used throughout an application to prevent the duplication of code and content.
To see how this works, add a Razor Component named TableTemplate.razor to the Blazor folder with the content shown in listing 34.17.
Listing 34.17 The contents of the TableTemplate.razor file in the Blazor folder
<table class="table table-sm table-bordered table-striped">
@if (Header != null) {
<thead>@Header</thead>
}
<tbody>@Body</tbody>
</table>
@code {
[Parameter]
public RenderFragment? Header { get; set; }
[Parameter]
public RenderFragment? Body { get; set; }
}
The component defines a RenderFragment property for each region of child content it supports. The TableTemplate component defines two RenderFragment properties, named Header and Body, which represent the content sections of a table. Each region of child content is rendered using a Razor expression, @Header and @Body, and you can check to see whether content has been provided for a specific section by checking to see whether the property value is null, which this component does for the Header section.
When using a template component, the content for each region is enclosed in an HTML element whose tag matches the name of the corresponding RenderFragment property, as shown in listing 34.18.
Listing 34.18 Applying a template component in the Blazor/PeopleList.razor file
<TableTemplate>
<Header>
<tr><th>ID</th><th>Name</th><th>Dept</th><th>Location</th></tr>
</Header>
<Body>
@foreach (Person p in People ?? Enumerable.Empty<Person>()) {
<tr class="@GetClass(p?.Location?.City)">
<td>@p?.PersonId</td>
<td>@p?.Surname, @p?.Firstname</td>
<td>@p?.Department?.Name</td>
<td>@p?.Location?.City, @p?.Location?.State</td>
</tr>
}
</Body>
</TableTemplate>
<ThemeWrapper Theme="info" Title="Location Selector">
<SelectFilter values="@Cities" title="@SelectTitle"
@bind-SelectedValue="SelectedCity" />
<button class="btn btn-primary mt-2"
@onclick="@(() => SelectedCity = "Oakland")">
Change
</button>
</ThemeWrapper>
@code {
[Inject]
public DataContext? Context { get; set; }
public IEnumerable<Person>? People => Context?.People
.Include(p => p.Department)
.Include(p => p.Location).Take(ItemCount);
public IEnumerable<string>? Cities =>
Context?.Locations.Select(l => l.City);
public string SelectedCity { get; set; } = string.Empty;
public string GetClass(string? city) =>
SelectedCity == city ? "bg-info text-white" : "";
[Parameter]
public int ItemCount { get; set; } = 4;
[Parameter]
public string? SelectTitle { get; set; }
}
The child content is structured into sections that correspond to the template component’s properties, Header and Body, which leaves the TableTemplate component responsible for the table structure and the PeopleList component responsible for providing the detail. Restart ASP.NET Core and request http://localhost:5000/controllers, and you will see the output produced by the template component, as shown in figure 34.7.
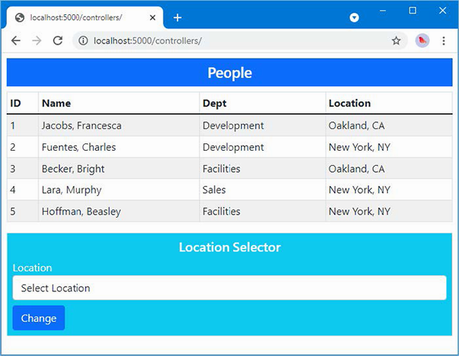
Figure 34.7 Using a template component
The template component I created in the previous section is useful, in the sense that it provides a consistent representation of a table that I can use throughout the example application. But it is also limited because it relies on the parent component to take responsibility for generating the rows for the table body. The template component doesn’t have any insight into the content it presents, which means it cannot do anything with that content other than display it.
Template components can be made data-aware with the use of a generic type parameter, which allows the parent component to provide a sequence of data objects and a template for presenting them. The template component becomes responsible for generating the content for each data object and, consequently, can provide more useful functionality. As a demonstration, I am going to add support to the template component for selecting how many table rows are displayed and for selecting table rows. The first step is to add a generic type parameter to the component and use it to render the content for the table body, as shown in listing 34.19.
Listing 34.19 Adding a type parameter in the Blazor/TableTemplate.razor file
@typeparam RowType
<table class="table table-sm table-bordered table-striped">
@if (Header != null) {
<thead>@Header</thead>
}
<tbody>
@if (RowData != null && RowTemplate != null) {
@foreach (RowType item in RowData) {
<tr>@RowTemplate(item)</tr>
}
}
</tbody>
</table>
@code {
[Parameter]
public RenderFragment? Header { get; set; }
[Parameter]
public RenderFragment<RowType>? RowTemplate { get; set; }
[Parameter]
public IEnumerable<RowType>? RowData { get; set; }
}
The generic type parameter is specified using the @typeparam attribute, and, in this case, I have given the parameter the name RowType because it will refer to the data type for which the component will generate table rows.
The data the component will process is received by adding a property whose type is a sequence of objects of the generic type. I have named the property RowData, and its type is IEnumerable<RowType>. The content the component will display for each object is received using a RenderFragment<T> property. I have named this property RowTemplate, and its type is RenderFragment<RowType>, reflecting the name I selected for the generic type parameter.
When a component receives a content section through a RenderFragment<T> property, it can render it for a single object by invoking the section as a method and using the object as the argument, like this:
...
@foreach (RowType item in RowData) {
<tr>@RowTemplate(item)</tr>
}
...
This fragment of code enumerates the RowType objects in the RowData sequence and renders the content section received through the RowTemplate property for each of them.
Using a generic template component
I have simplified the PeopleList component so it only uses the template component to produce a table of Person objects, and I have removed earlier features, as shown in listing 34.20.
Listing 34.20 Using a generic template component in the Blazor/PeopleList.razor file
<TableTemplate RowType="Person" RowData="People">
<Header>
<tr><th>ID</th><th>Name</th><th>Dept</th><th>Location</th></tr>
</Header>
<RowTemplate Context="p">
<td>@p.PersonId</td>
<td>@p.Surname, @p.Firstname</td>
<td>@p.Department?.Name</td>
<td>@p.Location?.City, @p.Location?.State</td>
</RowTemplate>
</TableTemplate>
@code {
[Inject]
public DataContext? Context { get; set; }
public IEnumerable<Person>? People => Context?.People
.Include(p => p.Department)
.Include(p => p.Location);
}
The RowType attribute is used to specify the value for the generic type argument. The RowData attribute specifies the data the template component will process.
The RowTemplate element denotes the elements that will be produced for each data object. When defining a content section for a RenderFragment<T> property, the Context attribute is used to assign a name to the current object being processed. In this case, the Context attribute is used to assign the name p to the current object, which is then referred to in the Razor expressions used to populate the content section’s elements.
The overall effect is that the template component is configured to display Person objects. The component will generate a table row for each Person, which will contain td elements whose content is set using the current Person object’s properties.
Since I removed properties that were decorated with the Parameter attribute in listing 34.20, I need to remove the corresponding attributes from the element that applies the PeopleList component, as shown in listing 34.21.
Listing 34.21 Removing attributes in the Index.cshtml file in the Views/Home folder
@model PeopleListViewModel
<h4 class="bg-primary text-white text-center p-2">People</h4>
<component type="typeof(Advanced.Blazor.PeopleList)"
render-mode="Server" />
To see the generic template component, restart ASP.NET Core and request http://localhost:5000/controllers. The data and content sections provided by the PeopleList component have been used by the TableTemplate component to produce the table shown in figure 34.8.
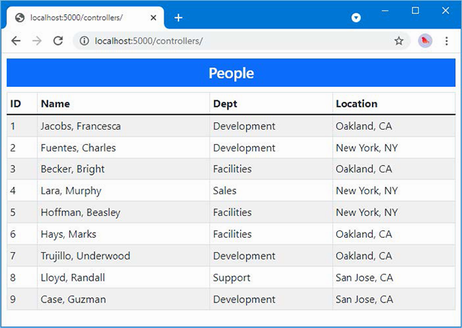
Figure 34.8 Using a generic template component
Adding features to the generic template component
This may feel like a step backward, but, as you will see, giving the template component insight into the data it handles sets the foundation for adding features, as shown in listing 34.22.
Listing 34.22 Adding a feature in the TableTemplate.razor file in the Blazor folder
@typeparam RowType
<div class="container-fluid">
<div class="row p-2">
<div class="col">
<SelectFilter Title="@("Sort")"
Values="@SortDirectionChoices"
@bind-SelectedValue="SortDirectionSelection" />
</div>
<div class="col">
<SelectFilter Title="@("Highlight")"
Values="@HighlightChoices()"
@bind-SelectedValue="HighlightSelection" />
</div>
</div>
</div>
<table class="table table-sm table-bordered table-striped">
@if (Header != null) {
<thead>@Header</thead>
}
<tbody>
@if (RowTemplate != null) {
@foreach (RowType item in SortedData()) {
<tr class="@IsHighlighted(item)">@RowTemplate(item)</tr>
}
}
</tbody>
</table>
@code {
[Parameter]
public RenderFragment? Header { get; set; }
[Parameter]
public RenderFragment<RowType>? RowTemplate { get; set; }
[Parameter]
public IEnumerable<RowType> RowData { get; set; }
= Enumerable.Empty<RowType>();
[Parameter]
public Func<RowType, string> Highlight { get; set; }
= (row) => String.Empty;
public IEnumerable<string> HighlightChoices() =>
RowData.Select(item => Highlight(item)).Distinct();
public string? HighlightSelection { get; set; }
public string IsHighlighted(RowType item) =>
Highlight(item) == HighlightSelection
? "table-dark text-white" : "";
[Parameter]
public Func<RowType, string> SortDirection { get; set; }
= (row) => String.Empty;
public string[] SortDirectionChoices =
new string[] { "Ascending", "Descending" };
public string SortDirectionSelection { get; set; } = "Ascending";
public IEnumerable<RowType> SortedData() =>
SortDirectionSelection == "Ascending"
? RowData.OrderBy(SortDirection)
: RowData.OrderByDescending(SortDirection);
}
The changes present the user with two select elements via the SelectFilter component created earlier in the chapter. These new elements allow the user to sort the data in ascending and descending order and to select a value used to highlight rows in the table. The parent component provides additional parameters that give the template component functions that select the properties used for sorting and highlighting, as shown in listing 34.23.
Listing 34.23 Configuring component features in the Blazor/PeopleList.razor file
<TableTemplate RowType="Person" RowData="People"
Highlight="@(p => p.Location?.City)"
SortDirection="@(p => p.Surname)">
<Header>
<tr><th>ID</th><th>Name</th><th>Dept</th><th>Location</th></tr>
</Header>
<RowTemplate Context="p">
<td>@p.PersonId</td>
<td>@p.Surname, @p.Firstname</td>
<td>@p.Department?.Name</td>
<td>@p.Location?.City, @p.Location?.State</td>
</RowTemplate>
</TableTemplate>
@code {
[Inject]
public DataContext? Context { get; set; }
public IEnumerable<Person>? People => Context?.People
.Include(p => p.Department)
.Include(p => p.Location);
}
The Highlight attribute provides the template component with a function that selects the property used for highlighting table rows, and the SortDirection attribute provides a function that selects a property used for sorting. To see the effect, restart ASP.NET Core and request http://localhost:5000/controllers. The response will contain the new select elements, which can be used to change the sort order or select a city for filtering, as shown in figure 34.9.
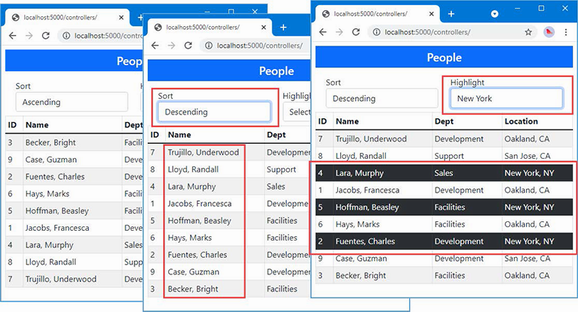
Figure 34.9 Adding features to a template component
Reusing a generic template component
The features added to the template component all relied on the generic type parameter, which allows the component to modify the content it presents without being tied to a specific class. The result is a component that can be used to display, sort, and highlight any data type wherever a table is required. Add a Razor Component named DepartmentList.razor to the Blazor folder with the content shown in listing 34.24.
Listing 34.24 The contents of the DepartmentList.razor file in the Blazor folder
<TableTemplate RowType="Department" RowData="Departments"
Highlight="@(d => d.Name)"
SortDirection="@(d => d.Name)">
<Header>
<tr><th>ID</th><th>Name</th><th>People</th><th>Locations</th></tr>
</Header>
<RowTemplate Context="d">
<td>@d.Departmentid</td>
<td>@d.Name</td>
<td>@(String.Join(", ", d.People!.Select(p => p.Surname)))</td>
<td>
@(String.Join(", ", d.People!.Select(p =>
p.Location!.City).Distinct()))
</td>
</RowTemplate>
</TableTemplate>
@code {
[Inject]
public DataContext? Context { get; set; }
public IEnumerable<Department>? Departments => Context?.Departments?
.Include(d => d.People!).ThenInclude(p => p.Location!);
}
The TableTemplate component is used to present the user with a list of the Department objects in the database, along with details of the related Person and Location objects, which are queried with the Entity Framework Core Include and ThenInclude methods. Listing 34.25 changes the Razor Component displayed by the Razor Page named Blazor.
Listing 34.25 Changing the component in the Blazor.cshtml file in the Pages folder
@page "/pages/blazor"
<h4 class="bg-primary text-white text-center p-2">Departments</h4>
<component type="typeof(Advanced.Blazor.DepartmentList)"
render-mode="Server" />
Restart ASP.NET Core and request http://localhost:5000/pages/blazor. The response will be presented using the templated component, as shown in figure 34.10.
Figure 34.10 Reusing a generic template component
As the number of components increases, it can be useful for a component to provide configuration data to descendants deep in the hierarchy of components. This can be done by having each component in the chain receive the data and pass it on to all of its children, but that is error-prone and requires every component to participate in the process, even if none of its descendants uses the data it passes on.
Blazor provides a solution to this problem by supporting cascading parameters, in which a component provides data values that are available directly to any of its descendants, without being relayed by intermediate components. Cascading parameters are defined using the CascadingValue component, which is used to wrap a section of content, as shown in listing 34.26.
Listing 34.26 A cascading parameter in the DepartmentList.razor file in the Blazor folder
<CascadingValue Name="BgTheme" Value="Theme" IsFixed="false">
<TableTemplate RowType="Department" RowData="Departments"
Highlight="@(d => d.Name)"
SortDirection="@(d => d.Name)">
<Header>
<tr>
<th>ID</th><th>Name</th><th>People</th><th>Locations</th>
</tr>
</Header>
<RowTemplate Context="d">
<td>@d.Departmentid</td>
<td>@d.Name</td>
<td>
@(String.Join(", ", d.People!.Select(p => p.Surname)))
</td>
<td>
@(String.Join(", ", d.People!.Select(p =>
p.Location!.City).Distinct()))
</td>
</RowTemplate>
</TableTemplate>
</CascadingValue>
<SelectFilter Title="@("Theme")" Values="Themes"
@bind-SelectedValue="Theme" />
@code {
[Inject]
public DataContext? Context { get; set; }
public IEnumerable<Department>? Departments => Context?.Departments?
.Include(d => d.People!).ThenInclude(p => p.Location!);
public string Theme { get; set; } = "info";
public string[] Themes =
new string[] { "primary", "info", "success" };
}
The CascadingValue element makes a value available to the components it encompasses and their descendants. The Name attribute specifies the name of the parameter, the Value attribute specifies the value, and the isFixed attribute is used to specify whether the value will change. The CascadingValue element has been used in listing 34.26 to create a cascading parameter named BgTheme, whose value is set by an instance of the SelectFilter component that presents the user with a selection of Bootstrap CSS theme names.
Cascading parameters are received directly by the components that require them with the CascadingParameter attribute, as shown in listing 34.27.
Listing 34.27 Receiving a cascading parameter in the SelectFilter.razor file in the Blazor folder
<div class="form-group p-2 bg-@Theme @TextColor()">
<label for="select-@Title">@Title</label>
<select name="select-@Title" class="form-control"
@onchange="HandleSelect" value="@SelectedValue">
<option disabled selected value="">Select @Title</option>
@foreach (string val in Values) {
<option value="@val" selected="@(val == SelectedValue)">
@val
</option>
}
</select>
</div>
@code {
[Parameter]
public IEnumerable<string> Values { get; set; }
= Enumerable.Empty<string>();
[Parameter]
public string? SelectedValue { get; set; }
[Parameter]
public string Title { get; set; } = "Placeholder";
[Parameter(CaptureUnmatchedValues = true)]
public Dictionary<string, object>? Attrs { get; set; }
[Parameter]
public EventCallback<string> SelectedValueChanged { get; set; }
public async Task HandleSelect(ChangeEventArgs e) {
SelectedValue = e.Value as string;
await SelectedValueChanged.InvokeAsync(SelectedValue);
}
[CascadingParameter(Name = "BgTheme")]
public string Theme { get; set; } = "";
public string TextColor() => String.IsNullOrEmpty(Theme)
? "text-dark" : "text-light";
}
The CascadingParameter attribute’s Name argument is used to specify the name of the cascading parameter. The BgTheme parameter defined in listing 34.26 is received by the Theme property in listing 34.27 and used to set the background for the component. Restart ASP.NET Core and request http://localhost:5000/pages/blazor, which produces the response shown in figure 34.11.
Figure 34.11 Using a cascading parameter
There are three instances of the SelectFilter component used in this example, but only two of them are within the hierarchy contained by the CascadingValue element. The other instance is defined outside of the CascadingValue element and does not receive the cascading value.
In the following sections, I describe the features Blazor provides for dealing with connection errors and unhandled application errors.
Blazor relies on its persistent HTTP connection between the browser and the ASP.NET Core server. The application cannot function when the connection is disrupted, and a modal error message is displayed that prevents the user from interacting with components.
Blazor allows the connection errors to be customized by defining an element with a specific id, as shown in listing 34.28.
Listing 34.28 A connection error element in the Blazor.cshtml file in the Pages folder
@page "/pages/blazor"
<h4 class="bg-primary text-white text-center p-2">Departments</h4>
<link rel="stylesheet" href="connectionErrors.css" />
<div id="components-reconnect-modal"
class="h4 bg-dark text-white text-center my-2 p-2
components-reconnect-hide">
Blazor Connection Lost
<div class="reconnect">
Trying to reconnect...
</div>
<div class="failed">
Reconnection Failed.
<button class="btn btn-light btn-sm m-1"
onclick="window.Blazor.reconnect()">
Reconnect
</button>
</div>
<div class="rejected">
Reconnection Rejected.
<button class="btn btn-light btn-sm m-1"
onclick="location.reload()">
Reload
</button>
</div>
</div>
<component type="typeof(Advanced.Blazor.DepartmentList)"
render-mode="Server" />
The id attribute of the custom error element must be components-reconnect-modal. When there is a connection error, Blazor locates this element and adds it to one of four classes, described in table 34.2.
Table 34.2 The connection error classes
|
Name |
Description |
|---|---|
|
|
The element is added to this class when the connection has been lost and Blazor is attempting a reconnection. The error message should be displayed to the user, and interaction with the Blazor content should be prevented. |
|
|
The element is added to this class if the connection is reestablished. The error message should be hidden, and interaction should be permitted. |
|
|
The element is added to this class if Blazor reconnection fails. The user can be presented with a button that invokes |
|
|
The element is added to this class if Blazor is able to reach the server but the user’s connection state has been lost. This typically happens when the server has been restarted. The user can be presented with a button that invokes |
The element isn’t added to any of these classes initially, so I have explicitly added it to the components-reconnect-hide class so that it isn’t visible until a problem occurs.
I want to present specific messages to the user for each of the conditions that can arise during reconnection. To this end, I added elements that display a message for each condition. To manage their visibility, add a CSS stylesheet named connectionErrors.css to the wwwroot folder and use it to define the styles shown in listing 34.29.
Listing 34.29 The contents of the connectionErrors.css file in the wwwroot folder
#components-reconnect-modal {
position: fixed; top: 0; right: 0; bottom: 0;
left: 0; z-index: 1000; overflow: hidden; opacity: 0.9;
}
.components-reconnect-hide { display: none; }
.components-reconnect-show { display: block; }
.components-reconnect-show > .reconnect { display: block; }
.components-reconnect-show > .failed,
.components-reconnect-show > .rejected {
display: none;
}
.components-reconnect-failed > .failed {
display: block;
}
.components-reconnect-failed > .reconnect,
.components-reconnect-failed > .rejected {
display: none;
}
.components-reconnect-rejected > .rejected {
display: block;
}
.components-reconnect-rejected > .reconnect,
.components-reconnect-rejected > .failed {
display: none;
}
These styles show the components-reconnect-modal element as a modal item, with its visibility determined by the components-reconnect-hide and components-reconnect-show classes. The visibility of the specific messages is toggled based on the application of the classes in table 34.2.
To see the effect, restart ASP.NET Core and request http://localhost:5000/pages/blazor. Wait until the component is displayed and then stop the ASP.NET Core server. You will see an initial error message as Blazor attempts to reconnect. After a few minutes, you will see the message that indicates that reconnection has failed.
Restart ASP.NET Core and request http://localhost:5000/pages/blazor. Wait until the component is displayed and then restart ASP.NET Core. This time Blazor will be able to connect to the server, but the connection will be rejected because the server restart has caused the connection state to be lost. Figure 34.12 shows both sequences of error messages.

Figure 34.12 Handling connection errors
Blazor does not respond well to uncaught application errors, which are almost always treated as terminal. To demonstrate the way that exceptions are handled, listing 34.30 introduces an exception that will be thrown when the user selects a specific value.
Listing 34.30 Introducing an exception in the SelectFilter.razor file in the Blazor folder
<div class="form-group p-2 bg-@Theme @TextColor()">
<label for="select-@Title">@Title</label>
<select name="select-@Title" class="form-control"
@onchange="HandleSelect" value="@SelectedValue">
<option disabled selected value="">Select @Title</option>
@foreach (string val in Values) {
<option value="@val" selected="@(val == SelectedValue)">
@val
</option>
}
</select>
</div>
@code {
[Parameter]
public IEnumerable<string> Values { get; set; }
= Enumerable.Empty<string>();
[Parameter]
public string? SelectedValue { get; set; }
[Parameter]
public string Title { get; set; } = "Placeholder";
[Parameter(CaptureUnmatchedValues = true)]
public Dictionary<string, object>? Attrs { get; set; }
[Parameter]
public EventCallback<string> SelectedValueChanged { get; set; }
public async Task HandleSelect(ChangeEventArgs e) {
SelectedValue = e.Value as string;
if (SelectedValue == "Sales") {
throw new Exception("Sales cannot be selected");
}
await SelectedValueChanged.InvokeAsync(SelectedValue);
}
[CascadingParameter(Name = "BgTheme")]
public string Theme { get; set; } = "";
public string TextColor() => String.IsNullOrEmpty(Theme)
? "text-dark" : "text-light";
}
Restart ASP.NET Core, request http://localhost:5000/pages/blazor, and select Sales from the Highlight menu. There is no visible change in the browser, but the exception thrown at the server when the button was clicked has proved fatal: the user can still choose values using the select elements because these are presented by the browser, but the event handlers that respond to selections no longer work, and the application is essentially dead.
When there is an unhandled application error, Blazor looks for an element whose id is blazor-error-ui and sets its CSS display property to block. Listing 34.31 adds an element with this id to the Blazor.cshtml file styled to present a useful message.
Listing 34.31 Adding an error element in the Blazor.cshtml file in the Pages folder
@page "/pages/blazor"
<h4 class="bg-primary text-white text-center p-2">Departments</h4>
<link rel="stylesheet" href="connectionErrors.css" />
<div id="components-reconnect-modal"
class="h4 bg-dark text-white text-center my-2 p-2
components-reconnect-hide">
Blazor Connection Lost
<div class="reconnect">
Trying to reconnect...
</div>
<div class="failed">
Reconnection Failed.
<button class="btn btn-light btn-sm m-1"
onclick="window.Blazor.reconnect()">
Reconnect
</button>
</div>
<div class="rejected">
Reconnection Rejected.
<button class="btn btn-light btn-sm m-1"
onclick="location.reload()">
Reload
</button>
</div>
</div>
<div id="blazor-error-ui"
class="text-center bg-danger h6 text-white p-2 fixed-top w-100"
style="display:none">
An error has occurred. This application will not respond until reloaded.
<button class="btn btn-sm btn-primary m-1" onclick="location.reload()">
Reload
</button>
</div>
<component type="typeof(Advanced.Blazor.DepartmentList)"
render-mode="Server" />
When the element is shown, the user will be presented with a warning and a button that reloads the browser. To see the effect, restart ASP.NET Core, request http://localhost:5000/pages/blazor, and select Sales from the Highlight menu, which will display the message shown in figure 34.13.
Figure 34.13 Displaying an error message
Error boundaries are used to contain errors within the component hierarchy so that a component can take responsibility for its own exceptions and the exceptions thrown by its child components. Listing 34.32 introduces an error boundary to contain the exception thrown by the SelectFilter component.
Listing 34.32 An error boundary in the TableTemplate.razor file in the Blazor folder
...
@typeparam RowType
<link rel="stylesheet" href="errorBoundaries.css" />
<div class="container-fluid">
<div class="row p-2">
<div class="col">
<SelectFilter Title="@("Sort")"
Values="@SortDirectionChoices"
@bind-SelectedValue="SortDirectionSelection" />
</div>
<div class="col">
<ErrorBoundary>
<SelectFilter Title="@("Highlight")"
Values="@HighlightChoices()"
@bind-SelectedValue="HighlightSelection" />
</ErrorBoundary>
</div>
</div>
</div>
<table class="table table-sm table-bordered table-striped">
@if (Header != null) {
<thead>@Header</thead>
}
<tbody>
@if (RowTemplate != null) {
@foreach (RowType item in SortedData()) {
<tr class="@IsHighlighted(item)">@RowTemplate(item)</tr>
}
}
</tbody>
</table>
...
Error boundaries are defined using the ErrorBoundary component, which displays its child content normally until an exception is thrown, at which point the child content is removed and a div element assigned to a blazor-error-boundary class is displayed. To define the content and styles that will be displayed, add a CSS stylesheet named errorBoundaries.css to the wwwroot folder with the content shown in listing 34.33.
Listing 34.33 The contents of the errorBoundaries.css file in the wwwroot folder
.blazor-error-boundary {
background-color: darkred;
color: white;
padding: 1rem;
text-align: center;
vertical-align: middle;
height: 100%;
font-size: large;
font-weight: bold;
}
.blazor-error-boundary::after {
content: "Error: Sales selected"
}
The CSS in the stylesheet displays a basic error message, which is styled in white text on a red background. (Don’t worry about how these styles work because there are easier ways to define error messages, as I explain shortly.)
To see the effect of the error boundary, restart ASP.NET Core, request http://localhost:5000/pages/blazor, and select Sales from the Highlight menu. An exception is thrown when the selection is made, which is contained by the error boundary, displaying the message shown in figure 34.14. Only the content contained within the ErrorBoundary component is affected by the exception, which means that the rest of the application works as normal, which means that the user can still change the sort order.
Figure 34.14 Using an error boundary
Defining error content within the boundary
Defining the error message in a CSS stylesheet is awkward, and I prefer to define the error content as part of the error boundary, as shown in listing 34.34.
Listing 34.34 Defining error content in the TableTemplate.razor file in the Blazor folder
...
<div class="container-fluid">
<div class="row p-2">
<div class="col">
<SelectFilter Title="@("Sort")" Values="@SortDirectionChoices"
@bind-SelectedValue="SortDirectionSelection" />
</div>
<div class="col">
<ErrorBoundary>
<ChildContent>
<SelectFilter Title="@("Highlight")"
Values="@HighlightChoices()"
@bind-SelectedValue="HighlightSelection" />
</ChildContent>
<ErrorContent>
<h4 class="bg-danger text-white text-center h-100 p-2">
Inline error: Sales Selected
</h4>
</ErrorContent>
</ErrorBoundary>
</div>
</div>
</div>
...
The ChildContent and ErrorContent tags are used to specify the content that will be displayed normally and when an exception has been thrown. Restart ASP.NET Core, request http://localhost:5000/pages/blazor, and select Sales from the Highlight menu to see the new error message, which is shown in figure 34.15.
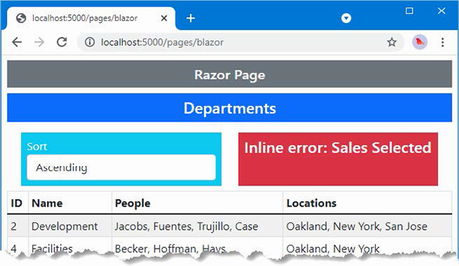
Figure 34.15 Error content defined within the boundary
Recovering from exceptions
Error boundaries allow an application to recover from exceptions, as shown in listing 34.35, although care should be taken to ensure that whatever problem caused the issue originally has truly been resolved.
Listing 34.35 A recoverable error boundary in the Blazor/TableTemplate.razor file
@typeparam RowType
<link rel="stylesheet" href="errorBoundaries.css" />
<div class="container-fluid">
<div class="row p-2">
<div class="col">
<SelectFilter Title="@("Sort")"
Values="@SortDirectionChoices"
@bind-SelectedValue="SortDirectionSelection" />
</div>
<div class="col">
<ErrorBoundary @ref="boundary">
<ChildContent>
<SelectFilter Title="@("Highlight")"
Values="@HighlightChoices()"
@bind-SelectedValue="HighlightSelection" />
</ChildContent>
<ErrorContent>
<h4 class="bg-danger text-white text-center h-100 p-2">
Inline error: Sales Selected
<div>
<button class="btn btn-light btn-sm m-1"
@onclick="@(() => boundary?.Recover())">
Recover
</button>
</div>
</h4>
</ErrorContent>
</ErrorBoundary>
</div>
</div>
</div>
<table class="table table-sm table-bordered table-striped">
@if (Header != null) {
<thead>@Header</thead>
}
<tbody>
@if (RowTemplate != null) {
@foreach (RowType item in SortedData()) {
<tr class="@IsHighlighted(item)">@RowTemplate(item)</tr>
}
}
</tbody>
</table>
@code {
ErrorBoundary? boundary;
// ...other members omitted for brevity...
}
The @ref binding is used to obtain a reference to the ErrorBoundary, which defines a Recover method. The error content presented to the user contains a button that invokes the Recover method when clicked, allowing the user to recover from the error.
Restart ASP.NET Core, request http://localhost:5000/pages/blazor, and select Sales from the Highlight menu to trigger the error; then click the Recover button, which will display the child content once again, as shown in figure 34.16.

Figure 34.16 Recovering from an error
Blazor components can be combined to present composite features to users.
Components can be configured using attributes in markup, which are received by applying the Parameter attribute to code properties.
Components can define custom events, which can be consumed in the parent component’s markup.
Components can also be wrappers around content, which is projected using the @ChildContent expression. Multiple sections of content can be presented by template components.
Errors can be presented to the user by defining elements with specific classes, as described in table 34.2. These include connection errors and uncaught application errors.
The effect of errors can be contained using error boundaries.
In this chapter, I explain how Blazor supports URL routing so that multiple components can be displayed through a single request. I show you how to set up the routing system, how to define routes, and how to create common content in a layout.
This chapter also covers the component lifecycle, which allows components to participate actively in the Blazor environment, which is especially important once you start using the URL routing feature. Finally, this chapter explains the different ways that components can interact outside of the parent-child relationships described in earlier chapters. Table 35.1 puts these features in context.
Table 35.1 Putting Blazor routing and lifecycle component interactions in context
|
Question |
Answer |
|---|---|
|
What are they? |
The routing feature allows components to respond to changes in the URL without requiring a new HTTP connection. The lifecycle feature allows components to define methods that are invoked as the application executes, and the interaction features provide useful ways of communicating between components and with other JavaScript code. |
|
Why are they useful? |
These features allow the creation of complex applications that take advantage of the Blazor architecture. |
|
How are they used? |
URL routing is set up using built-in components and configured using |
|
Are there any pitfalls or limitations? |
These are advanced features that must be used with care, especially when creating interactions outside of Blazor. |
|
Are there any alternatives? |
All the features described in this chapter are optional, but it is hard to create complex applications without them. |
Table 35.2 provides a guide to the chapter.
Table 35.2 Chapter guide
|
Problem |
Solution |
Listing |
|---|---|---|
|
Selecting components based on the current URL |
Use URL routing. |
6–12 |
|
Defining content that will be used by multiple components |
Use a layout. |
13, 14 |
|
Responding to the stages of the component’s lifecycle |
Implement the lifecycle notification methods. |
15–17 |
|
Coordinating the activities of multiple components |
Retain references with the |
18, 19 |
|
Coordinating with code outside of Blazor |
Use the interoperability features. |
20–35 |
This chapter uses the Advanced project from chapter 35. No changes are required for this chapter.
Open a new PowerShell command prompt, navigate to the folder that contains the Advanced.csproj file, and run the command shown in listing 35.1 to drop the database.
Listing 35.1 Dropping the database
dotnet ef database drop --force
Use the PowerShell command prompt to run the command shown in listing 35.2.
Listing 35.2 Running the example application
dotnet run
Use a browser to request http://localhost:5000/controllers, which will display a list of data items. Request http://localhost:5000/pages/blazor, and you will see the component from chapter 34 that I used to demonstrate bindings. Figure 35.1 shows both responses.
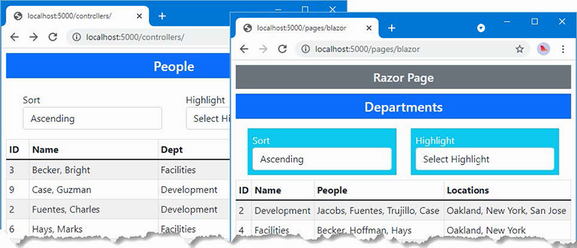
Figure 35.1 Running the example application
Blazor includes support for selecting the components to display to the user based on the ASP.NET Core routing system so that the application responds to changes in the URL by displaying different Razor Components. To get started, add a Razor Component named Routed.razor to the Blazor folder with the content shown in listing 35.3.
Listing 35.3 The contents of the Routed.razor file in the Blazor folder
<Router AppAssembly="typeof(Program).Assembly">
<Found>
<RouteView RouteData="@context" />
</Found>
<NotFound>
<h4 class="bg-danger text-white text-center p-2">
No Matching Route Found
</h4>
</NotFound>
</Router>
The Router component is included with ASP.NET Core and provides the link between Blazor and the ASP.NET Core routing features. Router is a generic template component that defines Found and NotFound sections.
The Router component requires the AppAssembly attribute, which specifies the .NET assembly to use. For most projects this is the current assembly, which is specified like this:
... <Router AppAssembly="typeof(Program).Assembly"> ...
The type of the Router component’s Found property is RenderFragment<RouteData>, which is passed on to the RouteView component through its RouteData property, like this:
...
<Found>
<RouteView RouteData="@context" />
</Found>
...
The RouteView component is responsible for displaying the component matched by the current route and, as I explain shortly, for displaying common content through layouts. The type of the NotFound property is RenderFragment, without a generic type argument, and displays a section of content when no component can be found for the current route.
Individual components can be displayed in existing controller views and Razor Pages, as previous chapters have shown. But when using component routing, it is preferable to create a set of URLs that are distinct to working with Blazor because the way that URLs are supported is limited and leads to tortured workarounds. Add a Razor Page named _Host.cshtml to the Pages folder and add the content shown in listing 35.4.
Listing 35.4 The contents of the _Host.cshtml file in the Pages folder
@page "/"
@{ Layout = null; }
<!DOCTYPE html>
<html>
<head>
<title>@ViewBag.Title</title>
<link href="/lib/bootstrap/css/bootstrap.min.css" rel="stylesheet" />
<base href="~/" />
</head>
<body>
<div class="m-2">
<component type="typeof(Advanced.Blazor.Routed)"
render-mode="Server" />
</div>
<script src="_framework/blazor.server.js"></script>
</body>
</html>
This page contains a component element that applies the Routed component defined in listing 35.4 and a script element for the Blazor JavaScript code. There is also a link element for the Bootstrap CSS stylesheet. Alter the configuration for the example application to use the _Host.cshtml file as a fallback when requests are not matched by the existing URL routes, as shown in listing 35.5.
Listing 35.5 Adding the fallback in the Progam.cs file in the Advanced folder
using Microsoft.EntityFrameworkCore;
using Advanced.Models;
var builder = WebApplication.CreateBuilder(args);
builder.Services.AddControllersWithViews();
builder.Services.AddRazorPages();
builder.Services.AddServerSideBlazor();
builder.Services.AddDbContext<DataContext>(opts => {
opts.UseSqlServer(
builder.Configuration["ConnectionStrings:PeopleConnection"]);
opts.EnableSensitiveDataLogging(true);
});
var app = builder.Build();
app.UseStaticFiles();
app.MapControllers();
app.MapControllerRoute("controllers",
"controllers/{controller=Home}/{action=Index}/{id?}");
app.MapRazorPages();
app.MapBlazorHub();
app.MapFallbackToPage("/_Host");
var context = app.Services.CreateScope().ServiceProvider
.GetRequiredService<DataContext>();
SeedData.SeedDatabase(context);
app.Run();
The MapFallbackToPage method configures the routing system to use the _Host page as a last resort for unmatched requests.
Components declare the URLs for which they should be displayed using @page directives. Listing 35.6 adds the @page directive to the PeopleList component.
Listing 35.6 Adding a directive in the PeopleList.razor file in the Blazor folder
@page "/people"
<TableTemplate RowType="Person" RowData="People"
Highlight="@(p => p.Location?.City)"
SortDirection="@(p => p.Surname)">
<Header>
<tr><th>ID</th><th>Name</th><th>Dept</th><th>Location</th></tr>
</Header>
<RowTemplate Context="p">
<td>@p.PersonId</td>
<td>@p.Surname, @p.Firstname</td>
<td>@p.Department?.Name</td>
<td>@p.Location?.City, @p.Location?.State</td>
</RowTemplate>
</TableTemplate>
@code {
[Inject]
public DataContext? Context { get; set; }
public IEnumerable<Person>? People => Context?.People
.Include(p => p.Department)
.Include(p => p.Location);
}
The directive in listing 35.6 means the PeopleList component will be displayed for the http://localhost:5000/people URL. Components can declare support for more than one route using multiple @page directives. Listing 35.7 adds @page directives to the DepartmentList component to support two URLs.
Listing 35.7 Adding a directive in the DepartmentList.razor file in the Blazor folder
@page "/departments"
@page "/depts"
<CascadingValue Name="BgTheme" Value="Theme" IsFixed="false">
<TableTemplate RowType="Department" RowData="Departments"
Highlight="@(d => d.Name)"
SortDirection="@(d => d.Name)">
<Header>
<tr>
<th>ID</th><th>Name</th><th>People</th><th>Locations</th>
</tr>
</Header>
<RowTemplate Context="d">
<td>@d.Departmentid</td>
<td>@d.Name</td>
<td>
@(String.Join(", ", d.People!.Select(p => p.Surname)))
</td>
<td>
@(String.Join(", ", d.People!.Select(p =>
p.Location!.City).Distinct()))
</td>
</RowTemplate>
</TableTemplate>
</CascadingValue>
<SelectFilter Title="@("Theme")" Values="Themes"
@bind-SelectedValue="Theme" />
@code {
[Inject]
public DataContext? Context { get; set; }
public IEnumerable<Department>? Departments => Context?.Departments?
.Include(d => d.People!).ThenInclude(p => p.Location!);
public string Theme { get; set; } = "info";
public string[] Themes =
new string[] { "primary", "info", "success" };
}
Most of the routing pattern features described in chapter 13 can be used in @page expressions, except catchall segment variables and optional segment variables. Using two @page expressions, one with a segment variable, can be used to re-create the optional variable feature, as demonstrated in chapter 36, where I show you how to implement a CRUD application using Blazor.
To see the basic Razor Component routing feature at work, restart ASP.NET Core and request http://localhost:5000/people and http://localhost:5000/depts. Each URL displays one of the components in the application, as shown in figure 35.2.
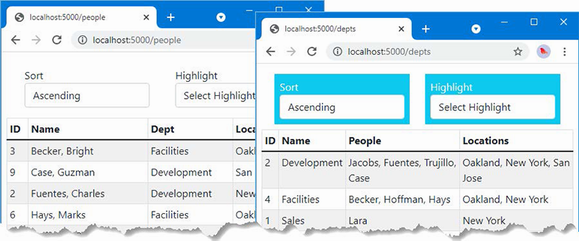
Figure 35.2 Enabling Razor Component routing in the example application
Setting a default component route
The configuration change in listing 35.5 sets up the fallback route for requests. A corresponding route is required in one of the application’s components to identify the component that should be displayed for the application’s default URL, http:// localhost:5000, as shown in listing 35.8.
Listing 35.8 Defining the default route in the PeopleList.razor file in the Blazor folder
@page "/people"
@page "/"
<TableTemplate RowType="Person" RowData="People"
Highlight="@(p => p.Location?.City)"
SortDirection="@(p => p.Surname)">
<Header>
<tr><th>ID</th><th>Name</th><th>Dept</th><th>Location</th></tr>
</Header>
<RowTemplate Context="p">
<td>@p.PersonId</td>
<td>@p.Surname, @p.Firstname</td>
<td>@p.Department?.Name</td>
<td>@p.Location?.City, @p.Location?.State</td>
</RowTemplate>
</TableTemplate>
@code {
[Inject]
public DataContext? Context { get; set; }
public IEnumerable<Person>? People => Context?.People
.Include(p => p.Department)
.Include(p => p.Location);
}
Restart ASP.NET Core and request http://localhost:5000, and you will see the content produced by the PeopleList component, as shown in figure 35.3.
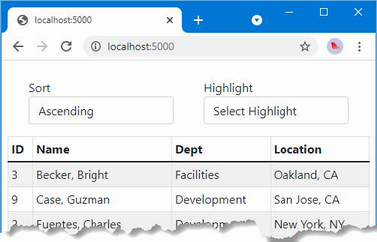
Figure 35.3 Displaying a component for the default URL
The basic routing configuration is in place, but it may not be obvious why using routes offers any advantages over the independent components demonstrated in earlier chapters. Improvements come through the NavLink component, which renders anchor elements that are wired into the routing system. Listing 35.9 adds NavLink to the PeopleList component.
Listing 35.9 Adding navigation in the PeopleList.razor file in the Blazor folder
@page "/people"
@page "/"
<TableTemplate RowType="Person" RowData="People"
Highlight="@(p => p.Location?.City)"
SortDirection="@(p => p.Surname)">
<Header>
<tr><th>ID</th><th>Name</th><th>Dept</th><th>Location</th></tr>
</Header>
<RowTemplate Context="p">
<td>@p.PersonId</td>
<td>@p.Surname, @p.Firstname</td>
<td>@p.Department?.Name</td>
<td>@p.Location?.City, @p.Location?.State</td>
</RowTemplate>
</TableTemplate>
<NavLink class="btn btn-primary" href="/depts">Departments</NavLink>
@code {
[Inject]
public DataContext? Context { get; set; }
public IEnumerable<Person>? People => Context?.People
.Include(p => p.Department)
.Include(p => p.Location);
}
Unlike the anchor elements used in other parts of ASP.NET Core, Navlink components are configured using URLs and not component, page, or action names. The NavLink in this example navigates to the URL supported by the @page directive of the DepartmentList component.
Navigation can also be performed programmatically, which is useful when a component responds to an event and then needs to navigate to a different URL, as shown in listing 35.10.
Listing 35.10 Navigating in the DepartmentList.razor file in the Blazor folder
@page "/departments"
@page "/depts"
<CascadingValue Name="BgTheme" Value="Theme" IsFixed="false">
<TableTemplate RowType="Department" RowData="Departments"
Highlight="@(d => d.Name)"
SortDirection="@(d => d.Name)">
<Header>
<tr>
<th>ID</th><th>Name</th><th>People</th><th>Locations</th>
</tr>
</Header>
<RowTemplate Context="d">
<td>@d.Departmentid</td>
<td>@d.Name</td>
<td>
@(String.Join(", ", d.People!.Select(p => p.Surname)))
</td>
<td>
@(String.Join(", ", d.People!.Select(p =>
p.Location!.City).Distinct()))
</td>
</RowTemplate>
</TableTemplate>
</CascadingValue>
<SelectFilter Title="@("Theme")" Values="Themes"
@bind-SelectedValue="Theme" />
<button class="btn btn-primary" @onclick="HandleClick">People</button>
@code {
[Inject]
public DataContext? Context { get; set; }
public IEnumerable<Department>? Departments => Context?.Departments?
.Include(d => d.People!).ThenInclude(p => p.Location!);
public string Theme { get; set; } = "info";
public string[] Themes =
new string[] { "primary", "info", "success" };
[Inject]
public NavigationManager? NavManager { get; set; }
public void HandleClick() => NavManager?.NavigateTo("/people");
}
The NavigationManager class provides programmatic access to navigation. Table 35.3 describes the most important members provided by the NavigationManager class.
Table 35.3 Useful NavigationManager members
|
Name |
Description |
|---|---|
|
|
This method navigates to the specified URL without sending a new HTTP request. |
|
|
This method converts a relative path to a complete URL. |
|
|
This method gets a relative path from a complete URL. |
|
|
This event is triggered when the location changes. |
|
|
This property returns the current URL. |
The NavigationManager class is provided as a service and is received by Razor Components using the Inject attribute, which provides access to the dependency injection features described in chapter 14.
The NavigationManager.NavigateTo method navigates to a URL and is used in this example to navigate to the /people URL, which will be handled by the PeopleList component.
To see why routing and navigation are important, restart ASP.NET Core and request http://localhost:5000/people. Click the Departments link, which is styled as a button, and the DepartmentList component will be displayed. Click the People link, and you will return to the PeopleList component, as shown in figure 35.4.
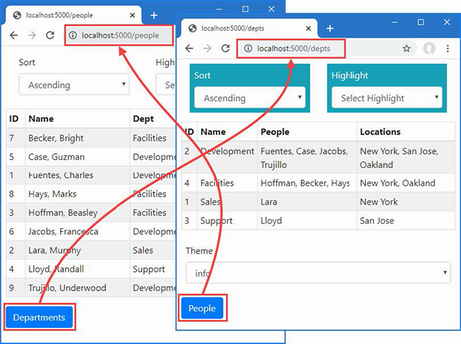
Figure 35.4 Navigating between routed components
If you perform this sequence with the F12 developer tools open, you will see that the transition from one component to the next is done without needing a separate HTTP request, even though the URL displayed by the browser changes. Blazor delivers the content rendered by each component over the persistent HTTP connection that is established when the first component is displayed and uses a JavaScript API to navigate without loading a new HTML document.
Components can receive segment variables by decorating a property with the Parameter attribute. To demonstrate, add a Razor Component named PersonDisplay.razor to the Blazor folder with the content shown in listing 35.11.
Listing 35.11 The contents of the PersonDisplay.razor file in the Blazor folder
@page "/person"
@page "/person/{id:long}"
<h5>Editor for Person: @Id</h5>
<NavLink class="btn btn-primary" href="/people">Return</NavLink>
@code {
[Parameter]
public long Id { get; set; }
}
This component doesn’t do anything other than displaying the value it receives from the routing data until I add features later in the chapter. The @page expression includes a segment variable named id, whose type is specified as long. The component receives the value assigned to the segment variable by defining a property with the same name and decorating it with the Parameter attribute.
Listing 35.12 uses the NavLink component to create navigation links for each of the Person objects displayed by the PeopleList component.
Listing 35.12 Adding navigation links in the PeopleList.razor file in the Blazor folder
@page "/people"
@page "/"
<TableTemplate RowType="Person" RowData="People"
Highlight="@(p => p.Location?.City)"
SortDirection="@(p => p.Surname)">
<Header>
<tr><th>ID</th><th>Name</th><th>Dept</th><th>Location</th>
<td></td>
</tr>
</Header>
<RowTemplate Context="p">
<td>@p.PersonId</td>
<td>@p.Surname, @p.Firstname</td>
<td>@p.Department?.Name</td>
<td>@p.Location?.City, @p.Location?.State</td>
<td>
<NavLink class="btn btn-sm btn-info"
href="@GetEditUrl(p.PersonId)">
Edit
</NavLink>
</td>
</RowTemplate>
</TableTemplate>
<NavLink class="btn btn-primary" href="/depts">Departments</NavLink>
@code {
[Inject]
public DataContext? Context { get; set; }
public IEnumerable<Person>? People => Context?.People
.Include(p => p.Department)
.Include(p => p.Location);
public string GetEditUrl(long id) => $"/person/{id}";
}
Razor Components do not support mixing static content and Razor expressions in attribute values. Instead, I have defined the GetEditUrl method to generate the navigation URLs for each Person object, which is called to produce the value for the NavLink href attributes.
Restart ASP.NET Core, request http://localhost:5000/people, and click one of the Edit buttons. The browser will navigate to the new URL without reloading the HTML document and display the placeholder content generated by the PersonDisplay component, as shown in figure 35.5, which shows how a component can receive data from the routing system.

Figure 35.5 Receiving data from the routing system in a Razor Component
Layouts are template components that provide common content for Razor Components. To create a layout, add a Razor Component called NavLayout.razor to the Blazor folder and add the content shown in listing 35.13.
Listing 35.13 The contents of the NavLayout.razor file in the Blazor folder
@inherits LayoutComponentBase
<div class="container-fluid">
<div class="row">
<div class="col-3">
<div class="d-grid gap-2">
@foreach (string key in NavLinks.Keys) {
<NavLink class="btn btn-outline-primary"
href="@NavLinks[key]"
ActiveClass="btn-primary text-white"
Match="NavLinkMatch.Prefix">
@key
</NavLink>
}
</div>
</div>
<div class="col">
@Body
</div>
</div>
</div>
@code {
public Dictionary<string, string> NavLinks
= new Dictionary<string, string> {
{"People", "/people" },
{"Departments", "/depts" },
{"Details", "/person" }
};
}
Layouts use the @inherits expression to specify the LayoutComponentBase class as the base for the class generated from the Razor Component. The LayoutComponentBase class defines a RenderFragment class named Body that is used to specify the content from components within the common content displayed by the layout. In this example, the layout component creates a grid layout that displays a set of NavLink components for each of the components in the application. The NavLink components are configured with two new attributes, described in table 35.4.
Table 35.4 The NavLink configuration attributes
|
Name |
Description |
|---|---|
|
|
This attribute specifies one or more CSS classes that the anchor element rendered by the |
|
|
This attribute specifies how the current URL is matched to the |
The NavLink components are configured to use Prefix matching and to add the anchor elements they render to the Bootstrap btn-primary and text-white classes when there is a match.
Applying a layout
There are three ways that a layout can be applied. A component can select its own layout using an @layout expression. A parent can use a layout for its child components by wrapping them in the built-in LayoutView component. A layout can be applied to all components by setting the DefaultLayout attribute of the RouteView component, as shown in listing 35.14.
Listing 35.14 Applying a layout in the Routed.razor file in the Blazor folder
<Router AppAssembly="typeof(Program).Assembly">
<Found>
<RouteView RouteData="@context"
DefaultLayout="typeof(NavLayout)" />
</Found>
<NotFound>
<h4 class="bg-danger text-white text-center p-2">
No Matching Route Found
</h4>
</NotFound>
</Router>
Restart ASP.NET Core and request http://localhost:5000/people. The layout will be displayed with the content rendered by the PeopleList component. The navigation buttons on the left side of the layout can be used to navigate through the application, as shown in figure 35.6.
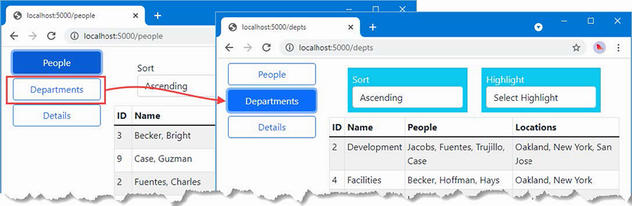
Figure 35.6 Using a layout component
Razor Components have a well-defined lifecycle, which is represented with methods that components can implement to receive notifications of key transitions. Table 35.5 describes the lifecycle methods.
Table 35.5 The Razor Component lifecycle methods
|
Name |
Description |
|---|---|
|
|
These methods are invoked when the component is first initialized. |
|
|
These methods are invoked after the values for properties decorated with the |
|
|
This method is called before the component’s content is rendered to update the content presented to the user. If the method returns |
|
|
This method is invoked after the component’s content is rendered. The |
Using either the OnInitialized or OnParameterSet method is useful for setting the initial state of the component. The layout defined in the previous section doesn’t deal with the default URL because the NavLink component matches only a single URL. The same issue exists for the DepartmentList component, which can be requested using the /departments and /depts paths.
Creating a component that matches multiple URLs requires the use of lifecycle methods. To understand why, add a Razor Component named MultiNavLink.razor to the Blazor folder with the content shown in listing 35.15.
Listing 35.15 The contents of the MultiNavLink.razor file in the Blazor folder
<a class="@ComputedClass" @onclick="HandleClick" href="">
@ChildContent
</a>
@code {
[Inject]
public NavigationManager? NavManager { get; set; }
[Parameter]
public IEnumerable<string> Href { get; set; }
= Enumerable.Empty<string>();
[Parameter]
public string Class { get; set; } = string.Empty;
[Parameter]
public string ActiveClass { get; set; } = string.Empty;
[Parameter]
public NavLinkMatch? Match { get; set; }
public NavLinkMatch ComputedMatch { get =>
Match ?? (Href.Count() == 1
? NavLinkMatch.Prefix : NavLinkMatch.All); }
[Parameter]
public RenderFragment? ChildContent { get; set; }
public string ComputedClass { get; set; } = string.Empty;
public void HandleClick() {
NavManager?.NavigateTo(Href.First());
}
private void CheckMatch(string currentUrl) {
string path = NavManager!.ToBaseRelativePath(currentUrl);
path = path.EndsWith("/")
? path.Substring(0, path.Length - 1) : path;
bool match = Href.Any(href => ComputedMatch == NavLinkMatch.All
? path == href : path.StartsWith(href));
ComputedClass = match ? $"{Class} {ActiveClass}" : Class;
}
protected override void OnParametersSet() {
ComputedClass = Class;
NavManager!.LocationChanged +=
(sender, arg) => CheckMatch(arg.Location);
Href = Href.Select(h => h.StartsWith("/") ? h.Substring(1) : h);
CheckMatch(NavManager!.Uri);
}
}
This component works in the same way as a regular NavLink but accepts an array of paths to match. The component relies on the OnParametersSet lifecycle method because some initial setup is required that cannot be performed until after values have been assigned to the properties decorated with the Parameter attribute, such as extracting the individual paths.
This component responds to changes in the current URL by listening for the LocationChanged event defined by the NavigationManager class. The event’s Location property provides the component with the current URL, which is used to alter the classes for the anchor element. Listing 35.16 applies the new component in the layout.
Listing 35.16 Applying a new component in the NavLayout.razor file in the Blazor folder
@inherits LayoutComponentBase
<div class="container-fluid">
<div class="row">
<div class="col-3">
<div class="d-grid gap-2">
@foreach (string key in NavLinks.Keys) {
<MultiNavLink
class="btn btn-outline-primary btn-block"
href="@NavLinks[key]"
ActiveClass="btn-primary text-white">
@key
</MultiNavLink>
}
</div>
</div>
<div class="col">
@Body
</div>
</div>
</div>
@code {
public Dictionary<string, string[]> NavLinks
= new Dictionary<string, string[]> {
{"People", new string[] {"/people", "/" } },
{"Departments", new string[] {"/depts", "/departments" } },
{"Details", new string[] { "/person" } }
};
}
Restart ASP.NET Core and request http://localhost:5000/people and http://localhost:5000/departments. Both URLs are recognized, and the corresponding navigation buttons are highlighted, as shown in figure 35.7.
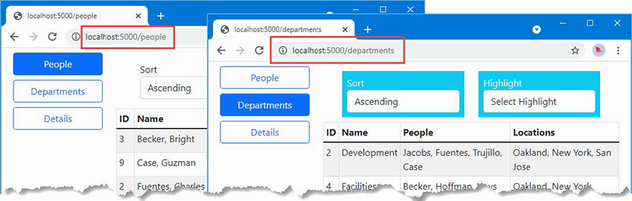
Figure 35.7 Using the lifecycle methods
The lifecycle methods are also useful for performing tasks that may complete after the initial content from the component has been rendered, such as querying the database. Listing 35.17 replaces the placeholder content in the PersonDisplay component and uses the lifecycle methods to query the database using values received as parameters.
Listing 35.17 Querying for data in the PersonDisplay.razor file in the Blazor folder
@page "/person"
@page "/person/{id:long}"
@if (Person == null) {
<h5 class="bg-info text-white text-center p-2">Loading...</h5>
} else {
<table class="table table-striped table-bordered">
<tbody>
<tr><th>Id</th><td>@Person.PersonId</td></tr>
<tr><th>Surname</th><td>@Person.Surname</td></tr>
<tr><th>Firstname</th><td>@Person.Firstname</td></tr>
</tbody>
</table>
}
<button class="btn btn-outline-primary"
@onclick="@(() => HandleClick(false))">
Previous
</button>
<button class="btn btn-outline-primary"
@onclick="@(() => HandleClick(true))">
Next
</button>
@code {
[Inject]
public DataContext? Context { get; set; }
[Inject]
public NavigationManager? NavManager { get; set; }
[Parameter]
public long Id { get; set; } = 0;
public Person? Person { get; set; }
protected async override Task OnParametersSetAsync() {
await Task.Delay(1000);
if (Context != null) {
Person = await Context.People
.FirstOrDefaultAsync(p => p.PersonId == Id)
?? new Person();
}
}
public void HandleClick(bool increment) {
Person = null;
NavManager?.NavigateTo(
$"/person/{(increment ? Id + 1 : Id - 1)}");
}
}
The component can’t query the database until the parameter values have been set and so the value of the Person property is obtained in the OnParametersSetAsync method. Since the database is running alongside the ASP.NET Core server, I have added a one-second delay before querying the database to help emphasize the way the component works.
The value of the Person property is null until the query has completed, at which point it will be either an object representing the query result or a new Person object if the query doesn’t produce a result. A loading message is displayed while the Person object is null.
Restart ASP.NET Core and request http://localhost:5000. Click one of the Edit buttons presented in the table, and the PersonDisplay component will display a summary of the data. Click the Previous and Next buttons to query for the objects with the adjacent primary key values, producing the results shown in figure 35.8.
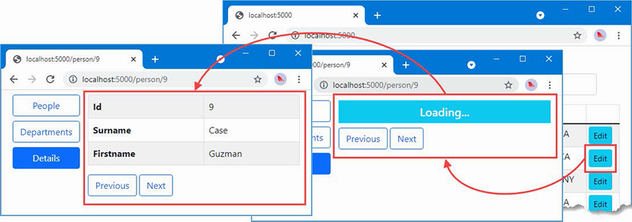
Figure 35.8 Performing asynchronous tasks in a component
Notice that Blazor doesn’t wait for the Task performed in the OnParametersSetAsync method to complete before displaying content to the user, which is why a loading message is useful when the Person property is null. Once the Task is complete and a value has been assigned to the Person property, the component’s view is automatically re-rendered, and the changes are sent to the browser over the persistent HTTP connection to be displayed to the user.
Most components work together through parameters and events, allowing the user’s interaction to drive changes in the application. Blazor also provides advanced options for managing interaction with components, which I describe in the following sections.
A parent component can obtain a reference to a child component and use it to consume the properties and methods it defines. In preparation, listing 35.18 adds a disabled state to the MultiNavLink component.
Listing 35.18 Adding a feature in the MultiNavLink.razor file in the Blazor folder
<a class="@ComputedClass" @onclick="HandleClick" href="">
@if (Enabled) {
@ChildContent
} else {
@("Disabled")
}
</a>
@code {
[Inject]
public NavigationManager? NavManager { get; set; }
[Parameter]
public IEnumerable<string> Href { get; set; }
= Enumerable.Empty<string>();
[Parameter]
public string Class { get; set; } = string.Empty;
[Parameter]
public string ActiveClass { get; set; } = string.Empty;
[Parameter]
public string DisabledClasses { get; set; } = string.Empty;
[Parameter]
public NavLinkMatch? Match { get; set; }
public NavLinkMatch ComputedMatch { get =>
Match ?? (Href.Count() == 1
? NavLinkMatch.Prefix : NavLinkMatch.All); }
[Parameter]
public RenderFragment? ChildContent { get; set; }
public string ComputedClass { get; set; } = string.Empty;
public void HandleClick() {
NavManager?.NavigateTo(Href.First());
}
private void CheckMatch(string currentUrl) {
string path = NavManager!.ToBaseRelativePath(currentUrl);
path = path.EndsWith("/")
? path.Substring(0, path.Length - 1) : path;
bool match = Href.Any(href => ComputedMatch == NavLinkMatch.All
? path == href : path.StartsWith(href));
if (!Enabled) {
ComputedClass = DisabledClasses;
} else {
ComputedClass = match ? $"{Class} {ActiveClass}" : Class;
}
}
protected override void OnParametersSet() {
ComputedClass = Class;
NavManager!.LocationChanged +=
(sender, arg) => CheckMatch(arg.Location);
Href = Href.Select(h => h.StartsWith("/") ? h.Substring(1) : h);
CheckMatch(NavManager!.Uri);
}
private bool Enabled { get; set; } = true;
public void SetEnabled(bool enabled) {
Enabled = enabled;
CheckMatch(NavManager!.Uri);
}
}
In listing 35.19, I have updated the shared layout so that it retains references to the MultiNavLink components and a button that toggles their Enabled property value.
Listing 35.19 Retaining references in the NavLayout.razor file in the Blazor folder
@inherits LayoutComponentBase
<div class="container-fluid">
<div class="row">
<div class="col-3">
<div class="d-grid gap-2">
@foreach (string key in NavLinks.Keys) {
<MultiNavLink class="btn btn-outline-primary btn-block"
href="@NavLinks[key]"
ActiveClass="btn-primary text-white"
DisabledClasses="btn btn-dark text-light
btn-block disabled"
@ref="Refs[key]">
@key
</MultiNavLink>
}
<button class="btn btn-secondary btn-block mt-5"
@onclick="ToggleLinks">
Toggle Links
</button>
</div>
</div>
<div class="col">
@Body
</div>
</div>
</div>
@code {
public Dictionary<string, string[]> NavLinks
= new Dictionary<string, string[]> {
{"People", new string[] {"/people", "/" } },
{"Departments", new string[] {"/depts", "/departments" } },
{"Details", new string[] { "/person" } }
};
public Dictionary<string, MultiNavLink?> Refs
= new Dictionary<string, MultiNavLink?>();
private bool LinksEnabled = true;
public void ToggleLinks() {
LinksEnabled = !LinksEnabled;
foreach (MultiNavLink? link in Refs.Values) {
link?.SetEnabled(LinksEnabled);
}
}
}
References to components are created by adding an @ref attribute and specifying the name of a field or property to which the component should be assigned. Since the MultiNavLink components are created in a @foreach loop driven by a Dictionary, the simplest way to retain references is also in a Dictionary, like this:
...
<MultiNavLink class="btn btn-outline-primary btn-block"
href="@NavLinks[key]" ActiveClass="btn-primary text-white"
DisabledClasses="btn btn-dark text-light btn-block disabled"
@ref="Refs[key]">
...
As each MultiNavLink component is created, it is added to the Refs dictionary. Razor Components are compiled into standard C# classes, which means that a collection of MultiNavLink components is a collection of MultiNavlink objects.
...
public Dictionary<string, MultiNavLink> Refs
= new Dictionary<string, MultiNavLink>();
...
Restart ASP.NET Core, request http://localhost:5000, and click the Toggle Links button. The event handler invokes the ToggleLinks method, which sets the value of the Enabled property for each of the MultiNavLink components, as shown in figure 35.9.
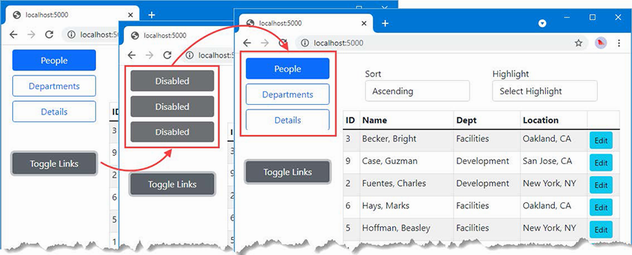
Figure 35.9 Retaining references to components
Components can be used by other code in the ASP.NET Core application, allowing a richer interaction between parts of complex projects. Listing 35.20 alters the method in the MultiNavLink component so it can be invoked by other parts of the ASP.NET Core application to enable and disable navigation.
Listing 35.20 Replacing a method in the MultiNavLink.razor file in the Blazor folder
<a class="@ComputedClass" @onclick="HandleClick" href="">
@if (Enabled) {
@ChildContent
} else {
@("Disabled")
}
</a>
@code {
// ...other properties and methods omitted for brevity...
private bool Enabled { get; set; } = true;
public void SetEnabled(bool enabled) {
InvokeAsync(() => {
Enabled = enabled;
CheckMatch(NavManager!.Uri);
StateHasChanged();
});
}
}
Razor Components provide two methods that are used in code that is invoked outside of the Blazor environment, as described in table 35.6.
Table 35.6 The Razor component external invocation methods
|
Name |
Description |
|---|---|
|
|
This method is used to execute a function inside the Blazor environment. |
|
|
This method is called when a change occurs outside of the normal lifecycle, as shown in the next section. |
The InvokeAsync method is used to invoke a function within the Blazor environment, ensuring that changes are processed correctly. The StateHasChanged method is invoked when all the changes have been applied, triggering a Blazor update and ensuring changes are reflected in the component’s output.
To create a service that will be available throughout the application, create the Advanced/Services folder and add to it a class file named ToggleService.cs, with the code shown in listing 35.21.
Listing 35.21 The contents of the ToggleService.cs file in the Services folder
using Advanced.Blazor;
namespace Advanced.Services {
public class ToggleService {
private List<MultiNavLink> components = new List<MultiNavLink>();
private bool enabled = true;
public void EnrolComponents(IEnumerable<MultiNavLink> comps) {
components.AddRange(comps);
}
public bool ToggleComponents() {
enabled = !enabled;
components.ForEach(c => c.SetEnabled(enabled));
return enabled;
}
}
}
This service manages a collection of components and invokes the SetEnabled method on all of them when its ToggleComponents method is called. There is nothing specific to Blazor in this service, which relies on the C# classes that are produced when Razor Component files are compiled. Listing 35.22 updates the application configuration to configure the ToggleService class as a singleton service.
Listing 35.22 Configuring a service in the Program.cs file in the Advanced folder
using Microsoft.EntityFrameworkCore;
using Advanced.Models;
var builder = WebApplication.CreateBuilder(args);
builder.Services.AddControllersWithViews();
builder.Services.AddRazorPages();
builder.Services.AddServerSideBlazor();
builder.Services.AddDbContext<DataContext>(opts => {
opts.UseSqlServer(
builder.Configuration["ConnectionStrings:PeopleConnection"]);
opts.EnableSensitiveDataLogging(true);
});
builder.Services.AddSingleton<Advanced.Services.ToggleService>();
var app = builder.Build();
app.UseStaticFiles();
app.MapControllers();
app.MapControllerRoute("controllers",
"controllers/{controller=Home}/{action=Index}/{id?}");
app.MapRazorPages();
app.MapBlazorHub();
app.MapFallbackToPage("/_Host");
var context = app.Services.CreateScope().ServiceProvider
.GetRequiredService<DataContext>();
SeedData.SeedDatabase(context);
app.Run();
Listing 35.23 updates the Blazor layout so that references to the MultiNavLink components are retained and registered with the new service.
Listing 35.23 Using the service in the NavLayout.razor file in the Blazor folder
@inherits LayoutComponentBase
@using Advanced.Services
<div class="container-fluid">
<div class="row">
<div class="col-3">
<div class="d-grid gap-2">
@foreach (string key in NavLinks.Keys) {
<MultiNavLink class="btn btn-outline-primary btn-block"
href="@NavLinks[key]"
ActiveClass="btn-primary text-white"
DisabledClasses="btn btn-dark text-light
btn-block disabled"
@ref="Refs[key]">
@key
</MultiNavLink>
}
<button class="btn btn-secondary btn-block mt-5"
@onclick="ToggleLinks">
Toggle Links
</button>
</div>
</div>
<div class="col">
@Body
</div>
</div>
</div>
@code {
[Inject]
public ToggleService? Toggler { get; set; }
public Dictionary<string, string[]> NavLinks
= new Dictionary<string, string[]> {
{"People", new string[] {"/people", "/" } },
{"Departments", new string[] {"/depts", "/departments" } },
{"Details", new string[] { "/person" } }
};
public Dictionary<string, MultiNavLink?> Refs
= new Dictionary<string, MultiNavLink?>();
//private bool LinksEnabled = true;
protected override void OnAfterRender(bool firstRender) {
if (firstRender && Toggler != null) {
Toggler.EnrolComponents(
Refs.Values as IEnumerable<MultiNavLink>);
}
}
public void ToggleLinks() {
Toggler?.ToggleComponents();
}
}
As noted in the previous section, component references are not available until after the content has been rendered. Listing 35.23 uses the OnAfterRender lifecycle method to register the component references with the service, which is received via dependency injection.
The final step is to use the service from a different part of the ASP.NET Core application. Listing 35.24 adds a simple action method to the Home controller that invokes the ToggleService.ToggleComponents method every time it handles a request.
Listing 35.24 Adding an action in the HomeController.cs file in the Controllers folder
using Advanced.Models;
using Microsoft.AspNetCore.Mvc;
using Microsoft.EntityFrameworkCore;
using Advanced.Services;
namespace Advanced.Controllers {
public class HomeController : Controller {
private DataContext context;
private ToggleService toggleService;
public HomeController(DataContext dbContext, ToggleService ts) {
context = dbContext;
toggleService = ts;
}
public IActionResult Index([FromQuery] string selectedCity) {
return View(new PeopleListViewModel {
People = context.People
.Include(p => p.Department).Include(p => p.Location),
Cities = context.Locations.Select(l => l.City).Distinct(),
SelectedCity = selectedCity
});
}
public string Toggle() =>
$"Enabled: {toggleService.ToggleComponents()}";
}
}
public class PeopleListViewModel {
public IEnumerable<Person> People { get; set; }
= Enumerable.Empty<Person>();
public IEnumerable<string> Cities { get; set; }
= Enumerable.Empty<string>();
public string SelectedCity { get; set; } = String.Empty;
public string GetClass(string? city) =>
SelectedCity == city ? "bg-info text-white" : "";
}
Restart ASP.NET Core and request http://localhost:5000. Open a separate browser window and request http://localhost:5000/controllers/home/toggle. When the second request is processed by the ASP.NET Core application, the action method will use the service, which toggles the state of the navigation button. Each time you request /controllers/home/toggle, the state of the navigation buttons will change, as shown in figure 35.10.
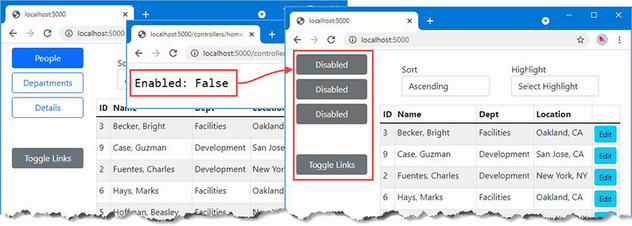
Figure 35.10 Invoking component methods
Blazor provides a range of tools for interaction between JavaScript and server-side C# code, as described in the following sections.
Invoking a JavaScript function from a component
To prepare for these examples, add a JavaScript file named interop.js to the wwwroot folder and add the code shown in listing 35.25.
Listing 35.25 The contents of the interop.js file in the wwwroot folder
function addTableRows(colCount) {
let elem = document.querySelector("tbody");
let row = document.createElement("tr");
elem.append(row);
for (let i = 0; i < colCount; i++) {
let cell = document.createElement("td");
cell.innerText = "New Elements"
row.append(cell);
}
}
The JavaScript code uses the API provided by the browser to locate a tbody element, which denotes the body of a table and adds a new row containing the number of cells specified by the function parameter.
To incorporate the JavaScript file into the application, add the element shown in listing 35.26 to the _Host Razor Page, which was configured as the fallback page that delivers the Blazor application to the browser.
Listing 35.26 Adding an element in the _Host.cshtml file in the Pages folder
@page "/"
@{ Layout = null; }
<!DOCTYPE html>
<html>
<head>
<title>@ViewBag.Title</title>
<link href="/lib/bootstrap/css/bootstrap.min.css" rel="stylesheet" />
<base href="~/" />
</head>
<body>
<div class="m-2">
<component type="typeof(Advanced.Blazor.Routed)"
render-mode="Server" />
</div>
<script src="_framework/blazor.server.js"></script>
<script src="~/interop.js"></script>
</body>
</html>
Listing 35.27 revises the PersonDisplay component so that it renders a button that invokes the JavaScript function when the onclick event is triggered. I have also removed the delay that I added earlier to demonstrate the use of the component lifecycle methods.
Listing 35.27 Invoking a function in the PersonDisplay.razor file in the Blazor folder
@page "/person"
@page "/person/{id:long}"
@if (Person == null) {
<h5 class="bg-info text-white text-center p-2">Loading...</h5>
} else {
<table class="table table-striped table-bordered">
<tbody>
<tr><th>Id</th><td>@Person.PersonId</td></tr>
<tr><th>Surname</th><td>@Person.Surname</td></tr>
<tr><th>Firstname</th><td>@Person.Firstname</td></tr>
</tbody>
</table>
}
<button class="btn btn-outline-primary" @onclick="@HandleClick">
Invoke JS Function
</button>
@code {
[Inject]
public DataContext? Context { get; set; }
[Inject]
public NavigationManager? NavManager { get; set; }
[Inject]
public IJSRuntime? JSRuntime { get; set; }
[Parameter]
public long Id { get; set; } = 0;
public Person? Person { get; set; }
protected async override Task OnParametersSetAsync() {
//await Task.Delay(1000);
if (Context != null) {
Person = await Context.People
.FirstOrDefaultAsync(p => p.PersonId == Id)
?? new Person();
}
}
public async Task HandleClick() {
await JSRuntime!.InvokeVoidAsync("addTableRows", 2);
}
}
Invoking a JavaScript function is done through the IJSRuntime interface, which components receive through dependency injection. The service is created automatically as part of the Blazor configuration and provides the methods described in table 35.7.
Table 35.7 The IJSRuntime methods
|
Name |
Description |
|---|---|
|
|
This method invokes the specified function with the arguments provided. The result type is specified by the generic type parameter. |
|
|
This method invokes a function that doesn’t produce a result. |
In listing 35.27, I use the InvokeVoidAsync method to invoke the addTableRows JavaScript function, providing a value for the function parameter. Restart ASP.NET Core, navigate to http://localhost:5000/person/1, and click the Invoke JS Function button. Blazor will invoke the JavaScript function, which adds a row to the end of the table, as shown in figure 35.11.

Figure 35.11 Invoking a JavaScript function
Retaining References to HTML Elements
Razor Components can retain references to the HTML elements they create and pass those references to JavaScript code. Listing 35.28 changes the JavaScript function from the previous example so that it operates on an HTML element it receives through a parameter.
Listing 35.28 Defining a parameter in the interop.js file in the wwwroot folder
function addTableRows(colCount, elem) {
//let elem = document.querySelector("tbody");
let row = document.createElement("tr");
elem.parentNode.insertBefore(row, elem);
for (let i = 0; i < colCount; i++) {
let cell = document.createElement("td");
cell.innerText = "New Elements"
row.append(cell);
}
}
In listing 35.29, the PersonDisplay component retains a reference to one of the HTML elements it creates and passes it as an argument to the JavaScript function.
Listing 35.29 Retaining a reference in the PersonDisplay.razor file in the Blazor folder
@page "/person"
@page "/person/{id:long}"
@if (Person == null) {
<h5 class="bg-info text-white text-center p-2">Loading...</h5>
} else {
<table class="table table-striped table-bordered">
<tbody>
<tr><th>Id</th><td>@Person.PersonId</td></tr>
<tr @ref="RowReference">
<th>Surname</th><td>@Person.Surname</td>
</tr>
<tr><th>Firstname</th><td>@Person.Firstname</td></tr>
</tbody>
</table>
}
<button class="btn btn-outline-primary" @onclick="@HandleClick">
Invoke JS Function
</button>
@code {
[Inject]
public DataContext? Context { get; set; }
[Inject]
public NavigationManager? NavManager { get; set; }
[Inject]
public IJSRuntime? JSRuntime { get; set; }
[Parameter]
public long Id { get; set; } = 0;
public Person? Person { get; set; }
protected async override Task OnParametersSetAsync() {
if (Context != null) {
Person = await Context.People
.FirstOrDefaultAsync(p => p.PersonId == Id)
?? new Person();
}
}
public ElementReference RowReference { get; set; }
public async Task HandleClick() {
await JSRuntime!.InvokeVoidAsync("addTableRows", 2, RowReference);
}
}
The @ref attribute assigns the HTML element to a property, whose type must be ElementReference. Restart ASP.NET Core, request http://localhost:5000/person/1, and click the Invoke JS Function button. The value of the ElementReference property is passed as an argument to the JavaScript function through the InvokeVoidAsync method, producing the result shown in figure 35.12.
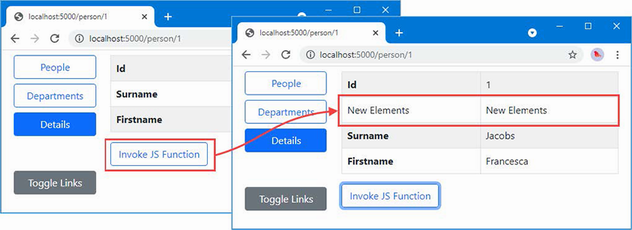
Figure 35.12 Retaining a reference to an HTML element
Invoking a component method from JavaScript
The basic approach for invoking a C# method from JavaScript is to use a static method. Listing 35.30 adds a static method to the MultiNavLink component that changes the enabled state.
Listing 35.30 Introducing static members in the MultiNavLink.razor file in the Blazor folder
<a class="@ComputedClass" @onclick="HandleClick" href="">
@if (Enabled) {
@ChildContent
} else {
@("Disabled")
}
</a>
@code {
// ...other methods and properties omitted for brevity...
[JSInvokable]
public static void ToggleEnabled() =>
ToggleEvent?.Invoke(null, new EventArgs());
private static event EventHandler? ToggleEvent;
protected override void OnInitialized() {
ToggleEvent += (sender, args) => SetEnabled(!Enabled);
}
}
Static methods must be decorated with the JSInvokable attribute before they can be invoked from JavaScript code. The main limitation of using static methods is that it makes it difficult to update individual components, so I have defined a static event that each instance of the component will handle. The event is named ToggleEvent, and it is triggered by the static method that will be called from JavaScript. To listen for the event, I have used the OnInitialized lifecycle event. When the event is received, the enabled state of the component is toggled through the instance method SetEnabled, which uses the InvokeAsync and StateHasChanged methods required when a change is made outside of Blazor.
Listing 35.31 adds a function to the JavaScript file that creates a button element that invokes the static C# method when it is clicked.
Listing 35.31 Adding a function in the interop.js file in the wwwroot folder
function addTableRows(colCount, elem) {
//let elem = document.querySelector("tbody");
let row = document.createElement("tr");
elem.parentNode.insertBefore(row, elem);
for (let i = 0; i < colCount; i++) {
let cell = document.createElement("td");
cell.innerText = "New Elements"
row.append(cell);
}
}
function createToggleButton() {
let sibling = document.querySelector("button:last-of-type");
let button = document.createElement("button");
button.classList.add("btn", "btn-secondary", "btn-block");
button.innerText = "JS Toggle";
sibling.parentNode.insertBefore(button, sibling.nextSibling);
button.onclick = () => DotNet.invokeMethodAsync("Advanced",
"ToggleEnabled");
}
The new function locates one of the existing button elements and adds a new button after it. When the button is clicked, the component method is invoked, like this:
...
button.onclick = () => DotNet.invokeMethodAsync("Advanced",
"ToggleEnabled");
...
It is important to pay close attention to the capitalization of the JavaScript function used for C# methods: it is DotNet, followed by a period, followed by invokeMethodAsync, with a lowercase i. The arguments are the name of the assembly and the name of the static method. (The name of the component is not required.)
The button element that the function in listing 35.31 looks for isn’t available until after Blazor has rendered content for the user. For this reason, listing 35.32 adds a statement to the OnAfterRenderAsync method defined by the NavLayout component to invoke the JavaScript function only when the content has been rendered. (The NavLayout component is the parent to the MultiNavLink components that will be affected when the static method is invoked and allows me to ensure the JavaScript function is invoked only once.)
Listing 35.32 Invoking a JavaScript function in the NavLayout.razor file in the Blazor folder
...
@code {
[Inject]
public ToggleService? Toggler { get; set; }
[Inject]
public IJSRuntime? JSRuntime { get; set; }
public Dictionary<string, string[]> NavLinks
= new Dictionary<string, string[]> {
{"People", new string[] {"/people", "/" } },
{"Departments", new string[] {"/depts", "/departments" } },
{"Details", new string[] { "/person" } }
};
public Dictionary<string, MultiNavLink?> Refs
= new Dictionary<string, MultiNavLink?>();
//private bool LinksEnabled = true;
protected async override Task OnAfterRenderAsync(bool firstRender) {
if (firstRender && Toggler != null) {
Toggler.EnrolComponents(
Refs.Values as IEnumerable<MultiNavLink>);
await JSRuntime!.InvokeVoidAsync("createToggleButton");
}
}
public void ToggleLinks() {
Toggler?.ToggleComponents();
}
}
...
Restart ASP.NET Core and request http://localhost:5000. Once Blazor has rendered its content, the JavaScript function will be called and creates a new button. Clicking the button invokes the static method, which triggers the event that toggles the state of the navigation buttons and causes a Blazor update, as shown in figure 35.13.
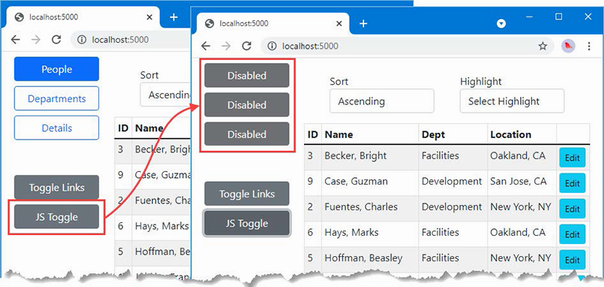
Figure 35.13 Invoking a component method from JavaScript
Invoking an instance method from a JavaScript function
Part of the complexity in the previous example comes from responding to a static method to update the Razor Component objects. An alternative approach is to provide the JavaScript code with a reference to an instance method, which it can then invoke directly.
The first step is to add the JSInvokable attribute to the method that the JavaScript code will invoke. I am going to invoke the ToggleComponents methods defined by the ToggleService class, as shown in listing 35.33.
Listing 35.33 Applying an attribute in the ToggleService.cs file in the Services folder
using Advanced.Blazor;
using Microsoft.JSInterop;
namespace Advanced.Services {
public class ToggleService {
private List<MultiNavLink> components = new List<MultiNavLink>();
private bool enabled = true;
public void EnrolComponents(IEnumerable<MultiNavLink> comps) {
components.AddRange(comps);
}
[JSInvokable]
public bool ToggleComponents() {
enabled = !enabled;
components.ForEach(c => c.SetEnabled(enabled));
return enabled;
}
}
}
The next step is to provide the JavaScript function with a reference to the object whose method will be invoked, as shown in listing 35.34.
Listing 35.34 Providing an instance in the NavLayout.razor file in the Blazor folder
...
protected async override Task OnAfterRenderAsync(bool firstRender) {
if (firstRender && Toggler != null) {
Toggler.EnrolComponents(
Refs.Values as IEnumerable<MultiNavLink>);
await JSRuntime!.InvokeVoidAsync("createToggleButton",
DotNetObjectReference.Create(Toggler));
}
}
...
The DotNetObjectReference.Create method creates a reference to an object, which is passed to the JavaScript function as an argument using the JSRuntime.InvokeVoidAsync method. The final step is to receive the object reference in JavaScript and invoke its method when the button element is clicked, as shown in listing 35.35.
Listing 35.35 Invoking a C# method in the interop.js file in the wwwroot folder
function addTableRows(colCount, elem) {
//let elem = document.querySelector("tbody");
let row = document.createElement("tr");
elem.parentNode.insertBefore(row, elem);
for (let i = 0; i < colCount; i++) {
let cell = document.createElement("td");
cell.innerText = "New Elements"
row.append(cell);
}
}
function createToggleButton(toggleServiceRef) {
let sibling = document.querySelector("button:last-of-type");
let button = document.createElement("button");
button.classList.add("btn", "btn-secondary", "btn-block");
button.innerText = "JS Toggle";
sibling.parentNode.insertBefore(button, sibling.nextSibling);
button.onclick = () =>
toggleServiceRef.invokeMethodAsync("ToggleComponents");
}
The JavaScript function receives the reference to the C# object as a parameter and invokes its methods using invokeMethodAsync, specifying the name of the method as the argument. (Arguments to the method can also be provided but are not required in this example.)
Restart ASP.NET Core, request http://localhost:5000, and click the JS Toggle button. The result is the same as shown in figure 35.13, but the change in the components is managed through the ToggleService object.
The component used to handle a request can be selected using routes, which are defined using the @page expression.
The NavLink component is used to navigate between components with routes.
Components have a well-defined lifecycle, through which methods are invoked at key moments, including initialization, configuration, and content rendering.
Parent components can obtain references to child components using the @ref expression.
Blazor supports interaction with JavaScript code running the browser. Components can invoke JavaScript functions and JavaScript code can invoke C# component methods.
This chapter covers
In this chapter, I describe the features that Blazor provides for dealing with HTML forms, including support for data validation. I describe the built-in components that Blazor provides and show you how they are used. In this chapter, I also explain how the Blazor model can cause unexpected results with Entity Framework Core and show you how to address these issues. I finish the chapter by creating a simple form application for creating, reading, updating, and deleting data (the CRUD operations) and explain how to extend the Blazor form features to improve the user’s experience. Table 36.1 puts the Blazor form features in context.
Table 36.1 Putting Blazor form features in context
|
Question |
Answer |
|---|---|
|
What are they? |
Blazor provides a set of built-in components that present the user with a form that can be easily validated. |
|
Why are they useful? |
Forms remain one of the core building blocks of web applications, and these components provide functionality that most projects will require. |
|
How are they used? |
The |
|
Are there any pitfalls or limitations? |
There can be issues with the way that Entity Framework Core and Blazor work together, and these become especially apparent when using forms. |
|
Are there any alternatives? |
You could create your own form components and validation features, although the features described in this chapter are suitable for most projects and, as I demonstrate, can be easily extended. |
Table 36.2 provides a guide to the chapter.
Table 36.2 Chapter guide
|
Problem |
Solution |
Listing |
|---|---|---|
|
Creating an HTML form |
Use the |
7–9, 13 |
|
Validating data |
Use the standard validation attributes and the events emitted by the |
10–12 |
|
Discarding unsaved data |
Explicitly release the data or create new scopes for components. |
14–16 |
|
Avoiding repeatedly querying the database |
Manage query execution explicitly. |
17–19 |
This chapter uses the Advanced project from chapter 35. To prepare for this chapter, create the Blazor/Forms folder and add to it a Razor Component named EmptyLayout.razor with the content shown in listing 36.1. I will use this component as the main layout for this chapter.
Listing 36.1 The contents of the EmptyLayout.razor file in the Blazor/Forms folder
@inherits LayoutComponentBase
<div class="m-2">
@Body
</div>
Add a RazorComponent named FormSpy.razor to the Blazor/Forms folder with the content shown in listing 36.2. This is a component I will use to display form elements alongside the values that are being edited.
Listing 36.2 The contents of the FormSpy.razor file in the Blazor/Forms folder
<div class="container-fluid no-gutters">
<div class="row">
<div class="col">
@ChildContent
</div>
<div class="col">
<table class="table table-sm table-striped table-bordered">
<thead>
<tr>
<th colspan="2" class="text-center">
Data Summary
</th>
</tr>
</thead>
<tbody>
<tr>
<th>ID</th><td>@PersonData?.PersonId</td>
</tr>
<tr>
<th>Firstname</th><td>@PersonData?.Firstname</td>
</tr>
<tr>
<th>Surname</th><td>@PersonData?.Surname</td>
</tr>
<tr>
<th>Dept ID</th>
<td>@PersonData?.DepartmentId</td>
</tr>
<tr>
<th>Location ID</th>
<td>@PersonData?.LocationId</td>
</tr>
</tbody>
</table>
</div>
</div>
</div>
@code {
[Parameter]
public RenderFragment? ChildContent { get; set; }
[Parameter]
public Person PersonData { get; set; } = new();
}
Next, add a component named Editor.razor to the Blazor/Forms folder and add the content shown in listing 36.3. This component will edit existing Person objects and create new ones.
Listing 36.3 The contents of the Editor.razor file in the Blazor/Forms folder
@page "/forms/edit/{id:long}"
@layout EmptyLayout
<h4 class="bg-primary text-center text-white p-2">Edit</h4>
<FormSpy PersonData="PersonData">
<h4 class="text-center">Form Placeholder</h4>
<div class="text-center">
<NavLink class="btn btn-secondary mt-2" href="/forms">
Back
</NavLink>
</div>
</FormSpy>
@code {
[Inject]
public NavigationManager? NavManager { get; set; }
[Inject]
DataContext? Context { get; set; }
[Parameter]
public long Id { get; set; }
public Person PersonData { get; set; } = new();
protected async override Task OnParametersSetAsync() {
if (Context != null) {
PersonData = await Context.People.FindAsync(Id)
?? new Person();
}
}
}
The component in listing 36.3 uses an @layout expression to override the default layout and select EmptyLayout. The side-by-side layout is used to present the PersonTable component alongside a placeholder, which is where I will add a form.
Finally, create a component named List.razor in the Blazor/Forms folder and add the content shown in listing 36.4 to define a component that will present the user with a table that lists Person objects.
Listing 36.4 The contents of the List.razor file in the Blazor/Forms folder
@page "/forms"
@page "/forms/list"
@layout EmptyLayout
<h5 class="bg-primary text-white text-center p-2">People</h5>
<table class="table table-sm table-striped table-bordered">
<thead>
<tr>
<th>ID</th>
<th>Name</th>
<th>Dept</th>
<th>Location</th>
<th></th>
</tr>
</thead>
<tbody>
@if (People.Count() == 0) {
<tr>
<th colspan="5" class="p-4 text-center">
Loading Data...
</th>
</tr>
} else {
@foreach (Person p in People) {
<tr>
<td>@p.PersonId</td>
<td>@p.Surname, @p.Firstname</td>
<td>@p.Department?.Name</td>
<td>@p.Location?.City</td>
<td>
<NavLink class="btn btn-sm btn-warning"
href="@GetEditUrl(p.PersonId)">
Edit
</NavLink>
</td>
</tr>
}
}
</tbody>
</table>
@code {
[Inject]
public DataContext? Context { get; set; }
public IEnumerable<Person> People { get; set; }
= Enumerable.Empty<Person>();
protected override void OnInitialized() {
People = Context?.People?.Include(p => p.Department)
.Include(p => p.Location)
?? Enumerable.Empty<Person>();
}
string GetEditUrl(long id) => $"/forms/edit/{id}";
}
Open a new PowerShell command prompt, navigate to the folder that contains the Advanced.csproj file, and run the command shown in listing 36.5 to drop the database.
Listing 36.5 Dropping the database
dotnet ef database drop --force
Use the PowerShell command prompt to run the command shown in listing 36.6.
Listing 36.6 Running the example application
dotnet run
Use a browser to request http://localhost:5000/forms, which will produce a data table. Click one of the Edit buttons, and you will see a placeholder for the form and a summary showing the current property values of the selected Person object, as shown in figure 36.1.
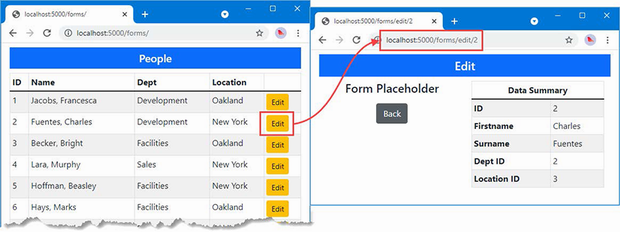
Figure 36.1 Running the example application
Blazor provides a set of built-in components that are used to render form elements, ensuring that the server-side component properties are updated after user interaction and integrating validation. Table 36.3 describes the components that Blazor provides.
Table 36.3 The Blazor form components
|
Name |
Description |
|---|---|
|
|
This component renders a |
|
|
This component renders an |
|
|
This component renders an input element whose |
|
|
This component renders an input element those |
|
|
This component renders an input element those |
|
|
This component renders a |
The EditForm component must be used for any of the other components to work. In listing 36.7, I have added an EditForm, along with InputText components that represent two of the properties defined by the Person class.
Listing 36.7 Using form components in the Editor.razor file in the Blazor/Forms folder
@page "/forms/edit/{id:long}"
@layout EmptyLayout
<h4 class="bg-primary text-center text-white p-2">Edit</h4>
<FormSpy PersonData="PersonData">
<EditForm Model="PersonData">
<div class="form-group">
<label>Person ID</label>
<InputNumber class="form-control"
@bind-Value="PersonData.PersonId" disabled />
</div>
<div class="form-group">
<label>Firstname</label>
<InputText class="form-control"
@bind-Value="PersonData.Firstname" />
</div>
<div class="form-group">
<label>Surname</label>
<InputText class="form-control"
@bind-Value="PersonData.Surname" />
</div>
<div class="form-group">
<label>Dept ID</label>
<InputNumber class="form-control"
@bind-Value="PersonData.DepartmentId" />
</div>
<div class="text-center">
<NavLink class="btn btn-secondary" href="/forms">
Back
</NavLink>
</div>
</EditForm>
</FormSpy>
@code {
[Inject]
public NavigationManager? NavManager { get; set; }
[Inject]
DataContext? Context { get; set; }
[Parameter]
public long Id { get; set; }
public Person PersonData { get; set; } = new();
protected async override Task OnParametersSetAsync() {
if (Context != null) {
PersonData = await Context.People.FindAsync(Id)
?? new Person();
}
}
}
The EditForm component renders a form element and provides the foundation for the validation features described in the “Validating Form Data” section. The Model attribute provides the EditForm with the object that the form uses to edit and validate.
The components in table 36.3 whose names begin with Input are used to display an input or textarea element for a single model property. These components define a custom binding named Value that is associated with the model property using the @bind-Value attribute. The property-level components must be matched to the type of the property they present to the user. It is for this reason that I have used the InputText component for the Firstname and Surname properties of the Person class, while the InputNumber component is used for the PersonId and DepartmentId properties. If you use a property-level component with a model property of the wrong type, you will receive an error when the component attempts to parse a value entered into the HTML element.
Restart ASP.NET Core and request http://localhost:5000/forms/edit/2, and you will see the three input elements displayed. Edit the values and move the focus by pressing the Tab key, and you will see the summary data on the right of the window update, as shown in figure 36.2. The built-in form components support attribute splatting, which is why the disabled attribute applied to the InputNumber component for the PersonId property has been applied to the input element.
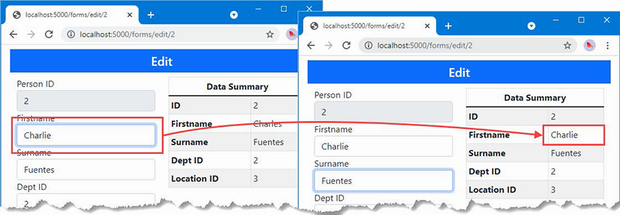
Figure 36.2 Using the Blazor form elements
Blazor provides built-in components for only input and textarea elements. Fortunately, creating a custom component that integrates into the Blazor form features is a simple process. Add a Razor Component named CustomSelect.razor to the Blazor/Forms folder and use it to define the component shown in listing 36.8.
Listing 36.8 The contents of the CustomSelect.razor file in the Blazor/Forms folder
@typeparam TValue
@inherits InputBase<TValue>
@using System.Diagnostics.CodeAnalysis
<select class="form-control @CssClass" value="@CurrentValueAsString"
@onchange="@(ev => CurrentValueAsString = ev.Value as string)">
@ChildContent
@foreach (KeyValuePair<string, TValue> kvp in Values) {
<option value="@kvp.Value">@kvp.Key</option>
}
</select>
@code {
[Parameter]
public RenderFragment? ChildContent { get; set; }
[Parameter]
public IDictionary<string, TValue> Values { get; set; }
= new Dictionary<string, TValue>();
[Parameter]
public Func<string, TValue>? Parser { get; set; }
protected override bool TryParseValueFromString(string? value,
[MaybeNullWhen(false)] out TValue? result,
[NotNullWhen(false)] out string? validationErrorMessage) {
try {
if (Parser != null && value != null) {
result = Parser(value);
validationErrorMessage = null;
return true;
}
result = default(TValue);
validationErrorMessage = "Value or parser not defined";
return false;
} catch {
result = default(TValue);
validationErrorMessage = "The value is not valid";
return false;
}
}
}
The base class for form components is InputBase<TValue>, where the generic type argument is the model property type the component represents.
The base class takes care of most of the work and provides the CurrentValueAsString property, which is used to provide the current value in event handlers when the user selects a new value, like this:
...
<select class="form-control @CssClass" value="@CurrentValueAsString"
@onchange="@(ev => CurrentValueAsString = ev.Value as string)">
...
In preparation for data validation, which I describe in the next section, this component includes the value of the CssClass property in the select element’s class attribute, like this:
...
<select class="form-control @CssClass" value="@CurrentValueAsString"
@onchange="@(ev => CurrentValueAsString = ev.Value as string)">
...
The abstract TryParseValueFromString method has to be implemented so that the base class is able to map between string values used by HTML elements and the corresponding value for the C# model property. I don’t want to implement my custom select element to any specific C# data type, so I have used an @typeparam expression to define a generic type parameter.
The Values property is used to receive a dictionary mapping string values that will be displayed to the user and TValue values that will be used as C# values. The method receives two out parameters that are used to set the parsed value and a parser validation error message that will be displayed to the user if there is a problem. Since I am working with generic types, the Parser property receives a function that is invoked to parse a string value into a TValue value.
Listing 36.9 applies the new form component so the user can select values for the DepartmentId and LocationId properties defined by the Person class.
Listing 36.9 Using a custom element in the Editor.razor file in the Blazor/Forms folder
@page "/forms/edit/{id:long}"
@layout EmptyLayout
<h4 class="bg-primary text-center text-white p-2">Edit</h4>
<FormSpy PersonData="PersonData">
<EditForm Model="PersonData">
<div class="form-group">
<label>Person ID</label>
<InputNumber class="form-control"
@bind-Value="PersonData.PersonId" disabled />
</div>
<div class="form-group">
<label>Firstname</label>
<InputText class="form-control"
@bind-Value="PersonData.Firstname" />
</div>
<div class="form-group">
<label>Surname</label>
<InputText class="form-control"
@bind-Value="PersonData.Surname" />
</div>
<div class="form-group">
<label>Dept ID</label>
<CustomSelect TValue="long" Values="Departments"
Parser="@((string str) => long.Parse(str))"
@bind-Value="PersonData.DepartmentId">
<option selected disabled value="0">
Choose a Department
</option>
</CustomSelect>
</div>
<div class="form-group">
<label>Location ID</label>
<CustomSelect TValue="long" Values="Locations"
Parser="@((string str) => long.Parse(str))"
@bind-Value="PersonData.LocationId">
<option selected disabled value="0">
Choose a Location
</option>
</CustomSelect>
</div>
<div class="text-center">
<NavLink class="btn btn-secondary mt-2" href="/forms">
Back
</NavLink>
</div>
</EditForm>
</FormSpy>
@code {
[Inject]
public NavigationManager? NavManager { get; set; }
[Inject]
DataContext? Context { get; set; }
[Parameter]
public long Id { get; set; }
public Person PersonData { get; set; } = new();
public IDictionary<string, long> Departments { get; set; }
= new Dictionary<string, long>();
public IDictionary<string, long> Locations { get; set; }
= new Dictionary<string, long>();
protected async override Task OnParametersSetAsync() {
if (Context != null) {
PersonData = await Context.People.FindAsync(Id)
?? new Person();
Departments = await Context.Departments
.ToDictionaryAsync(d => d.Name, d => d.Departmentid);
Locations = await Context.Locations
.ToDictionaryAsync(l => $"{l.City}, {l.State}",
l => l.LocationId);
}
}
}
I use the Entity Framework Core ToDictionaryAsync method to create collections of values and labels from the Department and Location data and use them to configure the CustomSelect components. Restart ASP.NET Core and request http://localhost:5000/forms/edit/2; you will see the select elements shown in figure 36.3. When you pick a new value, the CustomSelect component will update the CurrentValueAsString property, which will result in a call to the TryParseValueFromString method, with the result used to update the Value binding.
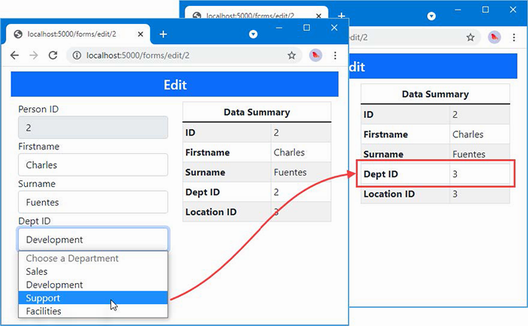
Figure 36.3 Using a custom form element
Blazor provides components that perform validation using the standard attributes. Table 36.4 describes the validation components.
Table 36.4 The Blazor validation components
|
Name |
Description |
|---|---|
|
|
This component integrates the validation attributes applied to the model class into the Blazor form features. |
|
|
This component displays validation error messages for a single property. |
|
|
This component displays validation error messages for the entire model object. |
The validation components generate elements assigned to classes, described in table 36.5, which can be styled with CSS to draw the user’s attention.
Table 36.5 The classes used by the Blazor validation components
|
Name |
Description |
|---|---|
|
|
The |
|
|
The |
The Blazor Input* components add the HTML elements they generate to the classes described in table 36.6 to indicate validation status. This includes the InputBase<TValue> class from which I derived the CustomSelect component and is the purpose of the CssClass property in listing 36.8.
Table 36.6 The validation classes added to form elements
|
Name |
Description |
|---|---|
|
|
Elements are added to this class once the user has edited the value. |
|
|
Elements are added to this class if the value they contain passes validation. |
|
|
Elements are added to this class if the value they contain fails validation. |
This combination of components and classes can be confusing at first, but the key is to start by defining the CSS styles you require based on the classes in table 36.5 and 36.6. Add a CSS Stylesheet named blazorValidation.css to the wwwroot folder with the content shown in listing 36.10.
Listing 36.10 The Contents of the blazorValidation.css File in the wwwroot Folder
.validation-errors {
background-color: rgb(220, 53, 69); color: white; padding: 8px;
text-align: center; font-size: 16px; font-weight: 500;
}
div.validation-message { color: rgb(220, 53, 69); font-weight: 500 }
.modified.valid { border: solid 3px rgb(40, 167, 69); }
.modified.invalid { border: solid 3px rgb(220, 53, 69); }
These styles format error messages in red and apply a red or green border to individual form elements. Listing 36.11 imports the CSS stylesheet and applies the Blazor validation components.
Listing 36.11 Applying validation in the Editor.razor file in the Blazor/Forms folder
@page "/forms/edit/{id:long}"
@layout EmptyLayout
<link href="/blazorValidation.css" rel="stylesheet" />
<h4 class="bg-primary text-center text-white p-2">Edit</h4>
<FormSpy PersonData="PersonData">
<EditForm Model="PersonData">
<DataAnnotationsValidator />
<ValidationSummary />
<div class="form-group">
<label>Person ID</label>
<InputNumber class="form-control"
@bind-Value="PersonData.PersonId" disabled />
</div>
<div class="form-group">
<label>Firstname</label>
<ValidationMessage For="@(() => PersonData.Firstname)" />
<InputText class="form-control"
@bind-Value="PersonData.Firstname" />
</div>
<div class="form-group">
<label>Surname</label>
<ValidationMessage For="@(() => PersonData.Surname)" />
<InputText class="form-control"
@bind-Value="PersonData.Surname" />
</div>
<div class="form-group">
<label>Dept ID</label>
<ValidationMessage For="@(() => PersonData.DepartmentId)" />
<CustomSelect TValue="long" Values="Departments"
Parser="@((string str) => long.Parse(str))"
@bind-Value="PersonData.DepartmentId">
<option selected disabled value="0">
Choose a Department
</option>
</CustomSelect>
</div>
<div class="form-group">
<label>Location ID</label>
<ValidationMessage For="@(() => PersonData.LocationId)" />
<CustomSelect TValue="long" Values="Locations"
Parser="@((string str) => long.Parse(str))"
@bind-Value="PersonData.LocationId">
<option selected disabled value="0">
Choose a Location
</option>
</CustomSelect>
</div>
<div class="text-center">
<NavLink class="btn btn-secondary mt-2" href="/forms">
Back
</NavLink>
</div>
</EditForm>
</FormSpy>
@code {
// ...members omitted for brevity...
}
The DataAnnotationsValidator and ValidationSummary components are applied without any configuration attributes. The ValidationMessage attribute is configured using the For attribute, which receives a function that returns the property the component represents. For example, here is the expression that selects the Firstname property:
... <ValidationMessage For="@(() => PersonData.Firstname)" /> ...
The expression defines no parameters and selects the property from the object used for the Model attribute of the EditForm component and not the model type. For this example, this means the expression operates on the PersonData object and not the Person class.
The final step for enabling data validation is to apply attributes to the model class, as shown in listing 36.12.
Listing 36.12 Applying validation attributes in the Person.cs file in the Models folder
using System.ComponentModel.DataAnnotations;
namespace Advanced.Models {
public class Person {
public long PersonId { get; set; }
[Required(ErrorMessage = "A firstname is required")]
[MinLength(3, ErrorMessage
= "Firstnames must be 3 or more characters")]
public string Firstname { get; set; } = String.Empty;
[Required(ErrorMessage = "A surname is required")]
[MinLength(3, ErrorMessage
= "Surnames must be 3 or more characters")]
public string Surname { get; set; } = String.Empty;
[Range(1, long.MaxValue,
ErrorMessage = "A department must be selected")]
public long DepartmentId { get; set; }
[Range(1, long.MaxValue,
ErrorMessage = "A location must be selected")]
public long LocationId { get; set; }
public Department? Department { get; set; }
public Location? Location { get; set; }
}
}
To see the effect of the validation components, restart ASP.NET Core and request http://localhost:5000/forms/edit/2. Clear the Firstname field and move the focus by pressing the Tab key or clicking on another field. As the focus changes, validation is performed, and error messages will be displayed. The Editor component shows both summary and per-property messages, so you will see the same error message shown twice. Delete all but the first two characters from the Surname field, and a second validation message will be displayed when you change the focus, as shown in figure 36.4. (There is validation support for the other properties, too, but the select element doesn’t allow the user to select an invalid valid. If you change a value, the select element will be decorated with a green border to indicate a valid selection, but you won’t be able to see an invalid response until I demonstrate how the form components can be used to create new data objects.)
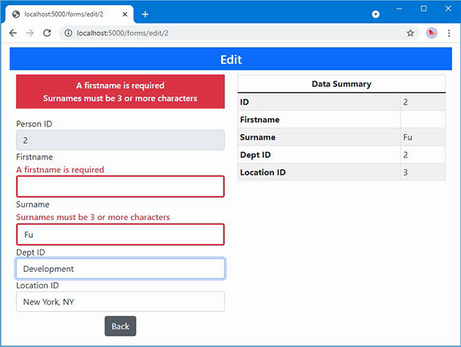
Figure 36.4 Using the Blazor validation features
The EditForm component defines events that allow an application to respond to user action, as described in table 36.7.
Table 36.7 The EditForm events
|
Name |
Description |
|---|---|
|
|
This event is triggered when the form is submitted and the form data passes validation. |
|
|
This event is triggered when the form is submitted and the form data fails validation. |
|
|
This event is triggered when the form is submitted and before validation is performed. |
These events are triggered by adding a conventional submit button within the content contained by the EditForm component. The EditForm component handles the onsubmit event sent by the form element it renders, applies validation, and triggers the events described in the table. Listing 36.13 adds a submit button to the Editor component and handles the EditForm events.
Listing 36.13 Handling events in the Editor.razor file in the Blazor/Forms folder
@page "/forms/edit/{id:long}"
@layout EmptyLayout
<link href="/blazorValidation.css" rel="stylesheet" />
<h4 class="bg-primary text-center text-white p-2">Edit</h4>
<h6 class="bg-info text-center text-white p-2">@FormSubmitMessage</h6>
<FormSpy PersonData="PersonData">
<EditForm Model="PersonData" OnValidSubmit="HandleValidSubmit"
OnInvalidSubmit="HandleInvalidSubmit">
<DataAnnotationsValidator />
<ValidationSummary />
<div class="form-group">
<label>Person ID</label>
<InputNumber class="form-control"
@bind-Value="PersonData.PersonId" disabled />
</div>
<div class="form-group">
<label>Firstname</label>
<ValidationMessage For="@(() => PersonData.Firstname)" />
<InputText class="form-control"
@bind-Value="PersonData.Firstname" />
</div>
<div class="form-group">
<label>Surname</label>
<ValidationMessage For="@(() => PersonData.Surname)" />
<InputText class="form-control"
@bind-Value="PersonData.Surname" />
</div>
<div class="form-group">
<label>Dept ID</label>
<ValidationMessage For="@(() => PersonData.DepartmentId)" />
<CustomSelect TValue="long" Values="Departments"
Parser="@((string str) => long.Parse(str))"
@bind-Value="PersonData.DepartmentId">
<option selected disabled value="0">
Choose a Department
</option>
</CustomSelect>
</div>
<div class="form-group">
<label>Location ID</label>
<ValidationMessage For="@(() => PersonData.LocationId)" />
<CustomSelect TValue="long" Values="Locations"
Parser="@((string str) => long.Parse(str))"
@bind-Value="PersonData.LocationId">
<option selected disabled value="0">
Choose a Location
</option>
</CustomSelect>
</div>
<div class="text-center">
<button type="submit" class="btn btn-primary mt-2">
Submit
</button>
<NavLink class="btn btn-secondary mt-2" href="/forms">
Back
</NavLink>
</div>
</EditForm>
</FormSpy>
@code {
// ...members omitted brevity...
public string FormSubmitMessage { get; set; }
= "Form Data Not Submitted";
public void HandleValidSubmit() => FormSubmitMessage
= "Valid Data Submitted";
public void HandleInvalidSubmit() => FormSubmitMessage
= "Invalid Data Submitted";
}
Restart ASP.NET Core and request http://localhost:5000/forms/edit/2. Clear the Firstname field, and click the Submit button. In addition to the validation error, you will see a message indicating that the form was submitted with invalid data. Enter a name into the field and click Submit again, and the message will change, as shown in figure 36.5.

Figure 36.5 Handling EditForm events
The Blazor model changes the way that Entity Framework Core behaves, which can lead to unexpected results if you are used to writing conventional ASP.NET Core applications. In the sections that follow, I explain the issues and how to avoid the problems that can arise.
To see the first issue, request http://localhost:5000/forms/edit/4, clear the Firstname field, change the contents of the Surname field to La, and press Tab to change the focus.
Neither of the new values passes validation, and you will see error messages as you move between the form elements. Click the Back button, and you will see that the data table reflects the changes you made, as shown in figure 36.6, even though they were not valid.
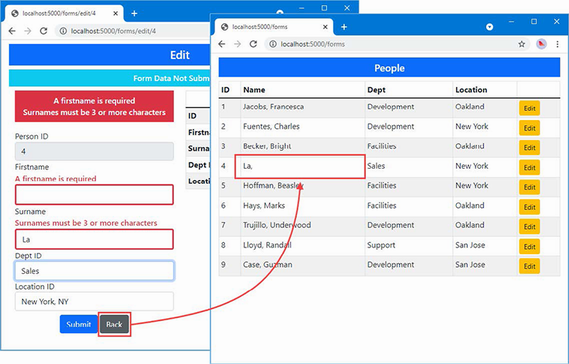
Figure 36.6 The effect of editing data
In a conventional ASP.NET Core application, written using controllers or Razor Pages, clicking a button triggers a new HTTP request. Each request is handled in isolation, and each request receives its own Entity Framework Core context object, which is configured as a scoped service. The result is that the data created when handling one request affects other requests only once it has been written to the database.
In a Blazor application, the routing system responds to URL changes without sending new HTTP requests, which means that multiple components are displayed using only the persistent HTTP connection that Blazor maintains to the server. This results in a single dependency injection scope being shared by multiple components, as shown in figure 36.7, and the changes made by one component will affect other components even if the changes are not written to the database.
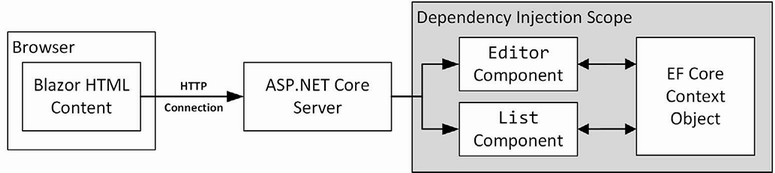
Figure 36.7 The use of an Entity Framework Core context in a Blazor application
Entity Framework Core is trying to be helpful, and this approach allows complex data operations to be performed over time before being stored (or discarded). Unfortunately, much like the helpful approach Entity Framework Core takes to dealing with related data, which I described in chapter 35, it presents a pitfall for the unwary developer who expects components to handle data like the rest of ASP.NET Core.
Discarding unsaved data changes
If sharing a context between components is appealing, which it will be for some applications, then you can embrace the approach and ensure that components discard any changes when they are destroyed, as shown in listing 36.14.
Listing 36.14 Discarding unsaved data in the Editor.razor file in the Blazor/Forms folder
@page "/forms/edit/{id:long}"
@layout EmptyLayout
@implements IDisposable
<!-- ...elements omitted for brevity... -->
@code {
// ...members omitted for brevity...
public void HandleInvalidSubmit() => FormSubmitMessage
= "Invalid Data Submitted";
public void Dispose() {
if (Context != null) {
Context.Entry(PersonData).State = EntityState.Detached;
}
}
}
As I noted in chapter 35, components can implement the System.IDisposable interface, and the Dispose method will be invoked when the component is about to be destroyed, which happens when navigation to another component occurs. In listing 36.14, the implementation of the Dispose method tells Entity Framework Core to disregard the PersonData object, which means it won’t be used to satisfy future requests. To see the effect, restart ASP.NET Core, request http://localhost:5000/forms/edit/4, clear the Firstname field, and click the Back button. The modified Person object is disregarded when Entity Framework Core provides the List component with its data, as shown in figure 36.8.
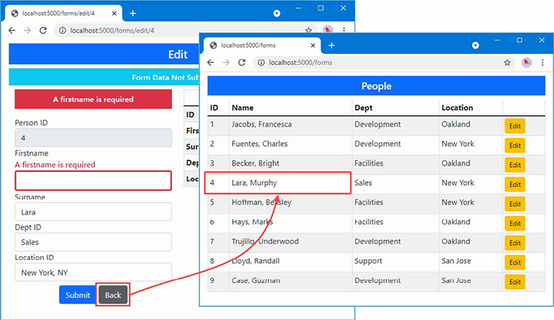
Figure 36.8 Discarding data objects
Creating new dependency injection scopes
You must create new dependency injection scopes if you want to preserve the model used by the rest of ASP.NET Core and have each component receive its own Entity Framework Core context object. This is done by using the @inherits expression to set the base class for the component to OwningComponentBase or OwningComponentBase<T>.
The OwningComponentCase class defines a ScopedServices property that is inherited by the component and that provides an IServiceProvider object that can be used to obtain services that are created in a scope that is specific to the component’s lifecycle and will not be shared with any other component, as shown in listing 36.15.
Listing 36.15 Using a new scope in the Editor.razor file in the Blazor/Forms folder
@page "/forms/edit/{id:long}"
@layout EmptyLayout
@inherits OwningComponentBase
@using Microsoft.Extensions.DependencyInjection
<!-- ...elements omitted for brevity... -->
@code {
[Inject]
public NavigationManager? NavManager { get; set; }
//[Inject]
DataContext? Context => ScopedServices.GetService<DataContext>();
[Parameter]
public long Id { get; set; }
// ...members omitted for brevity...
public void HandleInvalidSubmit() => FormSubmitMessage
= "Invalid Data Submitted";
//public void Dispose() {
// if (Context != null) {
// Context.Entry(PersonData).State = EntityState.Detached;
// }
//}
}
In the listing, I commented out the Inject attribute and set the value of the Context property by obtaining a DataContext service. The Microsoft.Extensions.DependencyInjection namespace contains extension methods that make it easier to obtain services from an IServiceProvider object, as described in chapter 14.
The OwningComponentBase<T> class defines an additional convenience property that provides access to a scoped service of type T and that can be useful if a component requires only a single scoped service, as shown in listing 36.16 (although further services can still be obtained through the ScopedServices property).
Listing 36.16 Using the typed base in the Editor.razor file in the Blazor/Forms folder
@page "/forms/edit/{id:long}"
@layout EmptyLayout
@inherits OwningComponentBase<DataContext>
<link href="/blazorValidation.css" rel="stylesheet" />
<h4 class="bg-primary text-center text-white p-2">Edit</h4>
<h6 class="bg-info text-center text-white p-2">@FormSubmitMessage</h6>
<!-- ...elements omitted for brevity... -->
@code {
[Inject]
public NavigationManager? NavManager { get; set; }
//[Inject]
DataContext? Context => Service;
[Parameter]
public long Id { get; set; }
// ...statements omitted for brevity...
}
The scoped service is available through a property named Service. In this example, I specified DataContext as the type argument for the base class.
Regardless of which base class is used, the result is that the Editor component has its own dependency injection scope and its own DataContext object. The List component has not been modified, so it will receive the request-scoped DataContext object, as shown in figure 36.9.

Figure 36.9 Using scoped services for components
Restart ASP.NET Core, navigate to http://localhost:5000/forms/edit/4, clear the Firstname field, and click the Back button. The changes made by the Editor component are not saved to the database, and since the Editor component’s data context is separate from the one used by the List component, the edited data is discarded, producing the same response as shown in figure 36.8.
Blazor responds to changes in state as efficiently as possible but still has to render a component’s content to determine the changes that should be sent to the browser.
One consequence of the way that Blazor works is that it can lead to a sharp increase in the number of queries sent to the database. To demonstrate the issue, listing 36.17 adds a button that increments a counter to the List component.
Listing 36.17 Adding a button in the List.razor file in the Blazor/Forms folder
@page "/forms"
@page "/forms/list"
@layout EmptyLayout
<h5 class="bg-primary text-white text-center p-2">People</h5>
<table class="table table-sm table-striped table-bordered">
<thead>
<tr>
<th>ID</th><th>Name</th><th>Dept</th><th>Location</th><th></th>
</tr>
</thead>
<tbody>
@if (People.Count() == 0) {
<tr>
<th colspan="5" class="p-4 text-center">
Loading Data...
</th>
</tr>
} else {
@foreach (Person p in People) {
<tr>
<td>@p.PersonId</td>
<td>@p.Surname, @p.Firstname</td>
<td>@p.Department?.Name</td>
<td>@p.Location?.City</td>
<td>
<NavLink class="btn btn-sm btn-warning"
href="@GetEditUrl(p.PersonId)">
Edit
</NavLink>
</td>
</tr>
}
}
</tbody>
</table>
<button class="btn btn-primary" @onclick="@(() => Counter++)">
Increment
</button>
<span class="h5">Counter: @Counter</span>
@code {
[Inject]
public DataContext? Context { get; set; }
public IEnumerable<Person> People { get; set; }
= Enumerable.Empty<Person>();
protected override void OnInitialized() {
People = Context?.People?.Include(p => p.Department)
.Include(p => p.Location)
?? Enumerable.Empty<Person>();
}
string GetEditUrl(long id) => $"/forms/edit/{id}";
public int Counter { get; set; } = 0;
}
Restart ASP.NET Core and request http://localhost:5000/forms. Click the Increment button and watch the output from the ASP.NET Core server. Each time you click the button, the event handler is invoked, and a new database query is sent to the database, producing logging messages like these:
...info: Microsoft.EntityFrameworkCore.Database.Command[20101]Executed DbCommand (0ms) [Parameters=[], CommandType='Text',CommandTimeout='30']SELECT [p].[PersonId], [p].[DepartmentId], [p].[Firstname],[p].[LocationId], [p].[Surname], [d].[Departmentid],[d].[Name], [l].[LocationId], [l].[City], [l].[State]FROM [People] AS [p]INNER JOIN [Departments] AS [d] ON [p].[DepartmentId]= [d].[Departmentid]INNER JOIN [Locations] AS [l] ON [p].[LocationId] = [l].[LocationId]info: Microsoft.EntityFrameworkCore.Database.Command[20101]Executed DbCommand (0ms) [Parameters=[], CommandType='Text',CommandTimeout='30']SELECT [p].[PersonId], [p].[DepartmentId], [p].[Firstname],[p].[LocationId], [p].[Surname], [d].[Departmentid], [d].[Name],[l].[LocationId], [l].[City], [l].[State]FROM [People] AS [p]INNER JOIN [Departments] AS [d] ON [p].[DepartmentId] = [d].[Departmentid]INNER JOIN [Locations] AS [l] ON [p].[LocationId] = [l].[LocationId]...
Each time the component is rendered, Entity Framework Core sends two identical requests to the database, even when the Increment button is clicked where no data operations are performed.
This issue can arise whenever Entity Framework Core is used and is exacerbated by Blazor. Although it is common practice to assign database queries to IEnumerable<T> properties, doing so masks an important aspect of Entity Framework Core, which is that its LINQ expressions are expressions of queries and not results, and each time the property is read, a new query is sent to the database. The value of the People property is read twice by the List component: once by the Count property to determine whether the data has loaded and once by the @foreach expression to generate the rows for the HTML table. When the user clicks the Increment button, Blazor renders the List component again to figure out what has changed, which causes the People property to be read twice more, producing two additional database queries.
Blazor and Entity Framework Core are both working the way they should. Blazor must rerender the component’s output to figure out what HTML changes need to be sent to the browser. It has no way of knowing what effect clicking the button has until after it has rendered the elements and evaluated all the Razor expressions. Entity Framework Core is executing its query each time the property is read, ensuring that the application always has fresh data.
This combination of features presents two issues. The first is that needless queries are sent to the database, which can increase the capacity required by an application (although not always because database servers are adept at handling queries).
The second issue is that changes to the database will be reflected in the content presented to the user after they make an unrelated interaction. If another user adds a Person object to the database, for example, it will appear in the table the next time the user clicks the Increment button. Users expect applications to reflect only their actions, and unexpected changes are confusing and distracting.
Managing queries in a component
The interaction between Blazor and Entity Framework Core won’t be a problem for all projects, but if it is, then the best approach is to query the database once and requery only for operations where the user might expect an update to occur. Some applications may need to present the user with an explicit option to reload the data, especially for applications where updates are likely to occur that the user will want to see, as shown in listing 36.18.
Listing 36.18 Controlling queries in the List.razor file in the Blazor/Forms folder
@page "/forms"
@page "/forms/list"
@layout EmptyLayout
<h5 class="bg-primary text-white text-center p-2">People</h5>
<table class="table table-sm table-striped table-bordered">
<thead>
<tr>
<th>ID</th>
<th>Name</th>
<th>Dept</th>
<th>Location</th>
<th></th>
</tr>
</thead>
<tbody>
@if (People.Count() == 0) {
<tr>
<th colspan="5" class="p-4 text-center">
Loading Data...
</th>
</tr>
} else {
@foreach (Person p in People) {
<tr>
<td>@p.PersonId</td>
<td>@p.Surname, @p.Firstname</td>
<td>@p.Department?.Name</td>
<td>@p.Location?.City</td>
<td>
<NavLink class="btn btn-sm btn-warning"
href="@GetEditUrl(p.PersonId)">
Edit
</NavLink>
</td>
</tr>
}
}
</tbody>
</table>
<button class="btn btn-danger" @onclick="UpdateData">Update</button>
<button class="btn btn-primary" @onclick="@(() => Counter++)">
Increment
</button>
<span class="h5">Counter: @Counter</span>
@code {
[Inject]
public DataContext? Context { get; set; }
public IEnumerable<Person> People { get; set; }
= Enumerable.Empty<Person>();
protected async override Task OnInitializedAsync() {
await UpdateData();
}
private async Task UpdateData() {
if (Context != null) {
People = await Context.People.Include(p => p.Department)
.Include(p => p.Location).ToListAsync<Person>();
} else {
People = Enumerable.Empty<Person>();
}
}
string GetEditUrl(long id) => $"/forms/edit/{id}";
public int Counter { get; set; } = 0;
}
The UpdateData method performs the same query but applies the ToListAsync method, which forces evaluation of the Entity Framework Core query. The results are assigned to the People property and can be read repeatedly without triggering additional queries. To give the user control over the data, I added a button that invokes the UpdateData method when it is clicked. Restart ASP.NET Core, request http://localhost:5000/forms, and click the Increment button. Monitor the output from the ASP.NET Core server, and you will see that there is a query made only when the component is initialized. To explicitly trigger a query, click the Update button.
Some operations may require a new query, which is easy to perform. To demonstrate, listing 36.19 adds a sort operation to the List component, which is implemented both with and without a new query.
Listing 36.19 Adding operations to the List.razor file in the Blazor/Forms folder
@page "/forms"
@page "/forms/list"
@layout EmptyLayout
<h5 class="bg-primary text-white text-center p-2">People</h5>
<table class="table table-sm table-striped table-bordered">
<thead>
<tr>
<th>ID</th>
<th>Name</th>
<th>Dept</th>
<th>Location</th>
<th></th>
</tr>
</thead>
<tbody>
@if (People.Count() == 0) {
<tr>
<th colspan="5" class="p-4 text-center">
Loading Data...
</th>
</tr>
} else {
@foreach (Person p in People) {
<tr>
<td>@p.PersonId</td>
<td>@p.Surname, @p.Firstname</td>
<td>@p.Department?.Name</td>
<td>@p.Location?.City</td>
<td>
<NavLink class="btn btn-sm btn-warning"
href="@GetEditUrl(p.PersonId)">
Edit
</NavLink>
</td>
</tr>
}
}
</tbody>
</table>
<button class="btn btn-danger my-2" @onclick="@(() => UpdateData())">
Update
</button>
<button class="btn btn-info my-2" @onclick="SortWithQuery">
Sort (With Query)
</button>
<button class="btn btn-info my-2" @onclick="SortWithoutQuery">
Sort (No Query)
</button>
<button class="btn btn-primary" @onclick="@(() => Counter++)">
Increment
</button>
<span class="h5">Counter: @Counter</span>
@code {
[Inject]
public DataContext? Context { get; set; }
public IEnumerable<Person> People { get; set; }
= Enumerable.Empty<Person>();
protected async override Task OnInitializedAsync() {
await UpdateData();
}
private IQueryable<Person> Query =>
Context!.People.Include(p => p.Department)
.Include(p => p.Location);
private async Task UpdateData(IQueryable<Person>? query = null) =>
People = await (query ?? Query).ToListAsync<Person>();
public async Task SortWithQuery() {
await UpdateData(Query.OrderBy(p => p.Surname));
}
public void SortWithoutQuery() {
People = People.OrderBy(p => p.Firstname).ToList<Person>();
}
string GetEditUrl(long id) => $"/forms/edit/{id}";
public int Counter { get; set; } = 0;
}
Entity Framework Core queries are expressed as IQueryable<T> objects, allowing the query to be composed with additional LINQ methods before it is dispatched to the database server. The new operations in the example both use the LINQ OrderBy method, but one applies this to the IQueryable<T>, which is then evaluated to send the query with the ToListAsync method. The other operation applies the OrderBy method to the existing result data, sorting it without sending a new query. To see both operations, restart ASP.NET Core, request http://localhost:5000/forms, and click the Sort buttons, as shown in figure 36.10. When the Sort (With Query) button is clicked, you will see a log message indicating that a query has been sent to the database.
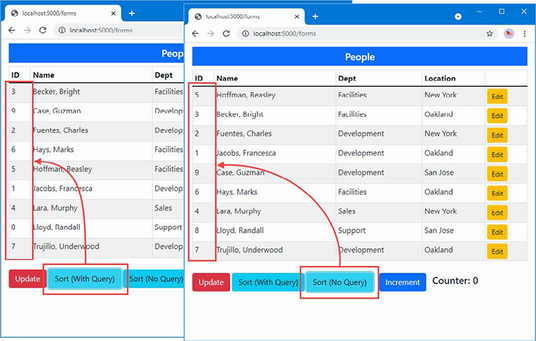
Figure 36.10 Managing component queries
To show how the features described in previous sections fit together, I am going to create a simple application that allows the user to perform create, read, update, and delete (CRUD) operations on Person objects.
The List component contains the basic functionality I require. Listing 36.20 removes some of the features from earlier sections that are no longer required and adds buttons that allow the user to navigate to other functions.
Listing 36.20 Preparing the component in the List.razor file in the Blazor/Forms folder
@page "/forms"
@page "/forms/list"
@layout EmptyLayout
@inherits OwningComponentBase<DataContext>
<h5 class="bg-primary text-white text-center p-2">People</h5>
<table class="table table-sm table-striped table-bordered">
<thead>
<tr>
<th>ID</th><th>Name</th><th>Dept</th><th>Location</th><th></th>
</tr>
</thead>
<tbody>
@if (People.Count() == 0) {
<tr>
<th colspan="5" class="p-4 text-center">
Loading Data...
</th>
</tr>
} else {
@foreach (Person p in People) {
<tr>
<td>@p.PersonId</td>
<td>@p.Surname, @p.Firstname</td>
<td>@p.Department?.Name</td>
<td>@p.Location?.City</td>
<td class="text-center">
<NavLink class="btn btn-sm btn-info"
href="@GetDetailsUrl(p.PersonId)">
Details
</NavLink>
<NavLink class="btn btn-sm btn-warning"
href="@GetEditUrl(p.PersonId)">
Edit
</NavLink>
<button class="btn btn-sm btn-danger"
@onclick="@(() => HandleDelete(p))">
Delete
</button>
</td>
</tr>
}
}
</tbody>
</table>
<NavLink class="btn btn-primary" href="/forms/create">Create</NavLink>
@code {
//[Inject]
public DataContext? Context => Service;
public IEnumerable<Person> People { get; set; }
= Enumerable.Empty<Person>();
protected async override Task OnInitializedAsync() {
await UpdateData();
}
private IQueryable<Person> Query =>
Context!.People.Include(p => p.Department)
.Include(p => p.Location);
private async Task UpdateData(IQueryable<Person>? query = null) =>
People = await (query ?? Query).ToListAsync<Person>();
public async Task SortWithQuery() {
await UpdateData(Query.OrderBy(p => p.Surname));
}
public void SortWithoutQuery() {
People = People.OrderBy(p => p.Firstname).ToList<Person>();
}
string GetEditUrl(long id) => $"/forms/edit/{id}";
string GetDetailsUrl(long id) => $"/forms/details/{id}";
public async Task HandleDelete(Person p) {
if (Context != null) {
Context.Remove(p);
await Context.SaveChangesAsync();
await UpdateData();
}
}
}
The operations for creating, viewing, and editing objects navigate to other URLs, but the delete operations are performed by the List component, taking care to reload the data after the changes have been saved to reflect the change to the user.
The details component displays a read-only view of the data, which doesn’t require the Blazor form features or present any issues with Entity Framework Core. Add a Blazor Component named Details.razor to the Blazor/Forms folder with the content shown in listing 36.21.
Listing 36.21 The contents of the Details.razor file in the Blazor/Forms folder
@page "/forms/details/{id:long}"
@layout EmptyLayout
@inherits OwningComponentBase<DataContext>
<h4 class="bg-info text-center text-white p-2">Details</h4>
<div class="form-group">
<label>ID</label>
<input class="form-control" value="@PersonData.PersonId" disabled />
</div>
<div class="form-group">
<label>Firstname</label>
<input class="form-control" value="@PersonData.Firstname" disabled />
</div>
<div class="form-group">
<label>Surname</label>
<input class="form-control" value="@PersonData.Surname" disabled />
</div>
<div class="form-group">
<label>Department</label>
<input class="form-control" value="@PersonData.Department?.Name"
disabled />
</div>
<div class="form-group">
<label>Location</label>
<input class="form-control"
value="@($"{PersonData.Location?.City}, "
+ PersonData.Location?.State)"
disabled />
</div>
<div class="text-center p-2">
<NavLink class="btn btn-info" href="@EditUrl">Edit</NavLink>
<NavLink class="btn btn-secondary" href="/forms">Back</NavLink>
</div>
@code {
[Inject]
public NavigationManager? NavManager { get; set; }
DataContext Context => Service;
[Parameter]
public long Id { get; set; }
public Person PersonData { get; set; } = new();
protected async override Task OnParametersSetAsync() {
if (Context != null) {
PersonData = await Context.People
.Include(p => p.Department)
.Include(p => p.Location)
.FirstOrDefaultAsync(p => p.PersonId == Id)
?? new();
}
}
public string EditUrl => $"/forms/edit/{Id}";
}
All the input elements displayed by this component are disabled, which means there is no need to handle events or process user input.
The remaining features will be handled by the Editor component. Listing 36.22 removes the features from earlier examples that are no longer required and adds support for creating and editing objects, including persisting the data.
Listing 36.22 Adding features in the Editor.razor file in the Blazor/Forms folder
@page "/forms/edit/{id:long}"
@page "/forms/create"
@layout EmptyLayout
@inherits OwningComponentBase<DataContext>
<link href="/blazorValidation.css" rel="stylesheet" />
<h4 class="bg-@Theme text-center text-white p-2">@Mode</h4>
<EditForm Model="PersonData" OnValidSubmit="HandleValidSubmit" >
<DataAnnotationsValidator />
@if (Mode == "Edit") {
<div class="form-group">
<label>ID</label>
<InputNumber class="form-control"
@bind-Value="PersonData.PersonId" readonly />
</div>
}
<div class="form-group">
<label>Firstname</label>
<ValidationMessage For="@(() => PersonData.Firstname)" />
<InputText class="form-control"
@bind-Value="PersonData.Firstname" />
</div>
<div class="form-group">
<label>Surname</label>
<ValidationMessage For="@(() => PersonData.Surname)" />
<InputText class="form-control"
@bind-Value="PersonData.Surname" />
</div>
<div class="form-group">
<label>Deptartment</label>
<ValidationMessage For="@(() => PersonData.DepartmentId)" />
<CustomSelect TValue="long" Values="Departments"
Parser="@((string str) => long.Parse(str))"
@bind-Value="PersonData.DepartmentId">
<option selected disabled value="0">
Choose a Department
</option>
</CustomSelect>
</div>
<div class="form-group">
<label>Location</label>
<ValidationMessage For="@(() => PersonData.LocationId)" />
<CustomSelect TValue="long" Values="Locations"
Parser="@((string str) => long.Parse(str))"
@bind-Value="PersonData.LocationId">
<option selected disabled value="0">Choose a Location</option>
</CustomSelect>
</div>
<div class="text-center">
<button type="submit" class="btn btn-@Theme mt-2">Save</button>
<NavLink class="btn btn-secondary mt-2" href="/forms">
Back
</NavLink>
</div>
</EditForm>
@code {
[Inject]
public NavigationManager? NavManager { get; set; }
//[Inject]
DataContext? Context => Service;
[Parameter]
public long Id { get; set; }
public Person PersonData { get; set; } = new();
public IDictionary<string, long> Departments { get; set; }
= new Dictionary<string, long>();
public IDictionary<string, long> Locations { get; set; }
= new Dictionary<string, long>();
protected async override Task OnParametersSetAsync() {
if (Context != null) {
if (Mode == "Edit") {
PersonData = await Context.People.FindAsync(Id)
?? new Person();
}
Departments = await Context.Departments
.ToDictionaryAsync(d => d.Name, d => d.Departmentid);
Locations = await Context.Locations
.ToDictionaryAsync(l => $"{l.City}, {l.State}",
l => l.LocationId);
}
}
public string Theme => Id == 0 ? "primary" : "warning";
public string Mode => Id == 0 ? "Create" : "Edit";
public async Task HandleValidSubmit() {
if (Context != null) {
if (Mode == "Create") {
Context.Add(PersonData);
}
await Context.SaveChangesAsync();
NavManager?.NavigateTo("/forms");
}
}
}
I added support for a new URL and used Bootstrap CSS themes to differentiate between creating a new object and editing an existing one. I removed the validation summary so that only property-level validation messages are displayed and added support for storing the data through Entity Framework Core. Unlike form applications created using controllers or Razor Pages, I don’t have to deal with model binding because Blazor lets me work directly with the object that Entity Framework Core produces from the initial database query. Restart ASP.NET Core and request http://localhost:5000/forms. You will see the list of Person objects shown in figure 36.11, and clicking the Create, Details, Edit, and Delete buttons will allow you to work with the data in the database.
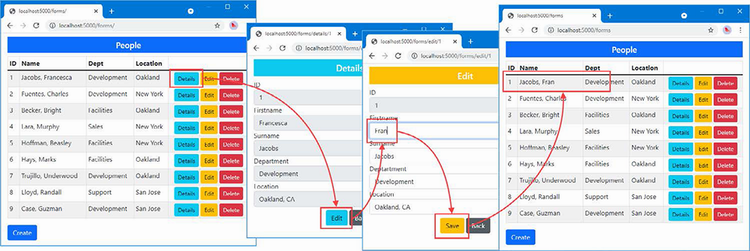
Figure 36.11 Using Blazor to work with data
The Blazor form features are effective but have the rough edges that are always found in new technology. I expect future releases to round out the feature set, but, in the meantime, Blazor makes it easy to enhance the way that forms work. The EditForm component defines a cascading EditContext object that provides access to form validation and makes it easy to create custom form components through the events, properties, and methods described in table 36.8.
Table 36.8 The EditContext features
|
Name |
Description |
|---|---|
|
|
This event is triggered when any of the form fields are modified. |
|
|
This event is triggered when validation is required and can be used to create custom validation processes. |
|
|
This event is triggered when the validation state of the overall form changes. |
|
|
This property returns the value passed to the |
|
|
This method is used to get a |
|
|
This method returns |
|
|
This method returns |
|
|
This method returns a sequence containing the validation error messages for the entire form. |
|
|
This method returns a sequence containing the validation error messages for a single field, using a |
|
|
This method marks the form as unmodified. |
|
|
This method marks a specific field as unmodified, using a |
|
|
This method is used to indicate a change in validation status. |
|
|
This method is used to indicate when a field has changed, using a |
|
|
This method performs validation on the form, returning |
You can create components that apply custom validation constraints if the built-in validation attributes are not sufficient. This type of component doesn’t render its own content, and it is more easily defined as a class. Add a class file named DeptStateValidator.cs to the Blazor/Forms folder and use it to define the component class shown in listing 36.23.
Listing 36.23 The contents of the DeptStateValidator.cs file in the Blazor/Forms folder
using Advanced.Models;
using Microsoft.AspNetCore.Components;
using Microsoft.AspNetCore.Components.Forms;
namespace Advanced.Blazor.Forms {
public class DeptStateValidator : OwningComponentBase<DataContext> {
public DataContext Context => Service;
[Parameter]
public long DepartmentId { get; set; }
[Parameter]
public string? State { get; set; }
[CascadingParameter]
public EditContext? CurrentEditContext { get; set; }
private string? DeptName { get; set; }
private IDictionary<long, string>? LocationStates { get; set; }
protected override void OnInitialized() {
if (CurrentEditContext != null) {
ValidationMessageStore store =
new ValidationMessageStore(CurrentEditContext);
CurrentEditContext.OnFieldChanged += (sender, args) => {
string name = args.FieldIdentifier.FieldName;
if (name == "DepartmentId" || name == "LocationId") {
Validate(CurrentEditContext.Model as Person,
store);
}
};
}
}
protected override void OnParametersSet() {
DeptName = Context.Departments.Find(DepartmentId)?.Name;
LocationStates = Context.Locations
.ToDictionary(l => l.LocationId, l => l.State);
}
private void Validate(Person? model,
ValidationMessageStore store) {
if (model?.DepartmentId == DepartmentId
&& LocationStates != null
&& CurrentEditContext != null
&& (!LocationStates.ContainsKey(model.LocationId)
|| LocationStates[model.LocationId] != State)) {
store.Add(CurrentEditContext.Field("LocationId"),
$"{DeptName} staff must be in: {State}");
} else {
store.Clear();
}
CurrentEditContext?.NotifyValidationStateChanged();
}
}
}
This component enforces a restriction on the state in which departments can be defined so that, for example, locations in California are the valid options only when the Development department has been chosen, and any other locations will produce a validation error.
The component has its own scoped DataContext object, which it receives by using OwningComponentBase<T> as its base class. The parent component provides values for the DepartmentId and State properties, which are used to enforce the validation rule. The cascading EditContext property is received from the EditForm component and provides access to the features described in table 36.8.
When the component is initialized, a new ValidationMessageStore is created. This object is used to register validation error messages and accepts the EditContext object as its constructor argument, like this:
...
ValidationMessageStore store =
new ValidationMessageStore(CurrentEditContext);
...
Blazor takes care of processing the messages added to the store, and the custom validation component only needs to decide which messages are required, which is handled by the Validate method. This method checks the DepartmentId and LocationId properties to make sure that the combination is allowed. If there is an issue, then a new validation message is added to the store, like this:
...
store.Add(CurrentEditContext.Field("LocationId"),
$"{DeptName} staff must be in: {State}");
...
The arguments to the Add method are a FieldIdentifier that identifies the field the error relates to and the validation message. If there are no validation errors, then the message store’s Clear method is called, which will ensure that any stale messages that have been previously generated by the component are no longer displayed.
The Validation method is called by the handler for the OnFieldChanged event, which allows the component to respond whenever the user makes a change.
...
CurrentEditContext.OnFieldChanged += (sender, args) => {
string name = args.FieldIdentifier.FieldName;
if (name == "DepartmentId" || name == "LocationId") {
Validate(CurrentEditContext.Model as Person, store);
}
};
...
The handler receives a FieldChangeEventArgs object, which defines a FieldIdentifer property that indicates which field has been modified. Listing 36.24 applies the new validation to the Editor component.
Listing 36.24 Applying validation in the Editor.razor file in the Blazor/Forms folder
@page "/forms/edit/{id:long}"
@page "/forms/create"
@layout EmptyLayout
@inherits OwningComponentBase<DataContext>
<link href="/blazorValidation.css" rel="stylesheet" />
<h4 class="bg-@Theme text-center text-white p-2">@Mode</h4>
<EditForm Model="PersonData" OnValidSubmit="HandleValidSubmit" >
<DataAnnotationsValidator />
<DeptStateValidator DepartmentId="2" State="CA" />
@if (Mode == "Edit") {
<div class="form-group">
<label>ID</label>
<InputNumber class="form-control"
@bind-Value="PersonData.PersonId" readonly />
</div>
}
<!-- ...elements omitted for brevity... -->
</EditForm>
@code {
// ...statements omitted for brevity...
}
The DepartmentId and State attributes specify the restriction that only locations in California can be selected for the Development department. Restart ASP.NET Core and request http://localhost:5000/forms/edit/4. Choose Development for the Department field, and you will see a validation error because the location for this Person is New York. This error will remain visible until you select a location in California or change the department, as shown in figure 36.12.
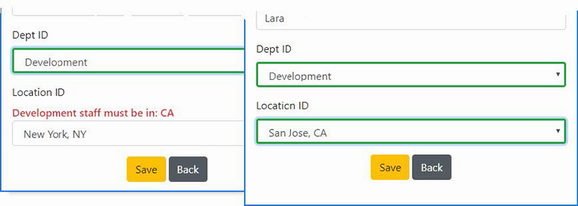
Figure 36.12 Creating a custom validation component
To finish this chapter, I am going to create a component that will render a submit button for the form that is enabled only when the data is valid. Add a Razor Component named ValidButton.razor to the Blazor/Forms folder with the contents shown in listing 36.25.
Listing 36.25 The contents of the ValidButton.razor file in the Blazor/Forms folder
<button class="@ButtonClass" @attributes="Attributes"
disabled="@Disabled">
@ChildContent
</button>
@code {
[Parameter]
public RenderFragment? ChildContent { get; set; }
[Parameter]
public string BtnTheme { get; set; } = "primary";
[Parameter]
public string DisabledClass { get; set; }
= "btn-outline-dark disabled";
[Parameter(CaptureUnmatchedValues = true)]
public IDictionary<string, object>? Attributes { get; set; }
[CascadingParameter]
public EditContext? CurrentEditContext { get; set; }
public bool Disabled { get; set; }
public string ButtonClass =>
Disabled ? $"btn btn-{BtnTheme} {DisabledClass} mt-2"
: $"btn btn-{BtnTheme} mt-2";
protected override void OnInitialized() {
SetButtonState();
if (CurrentEditContext != null) {
CurrentEditContext.OnValidationStateChanged +=
(sender, args) => SetButtonState();
CurrentEditContext.Validate();
}
}
public void SetButtonState() {
if (CurrentEditContext != null) {
Disabled = CurrentEditContext.GetValidationMessages().Any();
}
}
}
This component responds to the OnValidationStateChanged method, which is triggered when the validation state of the form changes. There is no EditContext property that details the validation state, so the best way to see if there are any validation issues is to see whether there are any validation messages. If there are, there are validation issues. If there are no validation messages, the form is valid. To ensure the button state is displayed correctly, the Validation method is called so that a validation check is performed as soon as the component is initialized.
Listing 36.26 uses the new component to replace the conventional button in the Editor component.
Listing 36.26 Applying a component in the Editor.razor file in the Blazor/Forms folder
...
<div class="text-center">
<ValidButton type="submit" BtnTheme="@Theme">Save</ValidButton>
<NavLink class="btn btn-secondary mt-2" href="/forms">Back</NavLink>
</div>
...
Restart ASP.NET Core and request http://localhost:5000/forms/create; you will see the validation messages displayed for each form element, with the Save button disabled. The button will be enabled once each validation issue has been resolved, as shown in figure 36.13.
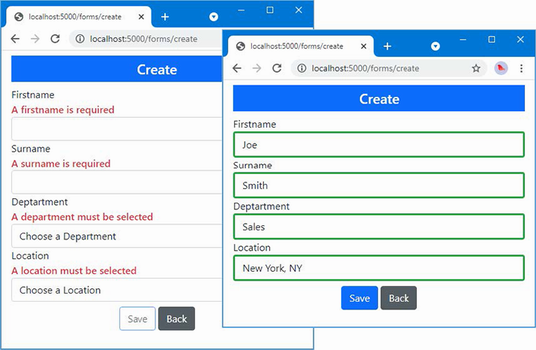
Figure 36.13 Creating a custom form button
Blazor provides built-in components for common HTML form elements, including form, input, and textarea elements.
Form events are presented through the EditForm component.
Entity Framework Core context scopes must be carefully managed to avoid stale data. Scopes can be managed through the IDisposable interface, or through automatic dependency injection.
Take care with data read from Entity Framework Core to avoid repeated queries.
This chapter covers
In this chapter, I demonstrate the use of Blazor WebAssembly, which is an implementation of Blazor written for WebAssembly.
WebAssembly is a virtual machine running inside the browser. High-level languages are compiled into low-level language-neutral assembler format that can be executed at close to native performance. WebAssembly provides access to the APIs available to JavaScript applications, which means that WebAssembly applications can access the domain object model, use cascading style sheets, and initiate asynchronous HTTP requests.
Blazor WebAssembly breaks the dependency on the server and executes the Blazor application entirely in the browser. The result is a true client-side application, with access to all the same features of Blazor Server but without the need for a persistent HTTP connection.
It is early days for both WebAssembly and Blazor WebAssembly, and there are some serious restrictions. WebAssembly is a new technology and is supported only by the latest browser versions. You will not be able to use WebAssembly if your project needs to support legacy browsers—or even older versions of modern browsers. Blazor WebAssembly applications are restricted to the set of APIs the browser provides, which means that not all .NET features can be used in a WebAssembly application. This doesn’t disadvantage Blazor when compared to client-side frameworks like Angular, but it does mean that features such as Entity Framework Core are not available because browsers restrict WebAssembly applications to making HTTP requests.
Still, despite the limitations of Blazor WebAssembly, it is an exciting technology, and it offers the promise of being able to write true client-side applications using C# and ASP.NET Core, without the need for a JavaScript framework. Table 37.1 puts Blazor WebAssembly in context.
Table 37.1 Putting Blazor WebAssembly in context
|
Question |
Answer |
|---|---|
|
What is it? |
Blazor WebAssembly is an implementation of Blazor that runs in the browser using WebAssembly. |
|
Why is it useful? |
Blazor WebAssembly allows client-side applications to be written in C# without server-side execution or the persistent HTTP connection required by Blazor Server. |
|
How is it used? |
Blazor components are added to a project that is dedicated to Blazor WebAssembly. |
|
Are there any pitfalls or limitations? |
Not all browsers support WebAssembly. A larger download is required to provide the browser with the code it requires, and not all ASP.NET Core features are available in Blazor WebAssembly components. |
|
Are there any alternatives? |
Blazor WebAssembly is the only combination of true client-side applications written using ASP.NET Core. Blazor Server can be used if server-side support is acceptable; otherwise, a JavaScript framework, such as Angular, React, or Vue.js, should be used. |
This chapter uses the Advanced project from chapter 36. To prepare for this chapter, add a class file named DataController.cs to the Controllers folder and use it to define the web service controller shown in listing 37.1.
Listing 37.1 The contents of the DataController.cs file in the Controllers folder
using Advanced.Models;
using Microsoft.AspNetCore.Mvc;
using Microsoft.EntityFrameworkCore;
namespace Advanced.Controllers {
[ApiController]
[Route("/api/people")]
public class DataController : ControllerBase {
private DataContext context;
public DataController(DataContext ctx) {
context = ctx;
}
[HttpGet]
public IEnumerable<Person> GetAll() {
IEnumerable<Person> people
= context.People
.Include(p => p.Department)
.Include(p => p.Location);
foreach (Person p in people) {
if (p.Department?.People != null) {
p.Department.People = null;
}
if (p.Location?.People != null) {
p.Location.People = null;
}
}
return people;
}
[HttpGet("{id}")]
public async Task<Person> GetDetails(long id) {
Person p = await context.People
.Include(p => p.Department)
.Include(p => p.Location)
.FirstAsync(p => p.PersonId == id);
if (p.Department?.People != null) {
p.Department.People = null;
}
if (p.Location?.People != null) {
p.Location.People = null;
}
return p;
}
[HttpPost]
public async Task Save([FromBody] Person p) {
await context.People.AddAsync(p);
await context.SaveChangesAsync();
}
[HttpPut]
public async Task Update([FromBody] Person p) {
context.Update(p);
await context.SaveChangesAsync();
}
[HttpDelete("{id}")]
public async Task Delete(long id) {
context.People.Remove(new Person() { PersonId = id });
await context.SaveChangesAsync();
}
[HttpGet("/api/locations")]
public IAsyncEnumerable<Location> GetLocations() =>
context.Locations.AsAsyncEnumerable();
[HttpGet("/api/departments")]
public IAsyncEnumerable<Department> GetDepts() =>
context.Departments.AsAsyncEnumerable();
}
}
This controller provides actions that allow Person objects to be created, read, updated, and deleted. I have also added actions that return the Location and Department objects. I usually create separate controllers for each type of data, but these actions are required only in support of the Person features, so I have combined all the operations into a single controller.
Open a new PowerShell command prompt, navigate to the folder that contains the Advanced.csproj file, and run the command shown in listing 37.2 to drop the database.
Listing 37.2 Dropping the database
dotnet ef database drop --force
Use the PowerShell command prompt to run the command shown in listing 37.3.
Listing 37.3 Running the example application
dotnet run
Use a browser to request http://localhost:5000/api/people, which will produce a JSON representation of the Person objects from the database, as shown in figure 37.1.
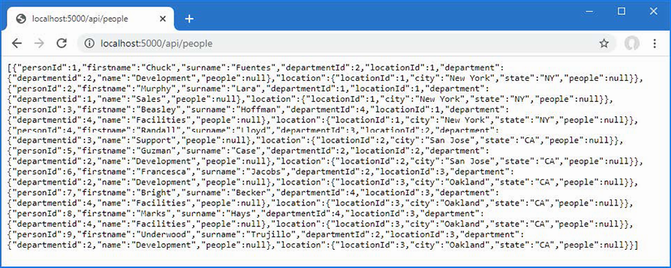
Figure 37.1 Running the example application
Blazor WebAssembly requires a separate project so that Razor Components can be compiled ready to be executed by the browser. The compiled components can be delivered to the browser by a standard ASP.NET Core server, which can also provide data through web services. To make it easy for the Blazor WebAssembly components to consume the data provided by the ASP.NET Core server, a third project is required that contains those items that are shared between them.
The process for creating the three projects is involved, partly because I am going to move some of the existing classes from the Advanced project into the data model project. Although it is possible to perform some of the steps using the Visual Studio wizards, I have set out the steps using the command-line tools to minimize errors.
Make sure Visual Studio or Visual Studio Code is closed before you start. Open a new PowerShell command prompt and navigate to the Advanced project folder, which is the one that contains the Advanced.csproj file, and run the commands shown in listing 37.4.
Listing 37.4 Preparing the project for Blazor
dotnet new classlib -o ../DataModel -f net7.0
Move-Item -Path @("Models/Person.cs", "Models/Location.cs",
"Models/Department.cs") ../DataModel
These commands create a new project named DataModel and move the data model classes to the new project.
I usually prefer to start with an empty project and add the packages and configuration files that the application requires. Use the PowerShell command prompt to run the commands shown in listing 37.5 from within the Advanced project folder (the folder that contains the Advanced.csproj file).
Listing 37.5 Creating the Blazor WebAssembly project
dotnet new blazorwasm -o ../BlazorWebAssembly -f net7.0 dotnet add ../BlazorWebAssembly reference ../DataModel
These commands create a Blazor WebAssembly project named BlazorWebAssembly and add a reference to the DataModel project, which makes the Person, Department, and Location classes available.
Use the PowerShell command prompt to run the commands shown in listing 37.6 in the Advanced project folder.
Listing 37.6 Preparing the advanced project
dotnet add reference ../DataModel ../BlazorWebAssembly dotnet add package Microsoft.AspNetCore.Components.WebAssembly.Server
--version 7.0.0
These commands create references to the other projects so that the data model classes and the components in the Blazor WebAssembly project can be used.
Run the command shown in listing 37.7 in the Advanced folder to add references to the new project to the solution file.
Listing 37.7 Adding solution references
dotnet sln add ../DataModel ../BlazorWebAssembly
Once you have set up all three projects, start Visual Studio or Visual Studio Code. If you are using Visual Studio, open the Advanced.sln file in the Advanced folder. All three projects are open for editing, as shown in figure 37.2. If you are using Visual Studio Code, open the folder that contains all three projects, as shown in figure 37.2.
Figure 37.2 Opening the three projects
The next step is to configure the ASP.NET Core project so that it can deliver the contents of the Blazor WebAssembly project to clients. Add the statements shown in listing 37.8 to the Program.cs file in the Advanced folder.
Listing 37.8 Configuring the application in the Program.cs file in the Advanced project
using Microsoft.EntityFrameworkCore;
using Advanced.Models;
var builder = WebApplication.CreateBuilder(args);
builder.Services.AddControllersWithViews();
builder.Services.AddRazorPages();
builder.Services.AddServerSideBlazor();
builder.Services.AddDbContext<DataContext>(opts => {
opts.UseSqlServer(
builder.Configuration["ConnectionStrings:PeopleConnection"]);
opts.EnableSensitiveDataLogging(true);
});
builder.Services.AddSingleton<Advanced.Services.ToggleService>();
var app = builder.Build();
app.UseStaticFiles();
app.MapControllers();
app.MapControllerRoute("controllers",
"controllers/{controller=Home}/{action=Index}/{id?}");
app.MapRazorPages();
app.MapBlazorHub();
app.MapFallbackToPage("/_Host");
app.UseBlazorFrameworkFiles("/webassembly");
app.MapFallbackToFile("/webassembly/{*path:nonfile}",
"/webassembly/index.xhtml");
var context = app.Services.CreateScope().ServiceProvider
.GetRequiredService<DataContext>();
SeedData.SeedDatabase(context);
app.Run();
These statements configure the ASP.NET Core request pipeline so that requests for /webassembly are handled by Blazor WebAssembly using the contents of the BlazorWebAssembly project.
Setting the base URL
The next step is to modify the HTML file that will be used to respond to requests for the /webassembly URL. Apply the change shown in listing 37.9 to the index.xhtml file in the wwwroot folder of the BlazorWebAssembly folder.
Listing 37.9 Setting the URL in the index.xhtml file in the wwwroot folder of the BlazorWebAssembly project
<!DOCTYPE html>
<html lang="en">
<head>
<meta charset="utf-8" />
<meta name="viewport" content="width=device-width, initial-scale=1.0,
maximum-scale=1.0, user-scalable=no" />
<title>BlazorWebAssembly</title>
<base href="/webassembly/" />
<link href="css/bootstrap/bootstrap.min.css" rel="stylesheet" />
<link href="css/app.css" rel="stylesheet" />
<link rel="icon" type="image/png" href="favicon.png" />
<link href="BlazorWebAssembly.styles.css" rel="stylesheet" />
</head>
<body>
<div id="app">
<svg class="loading-progress">
<circle r="40%" cx="50%" cy="50%" />
<circle r="40%" cx="50%" cy="50%" />
</svg>
<div class="loading-progress-text"></div>
</div>
<div id="blazor-error-ui">
An unhandled error has occurred.
<a href="" class="reload">Reload</a>
<a class="dismiss"> </a>
</div>
<script src="_framework/blazor.webassembly.js"></script>
</body>
The base element sets the URL from which all relative URLs in the document are defined and is required for the correct operation of the Blazor WebAssembly routing system.
Setting the static web asset base path
If you are using Visual Studio, right-click the BlazorWebAssembly project in the Solution Explorer, select Edit Project File from the pop-up menu, and add the configuration element shown in listing 37.10. If you are using Visual Studio Code, open the BlazorWebAssembly.csproj file in the BlazorWebAssembly folder and add the configuration element shown in listing 37.10.
Listing 37.10 Adding an element in the BlazorWebAssembly.csproj file in the BlazorWebAssembly folder
...
<PropertyGroup>
<TargetFramework>net6.0</TargetFramework>
<Nullable>enable</Nullable>
<ImplicitUsings>enable</ImplicitUsings>
<StaticWebAssetBasePath>/webassembly/</StaticWebAssetBasePath>
</PropertyGroup>
...
The element tag name is StaticWebAssetBasePath, and the content is /webassembly/, which starts and ends with a / character.
Start ASP.NET Core by selecting Start Without Debugging or Run Without Debugging from the Debug menu. If you prefer to use the command prompt, run the command shown in listing 37.11 in the Advanced project folder.
Listing 37.11 Running the example application
dotnet run
Use a browser to request http://localhost:5000/webassembly, and you will see the placeholder content added by the template used to create the BlazorWebAssembly project.
Using the PowerShell command prompt, run the following commands from within the Advanced project folder. Click the Counter and Fetch Data links, and you will see different content displayed, as shown in figure 37.3.
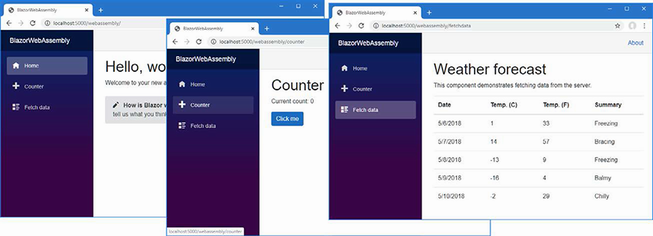
Figure 37.3 The Blazor WebAssembly placeholder content
Blazor WebAssembly uses the same approach as Blazor Server, relying on components as building blocks for applications, connected through the routing system, and displaying common content through layouts. In this section, I show how to create a Razor Component that works with Blazor WebAssembly, and then I’ll re-create the simple forms application from chapter 36.
The components I will create in this chapter all use the classes in the shared DataModel project. Rather than add @using expressions to each component, add the namespace for the data model classes to the _Imports.razor file in the root folder of the BlazorWebAssembly project, as shown in listing 37.12.
Listing 37.12 Adding a namespace in the _Imports.razor file in the BlazorWebAssembly project
@using System.Net.Http @using System.Net.Http.Json @using Microsoft.AspNetCore.Components.Forms @using Microsoft.AspNetCore.Components.Routing @using Microsoft.AspNetCore.Components.Web @using Microsoft.AspNetCore.Components.Web.Virtualization @using Microsoft.AspNetCore.Components.WebAssembly.Http @using Microsoft.JSInterop @using BlazorWebAssembly @using BlazorWebAssembly.Shared @using Advanced.Models
Notice that although I moved the model classes to the DataModel project, I have specified the Advanced.Models namespace. This is because the class files I moved all have namespace declarations that specify Advanced.Models, which means that moving the files hasn’t changed the namespace in which the classes exist.
In earlier chapters, I defined my Razor Components in a Blazor folder to keep the new content separate from the other parts of ASP.NET Core. There is only Blazor content in the BlazorWebAssembly project, so I am going to follow the convention adopted by the project template and use the Pages and Shared folders.
Add a Razor Component named List.razor to the Pages folder of the BlazorWebAssembly project and add the content shown in listing 37.13.
Listing 37.13 The contents of the List.razor File in the Pages folder of the BlazorWebAssembly project
@page "/forms"
@page "/forms/list"
<h5 class="bg-primary text-white text-center p-2">
People (WebAssembly)
</h5>
<table class="table table-sm table-striped table-bordered">
<thead>
<tr>
<th>ID</th>
<th>Name</th>
<th>Dept</th>
<th>Location</th>
<th></th>
</tr>
</thead>
<tbody>
@if (People.Count() == 0) {
<tr>
<th colspan="5" class="p-4 text-center">
Loading Data...
</th>
</tr>
} else {
@foreach (Person p in People) {
<tr>
<td>@p.PersonId</td>
<td>@p.Surname, @p.Firstname</td>
<td>@p.Department?.Name</td>
<td>@p.Location?.City</td>
<td class="text-center">
<NavLink class="btn btn-sm btn-info"
href="@GetDetailsUrl(p.PersonId)">
Details
</NavLink>
<NavLink class="btn btn-sm btn-warning"
href="@GetEditUrl(p.PersonId)">
Edit
</NavLink>
<button class="btn btn-sm btn-danger"
@onclick="@(() => HandleDelete(p))">
Delete
</button>
</td>
</tr>
}
}
</tbody>
</table>
<NavLink class="btn btn-primary" href="forms/create">Create</NavLink>
@code {
[Inject]
public HttpClient? Http { get; set; }
public Person[] People { get; set; } = Array.Empty<Person>();
protected async override Task OnInitializedAsync() {
await UpdateData();
}
private async Task UpdateData() {
if (Http != null) {
People = await Http.GetFromJsonAsync<Person[]>("/api/people")
?? Array.Empty<Person>();
}
}
string GetEditUrl(long id) => $"forms/edit/{id}";
string GetDetailsUrl(long id) => $"forms/details/{id}";
public async Task HandleDelete(Person p) {
if (Http != null) {
HttpResponseMessage resp =
await Http.DeleteAsync($"/api/people/{p.PersonId}");
if (resp.IsSuccessStatusCode) {
await UpdateData();
}
}
}
}
If you compare this component with the Blazor Server equivalent from chapter 36, you will see that they are largely the same. Both types of Blazor use the same set of core features, which is why the content uses the same Razor directives, handles events with the @onclick attributes, and uses the same @code section for C# statements. A Blazor WebAssembly component is compiled into a C# class, just like its Blazor Server counterpart. The key difference is, of course, that the C# class that is generated is executed in the browser—and that’s the reason for the differences from the component in chapter 36.
Navigating in a Blazor WebAssembly component
Notice that the URLs that are used for navigation are expressed without a leading forward-slash character, like this:
... <NavLink class="btn btn-primary" href="forms/create">Create</NavLink> ...
The root URL for the application was specified using the base element in listing 37.13, and using relative URLs ensures that navigation is performed relative to the root. In this case, the relative forms/create URL is combined with the /webassembly/ root specified by the base element, and navigation will be to /webassembly/forms/create. Including a leading forward slash would navigate to /forms/create instead, which is outside the set of URLs that are being managed by the Blazor WebAssembly part of the application. This change is required only for navigation URLs. URLs specified with the @page directive, for example, are not affected.
Getting Data in a Blazor WebAssembly component
The biggest change is that Blazor WebAssembly can’t use Entity Framework Core. Although the runtime may be able to execute the Entity Framework Core classes, the browser restricts WebAssembly applications to HTTP requests, preventing the use of SQL. To get data, Blazor WebAssembly applications consume web services, which is why I added the API controller to the Advanced project at the start of the chapter.
As part of the Blazor WebAssembly application startup, a service is created for the HttpClient class, which components can receive using the standard dependency injection features. The List component receives an HttpClient component through a property that has been decorated with the Inject attribute, like this:
...
[Inject]
public HttpClient? Http { get; set; }
...
The HttpClient class provides the methods described in table 37.2 to send HTTP requests.
Table 37.2 The methods defined by the HttpClient class
|
Name |
Description |
|---|---|
|
|
This method sends an HTTP GET request. |
|
|
This method sends an HTTP POST request. |
|
|
This method sends an HTTP PUT request. |
|
|
This method sends an HTTP PATCH request. |
|
|
This method sends an HTTP DELETE request. |
|
|
This method sends an HTTP, configured using an |
The methods in table 37.2 return a Task<HttpResponseMessage> result, which describes the response received from the HTTP server to the asynchronous request. Table 37.3 shows the most useful HttpResponseMessage properties.
Table 37.3 Useful HttpClient properties
|
Name |
Description |
|---|---|
|
|
This property returns the content returned by the server. |
|
|
This property returns the response headers. |
|
|
This property returns the response status code. |
|
|
This property returns |
The List component uses the DeleteAsync methods to ask the web service to delete objects when the user clicks a Delete button.
...
public async Task HandleDelete(Person p) {
if (Http != null) {
HttpResponseMessage resp =
await Http.DeleteAsync($"/api/people/{p.PersonId}");
if (resp.IsSuccessStatusCode) {
await UpdateData();
}
}
...
These methods are useful when you don’t need to work with the data the web service sends back, such as in this situation where I check to see only if the DELETE request has been successful. Notice that I specify the path for the request URL only when using the HttpClient service because the web service is available using the same scheme, host, and port as the application.
For operations where the web service returns data, the extension methods for the HttpClient class described in table 37.4 are more useful. These methods serialize data into JSON so it can be sent to the server and parse JSON responses into C# objects. For requests that return no result, the generic type argument can be omitted.
Table 37.4 The HttpClient extension methods
|
Name |
Description |
|---|---|
|
|
This method sends an HTTP GET request and parses the response to type |
|
|
This method sends an HTTP POST request with the serialized data value of |
|
|
This method sends an HTTP PUT request with the serialized data value of |
The List component uses the GetJsonAsync<T> method to request data from the web service.
...
private async Task UpdateData() {
if (Http != null) {
People = await Http.GetFromJsonAsync<Person[]>("/api/people")
?? Array.Empty<Person>();
}
}
...
Setting the generic type argument to Person[] tells HttpClient to parse the response into an array of Person objects.
The template used to create the Blazor WebAssembly project includes a layout that presents the navigation features for the placeholder content. I don’t want these navigation features, so the first step is to create a new layout. Add a Razor Component named EmptyLayout.razor to the Shared folder of the BlazorWebAssembly project with the content shown in listing 37.14.
Listing 37.14 The EmptyLayout.razor file in the Shared folder of the BlazorWebAssembly project
@inherits LayoutComponentBase
<div class="m-2">
@Body
</div>
I could apply the new layout with @layout expressions, as I did in chapter 36, but I am going to use this layout as the default by changing the routing configuration, which is defined in the App.razor file in the BlazorWebAssembly project, as shown in listing 37.15.
Listing 37.15 Applying the layout in the App.razor file in the BlazorWebAssembly project
<Router AppAssembly="@typeof(App).Assembly">
<Found Context="routeData">
<RouteView RouteData="@routeData"
DefaultLayout="@typeof(EmptyLayout)" />
<FocusOnNavigate RouteData="@routeData" Selector="h1" />
</Found>
<NotFound>
<PageTitle>Not found</PageTitle>
<LayoutView Layout="@typeof(EmptyLayout)">
<p role="alert">Sorry, there's nothing at this address.</p>
</LayoutView>
</NotFound>
</Router>
Chapter 35 describes the Router, RouteView, Found, and NotFound components.
The template created the Blazor WebAssembly project with its own copy of the Bootstrap CSS framework and with an additional stylesheet that combines the styles required to configure the Blazor WebAssembly error and validation elements and manage the layout of the application. Replace the link elements in the HTML file as shown in listing 37.16 and apply styles directly to the error element. This has the effect of removing the styles used by the Microsoft layout and using the Bootstrap CSS stylesheet that was added to the Advanced project.
Listing 37.16 Modifying the index.xhtml file in the wwwroot folder in the BlazorWebAssembly project
<!DOCTYPE html>
<html lang="en">
<head>
<meta charset="utf-8" />
<meta name="viewport" content="width=device-width, initial-scale=1.0,
maximum-scale=1.0, user-scalable=no" />
<title>BlazorWebAssembly</title>
<base href="/webassembly/" />
<!--<link href="css/bootstrap/bootstrap.min.css" rel="stylesheet" />-->
<!--<link href="css/app.css" rel="stylesheet" />-->
<link href="/lib/bootstrap/css/bootstrap.min.css" rel="stylesheet" />
<link rel="icon" type="image/png" href="favicon.png" />
<link href="BlazorWebAssembly.styles.css" rel="stylesheet" />
</head>
<body>
<div id="app">
<svg class="loading-progress">
<circle r="40%" cx="50%" cy="50%" />
<circle r="40%" cx="50%" cy="50%" />
</svg>
<div class="loading-progress-text"></div>
</div>
<div id="blazor-error-ui"
class="text-center bg-danger h6 text-white p-2 fixed-top w-100"
style="display:none">
An unhandled error has occurred.
<a href="" class="reload">Reload</a>
<a class="dismiss"> </a>
</div>
<script src="_framework/blazor.webassembly.js"></script>
</body>
</html>
To see the new component, restart ASP.NET Core and request http://localhost:5000/webassembly/forms, which will produce the response shown in figure 37.4.
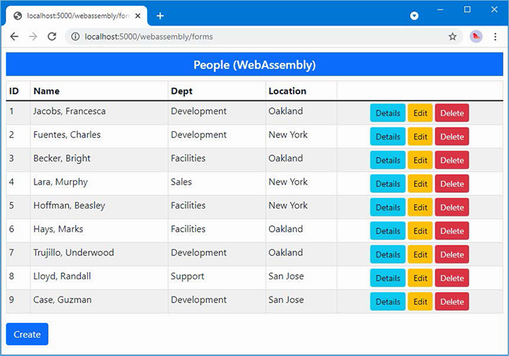
Figure 37.4 A Blazor WebAssembly component
Blazor WebAssembly components follow the standard Blazor lifecycle, and the component displays the data it receives from the web service.
Only the Delete button displayed by the List component works currently. In the sections that follow, I complete the Blazor WebAssembly form application by creating additional components.
Add a Razor Component named Details.razor to the Pages folder of the BlazorWebAssembly project with the content shown in listing 37.17.
Listing 37.17 The contents of the Details.razor file in the Pages folder of the BlazorWebAssembly Project
@page "/forms/details/{id:long}"
<h4 class="bg-info text-center text-white p-2">Details (WebAssembly)</h4>
<div class="form-group">
<label>ID</label>
<input class="form-control" value="@PersonData.PersonId" disabled />
</div>
<div class="form-group">
<label>Firstname</label>
<input class="form-control" value="@PersonData.Firstname" disabled />
</div>
<div class="form-group">
<label>Surname</label>
<input class="form-control" value="@PersonData.Surname" disabled />
</div>
<div class="form-group">
<label>Department</label>
<input class="form-control" value="@PersonData.Department?.Name"
disabled />
</div>
<div class="form-group">
<label>Location</label>
<input class="form-control"
value="@($"{PersonData.Location?.City}, "
+ PersonData.Location?.State)"
disabled />
</div>
<div class="text-center p-2">
<NavLink class="btn btn-info" href="@EditUrl">Edit</NavLink>
<NavLink class="btn btn-secondary" href="forms">Back</NavLink>
</div>
@code {
[Inject]
public NavigationManager? NavManager { get; set; }
[Inject]
public HttpClient? Http { get; set; }
[Parameter]
public long Id { get; set; }
public Person PersonData { get; set; } = new Person();
protected async override Task OnParametersSetAsync() {
if (Http != null) {
PersonData = await Http.GetFromJsonAsync<Person>(
$"/api/people/{Id}")
?? new();
}
}
public string EditUrl => $"forms/edit/{Id}";
}
The Details component has only two differences from its Blazor Server counterpart, following the pattern established by the List component: the data is obtained through the HttpClient service, and navigation targets are expressed using relative URLs. In all other regards, such as obtaining parameters from routing data, Blazor WebAssembly works just the same way as Blazor Server.
To complete the forms application, add a Razor Component named Editor.razor to the Pages folder of the BlazorWebAssembly project with the content shown in listing 37.18.
Listing 37.18 The contents of the Editor.razor file in the Pages folder of the BlazorWebAssembly Project
@page "/forms/edit/{id:long}"
@page "/forms/create"
<link href="/blazorValidation.css" rel="stylesheet" />
<h4 class="bg-@Theme text-center text-white p-2">@Mode (WebAssembly)</h4>
<EditForm Model="PersonData" OnValidSubmit="HandleValidSubmit">
<DataAnnotationsValidator />
@if (Mode == "Edit") {
<div class="form-group">
<label>ID</label>
<InputNumber class="form-control"
@bind-Value="PersonData.PersonId" readonly />
</div>
}
<div class="form-group">
<label>Firstname</label>
<ValidationMessage For="@(() => PersonData.Firstname)" />
<InputText class="form-control"
@bind-Value="PersonData.Firstname" />
</div>
<div class="form-group">
<label>Surname</label>
<ValidationMessage For="@(() => PersonData.Surname)" />
<InputText class="form-control"
@bind-Value="PersonData.Surname" />
</div>
<div class="form-group">
<label>Department</label>
<ValidationMessage For="@(() => PersonData.DepartmentId)" />
<select @bind="PersonData.DepartmentId" class="form-control">
<option selected disabled value="0">
Choose a Department
</option>
@foreach (var kvp in Departments) {
<option value="@kvp.Value">@kvp.Key</option>
}
</select>
</div>
<div class="form-group">
<label>Location</label>
<ValidationMessage For="@(() => PersonData.LocationId)" />
<select @bind="PersonData.LocationId" class="form-control">
<option selected disabled value="0">Choose a Location</option>
@foreach (var kvp in Locations) {
<option value="@kvp.Value">@kvp.Key</option>
}
</select>
</div>
<div class="text-center p-2">
<button type="submit" class="btn btn-@Theme">Save</button>
<NavLink class="btn btn-secondary" href="forms">Back</NavLink>
</div>
</EditForm>
@code {
[Inject]
public HttpClient? Http { get; set; }
[Inject]
public NavigationManager? NavManager { get; set; }
[Parameter]
public long Id { get; set; }
public Person PersonData { get; set; } = new Person();
public IDictionary<string, long> Departments { get; set; }
= new Dictionary<string, long>();
public IDictionary<string, long> Locations { get; set; }
= new Dictionary<string, long>();
protected async override Task OnParametersSetAsync() {
if (Http != null) {
if (Mode == "Edit") {
PersonData = await Http.GetFromJsonAsync<Person>(
$"/api/people/{Id}")
?? new();
}
var depts = await Http.GetFromJsonAsync<Department[]>(
"/api/departments");
Departments = (depts ?? Array.Empty<Department>())
.ToDictionary(d => d.Name, d => d.Departmentid);
var locs = await Http.GetFromJsonAsync<Location[]>(
"/api/locations");
Locations = (locs ?? Array.Empty<Location>())
.ToDictionary(l => $"{l.City}, {l.State}",
l => l.LocationId);
}
}
public string Theme => Id == 0 ? "primary" : "warning";
public string Mode => Id == 0 ? "Create" : "Edit";
public async Task HandleValidSubmit() {
if (Http != null) {
if (Mode == "Create") {
await Http.PostAsJsonAsync("/api/people", PersonData);
} else {
await Http.PutAsJsonAsync("/api/people", PersonData);
}
NavManager?.NavigateTo("forms");
}
}
}
This component uses the Blazor form features described in chapter 36 but uses HTTP requests to read and write data to the web service created at the start of the chapter. The GetFromJsonAsync<T> method is used to read data from the web service, and the PostAsJsonAsync and PutAsJsonAsync methods are used to send POST or PUT requests when the user submits the form.
Notice that I have not used the custom select component or validation components I created in chapter 36. Sharing components between projects—especially when Blazor WebAssembly is introduced after development has started—is awkward. I expect the process to improve in future releases, but for this chapter, I have simply done without the features. As a consequence, the select elements do not trigger validation when a value is selected, the submit button isn’t automatically disabled, and there are no restrictions on the combination of department and location.
Restart ASP.NET Core and request http://localhost:5000/webassembly/forms, and you will see the Blazor WebAssembly version of the form application. Click the Details button for the first item in the table, and you will see the fields for the selected object. Click the Edit button, and you will be presented with an editable form. Make a change and click the Save button, and the changes will be sent to the web service and displayed in the data table, as shown in figure 37.5.
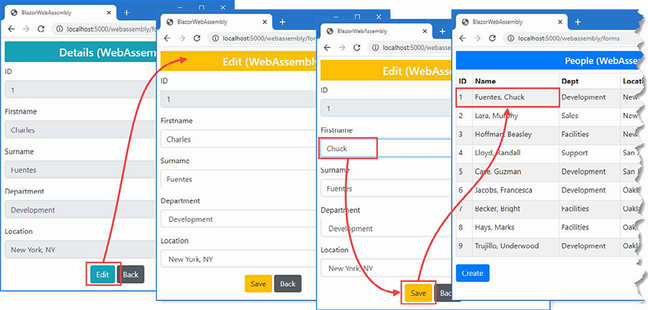
Figure 37.5 The completed Blazor WebAssembly form application
Blazor WebAssembly creates client-side applications that do not need to maintain a persistent connection to the ASP.NET Core server.
Creating an application with WebAssembly builds on the features described in earlier chapters for Blazor Server.
Data access in a WebAssembly application must be performed through the HttpClient object received via dependency injection.
ASP.NET Core Identity is an API from Microsoft to manage users in ASP.NET Core applications and includes support for integrating authentication and authorization into the request pipeline.
ASP.NET Core Identity is a toolkit with which you create the authorization and authentication features an application requires. There are endless integration options for features such as two-factor authentication, federation, single sign-on, and account self-service. There are options that are useful only in large corporate environments or when using cloud-hosted user management.
ASP.NET Core Identity has evolved into its own framework and is too large for me to cover in detail in this book. Instead, I have focused on the parts of the Identity API that intersect with web application development, much as I have done with Entity Framework Core. In this chapter, I show you how to add ASP.NET Core Identity to a project and explain how to consume the ASP.NET Core Identity API to create tools to perform basic user and role management. In chapter 39, I show you how to use ASP.NET Core Identity to authenticate users and perform authorization. Table 38.1 puts ASP.NET Core Identity in context.
Table 38.1 Putting ASP.NET Core Identity in context
|
Question |
Answer |
|---|---|
|
What is it? |
ASP.NET Core Identity is an API for managing users. |
|
Why is it useful? |
Most applications have some features that should not be available to all users. ASP.NET Core Identity provides features to allow users to authenticate themselves and gain access to restricted features. |
|
How is it used? |
ASP.NET Core Identity is added to projects as a package and stores its data in a database using Entity Framework Core. Management of users is performed through a well-defined API, and its features are applied as attributes, as I describe in chapter 39. |
|
Are there any pitfalls or limitations? |
ASP.NET Core Identity is complex and provides support for a wide range of authentication, authorization, and management models. It can be difficult to understand all the options, and documentation can be sparse. |
|
Are there any alternatives? |
There is no sensible alternative to ASP.NET Core Identity if a project needs to restrict access to features. |
Table 38.2 provides a guide to the chapter.
Table 38.2 Chapter guide
|
Problem |
Solution |
Listing |
|---|---|---|
|
Preparing the application for Identity |
Create the context class and use it to prepare a migration that is applied to the database. |
4–7 |
|
Managing user accounts |
Use the |
8–12, 15, 16 |
|
Setting a username and password policy |
Use the options pattern to configure Identity. |
13, 14 |
|
Managing roles |
Use the |
17–20 |
This chapter uses the Advanced, DataModel, and BlazorWebAssembly projects from chapter 37. If you are using Visual Studio, open the Advanced.sln file you created in the previous chapter to open all three projects. If you are using Visual Studio Code, open the folder that contains the three projects.
Open a new PowerShell command prompt, navigate to the folder that contains the Advanced.csproj file, and run the command shown in listing 38.1 to drop the database.
Listing 38.1 Dropping the database
dotnet ef database drop --force
Use the PowerShell command prompt to run the command shown in listing 38.2.
Listing 38.2 Running the example application
dotnet run
Use a browser to request http://localhost:5000, which will produce the response shown in figure 38.1.
Figure 38.1 Running the example application
The process for setting up ASP.NET Core Identity requires adding a package to the project, configuring the application, and preparing the database. To get started, use a PowerShell command prompt to run the command shown in listing 38.3 in the Advanced project folder, which installs the ASP.NET Core Identity package. If you are using Visual Studio, you can install the package by selecting Project > Manage NuGet Packages.
Listing 38.3 Installing ASP.NET Core Identity packages
dotnet add package Microsoft.AspNetCore.Identity.EntityFrameworkCore
--version 7.0.0
ASP.NET Identity requires a database, which is managed through Entity Framework Core. To create the Entity Framework Core context class that will provide access to the Identity data, add a class file named IdentityContext.cs to the Advanced/Models folder with the code shown in listing 38.4.
Listing 38.4 The IdentityContext.cs File in the Models Folder of the Advanced Project
using Microsoft.AspNetCore.Identity;
using Microsoft.AspNetCore.Identity.EntityFrameworkCore;
using Microsoft.EntityFrameworkCore;
namespace Advanced.Models {
public class IdentityContext: IdentityDbContext<IdentityUser> {
public IdentityContext(DbContextOptions<IdentityContext> options)
: base(options) { }
}
}
The ASP.NET Core Identity package includes the IdentityDbContext<T> class, which is used to create an Entity Framework Core context class. The generic type argument T is used to specify the class that will represent users in the database. You can create custom user classes, but I have used the basic class, called IdentityUser, which provides the core Identity features.
Configuring the database connection string
A connection string is required to tell ASP.NET Core Identity where it should store its data. In listing 38.5, I added a connection string to the appsettings.json file, alongside the one used for the application data.
Listing 38.5 Adding a connection in the appsettings.json file in the Advanced project
{
"Logging": {
"LogLevel": {
"Default": "Information",
"Microsoft.AspNetCore": "Warning",
"Microsoft.EntityFrameworkCore": "Information"
}
},
"AllowedHosts": "*",
"ConnectionStrings": {
"PeopleConnection": "Server=(localdb)\\MSSQLLocalDB;Database=People;
➥MultipleActiveResultSets=True",
"IdentityConnection": "Server=(localdb)\\MSSQLLocalDB;Database=Identity
➥;MultipleActiveResultSets=True"
}
}
The connection string specifies a LocalDB database named Identity.
The next step is to configure ASP.NET Core so the Identity database context is set up as a service, as shown in listing 38.6.
Listing 38.6 Configuring identity in the Program.cs file in the Advanced project
using Microsoft.EntityFrameworkCore;
using Advanced.Models;
using Microsoft.AspNetCore.Identity;
var builder = WebApplication.CreateBuilder(args);
builder.Services.AddControllersWithViews();
builder.Services.AddRazorPages();
builder.Services.AddServerSideBlazor();
builder.Services.AddDbContext<DataContext>(opts => {
opts.UseSqlServer(
builder.Configuration["ConnectionStrings:PeopleConnection"]);
opts.EnableSensitiveDataLogging(true);
});
builder.Services.AddSingleton<Advanced.Services.ToggleService>();
builder.Services.AddDbContext<IdentityContext>(opts =>
opts.UseSqlServer(builder.Configuration[
"ConnectionStrings:IdentityConnection"]));
builder.Services.AddIdentity<IdentityUser, IdentityRole>()
.AddEntityFrameworkStores<IdentityContext>();
var app = builder.Build();
app.UseStaticFiles();
app.MapControllers();
app.MapControllerRoute("controllers",
"controllers/{controller=Home}/{action=Index}/{id?}");
app.MapRazorPages();
app.MapBlazorHub();
app.MapFallbackToPage("/_Host");
app.UseBlazorFrameworkFiles("/webassembly");
app.MapFallbackToFile("/webassembly/{*path:nonfile}",
"/webassembly/index.xhtml");
var context = app.Services.CreateScope().ServiceProvider
.GetRequiredService<DataContext>();
SeedData.SeedDatabase(context);
app.Run();
The remaining step is to create the Entity Framework Core database migration and apply it to create the database. Open a new PowerShell window, navigate to the Advanced project folder, and run the commands shown in listing 38.7.
Listing 38.7 Creating and applying the database migration
dotnet ef migrations add --context IdentityContext Initial dotnet ef database update --context IdentityContext
As I explained in earlier chapters, Entity Framework Core manages changes to database schemas through a feature called migrations. Now that there are two database context classes in the project, the Entity Framework Core tools require the --context argument to determine which context class is being used. The commands in listing 38.7 create a migration that contains the ASP.NET Core Identity schema and apply it to the database.
In this section, I am going to create the tools that manage users through ASP.NET Core Identity. Users are managed through the UserManager<T> class, where T is the class chosen to represent users in the database. When I created the Entity Framework Core context class, I specified IdentityUser as the class to represent users in the database. This is the built-in class that is provided by ASP.NET Core Identity, and it provides the core features that are required by most applications. table 38.3 describes the most useful IdentityUser properties. (There are additional properties defined by the IdentityUser class, but these are the ones required by most applications and are the ones I use in this book.)
Table 38.3 Useful IdentityUser properties
|
Name |
Description |
|---|---|
|
|
This property contains the unique ID for the user. |
|
|
This property returns the user’s username. |
|
|
This property contains the user’s e-mail address. |
Table 38.4 describes the UserManagement<T> members I use in this section to manage users.
Table 38.4 Useful UserManager<T> members
|
Name |
Description |
|---|---|
|
|
This property returns a sequence containing the users stored in the database. |
|
|
This method queries the database for the user object with the specified ID. |
|
|
This method stores a new user in the database using the specified password. |
|
|
This method modifies an existing user in the database. |
|
|
This method removes the specified user from the database. |
In preparation for creating the management tools, add the expressions shown in listing 38.8 to the _ViewImports.cshtml file in the Pages folder of the Advanced project.
Listing 38.8 Adding expressions in the _ViewImports.cshtml file in the Pages folder of the Advanced project
@addTagHelper *, Microsoft.AspNetCore.Mvc.TagHelpers @using Advanced.Models @using Microsoft.AspNetCore.Mvc.RazorPages @using Microsoft.EntityFrameworkCore @using System.ComponentModel.DataAnnotations @using Microsoft.AspNetCore.Identity @using Advanced.Pages
Next, create the Pages/Users folder in the Advanced project and add to it a Razor Layout named _Layout.cshtml to the Pages/Users folder with the content shown in listing 38.9.
Listing 38.9 The _Layout.cshtml file in the Pages/Users folder in the Advanced project
<!DOCTYPE html>
<html>
<head>
<title>Identity</title>
<link href="/lib/bootstrap/css/bootstrap.min.css" rel="stylesheet" />
</head>
<body>
<div class="m-2">
<h5 class="bg-info text-white text-center p-2">
User Administration
</h5>
@RenderBody()
</div>
</body>
</html>
Add a class file named AdminPageModel.cs to the Pages folder and use it to define the class shown in listing 38.10.
Listing 38.10 The AdminPageModel.cs file in the Pages folder in the Advanced project
using Microsoft.AspNetCore.Mvc.RazorPages;
namespace Advanced.Pages {
public class AdminPageModel : PageModel {
}
}
This class will be the base for the page model classes defined in this section. As you will see in chapter 39, a common base class is useful when it comes to securing the application.
Although the database is currently empty, I am going to start by creating a Razor Page that will enumerate user accounts. Add a Razor Page named List.cshtml to the Pages/Users folder in the Advanced project with the content shown in listing 38.11.
Listing 38.11 The contents of the List.cshtml file in the Pages/Users folder in the Advanced project
@page
@model ListModel
<table class="table table-sm table-bordered">
<tr><th>ID</th><th>Name</th><th>Email</th><th></th></tr>
@if (Model.Users.Count() == 0) {
<tr><td colspan="4" class="text-center">No User Accounts</td></tr>
} else {
foreach (IdentityUser user in Model.Users) {
<tr>
<td>@user.Id</td>
<td>@user.UserName</td>
<td>@user.Email</td>
<td class="text-center">
<form asp-page="List" method="post">
<input type="hidden" name="Id" value="@user.Id" />
<a class="btn btn-sm btn-warning"
asp-page="Editor" asp-route-id="@user.Id"
asp-route-mode="edit">
Edit
</a>
<button type="submit"
class="btn btn-sm btn-danger">
Delete
</button>
</form>
</td>
</tr>
}
}
</table>
<a class="btn btn-primary" asp-page="create">Create</a>
@functions {
public class ListModel : AdminPageModel {
public UserManager<IdentityUser> UserManager;
public ListModel(UserManager<IdentityUser> userManager) {
UserManager = userManager;
}
public IEnumerable<IdentityUser> Users { get; set; }
= Enumerable.Empty<IdentityUser>();
public void OnGet() {
Users = UserManager.Users;
}
}
}
The UserManager<IdentityUser> class is set up as a service so that it can be consumed via dependency injection. The Users property returns a collection of IdentityUser objects, which can be used to enumerate the user accounts. This Razor Page displays the users in a table, with buttons that allow each user to be edited or deleted, although this won’t be visible initially because a placeholder message is shown when there are no user objects to display. There is a button that navigates to a Razor Page named Create, which I define in the next section.
Restart ASP.NET and request http://localhost:5000/users/list to see the (currently empty) data table, which is shown in figure 38.2.
Figure 38.2 Enumerating users
Add a Razor Page named Create.cshtml to the Pages/Users folder with the content shown in listing 38.12.
Listing 38.12 The Create.cshtml file in the Pages/Users folder of the Advanced project
@page
@model CreateModel
<h5 class="bg-primary text-white text-center p-2">Create User</h5>
<form method="post">
<div asp-validation-summary="All" class="text-danger"></div>
<div class="form-group">
<label>User Name</label>
<input name="UserName" class="form-control"
value="@Model.UserName" />
</div>
<div class="form-group">
<label>Email</label>
<input name="Email" class="form-control"
value="@Model.Email" />
</div>
<div class="form-group">
<label>Password</label>
<input name="Password" class="form-control"
value="@Model.Password" />
</div>
<div class="py-2">
<button type="submit" class="btn btn-primary">Submit</button>
<a class="btn btn-secondary" asp-page="list">Back</a>
</div>
</form>
@functions {
public class CreateModel : AdminPageModel {
public UserManager<IdentityUser> UserManager;
public CreateModel(UserManager<IdentityUser> usrManager) {
UserManager = usrManager;
}
[BindProperty]
public string UserName { get; set; } = string.Empty;
[BindProperty]
[EmailAddress]
public string Email { get; set; } = string.Empty;
[BindProperty]
public string Password { get; set; } = string.Empty;
public async Task<IActionResult> OnPostAsync() {
if (ModelState.IsValid) {
IdentityUser user =
new IdentityUser {
UserName = UserName,
Email = Email
};
IdentityResult result =
await UserManager.CreateAsync(user, Password);
if (result.Succeeded) {
return RedirectToPage("List");
}
foreach (IdentityError err in result.Errors) {
ModelState.AddModelError("", err.Description);
}
}
return Page();
}
}
}
Even though ASP.NET Core Identity data is stored using Entity Framework Core, you don’t work directly with the database context class. Instead, data is managed through the methods provided by the UserManager<T> class. New users are created using the CreateAsync method, which accepts an IdentityUser object and a password string as arguments.
This Razor Page defines three properties that are subject to model binding. The UserName and Email properties are used to configure the IdentityUser object, which is combined with the value bound to the Password property to call the CreateAsync method. These properties are configured with validation attributes, and values will be required because the property types are non-nullable.
The result of the CreateAsync method is a Task<IdentityResult> object, which indicates the outcome of the create operation, using the properties described in table 38.5.
Table 38.5 The properties defined by the IdentityResult class
|
Name |
Description |
|---|---|
|
|
Returns |
|
|
Returns a sequence of |
I inspect the Succeeded property to determine whether a new user has been created in the database. If the Succeeded property is true, then the client is redirected to the List page so that the list of users is displayed, reflecting the new addition.
...
if (result.Succeeded) {
return RedirectToPage("List");
}
foreach (IdentityError err in result.Errors) {
ModelState.AddModelError("", err.Description);
}
...
If the Succeeded property is false, then the sequence of IdentityError objects provided by the Errors property is enumerated, with the Description property used to create a model-level validation error using the ModelState.AddModelError method.
To test the ability to create a new user account, restart ASP.NET Core and request http://localhost:5000/users/list. Click the Create button and fill in the form with the values shown in table 38.6.
Table 38.6 The values for creating an example user
|
Field |
Description |
|---|---|
|
Name |
Joe |
|
|
joe@example.com |
|
Password |
Secret123$ |
Once you have entered the values, click the Submit button. ASP.NET Core Identity will create the user in the database, and the browser will be redirected, as shown in figure 38.3. (You will see a different ID value because IDs are randomly generated for each user.)
Figure 38.3 Creating a new user
Click the Create button again and enter the same details into the form, using the values in table 38.6. This time you will see an error reported through the model validation summary when you click the Create button, as shown in figure 38.4. This is an example of an error returned through the IdentityResult object produced by the CreateAsync method.
Figure 38.4 An error when creating a new user
Validating passwords
One of the most common requirements, especially for corporate applications, is to enforce a password policy. You can see the default policy by navigating to http://localhost:5000/Users/Create and filling out the form with the data shown in table 38.7.
Table 38.7 The values for creating an example user
|
Field |
Description |
|---|---|
|
Name |
Alice |
|
|
alice@example.com |
|
Password |
secret |
When you submit the form, ASP.NET Core Identity checks the candidate password and generates errors if it doesn’t match the password, as shown in figure 38.5.
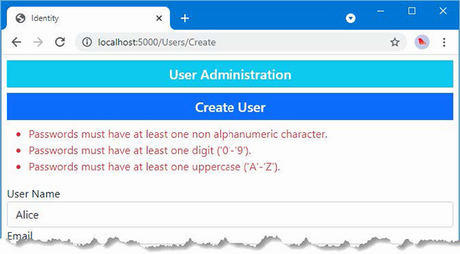
Figure 38.5 Password validation errors
The password validation rules are configured using the options pattern, as shown in listing 38.13.
Listing 38.13 Configuring validation in the Program.cs file in the Advanced project
using Microsoft.EntityFrameworkCore;
using Advanced.Models;
using Microsoft.AspNetCore.Identity;
var builder = WebApplication.CreateBuilder(args);
builder.Services.AddControllersWithViews();
builder.Services.AddRazorPages();
builder.Services.AddServerSideBlazor();
builder.Services.AddDbContext<DataContext>(opts => {
opts.UseSqlServer(
builder.Configuration["ConnectionStrings:PeopleConnection"]);
opts.EnableSensitiveDataLogging(true);
});
builder.Services.AddSingleton<Advanced.Services.ToggleService>();
builder.Services.AddDbContext<IdentityContext>(opts =>
opts.UseSqlServer(builder.Configuration[
"ConnectionStrings:IdentityConnection"]));
builder.Services.AddIdentity<IdentityUser, IdentityRole>()
.AddEntityFrameworkStores<IdentityContext>();
builder.Services.Configure<IdentityOptions>(opts => {
opts.Password.RequiredLength = 6;
opts.Password.RequireNonAlphanumeric = false;
opts.Password.RequireLowercase = false;
opts.Password.RequireUppercase = false;
opts.Password.RequireDigit = false;
});
var app = builder.Build();
app.UseStaticFiles();
app.MapControllers();
app.MapControllerRoute("controllers",
"controllers/{controller=Home}/{action=Index}/{id?}");
app.MapRazorPages();
app.MapBlazorHub();
app.MapFallbackToPage("/_Host");
app.UseBlazorFrameworkFiles("/webassembly");
app.MapFallbackToFile("/webassembly/{*path:nonfile}",
"/webassembly/index.xhtml");
var context = app.Services.CreateScope().ServiceProvider
.GetRequiredService<DataContext>();
SeedData.SeedDatabase(context);
app.Run();
ASP.NET Core Identity is configured using the IdentityOptions class, whose Password property returns a PasswordOptions class that configures password validation using the properties described in table 38.8.
Table 38.8 The PasswordOptions properties
|
Name |
Description |
|---|---|
|
|
This |
|
|
Setting this |
|
|
Setting this |
|
|
Setting this |
|
|
Setting this |
In the listing, I specified that passwords must have a minimum length of six characters and disabled the other constraints. This isn’t something that you should do without careful consideration in a real project, but it allows for an effective demonstration. Restart ASP.NET Core, request http://localhost:5000/users/create, and fill out the form using the details from table 38.7. When you click the Submit button, the password will be accepted by the new validation rules, and a new user will be created, as shown in figure 38.6.
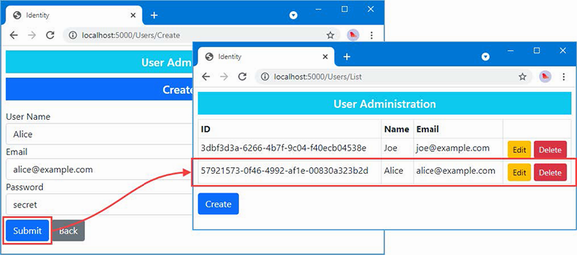
Figure 38.6 Changing the password validation rules
Validating user details
Validation is also performed on usernames and e-mail addresses when accounts are created. To see how validation is applied, request http://localhost:5000/users/create and fill out the form using the values shown in table 38.9.
Table 38.9 The values for creating an example user
|
Field |
Description |
|---|---|
|
Name |
Bob! |
|
|
alice@example.com |
|
Password |
secret |
Click the Submit button, and you will see the error message shown in figure 38.7.
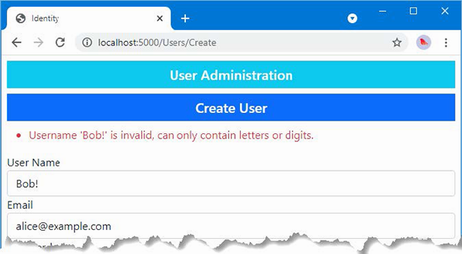
Figure 38.7 A user details validation error
Validation can be configured with the options pattern, using the User property defined by the IdentityOptions class. This class returns a UserOptions class, whose properties are described in table 38.10.
Table 38.10 The UserOptions properties
|
Name |
Description |
|---|---|
|
|
This |
|
|
Setting this |
In listing 38.14, I have changed the configuration of the application so that unique e-mail addresses are required and so that only lowercase alphabetic characters are allowed in usernames.
Listing 38.14 Changing validation in the Program.cs file in the Advanced project
...
builder.Services.Configure<IdentityOptions>(opts => {
opts.Password.RequiredLength = 6;
opts.Password.RequireNonAlphanumeric = false;
opts.Password.RequireLowercase = false;
opts.Password.RequireUppercase = false;
opts.Password.RequireDigit = false;
opts.User.RequireUniqueEmail = true;
opts.User.AllowedUserNameCharacters = "abcdefghijklmnopqrstuvwxyz";
});
...
Restart ASP.NET Core, request http://localhost:5000/users/create, and fill out the form with the values in table 38.9. Click the Submit button, and you will see that the e-mail address now causes an error. The username still contains illegal characters and is also flagged as an error, as shown in figure 38.8.
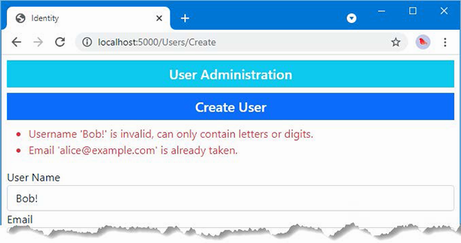
Figure 38.8 Validating user detail
To add support for editing users, add a Razor Page named Editor.cshtml to the Pages/Users folder of the Advanced project with the content shown in listing 38.15.
Listing 38.15 The Editor.cshtml file in the Pages/Users folder of the Advanced project
@page "{id}"
@model EditorModel
<h5 class="bg-warning text-white text-center p-2">Edit User</h5>
<form method="post">
<div asp-validation-summary="All" class="text-danger"></div>
<div class="form-group">
<label>ID</label>
<input name="Id" class="form-control" value="@Model.Id"
disabled />
<input name="Id" type="hidden" value="@Model.Id" />
</div>
<div class="form-group">
<label>User Name</label>
<input name="UserName" class="form-control"
value="@Model.UserName" />
</div>
<div class="form-group">
<label>Email</label>
<input name="Email" class="form-control" value="@Model.Email" />
</div>
<div class="form-group">
<label>New Password</label>
<input name="Password" class="form-control"
value="@Model.Password" />
</div>
<div class="py-2">
<button type="submit" class="btn btn-warning">Submit</button>
<a class="btn btn-secondary" asp-page="list">Back</a>
</div>
</form>
@functions {
public class EditorModel : AdminPageModel {
public UserManager<IdentityUser> UserManager;
public EditorModel(UserManager<IdentityUser> usrManager) {
UserManager = usrManager;
}
[BindProperty]
public string Id { get; set; } = string.Empty;
[BindProperty]
public string UserName { get; set; } = string.Empty;
[BindProperty]
[EmailAddress]
public string Email { get; set; } = string.Empty;
[BindProperty]
public string? Password { get; set; }
public async Task OnGetAsync(string id) {
IdentityUser? user = await UserManager.FindByIdAsync(id);
if (user != null) {
Id = user.Id;
UserName = user.UserName ?? string.Empty;
Email = user.Email ?? string.Empty;
}
}
public async Task<IActionResult> OnPostAsync() {
if (ModelState.IsValid) {
IdentityUser? user = await UserManager.FindByIdAsync(Id);
if (user != null) {
user.UserName = UserName;
user.Email = Email;
IdentityResult result =
await UserManager.UpdateAsync(user);
if (result.Succeeded
&& !String.IsNullOrEmpty(Password)) {
await UserManager.RemovePasswordAsync(user);
result = await UserManager.AddPasswordAsync(user,
Password);
}
if (result.Succeeded) {
return RedirectToPage("List");
}
foreach (IdentityError err in result.Errors) {
ModelState.AddModelError("", err.Description);
}
}
}
return Page();
}
}
}
The Editor page uses the UserManager<T>.FindByIdAsync method to locate the user, querying the database with the id value received through the routing system and received as an argument to the OnGetAsync method. The values from the IdentityUser object returned by the query are used to populate the properties that are displayed by the view part of the page, ensuring that the values are not lost if the page is redisplayed due to validation errors.
When the user submits the form, the FindByIdAsync method is used to query the database for the IdentityUser object, which is updated with the UserName and Email values provided in the form. Passwords require a different approach and must be removed from the user object before a new password is assigned, like this:
... await UserManager.RemovePasswordAsync(user); result = await UserManager.AddPasswordAsync(user, Password); ...
The Editor page changes the password only if the form contains a Password value and if the updates for the UserName and Email fields have been successful. Errors from ASP.NET Core Identity are presented as validation messages, and the browser is redirected to the List page after a successful update. Request http://localhost:5000/Users/List, click the Edit button for Joe, and change the UserName field to bob, with all lowercase characters. Click the Submit button, and you will see the change reflected in the list of users, as shown in figure 38.9.

Figure 38.9 Editing a user
The last feature I need for my basic user management application is the ability to delete users, as shown in listing 38.16.
Listing 38.16 Deleting users in the List.cshtml file in the Pages/Users folder in the Advanced project
...
@functions {
public class ListModel : AdminPageModel {
public UserManager<IdentityUser> UserManager;
public ListModel(UserManager<IdentityUser> userManager) {
UserManager = userManager;
}
public IEnumerable<IdentityUser> Users { get; set; }
= Enumerable.Empty<IdentityUser>();
public void OnGet() {
Users = UserManager.Users;
}
public async Task<IActionResult> OnPostAsync(string id) {
IdentityUser? user = await UserManager.FindByIdAsync(id);
if (user != null) {
await UserManager.DeleteAsync(user);
}
return RedirectToPage();
}
}
}
...
The List page already displays a Delete button for each user in the data table, which submits a POST request containing the Id value for the IdentityUser object to be removed. The OnPostAsync method receives the Id value and uses it to query Identity using the FindByIdAsync method, passing the object that is returned to the DeleteAsync method, which deletes it from the database. To check the delete functionality, request http://localhost:5000/Users/List and click Delete for the Alice account. The user object will be removed, as shown in figure 38.10.
Figure 38.10 Deleting a user
Some applications enforce only two levels of authorization: authenticated users are allowed access to all the application’s features, while unauthenticated users have less—or no—access. The SportsStore application in part 1 followed this approach: there was one user, and once authenticated, they had access to all the application’s features, including administration tools, while unauthenticated users were restricted to the public store features.
ASP.NET Core Identity supports roles for applications that require more granular authorization. Users are assigned to one or more roles, and their membership of those roles determines which features are accessible. In the sections that follow, I show you how to build tools to create and manage roles.
Roles are managed through the RoleManager<T> class, where T is the representation of roles in the database. When I configured ASP.NET Core Identity at the start of the chapter, I selected IdentityRole, which is the built-in class that Identity provides to describe a role, which means that I will be using the RoleManager<IdentityRole> class in these examples. The RoleManager<T> class defines the methods and properties shown in table 38.11 that allow roles to be created and managed.
Table 38.11 The members defined by the RoleManager<T> class
|
Name |
Description |
|---|---|
|
|
Creates a new role |
|
|
Deletes the specified role |
|
|
Finds a role by its ID |
|
|
Finds a role by its name |
|
|
Returns |
|
|
Stores changes to the specified role |
|
|
Returns an enumeration of the roles that have been defined |
Table 38.12 describes the key properties defined by the IdentityRole class.
Table 38.12 Useful IdentityRole properties
|
Name |
Description |
|---|---|
|
|
This property contains the unique ID for the role. |
|
|
This property returns the role name. |
Although roles are managed through the RoleManager<T> class, membership of roles is managed through the methods provided by UserManager<T> described in table 38.13.
Table 38.13 The UserManager<T> methods for managing role membership
|
Name |
Description |
|---|---|
|
|
This method adds a user to a role. |
|
|
This method removes a user from a role. |
|
|
This method returns the roles for which the user is a member. |
|
|
This method returns users who are members of the specified role. |
|
|
This method returns |
To prepare for the role management tools, create the Pages/Roles folder in the Advanced project and add to it a Razor Layout named _Layout.cshtml with the content shown in listing 38.17.
Listing 38.17 The _Layout.cshtml file in the Pages/Roles folder in the Advanced project
<!DOCTYPE html>
<html>
<head>
<title>Identity</title>
<link href="/lib/bootstrap/css/bootstrap.min.css" rel="stylesheet" />
</head>
<body>
<div class="m-2">
<h5 class="bg-secondary text-white text-center p-2">
Role Administration
</h5>
@RenderBody()
</div>
</body>
</html>
This layout will ensure there is an obvious difference between the user and role management tools.
Add a Razor Page named List.cshtml to the Pages/Roles folder in the Advanced project with the content shown in listing 38.18.
Listing 38.18 The List.cshtml file in the Pages/Roles folder in the Advanced project
@page
@model ListModel
<table class="table table-sm table-bordered">
<tr><th>ID</th><th>Name</th><th>Members</th><th></th></tr>
@if (Model.Roles.Count() == 0) {
<tr><td colspan="4" class="text-center">No Roles</td></tr>
} else {
foreach (IdentityRole role in Model.Roles) {
<tr>
<td>@role.Id</td>
<td>@role.Name</td>
<td>@(await Model.GetMembersString(role.Name))</td>
<td class="text-center">
<form asp-page="List" method="post">
<input type="hidden" name="Id" value="@role.Id" />
<a class="btn btn-sm btn-warning"
asp-page="Editor"
asp-route-id="@role.Id"
asp-route-mode="edit">Edit</a>
<button type="submit"
class="btn btn-sm btn-danger">
Delete
</button>
</form>
</td>
</tr>
}
}
</table>
<a class="btn btn-primary" asp-page="create">Create</a>
@functions {
public class ListModel : AdminPageModel {
public UserManager<IdentityUser> UserManager;
public RoleManager<IdentityRole> RoleManager;
public ListModel(UserManager<IdentityUser> userManager,
RoleManager<IdentityRole> roleManager) {
UserManager = userManager;
RoleManager = roleManager;
}
public IEnumerable<IdentityRole> Roles { get; set; }
= Enumerable.Empty<IdentityRole>();
public void OnGet() {
Roles = RoleManager.Roles;
}
public async Task<string> GetMembersString(string? role) {
IEnumerable<IdentityUser> users
= (await UserManager.GetUsersInRoleAsync(role!));
string result = users.Count() == 0
? "No members"
: string.Join(", ",
users.Take(3).Select(u => u.UserName).ToArray());
return users.Count() > 3
? $"{result}, (plus others)" : result;
}
public async Task<IActionResult> OnPostAsync(string id) {
IdentityRole? role = await RoleManager.FindByIdAsync(id);
if (role != null) {
await RoleManager.DeleteAsync(role);
}
return RedirectToPage();
}
}
}
The roles are enumerated, along with the names of up to three of the role members or a placeholder message if there are no members. There is also a Create button, and each role is presented with Edit and Delete buttons, following the same pattern I used for the user management tools.
The Delete button sends a POST request back to the Razor Page. The OnPostAsync method uses the FindByIdAsync method to retrieve the role object, which is passed to the DeleteAsync method to remove it from the database.
Add a Razor Page named Create.cshtml in the Pages/Roles folder in the Advanced project with the contents shown in listing 38.19.
Listing 38.19 The Create.cshtml file in the Pages/Roles folder in the Advanced project
@page
@model CreateModel
<h5 class="bg-primary text-white text-center p-2">Create Role</h5>
<form method="post">
<div asp-validation-summary="All" class="text-danger"></div>
<div class="form-group">
<label>Role Name</label>
<input name="Name" class="form-control" value="@Model.Name" />
</div>
<div class="py-2">
<button type="submit" class="btn btn-primary">Submit</button>
<a class="btn btn-secondary" asp-page="list">Back</a>
</div>
</form>
@functions {
public class CreateModel : AdminPageModel {
public RoleManager<IdentityRole> RoleManager;
public CreateModel(UserManager<IdentityUser> userManager,
RoleManager<IdentityRole> roleManager) {
RoleManager = roleManager;
}
[BindProperty]
public string Name { get; set; } = string.Empty;
public async Task<IActionResult> OnPostAsync() {
if (ModelState.IsValid) {
IdentityRole role =
new IdentityRole { Name = Name };
IdentityResult result =
await RoleManager.CreateAsync(role);
if (result.Succeeded) {
return RedirectToPage("List");
}
foreach (IdentityError err in result.Errors) {
ModelState.AddModelError("", err.Description);
}
}
return Page();
}
}
}
The user is presented with a form containing an input element to specify the name of the new role. When the form is submitted, the OnPostAsync method creates a new IdentityRole object and passes it to the CreateAsync method.
To add support for managing role memberships, add a Razor Page named Editor.cshtml to the Pages/Roles folder in the Advanced project, with the content shown in listing 38.20.
Listing 38.20 The Editor.cshtml file in the Pages/Roles folder in the Advanced project
@page "{id}"
@model EditorModel
<h5 class="bg-primary text-white text-center p-2">
Edit Role: @Model.Role?.Name
</h5>
<form method="post">
<input type="hidden" name="rolename" value="@Model.Role?.Name" />
<div asp-validation-summary="All" class="text-danger"></div>
<h5 class="bg-secondary text-white p-2">Members</h5>
<table class="table table-sm table-striped table-bordered">
<thead><tr><th>User</th><th>Email</th><th></th></tr></thead>
<tbody>
@if ((await Model.Members()).Count() == 0) {
<tr>
<td colspan="3" class="text-center">No members</td>
</tr>
}
@foreach (IdentityUser user in await Model.Members()) {
<tr>
<td>@user.UserName</td>
<td>@user.Email</td>
<td>
<button asp-route-userid="@user.Id"
class="btn btn-primary btn-sm" type="submit">
Change
</button>
</td>
</tr>
}
</tbody>
</table>
<h5 class="bg-secondary text-white p-2">Non-Members</h5>
<table class="table table-sm table-striped table-bordered">
<thead><tr><th>User</th><th>Email</th><th></th></tr></thead>
<tbody>
@if ((await Model.NonMembers()).Count() == 0) {
<tr>
<td colspan="3" class="text-center">
No non-members
</td>
</tr>
}
@foreach (IdentityUser user in await Model.NonMembers()) {
<tr>
<td>@user.UserName</td>
<td>@user.Email</td>
<td>
<button asp-route-userid="@user.Id"
class="btn btn-primary btn-sm" type="submit">
Change
</button>
</td>
</tr>
}
</tbody>
</table>
</form>
<a class="btn btn-secondary" asp-page="list">Back</a>
@functions {
public class EditorModel : AdminPageModel {
public UserManager<IdentityUser> UserManager;
public RoleManager<IdentityRole> RoleManager;
public EditorModel(UserManager<IdentityUser> userManager,
RoleManager<IdentityRole> roleManager) {
UserManager = userManager;
RoleManager = roleManager;
}
public IdentityRole? Role { get; set; } = new();
public Task<IList<IdentityUser>> Members() {
if (Role?.Name != null) {
return UserManager.GetUsersInRoleAsync(Role.Name);
}
return Task.FromResult(new List<IdentityUser>()
as IList<IdentityUser>);
}
public async Task<IEnumerable<IdentityUser>> NonMembers() =>
UserManager.Users.ToList().Except(await Members());
public async Task OnGetAsync(string id) {
Role = await RoleManager.FindByIdAsync(id);
}
public async Task<IActionResult> OnPostAsync(string userid,
string rolename) {
Role = await RoleManager.FindByNameAsync(rolename);
IdentityUser? user = await UserManager.FindByIdAsync(userid);
if (user != null) {
IdentityResult result;
if (await UserManager.IsInRoleAsync(user, rolename)) {
result = await UserManager.RemoveFromRoleAsync(user,
rolename);
} else {
result =
await UserManager.AddToRoleAsync(user, rolename);
}
if (result.Succeeded) {
return RedirectToPage();
} else {
foreach (IdentityError err in result.Errors) {
ModelState.AddModelError("", err.Description);
}
return Page();
}
}
return Page();
}
}
}
The user is presented with a table showing the users who are members of the role and with a table showing nonmembers. Each row contains a Change button that submits the form. The OnPostAsync method uses the UserManager.FindByIdAsync method to retrieve the user object from the database. The IsInRoleAsync method is used to determine whether the user is a member of the role, and the AddToRoleAsync and RemoveFromRoleAsync methods are used to add and remove the user, respectively.
Restart ASP.NET Core and request http://localhost:5000/roles/list. The list will be empty because there are no roles in the database. Click the Create button, enter Admins into the text field, and click the Submit button to create a new role. Once the role has been created, click the Edit button, and you will see the list of users who can be added to the role. Clicking the Change button will move the user in and out of the role. Click back, and the list will be updated to show the users who are members of the role, as shown in figure 38.11.
Figure 38.11 Managing roles
The ASP.NET Core Identity framework is used to authenticate users.
User data can be stored in an relational database, but there are other authentication mechanisms available, although some of them can be complex to set up.
User identities are managed and authenticated using the UserManager<T> class, where T is the class used to represent users in the application.
Roles are managed and applied using the RoleManager<T> class, where T is the class used to represent roles in the application.
Account administration tools can be created using the standard ASP.NET Core features.
In this chapter, I explain how ASP.NET Core Identity is applied to authenticate users and authorize access to application features. I create the features required for users to establish their identity, explain how access to endpoints can be controlled, and demonstrate the security features that Blazor provides. I also show two different ways to authenticate web service clients. Table 39.1 provides a guide to the chapter.
Table 39.1 Chapter guide
|
Problem |
Solution |
Listing |
|---|---|---|
|
Authenticating users |
Use the |
3–8 |
|
Restricting access to endpoints |
Use the |
9–13 |
|
Restricting access to Blazor components |
Use the |
14–17 |
|
Restricting access to web services |
Use cookie authentication or bearer tokens. |
18–30 |
This chapter uses the projects from chapter 38. To prepare for this chapter, I am going to reset both the application data and ASP.NET Core Identity databases and create new users and roles. Open a new command prompt and run the commands shown in listing 39.1 in the Advanced project folder, which contains the Advanced.csproj file. These commands remove the existing databases and re-create them.
Listing 39.1 Re-creating the project databases
dotnet ef database drop --force --context DataContext dotnet ef database drop --force --context IdentityContext dotnet ef database update --context DataContext dotnet ef database update --context IdentityContext
Now that the application contains multiple database context classes, the Entity Framework Core commands require the --context argument to select the context that a command applies to. Use the PowerShell command prompt to run the command shown in listing 39.2.
Listing 39.2 Running the example application
dotnet run
Use a browser to request http://localhost:5000/controllers, which will produce the response shown in figure 39.1.
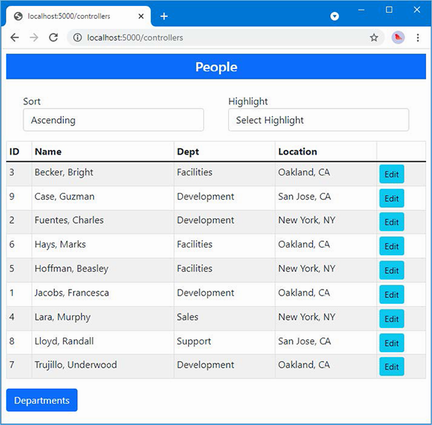
Figure 39.1 Running the example application
The main application database is automatically reseeded when the application starts. There is no seed data for the ASP.NET Core Identity database. Request http://localhost:5000/users/list and http://localhost:5000/roles/list, and you will see the responses in figure 39.2, which show the database is empty.

Figure 39.2 The empty ASP.NET Core Identity database
In the sections that follow, I show you how to add authentication features to the example project so that users can present their credentials and establish their identity to the application.
To enforce a security policy, the application must allow users to authenticate themselves, which is done using the ASP.NET Core Identity API. Create the Pages/Account folder and add to it a Razor layout named _Layout.cshtml with the content shown in listing 39.3. This layout will provide common content for authentication features.
Listing 39.3 The _Layout.cshtml file in the Pages/Account folder in the Advanced project
<!DOCTYPE html>
<html>
<head>
<title>Identity</title>
<link href="/lib/bootstrap/css/bootstrap.min.css" rel="stylesheet" />
</head>
<body>
<div class="m-2">
@RenderBody()
</div>
</body>
</html>
Add a Razor Page named Login.cshtml to the Pages/Account folder in the Advanced project with the content shown in listing 39.4.
Listing 39.4 The Login.cshtml file in the Pages/Account folder of the Advanced project
@page
@model LoginModel
<div class="bg-primary text-center text-white p-2"><h4>Log In</h4></div>
<div class="m-1 text-danger" asp-validation-summary="All"></div>
<form method="post">
<input type="hidden" name="returnUrl" value="@Model.ReturnUrl" />
<div class="form-group">
<label>UserName</label>
<input class="form-control" asp-for="UserName" />
</div>
<div class="form-group">
<label>Password</label>
<input asp-for="Password" type="password" class="form-control" />
</div>
<button class="btn btn-primary mt-2" type="submit">Log In</button>
</form>
@functions {
public class LoginModel : PageModel {
private SignInManager<IdentityUser> signInManager;
public LoginModel(SignInManager<IdentityUser> signinMgr) {
signInManager = signinMgr;
}
[BindProperty]
public string UserName { get; set; } = string.Empty;
[BindProperty]
public string Password { get; set; } = string.Empty;
[BindProperty(SupportsGet = true)]
public string? ReturnUrl { get; set; }
public async Task<IActionResult> OnPostAsync() {
if (ModelState.IsValid) {
Microsoft.AspNetCore.Identity.SignInResult result =
await signInManager.PasswordSignInAsync(UserName,
Password, false, false);
if (result.Succeeded) {
return Redirect(ReturnUrl ?? "/");
}
ModelState.AddModelError("",
"Invalid username or password");
}
return Page();
}
}
}
ASP.NET Core Identity provides the SigninManager<T> class to manage logins, where the generic type argument T is the class that represents users in the application, which is IdentityUser for the example application. Table 39.2 describes the SigninManager<T> members I use in this chapter.
Table 39.2 Useful SigninManager<T> members
|
Name |
Description |
|---|---|
|
|
This method attempts authentication using the specified username and password. The |
|
|
This method signs out the user. |
The Razor Page presents the user with a form that collects a username and a password, which are used to perform authentication with the PasswordSignInAsync method, like this:
...
Microsoft.AspNetCore.Identity.SignInResult result =
await signInManager.PasswordSignInAsync(UserName,
Password, false, false);
...
The result from the PasswordSignInAsync methods is a SignInResult object, which defines a Suceeded property that is true if the authentication is successful. (There is also a SignInResult class defined in the Microsoft.AspNetCore.Mvc namespace, which is why I used a fully qualified class name in the listing.)
Authentication in an ASP.NET Core application is usually triggered when the user tries to access an endpoint that requires authorization, and it is convention to return the user to that endpoint if authentication is successful, which is why the Login page defines a ReturnUrl property that is used in a redirection if the user has provided valid credentials.
...
if (result.Succeeded) {
return Redirect(ReturnUrl ?? "/");
}
...
If the user hasn’t provided valid credentials, then a validation message is shown, and the page is redisplayed.
When a user is authenticated, a cookie is added to the response so that subsequent requests can be identified as being already authenticated. Add a Razor Page named Details.cshtml to the Pages/Account folder of the Advanced project with the content shown in listing 39.5, which displays the cookie when it is present.
Listing 39.5 The Details.cshtml file in the Pages/Account folder of the Advanced folder
@page
@model DetailsModel
<table class="table table-sm table-bordered">
<tbody>
@if (Model.Cookie == null) {
<tr><th class="text-center">No Identity Cookie</th></tr>
} else {
<tr>
<th>Cookie</th>
<td class="text-break">@Model.Cookie</td>
</tr>
}
</tbody>
</table>
@functions {
public class DetailsModel : PageModel {
public string? Cookie { get; set; }
public void OnGet() {
Cookie = Request.Cookies[".AspNetCore.Identity.Application"];
}
}
}
The name used for the ASP.NET Core Identity cookie is .AspNetCore.Identity.Application, and this page retrieves the cookie from the request and displays its value or a placeholder message if there is no cookie.
It is important to give users the ability to sign out so they can explicitly delete the cookie, especially if public machines may be used to access the application. Add a Razor Page named Logout.cshtml to the Pages/Account folder of the Advanced folder with the content shown in listing 39.6.
Listing 39.6 The Logout.cshtml file in the Pages/Account folder in the Advanced project
@page
@model LogoutModel
<div class="bg-primary text-center text-white p-2"><h4>Log Out</h4></div>
<div class="m-2">
<h6>You are logged out</h6>
<a asp-page="Login" class="btn btn-secondary">OK</a>
</div>
@functions {
public class LogoutModel : PageModel {
private SignInManager<IdentityUser> signInManager;
public LogoutModel(SignInManager<IdentityUser> signInMgr) {
signInManager = signInMgr;
}
public async Task OnGetAsync() {
await signInManager.SignOutAsync();
}
}
}
This page calls the SignOutAsync method described in table 39.2 to sign the application out of the application. The ASP.NET Core Identity cookie will be deleted so that the browser will not include it in future requests (and invalidated the cookie so that requests will not be treated as authenticated even if the cookie is used again anyway).
Restart ASP.NET Core and request http://localhost:5000/users/list. Click the Create button and fill out the form using the data shown in table 39.3. Click the Submit button to submit the form and create the user account.
Table 39.3 The data values to create a user
|
Field |
Description |
|---|---|
|
UserName |
bob |
|
|
bob@example.com |
|
Password |
secret |
Navigate to http://localhost:5000/account/login and authenticate using the username and password from table 39.3. No return URL has been specified, and you will be redirected to the root URL once you have been authenticated. Request http://localhost:5000/account/details, and you will see the ASP.NET Core Identity cookie. Request http://localhost:5000/account/logout to log out of the application and return to http://localhost:5000/account/details to confirm that the cookie has been deleted, as shown in figure 39.3.
Figure 39.3 Authenticating a user
ASP.NET Core Identity provides a middleware component that detects the cookie created by the SignInManager<T> class and populates the HttpContext object with details of the authenticated user. This provides endpoints with details about the user without needing to be aware of the authentication process or having to deal directly with the cookie created by the authentication process. Listing 39.7 adds the authentication middleware to the example application’s request pipeline.
Listing 39.7 Enabling middleware in the Program.cs file in the Advanced folder
using Microsoft.EntityFrameworkCore;
using Advanced.Models;
using Microsoft.AspNetCore.Identity;
var builder = WebApplication.CreateBuilder(args);
builder.Services.AddControllersWithViews();
builder.Services.AddRazorPages();
builder.Services.AddServerSideBlazor();
builder.Services.AddDbContext<DataContext>(opts => {
opts.UseSqlServer(
builder.Configuration["ConnectionStrings:PeopleConnection"]);
opts.EnableSensitiveDataLogging(true);
});
builder.Services.AddSingleton<Advanced.Services.ToggleService>();
builder.Services.AddDbContext<IdentityContext>(opts =>
opts.UseSqlServer(builder.Configuration[
"ConnectionStrings:IdentityConnection"]));
builder.Services.AddIdentity<IdentityUser, IdentityRole>()
.AddEntityFrameworkStores<IdentityContext>();
builder.Services.Configure<IdentityOptions>(opts => {
opts.Password.RequiredLength = 6;
opts.Password.RequireNonAlphanumeric = false;
opts.Password.RequireLowercase = false;
opts.Password.RequireUppercase = false;
opts.Password.RequireDigit = false;
opts.User.RequireUniqueEmail = true;
opts.User.AllowedUserNameCharacters = "abcdefghijklmnopqrstuvwxyz";
});
var app = builder.Build();
app.UseStaticFiles();
app.UseAuthentication();
app.MapControllers();
app.MapControllerRoute("controllers",
"controllers/{controller=Home}/{action=Index}/{id?}");
app.MapRazorPages();
app.MapBlazorHub();
app.MapFallbackToPage("/_Host");
app.UseBlazorFrameworkFiles("/webassembly");
app.MapFallbackToFile("/webassembly/{*path:nonfile}",
"/webassembly/index.xhtml");
var context = app.Services.CreateScope().ServiceProvider
.GetRequiredService<DataContext>();
SeedData.SeedDatabase(context);
app.Run();
The middleware sets the value of the HttpContext.User property to a ClaimsPrincipal object. Claims are pieces of information about a user and details of the source of that information, providing a general-purpose approach to describing the information known about a user.
The ClaimsPrincipal class is part of .NET Core and isn’t directly useful in most ASP.NET Core applications, but there are two nested properties that are useful in most applications, as described in table 39.4.
Table 39.4 Useful Nested ClaimsPrincipal Properties
|
Name |
Description |
|---|---|
|
|
This property returns the username, which will be |
|
|
This property returns |
The username provided through the ClaimsPrincipal object can be used to obtain the ASP.NET Core Identity user object, as shown in listing 39.8.
Listing 39.8 User details in the Details.cshtml file in the Pages/Account folder of the Advanced project
@page
@model DetailsModel
<table class="table table-sm table-bordered">
<tbody>
@if (Model.IdentityUser == null) {
<tr><th class="text-center">No User</th></tr>
} else {
<tr><th>Name</th><td>@Model.IdentityUser.UserName</td></tr>
<tr><th>Email</th><td>@Model.IdentityUser.Email</td></tr>
}
</tbody>
</table>
@functions {
public class DetailsModel : PageModel {
private UserManager<IdentityUser> userManager;
public DetailsModel(UserManager<IdentityUser> manager) {
userManager = manager;
}
public IdentityUser? IdentityUser { get; set; }
public async Task OnGetAsync() {
if (User.Identity != null
&& User.Identity.Name != null
&& User.Identity.IsAuthenticated) {
IdentityUser = await
userManager.FindByNameAsync(User.Identity.Name);
}
}
}
}
The HttpContext.User property can be accessed through the User convenience property defined by the PageModel and ControllerBase classes. This Razor Page confirms that there is an authenticated user associated with the request and gets the IdentityUser object that describes the user.
Restart ASP.NET Core, request http://localhost:5000/account/login, and authenticate using the details in table 39.3. Request http://localhost:5000/account/details, and you will see how the ASP.NET Core Identity middleware enabled in listing 39.7 has processed the cookie to associate user details with the request, as shown in figure 39.4.
Figure 39.4 Getting details of an authenticated user
Once an application has an authentication feature, user identities can be used to restrict access to endpoints. In the sections that follow, I explain the process for enabling authorization and demonstrate how an authorization policy can be defined.
The Authorize attribute is used to restrict access to an endpoint and can be applied to individual action or page handler methods or to controller or page model classes, in which case the policy applies to all the methods defined by the class. I want to restrict access to the user and role administration tools created in chapter 38. When there are multiple Razor Pages or controllers for which the same authorization policy is required, it is a good idea to define a common base class to which the Authorize attribute can be applied because it ensures that you won’t accidentally omit the attribute and allow unauthorized access. It is for this reason that I defined the AdminPageModel class and used it as the base for all the administration tool page models in chapter 38. Listing 39.9 applies the Authorize attribute to the AdminPageModel class to create the authorization policy.
Listing 39.9 Applying an attribute in the AdminPageModel.cs file in the Pages folder in the Advanced project
using Microsoft.AspNetCore.Mvc.RazorPages;
using Microsoft.AspNetCore.Authorization;
namespace Advanced.Pages {
[Authorize(Roles="Admins")]
public class AdminPageModel : PageModel {
}
}
The Authorize attribute can be applied without arguments, which restricts access to any authenticated user. The Roles argument is used to further restrict access to users who are members of specific roles, which are expressed as a comma-separated list. The attribute in this listing restricts access to users assigned to the Admins role. The authorization restrictions are inherited, which means that applying the attribute to the base class restricts access to all the Razor Pages created to manage users and roles in chapter 38.
The authorization policy is enforced by a middleware component, which must be added to the application’s request pipeline, as shown in listing 39.10.
Listing 39.10 Adding middleware in the Program.cs file in the Advanced project
... app.UseStaticFiles(); app.UseAuthentication(); app.UseAuthorization(); app.MapControllers(); ...
The UseAuthorization method must be called between the UseRouting and UseEndpoints methods and after the UseAuthentication method has been called. This ensures that the authorization component can access the user data and inspect the authorization policy after the endpoint has been selected but before the request is handled.
The application must deal with two different types of authorization failure. If no user has been authenticated when a restricted endpoint is requested, then the authorization middleware will return a challenge response, which will trigger a redirection to the login page so the user can present their credentials and prove they should be able to access the endpoint.
But if an authenticated user requests a restricted endpoint and doesn’t pass the authorization checks, then an access denied response is generated so the application can display a suitable warning to the user. Add a Razor Page named AccessDenied.cshtml to the Pages/Account folder of the Advanced folder with the content shown in listing 39.11.
Listing 39.11 The AccessDenied.cshtml file in the Pages/Account folder of the Advanced project
@page
<h4 class="bg-danger text-white text-center p-2">Access Denied</h4>
<div class="m-2">
<h6>You are not authorized for this URL</h6>
<a class="btn btn-outline-danger" href="/">OK</a>
<a class="btn btn-outline-secondary" asp-page="Logout">Logout</a>
</div>
This page displays a warning message to the user, with a button that navigates to the root URL. There is typically little the user can do to resolve authorization failures without administrative intervention, and my preference is to keep the access denied response as simple as possible.
In listing 39.9, I restricted access to the user and role administration tools so they can be accessed only by users in the Admin role. There is no such role in the database, which creates a problem: I am locked out of the administration tools because there is no authorized account that will let me create the role.
I could have created an administration user and role before applying the Authorize attribute, but that complicates deploying the application, when making code changes should be avoided. Instead, I am going to create seed data for ASP.NET Core Identity to ensure there will always be at least one account that can be used to access the user and role management tools. Add a class file named IdentitySeedData.cs to the Models folder in the Advanced project and use it to define the class shown in listing 39.12.
Listing 39.12 The IdentitySeedData.cs file in the Models folder of the Advanced project
using Microsoft.AspNetCore.Identity;
namespace Advanced.Models {
public class IdentitySeedData {
public static void CreateAdminAccount(
IServiceProvider serviceProvider,
IConfiguration configuration) {
CreateAdminAccountAsync(serviceProvider, configuration)
.Wait();
}
public static async Task CreateAdminAccountAsync(IServiceProvider
serviceProvider, IConfiguration configuration) {
serviceProvider =
serviceProvider.CreateScope().ServiceProvider;
UserManager<IdentityUser> userManager = serviceProvider
.GetRequiredService<UserManager<IdentityUser>>();
RoleManager<IdentityRole> roleManager = serviceProvider
.GetRequiredService<RoleManager<IdentityRole>>();
string username = configuration["Data:AdminUser:Name"]
?? "admin";
string email = configuration["Data:AdminUser:Email"]
?? "admin@example.com";
string password = configuration["Data:AdminUser:Password"]
?? "secret";
string role = configuration["Data:AdminUser:Role"]
?? "Admins";
if (await userManager.FindByNameAsync(username) == null) {
if (await roleManager.FindByNameAsync(role) == null) {
await roleManager.CreateAsync(new IdentityRole(role));
}
IdentityUser user = new IdentityUser {
UserName = username,
Email = email
};
IdentityResult result = await userManager
.CreateAsync(user, password);
if (result.Succeeded) {
await userManager.AddToRoleAsync(user, role);
}
}
}
}
}
The UserManager<T> and RoleManager<T> services are scoped, which means I need to create a new scope before requesting the services since the seeding will be done when the application starts. The seeding code creates a user account that is assigned to a role. The values for the seed data are read from the application’s configuration with fallback values, making it easy to configure the seeded account without needing a code change. Listing 39.13 adds a statement to the Program.cs file so that the database is seeded when the application starts.
Listing 39.13 Seeding identity in the Program.cs file in the Advanced project
...
var context = app.Services.CreateScope().ServiceProvider
.GetRequiredService<DataContext>();
SeedData.SeedDatabase(context);
IdentitySeedData.CreateAdminAccount(app.Services, app.Configuration);
app.Run();
...
Restart ASP.NET Core and request http://localhost:5000/account/logout to ensure that no user is logged in to the application. Without logging in, request http://localhost:5000/users/list. The endpoint that will be selected to handle the request requires authentication, and the login prompt will be shown since there is no authenticated user associated with the request. Authenticate with the username bob and the password secret. This user doesn’t have access to the restricted endpoint, and the access denied response will be shown, as illustrated by figure 39.5.
Figure 39.5 A user without authorization
Click the Logout button and request http://localhost:5000/users/list again, which will lead to the login prompt being displayed. Authenticate with the username admin and the password secret. This is the user account created by the seed data and that is a member of the role specified by the Authorize attribute. The user passes the authorization check, and the requested Razor Page is displayed, as shown in figure 39.6.
Figure 39.6 A user with authorization
The simplest way to protect Blazor applications is to restrict access to the action method or Razor Page that acts as the entry point. In listing 39.14, I added the Authorize attribute to the page model class for the _Host page, which is the entry point for the Blazor application in the example project.
Listing 39.14 Applying an attribute in the _Host.cshtml file in the Pages folder of the Advanced project
@page "/"
@{ Layout = null; }
@model HostModel
@using Microsoft.AspNetCore.Authorization
<!DOCTYPE html>
<html>
<head>
<title>@ViewBag.Title</title>
<link href="/lib/bootstrap/css/bootstrap.min.css" rel="stylesheet" />
<base href="~/" />
</head>
<body>
<div class="m-2">
<component type="typeof(Advanced.Blazor.Routed)"
render-mode="Server" />
</div>
<script src="_framework/blazor.server.js"></script>
<script src="~/interop.js"></script>
</body>
</html>
@functions {
[Authorize]
public class HostModel : PageModel { }
}
This has the effect of preventing unauthenticated users from accessing the Blazor application. Request http://localhost:5000/account/logout to ensure the browser doesn’t have an authentication cookie and then request http://localhost:5000. This request will be handled by the _Host page, but the authorization middleware will trigger the redirection to the login prompt. Authenticate with the username bob and the password secret, and you will be granted access to the Blazor application, as shown in figure 39.7.
Figure 39.7 Restricting access to the Blazor endpoint
Restricting access to the endpoint is an effective technique, but it applies the same level of authorization to all the Blazor functionality. For applications that require more granular restrictions, Blazor provides the AuthorizeRouteView component, which allows different content to be displayed for authorized and unauthorized when components are managed using URL routing. Listing 39.15 adds the AuthorizeRouteView to the routing component in the example application.
Listing 39.15 Adding a component in the Routed.razor file in the Blazor folder of the Advanced project
@using Microsoft.AspNetCore.Components.Authorization
<Router AppAssembly="typeof(Program).Assembly">
<Found>
<AuthorizeRouteView RouteData="@context"
DefaultLayout="typeof(NavLayout)">
<NotAuthorized Context="authContext">
<h4 class="bg-danger text-white text-center p-2">
Not Authorized
</h4>
<div class="text-center">
You may need to log in as a different user
</div>
</NotAuthorized>
</AuthorizeRouteView>
</Found>
<NotFound>
<h4 class="bg-danger text-white text-center p-2">
No Matching Route Found
</h4>
</NotFound>
</Router>
The NotAuthorized section is used to define the content that will be presented to users when they attempt to access a restricted resource. To demonstrate this feature, I am going to restrict access to the DepartmentList component to users assigned to the Admins role, as shown in listing 39.16.
Listing 39.16 Restricting access in the DepartmentList.cshtml file in the Blazor folder in the Advanced project
@page "/departments"
@page "/depts"
@using Microsoft.AspNetCore.Authorization
@attribute [Authorize(Roles = "Admins")]
<CascadingValue Name="BgTheme" Value="Theme" IsFixed="false">
<TableTemplate RowType="Department" RowData="Departments"
Highlight="@(d => d.Name)"
SortDirection="@(d => d.Name)">
<Header>
<tr>
<th>ID</th><th>Name</th><th>People</th><th>Locations</th>
</tr>
</Header>
<RowTemplate Context="d">
<td>@d.Departmentid</td>
<td>@d.Name</td>
<td>
@(String.Join(", ", d.People!.Select(p => p.Surname)))
</td>
<td>
@(String.Join(", ", d.People!.Select(p =>
p.Location!.City).Distinct()))
</td>
</RowTemplate>
</TableTemplate>
</CascadingValue>
<SelectFilter Title="@("Theme")" Values="Themes"
@bind-SelectedValue="Theme" />
<button class="btn btn-primary" @onclick="HandleClick">People</button>
@code {
[Inject]
public DataContext? Context { get; set; }
public IEnumerable<Department>? Departments => Context?.Departments?
.Include(d => d.People!).ThenInclude(p => p.Location!);
public string Theme { get; set; } = "info";
public string[] Themes =
new string[] { "primary", "info", "success" };
[Inject]
public NavigationManager? NavManager { get; set; }
public void HandleClick() => NavManager?.NavigateTo("/people");
}
I have used the @attribute directive to apply the Authorize attribute to the component. Restart ASP.NET Core and request http://localhost:5000/account/logout to remove the authentication cookie and then request http://localhost:5000. When prompted, authenticate with the username bob and the password secret. You will see the Blazor application, but when you click the Departments button, you will see the authorization content defined in listing 39.15, as shown in figure 39.8. Log out again and log in as admin with the password secret, and you will be able to use the restricted component.
Figure 39.8 Using authorization in a Blazor application
The AuthorizeView component is used to restrict access to sections of content rendered by a component. In listing 39.17, I have changed the authorization for the DepartmentList component so that any authenticated user can access the page and use the AuthorizeView component so that the contents of the Locations column in the table is shown only to users assigned to the Admins group.
Listing 39.17 Selective content in the DepartmentList.razor file in the Blazor folder in the Advanced project
@page "/departments"
@page "/depts"
@using Microsoft.AspNetCore.Authorization
@using Microsoft.AspNetCore.Components.Authorization
@attribute [Authorize]
<CascadingValue Name="BgTheme" Value="Theme" IsFixed="false">
<TableTemplate RowType="Department" RowData="Departments"
Highlight="@(d => d.Name)"
SortDirection="@(d => d.Name)">
<Header>
<tr>
<th>ID</th><th>Name</th><th>People</th><th>Locations</th>
</tr>
</Header>
<RowTemplate Context="d">
<td>@d.Departmentid</td>
<td>@d.Name</td>
<td>
@(String.Join(", ", d.People!.Select(p => p.Surname)))
</td>
<td>
<AuthorizeView Roles="Admins">
<Authorized>
@(String.Join(", ",d.People!
.Select(p => p.Location!.City).Distinct()))
</Authorized>
<NotAuthorized>
(Not authorized)
</NotAuthorized>
</AuthorizeView>
</td>
</RowTemplate>
</TableTemplate>
</CascadingValue>
<SelectFilter Title="@("Theme")" Values="Themes"
@bind-SelectedValue="Theme" />
<button class="btn btn-primary" @onclick="HandleClick">People</button>
@code {
[Inject]
public DataContext? Context { get; set; }
public IEnumerable<Department>? Departments => Context?.Departments?
.Include(d => d.People!).ThenInclude(p => p.Location!);
public string Theme { get; set; } = "info";
public string[] Themes =
new string[] { "primary", "info", "success" };
[Inject]
public NavigationManager? NavManager { get; set; }
public void HandleClick() => NavManager?.NavigateTo("/people");
}
The AuthorizeView component is configured with the Roles property, which accepts a comma-separated list of authorized roles. The Authorized section contains the content that will be shown to authorized users. The NotAuthorized section contains the content that will be shown to unauthorized users.
Restart ASP.NET Core and authenticate as bob, with password secret, before requesting http://localhost:5000/depts. This user is not authorized to see the contents of the Locations column, as shown in figure 39.9. Authenticate as admin, with password secret, and request http://localhost:5000/depts again. This time the user is a member of the Admins role and passes the authorization checks, also shown in figure 39.9.
Figure 39.9 Selectively displaying content based on authorization
The authorization process in the previous section relies on being able to redirect the client to a URL that allows the user to enter their credentials. A different approach is required when adding authentication and authorization to a web service because there is no option to present the user with an HTML form to collect their credentials. The first step in adding support for web services authentication is to disable the redirections so that the client will receive HTTP error responses when attempting to request an endpoint that requires authentication. Add a class file named CookieAuthenticationExtensions.cs to the Advanced folder and use it to define the extension method shown in listing 39.18.
Listing 39.18 The CookieAuthenticationExtensions.cs file in the Advanced folder
using System.Linq.Expressions;
namespace Microsoft.AspNetCore.Authentication.Cookies {
public static class CookieAuthenticationExtensions {
public static void DisableRedirectForPath(
this CookieAuthenticationEvents events,
Expression<Func<CookieAuthenticationEvents,
Func<RedirectContext<CookieAuthenticationOptions>,
Task>>> expr,
string path, int statuscode) {
string propertyName
= ((MemberExpression)expr.Body).Member.Name;
var oldHandler = expr.Compile().Invoke(events);
Func<RedirectContext<CookieAuthenticationOptions>, Task>
newHandler = context => {
if (context.Request.Path.StartsWithSegments(path)) {
context.Response.StatusCode = statuscode;
} else {
oldHandler(context);
}
return Task.CompletedTask;
};
typeof(CookieAuthenticationEvents).GetProperty(propertyName)?
.SetValue(events, newHandler);
}
}
}
This code is hard to follow. ASP.NET Core provides the CookieAuthenticationOptions class, which is used to configure cookie-based authentication. The CookieAuthenticationOptions.Events property returns a CookieAuthenticationEvents object, which is used to set the handlers for the events triggered by the authentication system, including the redirections that occur when the user requests unauthorized content. The extension methods in listing 39.18 replaces the default handler for an event with one that performs redirection only if the request doesn’t start with a specified path string. Listing 39.19 uses the extension method to replace the OnRedirectToLogin and OnRedirectToAccessDenied handlers so that redirections are not performed when the request path starts with /api.
Listing 39.19 Preventing redirection in the Program.cs file in the Advanced folder
using Microsoft.EntityFrameworkCore;
using Advanced.Models;
using Microsoft.AspNetCore.Identity;
using Microsoft.AspNetCore.Authentication.Cookies;
var builder = WebApplication.CreateBuilder(args);
builder.Services.AddControllersWithViews();
builder.Services.AddRazorPages();
builder.Services.AddServerSideBlazor();
builder.Services.AddDbContext<DataContext>(opts => {
opts.UseSqlServer(
builder.Configuration["ConnectionStrings:PeopleConnection"]);
opts.EnableSensitiveDataLogging(true);
});
builder.Services.AddSingleton<Advanced.Services.ToggleService>();
builder.Services.AddDbContext<IdentityContext>(opts =>
opts.UseSqlServer(builder.Configuration[
"ConnectionStrings:IdentityConnection"]));
builder.Services.AddIdentity<IdentityUser, IdentityRole>()
.AddEntityFrameworkStores<IdentityContext>();
builder.Services.Configure<IdentityOptions>(opts => {
opts.Password.RequiredLength = 6;
opts.Password.RequireNonAlphanumeric = false;
opts.Password.RequireLowercase = false;
opts.Password.RequireUppercase = false;
opts.Password.RequireDigit = false;
opts.User.RequireUniqueEmail = true;
opts.User.AllowedUserNameCharacters = "abcdefghijklmnopqrstuvwxyz";
});
builder.Services.AddAuthentication(opts => {
opts.DefaultScheme =
CookieAuthenticationDefaults.AuthenticationScheme;
opts.DefaultChallengeScheme =
CookieAuthenticationDefaults.AuthenticationScheme;
}).AddCookie(opts => {
opts.Events.DisableRedirectForPath(e => e.OnRedirectToLogin,
"/api", StatusCodes.Status401Unauthorized);
opts.Events.DisableRedirectForPath(e => e.OnRedirectToAccessDenied,
"/api", StatusCodes.Status403Forbidden);
});
var app = builder.Build();
app.UseStaticFiles();
app.UseAuthentication();
app.UseAuthorization();
app.MapControllers();
app.MapControllerRoute("controllers",
"controllers/{controller=Home}/{action=Index}/{id?}");
app.MapRazorPages();
app.MapBlazorHub();
app.MapFallbackToPage("/_Host");
app.UseBlazorFrameworkFiles("/webassembly");
app.MapFallbackToFile("/webassembly/{*path:nonfile}",
"/webassembly/index.xhtml");
var context = app.Services.CreateScope().ServiceProvider
.GetRequiredService<DataContext>();
SeedData.SeedDatabase(context);
IdentitySeedData.CreateAdminAccount(app.Services, app.Configuration);
app.Run();
The AddAuthentication method is used to select cookie-based authentication and is chained with the AddCookie method to replace the event handlers that would otherwise trigger redirections.
To demonstrate how to perform authentication with web services, I am going to create a simple JavaScript client that will consume data from the Data controller in the example project.
Add an HTML Page called webclient.xhtml to the wwwroot folder of the Advanced project with the elements shown in listing 39.20.
Listing 39.20 The contents of the webclient.xhtml file in the wwwroot folder of the Advanced project
<!DOCTYPE html>
<html>
<head>
<title>Web Service Authentication</title>
<link href="/lib/bootstrap/css/bootstrap.min.css" rel="stylesheet" />
<script type="text/javascript" src="webclient.js"></script>
</head>
<body>
<div id="controls" class="m-2"></div>
<div id="data" class="m-2 p-2">
No data
</div>
</body>
</html>
Add a JavaScript file named webclient.js to the wwwroot of the Advanced project with the content shown in listing 39.21.
Listing 39.21 The webclient.js file in the wwwroot folder of the Advanced project
const username = "bob";
const password = "secret";
window.addEventListener("DOMContentLoaded", () => {
const controlDiv = document.getElementById("controls");
createButton(controlDiv, "Get Data", getData);
createButton(controlDiv, "Log In", login);
createButton(controlDiv, "Log Out", logout);
});
function login() {
// do nothing
}
function logout() {
// do nothing
}
async function getData() {
let response = await fetch("/api/people");
if (response.ok) {
let jsonData = await response.json();
displayData(...jsonData.map(item => `${item.surname},
${item.firstname}`));
} else {
displayData(`Error: ${response.status}: ${response.statusText}`);
}
}
function displayData(...items) {
const dataDiv = document.getElementById("data");
dataDiv.innerHTML = "";
items.forEach(item => {
const itemDiv = document.createElement("div");
itemDiv.innerText = item;
itemDiv.style.wordWrap = "break-word";
dataDiv.appendChild(itemDiv);
})
}
function createButton(parent, label, handler) {
const button = document.createElement("button");
button.classList.add("btn", "btn-primary", "m-2");
button.innerText = label;
button.onclick = handler;
parent.appendChild(button);
}
This code presents the user with Get Data and Log In and Log Out buttons. Clicking the Get Data button sends an HTTP request using the Fetch API, processes the JSON result, and displays a list of names. The other buttons do nothing, but I’ll use them in later examples to authenticate with the ASP.NET Core application using the hardwired credentials in the JavaScript code.
Request http://localhost:5000/webclient.xhtml and click the Get Data button. The JavaScript client will send an HTTP request to the Data controller and display the results, as shown in figure 39.10.
Figure 39.10 A simple web client
The standard authorization features are used to restrict access to web service endpoints, and in listing 39.22, I have applied the Authorize attribute to the DataController class.
Listing 39.22 Applying an attribute in the DataController.cs file in the Controllers folder of the Advanced project
using Advanced.Models;
using Microsoft.AspNetCore.Mvc;
using Microsoft.EntityFrameworkCore;
using Microsoft.AspNetCore.Authorization;
namespace Advanced.Controllers {
[ApiController]
[Route("/api/people")]
[Authorize]
public class DataController : ControllerBase {
private DataContext context;
// ...methods omitted for brevity...
}
}
Restart ASP.NET Core and request http://localhost:5000/account/logout to ensure that the JavaScript client doesn’t use an authentication cookie from a previous example. Request http://localhost:5000/webclient.xhtml to load the JavaScript client and click the Get Data button to send the HTTP request. The server will respond with a 401 Unauthorized response, as shown in figure 39.11.
Figure 39.11 An unauthorized request
The simplest way to implement authentication is to rely on the standard ASP.NET Core cookies demonstrated in previous sections. Add a class file named ApiAccountController.cs to the Controllers folder of the Advanced project and use it to define the controller shown in listing 39.23.
Listing 39.23 The ApiAccountController.cs file in the Controllers folder of the Advanced project
using Microsoft.AspNetCore.Identity;
using Microsoft.AspNetCore.Mvc;
namespace Advanced.Controllers {
[ApiController]
[Route("/api/account")]
public class ApiAccountController : ControllerBase {
private SignInManager<IdentityUser> signinManager;
public ApiAccountController(SignInManager<IdentityUser> mgr) {
signinManager = mgr;
}
[HttpPost("login")]
public async Task<IActionResult> Login([FromBody]
Credentials creds) {
Microsoft.AspNetCore.Identity.SignInResult result
= await signinManager.PasswordSignInAsync(creds.Username,
creds.Password, false, false);
if (result.Succeeded) {
return Ok();
}
return Unauthorized();
}
[HttpPost("logout")]
public async Task<IActionResult> Logout() {
await signinManager.SignOutAsync();
return Ok();
}
public class Credentials {
public string Username { get; set; } = string.Empty;
public string Password { get; set; } = string.Empty;
}
}
}
This web service controller defines actions that allow clients to log in and log out. The response for a successful authentication request will contain a cookie that the browser will automatically include in requests made by the JavaScript client.
Listing 39.24 adds support to the simple JavaScript client for authenticating using the action methods defined in listing 39.23.
Listing 39.24 Adding authentication in the webclient.js file in the wwwroot folder of the Advanced project
const username = "bob";
const password = "secret";
window.addEventListener("DOMContentLoaded", () => {
const controlDiv = document.getElementById("controls");
createButton(controlDiv, "Get Data", getData);
createButton(controlDiv, "Log In", login);
createButton(controlDiv, "Log Out", logout);
});
async function login() {
let response = await fetch("/api/account/login", {
method: "POST",
headers: { "Content-Type": "application/json" },
body: JSON.stringify({ username: username, password: password })
});
if (response.ok) {
displayData("Logged in");
} else {
displayData('Error: ${response.status}: ${response.statusText}');
}
}
async function logout() {
let response = await fetch("/api/account/logout", {
method: "POST"
});
if (response.ok) {
displayData("Logged out");
} else {
displayData('Error: ${response.status}: ${response.statusText}');
}
}
async function getData() {
let response = await fetch("/api/people");
if (response.ok) {
let jsonData = await response.json();
displayData(...jsonData.map(item => `${item.surname},
${item.firstname}`));
} else {
displayData(`Error: ${response.status}: ${response.statusText}`);
}
}
function displayData(...items) {
const dataDiv = document.getElementById("data");
dataDiv.innerHTML = "";
items.forEach(item => {
const itemDiv = document.createElement("div");
itemDiv.innerText = item;
itemDiv.style.wordWrap = "break-word";
dataDiv.appendChild(itemDiv);
})
}
function createButton(parent, label, handler) {
const button = document.createElement("button");
button.classList.add("btn", "btn-primary", "m-2");
button.innerText = label;
button.onclick = handler;
parent.appendChild(button);
}
Restart ASP.NET Core, request http://localhost:5000/webclient.xhtml, and click the Login In button. Wait for the message confirming authentication and then click the Get Data button. The browser includes the authentication cookie, and the request passes the authorization checks. Click the Log Out button and then click Get Data again. No cookie is used, and the request fails. Figure 39.12 shows both requests.
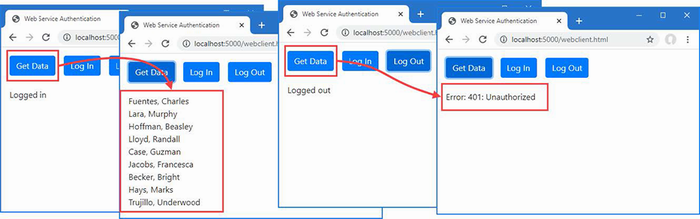
Figure 39.12 Using cookie authentication
Not all web services will be able to rely on cookies because not all clients can use then. An alternative is to use a bearer token, which is a string that clients are given and is included in the requests they send to the web service. Clients don’t understand the meaning of the token—which is said to be opaque—and just use whatever token the server provides.
I am going to demonstrate authentication using a JSON Web Token (JWT), which provides the client with an encrypted token that contains the authenticated username. The client is unable to decrypt or modify the token, but when it is included in a request, the ASP.NET Core server decrypts the token and uses the name it contains as the identity of the user. The JWT format is described in detail at https://tools.ietf.org/html/rfc7519.
Open a new PowerShell command prompt, navigate to the Advanced project folder, and run the commands shown in listing 39.25 to add the packages for JWT to the project.
Listing 39.25 Installing the NuGet package
dotnet add package System.IdentityModel.Tokens.Jwt --version 6.25.0
dotnet add package Microsoft.AspNetCore.Authentication.JwtBearer
--version 7.0.0
JWT requires a key that is used to encrypt and decrypt tokens. Add the configuration setting shown in listing 39.26 to the appsettings.json file. If you use JWT in a real application, ensure you change the key or use a secret to store the key outside of the project.
Listing 39.26 Adding a setting in the appsettings.json file in the Advanced project
{
"Logging": {
"LogLevel": {
"Default": "Information",
"Microsoft.AspNetCore": "Warning",
"Microsoft.EntityFrameworkCore": "Information"
}
},
"AllowedHosts": "*",
"ConnectionStrings": {
"PeopleConnection": "Server=(localdb)\\MSSQLLocalDB;...
Database=People;MultipleActiveResultSets=True",
"IdentityConnection": "Server=(localdb)\\MSSQLLocalDB;Database=Identity
➥;MultipleActiveResultSets=True"
},
"jwtSecret": "jwt_secret"
}
The client will send an HTTP request that contains user credentials and will receive a JWT in response. Listing 39.27 adds an action method to the ApiAccount controller that receives the credentials, validates them, and generates tokens.
Listing 39.27 Generating tokens in the ApiAccountController.cs file in the Controllers folder of the Advanced project
using Microsoft.AspNetCore.Identity;
using Microsoft.AspNetCore.Mvc;
using Microsoft.IdentityModel.Tokens;
using System.IdentityModel.Tokens.Jwt;
using System.Text;
using System.Security.Claims;
namespace Advanced.Controllers {
[ApiController]
[Route("/api/account")]
public class ApiAccountController : ControllerBase {
private SignInManager<IdentityUser> signinManager;
private UserManager<IdentityUser> userManager;
private IConfiguration configuration;
public ApiAccountController(SignInManager<IdentityUser> mgr,
UserManager<IdentityUser> usermgr,
IConfiguration config) {
signinManager = mgr;
userManager = usermgr;
configuration = config;
}
[HttpPost("login")]
public async Task<IActionResult> Login(
[FromBody] Credentials creds) {
Microsoft.AspNetCore.Identity.SignInResult result
= await signinManager.PasswordSignInAsync(creds.Username,
creds.Password, false, false);
if (result.Succeeded) {
return Ok();
}
return Unauthorized();
}
[HttpPost("logout")]
public async Task<IActionResult> Logout() {
await signinManager.SignOutAsync();
return Ok();
}
[HttpPost("token")]
public async Task<IActionResult> Token(
[FromBody] Credentials creds) {
if (await CheckPassword(creds)) {
JwtSecurityTokenHandler handler =
new JwtSecurityTokenHandler();
byte[] secret =
Encoding.ASCII.GetBytes(configuration["jwtSecret"]!);
SecurityTokenDescriptor descriptor =
new SecurityTokenDescriptor {
Subject = new ClaimsIdentity(new Claim[] {
new Claim(ClaimTypes.Name, creds.Username)
}),
Expires = DateTime.UtcNow.AddHours(24),
SigningCredentials = new SigningCredentials(
new SymmetricSecurityKey(secret),
SecurityAlgorithms.HmacSha256Signature)
};
SecurityToken token = handler.CreateToken(descriptor);
return Ok(new {
success = true,
token = handler.WriteToken(token)
});
}
return Unauthorized();
}
private async Task<bool> CheckPassword(Credentials creds) {
IdentityUser? user
= await userManager.FindByNameAsync(creds.Username);
if (user != null) {
return (await signinManager.CheckPasswordSignInAsync(user,
creds.Password, true)).Succeeded;
}
return false;
}
public class Credentials {
public string Username { get; set; } = string.Empty;
public string Password { get; set; } = string.Empty;
}
}
}
When the Token action method is invoked, it passes the credentials to the CheckPassword method, which enumerates the IPasswordValidator<T> objects to invoke the ValidateAsync method on each of them. If the password is validated by any of the validators, then the Token method creates a token.
The JWT specification defines a general-purpose token that can be used more broadly than identifying users in HTTP requests, and many of the options that are available are not required for this example. The token that is created in listing 39.27 contains a payload like this:
...
{
"unique_name": "bob",
"nbf": 1579765454,
"exp": 1579851854,
"iat": 1579765454
}
...
The unique_name property contains the name of the user and is used to authenticate requests that contain the token. The other payload properties are timestamps, which I do not use.
The payload is encrypted using the key defined in listing 39.27 and returned to the client as a JSON-encoded response that looks like this:
...
{
"success":true,
"token":"eyJhbGciOiJIUzI1NiIsInR5cCI6IkpXVCJ9..."
}
...
I have shown just the first part of the token because they are long strings and it is the structure of the response that is important. The client receives the token and includes it in future requests using the Authorization header, like this:
... Authorization: Bearer eyJhbGciOiJIUzI1NiIsInR5cCI6IkpXVCJ9 ...
The server receives the token, decrypts it using the key, and authenticates the request using the value of the unique_name property from the token payload. No further validation is performed, and requests with a valid token will be authenticated using whatever username is contained in the payload.
The next step is to configure the application to receive and validate the tokens, as shown in listing 39.28.
Listing 39.28 Authenticating tokens in the Program.cs file in the Advanced project
using Microsoft.EntityFrameworkCore;
using Advanced.Models;
using Microsoft.AspNetCore.Identity;
using Microsoft.AspNetCore.Authentication.Cookies;
using Microsoft.IdentityModel.Tokens;
using System.Text;
using System.Security.Claims;
using Microsoft.AspNetCore.Authentication.JwtBearer;
var builder = WebApplication.CreateBuilder(args);
builder.Services.AddControllersWithViews();
builder.Services.AddRazorPages();
builder.Services.AddServerSideBlazor();
builder.Services.AddDbContext<DataContext>(opts => {
opts.UseSqlServer(
builder.Configuration["ConnectionStrings:PeopleConnection"]);
opts.EnableSensitiveDataLogging(true);
});
builder.Services.AddSingleton<Advanced.Services.ToggleService>();
builder.Services.AddDbContext<IdentityContext>(opts =>
opts.UseSqlServer(builder.Configuration[
"ConnectionStrings:IdentityConnection"]));
builder.Services.AddIdentity<IdentityUser, IdentityRole>()
.AddEntityFrameworkStores<IdentityContext>();
builder.Services.Configure<IdentityOptions>(opts => {
opts.Password.RequiredLength = 6;
opts.Password.RequireNonAlphanumeric = false;
opts.Password.RequireLowercase = false;
opts.Password.RequireUppercase = false;
opts.Password.RequireDigit = false;
opts.User.RequireUniqueEmail = true;
opts.User.AllowedUserNameCharacters = "abcdefghijklmnopqrstuvwxyz";
});
builder.Services.AddAuthentication(opts => {
opts.DefaultScheme =
CookieAuthenticationDefaults.AuthenticationScheme;
opts.DefaultChallengeScheme =
CookieAuthenticationDefaults.AuthenticationScheme;
}).AddCookie(opts => {
opts.Events.DisableRedirectForPath(e => e.OnRedirectToLogin,
"/api", StatusCodes.Status401Unauthorized);
opts.Events.DisableRedirectForPath(e => e.OnRedirectToAccessDenied,
"/api", StatusCodes.Status403Forbidden);
}).AddJwtBearer(opts => {
opts.RequireHttpsMetadata = false;
opts.SaveToken = true;
opts.TokenValidationParameters = new TokenValidationParameters {
ValidateIssuerSigningKey = true,
IssuerSigningKey = new SymmetricSecurityKey(
Encoding.ASCII.GetBytes(builder.Configuration["jwtSecret"]!)),
ValidateAudience = false,
ValidateIssuer = false
};
opts.Events = new JwtBearerEvents {
OnTokenValidated = async ctx => {
var usrmgr = ctx.HttpContext.RequestServices
.GetRequiredService<UserManager<IdentityUser>>();
var signinmgr = ctx.HttpContext.RequestServices
.GetRequiredService<SignInManager<IdentityUser>>();
string? username =
ctx.Principal?.FindFirst(ClaimTypes.Name)?.Value;
if (username != null) {
IdentityUser? idUser =
await usrmgr.FindByNameAsync(username);
if (idUser != null) {
ctx.Principal =
await signinmgr.CreateUserPrincipalAsync(idUser);
}
}
}
};
});
var app = builder.Build();
app.UseStaticFiles();
app.UseAuthentication();
app.UseAuthorization();
app.MapControllers();
app.MapControllerRoute("controllers",
"controllers/{controller=Home}/{action=Index}/{id?}");
app.MapRazorPages();
app.MapBlazorHub();
app.MapFallbackToPage("/_Host");
app.UseBlazorFrameworkFiles("/webassembly");
app.MapFallbackToFile("/webassembly/{*path:nonfile}",
"/webassembly/index.xhtml");
var context = app.Services.CreateScope().ServiceProvider
.GetRequiredService<DataContext>();
SeedData.SeedDatabase(context);
IdentitySeedData.CreateAdminAccount(app.Services, app.Configuration);
app.Run();
The AddJwtBearer adds support for JWT to the authentication system and provides the settings required to decrypt tokens. I have added a handler for the OnTokenValidated event, which is triggered when a token is validated so that I can query the user database and associate the IdentityUser object with the request. This acts as a bridge between the JWT tokens and the ASP.NET Core Identity data, ensuring that features like role-based authorization work seamlessly.
To allow a restricted endpoint to be accessed with tokens, I have modified the Authorize attribute applied to the Data controller, as shown in listing 39.29.
Listing 39.29 Enabling tokens in the DataController.cs file in the Controllers folder of the Advanced project
using Advanced.Models;
using Microsoft.AspNetCore.Mvc;
using Microsoft.EntityFrameworkCore;
using Microsoft.AspNetCore.Authorization;
namespace Advanced.Controllers {
[ApiController]
[Route("/api/people")]
[Authorize(AuthenticationSchemes = "Identity.Application, Bearer")]
public class DataController : ControllerBase {
private DataContext context;
// ...methods omitted for brevity...
}
}
The AuthenticationSchemes argument is used to specify the types of authentication that can be used to authorize access to the controller. In this case, I have specified that the default cookie authentication and the new bearer tokens can be used.
The final step is to update the JavaScript client so that it obtains a token and includes it in requests for data, as shown in listing 39.30.
Listing 39.30 Using tokens in the webclient.js file in the wwwroot folder of the Advanced project
const username = "bob";
const password = "secret";
let token;
window.addEventListener("DOMContentLoaded", () => {
const controlDiv = document.getElementById("controls");
createButton(controlDiv, "Get Data", getData);
createButton(controlDiv, "Log In", login);
createButton(controlDiv, "Log Out", logout);
});
async function login() {
let response = await fetch("/api/account/token", {
method: "POST",
headers: { "Content-Type": "application/json" },
body: JSON.stringify({ username: username, password: password })
});
if (response.ok) {
token = (await response.json()).token;
displayData("Logged in", token);
} else {
displayData(`Error: ${response.status}: ${response.statusText}`);
}
}
async function logout() {
token = "";
displayData("Logged out");
}
async function getData() {
let response = await fetch("/api/people", {
headers: { "Authorization": 'Bearer ${token}' }
});
if (response.ok) {
let jsonData = await response.json();
displayData(...jsonData.map(item =>
`${item.surname}, ${item.firstname}`));
} else {
displayData(`Error: ${response.status}: ${response.statusText}`);
}
}
function displayData(...items) {
const dataDiv = document.getElementById("data");
dataDiv.innerHTML = "";
items.forEach(item => {
const itemDiv = document.createElement("div");
itemDiv.innerText = item;
itemDiv.style.wordWrap = "break-word";
dataDiv.appendChild(itemDiv);
})
}
function createButton(parent, label, handler) {
const button = document.createElement("button");
button.classList.add("btn", "btn-primary", "m-2");
button.innerText = label;
button.onclick = handler;
parent.appendChild(button);
}
The client receives the authentication response and assigns the token so it can be used by the GetData method, which sets the Authorization header. Notice that no logout request is required, and the variable used to store the token is simply reset when the user clicks the Log Out button.
Restart ASP.NET Core and request http://localhost:5000/webclient.xhtml. Click the Log In button, and a token will be generated and displayed. Click the Get Data button, and the token will be sent to the server and used to authenticate the user, producing the results shown in figure 39.13.
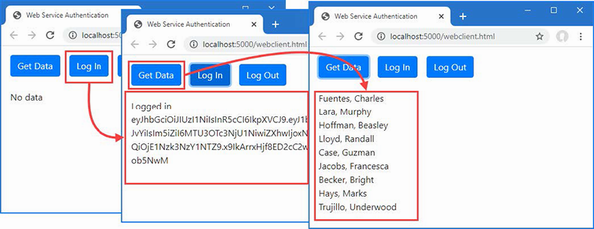
Figure 39.13 Using a token for authentication
User credentials are validated using the SignInManager service and successful authentications usually generate a cookie that will be included in subsequent requests.
Identity supports alternatives to cookies, including bearer tokens for use with web services and JavaScript clients.
Access controls are applied to ensure that only authorized users can request restricted actions, pages, or components. Authorization policies are specified using attributes.
A
Action methods 500
Action Results 514
redirection 514
sending files 514
status codes 514
ActivatorUtilities class
resolving services 362
Angular 3
appsettings.Development.json File 388
appsettings.json File 387
Arrays
model binding 816
ASP.NET Core
application frameworks 3
Blazor 4
MVC framework 3
Razor Pages 4
architecture 1
gRPC 5
platform 5
SignalR 5
utility frameworks
ASP.NET Core Identity 5
Entity Framework Core 5
ASP.NET Core Identity 5
access denied endpoint 1184
application configuration 1147
authentication 1174
authentication cookie 1177
authentication middleware 1180
authentication vs authorization 1175
authN 1175
authorization 1183
Authorize attribute 1183
endpoints 1183
web services 1194
authorization middleware 1184
Authorize attribute 1198
AuthenticationSchemes argument 1208
Roles argument 1183
authZ 1175
Blazor applications 1188
changing passwords 1161
ClaimsPrincipal class 1181
creating
roles 1167
users 1152
database
configuration
migration 1148
reset 1148
deleting
roles 1165
users 1162
disabling redirection 1196
editing
roles 1168
users 1160
Entity Framework Core 1148
enumerating
roles 1165
IdentityResult class 1154
IdentityRole class 1164
Identity Server 1188
IdentityUser class 1149
importance of HTTPS 1177
logging in 1175
management tools 1149
OAuth 1188
options pattern 1157
package, adding 1145
PasswordOptions class 1157
password validation 1155
redirection URLs 1188
RoleManager<T> class 1164
role membership 1168
scaffolding 1149
seed data 1185
service configuration 1147
SignInManager<T> class 1176
two-factor authentication 1182
UserManager<T> class 1149, 1164
UserOptions class 1159
validating user details 1158
web services 1194
bearer tokens 1202
cookie authentication 1199
JSON Web Token 1202
B
advantages 978
application errors
element ID 1035
error boundaries 1036
architecture 977
attributes
parameters 992
attribute splatting 1010
authorization 1188
AuthorizeRouteView component 1190
AuthorizeView component 1192
configuring 996
DateTime bindings 997
defining 996
Blazor Server 4
Blazor WebAssembly 4
cascading parameters 1028
client-side code 979
component
applying 983
attributes 1008
bulk attributes 1009
cascading parameters 1028
child content 1017
@ChildContent expression 1017
code section 982
combining 1006
configuration 1008
content section 982
creating 981
custom events 1012
generic templates 1022
@key expression 1018
restricting element reuse 1018
templates 1019
components
code-only components 1002
custom form components 1088
DataAnnotationsValidator component 1092
element references 1073
forms 1085
InvokeAsync method 1066
invoking from other code 1065
JavaScript 1070
DotNetObjectReference class 1078
InvokeAsync method 1072
InvokeVoidAsync method 1072
LayoutView component 1056
partial classes 1000
StateHasChanged method 1066
ValidationMessage component 1092
ValidationSummary component 1092
component tag helper 983
connection errors 1031
element classes 1032
element ID 1032
testing with Fiddler 1033
data validation
components 1092
element classes 1092
disadvantages 978
EditForm component 1085
enabling 979
Entity Framework Core
dependency injection scopes 1098
repeated queries 1103
errors 1031
events
attributes 986
default actions 992
event types 986
handler methods names 989
handler parameters 988
inline expressions 991
parameters 992
propagation 992
form features 1085
forms
EditContext features 1115
forms
CRUD operations 1109
HTTP connection 977
hub 979
imports file, creating 980
InputCheckbox component 1085
InputDate component 1085
InputNumber component 1085
InputTextArea component 1085
InputText component 1085
JavaScript file 979
@layout expression 1056
layouts 1056
lifecycle 1057
methods 1057
Parameter attribute 1008, 1009
@ref expression 1062
rendering modes 983
retaining references
@ref expression 1062
routing 1044
configuring fallback 1046
default route 1049
MapFallbackToPage method 1047
navigation 1050
NavigationManager service 1051
@page directive 1047
receiving route data 1053
Router component 1044
RouteView component 1044
WebAssembly
base element 1129
base URL 1129
components 1131
CSS styles 1137
HttpClient service 1134
layout 1136
navigation URLs 1133
placeholder components 1130
shared code 1126
Blazor Server 977
Blazor WebAssembly 1126
Bootstrap CSS framework 967
C
C#
anonymous types 107
asynchronous methods 111
asynchronous enumerable 114
async keyword 112
await keyword 112
tasks 111
collection initializers 90
extension methods 95
interfaces 97
global using statements 79
implicit usings 79
index initializers 92
interfaces
default implementations 109
extension methods 97
lambda expressions 100
expression forms 105
functions 102
methods 105
properties 105
nameof expressions 117
null state analysis 82
object initializers 90
pattern matching 94
switch statements 94
Program.cs file 79
top-level statements 79
type inference
var keyword 107
var keyword 107
Caching 452
Circular references 534
Client-Side packages 411
Collections
model binding 820
Commands
dotenet list package 68
dotnet ef command 69
dotnet ef database 473
dotnet ef migrations 473, 489, 967
dotnet new globaljson 61
dotnet new sln 61
dotnet new web 61
dotnet remove package 69
dotnet run 66
dotnet sln 61
dotnet sql cache create 458
dotnet test 128
Invoke-RestMethod 498
libman 69
libman init 70
libman install 70
sqlcmd 458
Configuration 387
appsettings.json File 387
ASPNETCORE_ENVIRONMENT 393
command-line arguments 475
determining the environment 397
environment-specific configuration 388, 392
IConfiguration interface 388
IsDevelopment method 397
IsProduction method 397
IsStaging method 397
launch.json File 393
launchSettings.json File 392
listing secrets 399
User Secrets 398
reading secrets 399
storing secrets 398
using in middleware components 388
Containers, creating 274
Content Delivery Networks 741
Content Negotiation 542
Controllers 498
Cookies 420
CookieOptions class 421
IsEssential property 424
ITrackingConsentFeature interface 424
sessions 426
tracking cookies 422
requiring consent 423
UseCookiePolicy method 424
Cross-origin requests
enabling 510
D
Data Validation
attributes 519
Range 520
Required 520
ModelState property 520
Debugging 71
ActivatorUtilities class 362
CreateInstance method 363
GetServiceOrCreateInstance method 363
AddTransient method 365
controllers 504
CreateScope method 370
dependency chains 374
Entity Framework Core scopes 1098
exceptions 371
factory functions 377
FromServices attribute 505
GetRequiredService method 361
GetService method 361
HttpContext object 369
RequestServices property 371
IServiceProvider interface
extension methods 361
middleware
constructor parameter 359
middleware
HttpContext object 360
root scope exceptions 371
singleton services 364
transient services 365
AddTransient method 365
methods 365
scoped services 369
services in Program.cs file 376
services with multiple implementations 379
singleton pattern 354
tight coupling 352
type brokers 355
unbound types 381
whether to use 352
Design patterns 4
Dictionaries
model binding 820
Docker 274
E
Endpoints
controllers 23
Entity Framework Core 5
AddDbContext<T> method 471, 488, 966
applying programmatically 474
SaveChangesAsync method 476
SaveChanges method 474
ASP.NET Core Identity 1148
changing primary keys 938
Column attribute 487
connection strings 472, 489, 967
multiple active result sets 472
creating related data 948
creating services 471, 488, 966
global tools
installing 469
LINQ queries 476
translation to SQL 477
logging sensitive data 478
migrations
applying 473
NuGet packages, installing 470, 485, 963
Related data 533
circular references 534
Include method 534
projecting new objects 535
related data properties, resetting 934
SQL types 487
Column attribute 487
storing data
migrations
Errata, reporting 7
Error boundaries 1036
Exceptions
developer exception page 441
HTML error responses 443
status code responses 444
F
Files
sending using action results 514
Filters 880
context objects 895
attributes 886
authorization filters 885, 887
context objects 909
execution order 885
filter attributes 886
FilterContext class 887
filter factories 913
filter interfaces 886
global filters 916
IActionFilter interface 894
IAlwaysRunResultFilter interface 903
IAsyncActionFilter interface 894
IAsyncAlwaysRunResultFilter interface 903
IAsyncAuthorizationFilter interface 887
IAsyncExceptionFilter interface 908
IAsyncPageFilter interface 899
IAsyncResourceFilter interface 890
IAsyncResultFilter interface 903
IAuthorizationFilter interface 887
IExceptionFilter interface 908
IFilterFactory interface 913
interfaces 886
IOrderedFilter interface 918
IPageFilter interface 899
IResourceFilter interface 890
IResultFilter interface 903
lifecycle 911
reusing filters 913
using scopes 915
ordering 918
context objects 899
RequireHttps 882
context classes 890
always-run filters 905
context objects 904
reusing filters 913
ServiceFilter attribute 916
short-circuiting 886
types of filter 885
using 882
Forms 928
Blazor form features 1085
button elements
asp-action attribute 766
asp-controller attribute 766
asp-page attribute 766
creating related data 948
separate request 953
single request 948
CSRF protection 787
AutoValidateAntiForgeryToken attribute 789
controllers 789
IgnoreAntiForgeryToken attribute 790
JavaScript clients 790
configuring 791
Razor Pages 790
security token 788
ValidateAntiForgeryToken attribute 790
form elements
asp-action attribute 764
asp-* attributes 764
asp-controller attribute 764
asp-page attribute 765
target 764
input elements
asp-for attribute 767
Column attribute 772
DisplayFormat attribute 773
formatting values 771
id attribute 768
name attribute 768
related data 775
type attribute 769
value attribute 768
label elements
asp-for attribute 779
for attribute 779
Post/Redirect/Get pattern 759
#pragma warning 777
primary keys, invariant 938
resetting related data 934
select elements
asp-for attribute 781
SelectList class 783
SelectListItem class 783
tag helpers 759
form elements 764
textarea elements
asp-for attribute 785
G
General Data Protection Regulation 422
Globbing selectors 735
GraphQL 495
H
Host header
request filtering 446
HTML Forms 759
HTML, Safe Encoding 626
HttpContext class
useful members 294
HttpRequest class
useful members 294
HttpResponse class
useful members 295
HTTPS 431
configuring 431
detecting HTTPS requests 433
development certificates 432, 878
enabling 431
HTTP Strict Transport Security 435
redirection from HTTP 434
configuration 434
SSL 431
TLS 431
HTTP status codes 444
J
jQuery
client-side validation packages 866
installing package 729
JSON
JsonIgnore attribute 524
JsonIgnoreCondition enum 524
serializer configuration 524
web services 495
JSON.NET Serializer 537
JSON Patch 536
L
Library Manager 411
Lists
model binding 820
Logging 401
ILogger<T> interface
extension methods 403
LoggerMessage attribute 405
logging providers 401
console provider 401
Debug provider 401
EventSource provider 401
list 401
SQL queries 477
M
Middleware
branching 302
built-in middleware 288
context objects 294
cookies 420
creating 293
using classes 297
exception handling 441
Host header filtering 447
HTTPS 431
Map method 302
Map When method 303
next function 296
request pipeline 288
response caching 461
response compression
UseResponseCompression method 463
return path 299
Run middleware 305
sessions 426
short-circuiting 300
static files 412
terminal middleware 304
URL routing 316
Use method 294
UseMiddleware method 298
Minimal API 497
Model Binding 506
arrays 816
specifying indices 818
BindNever attribute 808
BindProperties attribute 808
BindProperty attribute 807
GET requests 808
collections 816
arrays 816
collections of complex types 822
dictionaries 820
key/value pairs 820
lists 820
sequences 820
sets 820
simple collections 820
complex types 805
binding to a property 807
nested types 809
property binding 807
selectively binding properties 813, 815
default values 802
nullable parameters 804
FromBody attribute 507, 824, 829
FromForm attribute 824
FromQuery attribute 824
FromRoute attribute 824
FromService attribute 825
manual binding 830
TryUpdateModelAsync method 831
nested types 809
over binding 512
Razor Pages 800
search locations 798
selecting a source 824
simple types 799
default values 802
source, selecting 824
TryUpdateModelAsync method 831
understanding 797
Model expression
null conditional operator 777
Model Validation
AddModelError method 838
client-side validation
extending 869
JavaScript packages 866
explicit validation 838
GetValidationState method 838
IsValid property 838
metadata validation 857
mismatched model types 935
model state dictionary 838
new view model objects 935
Razor Pages 854
remote validation 869
understanding 837
validating checkboxes 860
validation attributes 857
Compare attribute 858
custom attributes 861
Range attribute 858
RegularExpression attribute 858
Required attribute 858
StringLength attribute 858
validation messages 839
attributes 839
configuring 847
element highlighting 840
model-level messages 851
property-level messages 850
tag helper 841
ValidationSummary values 842
validation states 844
web services controllers 860
Model-View-Controller Pattern 499
MVC Framework
action results 514
actions 500
ControllerBase class 501
controllers
defining 501
ModelState property 520
Controllers 498
enabling 499
MVC pattern 499
NonController attribute 501
pattern 3
Razor 561
separation of concerns 3
Views 561
N
.NET SDK
versions
NuGet 292
O
OpenAPI 553
P
Pages
model expressions 712
PATCH method 536
Platform
client-side packages 411
configuration 387
Cookies 420
distributed cache 427
exceptions 441
Host header 446
HTTPS” 431
Logging 401
middleware 288
request features 424
request pipeline 288
branching 302
return path 299
services 288
sessions 426
static content 411
understanding 288
Project
appsettings.json File 387
launch.json File 393
launchSettings.json File 392
request pipeline
short-circuiting 300
Projects
adding items 63
adding packages 292
appsettings files 290
building projects 64
client-side packages 69
compiling projects 64
creating
dotnet new command 20
creating projects 61
debugging 71
Empty template 288
global.json file 290
launchSettings.json file 290
LibMan 69
managing packages
client-side packages 69
tool packages 69
managing packages 68
scaffolding 64
templates 60
limitations 60
tool packages 69
R
Razor Component 981
Razor Pages 4
action results
Page method, implied 647
redirections 650
actions results 647
code-behind classes 644
common base classes 944
configuration 633
creating 634
dependency injection 660
generated class 637
HTTP methods 651
@inject directive 660
layouts 656
model Validation 854
multiple handler methods 942
@page directive 641
base class 644
code-behind class 644
generating URLs 734
handler parameter/variable 653
multiple handler methods 653
multiple HTTP methods 651
properties 644
Url property 734
page view 637
partial views 658
search path 658
sharing with MVC Framework 658
registering tag helpers 698
routing 639
conventions 642
default URL 640
defining a route 641
routing convention 636
runtime compilation 633
view components, using 670
React 3
Redis 456
Repository pattern
using 148
Response compressions 463
RESTFul web services 494
ambiguous routes
avoiding 342
ordering 343
applying middleware 316
areas 329
defining endpoints 317
Map methods 317
endpoints
RequestDelegate 317
endpoint selection 345
GetEndpoint method 346
fallback routes 340
generating URLs 326
LinkGenerator class 328
HttpContext.RouteValues property 322
IEndpointRouteBuilder methods 317
MapControllerRoute method 565
MapDefaultControllerRoute method 567
Razor Pages 636
route selection 324
URL patterns 321
catch-all segments 334
complex patterns 330
constraints 336
combining 338
custom 341
default values 331
optional segments 333
regular expressions 339
RouteValuesDictionary class 322
segments 321
segment variables 322
WithMetadata method 327
S
Scaffolding 64
Services
AddDistributedSqlServerCache
AddDistributedMemoryCache method 456
application lifetime service 475
caching 452
AddDistributedMemoryCache method 456
AddStackExchangeRedisCahce method 456
database preparation 458
data cache 454
DistributedCacheEntryOptions class 455
distributed caching 458
IDistributedCache implementations 456
IDistributedCache interface 455
memory cache options 457
NuGet package 459
persistent caching 458
SQL Server cache options 460
response caching 461
AddResponseCaching method 462
Cache-Control header 463
UseResponseCaching method 462
Vary header 463
Sessions 426
configuration 427
data cache 427
AddDistributedMemoryCache method 427
ISession interface 429
session data 429
committing changes 430
SignalR 5
Single Page Applications
Angular 3
React 3
Singleton pattern 354
Solutions 61
Source maps 737
SportsStore 139
administration 238
Blazor Server 240
checkout 224
client-side packages 169
connection strings 146
creating projects 139
data model 144
deployment 274
Entity Framework Core 146
filtering categories 176
migrations 151
navigation menu 184
page counts, fixing 191
pagination 157
repository pattern 148
security 261
tag helpers 160
Unit Testing 139
validation 234
SQL Server
Startup Class
enabling MVC 499
Static Content 411
Library Manager 415
initializing project 415
installing 415
installing packages 967
middleware 412
configuration options 413
wwwroot folder 411
Status code responses 444
T
Tag Helper Components 721
Tag Helpers
anchor elements 731
Razor Pages 733
attributes
HtmlAttributeName attribute 697
naming convention 696
Blazor 983
built-in helpers
enabling 731
Cache busting 740
caching content 748
cache expiry 750
distributed caching 750
variations 752
TagHelperContext class 696
ViewContext attribute 711
coordination 718
Items collection 718
creating 695
CSS stylesheets 743
enabling 731
environment element 753
forms 759
globbing 735
HtmlAttributeNotBound attribute 711
HtmlTargetElement attribute 700
properties 700
images 746
img elements 746
JavaScript files 735
link elements 743
content delivery networks 745
model expressions 712
output 697
ProcessAsync method 696
Process method 695
property naming convention 696
registering 698
scope
increasing 701
restricting 700
script elements 735
cache busting 740
content delivery networks 741
selecting 735
short-hand elements 703
suppressing output 720
TagBuilder class 706
TagHelper base class 695
tag helper components 721
creating 721
expanding selection 723
TagHelperComponent class 721
TagHelperComponentTagHelper class 723
TagHelperContext class
properties 696
TagHelperOutput class
properties 697
validation messages 841
view components 669
ViewContext attribute 711
_ViewImports.cshtml file 698
Temp data 604
Type broker pattern 355
U
Unit testing
Assert methods 126
creating the test project 124
Fact attribute 126
isolating components 130
mocking 135
Moq package 135
MSTest 124
NUnit 124
project templates 124
writing tests 125
XUnit 124
Unit Testing 139
URL Routing 316
User Secrets 398
V
View Components 667
applying
Component.InvokeAsync expression 668
custom HTML element 669
Razor Pages 670
tag helper 669
vc element 669
context data 678
parent view 679
creating 667
hybrid classes
controllers 688
Razor Pages 685
ViewComponent attribute 685
ViewComponentContext attribute 685
Invoke method 667
parent views 679
results 671
HTML fragments 675
partial views 672
ViewComponent attribute 685
ViewComponent class 667
context data 678
properties 678
views 672
search locations 674
Views 25
AddControllersWithViews method 565
AddRazorRuntimeCompilation method 565
content encoding
disable 627
content-encoding 626
CSHTML files 569
directives 587
@addTagHelper 587
@attribute 587
@functions 587
@implements 587
@inherits 587
@model 587
@namespace 587
@page 587
expressions
@ 588
attribute values 590
@await 588
code blocks 588
conditional expressions
if expressions 591
select expressions 592
element content 589
@foreach 588
@if 588
@Model 588
sequences
foreach expressions 594
@switch 588
@try 588
generated classes 575
generating URLs 734
Url property 734
HTML content-encoding 626
IntelliSense support 580
JSON content-encoding 628
layouts 607
configuring 609
disabling 614
optional sections 618
overriding the default layout 612
RenderSection method 616
section expressions 616
sections 615
selecting a layout 608
selecting programmatically 613
@model expressions 579
model expressions 712
@Model expressions 570
partial views 622
partial element 623
RazorPage<T> class 576
additional properties 578
RazorPage<T> properties 576
Razor syntax 587
recompilation 570
registering tag helpers 698
search path 568
selecting by name 571
shared views 573
temp data 604
keep method 606
peek method 606
TempData attribute 606
TempData property 605
templated delegates 625
view bag 602
view components 672
view import file 622
view imports file
_ViewImports.cshtml file 581
view model object 570
View model type
@model expressions 578
view start files 611
Visual Studio
installing 14
LocalDB 15
workloads 15
Visual Studio Code
installing 16
LocalDB 17
W
Web Pages 3
Web services
authentication 1194
authorization 1194
action methods
results 503
action results 514
actions
HTTP method attributes 502
ApiController attribute 521
Content Formatting 540
custom formatters 543
default policy 540
JSON formatting 543
Restricting Formats 549
XML formatting 543
Content Negotiation 542
Accept header 542
Consumes attribute 549
Respecting Accept header 545
Using the URL 548
controllers 498
asynchronous actions 511
attributes 501
ControllerBase class 501
creating 500
dependency injection 504
FromServices attribute 505
model binding 506
services 504
CORS 510
data validation 519
GraphQL 495
gRPC 495
HTTP PATCH method 536
JSON Patch 536
JSON 495
JSON.NET Serializer 537
JsonPatchDocument<T> class 539
NuGet package 537
specification 536
model validation 860
null properties 523
OpenAPI 553
API Analyzer 557
conflicts 553
Nuget Package 554
ProducesResponseType attribute 559
Related data 533
remote model validation 869
REST 494
routing 501
URLs and HTTP Methods 495
Ultimate ASP.NET Core Web API 2nd Premium Edition
1 PROJECT CONFIGURATION
2 Creating the Required Projects
3 ONION ARCHITECTURE IMPLEMENTATION
4 HANDLING GET REQUESTS
5 GLOBAL ERROR HANDLING
6 GETTING ADDITIONAL RESOURCES
7 CONTENT NEGOTIATION
8 METHOD SAFETY AND METHOD IDEMPOTENCY
9 CREATING RESOURCES
10 WORKING WITH DELETE REQUESTS
11 WORKING WITH PUT REQUESTS
12 WORKING WITH PATCH REQUESTS
13 VALIDATION
14 ASYNCHRONOUS CODE
15 ACTION FILTERS
16 PAGING
17 FILTERING
18 SEARCHING
19 SORTING
20 DATA SHAPING
21 SUPPORTING HATEOAS
22 WORKING WITH OPTIONS AND HEAD REQUESTS
23 ROOT DOCUMENT
24 VERSIONING APIS
25 CACHING
26 RATE LIMITING AND THROTTLING
27 JWT, IDENTITY, AND REFRESH TOKEN
28 REFRESH TOKEN
29 BINDING CONFIGURATION AND OPTIONS PATTERN
30 DOCUMENTING API WITH SWAGGER
31 DEPLOYMENT TO IIS
32 BONUS 1 - RESPONSE PERFORMANCE IMPROVEMENTS
33 BONUS 2 - INTRODUCTION TO CQRS AND MEDIATR WITH ASP.NET CORE WEB API
1 Project configuration
Configuration in .NET Core is very different from what we’re used to in .NET Framework projects. We don’t use the web.config file anymore, but instead, use a built-in Configuration framework that comes out of the box in .NET Core.
To be able to develop good applications, we need to understand how to configure our application and its services first.
In this section, we’ll learn about configuration in the Program class and set up our application. We will also learn how to register different services and how to use extension methods to achieve this.
Of course, the first thing we need to do is to create a new project, so,let’s dive right into it.
1.1 Creating a New Project
Let's open Visual Studio, we are going to use VS 2022, and create a new ASP.NET Core Web API Application:
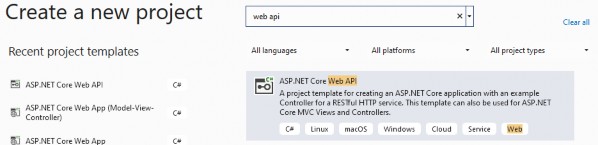
Now let’s choose a name and location for our project:
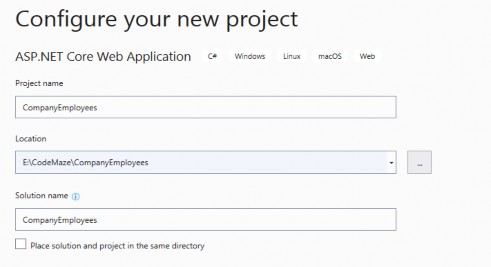
Next, we want to choose a .NET 6.0 from the dropdown list. Also, we don’t want to enable OpenAPI support right now. We’ll do that later in the book on our own. Now we can proceed by clicking the Create button and the project will start initializing:
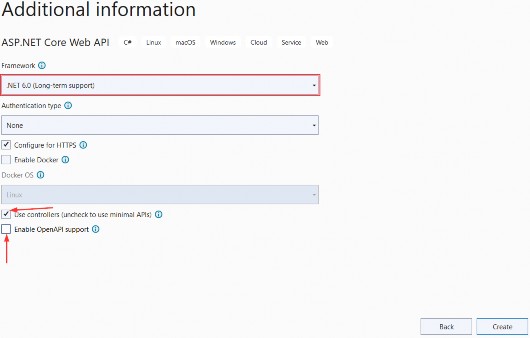
1.2 launchSettings.json File Configuration
After the project has been created, we are going to modify the launchSettings.json file, which can be found in the Properties section of the Solution Explorer window.
This configuration determines the launch behavior of the ASP.NET Core applications. As we can see, it contains both configurations to launch settings for IIS and self-hosted applications (Kestrel).
For now, let’s change the launchBrowser property to false to prevent the web browser from launching on application start.
{ "$schema": "https://json.schemastore.org/launchsettings.json", "iisSettings": { "windowsAuthentication": false, "anonymousAuthentication": true, "iisExpress": { "applicationUrl": "http://localhost:1629", "sslPort": 44370 } }, "profiles": { "CompanyEmployees": { "commandName": "Project", "dotnetRunMessages": true, "launchBrowser": false, "launchUrl": "weatherforecast", "applicationUrl": "https://localhost:5001;http://localhost:5000", "environmentVariables": { "ASPNETCORE_ENVIRONMENT": "Development" } }, "IIS Express": { "commandName": "IISExpress", "launchBrowser": false, "launchUrl": "weatherforecast", "environmentVariables": { "ASPNETCORE_ENVIRONMENT": "Development" } } } }
This is convenient since we are developing a Web API project and we don’t need a browser to check our API out. We will use Postman (described later) for this purpose.
If you’ve checked Configure for HTTPS checkbox earlier in the setup phase, you will end up with two URLs in the applicationUrl section — one for HTTPS (localhost:5001), and one for HTTP (localhost:5000).
You’ll also notice the sslPort property which indicates that our application, when running in IISExpress, will be configured for HTTPS (port 44370), too.
NOTE: This HTTPS configuration is only valid in the local environment. You will have to configure a valid certificate and HTTPS redirection once you deploy the application.
There is one more useful property for developing applications locally and that’s the launchUrl property. This property determines which URL will the application navigate to initially. For launchUrl property to work, we need to set the launchBrowser property to true. So, for example, if we set the launchUrl property to weatherforecast, we will be redirected to https://localhost:5001/weatherforecast when we launch our application.
1.3 Program.cs Class Explanations
Program.cs is the entry point to our application and it looks like this:
var builder = WebApplication.CreateBuilder(args);
// Add services to the container.
builder.Services.AddControllers();
var app = builder.Build();
// Configure the HTTP request pipeline.
app.UseHttpsRedirection();
app.UseAuthorization();
app.MapControllers(); app.Run();Compared to the Program.cs class from .NET 5, there are some major changes. Some of the most obvious are:
• Top-level statements
• Implicit using directives
• No Startup class (on the project level)
“Top-level statements” means the compiler generates the namespace, class, and method elements for the main program in our application. We can see that we don’t have the class block in the code nor the Main method. All of that is generated for us by the compiler. Of course, we can add other functions to the Program class and those will be created as the local functions nested inside the generated Main method. Top-level statements are meant to simplify the entry point to the application and remove the extra “fluff” so we can focus on the important stuff instead.
“Implicit using directives” mean the compiler automatically adds a different set of using directives based on a project type, so we don’t have to do that manually. These using directives are stored in the obj/Debug/net6.0 folder of our project under the name CompanyEmployees.GlobalUsings.g.cs:
// <auto-generated/>
global using global::Microsoft.AspNetCore.Builder;
global using global::Microsoft.AspNetCore.Hosting;
global using global::Microsoft.AspNetCore.Http;
global using global::Microsoft.AspNetCore.Routing;
global using global::Microsoft.Extensions.Configuration;
global using global::Microsoft.Extensions.DependencyInjection;
global using global::Microsoft.Extensions.Hosting;
global using global::Microsoft.Extensions.Logging;
global using global::System;
global using global::System.Collections.Generic;
global using global::System.IO;
global using global::System.Linq;
global using global::System.Net.Http;
global using global::System.Net.Http.Json;
global using global::System.Threading;
global using global::System.Threading.Tasks;This means that we can use different classes from these namespaces in our project without adding using directives explicitly in our project files. Of course, if you don’t want this type of behavior, you can turn it off by visiting the project file and disabling the ImplicitUsings tag:
<ImplicitUsings>disable</ImplicitUsings>By default, this is enabled in the .csproj file, and we are going to keep it like that.
Now, let’s take a look at the code inside the Program class. With this line of code:
var builder = WebApplication.CreateBuilder(args);The application creates a builder variable of the type WebApplicationBuilder. The WebApplicationBuilder class is responsible for four main things:
• Adding Configuration to the project by using the builder.Configuration property
• Registering services in our app with the builder.Services property
• Logging configuration with the builder.Logging property
• Other IHostBuilder and IWebHostBuilder configuration
Compared to .NET 5 where we had a static CreateDefaultBuilder class, which returned the IHostBuilder type, now we have the static CreateBuilder method, which returns WebApplicationBuilder type.
Of course, as we see it, we don’t have the Startup class with two familiar methods: ConfigureServices and Configure. Now, all this is replaced by the code inside the Program.cs file.
Since we don’t have the ConfigureServices method to configure our services, we can do that right below the builder variable declaration. In the new template, there’s even a comment section suggesting where we should start with service registration. A service is a reusable part of the code that adds some functionality to our application, but we’ll talk about services more later on.
In .NET 5, we would use the Configure method to add different middleware components to the application’s request pipeline. But since we don’t have that method anymore, we can use the section below the var app = builder.Build(); part to do that. Again, this is marked with the comment section as well:
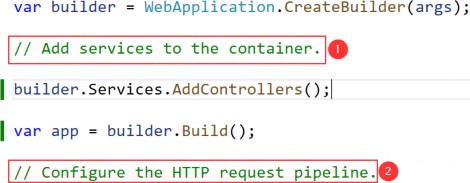
NOTE: If you still want to create your application using the .NET 5 way, with Program and Startup classes, you can do that, .NET 6 supports it as well. The easiest way is to create a .NET 5 project, copy the Startup and Program classes and paste it into the .NET 6 project.
Since larger applications could potentially contain a lot of different services, we can end up with a lot of clutter and unreadable code in the Program class. To make it more readable for the next person and ourselves, we can structure the code into logical blocks and separate those blocks into extension methods.
1.4 Extension Methods and CORS Configuration
An extension method is inherently a static method. What makes it different from other static methods is that it accepts this as the first parameter, and this represents the data type of the object which will be using that extension method. We’ll see what that means in a moment.
An extension method must be defined inside a static class. This kind of method extends the behavior of a type in .NET. Once we define an extension method, it can be chained multiple times on the same type of object.
So, let’s start writing some code to see how it all adds up.
We are going to create a new folder Extensions in the project and create a new class inside that folder named ServiceExtensions. The ServiceExtensions class should be static.
public static class ServiceExtensions
{
}Let’s start by implementing something we need for our project immediately so we can see how extensions work.
The first thing we are going to do is to configure CORS in our application. CORS (Cross-Origin Resource Sharing) is a mechanism to give or restrict access rights to applications from different domains.
If we want to send requests from a different domain to our application, configuring CORS is mandatory. So, to start, we’ll add a code that allows all requests from all origins to be sent to our API:
public static void ConfigureCors(this IServiceCollection services) =>
services.AddCors(options =>
{
options.AddPolicy("CorsPolicy", builder =>
builder.AllowAnyOrigin()
.AllowAnyMethod()
.AllowAnyHeader());
});We are using basic CORS policy settings because allowing any origin, method, and header is okay for now. But we should be more restrictive with those settings in the production environment. More precisely, as restrictive as possible.
Instead of the AllowAnyOrigin() method which allows requests from any source, we can use the WithOrigins("https://example.com") which will allow requests only from that concrete source. Also, instead of AllowAnyMethod() that allows all HTTP methods, we can use WithMethods("POST", "GET") that will allow only specific HTTP methods. Furthermore, you can make the same changes for the AllowAnyHeader() method by using, for example, the WithHeaders("accept", "content- type") method to allow only specific headers.
1.5 IIS Configuration
ASP.NET Core applications are by default self-hosted, and if we want to host our application on IIS, we need to configure an IIS integration which will eventually help us with the deployment to IIS. To do that, we need to add the following code to the ServiceExtensions class:
public static void ConfigureIISIntegration(this IServiceCollection services) =>
services.Configure<IISOptions>(options =>
{
});We do not initialize any of the properties inside the options because we are fine with the default values for now. But if you need to fine-tune the configuration right away, you might want to take a look at the possible options:
| Option | Default | Setting |
|---|---|---|
| AutomaticAuthentication | true | if true,the authentication middleware sets the HttpContext.User and responds to generic challenges,if false,the authentication middleware only provides an identity(HttpContext.User ) and responds to challenges when explicitly requested by the AuthenticationScheme . Windows Authentication must be enabled in IIS for AutomaticAuthentication to function. |
| AuthenticationDisplayName | null | Sets the display name shown to users on login pages |
| ForwardClientCertificate | true | if true and the MS-ASPNETCORE-CLIENTCERT request header is present,the HttpContext.Connection.ClientCertificate is populated. |
Now, we mentioned extension methods are great for organizing your code and extending functionalities. Let’s go back to our Program class and modify it to support CORS and IIS integration now that we’ve written extension methods for those functionalities. We are going to remove the first comment and write our code over it:
using CompanyEmployees.Extensions;
var builder = WebApplication.CreateBuilder(args);
builder.Services.ConfigureCors();
builder.Services.ConfigureIISIntegration();
builder.Services.AddControllers();
var app = builder.Build();
And let's add a few mandatory methods to the second part of the Program class (the one for the request pipeline configuration):
var app = builder.Build();
if (app.Environment.IsDevelopment()) app.UseDeveloperExceptionPage();
else
app.UseHsts();
app.UseHttpsRedirection();
app.UseStaticFiles();
app.UseForwardedHeaders(new ForwardedHeadersOptions
{
ForwardedHeaders = ForwardedHeaders.All
});
app.UseCors("CorsPolicy");
app.UseAuthorization();
app.MapControllers();
app.Run();We’ve added CORS and IIS configuration to the section where we need to configure our services. Furthermore, CORS configuration has been added to the application’s pipeline inside the second part of the Program class.But as you can see, there are some additional methods unrelated to IIS configuration. Let’s go through those and learn what they do.
• app.UseForwardedHeaders() will forward proxy headers to the
current request. This will help us during application deployment. Pay attention that we require Microsoft.AspNetCore.HttpOverrides using directive to introduce the ForwardedHeaders enumeration
• app.UseStaticFiles() enables using static files for the request. If we don’t set a path to the static files directory, it will use a wwwroot folder in our project by default.
• app.UseHsts() will add middleware for using HSTS, which adds the Strict-Transport-Security header.
1.6 Additional Code in the Program Class
We have to pay attention to the AddControllers() method. This method registers only the controllers in IServiceCollection and not Views or Pages because they are not required in the Web API project which we are building.
Right below the controller registration, we have this line of code:
var app = builder.Build();With the Build method, we are creating the app variable of the type WebApplication. This class (WebApplication) is very important since it implements multiple interfaces like IHost that we can use to start and stop the host, IApplicationBuilder that we use to build the middleware pipeline (as you could’ve seen from our previous custom code), and IEndpointRouteBuilder used to add endpoints in our app.
The UseHttpRedirection method is used to add the middleware for the redirection from HTTP to HTTPS. Also, we can see the UseAuthorization method that adds the authorization middleware to the specified IApplicationBuilder to enable authorization capabilities.
Finally, we can see the MapControllers method that adds the endpoints from controller actions to the IEndpointRouteBuilder and the Run method that runs the application and block the calling thread until the host shutdown.
Microsoft advises that the order of adding different middlewares to the application builder is very important, and we are going to talk about that in the middleware section of this book.
1.7 Environment-Based Settings
While we develop our application, we use the “development” environment. But as soon as we publish our application, it goes to the “production” environment. Development and production environments should have different URLs, ports, connection strings, passwords, and other sensitive information.
Therefore, we need to have a separate configuration for each environment and that’s easy to accomplish by using .NET Core-provided mechanisms.
As soon as we create a project, we are going to see the appsettings.json file in the root, which is our main settings file, and when we expand it we are going to see the appsetings.Development.json file by default. These files are separate on the file system, but Visual Studio makes it obvious that they are connected somehow:

The apsettings.{EnvironmentSuffix}.json files are used to override the main appsettings.json file. When we use a key-value pair from the original file, we override it. We can also define environment-specific values too.
For the production environment, we should add another file: appsettings.Production.json:
The appsettings.Production.json file should contain the configuration for the production environment.
To set which environment our application runs on, we need to set up the ASPNETCORE_ENVIRONMENT environment variable. For example, to run the application in production, we need to set it to the Production value on the machine we do the deployment to.
We can set the variable through the command prompt by typing set ASPNETCORE_ENVIRONMENT=Production in Windows or export ASPNET_CORE_ENVIRONMENT=Production in Linux.
ASP.NET Core applications use the value of that environment variable to decide which appsettings file to use accordingly. In this case, that will be appsettings.Production.json.
If we take a look at our launchSettings.json file, we are going to see that this variable is currently set to Development.
Now, let’s talk a bit more about the middleware in ASP.NET Core applications.
1.8 ASP.NET Core Middleware
As we already used some middleware code to modify the application’s pipeline (CORS, Authorization...), and we are going to use the middleware throughout the rest of the book, we should be more familiar with the ASP.NET Core middleware.
ASP.NET Core middleware is a piece of code integrated inside the application’s pipeline that we can use to handle requests and responses. When we talk about the ASP.NET Core middleware, we can think of it as a code section that executes with every request.
Usually, we have more than a single middleware component in our application. Each component can:
• Pass the request to the next middleware component in the pipeline and also
• It can execute some work before and after the next component in the pipeline
To build a pipeline, we are using request delegates, which handle each HTTP request. To configure request delegates, we use the Run, Map, and Use extension methods. Inside the request pipeline, an application executes each component in the same order they are placed in the code- top to bottom:
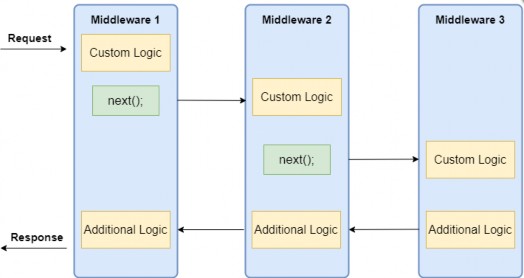
Additionally, we can see that each component can execute custom logic before using the next delegate to pass the execution to another component. The last middleware component doesn’t call the next delegate, which means that this component is short-circuiting the pipeline. This is a terminal middleware because it stops further middleware from processing the request. It executes the additional logic and then returns the execution to the previous middleware components.
Before we start with examples, it is quite important to know about the order in which we should register our middleware components. The order is important for the security, performance, and functionality of our applications:
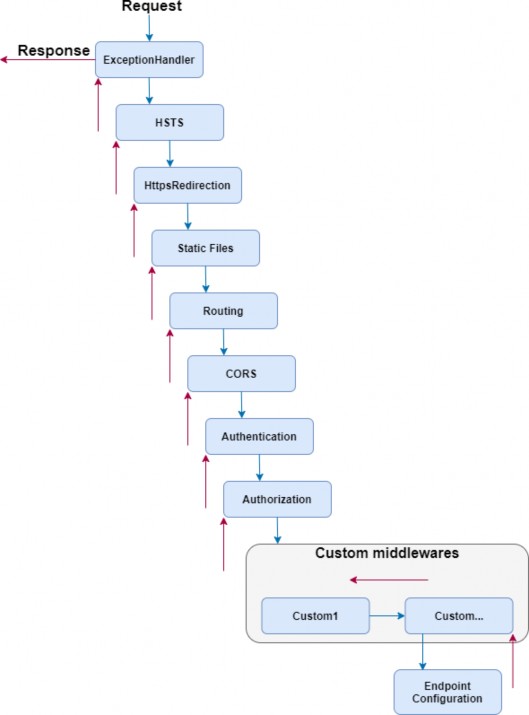
As we can see, we should register the exception handler in the early stage of the pipeline flow so it could catch all the exceptions that can happen in the later stages of the pipeline. When we create a new ASP.NET Core app, many of the middleware components are already registered in the order from the diagram. We have to pay attention when registering additional existing components or the custom ones to fit this recommendation.
For example, when adding CORS to the pipeline, the app in the development environment will work just fine if you don’t add it in this order. But we’ve received several questions from our readers stating that they face the CORS problem once they deploy the app. But once we suggested moving the CORS registration to the required place, the problem disappeared.
Now, we can use some examples to see how we can manipulate the application’s pipeline. For this section’s purpose, we are going to create a separate application that will be dedicated only to this section of the book. The later sections will continue from the previous project, that we’ve already created.
1.8.1 Creating a First Middleware Component
Let’s start by creating a new ASP.NET Core Web API project, and name it MiddlewareExample.
In the launchSettings.json file, we are going to add some changes regarding the launch profiles:
{ "profiles": { "MiddlewareExample": { "commandName": "Project", "dotnetRunMessages": true, "launchBrowser": true, "launchUrl": "weatherforecast", "applicationUrl": "https://localhost:5001;http://localhost:5000", "environmentVariables": { "ASPNETCORE_ENVIRONMENT": "Development" } } }
}
Now, inside the Program class, right below the UseAuthorization part, we are going to use an anonymous method to create a first middleware component:
app.UseAuthorization();
app.Run(async context => { await context.Response.WriteAsync("Hello from the middleware component."); });
app.MapControllers();We use the Run method, which adds a terminal component to the app pipeline. We can see we are not using the next delegate because the Run method is always terminal and terminates the pipeline. This method accepts a single parameter of the RequestDelegate type. If we inspect this delegate we are going to see that it accepts a single HttpContext parameter:
namespace Microsoft.AspNetCore.Http { public delegate Task RequestDelegate(HttpContext context); }So, we are using that context parameter to modify our requests and responses inside the middleware component. In this specific example, we are modifying the response by using the WriteAsync method. For this method, we need Microsoft.AspNetCore.Http namespace.
Let’s start the app, and inspect the result:
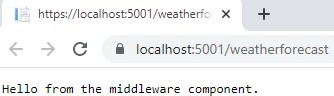
There we go. We can see a result from our middleware.
1.8.2 Working with the Use Method
To chain multiple request delegates in our code, we can use the Use method. This method accepts a Func delegate as a parameter and returns a Task as a result:
public static IApplicationBuilder Use(this IApplicationBuilder app, Func<HttpContext, Func<Task>, Task> middleware);So, this means when we use it, we can make use of two parameters, context and next:
app.UseAuthorization(); app.Use(async (context, next) => { Console.WriteLine($"Logic before executing the next delegate in the Use method"); await next.Invoke(); Console.WriteLine($"Logic after executing the next delegate in the Use method"); }); app.Run(async context => { Console.WriteLine($"Writing the response to the client in the Run method"); await context.Response.WriteAsync("Hello from the middleware component."); }); app.MapControllers();As you can see, we add several logging messages to be sure what the order of executions inside middleware components is. First, we write to a console window, then we invoke the next delegate passing the execution to another component in the pipeline. In the Run method, we write a second message to the console window and write a response to the client. After that, the execution is returned to the Use method and we write the third message (the one below the next delegate invocation) to the console window.
The Run method doesn’t accept the next delegate as a parameter, so without it to send the execution to another component, this component short-circuits the request pipeline.
Now, let’s start the app and inspect the result, which proves our execution order:

Maybe you will see two sets of messages but don’t worry, that’s because the browser sends two sets of requests, one for the /weatherforecast and another for the favicon.ico. If you, for example, use Postman to test this, you will see only one set of messages.
One more thing to mention. We shouldn’t call the next.Invoke after we send the response to the client. This can cause exceptions if we try to set the status code or modify the headers of the response.
For example:
app.Use(async (context, next) => { await context.Response.WriteAsync("Hello from the middleware component."); await next.Invoke(); Console.WriteLine($"Logic after executing the next delegate in the Use method"); }); app.Run(async context => { Console.WriteLine($"Writing the response to the client in the Run method"); context.Response.StatusCode = 200; await context.Response.WriteAsync("Hello from the middleware component."); });Here we write a response to the client and then call next.Invoke. Of course, this passes the execution to the next component in the pipeline. There, we try to set the status code of the response and write another one. But let’s inspect the result:
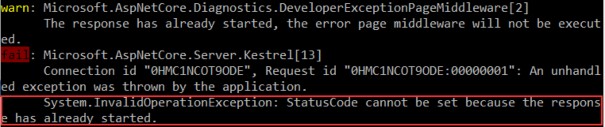
We can see the error message, which is pretty self-explanatory.
1.8.3 Using the Map and MapWhen Methods
To branch the middleware pipeline, we can use both Map and MapWhen methods. The Map method is an extension method that accepts a path string as one of the parameters:
public static IApplicationBuilder Map(this IApplicationBuilder app, PathString pathMatch, Action<IApplicationBuilder> configuration)When we provide the pathMatch string, the Map method will compare it to the start of the request path. If they match, the app will execute the branch.
So, let’s see how we can use this method by modifying the Program class:
app.Use(async (context, next) => { Console.WriteLine($"Logic before executing the next delegate in the Use method"); await next.Invoke(); Console.WriteLine($"Logic after executing the next delegate in the Use method"); }); app.Map("/usingmapbranch", builder => { builder.Use(async (context, next) => { Console.WriteLine("Map branch logic in the Use method before the next delegate"); await next.Invoke(); Console.WriteLine("Map branch logic in the Use method after the next delegate"); }); builder.Run(async context => { Console.WriteLine($"Map branch response to the client in the Run method"); await context.Response.WriteAsync("Hello from the map branch."); }); }); app.Run(async context => { Console.WriteLine($"Writing the response to the client in the Run method"); await context.Response.WriteAsync("Hello from the middleware component."); });By using the Map method, we provide the path match, and then in the delegate, we use our well-known Use and Run methods to execute middleware components.
Now, if we start the app and navigate to /usingmapbranch, we are going to see the response in the browser:

But also, if we inspect console logs, we are going to see our new messages:
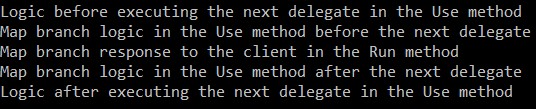
Here, we can see the messages from the Use method before the branch, and the messages from the Use and Run methods inside the Map branch. We are not seeing any message from the Run method outside the branch. It is important to know that any middleware component that we add after the Map method in the pipeline won’t be executed. This is true even if we don’t use the Run middleware inside the branch.
1.8.4 Using MapWhen Method
If we inspect the MapWhen method, we are going to see that it accepts two parameters:
public static IApplicationBuilder MapWhen(this IApplicationBuilder app, Func<HttpContext, bool> predicate, Action<IApplicationBuilder> configuration)This method uses the result of the given predicate to branch the request pipeline.
So, let’s see it in action:
app.Map("/usingmapbranch", builder => { ... }); app.MapWhen(context => context.Request.Query.ContainsKey("testquerystring"), builder => { builder.Run(async context => { await context.Response.WriteAsync("Hello from the MapWhen branch.");
}); }); app.Run(async context => { ... });Here, if our request contains the provided query string, we execute the Run method by writing the response to the client. So, as we said, based on the predicate’s result the MapWhen method branch the request pipeline.
Now, we can start the app and navigate to https://localhost:5001?testquerystring=test:

And there we go. We can see our expected message. Of course, we can chain multiple middleware components inside this method as well.
So, now we have a good understanding of using middleware and its order of invocation in the ASP.NET Core application. This knowledge is going to be very useful to us once we start working on a custom error handling middleware (a few sections later).
In the next chapter, we’ll learn how to configure a Logger service because it’s really important to have it configured as early in the project as possible. We can close this app, and continue with the CompanyEmployees app.
2 Configuring a logging service
Why do logging messages matter so much during application development? While our application is in the development stage, it's easy to debug the code and find out what happened. But debugging in a production environment is not that easy.
That's why log messages are a great way to find out what went wrong and why and where the exceptions have been thrown in our code in the production environment. Logging also helps us more easily follow the flow of our application when we don’t have access to the debugger.
.NET Core has its implementation of the logging mechanism, but in all our projects we prefer to create our custom logger service with the external logger library NLog.
We are going to do that because having an abstraction will allow us to have any logger behind our interface. This means that we can start with NLog, and at some point, we can switch to any other logger and our interface will still work because of our abstraction.
2.1 Creating the Required Projects
Let’s create two new projects. In the first one named Contracts, we are going to keep our interfaces. We will use this project later on too, to define our contracts for the whole application. The second one, LoggerService, we are going to use to write our logger logic in.
To create a new project, right-click on the solution window, choose Add, and then NewProject. Choose the Class Library (C#) project template:
Finally, name it Contracts, and choose the .NET 6.0 as a version. Do the same thing for the second project and name it LoggerService. Now that we have these projects in place, we need to reference them from our main project.
To do that, navigate to the solution explorer. Then in the LoggerService project, right-click on Dependencies and choose the Add Project Reference option. Under Projects, click Solution and check the Contracts project.
Now, in the main project right click on Dependencies and then click on Add Project Reference. Check the LoggerService checkbox to import it. Since we have referenced the Contracts project through the LoggerService, it will be available in the main project too.
2.2 Creating the ILoggerManager Interface and Installing NLog
Our logger service will contain four methods for logging our messages:
• Info messages
• Debug messages
• Warning messages
• Error messages
To achieve this, we are going to create an interface named ILoggerManager inside the Contracts project containing those four method definitions.
So, let’s do that first by right-clicking on the Contracts project, choosing the Add -> New Item menu, and then selecting the Interface option where we have to specify the name ILoggerManager and click the Add button. After the file creation, we can add the code:
public interface ILoggerManager { void LogInfo(string message); void LogWarn(string message); void LogDebug(string message); void LogError(string message); }Before we implement this interface inside the LoggerService project, we need to install the NLog library in our LoggerService project. NLog is a logging platform for .NET which will help us create and log our messages.
We are going to show two different ways of adding the NLog library to our project.
Install-Package NLog.Extensions.Logging -Version 1.7.4After a couple of seconds, NLog is up and running in our application.
2.3 Implementing the Interface and Nlog.Config File
In the LoggerService project, we are going to create a new class: LoggerManager. We can do that by repeating the same steps for the interface creation just choosing the class option instead of an interface. Now let’s have it implement the ILoggerManager interface we previously defined:
public class LoggerManager : ILoggerManager { private static ILogger logger = LogManager.GetCurrentClassLogger(); public LoggerManager() { } public void LogDebug(string message) => logger.Debug(message); public void LogError(string message) => logger.Error(message); public void LogInfo(string message) => logger.Info(message); public void LogWarn(string message) => logger.Warn(message); }As you can see, our methods are just wrappers around NLog’s methods. Both ILogger and LogManager are part of the NLog namespace. Now, we need to configure it and inject it into the Program class in the section related to the service configuration.
NLog needs to have information about where to put log files on the file system, what the name of these files will be, and what is the minimum level of logging that we want.
We are going to define all these constants in a text file in the main project and name it nlog.config. So, let’s right-click on the main project, choose Add -> New Item, and then search for the Text File. Select the Text File, and add the name nlog.config.
<?xml version="1.0" encoding="utf-8" ?> <nlog xmlns="http://www.nlog-project.org/schemas/NLog.xsd" xmlns:xsi="http://www.w3.org/2001/XMLSchema-instance" autoReload="true" internalLogLevel="Trace" internalLogFile=".\internal_logs\internallog.txt">
<targets> <target name="logfile" xsi:type="File" fileName=".\logs\${shortdate}_logfile.txt" layout="${longdate} ${level:uppercase=true} ${message}"/> </targets> <rules> <logger name="*" minlevel="Debug" writeTo="logfile" /> </rules> </nlog>You can find the internal logs at the project root, and the logs folder in the bin\debug folder of the main project once we start the app. Once the application is published both folders will be created at the root of the output folder which is what we want.
NOTE: If you want to have more control over the log output, we suggest renaming the current file to nlog.development.config and creating another configuration file called nlog.production.config. Then you can do something like this in the code: env.ConfigureNLog($"nlog.{env.EnvironmentName}.config"); to get the different configuration files for different environments. From our experience production path is what matters, so this might be a bit redundant.
2.4 Configuring Logger Service for Logging Messages
Setting up the configuration for a logger service is quite easy. First, we need to update the Program class and include the path to the configuration file for the NLog configuration:
using NLog; var builder = WebApplication.CreateBuilder(args); LogManager.LoadConfiguration(string.Concat(Directory.GetCurrentDirectory(), "/nlog.config")); builder.Services.ConfigureCors(); builder.Services.ConfigureIISIntegration();We are using NLog’s LogManager static class with the LoadConfiguration method to provide a path to the configuration file.
NOTE: If VisualStudio asks you to install the NLog package in the main project, don’t do it. Just remove the LoggerService reference from the main project and add it again. We have already installed the required package in the LoggerService project and the main project should be able to reference it as well.
The next thing we need to do is to add the logger service inside the .NET Core’s IOC container. There are three ways to do that:
• By calling the services.AddSingleton method, we can create a service the first time we request it and then every subsequent request will call the same instance of the service. This means that all components share the same service every time they need it and the same instance will be used for every method call.
• By calling the services.AddScoped method, we can create a service once per request. That means whenever we send an HTTP request to the application, a new instance of the service will be created.
• By calling the services.AddTransient method, we can create a service each time the application requests it. This means that if multiple components need the service, it will be created again for every single component request.
So, let’s add a new method in the ServiceExtensions class:
public static void ConfigureLoggerService(this IServiceCollection services) => services.AddSingleton<ILoggerManager, LoggerManager>();And after that, we need to modify the Program class to include our newly created extension method:
builder.Services.AddControllers();
builder.Services.ConfigureLoggerService();
builder.Services.ConfigureCors(); builder.Services.ConfigureIISIntegration();Every time we want to use a logger service, all we need to do is to inject it into the constructor of the class that needs it. .NET Core will resolve that service and the logging features will be available.
This type of injecting a class is called Dependency Injection and it is built into .NET Core.
Let’s learn a bit more about it.
2.5 DI, IoC, and Logger Service Testing
What is Dependency Injection (DI) exactly and what is IoC (Inversion of Control)?
Dependency injection is a technique we use to achieve the decoupling of objects and their dependencies. It means that rather than instantiating an object explicitly in a class every time we need it, we can instantiate it once and then send it to the class.
This is often done through a constructor. The specific approach we utilize is also known as the Constructor Injection.
In a system that is designed around DI, you may find many classes requesting their dependencies via their constructors. In this case, it is helpful to have a class that manages and provides dependencies to classes through the constructor.
These classes are referred to as containers or more specifically, Inversion of Control containers. An IoC container is essentially a factory that is responsible for providing instances of the types that are requested from it.
To test our logger service, we are going to use the default WeatherForecastController. You can find it in the main project in the Controllers folder. It comes with the ASP.NET Core Web API template.
In the Solution Explorer, we are going to open the Controllers folder and locate the WeatherForecastController class. Let’s modify it:
[Route("[controller]")] [ApiController] public class WeatherForecastController : ControllerBase { private ILoggerManager _logger; public WeatherForecastController(ILoggerManager logger) { _logger = logger; } [HttpGet] public IEnumerable<string> Get() { _logger.LogInfo("Here is info message from our values controller."); _logger.LogDebug("Here is debug message from our values controller."); _logger.LogWarn("Here is warn message from our values controller."); _logger.LogError("Here is an error message from our values controller."); return new string[] { "value1", "value2" }; } }Now let’s start the application and browse to https://localhost:5001/weatherforecast.
As a result, you will see an array of two strings. Now go to the folder that you have specified in the nlog.config file, and check out the result. You should see two folders: the internal_logs folder and the logs folder. Inside the logs folder, you should find a file with the following logs:
image
That’s all we need to do to configure our logger for now. We’ll add some messages to our code along with the new features.
3 Onion architecture implementation
In this chapter, we are going to talk about the Onion architecture, its layers, and the advantages of using it. We will learn how to create different layers in our application to separate the different application parts and improve the application's maintainability and testability.
That said, we are going to create a database model and transfer it to the MSSQL database by using the code first approach. So, we are going to learn how to create entities (model classes), how to work with the DbContext class, and how to use migrations to transfer our created database model to the real database. Of course, it is not enough to just create a database model and transfer it to the database. We need to use it as well, and for that, we will create a Repository pattern as a data access layer.
With the Repository pattern, we create an abstraction layer between the data access and the business logic layer of an application. By using it, we are promoting a more loosely coupled approach to access our data in the database.
Also, our code becomes cleaner, easier to maintain, and reusable. Data access logic is stored in a separate class, or sets of classes called a repository, with the responsibility of persisting the application’s business model.
Additionally, we are going to create a Service layer to extract all the business logic from our controllers, thus making the presentation layer and the controllers clean and easy to maintain.
So, let’s start with the Onion architecture explanation.
3.1 About Onion Architecture
The Onion architecture is a form of layered architecture and we can visualize these layers as concentric circles. Hence the name Onion architecture. The Onion architecture was first introduced by Jeffrey Palermo, to overcome the issues of the traditional N-layered architecture approach.
There are multiple ways that we can split the onion, but we are going to choose the following approach where we are going to split the architecture into 4 layers:
• Domain Layer
• Service Layer
• Infrastructure Layer
• Presentation Layer
Conceptually, we can consider that the Infrastructure and Presentation layers are on the same level of the hierarchy.
Now, let us go ahead and look at each layer with more detail to see why we are introducing it and what we are going to create inside of that layer:
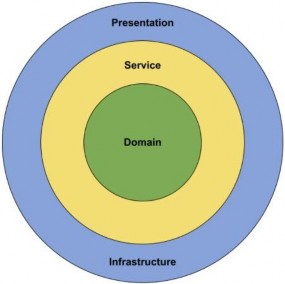
We can see all the different layers that we are going to build in our project.
3.1.1 Advantages of the Onion Architecture
Let us take a look at what are the advantages of Onion architecture, and why we would want to implement it in our projects.
All of the layers interact with each other strictly through the interfaces defined in the layers below. The flow of dependencies is towards the core of the Onion. We will explain why this is important in the next section.
Using dependency inversion throughout the project, depending on abstractions (interfaces) and not the implementations, allows us to switch out the implementation at runtime transparently. We are depending on abstractions at compile-time, which gives us strict contracts to work with, and we are being provided with the implementation at runtime.
Testability is very high with the Onion architecture because everything depends on abstractions. The abstractions can be easily mocked with a mocking library such as Moq. We can write business logic without concern about any of the implementation details. If we need anything from an external system or service, we can just create an interface for it and consume it. We do not have to worry about how it will be implemented.The higher layers of the Onion will take care of implementing that interface transparently.
3.1.2 Flow of Dependencies
The main idea behind the Onion architecture is the flow of dependencies, or rather how the layers interact with each other. The deeper the layer resides inside the Onion, the fewer dependencies it has.
The Domain layer does not have any direct dependencies on the outside layers. It is isolated, in a way, from the outside world. The outer layers are all allowed to reference the layers that are directly below them in the hierarchy.
We can conclude that all the dependencies in the Onion architecture flow inwards. But we should ask ourselves, why is this important?
The flow of dependencies dictates what a certain layer in the Onion architecture can do. Because it depends on the layers below it in the hierarchy, it can only call the methods that are exposed by the lower layers.
We can use lower layers of the Onion architecture to define contracts or interfaces. The outer layers of the architecture implement these interfaces. This means that in the Domain layer, we are not concerning ourselves with infrastructure details such as the database or external services.
Using this approach, we can encapsulate all of the rich business logic in the Domain and Service layers without ever having to know any implementation details. In the Service layer, we are going to depend only on the interfaces that are defined by the layer below, which is the Domain layer.
So, after all the theory, we can continue with our project implementation.
Let’s start with the models and the Entities project.
3.2 Creating Models
Using the example from the second chapter of this book, we are going to extract a new Class Library project named Entities.
Inside it, we are going to create a folder named Models, which will contain all the model classes (entities). Entities represent classes that Entity Framework Core uses to map our database model with the tables from the database. The properties from entity classes will be mapped to the database columns.
So, in the Models folder we are going to create two classes and modify them:
public class Company { [Column("CompanyId")]
public Guid Id { get; set; } [Required(ErrorMessage = "Company name is a required field.")] [MaxLength(60, ErrorMessage = "Maximum length for the Name is 60 characters.")] public string? Name { get; set; } [Required(ErrorMessage = "Company address is a required field.")] [MaxLength(60, ErrorMessage = "Maximum length for the Address is 60 characters")] public string? Address { get; set; } public string? Country { get; set; } public ICollection<Employee>? Employees { get; set; } } public class Employee { [Column("EmployeeId")] public Guid Id { get; set; } [Required(ErrorMessage = "Employee name is a required field.")] [MaxLength(30, ErrorMessage = "Maximum length for the Name is 30 characters.")] public string? Name { get; set; } [Required(ErrorMessage = "Age is a required field.")] public int Age { get; set; } [Required(ErrorMessage = "Position is a required field.")] [MaxLength(20, ErrorMessage = "Maximum length for the Position is 20 characters.")] public string? Position { get; set; } [ForeignKey(nameof(Company))] public Guid CompanyId { get; set; } public Company? Company { get; set; } }
We have created two classes: the Company and Employee. Those classes contain the properties which Entity Framework Core is going to map to the columns in our tables in the database. But not all the properties will be mapped as columns. The last property of the Company class (Employees) and the last property of the Employee class (Company) are navigational properties; these properties serve the purpose of defining the relationship between our models.
We can see several attributes in our entities. The [Column] attribute will specify that the Id property is going to be mapped with a different name in the database. The [Required] and [MaxLength] properties are here for validation purposes. The first one declares the property as mandatory and the second one defines its maximum length.
Once we transfer our database model to the real database, we are going to see how all these validation attributes and navigational properties affect the column definitions.
3.3 Context Class and the Database Connection
Before we start with the context class creation, we have to create another .NET Class Library and name it Repository. We are going to use this project for the database context and repository implementation.
Now, let's create the context class, which will be a middleware component for communication with the database. It must inherit from the Entity Framework Core’s DbContext class and it consists of DbSet properties, which EF Core is going to use for the communication with the database.Because we are working with the DBContext class, we need to install the Microsoft.EntityFrameworkCore package in the Repository project. Also, we are going to reference the Entities project from the Repository project:
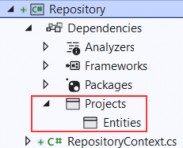
Then, let’s navigate to the root of the Repository project and create the RepositoryContext class:
public class RepositoryContext : DbContext { public RepositoryContext(DbContextOptions options) : base(options) { }
public DbSet<Company>? Companies { get; set; } public DbSet<Employee>? Employees { get; set; } }After the class modification, let’s open the appsettings.json file, in the main project, and add the connection string named sqlconnection:
{ "Logging": { "LogLevel": { "Default": "Warning" } }, "ConnectionStrings": { "sqlConnection": "server=.; database=CompanyEmployee; Integrated Security=true" }, "AllowedHosts": "*" }It is quite important to have the JSON object with the ConnectionStrings name in our appsettings.json file, and soon you will see why.
But first, we have to add the Repository project’s reference into the main project.
Then, let’s create a new ContextFactory folder in the main project and inside it a new RepositoryContextFactory class. Since our RepositoryContext class is in a Repository project and not in the main one, this class will help our application create a derived DbContext instance during the design time which will help us with our migrations:
public class RepositoryContextFactory : IDesignTimeDbContextFactory<RepositoryContext> { public RepositoryContext CreateDbContext(string[] args) { var configuration = new ConfigurationBuilder() .SetBasePath(Directory.GetCurrentDirectory()) .AddJsonFile("appsettings.json") .Build(); var builder = new DbContextOptionsBuilder<RepositoryContext>() .UseSqlServer(configuration.GetConnectionString("sqlConnection")); return new RepositoryContext(builder.Options); } }We are using the IDesignTimeDbContextFactory <out TContext> interface that allows design-time services to discover implementations of this interface. Of course, the TContext parameter is our RepositoryContext class.
For this, we need to add two using directives:
using Microsoft.EntityFrameworkCore.Design;
using Repository;Then, we have to implement this interface with the CreateDbContext method. Inside it, we create the configuration variable of the IConfigurationRoot type and specify the appsettings file, we want to use. With its help, we can use the GetConnectionString method to access the connection string from the appsettings.json file. Moreover, to be able to use the UseSqlServer method, we need to install the Microsoft.EntityFrameworkCore.SqlServer package in the main project and add one more using directive:
using Microsoft.EntityFrameworkCore;If we navigate to the GetConnectionString method definition, we will see that it is an extension method that uses the ConnectionStrings name from the appsettings.json file to fetch the connection string by the provided key:

Finally, in the CreateDbContext method, we return a new instance of our RepositoryContext class with provided options.
3.4 Migration and Initial Data Seed
Migration is a standard process of creating and updating the database from our application. Since we are finished with the database model creation, we can transfer that model to the real database. But we need to modify our CreateDbContext method first:
var builder = new DbContextOptionsBuilder<RepositoryContext>() .
UseSqlServer(configuration.GetConnectionString("sqlConnection"), b => b.MigrationsAssembly("CompanyEmployees"));We have to make this change because migration assembly is not in our main project, but in the Repository project. So, we’ve just changed the project for the migration assembly.
Before we execute our migration commands, we have to install an additional ef core library: Microsoft.EntityFrameworkCore.Tools
Now, let’s open the Package Manager Console window and create our first migration:
PM> Add-Migration DatabaseCreationWith this command, we are creating migration files and we can find them in the Migrations folder in our main project:
With those files in place, we can apply migration:
PM> Update-DatabaseExcellent. We can inspect our database now:
Once we have the database and tables created, we should populate them with some initial data. To do that, we are going to create another folder in the Repository project called Configuration and add the CompanyConfiguration class:
public class CompanyConfiguration : IEntityTypeConfiguration<Company> { public void Configure(EntityTypeBuilder<Company> builder) { builder.HasData ( new Company { Id = new Guid("c9d4c053-49b6-410c-bc78-2d54a9991870"), Name = "IT_Solutions Ltd", Address = "583 Wall Dr. Gwynn Oak, MD 21207", Country = "USA" }, new Company { Id = new Guid("3d490a70-94ce-4d15-9494-5248280c2ce3"), Name = "Admin_Solutions Ltd", Address = "312 Forest Avenue, BF 923", Country = "USA" } ); } }
Let’s do the same thing for the EmployeeConfiguration class:
public class EmployeeConfiguration : IEntityTypeConfiguration<Employee> { public void Configure(EntityTypeBuilder<Employee> builder) { builder.HasData ( new Employee { Id = new Guid("80abbca8-664d-4b20-b5de-024705497d4a"), Name = "Sam Raiden", Age = 26, Position = "Software developer", CompanyId = new Guid("c9d4c053-49b6-410c-bc78-2d54a9991870") }, new Employee { Id = new Guid("86dba8c0-d178-41e7-938c-ed49778fb52a"), Name = "Jana McLeaf", Age = 30, Position = "Software developer", CompanyId = new Guid("c9d4c053-49b6-410c-bc78-2d54a9991870") }, new Employee { Id = new Guid("021ca3c1-0deb-4afd-ae94-2159a8479811"), Name = "Kane Miller", Age = 35, Position = "Administrator", CompanyId = new Guid("3d490a70-94ce-4d15-9494-5248280c2ce3") } ); } }To invoke this configuration, we have to change the RepositoryContext class:
public class RepositoryContext: DbContext { public RepositoryContext(DbContextOptions options) : base(options) { } protected override void OnModelCreating(ModelBuilder modelBuilder) { modelBuilder.ApplyConfiguration(new CompanyConfiguration()); modelBuilder.ApplyConfiguration(new EmployeeConfiguration()); } public DbSet<Company> Companies { get; set; } public DbSet<Employee> Employees { get; set; } }Now, we can create and apply another migration to seed these data to the database:
PM> Add-Migration InitialData
PM> Update-DatabaseThis will transfer all the data from our configuration files to the respective tables.
3.5 Repository Pattern Logic
After establishing a connection to the database and creating one, it's time to create a generic repository that will provide us with the CRUD methods. As a result, all the methods can be called upon any repository class in our project.
Furthermore, creating the generic repository and repository classes that use that generic repository is not going to be the final step. We will go a step further and create a wrapper class around repository classes and inject it as a service in a dependency injection container.
Consequently, we will be able to instantiate this class once and then call any repository class we need inside any of our controllers.
The advantages of this approach will become clearer once we use it in the project.
That said, let’s start by creating an interface for the repository inside the Contracts project:
public interface IRepositoryBase<T> { IQueryable<T> FindAll(bool trackChanges); IQueryable<T> FindByCondition(Expression<Func<T, bool>> expression, bool trackChanges); void Create(T entity); void Update(T entity); void Delete(T entity); }Right after the interface creation, we are going to reference Contracts inside the Repository project. Also, in the Repository project, we are going to create an abstract class RepositoryBase — which is going to implement the IRepositoryBase interface:
public abstract class RepositoryBase<T> : IRepositoryBase<T> where T : class { protected RepositoryContext RepositoryContext; public RepositoryBase(RepositoryContext repositoryContext) => RepositoryContext = repositoryContext; public IQueryable<T> FindAll(bool trackChanges) => !trackChanges ? RepositoryContext.Set<T>() .AsNoTracking() : RepositoryContext.Set<T>(); public IQueryable<T> FindByCondition(Expression<Func<T, bool>> expression, bool trackChanges) => !trackChanges ? RepositoryContext.Set<T>() .Where(expression) .AsNoTracking() : RepositoryContext.Set<T>() .Where(expression); public void Create(T entity) => RepositoryContext.Set<T>().Add(entity); public void Update(T entity) => RepositoryContext.Set<T>().Update(entity); public void Delete(T entity) => RepositoryContext.Set<T>().Remove(entity); }This abstract class as well as the IRepositoryBase interface work with the generic type T. This type T gives even more reusability to the RepositoryBase class. That means we don’t have to specify the exact model (class) right now for the RepositoryBase to work with. We can do that later on.
Moreover, we can see the trackChanges parameter. We are going to use it to improve our read-only query performance. When it’s set to false, we attach the AsNoTracking method to our query to inform EF Core that it doesn’t need to track changes for the required entities. This greatly improves the speed of a query.
3.6 Repository User Interfaces and Classes
Now that we have the RepositoryBase class, let’s create the user classes that will inherit this abstract class.
By inheriting from the RepositoryBase class, they will have access to all the methods from it. Furthermore, every user class will have its interface for additional model-specific methods.
This way, we are separating the logic that is common for all our repository user classes and also specific for every user class itself.
Let’s create the interfaces in the Contracts project for the Company and Employee classes:
namespace Contracts { public interface ICompanyRepository { } } namespace Contracts { public interface IEmployeeRepository { } }After this, we can create repository user classes in the Repository project.
The first thing we are going to do is to create the CompanyRepository class:
public class CompanyRepository : RepositoryBase<Company>, ICompanyRepository { public CompanyRepository(RepositoryContext repositoryContext) : base(repositoryContext) { } }And then, the EmployeeRepository class:
public class EmployeeRepository : RepositoryBase<Employee>, IEmployeeRepository
{ public EmployeeRepository(RepositoryContext repositoryContext) : base(repositoryContext) { } }After these steps, we are finished creating the repository and repository- user classes. But there are still more things to do.
3.7 Creating a Repository Manager
It is quite common for the API to return a response that consists of data from multiple resources; for example, all the companies and just some employees older than 30. In such a case, we would have to instantiate both of our repository classes and fetch data from their resources.
Maybe it’s not a problem when we have only two classes, but what if we need the combined logic of five or even more different classes? It would just be too complicated to pull that off.
With that in mind, we are going to create a repository manager class, which will create instances of repository user classes for us and then register them inside the dependency injection container. After that, we can inject it inside our services with constructor injection (supported by ASP.NET Core). With the repository manager class in place, we may call any repository user class we need.
But we are also missing one important part. We have the Create, Update, and Delete methods in the RepositoryBase class, but they won’t make any change in the database until we call the SaveChanges method. Our repository manager class will handle that as well.
That said, let’s get to it and create a new interface in the Contract project:
public interface IRepositoryManager { ICompanyRepository Company { get; } IEmployeeRepository Employee { get; }
void Save(); }And add a new class to the Repository project:
public sealed class RepositoryManager : IRepositoryManager { private readonly RepositoryContext _repositoryContext; private readonly Lazy<ICompanyRepository> _companyRepository; private readonly Lazy<IEmployeeRepository> _employeeRepository; public RepositoryManager(RepositoryContext repositoryContext) { _repositoryContext = repositoryContext; _companyRepository = new Lazy<ICompanyRepository>(() => new CompanyRepository(repositoryContext)); _employeeRepository = new Lazy<IEmployeeRepository>(() => new EmployeeRepository(repositoryContext)); } public ICompanyRepository Company => _companyRepository.Value; public IEmployeeRepository Employee => _employeeRepository.Value; public void Save() => _repositoryContext.SaveChanges(); }As you can see, we are creating properties that will expose the concrete repositories and also we have the Save() method to be used after all the modifications are finished on a certain object. This is a good practice because now we can, for example, add two companies, modify two employees, and delete one company — all in one action — and then just call the Save method once. All the changes will be applied or if something fails, all the changes will be reverted:
_repository.Company.Create(company); _repository.Company.Create(anotherCompany); _repository.Employee.Update(employee); _repository.Employee.Update(anotherEmployee); _repository.Company.Delete(oldCompany); _repository.Save();The interesting part with the RepositoryManager implementation is that we are leveraging the power of the Lazy class to ensure the lazy initialization of our repositories. This means that our repository instances are only going to be created when we access them for the first time, and not before that.
After these changes, we need to register our manager class in the main project. So, let’s first modify the ServiceExtensions class by adding this code:
public static void ConfigureRepositoryManager(this IServiceCollection services) => services.AddScoped<IRepositoryManager, RepositoryManager>();And in the Program class above the AddController() method, we have to add this code:
builder.Services.ConfigureRepositoryManager();Excellent.
As soon as we add some methods to the specific repository classes, and add our service layer, we are going to be able to test this logic.
So, we did an excellent job here. The repository layer is prepared and ready to be used to fetch data from the database.
Now, we can continue towards creating a service layer in our application.
3.8 Adding a Service Layer
The Service layer sits right above the Domain layer (the Contracts project is the part of the Domain layer), which means that it has a reference to the Domain layer. The Service layer will be split into two projects, Service.Contracts and Service.
So, let’s start with the Service.Contracts project creation (.NET Core Class Library) where we will hold the definitions for the service interfaces that are going to encapsulate the main business logic. In the next section, we are going to create a presentation layer and then, we will see the full use of this project.
Once the project is created, we are going to add three interfaces inside it.
ICompanyService:
public interface ICompanyService { }
IEmployeeService:
public interface IEmployeeService { }And IServiceManager:
public interface IServiceManager { ICompanyService CompanyService { get; } IEmployeeService EmployeeService { get; } }As you can see, we are following the same pattern as with the repository contracts implementation.
Now, we can create another project, name it Service, and reference the
Service.Contracts and Contracts projects inside it:
After that, we are going to create classes that will inherit from the interfaces that reside in the Service.Contracts project.
So, let’s start with the CompanyService class:
using Contracts; using Service.Contracts; namespace Service { internal sealed class CompanyService : ICompanyService { private readonly IRepositoryManager _repository; private readonly ILoggerManager _logger; public CompanyService(IRepositoryManager repository, ILoggerManager logger)
{ _repository = repository; _logger = logger; } } }As you can see, our class inherits from the ICompanyService interface, and we are injecting the IRepositoryManager and ILoggerManager interfaces. We are going to use IRepositoryManager to access the repository methods from each user repository class (CompanyRepository or EmployeeRepository), and ILoggerManager to access the logging methods we’ve created in the second section of this book.
To continue, let’s create a new EmployeeService class:
using Contracts; using Service.Contracts; namespace Service { internal sealed class EmployeeService : IEmployeeService { private readonly IRepositoryManager _repository; private readonly ILoggerManager _logger; public EmployeeService(IRepositoryManager repository, ILoggerManager logger) { _repository = repository; _logger = logger; } } }Finally, we are going to create the ServiceManager class:
public sealed class ServiceManager : IServiceManager { private readonly Lazy<ICompanyService> _companyService; private readonly Lazy<IEmployeeService> _employeeService; public ServiceManager(IRepositoryManager repositoryManager, ILoggerManager logger) { _companyService = new Lazy<ICompanyService>(() => new CompanyService(repositoryManager, logger)); _employeeService = new Lazy<IEmployeeService>(() => new EmployeeService(repositoryManager, logger)); } public ICompanyService CompanyService => _companyService.Value; public IEmployeeService EmployeeService => _employeeService.Value;}Here, as we did with the RepositoryManager class, we are utilizing the Lazy class to ensure the lazy initialization of our services.
Now, with all these in place, we have to add the reference from the Service project inside the main project. Since Service is already referencing Service.Contracts, our main project will have the same reference as well.
Now, we have to modify the ServiceExtensions class:
public static void ConfigureServiceManager(this IServiceCollection services) => services.AddScoped<IServiceManager, ServiceManager>();And we have to add using directives:
using Service;
using Service.Contracts;Then, all we have to do is to modify the Program class to call this extension method:
builder.Services.ConfigureRepositoryManager(); builder.Services.ConfigureServiceManager();3.9 Registering RepositoryContext at a Runtime
With the RepositoryContextFactory class, which implements the IDesignTimeDbContextFactory interface, we have registered our RepositoryContext class at design time. This helps us find the RepositoryContext class in another project while executing migrations.
But, as you could see, we have the RepositoryManager service registration, which happens at runtime, and during that registration, we must have RepositoryContext registered as well in the runtime, so we could inject it into other services (like RepositoryManager service). This might be a bit confusing, so let’s see what that means for us.
Let’s modify the ServiceExtensions class:
public static void ConfigureSqlContext(this IServiceCollection services, IConfiguration configuration) => services.AddDbContext<RepositoryContext>(opts => opts.UseSqlServer(configuration.GetConnectionString("sqlConnection")));We are not specifying the MigrationAssembly inside the UseSqlServer method. We don’t need it in this case.
As the final step, we have to call this method in the Program class:
builder.Services.ConfigureSqlContext(builder.Configuration);With this, we have completed our implementation, and our service layer is ready to be used in our next chapter where we are going to learn about handling GET requests in ASP.NET Core Web API.
One additional thing. From .NET 6 RC2, there is a shortcut method AddSqlServer, which can be used like this:
public static void ConfigureSqlContext(this IServiceCollection services, IConfiguration configuration) => services.AddSqlServer<RepositoryContext>((configuration.GetConnectionString("sqlConnection")));This method replaces both AddDbContext and UseSqlServer methods and allows an easier configuration. But it doesn’t provide all of the features the AddDbContext method provides. So for more advanced options, it is recommended to use AddDbContext. We will use it throughout the rest of the project.
4 HANDLING GET REQUESTS
We’re all set to add some business logic to our application. But before we do that, let’s talk a bit about controller classes and routing because they play an important part while working with HTTP requests.
4.1 Controllers and Routing in WEB API
Controllers should only be responsible for handling requests, model validation, and returning responses to the frontend or some HTTP client. Keeping business logic away from controllers is a good way to keep them lightweight, and our code more readable and maintainable.
If you want to create the controller in the main project, you would right- click on the Controllers folder and then Add=>Controller. Then from the menu, you would choose API Controller Class and give it a name:
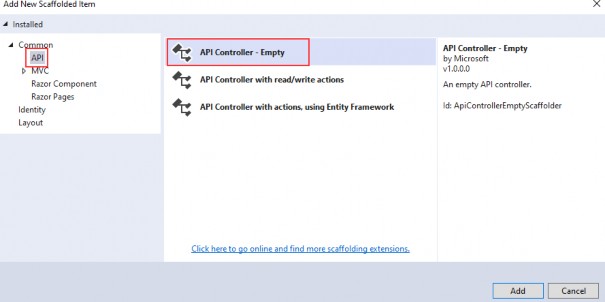
But, that’s not the thing we are going to do. We don’t want to create our controllers in the main project.
What we are going to do instead is create a presentation layer in our application.
The purpose of the presentation layer is to provide the entry point to our system so that consumers can interact with the data. We can implement this layer in many ways, for example creating a REST API, gRPC, etc.
However, we are going to do something different from what you are normally used to when creating Web APIs. By convention, controllers are defined in the Controllers folder inside the main project.
Why is this a problem?
Because ASP.NET Core uses Dependency Injection everywhere, we need to have a reference to all of the projects in the solution from the main project. This allows us to configure our services inside the Program class.
While this is exactly what we want to do, it introduces a big design flaw. What’s preventing our controllers from injecting anything they want inside the constructor?
So how can we impose some more strict rules about what controllers can do?
Do you remember how we split the Service layer into the Service.Contracts and Service projects? That was one piece of the puzzle.
Another part of the puzzle is the creation of a new class library project,CompanyEmployees.Presentation.
Inside that new project, we are going to install Microsoft.AspNetCore.Mvc.Core package so it has access to the ControllerBase class for our future controllers. Additionally, let’s create a single class inside the Presentation project:
public static class AssemblyReference {}It's an empty static class that we are going to use for the assembly reference inside the main project, you will see that in a minute.
The one more thing, we have to do is to reference the Service.Contracts project inside the Presentation project.
Now, we are going to delete the Controllers folder and the WeatherForecast.cs file from the main project because we are not going to need them anymore.
Next, we have to reference the Presentation project inside the main one. As you can see, our presentation layer depends only on the service contracts, thus imposing more strict rules on our controllers.
Then, we have to modify the Program.cs file:
builder.Services.AddControllers() .AddApplicationPart(typeof(CompanyEmployees.Presentation.AssemblyReference).Assembly);Without this code, our API wouldn’t work, and wouldn’t know where to route incoming requests. But now, our app will find all of the controllers inside of the Presentation project and configure them with the framework. They are going to be treated the same as if they were defined conventionally.
But, we don’t have our controllers yet. So, let’s navigate to the Presentation project, create a new folder named Controllers, and then a new class named CompaniesController. Since this is a class library project, we don’t have an option to create a controller as we had in the main project. Therefore, we have to create a regular class and then modify it:
using Microsoft.AspNetCore.Mvc; namespace CompanyEmployees.Presentation.Controllers { [Route("api/[controller]")] [ApiController] public class CompaniesController : ControllerBase { } }We’ve created this controller in the same way the main project would.
Every web API controller class inherits from the ControllerBase abstract class, which provides all necessary behavior for the derived class.
Also, above the controller class we can see this part of the code:
[Route("api/[controller]")]This attribute represents routing and we are going to talk more about routing inside Web APIs.
Web API routing routes incoming HTTP requests to the particular action method inside the Web API controller. As soon as we send our HTTP request, the MVC framework parses that request and tries to match it to an action in the controller.
There are two ways to implement routing in the project:
• Convention-based routing and
• Attribute routing
Convention-based routing is called such because it establishes a convention for the URL paths. The first part creates the mapping for the controller name, the second part creates the mapping for the action method, and the third part is used for the optional parameter. We can configure this type of routing in the Program class:

Our Web API project doesn’t configure routes this way, but if you create an MVC project this will be the default route configuration. Of course, if you are using this type of route configuration, you have to use the app.UseRouting method to add the routing middleware in the application’s pipeline.
If you inspect the Program class in our main project, you won’t find the UseRouting method because the routes are configured with the app.MapControllers method, which adds endpoints for controller actions without specifying any routes.
Attribute routing uses the attributes to map the routes directly to the action methods inside the controller. Usually, we place the base route above the controller class, as you can see in our Web API controller class. Similarly, for the specific action methods, we create their routes right above them.
While working with the Web API project, the ASP.NET Core team suggests that we shouldn’t use Convention-based Routing, but Attribute routing instead.
Different actions can be executed on the resource with the same URI, but with different HTTP Methods. In the same manner for different actions, we can use the same HTTP Method, but different URIs. Let’s explain this quickly.
For Get request, Post, or Delete, we use the same URI /api/companies but we use different HTTP Methods like GET, POST, or DELETE. But if we send a request for all companies or just one company, we are going to use the same GET method but different URIs (/api/companies for all companies and /api/companies/{companyId} for a single company).
We are going to understand this even more once we start implementing different actions in our controller.
4.2 Naming Our Resources
The resource name in the URI should always be a noun and not an action. That means if we want to create a route to get all companies, we should create this route: api/companies and not this one:/api/getCompanies.
The noun used in URI represents the resource and helps the consumer to understand what type of resource we are working with. So, we shouldn’t choose the noun products or orders when we work with the companies resource; the noun should always be companies. Therefore, by following this convention if our resource is employees (and we are going to work with this type of resource), the noun should be employees.
Another important part we need to pay attention to is the hierarchy between our resources. In our example, we have a Company as a principal entity and an Employee as a dependent entity. When we create a route for a dependent entity, we should follow a slightly different convention:/api/principalResource/{principalId}/dependentResource.
Because our employees can’t exist without a company, the route for the employee's resource should be /api/companies/{companyId}/employees.
With all of this in mind, we can start with the Get requests.
4.3 Getting All Companies From the Database
So let’s start.
The first thing we are going to do is to change the base route
from [Route("api/[controller]")] to [Route("api/companies")]. Even though the first route will work just fine, with the second example we are more specific to show that this routing should point to the CompaniesController class.
Now it is time to create the first action method to return all the companies from the database. Let’s create a definition for the GetAllCompanies method in the ICompanyRepository interface:
public interface ICompanyRepository { IEnumerable<Company> GetAllCompanies(bool trackChanges); }
For this to work, we need to add a reference from the Entities project to the Contracts project.
Now, we can continue with the interface implementation in the CompanyRepository class:
internal sealed class CompanyRepository : RepositoryBase<Company>, ICompanyRepository { public CompanyRepository(RepositoryContext repositoryContext) :base(repositoryContext) { } public IEnumerable<Company> GetAllCompanies(bool trackChanges) => FindAll(trackChanges) .OrderBy(c => c.Name) .ToList(); }As you can see, we are calling the FindAll method from the RepositoryBase class, ordering the result with the OrderBy method, and then executing the query with the ToList method.
After the repository implementation, we have to implement a service layer.
Let’s start with the ICompanyService interface modification:
public interface ICompanyService { IEnumerable<Company> GetAllCompanies(bool trackChanges); }Since the Company model resides in the Entities project, we have to add the Entities reference to the Service.Contracts project. At least, we have for now.
Let’s be clear right away before we proceed. Getting all the entities from the database is a bad idea. We’re going to start with the simplest method and change it later on.
Then, let’s continue with the CompanyService modification:
internal sealed class CompanyService : ICompanyService { private readonly IRepositoryManager _repository; private readonly ILoggerManager _logger; public CompanyService(IRepositoryManager repository, ILoggerManager logger) { _repository = repository; _logger = logger; } public IEnumerable<Company> GetAllCompanies(bool trackChanges) { try { var companies = _repository.Company.GetAllCompanies(trackChanges); return companies; } catch (Exception ex) { _logger.LogError($"Something went wrong in the {nameof(GetAllCompanies)} service method {ex}"); throw; } } }We are using our repository manager to call the GetAllCompanies method from the CompanyRepository class and return all the companies from the database.
Finally, we have to return companies by using the GetAllCompanies method inside the Web API controller.
The purpose of the action methods inside the Web API controllers is not only to return results. It is the main purpose, but not the only one. We need to pay attention to the status codes of our Web API responses as well. Additionally, we are going to decorate our actions with the HTTP attributes which will mark the type of the HTTP request to that action.
So, let’s modify the CompaniesController:
[Route("api/companies")] [ApiController] public class CompaniesController : ControllerBase { private readonly IServiceManager _service; public CompaniesController(IServiceManager service) => _service = service; [HttpGet] public IActionResult GetCompanies() { try { var companies = _service.CompanyService.GetAllCompanies(trackChanges: false); return Ok(companies); } catch { return StatusCode(500, "Internal server error"); } } }
Let’s explain this code a bit.
First of all, we inject the IServiceManager interface inside the constructor. Then by decorating the GetCompanies action with
the [HttpGet] attribute, we are mapping this action to the GET request. Then, we use an injected service to call the service method that gets the data from the repository class.
The IActionResult interface supports using a variety of methods, which return not only the result but also the status codes. In this situation,the OK method returns all the companies and also the status code 200 — which stands for OK. If an exception occurs, we are going to return the internal server error with the status code 500.
Because there is no route attribute right above the action, the route for the GetCompanies action will be api/companies which is the route placed on top of our controller.
4.4 Testing the Result with Postman
To check the result, we are going to use a great tool named Postman, which helps a lot with sending requests and displaying responses. If you download our exercise files, you will find the file Bonus 2- CompanyEmployeesRequests.postman_collection.json, which contains a request collection divided for each chapter of this book. You can import them in Postman to save yourself the time of manually typing them:
NOTE: Please note that some GUID values will be different for your project, so you have to change them according to those values.
So let’s start the application by pressing the F5 button and check that it is now listening on the https://localhost:5001 address:
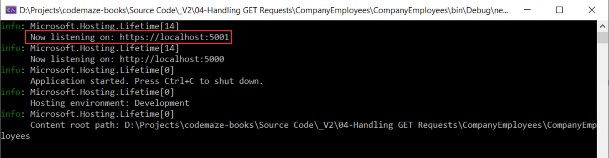
If this is not the case, you probably ran it in the IIS mode; so turn the application off and start it again, but in the CompanyEmployees mode:

Now, we can use Postman to test the result:https://localhost:5001/api/companies
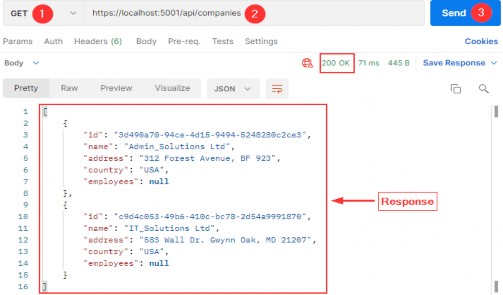
Excellent, everything is working as planned. But we are missing something. We are using the Company entity to map our requests to the database and then returning it as a result to the client, and this is not a good practice. So, in the next part, we are going to learn how to improve our code with DTO classes.
4.5 DTO Classes vs. Entity Model Classes
A data transfer object (DTO) is an object that we use to transport data between the client and server applications.
So, as we said in a previous section of this book, it is not a good practice to return entities in the Web API response; we should instead use data transfer objects. But why is that?
Well, EF Core uses model classes to map them to the tables in the database and that is the main purpose of a model class. But as we saw, our models have navigational properties and sometimes we don’t want to map them in an API response. So, we can use DTO to remove any property or concatenate properties into a single property.
Moreover, there are situations where we want to map all the properties from a model class to the result — but still, we want to use DTO instead. The reason is if we change the database, we also have to change the properties in a model — but that doesn’t mean our clients want the result changed. So, by using DTO, the result will stay as it was before the model changes.
As we can see, keeping these objects separate (the DTO and model classes) leads to a more robust and maintainable code in our application.
Now, when we know why should we separate DTO from a model class in our code, let’s create a new project named Shared and then a new folder DataTransferObjects with the CompanyDto record inside:
namespace Shared.DataTransferObjects { public record CompanyDto(Guid Id, string Name, string FullAddress); }Instead of a regular class, we are using a record for DTO. This specific record type is known as a Positional record.
A Record type provides us an easier way to create an immutable reference type in .NET. This means that the Record’s instance property values cannot change after its initialization. The data are passed by value and the equality between two Records is verified by comparing the value of their properties.
Records can be a valid alternative to classes when we have to send or receive data. The very purpose of a DTO is to transfer data from one part of the code to another, and immutability in many cases is useful. We use them to return data from a Web API or to represent events in our application.
This is the exact reason why we are using records for our DTOs.
In our DTO, we have removed the Employees property and we are going to use the FullAddress property to concatenate the Address and Country properties from the Company class. Furthermore, we are not using validation attributes in this record, because we are going to use this record only to return a response to the client. Therefore, validation attributes are not required.
So, the first thing we have to do is to add the reference from the Shared project to the Service.Contracts project, and remove the Entities reference. At this moment the Service.Contracts project is only referencing the Shared project.
Then, we have to modify the ICompanyService interface:
public interface ICompanyService { IEnumerable<CompanyDto> GetAllCompanies(bool trackChanges); }
And the CompanyService class:
public IEnumerable<CompanyDto> GetAllCompanies(bool trackChanges) { try { var companies = _repository.Company.GetAllCompanies(trackChanges); var companiesDto = companies.Select(c => new CompanyDto(c.Id, c.Name ?? "", string.Join(' ', c.Address, c.Country))) .ToList(); return companiesDto; } catch (Exception ex) { _logger.LogError($"Something went wrong in the {nameof(GetAllCompanies)} service method {ex}"); throw; } }Let’s start our application and test it with the same request from Postman:https://localhost:5001/api/companies
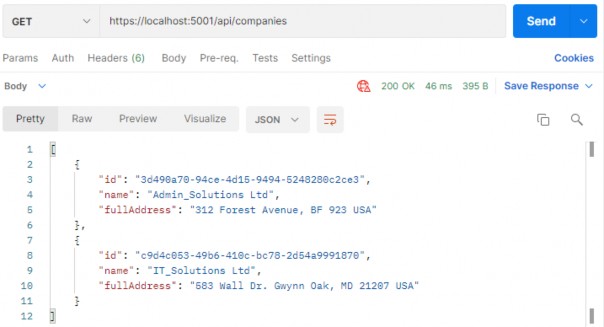
This time we get our CompanyDto result, which is a more preferred way. But this can be improved as well. If we take a look at our mapping code in the GetCompanies action, we can see that we manually map all the properties. Sure, it is okay for a few fields — but what if we have a lot more? There is a better and cleaner way to map our classes and that is by using the Automapper.
4.6 Using AutoMapper in ASP.NET Core
AutoMapper is a library that helps us with mapping objects in our applications. By using this library, we are going to remove the code for manual mapping — thus making the action readable and maintainable.
So, to install AutoMapper, let’s open a Package Manager Console window, choose the Service project as a default project from the drop-down list, and run the following command:
PM> Install-Package AutoMapper.Extensions.Microsoft.DependencyInjectionAfter installation, we are going to register this library in the Program class:
builder.Services.AddAutoMapper(typeof(Program));As soon as our library is registered, we are going to create a profile class, also in the main project, where we specify the source and destination objects for mapping:
public class MappingProfile : Profile { public MappingProfile() { CreateMap<Company, CompanyDto>() .ForMember(c => c.FullAddress, opt => opt.MapFrom(x => string.Join(' ', x.Address, x.Country))); } }The MappingProfile class must inherit from the AutoMapper’s Profile class. In the constructor, we are using the CreateMap method where we specify the source object and the destination object to map to. Because we have the FullAddress property in our DTO record, which contains both the Address and the Country from the model class, we have to specify additional mapping rules with the ForMember method.
Now, we have to modify the ServiceManager class to enable DI in our service classes:
public sealed class ServiceManager : IServiceManager { private readonly Lazy<ICompanyService> _companyService; private readonly Lazy<IEmployeeService> _employeeService; public ServiceManager(IRepositoryManager repositoryManager, ILoggerManager logger, IMapper mapper) { _companyService = new Lazy<ICompanyService>(() => new CompanyService(repositoryManager, logger, mapper)); _employeeService = new Lazy<IEmployeeService>(() => new EmployeeService(repositoryManager, logger, mapper)); } public ICompanyService CompanyService => _companyService.Value; public IEmployeeService EmployeeService => _employeeService.Value; }Of course, now we have two errors regarding our service constructors. So we need to fix that in both CompanyService and EmployeeService classes:
internal sealed class CompanyService : ICompanyService { private readonly IRepositoryManager _repository; private readonly ILoggerManager _logger; private readonly IMapper _mapper; public CompanyService(IRepositoryManager repository, ILoggerManager logger, IMapper mapper) { _repository = repository; _logger = logger; _mapper = mapper; } ... }We should do the same in the EmployeeService class:
internal sealed class EmployeeService : IEmployeeService { private readonly IRepositoryManager _repository; private readonly ILoggerManager _logger; private readonly IMapper _mapper; public EmployeeService(IRepositoryManager repository, ILoggerManager logger, IMapper mapper) { _repository = repository; _logger = logger; _mapper = mapper; } }Finally, we can modify the GetAllCompanies method in the CompanyService class:
public IEnumerable<CompanyDto> GetAllCompanies(bool trackChanges) { try { var companies = _repository.Company.GetAllCompanies(trackChanges); var companiesDto = _mapper.Map<IEnumerable<CompanyDto>>(companies); return companiesDto; } catch (Exception ex) { _logger.LogError($"Something went wrong in the {nameof(GetAllCompanies)} service method {ex}");
throw; } }We are using the Map method and specify the destination and then the source object.
Excellent.
Now if we start our app and send the same request from Postman, we are going to get an error message:
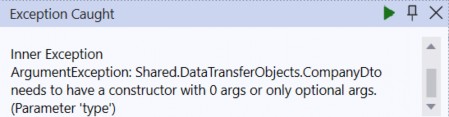
This happens because AutoMapper is not able to find the specific FullAddress property as we specified in the MappingProfile class. We are intentionally showing this error for you to know what to do if it happens to you in your projects.
So to solve this, all we have to do is to modify the MappingProfile class:
public MappingProfile() { CreateMap<Company, CompanyDto>() .ForCtorParam("FullAddress", opt => opt.MapFrom(x => string.Join(' ', x.Address, x.Country))); }This time, we are not using the ForMember method but the ForCtorParam method to specify the name of the parameter in the constructor that AutoMapper needs to map to.
Now, let’s use Postman again to send the request to test our app:https://localhost:5001/api/companies

We can see that everything is working as it is supposed to, but now with much better code.
5 GLOBAL ERROR HANDLING
Exception handling helps us deal with the unexpected behavior of our system. To handle exceptions, we use the try-catch block in our code as well as the finally keyword to clean up our resources afterward.
Even though there is nothing wrong with the try-catch blocks in our Actions and methods in the Web API project, we can extract all the exception handling logic into a single centralized place. By doing that, we make our actions cleaner, more readable, and the error handling process more maintainable.
In this chapter, we are going to refactor our code to use the built-in middleware for global error handling to demonstrate the benefits of this approach. Since we already talked about the middleware in ASP.NET Core (in section 1.8), this section should be easier to understand.
5.1 Handling Errors Globally with the Built-In Middleware
The UseExceptionHandler middleware is a built-in middleware that we can use to handle exceptions. So, let’s dive into the code to see this middleware in action.
We are going to create a new ErrorModel folder in the Entities project, and add the new class ErrorDetails in that folder:
using System.Text.Json; namespace Entities.ErrorModel { public class ErrorDetails { public int StatusCode { get; set; } public string? Message { get; set; } public override string ToString() => JsonSerializer.Serialize(this); } }We are going to use this class for the details of our error message.
To continue, in the Extensions folder in the main project, we are going to add a new static class: ExceptionMiddlewareExtensions.cs.
Now, we need to modify it:
public static class ExceptionMiddlewareExtensions { public static void ConfigureExceptionHandler(this WebApplication app, ILoggerManager logger) { app.UseExceptionHandler(appError => { appError.Run(async context => { context.Response.StatusCode = (int)HttpStatusCode.InternalServerError; context.Response.ContentType = "application/json"; var contextFeature = context.Features.Get<IExceptionHandlerFeature>(); if (contextFeature != null) { logger.LogError($"Something went wrong: {contextFeature.Error}"); await context.Response.WriteAsync(new ErrorDetails() { StatusCode = context.Response.StatusCode, Message = "Internal Server Error.", }.ToString()); } }); }); } }In the code above, we create an extension method, on top of the WebApplication type, and we call the UseExceptionHandler method. That method adds a middleware to the pipeline that will catch exceptions, log them, and re-execute the request in an alternate pipeline.
Inside the UseExceptionHandler method, we use the appError variable of the IApplicationBuilder type. With that variable, we call the Run method, which adds a terminal middleware delegate to the application’s pipeline. This is something we already know from section 1.8.
Then, we populate the status code and the content type of our response, log the error message and finally return the response with the custom-created object. Later on, we are going to modify this middleware even more to support our business logic in a service layer.
Of course, there are several namespaces we should add to make this work:
using Contracts; using Entities.ErrorModel; using Microsoft.AspNetCore.Diagnostics; using System.Net;5.2 Program Class Modification
To be able to use this extension method, let’s modify the Program class:
var app = builder.Build(); var logger = app.Services.GetRequiredService<ILoggerManager>(); app.ConfigureExceptionHandler(logger); if (app.Environment.IsProduction()) app.UseHsts(); app.UseHttpsRedirection(); app.UseStaticFiles(); app.UseForwardedHeaders(new ForwardedHeadersOptions { ForwardedHeaders = ForwardedHeaders.All }); app.UseCors("CorsPolicy"); app.UseAuthorization(); app.MapControllers(); app.Run();
Here, we first extract the ILoggerManager service inside the logger variable. Then, we just call the ConfigureExceptionHandler method and pass that logger service. It is important to know that we have to extract the ILoggerManager service after the var app = builder.Build() code line because the Build method builds the WebApplication and registers all the services added with IOC.
Additionally, we remove the call to the UseDeveloperExceptionPage method in the development environment since we don’t need it now and it also interferes with our error handler middleware.
Finally, let’s remove the try-catch block from the GetAllCompanies service method:
public IEnumerable<CompanyDto> GetAllCompanies(bool trackChanges) { var companies = _repository.Company.GetAllCompanies(trackChanges); var companiesDto = _mapper.Map<IEnumerable<CompanyDto>>(companies); return companiesDto; }And from our GetCompanies action:
[HttpGet] public IActionResult GetCompanies() { var companies = _service.CompanyService.GetAllCompanies(trackChanges: false); return Ok(companies); }And there we go. Our methods are much cleaner now. More importantly, we can reuse this functionality to write more readable methods and actions in the future.
5.3 Testing the Result
To inspect this functionality, let’s add the following line to the GetCompanies action, just to simulate an error:
[HttpGet] public IActionResult GetCompanies() { throw new Exception("Exception"); var companies = _service.CompanyService.GetAllCompanies(trackChanges: false); return Ok(companies); }NOTE: Once you send the request, Visual Studio will stop the execution inside the GetCompanies action on the line where we throw an exception. This is normal behavior and all you have to do is to click the continue button to finish the request flow. Additionally, you can start your app with CTRL+F5, which will prevent Visual Studio from stopping the execution. Also, if you want to start your app with F5 but still to avoid VS execution stoppages, you can open the Tools->Options->Debugging->General option and uncheck the Enable Just My Code checkbox.
And send a request from Postman:https://localhost:5001/api/companies
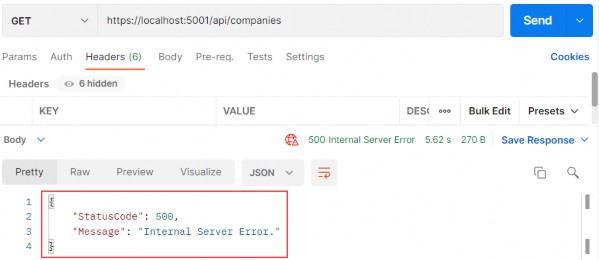
We can check our log messages to make sure that logging is working as well.
6 GETTING ADDITIONAL RESOURCES
As of now, we can continue with GET requests by adding additional actions to our controller. Moreover, we are going to create one more controller for the Employee resource and implement an additional action in it.
6.1 Getting a Single Resource From the Database
Let’s start by modifying the ICompanyRepository interface:
public interface ICompanyRepository { IEnumerable<Company> GetAllCompanies(bool trackChanges); Company GetCompany(Guid companyId, bool trackChanges); }Then, we are going to implement this interface in the CompanyRepository.cs file:
public Company GetCompany(Guid companyId, bool trackChanges) => FindByCondition(c => c.Id.Equals(companyId), trackChanges) .SingleOrDefault();Then, we have to modify the ICompanyService interface:
public interface ICompanyService { IEnumerable<CompanyDto> GetAllCompanies(bool trackChanges); CompanyDto GetCompany(Guid companyId, bool trackChanges); }And of course, we have to implement this interface in the CompanyService class:
public CompanyDto GetCompany(Guid id, bool trackChanges) { var company = _repository.Company.GetCompany(id, trackChanges); //Check if the company is null var companyDto = _mapper.Map<CompanyDto>(company); return companyDto; }So, we are calling the repository method that fetches a single company from the database, maps the result to companyDto, and returns it. You can also see the comment about the null checks, which we are going to solve just in a minute.
Finally, let’s change the CompanyController class:
[HttpGet("{id:guid}")] public IActionResult GetCompany(Guid id) { var company = _service.CompanyService.GetCompany(id, trackChanges: false); return Ok(company); }The route for this action is /api/companies/id and that’s because the /api/companies part applies from the root route (on top of the controller) and the id part is applied from the action attribute [HttpGet(“{id:guid}“)]. You can also see that we are using a route constraint (:guid part) where we explicitly state that our id parameter is of the GUID type. We can use many different constraints like int, double, long, float, datetime, bool, length, minlength, maxlength, and many others.
Let’s use Postman to send a valid request towards our API: https://localhost:5001/api/companies/3d490a70-94ce-4d15-9494-5248280c2ce3
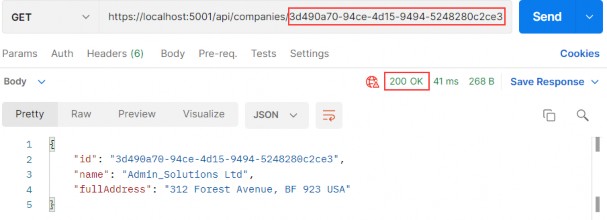
Great. This works as expected. But, what if someone uses an invalid id parameter?
6.1.1 Handling Invalid Requests in a Service Layer
As you can see, in our service method, we have a comment stating that the result returned from the repository could be null, and this is something we have to handle. We want to return the NotFound response to the client but without involving our controller’s actions. We are going to keep them nice and clean as they already are.
So, what we are going to do is to create custom exceptions that we can call from the service methods and interrupt the flow. Then our error handling middleware can catch the exception, process the response, and return it to the client. This is a great way of handling invalid requests inside a service layer without having additional checks in our controllers.
That said, let’s start with a new Exceptions folder creation inside the Entities project. Since, in this case, we are going to create a not found response, let’s create a new NotFoundException class inside that folder:
public abstract class NotFoundException : Exception { protected NotFoundException(string message) : base(message) { } }This is an abstract class, which will be a base class for all the individual not found exception classes. It inherits from the Exception class to represent the errors that happen during application execution. Since in our current case, we are handling the situation where we can’t find the company in the database, we are going to create a new CompanyNotFoundException class in the same Exceptions folder:
public sealed class CompanyNotFoundException : NotFoundException { public CompanyNotFoundException(Guid companyId) :base ($"The company with id: {companyId} doesn't exist in the database.") { } }Right after that, we can remove the comment in the GetCompany method and throw this exception:
public CompanyDto GetCompany(Guid id, bool trackChanges) { var company = _repository.Company.GetCompany(id, trackChanges); if (company is null) throw new CompanyNotFoundException(id); var companyDto = _mapper.Map<CompanyDto>(company); return companyDto; }Finally, we have to modify our error middleware because we don’t want to return the 500 error message to our clients for every custom error we throw from the service layer.
So, let’s modify the ExceptionMiddlewareExtensions class in the main project:
public static class ExceptionMiddlewareExtensions { public static void ConfigureExceptionHandler(this WebApplication app, ILoggerManager logger) { app.UseExceptionHandler(appError => { appError.Run(async context => { context.Response.ContentType = "application/json"; var contextFeature = context.Features.Get<IExceptionHandlerFeature>(); if (contextFeature != null) { context.Response.StatusCode = contextFeature.Error switch { NotFoundException => StatusCodes.Status404NotFound, _ => StatusCodes.Status500InternalServerError }; logger.LogError($"Something went wrong: {contextFeature.Error}"); await context.Response.WriteAsync(new ErrorDetails() { StatusCode = context.Response.StatusCode, Message = contextFeature.Error.Message, }.ToString()); } }); }); } }We remove the hardcoded StatusCode setup and add the part where we populate it based on the type of exception we throw in our service layer. We are also dynamically populating the Message property of the ErrorDetails object that we return as the response.
Additionally, you can see the advantage of using the base abstract exception class here (NotFoundException in this case). We are not checking for the specific class implementation but the base type. This allows us to have multiple not found classes that inherit from the NotFoundException class and this middleware will know that we want to return the NotFound response to the client.
Excellent. Now, we can start the app and send the invalid request:https://localhost:5001/api/companies/3d490a70-94ce-4d15-9494-5248280c2ce2
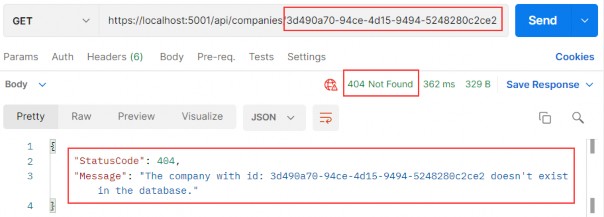
We can see the status code we require and also the response object with proper StatusCode and Message properties. Also, if you inspect the log message, you will see that we are logging a correct message.
With this approach, we have perfect control of all the exceptional cases in our app. We have that control due to global error handler implementation. For now, we only handle the invalid id sent from the client, but we will handle more exceptional cases in the rest of the project.
In our tests for a published app, the regular request sent from Postman took 7ms and the exceptional one took 14ms. So you can see how fast the response is.
Of course, we are using exceptions only for these exceptional cases (Company not found, Employee not found...) and not throwing them all over the application. So, if you follow the same strategy, you will not face any performance issues.
Lastly, if you have an application where you have to throw custom exceptions more often and maybe impact your performance, we are going to provide an alternative to exceptions in the first bonus chapter of this book (Chapter 32).
6.2 Parent/Child Relationships in Web API
Up until now, we have been working only with the company, which is a parent (principal) entity in our API. But for each company, we have a related employee (dependent entity). Every employee must be related to a certain company and we are going to create our URIs in that manner.
That said, let’s create a new controller in the Presentation project and name it EmployeesController:
[Route("api/companies/{companyId}/employees")] [ApiController] public class EmployeesController : ControllerBase { private readonly IServiceManager _service; public EmployeesController(IServiceManager service) => _service = service; }We are familiar with this code, but our main route is a bit different. As we said, a single employee can’t exist without a company entity and this is exactly what we are exposing through this URI. To get an employee or employees from the database, we have to specify the companyId parameter, and that is something all actions will have in common. For that reason, we have specified this route as our root route.
Before we create an action to fetch all the employees per company, we have to modify the IEmployeeRepository interface:
public interface IEmployeeRepository { IEnumerable<Employee> GetEmployees(Guid companyId, bool trackChanges); }
After interface modification, we are going to modify the EmployeeRepository class:
public IEnumerable<Employee> GetEmployees(Guid companyId, bool trackChanges) => FindByCondition(e => e.CompanyId.Equals(companyId), trackChanges) .OrderBy(e => e.Name).ToList();Then, before we start adding code to the service layer, we are going to create a new DTO. Let’s name it EmployeeDto and add it to the Shared/DataTransferObjects folder:
public record EmployeeDto(Guid Id, string Name, int Age, string Position);Since we want to return this DTO to the client, we have to create a mapping rule inside the MappingProfile class:
public MappingProfile() { CreateMap<Company, CompanyDto>() .ForCtorParam("FullAddress", opt => opt.MapFrom(x => string.Join(' ', x.Address, x.Country))); CreateMap<Employee, EmployeeDto>(); }Now, we can modify the IEmployeeService interface:
public interface IEmployeeService { IEnumerable<EmployeeDto> GetEmployees(Guid companyId, bool trackChanges); }And of course, we have to implement this interface in the EmployeeService class:
public IEnumerable<EmployeeDto> GetEmployees(Guid companyId, bool trackChanges) { var company = _repository.Company.GetCompany(companyId, trackChanges); if (company is null) throw new CompanyNotFoundException(companyId);
var employeesFromDb = _repository.Employee.GetEmployees(companyId, trackChanges); var employeesDto = _mapper.Map<IEnumerable<EmployeeDto>>(employeesFromDb); return employeesDto; }Here, we first fetch the company entity from the database. If it doesn’t exist, we return the NotFound response to the client. If it does, we fetch all the employees for that company, map them to the collection of EmployeeDto and return it to the caller.
Finally, let’s modify the Employees controller:
[HttpGet] public IActionResult GetEmployeesForCompany(Guid companyId) { var employees = _service.EmployeeService.GetEmployees(companyId, trackChanges: false); return Ok(employees); }This code is pretty straightforward — nothing we haven’t seen so far — but we need to explain just one thing. As you can see, we have the companyId parameter in our action and this parameter will be mapped from the main route. For that reason, we didn’t place it in the [HttpGet] attribute as we did with the GetCompany action.
That done, we can send a request with a valid companyId:https://localhost:5001/api/companies/c9d4c053-49b6-410c-bc78-2d54a9991870/employees
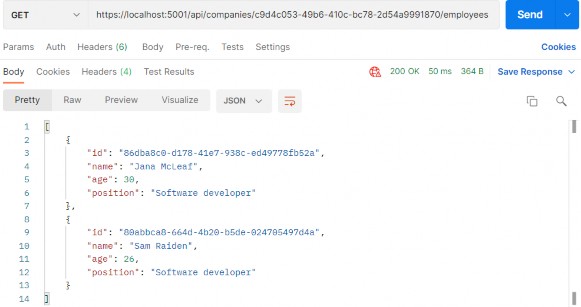
And with an invalid companyId:https://localhost:5001/api/companies/c9d4c053-49b6-410c-bc78-2d54a9991873/employees

Excellent. Let’s continue by fetching a single employee.
6.3 Getting a Single Employee for Company
So, as we did in previous sections, let’s start with the IEmployeeRepository interface modification:
public interface IEmployeeRepository { IEnumerable<Employee> GetEmployees(Guid companyId, bool trackChanges); Employee GetEmployee(Guid companyId, Guid id, bool trackChanges); }Now, let’s implement this method in the EmployeeRepository class:
public Employee GetEmployee(Guid companyId, Guid id, bool trackChanges) => FindByCondition(e => e.CompanyId.Equals(companyId) && e.Id.Equals(id), trackChanges) .SingleOrDefault();Next, let’s add another exception class in the Entities/Exceptions folder:
public class EmployeeNotFoundException : NotFoundException { public EmployeeNotFoundException(Guid employeeId) : base($"Employee with id: {employeeId} doesn't exist in the database.") { } }We will soon see why do we need this class.
To continue, we have to modify the IEmployeeService interface:
public interface IEmployeeService { IEnumerable<EmployeeDto> GetEmployees(Guid companyId, bool trackChanges); EmployeeDto GetEmployee(Guid companyId, Guid id, bool trackChanges); }And implement this new method in the EmployeeService class:
public EmployeeDto GetEmployee(Guid companyId, Guid id, bool trackChanges) { var company = _repository.Company.GetCompany(companyId, trackChanges); if (company is null) throw new CompanyNotFoundException(companyId); var employeeDb = _repository.Employee.GetEmployee(companyId, id, trackChanges); if (employeeDb is null) throw new EmployeeNotFoundException(id); var employee = _mapper.Map<EmployeeDto>(employeeDb); return employee; }
This is also a pretty clear code and we can see the reason for creating a new exception class.
Finally, let’s modify the EmployeeController class:
[HttpGet("{id:guid}")] public IActionResult GetEmployeeForCompany(Guid companyId, Guid id) { var employee = _service.EmployeeService.GetEmployee(companyId, id, trackChanges: false); return Ok(employee);}Excellent. You can see how clear our action is.
We can test this action by using already created requests from the Bonus 2-CompanyEmployeesRequests.postman_collection.json file placed in the folder with the exercise files:https://localhost:5001/api/companies/c9d4c053-49b6-410c-bc78-2d54a9991870/employees/86dba8c0-d178-41e7-938c-ed49778fb52a
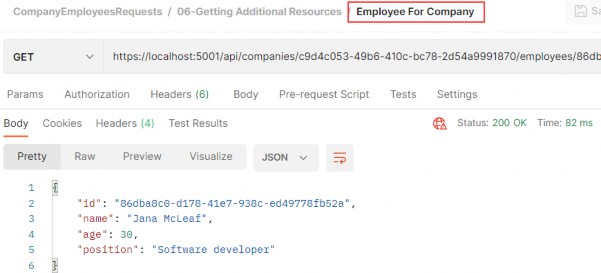
When we send the request with an invalid company or employee id:https://localhost:5001/api/companies/c9d4c053-49b6-410c-bc78-2d54a9991870/employees/86dba8c0-d178-41e7-938c-ed49778fb52c
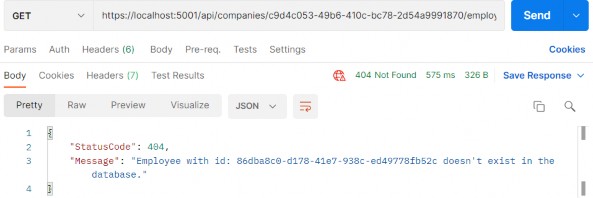

Our responses are pretty self-explanatory, which makes for a good user experience.
Until now, we have received only JSON formatted responses from our API. But what if we want to support some other format, like XML for example?
Well, in the next chapter we are going to learn more about Content Negotiation and enabling different formats for our responses.
7 CONTENT NEGOTIATION
Content negotiation is one of the quality-of-life improvements we can add to our REST API to make it more user-friendly and flexible. And when we design an API, isn’t that what we want to achieve in the first place?
Content negotiation is an HTTP feature that has been around for a while, but for one reason or another, it is often a bit underused.
In short, content negotiation lets you choose or rather “negotiate” the content you want to get in a response to the REST API request.
7.1 What Do We Get Out of the Box?
By default, ASP.NET Core Web API returns a JSON formatted result.
We can confirm that by looking at the response from the GetCompanies
action:https://localhost:5001/api/companies
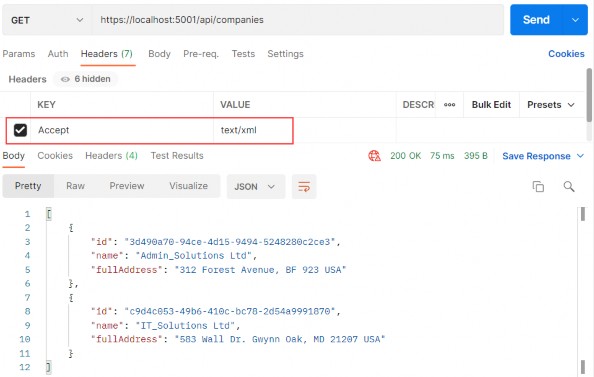
We can clearly see that the default result when calling GET on /api/companies returns the JSON result. We have also used the Accept header (as you can see in the picture above) to try forcing the server to return other media types like plain text and XML.
But that doesn’t work. Why?
Because we need to configure server formatters to format a response the way we want it.
Let’s see how to do that.
7.2 Changing the Default Configuration of Our Project
A server does not explicitly specify where it formats a response to JSON. But you can override it by changing configuration options through the AddControllers method.
We can add the following options to enable the server to format the XML response when the client tries negotiating for it:
builder.Services.ConfigureCors(); builder.Services.ConfigureIISIntegration(); builder.Services.ConfigureLoggerService(); builder.Services.ConfigureRepositoryManager(); builder.Services.ConfigureServiceManager(); builder.Services.ConfigureSqlContext(builder.Configuration); builder.Services.AddAutoMapper(typeof(Program)); builder.Services.AddControllers(config => { config.RespectBrowserAcceptHeader = true; }).AddXmlDataContractSerializerFormatters() .AddApplicationPart(typeof(CompanyEmployees.Presentation.AssemblyReference).Assembly);First things first, we must tell a server to respect the Accept header. After that, we just add the AddXmlDataContractSerializerFormatters method to support XML formatters.
Now that we have our server configured, let’s test the content negotiation once more.
7.3 Testing Content Negotiation
Let’s see what happens now if we fire the same request through Postman:https://localhost:5001/api/companies
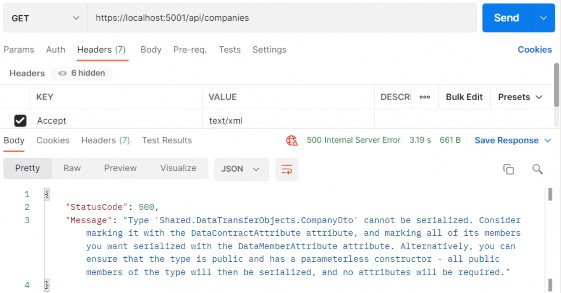
We get an error because XmlSerializer cannot easily serialize our positional record type. There are two solutions to this. The first one is marking our CompanyDto record with the [Serializable] attribute:
[Serializable]
public record CompanyDto(Guid Id, string Name, string FullAddress);Now, we can send the same request again:
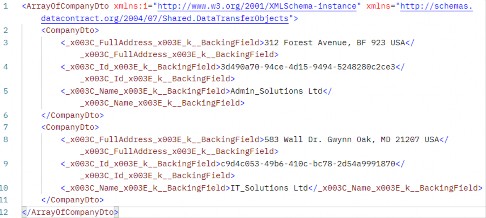
This time, we are getting our XML response but, as you can see,properties have some strange names. That’s because the compiler behind the scenes generates the record as a class with fields named like that (name_BackingField) and the XML serializer just serializes those fields with the same names.
If we don’t want these property names in our response, but the regular ones, we can implement a second solution. Let’s modify our record with the init only property setters:
public record CompanyDto { public Guid Id { get; init; } public string? Name { get; init; } public string? FullAddress { get; init; }This object is still immutable and init-only properties protect the state of the object from mutation once initialization is finished.
Additionally, we have to make one more change in the MappingProfile class:
public MappingProfile() { CreateMap<Company, CompanyDto>() .ForMember(c => c.FullAddress, opt => opt.MapFrom(x => string.Join(' ', x.Address, x.Country))); CreateMap<Employee, EmployeeDto>(); }We are returning this mapping rule to a previous state since now, we do have properties in our object.
Now, we can send the same request again:
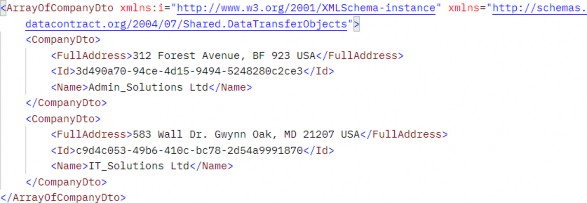
There is our XML response.
Now by changing the Accept header from text/xml to text/json, we can get differently formatted responses — and that is quite awesome, wouldn’t you agree?
Okay, that was nice and easy.
But what if despite all this flexibility a client requests a media type that a server doesn’t know how to format?
7.4 Restricting Media Types
Currently, it – the server - will default to a JSON type.
But we can restrict this behavior by adding one line to the configuration:
builder.Services.AddControllers(config => { config.RespectBrowserAcceptHeader = true; config.ReturnHttpNotAcceptable = true; }).AddXmlDataContractSerializerFormatters() .AddApplicationPart(typeof(CompanyEmployees.Presentation.AssemblyReference).Assembly);We added the ReturnHttpNotAcceptable = true option, which tells the server that if the client tries to negotiate for the media type the server doesn’t support, it should return the 406 Not Acceptable status code.
This will make our application more restrictive and force the API consumer to request only the types the server supports. The 406 status code is created for this purpose.
Now, let’s try fetching the text/css media type using Postman to see what happens:https://localhost:5001/api/companies
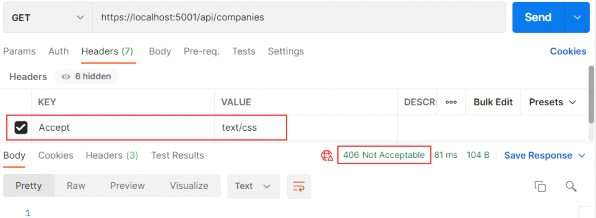
And as expected, there is no response body and all we get is a nice 406 Not Acceptable status code.
So far so good.
7.5 More About Formatters
If we want our API to support content negotiation for a type that is not “in the box,” we need to have a mechanism to do this.
So, how can we do that?
ASP.NET Core supports the creation of custom formatters. Their purpose is to give us the flexibility to create our formatter for any media types we need to support.
We can make the custom formatter by using the following method:
• Create an output formatter class that inherits the TextOutputFormatter class.
• Create an input formatter class that inherits the TextInputformatter class.
• Add input and output classes to the InputFormatters and OutputFormatters collections the same way we did for the XML formatter.
Now let’s have some fun and implement a custom CSV formatter for our example.
7.6 Implementing a Custom Formatter
Since we are only interested in formatting responses, we need to implement only an output formatter. We would need an input formatter only if a request body contained a corresponding type.
The idea is to format a response to return the list of companies in a CSV format.
Let’s add a CsvOutputFormatter class to our main project:
public class CsvOutputFormatter : TextOutputFormatter { public CsvOutputFormatter() { SupportedMediaTypes.Add(MediaTypeHeaderValue.Parse("text/csv")); SupportedEncodings.Add(Encoding.UTF8); SupportedEncodings.Add(Encoding.Unicode); } protected override bool CanWriteType(Type? type) { if (typeof(CompanyDto).IsAssignableFrom(type) || typeof(IEnumerable<CompanyDto>).IsAssignableFrom(type)) { return base.CanWriteType(type); } return false; } public override async Task WriteResponseBodyAsync(OutputFormatterWriteContext context, Encoding selectedEncoding) { var response = context.HttpContext.Response; var buffer = new StringBuilder(); if (context.Object is IEnumerable<CompanyDto>) { foreach (var company in (IEnumerable<CompanyDto>)context.Object) { FormatCsv(buffer, company); } } else { FormatCsv(buffer, (CompanyDto)context.Object); }
await response.WriteAsync(buffer.ToString()); } private static void FormatCsv(StringBuilder buffer, CompanyDto company) { buffer.AppendLine($"{company.Id},\"{company.Name},\"{company.FullAddress}\""); } }There are a few things to note here:
• In the constructor, we define which media type this formatter should parse as well as encodings.
• The CanWriteType method is overridden, and it indicates whether or not the CompanyDto type can be written by this serializer.
• The WriteResponseBodyAsync method constructs the response.
• And finally, we have the FormatCsv method that formats a response the way we want it.
The class is pretty straightforward to implement, and the main thing that you should focus on is the FormatCsv method logic.
Now we just need to add the newly made formatter to the list of OutputFormatters in the ServicesExtensions class:
public static IMvcBuilder AddCustomCSVFormatter(this IMvcBuilder builder) => builder.AddMvcOptions(config => config.OutputFormatters.Add(new CsvOutputFormatter()));And to call it in the AddControllers:
builder.Services.AddControllers(config => { config.RespectBrowserAcceptHeader = true; config.ReturnHttpNotAcceptable = true; }).AddXmlDataContractSerializerFormatters() .AddCustomCSVFormatter() .AddApplicationPart(typeof(CompanyEmployees.Presentation.AssemblyReference).Assembly);Let’s run this and see if it works. This time we will put text/csv as the value for the Accept header: https://localhost:5001/api/companies
Well, what do you know, it works!
In this chapter, we finished working with GET requests in our project and we are ready to move on to the POST PUT and DELETE requests. We have a lot more ground to cover, so let’s get down to business.
8 METHOD SAFETY AND METHOD IDEMPOTENCY
Before we start with the Create, Update, and Delete actions, we should explain two important principles in the HTTP standard. Those standards are Method Safety and Method Idempotency.
We can consider a method a safe one if it doesn’t change the resource representation. So, in other words, the resource shouldn’t be changed after our method is executed.
If we can call a method multiple times with the same result, we can consider that method idempotent. So in other words, the side effects of calling it once are the same as calling it multiple times.
Let’s see how this applies to HTTP methods:
| HTTP Method | Is it Safe? | Is it Idempotent? |
|---|---|---|
| GET | Yes | Yes |
| OPTIONS | Yes | Yes |
| HEAD | Yes | Yes |
| POST | No | No |
| DELETE | No | Yes |
| PUT | No | Yes |
| PATCH | No | No |
As you can see, the GET, OPTIONS, and HEAD methods are both safe and idempotent, because when we call those methods they will not change the resource representation. Furthermore, we can call these methods multiple times, but they will return the same result every time.
The POST method is neither safe nor idempotent. It causes changes in the resource representation because it creates them. Also, if we call the POST method multiple times, it will create a new resource every time.
The DELETE method is not safe because it removes the resource, but it is idempotent because if we delete the same resource multiple times, we will get the same result as if we have deleted it only once.
PUT is not safe either. When we update our resource, it changes. But it is idempotent because no matter how many times we update the same resource with the same request it will have the same representation as if we have updated it only once.
Finally, the PATCH method is neither safe nor idempotent.
Now that we’ve learned about these principles, we can continue with our application by implementing the rest of the HTTP methods (we have already implemented GET). We can always use this table to decide which method to use for which use case.
9 CREATING RESOURCES
In this section, we are going to show you how to use the POST HTTP method to create resources in the database.
So, let’s start.
9.1 Handling POST Requests
Firstly, let’s modify the decoration attribute for the GetCompany action in the Companies controller:
[HttpGet("{id:guid}", Name = "CompanyById")]With this modification, we are setting the name for the action. This name will come in handy in the action method for creating a new company.
We have a DTO class for the output (the GET methods), but right now we need the one for the input as well. So, let’s create a new record in the Shared/DataTransferObjects folder:
public record CompanyForCreationDto(string Name, string Address, string Country);We can see that this DTO record is almost the same as the Company record but without the Id property. We don’t need that property when we create an entity.
We should pay attention to one more thing. In some projects, the input and output DTO classes are the same, but we still recommend separating them for easier maintenance and refactoring of our code. Furthermore, when we start talking about validation, we don’t want to validate the output objects — but we definitely want to validate the input ones.
With all of that said and done, let’s continue by modifying the ICompanyRepository interface:
public interface ICompanyRepository { IEnumerable<Company> GetAllCompanies(bool trackChanges);
Company GetCompany(Guid companyId, bool trackChanges); void CreateCompany(Company company); }After the interface modification, we are going to implement that interface:
public void CreateCompany(Company company) => Create(company);We don’t explicitly generate a new Id for our company; this would be done by EF Core. All we do is to set the state of the company to Added.
Next, we want to modify the ICompanyService interface:
public interface ICompanyService { IEnumerable<CompanyDto> GetAllCompanies(bool trackChanges); CompanyDto GetCompany(Guid companyId, bool trackChanges); CompanyDto CreateCompany(CompanyForCreationDto company); }And of course, we have to implement this method in the CompanyService class:
public CompanyDto CreateCompany(CompanyForCreationDto company) { var companyEntity = _mapper.Map<Company>(company); _repository.Company.CreateCompany(companyEntity); _repository.Save(); var companyToReturn = _mapper.Map<CompanyDto>(companyEntity); return companyToReturn; }Here, we map the company for creation to the company entity, call the repository method for creation, and call the Save() method to save the entity to the database. After that, we map the company entity to the company DTO object to return it to the controller.
But we don’t have the mapping rule for this so we have to create another mapping rule for the Company and CompanyForCreationDto objects.Let’s do this in the MappingProfile class:
public MappingProfile() { CreateMap<Company, CompanyDto>() .ForMember(c => c.FullAddress,
opt => opt.MapFrom(x => string.Join(' ', x.Address, x.Country))); CreateMap<Employee, EmployeeDto>(); CreateMap<CompanyForCreationDto, Company>(); }Our POST action will accept a parameter of the type CompanyForCreationDto, and as you can see our service method accepts the parameter of the same type as well, but we need the Company object to send it to the repository layer for creation. Therefore, we have to create this mapping rule.
Last, let’s modify the controller:
[HttpPost] public IActionResult CreateCompany([FromBody] CompanyForCreationDto company) { if (company is null) return BadRequest("CompanyForCreationDto object is null"); var createdCompany = _service.CompanyService.CreateCompany(company); return CreatedAtRoute("CompanyById", new { id = createdCompany.Id }, createdCompany); }Let’s use Postman to send the request and examine the result:https://localhost:5001/api/companies
9.2 Code Explanation
Let’s talk a little bit about this code. The interface and the repository parts are pretty clear, so we won’t talk about that. We have already explained the code in the service method. But the code in the controller contains several things worth mentioning.
If you take a look at the request URI, you’ll see that we use the same one as for the GetCompanies action: api/companies — but this time we are using the POST request.
The CreateCompany method has its own [HttpPost] decoration attribute, which restricts it to POST requests. Furthermore, notice the company parameter which comes from the client. We are not collecting it from the URI but the request body. Thus the usage of
the [FromBody] attribute. Also, the company object is a complex type; therefore, we have to use [FromBody].
If we wanted to, we could explicitly mark the action to take this parameter from the URI by decorating it with the [FromUri] attribute, though we wouldn’t recommend that at all because of security reasons and the complexity of the request.
Because the company parameter comes from the client, it could happen that it can’t be deserialized. As a result, we have to validate it against the reference type’s default value, which is null.
The last thing to mention is this part of the code:
CreatedAtRoute("CompanyById", new { id = companyToReturn.Id }, companyToReturn);CreatedAtRoute will return a status code 201, which stands for Created. Also, it will populate the body of the response with the new company object as well as the Location attribute within the
response header with the address to retrieve that company. We need to provide the name of the action, where we can retrieve the created entity.
If we take a look at the headers part of our response, we are going to see a link to retrieve the created company:
Finally, from the previous example, we can confirm that the POST method is neither safe nor idempotent. We saw that when we send the POST request, it is going to create a new resource in the database — thus changing the resource representation. Furthermore, if we try to send this request a couple of times, we will get a new object for every request (it will have a different Id for sure).
Excellent.
There is still one more thing we need to explain.
9.2.1 Validation from the ApiController Attribute
In this section, we are going to talk about the [ApiController] attribute that we can find right below the [Route] attribute in our controller:
[Route("api/companies")] [ApiController] public class CompaniesController : ControllerBase {But, before we start with the explanation, let’s place a breakpoint in the CreateCompany action, right on the if (company is null) check.
Then, let’s use Postman to send an invalid POST request:https://localhost:5001/api/companies
We are going to talk about Validation in chapter 13, but for now, we have to explain a couple of things.
First of all, we have our response - a Bad Request in Postman, and we have error messages that state what’s wrong with our request. But, we never hit that breakpoint that we’ve placed inside the CreateCompany action.
Why is that?
Well, the [ApiController] attribute is applied to a controller class to enable the following opinionated, API-specific behaviors:
• Attribute routing requirement
• Automatic HTTP 400 responses
• Binding source parameter inference
• Multipart/form-data request inference
• Problem details for error status codes
As you can see, it handles the HTTP 400 responses, and in our case, since the request’s body is null, the [ApiController] attribute handles that and returns the 400 (BadReqeust) response before the request even hits the CreateCompany action.
This is useful behavior, but it prevents us from sending our custom responses with different messages and status codes to the client. This will be very important once we get to the Validation.
So to enable our custom responses from the actions, we are going to add this code into the Program class right above the AddControllers method:
builder.Services.Configure<ApiBehaviorOptions>(options => { options.SuppressModelStateInvalidFilter = true; });With this, we are suppressing a default model state validation that is implemented due to the existence of the [ApiController] attribute in all API controllers. So this means that we can solve the same problem differently, by commenting out or removing the [ApiController] attribute only, without additional code for suppressing validation. It's all up to you. But we like keeping it in our controllers because, as you could’ve seen, it provides additional functionalities other than just 400 – Bad Request responses.
Now, once we start the app and send the same request, we will hit that breakpoint and see our response in Postman.
Nicely done.
Now, we can remove that breakpoint and continue with learning about the creation of child resources.
9.3 Creating a Child Resource
While creating our company, we created the DTO object required for the CreateCompany action. So, for employee creation, we are going to do the same thing:
public record EmployeeForCreationDto(string Name, int Age, string Position);We don’t have the Id property because we are going to create that Id on the server-side. But additionally, we don’t have the CompanyId because we accept that parameter through the route:[Route("api/companies/{companyId}/employees")]
The next step is to modify the IEmployeeRepository interface:
public interface IEmployeeRepository { IEnumerable<Employee> GetEmployees(Guid companyId, bool trackChanges); Employee GetEmployee(Guid companyId, Guid id, bool trackChanges); void CreateEmployeeForCompany(Guid companyId, Employee employee); }Of course, we have to implement this interface:
public void CreateEmployeeForCompany(Guid companyId, Employee employee) { employee.CompanyId = companyId; Create(employee); }Because we are going to accept the employee DTO object in our action and send it to a service method, but we also have to send an employee object to this repository method, we have to create an additional mapping rule in the MappingProfile class:
CreateMap<EmployeeForCreationDto, Employee>();The next thing we have to do is IEmployeeService modification:
public interface IEmployeeService { IEnumerable<EmployeeDto> GetEmployees(Guid companyId, bool trackChanges); EmployeeDto GetEmployee(Guid companyId, Guid id, bool trackChanges); EmployeeDto CreateEmployeeForCompany(Guid companyId, EmployeeForCreationDto employeeForCreation, bool trackChanges); }And implement this new method in EmployeeService:
public EmployeeDto CreateEmployeeForCompany(Guid companyId, EmployeeForCreationDto employeeForCreation, bool trackChanges) { var company = _repository.Company.GetCompany(companyId, trackChanges); if (company is null) throw new CompanyNotFoundException(companyId); var employeeEntity = _mapper.Map<Employee>(employeeForCreation); _repository.Employee.CreateEmployeeForCompany(companyId, employeeEntity); _repository.Save(); var employeeToReturn = _mapper.Map<EmployeeDto>(employeeEntity); return employeeToReturn; }We have to check whether that company exists in the database because there is no point in creating an employee for a company that does not exist. After that, we map the DTO to an entity, call the repository methods to create a new employee, map back the entity to the DTO, and return it to the caller.
Now, we can add a new action in the EmployeesController:
[HttpPost] public IActionResult CreateEmployeeForCompany(Guid companyId, [FromBody] EmployeeForCreationDto employee) { if (employee is null) return BadRequest("EmployeeForCreationDto object is null"); var employeeToReturn = _service.EmployeeService.CreateEmployeeForCompany(companyId, employee, trackChanges: false); return CreatedAtRoute("GetEmployeeForCompany", new { companyId, id = employeeToReturn.Id }, employeeToReturn); }As we can see, the main difference between this action and the CreateCompany action (if we exclude the fact that we are working with different DTOs) is the return statement, which now has two parameters for the anonymous object.
For this to work, we have to modify the HTTP attribute above the GetEmployeeForCompany action:
[HttpGet("{id:guid}", Name = "GetEmployeeForCompany")]Let’s give this a try:https://localhost:5001/api/companies/14759d51-e9c1-4afc-f9bf-08d98898c9c3/employees
Excellent. A new employee was created.
If we take a look at the Headers tab, we'll see a link to fetch our newly created employee. If you copy that link and send another request with it, you will get this employee for sure:
9.4 Creating Children Resources Together with a Parent
There are situations where we want to create a parent resource with its children. Rather than using multiple requests for every single child, we want to do this in the same request with the parent resource.
We are going to show you how to do this.
The first thing we are going to do is extend the CompanyForCreationDto class:
public record CompanyForCreationDto(string Name, string Address, string Country, IEnumerable<EmployeeForCreationDto> Employees);We are not going to change the action logic inside the controller nor the repository/service logic; everything is great there. That’s all. Let’s test it:https://localhost:5001/api/companies
You can see that this company was created successfully.
Now we can copy the location link from the Headers tab, paste it in another Postman tab, and just add the /employees part:
We have confirmed that the employees were created as well.
9.5 Creating a Collection of Resources
Until now, we have been creating a single resource whether it was Company or Employee. But it is quite normal to create a collection of resources, and in this section that is something we are going to work with.
If we take a look at the CreateCompany action, for example, we can see that the return part points to the CompanyById route (the GetCompany action). That said, we don’t have the GET action for the collection creating action to point to. So, before we start with the POST collection action, we are going to create the GetCompanyCollection action in the Companies controller.
But first, let's modify the ICompanyRepository interface:
IEnumerable<Company> GetByIds(IEnumerable<Guid> ids, bool trackChanges);Then we have to change the CompanyRepository class:
public IEnumerable<Company> GetByIds(IEnumerable<Guid> ids, bool trackChanges) => FindByCondition(x => ids.Contains(x.Id), trackChanges) .ToList();After that, we are going to modify ICompanyService:
public interface ICompanyService { IEnumerable<CompanyDto> GetAllCompanies(bool trackChanges); CompanyDto GetCompany(Guid companyId, bool trackChanges); CompanyDto CreateCompany(CompanyForCreationDto company); IEnumerable<CompanyDto> GetByIds(IEnumerable<Guid> ids, bool trackChanges); }And implement this in CompanyService:
public IEnumerable<CompanyDto> GetByIds(IEnumerable<Guid> ids, bool trackChanges) { if (ids is null) throw new IdParametersBadRequestException(); var companyEntities = _repository.Company.GetByIds(ids, trackChanges); if (ids.Count() != companyEntities.Count()) throw new CollectionByIdsBadRequestException(); var companiesToReturn = _mapper.Map<IEnumerable<CompanyDto>>(companyEntities); return companiesToReturn; }Here, we check if ids parameter is null and if it is we stop the execution flow and return a bad request response to the client. If it’s not null, we fetch all the companies for each id in the ids collection. If the count of ids and companies mismatch, we return another bad request response to the client. Finally, we are executing the mapping action and returning the result to the caller.
Of course, we don’t have these two exception classes yet, so let’s create them.
Since we are returning a bad request result, we are going to create a new abstract class in the Entities/Exceptions folder:
public abstract class BadRequestException : Exception { protected BadRequestException(string message) :base(message) { } }Then, in the same folder, let’s create two new specific exception classes:
public sealed class IdParametersBadRequestException : BadRequestException { public IdParametersBadRequestException() :base("Parameter ids is null") { } } public sealed class CollectionByIdsBadRequestException : BadRequestException { public CollectionByIdsBadRequestException() :base("Collection count mismatch comparing to ids.") { } }At this point, we’ve removed two errors from the GetByIds method. But, to show the correct response to the client, we have to modify the ConfigureExceptionHandler class – the part where we populate the StatusCode property:
context.Response.StatusCode = contextFeature.Error switch { NotFoundException => StatusCodes.Status404NotFound, BadRequestException => StatusCodes.Status400BadRequest, _ => StatusCodes.Status500InternalServerError };After that, we can add a new action in the controller:
[HttpGet("collection/({ids})", Name = "CompanyCollection")] public IActionResult GetCompanyCollection(IEnumerable<Guid> ids) { var companies = _service.CompanyService.GetByIds(ids, trackChanges: false); return Ok(companies); }And that's it. This action is pretty straightforward, so let's continue towards POST implementation.
Let’s modify the ICompanyService interface first:
public interface ICompanyService { IEnumerable<CompanyDto> GetAllCompanies(bool trackChanges); CompanyDto GetCompany(Guid companyId, bool trackChanges); CompanyDto CreateCompany(CompanyForCreationDto company); IEnumerable<CompanyDto> GetByIds(IEnumerable<Guid> ids, bool trackChanges); (IEnumerable<CompanyDto> companies, string ids) CreateCompanyCollection (IEnumerable<CompanyForCreationDto> companyCollection); }So, this new method will accept a collection of the CompanyForCreationDto type as a parameter, and return a Tuple with two fields (companies and ids) as a result.
That said, let’s implement it in the CompanyService class:
public (IEnumerable<CompanyDto> companies, string ids) CreateCompanyCollection (IEnumerable<CompanyForCreationDto> companyCollection) { if (companyCollection is null) throw new CompanyCollectionBadRequest(); var companyEntities = _mapper.Map<IEnumerable<Company>>(companyCollection); foreach (var company in companyEntities) { _repository.Company.CreateCompany(company); } _repository.Save(); var companyCollectionToReturn = _mapper.Map<IEnumerable<CompanyDto>>(companyEntities); var ids = string.Join(",", companyCollectionToReturn.Select(c => c.Id)); return (companies: companyCollectionToReturn, ids: ids); }So, we check if our collection is null and if it is, we return a bad request. If it isn’t, then we map that collection and save all the collection elements to the database. Finally, we map the company collection back, take all the ids as a comma-separated string, and return the Tuple with these two fields as a result to the caller.
Again, we can see that we don’t have the exception class, so let’s just create it:
public sealed class CompanyCollectionBadRequest : BadRequestException { public CompanyCollectionBadRequest() :base("Company collection sent from a client is null.")
{ } }
Finally, we can add a new action in the CompaniesController:
[HttpPost("collection")] public IActionResult CreateCompanyCollection([FromBody] IEnumerable<CompanyForCreationDto> companyCollection) { var result = _service.CompanyService.CreateCompanyCollection(companyCollection); return CreatedAtRoute("CompanyCollection", new { result.ids }, result.companies); }We receive the companyCollection parameter from the client, send it to the service method, and return a result with a comma-separated string and our newly created companies.
Now you may ask, why are we sending a comma-separated string when we expect a collection of ids in the GetCompanyCollection action?
Well, we can’t just pass a list of ids in the CreatedAtRoute method because there is no support for the Header Location creation with the list. You may try it, but we're pretty sure you would get the location like this:

We can test our create action now with a bad request:https://localhost:5001/api/companies/collection

We can see that the request is handled properly and we have a correct response.
Now, let’s send a valid request:https://localhost:5001/api/companies/collection
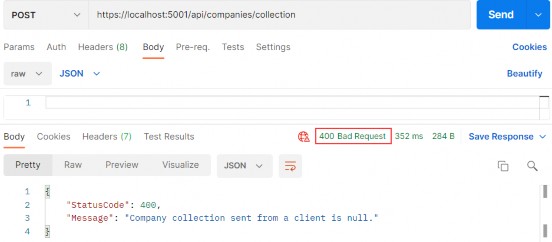
Excellent. Let’s check the header tab:

We can see a valid location link. So, we can copy it and try to fetch our newly created companies:
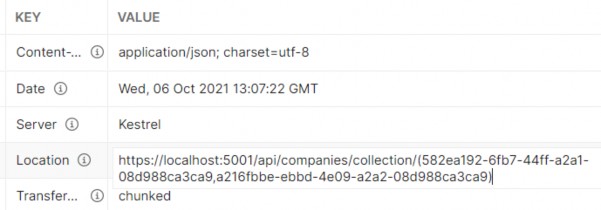
But we are getting the 415 Unsupported Media Type message. This is because our API can’t bind the string type parameter to the IEnumerable
Well, we can solve this with a custom model binding.
9.6 Model Binding in API
Let’s create the new folder ModelBinders in the Presentation project and inside the new class ArrayModelBinder:
public class ArrayModelBinder : IModelBinder { public Task BindModelAsync(ModelBindingContext bindingContext) { if(!bindingContext.ModelMetadata.IsEnumerableType) {
bindingContext.Result = ModelBindingResult.Failed(); return Task.CompletedTask; } var providedValue = bindingContext.ValueProvider .GetValue(bindingContext.ModelName) .ToString(); if(string.IsNullOrEmpty(providedValue)) { bindingContext.Result = ModelBindingResult.Success(null); return Task.CompletedTask; } var genericType = bindingContext.ModelType.GetTypeInfo().GenericTypeArguments[0]; var converter = TypeDescriptor.GetConverter(genericType); var objectArray = providedValue.Split(new[] { "," }, StringSplitOptions.RemoveEmptyEntries) .Select(x => converter.ConvertFromString(x.Trim())) .ToArray(); var guidArray = Array.CreateInstance(genericType, objectArray.Length); objectArray.CopyTo(guidArray, 0); bindingContext.Model = guidArray; bindingContext.Result = ModelBindingResult.Success(bindingContext.Model); return Task.CompletedTask; } } At first glance, this code might be hard to comprehend, but once we explain it, it will be easier to understand.
We are creating a model binder for the IEnumerable type. Therefore, we have to check if our parameter is the same type.
Next, we extract the value (a comma-separated string of GUIDs) with the ValueProvider.GetValue() expression. Because it is a type string, we just check whether it is null or empty. If it is, we return null as a result because we have a null check in our action in the controller. If it is not, we move on.
In the genericType variable, with the reflection help, we store the type the IEnumerable consists of. In our case, it is GUID. With the converter variable, we create a converter to a GUID type. As you can see, we didn’t just force the GUID type in this model binder; instead, we inspected what is the nested type of the IEnumerable parameter and then created a converter for that exact type, thus making this binder generic.
After that, we create an array of type object (objectArray) that consist of all the GUID values we sent to the API and then create an array of GUID types (guidArray), copy all the values from the objectArray to the guidArray, and assign it to the bindingContext.
These are the required using directives:
using Microsoft.AspNetCore.Mvc.ModelBinding; using System.ComponentModel; using System.Reflection;And that is it. Now, we have just to make a slight modification in the GetCompanyCollection action:
public IActionResult GetCompanyCollection([ModelBinder(BinderType = typeof(ArrayModelBinder))]IEnumerable<Guid> ids)This is the required namespace:
using CompanyEmployees.Presentation.ModelBinders;Visual Studio will provide two different namespaces to resolve the error, so be sure to pick the right one.
Excellent.
Our ArrayModelBinder will be triggered before an action executes. It will convert the sent string parameter to the IEnumerable
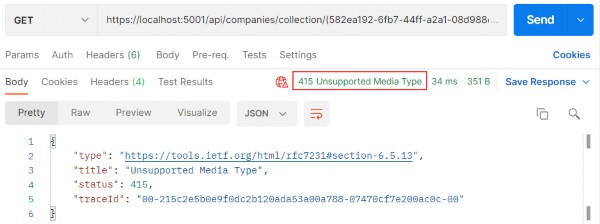
Well done.
We are ready to continue towards DELETE actions.
10 WORKING WITH DELETE REQUESTS
Let’s start this section by deleting a child resource first. So, let’s modify the IEmployeeRepository interface:
public interface IEmployeeRepository { IEnumerable<Employee> GetEmployees(Guid companyId, bool trackChanges); Employee GetEmployee(Guid companyId, Guid id, bool trackChanges); void CreateEmployeeForCompany(Guid companyId, Employee employee); void DeleteEmployee(Employee employee); }The next step for us is to modify the EmployeeRepository class:
public void DeleteEmployee(Employee employee) => Delete(employee);After that, we have to modify the IEmployeeService interface:
public interface IEmployeeService { IEnumerable<EmployeeDto> GetEmployees(Guid companyId, bool trackChanges); EmployeeDto GetEmployee(Guid companyId, Guid id, bool trackChanges); EmployeeDto CreateEmployeeForCompany(Guid companyId, EmployeeForCreationDto employeeForCreation, bool trackChanges); void DeleteEmployeeForCompany(Guid companyId, Guid id, bool trackChanges); }And of course, the EmployeeService class:
public void DeleteEmployeeForCompany(Guid companyId, Guid id, bool trackChanges) { var company = _repository.Company.GetCompany(companyId, trackChanges); if (company is null) throw new CompanyNotFoundException(companyId); var employeeForCompany = _repository.Employee.GetEmployee(companyId, id, trackChanges); if (employeeForCompany is null) throw new EmployeeNotFoundException(id); _repository.Employee.DeleteEmployee(employeeForCompany); _repository.Save(); }Pretty straightforward method implementation where we fetch the company and if it doesn’t exist, we return the Not Found response. If it exists, we fetch the employee for that company and execute the same check, where if it’s true, we return another not found response. Lastly, we delete the employee from the database.
Finally, we can add a delete action to the controller class:
[HttpDelete("{id:guid}")] public IActionResult DeleteEmployeeForCompany(Guid companyId, Guid id) { _service.EmployeeService.DeleteEmployeeForCompany(companyId, id, trackChanges: false); return NoContent(); }There is nothing new with this action. We collect the companyId from the root route and the employee’s id from the passed argument. Call the service method and return the NoContent() method, which returns the status code 204 No Content.
Let’s test this:https://localhost:5001/api/companies/14759d51-e9c1-4afc-f9bf-08d98898c9c3/employees/e06cfcc6-e353-4bd8-0870-08d988af0956
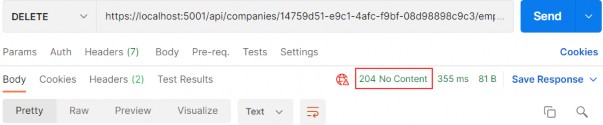
Excellent. It works great.
You can try to get that employee from the database, but you will get 404 for sure:https://localhost:5001/api/companies/14759d51-e9c1-4afc-f9bf-08d98898c9c3/employees/e06cfcc6-e353-4bd8-0870-08d988af0956
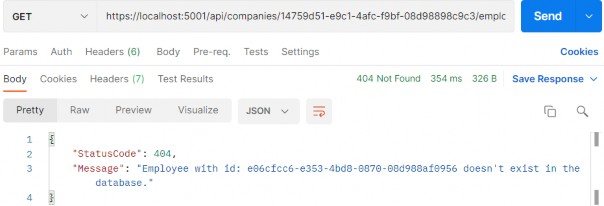
We can see that the DELETE request isn’t safe because it deletes the resource, thus changing the resource representation. But if we try to send this delete request one or even more times, we would get the same 404 result because the resource doesn’t exist anymore. That’s what makes the DELETE request idempotent.
10.1 Deleting a Parent Resource with its Children
With Entity Framework Core, this action is pretty simple. With the basic configuration, cascade deleting is enabled, which means deleting a parent resource will automatically delete all of its children. We can confirm that from the migration file:
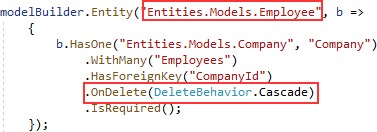
So, all we have to do is to create a logic for deleting the parent resource.
Well, let’s do that following the same steps as in a previous example:
public interface ICompanyRepository { IEnumerable<Company> GetAllCompanies(bool trackChanges); Company GetCompany(Guid companyId, bool trackChanges); void CreateCompany(Company company); IEnumerable<Company> GetByIds(IEnumerable<Guid> ids, bool trackChanges); void DeleteCompany(Company company); }Then let’s modify the repository class:
public void DeleteCompany(Company company) => Delete(company);Then we have to modify the service interface:
public interface ICompanyService { IEnumerable<CompanyDto> GetAllCompanies(bool trackChanges); CompanyDto GetCompany(Guid companyId, bool trackChanges); CompanyDto CreateCompany(CompanyForCreationDto company); IEnumerable<CompanyDto> GetByIds(IEnumerable<Guid> ids, bool trackChanges); (IEnumerable<CompanyDto> companies, string ids) CreateCompanyCollection (IEnumerable<CompanyForCreationDto> companyCollection); void DeleteCompany(Guid companyId, bool trackChanges); }And the service class:
public void DeleteCompany(Guid companyId, bool trackChanges) { var company = _repository.Company.GetCompany(companyId, trackChanges); if (company is null) throw new CompanyNotFoundException(companyId); _repository.Company.DeleteCompany(company); _repository.Save(); }Finally, let’s modify our controller:
[HttpDelete("{id:guid}")] public IActionResult DeleteCompany(Guid id) { _service.CompanyService.DeleteCompany(id, trackChanges: false); return NoContent(); }And let’s test our action:https://localhost:5001/api/companies/0AD5B971-FF51-414D-AF01-34187E407557

It works.
You can check in your database that this company alongside its children doesn’t exist anymore.
There we go. We have finished working with DELETE requests and we are ready to continue to the PUT requests.
11 WORKING WITH PUT REQUESTS
In this section, we are going to show you how to update a resource using the PUT request. We are going to update a child resource first and then we are going to show you how to execute insert while updating a parent resource.
11.1 Updating Employee
In the previous sections, we first changed our interface, then the repository/service classes, and finally the controller. But for the update, this doesn’t have to be the case.
Let’s go step by step.
The first thing we are going to do is to create another DTO record for update purposes:
public record EmployeeForUpdateDto(string Name, int Age, string Position);We do not require the Id property because it will be accepted through the URI, like with the DELETE requests. Additionally, this DTO contains the same properties as the DTO for creation, but there is a conceptual difference between those two DTO classes. One is for updating and the other is for creating. Furthermore, once we get to the validation part, we will understand the additional difference between those two.
Because we have an additional DTO record, we require an additional mapping rule:
CreateMap<EmployeeForUpdateDto, Employee>();After adding the mapping rule, we can modify the IEmployeeService interface:
public interface IEmployeeService { IEnumerable<EmployeeDto> GetEmployees(Guid companyId, bool trackChanges); EmployeeDto GetEmployee(Guid companyId, Guid id, bool trackChanges);
EmployeeDto CreateEmployeeForCompany(Guid companyId, EmployeeForCreationDto employeeForCreation, bool trackChanges); void DeleteEmployeeForCompany(Guid companyId, Guid id, bool trackChanges); void UpdateEmployeeForCompany(Guid companyId, Guid id, EmployeeForUpdateDto employeeForUpdate, bool compTrackChanges, bool empTrackChanges); }We are declaring a method that contains both id parameters – one for the company and one for employee, the employeeForUpdate object sent from the client, and two track changes parameters, again, one for the company and one for the employee. We are doing that because we won't track changes while fetching the company entity, but we will track changes while fetching the employee.
That said, let’s modify the EmployeeService class:
public void UpdateEmployeeForCompany(Guid companyId, Guid id, EmployeeForUpdateDto employeeForUpdate, bool compTrackChanges, bool empTrackChanges) { var company = _repository.Company.GetCompany(companyId, compTrackChanges); if (company is null) throw new CompanyNotFoundException(companyId); var employeeEntity = _repository.Employee.GetEmployee(companyId, id, empTrackChanges); if (employeeEntity is null) throw new EmployeeNotFoundException(id); _mapper.Map(employeeForUpdate, employeeEntity); _repository.Save(); }So first, we fetch the company from the database. If it doesn’t exist, we interrupt the flow and send the response to the client. After that, we do the same thing for the employee. But there is one difference here. Pay attention to the way we fetch the company and the way we fetch the employeeEntity. Do you see the difference?
As we’ve already said: the trackChanges parameter will be set to true for the employeeEntity. That’s because we want EF Core to track changes on this entity. This means that as soon as we change any property in this entity, EF Core will set the state of that entity to Modified.
As you can see, we are mapping from the employeeForUpdate object (we will change just the age property in a request) to the employeeEntity — thus changing the state of the employeeEntity object to Modified.
Because our entity has a modified state, it is enough to call the Save method without any additional update actions. As soon as we call the Save method, our entity is going to be updated in the database.
Now, when we have all of these, let’s modify the EmployeesController:
[HttpPut("{id:guid}")] public IActionResult UpdateEmployeeForCompany(Guid companyId, Guid id, [FromBody] EmployeeForUpdateDto employee) { if (employee is null) return BadRequest("EmployeeForUpdateDto object is null"); _service.EmployeeService.UpdateEmployeeForCompany(companyId, id, employee, compTrackChanges: false, empTrackChanges: true); return NoContent(); }We are using the PUT attribute with the id parameter to annotate this action. That means that our route for this action is going to be: api/companies/{companyId}/employees/{id}.
Then, we check if the employee object is null, and if it is, we return a BadRequest response.
After that, we just call the update method from the service layer and pass false for the company track changes and true for the employee track changes.
Finally, we return the 204 NoContent status.
We can test our action:https://localhost:5001/api/companies/C9D4C053-49B6-410C-BC78-2D54A9991870/employees/80ABBCA8-664D-4B20-B5DE-024705497D4A
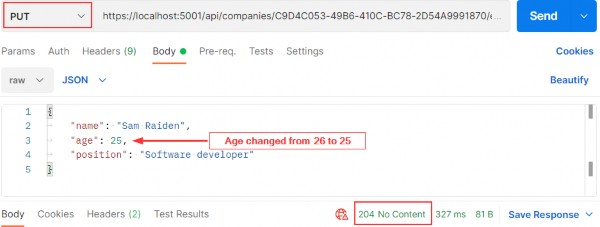
And it works; we get the 204 No Content status.
We can check our executed query through EF Core to confirm that only the Age column is updated:
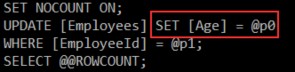
Excellent.
You can send the same request with the invalid company id or employee id. In both cases, you should get a 404 response, which is a valid response to this kind of situation.
NOTE: We’ve changed only the Age property, but we have sent all the other properties with unchanged values as well. Therefore, Age is only updated in the database. But if we send the object with just the Age property, other properties will be set to their default values and the whole object will be updated — not just the Age column. That’s because the PUT is a request for a full update. This is very important to know.
11.1.1 About the Update Method from the RepositoryBase Class
Right now, you might be asking: “Why do we have the Update method in the RepositoryBase class if we are not using it?”
The update action we just executed is a connected update (an update where we use the same context object to fetch the entity and to update it). But sometimes we can work with disconnected updates. This kind of update action uses different context objects to execute fetch and update actions or sometimes we can receive an object from a client with the Id property set as well, so we don’t have to fetch it from the database. In that situation, all we have to do is to inform EF Core to track changes on that entity and to set its state to modified. We can do both actions with the Update method from our RepositoryBase class. So, you see, having that method is crucial as well.
One note, though. If we use the Update method from our repository, even if we change just the Age property, all properties will be updated in the database.
11.2 Inserting Resources while Updating One
While updating a parent resource, we can create child resources as well without too much effort. EF Core helps us a lot with that process. Let’s see how.
The first thing we are going to do is to create a DTO record for update:
public record CompanyForUpdateDto(string Name, string Address, string Country, IEnumerable<EmployeeForCreationDto> Employees);After this, let’s create a new mapping rule:
CreateMap<CompanyForUpdateDto, Company>();Then, let’s move on to the interface modification:
public interface ICompanyService {
IEnumerable<CompanyDto> GetAllCompanies(bool trackChanges); CompanyDto GetCompany(Guid companyId, bool trackChanges); CompanyDto CreateCompany(CompanyForCreationDto company); IEnumerable<CompanyDto> GetByIds(IEnumerable<Guid> ids, bool trackChanges); (IEnumerable<CompanyDto> companies, string ids) CreateCompanyCollection (IEnumerable<CompanyForCreationDto> companyCollection); void DeleteCompany(Guid companyId, bool trackChanges); void UpdateCompany(Guid companyid, CompanyForUpdateDto companyForUpdate, bool trackChanges); }
And of course, the service class modification:
public void UpdateCompany(Guid companyId, CompanyForUpdateDto companyForUpdate, bool trackChanges) { var companyEntity = _repository.Company.GetCompany(companyId, trackChanges); if (companyEntity is null) throw new CompanyNotFoundException(companyId); _mapper.Map(companyForUpdate, companyEntity); _repository.Save(); }So again, we fetch our company entity from the database, and if it is null, we just return the NotFound response. But if it’s not null, we map the companyForUpdate DTO to companyEntity and call the Save method.
Right now, we can modify our controller:
[HttpPut("{id:guid}")] public IActionResult UpdateCompany(Guid id, [FromBody] CompanyForUpdateDto company) { if (company is null) return BadRequest("CompanyForUpdateDto object is null"); _service.CompanyService.UpdateCompany(id, company, trackChanges: true); return NoContent(); }That’s it. You can see that this action is almost the same as the employee update action.
Let’s test this now:
https://localhost:5001/api/companies/3d490a70-94ce-4d15-9494-5248280c2ce3i
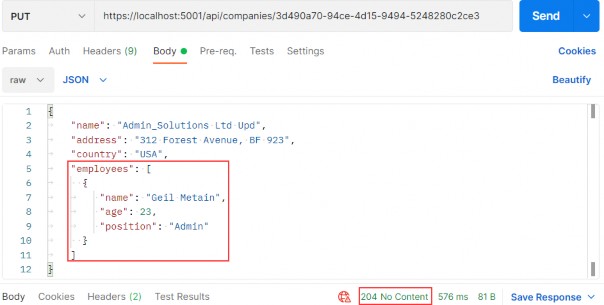
We modify the name of the company and attach an employee as well. As a result, we can see 204, which means that the entity has been updated. But what about that new employee?
Let’s inspect our query:

You can see that we have created the employee entity in the database. So, EF Core does that job for us because we track the company entity. As soon as mapping occurs, EF Core sets the state for the company entity to modified and for all the employees to added. After we call the Save method, the Name property is going to be modified and the employee entity is going to be created in the database.
We are finished with the PUT requests, so let’s continue with PATCH.
12 WORKING WITH PATCH REQUESTS
In the previous chapter, we worked with the PUT request to fully update our resource. But if we want to update our resource only partially, we should use PATCH.
The partial update isn’t the only difference between PATCH and PUT. The request body is different as well. For the Company PATCH request, for example, we should use [FromBody]JsonPatchDocument
Additionally, for the PUT request’s media type, we have used application/json — but for the PATCH request’s media type, we should use application/json-patch+json. Even though the first one would be accepted in ASP.NET Core for the PATCH request, the recommendation by REST standards is to use the second one.
Let’s see what the PATCH request body looks like:
[ { "op": "replace", "path": "/name", "value": "new name" }, { "op": "remove", "path": "/name" } ]The square brackets represent an array of operations. Every operation is placed between curly brackets. So, in this specific example, we have two operations: Replace and Remove represented by the op property. The path property represents the object’s property that we want to modify and the value property represents a new value.
In this specific example, for the first operation, we replace the value of the name property with a new name. In the second example, we remove the name property, thus setting its value to default.
There are six different operations for a PATCH request:
| OPERATION | REQUEST BODY | EXPLANATION |
|---|---|---|
| Add | { "op": "add", "path": "/name", "value": "new value" } | Assigns a new value to a required property. |
| Remove | { "op": "remove","path": "/name"} | Sets a default value to a required property. |
| Replace | { "op": "replace", "path": "/name", "value": "new value" } | Replaces a value of a required property to a new value. |
| Copy | {"op": "copy","from": "/name","path": "/title"} | Copies the value from a property in the “from” part to the property in the “path” part. |
| Move | { "op": "move", "from": "/name", "path": "/title" } | Moves the value from a property in the “from” part to a property in the “path” part. |
| Test | {"op": "test","path": "/name","value": "new value"} | Tests if a property has a specified value. |
After all this theory, we are ready to dive into the coding part.
12.1 Applying PATCH to the Employee Entity
Before we start with the code modification, we have to install two required libraries:
• The Microsoft.AspNetCore.JsonPatch library, in the Presentation project, to support the usage of JsonPatchDocument in our controller and
• The Microsoft.AspNetCore.Mvc.NewtonsoftJson library, in the main project, to support request body conversion to a PatchDocument once we send our request.
As you can see, we are still using the NewtonsoftJson library to support the PatchDocument conversion. The official statement from Microsoft is that they are not going to replace it with System.Text.Json: “The main reason is that this will require a huge investment from us, with not a very high value-add for the majority of our customers.”.
By using AddNewtonsoftJson, we are replacing the System.Text.Json formatters for all JSON content. We don’t want to do that so, we are going ton add a simple workaround in the Program class:
NewtonsoftJsonPatchInputFormatter GetJsonPatchInputFormatter() => new ServiceCollection().AddLogging().AddMvc().AddNewtonsoftJson() .Services.BuildServiceProvider() .GetRequiredService<IOptions<MvcOptions>>().Value.InputFormatters .OfType<NewtonsoftJsonPatchInputFormatter>().First();By adding a method like this in the Program class, we are creating a local function. This function configures support for JSON Patch using Newtonsoft.Json while leaving the other formatters unchanged.
For this to work, we have to include two more namespaces in the class:
using Microsoft.AspNetCore.Mvc.Formatters; using Microsoft.Extensions.Options;After that, we have to modify the AddControllers method:
builder.Services.AddControllers(config => { config.RespectBrowserAcceptHeader = true; config.ReturnHttpNotAcceptable = true; config.InputFormatters.Insert(0, GetJsonPatchInputFormatter()); }).AddXmlDataContractSerializerFormatters()We are placing our JsonPatchInputFormatter at the index 0 in the InputFormatters list.
We will require a mapping from the Employee type to the EmployeeForUpdateDto type. Therefore, we have to create a mapping rule for that.
If we take a look at the MappingProfile class, we will see that we have a mapping from the EmployeeForUpdateDto to the Employee type:
CreateMap<EmployeeForUpdateDto, Employee>();But we need it another way. To do so, we are not going to create an additional rule; we can just use the ReverseMap method to help us in the process:
CreateMap<EmployeeForUpdateDto, Employee>().ReverseMap();The ReverseMap method is also going to configure this rule to execute reverse mapping if we ask for it.
After that, we are going to add two new method contracts to the IEmployeeService interface:
(EmployeeForUpdateDto employeeToPatch, Employee employeeEntity) GetEmployeeForPatch( Guid companyId, Guid id, bool compTrackChanges, bool empTrackChanges); void SaveChangesForPatch(EmployeeForUpdateDto employeeToPatch, Employee employeeEntity);Of course, for this to work, we have to add the reference to the Entities project.
Then, we have to implement these two methods in the EmployeeService class:
public (EmployeeForUpdateDto employeeToPatch, Employee employeeEntity) GetEmployeeForPatch (Guid companyId, Guid id, bool compTrackChanges, bool empTrackChanges) { var company = _repository.Company.GetCompany(companyId, compTrackChanges); if (company is null) throw new CompanyNotFoundException(companyId); var employeeEntity = _repository.Employee.GetEmployee(companyId, id, empTrackChanges); if (employeeEntity is null) throw new EmployeeNotFoundException(companyId); var employeeToPatch = _mapper.Map<EmployeeForUpdateDto>(employeeEntity); return (employeeToPatch, employeeEntity); } public void SaveChangesForPatch(EmployeeForUpdateDto employeeToPatch, Employee employeeEntity) { _mapper.Map(employeeToPatch, employeeEntity); _repository.Save(); }
In the first method, we are trying to fetch both the company and employee from the database and if we can’t find either of them, we stop the execution flow and return the NotFound response to the client. Then, we map the employee entity to the EmployeeForUpdateDto type and return both objects (employeeToPatch and employeeEntity) inside the Tuple to the controller.
The second method just maps from emplyeeToPatch to employeeEntity and calls the repository's Save method.
Now, we can modify our controller:
[HttpPatch("{id:guid}")] public IActionResult PartiallyUpdateEmployeeForCompany(Guid companyId, Guid id, [FromBody] JsonPatchDocument<EmployeeForUpdateDto> patchDoc) { if (patchDoc is null) return BadRequest("patchDoc object sent from client is null."); var result = _service.EmployeeService.GetEmployeeForPatch(companyId, id, compTrackChanges: false, empTrackChanges: true); patchDoc.ApplyTo(result.employeeToPatch); _service.EmployeeService.SaveChangesForPatch(result.employeeToPatch, result.employeeEntity); return NoContent(); }You can see that our action signature is different from the PUT actions. We are accepting the JsonPatchDocument from the request body. After that, we have a familiar code where we check the patchDoc for null value and if it is, we return a BadRequest. Then we call the service method where we map from the Employee type to the EmployeeForUpdateDto type; we need to do that because the patchDoc variable can apply only to the EmployeeForUpdateDto type. After apply is executed, we call another service method to map again to the Employee type (from employeeToPatch to employeeEntity) and save changes in the database. In the end, we return NoContent.
Don’t forget to include an additional namespace:
using Microsoft.AspNetCore.JsonPatch;Now, we can send a couple of requests to test this code:
Let’s first send the replace operation:
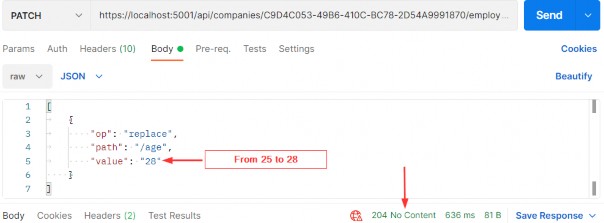
It works; we get the 204 No Content message. Let’s check the same employee:
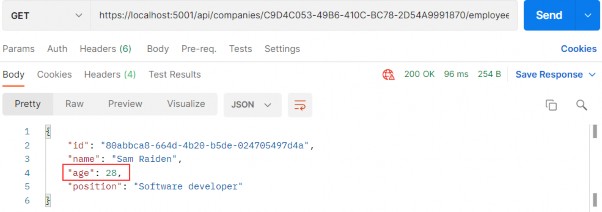
And we see the Age property has been changed.
Let’s send a remove operation in a request:
https://localhost:5001/api/companies/C9D4C053-49B6-410C-BC78-2D54A9991870/employees/80ABBCA8-664D-4B20-B5DE-024705497D4A

This works as well. Now, if we check our employee, its age is going to be set to 0 (the default value for the int type):
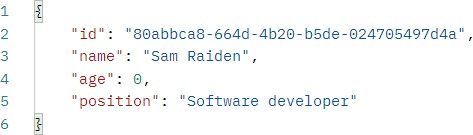
Finally, let’s return a value of 28 for the Age property:
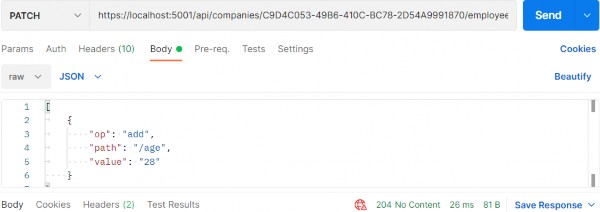
Let’s check the employee now:
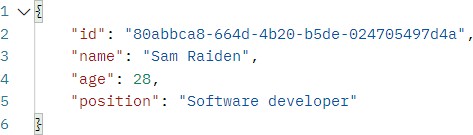
Excellent.
Everything works as expected.
13 VALIDATION
While writing API actions, we have a set of rules that we need to check. If we take a look at the Company class, we can see different data annotation attributes above our properties:
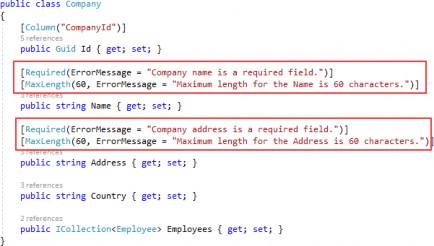
Those attributes serve the purpose to validate our model object while creating or updating resources in the database. But we are not making use of them yet.
In this chapter, we are going to show you how to validate our model objects and how to return an appropriate response to the client if the model is not valid. So, we need to validate the input and not the output of our controller actions. This means that we are going to apply this validation to the POST, PUT, and PATCH requests, but not for the GET request.
13.1 ModelState, Rerun Validation, and Built-in Attributes
To validate against validation rules applied by Data Annotation attributes, we are going to use the concept of ModelState. It is a dictionary containing the state of the model and model binding validation.
It is important to know that model validation occurs after model binding and reports errors where the data, sent from the client, doesn’t meet our validation criteria. Both model validation and data binding occur before our request reaches an action inside a controller. We are going to use the ModelState.IsValid expression to check for those validation rules.
By default, we don’t have to use the ModelState.IsValid expression in Web API projects since, as we explained in section 9.2.1, controllers are decorated with the [ApiController] attribute. But, as we could’ve seen, it defaults all the model state errors to 400 – BadRequest and doesn’t allow us to return our custom error messages with a different status code. So, we suppressed it in the Program class.
The response status code, when validation fails, should be 422 Unprocessable Entity. That means that the server understood the content type of the request and the syntax of the request entity is correct, but it was unable to process validation rules applied on the entity inside the request body. If we didn’t suppress the model validation from the [ApiController] attribute, we wouldn’t be able to return this status code (422) since, as we said, it would default to 400.
13.1.1 Rerun Validation
In some cases, we want to repeat our validation. This can happen if, after the initial validation, we compute a value in our code, and assign it to the property of an already validated object.
If this is the case, and we want to run the validation again, we can use the ModelStateDictionary.ClearValidationState method to clear the validation specific to the model that we’ve already validated, and then use the TryValidateModel method:
[HttpPost] public IActionResult POST([FromBody] Book book) { if (!ModelState.IsValid) return UnprocessableEntity(ModelState);
var newPrice = book.Price - 10; book.Price = newPrice; ModelState.ClearValidationState(nameof(Book)); if (!TryValidateModel(book, nameof(Book))) return UnprocessableEntity(ModelState); _service.CreateBook(book); return CreatedAtRoute("BookById", new { id = book.Id }, book); }This is just a simple example but it explains how we can revalidate our model object.
13.1.2 Built-in Attributes
Validation attributes let us specify validation rules for model properties. At the beginning of this chapter, we have marked some validation attributes. Those attributes (Required and MaxLength) are part of built-in attributes. And of course, there are more than two built-in attributes. These are the most used ones:
| ATTRIBUTE | USAGE |
|---|---|
| [ValidateNever] | Indicates that property or parameter should be excluded from validation. |
| [Compare] | We use it for the properties comparison. |
| [EmailAddress] | Validates the email format of the property. |
| [Phone] | Validates the phone format of the property. |
| [Range] | Validates that the property falls within a specified range. |
| [RegularExpression] | Validates that the property value matches a specified regular expression. |
| [Required] | We use it to prevent a null value for the property. |
| [StringLength] | Validates that a string property value doesn't exceed a specified length limit. |
If you want to see a complete list of built-in attributes, you can visit this page. https://learn.microsoft.com/en-us/dotnet/api/system.componentmodel.dataannotations?view=net-6.0
13.2 Custom Attributes and IValidatableObject
There are scenarios where built-in attributes are not enough and we have to provide some custom logic. For that, we can create a custom attribute by using the ValidationAttribute class, or we can use the IValidatableObject interface.
So, let’s see an example of how we can create a custom attribute:
public class ScienceBookAttribute : ValidationAttribute { public BookGenre Genre { get; set; } public string Error => $"The genre of the book must be {BookGenre.Science}"; public ScienceBookAttribute(BookGenre genre) { Genre= genre; } protected override ValidationResult? IsValid(object? value, ValidationContext validationContext) { var book = (Book)validationContext.ObjectInstance; if (!book.Genre.Equals(Genre.ToString())) return new ValidationResult(Error); return ValidationResult.Success; } }Once this attribute is called, we are going to pass the genre parameter inside the constructor. Then, we have to override the IsValid method. There we extract the object we want to validate and inspect if the Genre property matches our value sent through the constructor. If it’s not we return the Error property as a validation result. Otherwise, we return success.
To call this custom attribute, we can do something like this:
public class Book { public int Id { get; set; } [Required] public string? Name { get; set; } [Range(10, int.MaxValue)] public int Price { get; set; }
[ScienceBook(BookGenre.Science)] public string? Genre { get; set; } }Now we can use the IValidatableObject interface:
public class Book : IValidatableObject { public int Id { get; set; } [Required] public string? Name { get; set; } [Range(10, int.MaxValue)] public int Price { get; set; } public string? Genre { get; set; } public IEnumerable<ValidationResult> Validate(ValidationContext validationContext) { var errorMessage = $"The genre of the book must be {BookGenre.Science}"; if (!Genre.Equals(BookGenre.Science.ToString())) yield return new ValidationResult(errorMessage, new[] { nameof(Genre) }); } }This validation happens in the model class, where we have to implement the Validate method. The code inside that method is pretty straightforward. Also, pay attention that we don’t have to apply any validation attribute on top of the Genre property.
As we’ve seen from the previous examples, we can create a custom attribute in a separate class and even make it generic so it could be reused for other model objects. This is not the case with the IValidatableObject interface. It is used inside the model class and of course, the validation logic can’t be reused.
So, this could be something you can think about when deciding which one to use.
After all of this theory and code samples, we are ready to implement model validation in our code.
13.3 Validation while Creating Resource
Let’s send another request for the CreateEmployee action, but this time with the invalid request body:
https://localhost:5001/api/companies/582ea192-6fb7-44ff-a2a1-08d988ca3ca9/employees
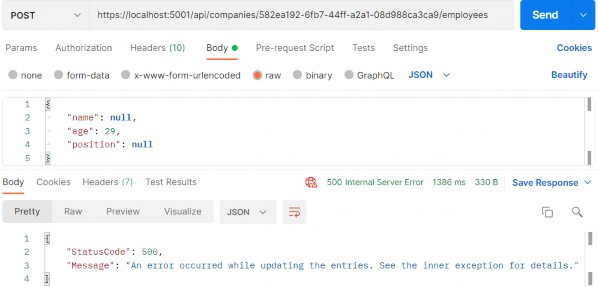
And we get the 500 Internal Server Error, which is a generic message when something unhandled happens in our code. But this is not good. This means that the server made an error, which is not the case. In this case, we, as a consumer, sent the wrong model to the API — thus the error message should be different.
To fix this, let’s modify our EmployeeForCreationDto record because that’s what we deserialize the request body to:
public record EmployeeForCreationDto( [Required(ErrorMessage = "Employee name is a required field.")] [MaxLength(30, ErrorMessage = "Maximum length for the Name is 30 characters.")] string Name, [Required(ErrorMessage = "Age is a required field.")] int Age, [Required(ErrorMessage = "Position is a required field.")] [MaxLength(20, ErrorMessage = "Maximum length for the Position is 20 characters.")] string Position );This is how we can apply validation attributes in our positional records. But, in our opinion, positional records start losing readability once the attributes are applied, and for that reason, we like using init setters if we have to apply validation attributes. So, we are going to do exactly that and modify this position record:
public record EmployeeForCreationDto { [Required(ErrorMessage = "Employee name is a required field.")] [MaxLength(30, ErrorMessage = "Maximum length for the Name is 30 characters.")] public string? Name { get; init; } [Required(ErrorMessage = "Age is a required field.")] public int Age { get; init; } [Required(ErrorMessage = "Position is a required field.")] [MaxLength(20, ErrorMessage = "Maximum length for the Position is 20 characters.")] public string? Position { get; init; } }Now, we have to modify our action:
[HttpPost] public IActionResult CreateEmployeeForCompany(Guid companyId, [FromBody] EmployeeForCreationDto employee) { if (employee is null) return BadRequest("EmployeeForCreationDto object is null"); if (!ModelState.IsValid) return UnprocessableEntity(ModelState); var employeeToReturn = _service.EmployeeService.CreateEmployeeForCompany(companyId, employee, trackChanges: false); return CreatedAtRoute("GetEmployeeForCompany", new { companyId, id = employeeToReturn.Id }, employeeToReturn); }As mentioned before in the part about the ModelState dictionary, all we have to do is to call the IsValid method and return the UnprocessableEntity response by providing our ModelState.
And that is all.
Let’s send our request one more time:
https://localhost:5001/api/companies/582ea192-6fb7-44ff-a2a1-08d988ca3ca9/employees
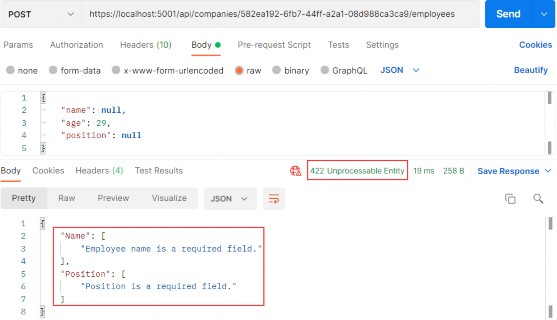
Let’s send an additional request to test the max length rule:
https://localhost:5001/api/companies/582ea192-6fb7-44ff-a2a1-08d988ca3ca9/employees
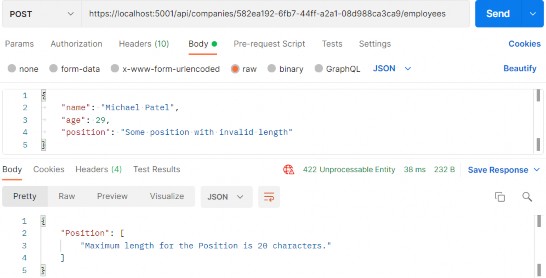
Excellent. It works as expected.
The same actions can be applied for the CreateCompany action and CompanyForCreationDto class — and if you check the source code for this chapter, you will find it implemented.
13.3.1 Validating Int Type
Let’s create one more request with the request body without the age property:
https://localhost:5001/api/companies/582ea192-6fb7-44ff-a2a1-08d988ca3ca9/employees
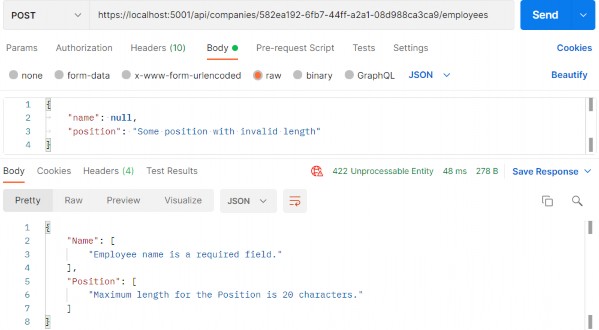
We can see that the age property hasn’t been sent, but in the response body, we don’t see the error message for the age property next to other error messages. That is because the age is of type int and if we don’t send that property, it would be set to a default value, which is 0.
So, on the server-side, validation for the Age property will pass, because it is not null.
To prevent this type of behavior, we have to modify the data annotation attribute on top of the Age property in the EmployeeForCreationDto class:
[Range(18, int.MaxValue, ErrorMessage = "Age is required and it can't be lower than 18")] public int Age { get; set; }Now, let’s try to send the same request one more time:
https://localhost:5001/api/companies/582ea192-6fb7-44ff-a2a1-08d988ca3ca9/employees
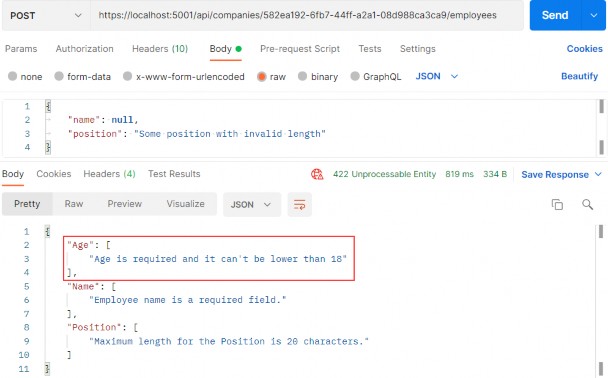
Now, we have the Age error message in our response.
If we want, we can add the custom error messages in our action: ModelState.AddModelError(string key, string errorMessage)
With this expression, the additional error message will be included with all the other messages.
13.4 Validation for PUT Requests
The validation for PUT requests shouldn’t be different from POST requests (except in some cases), but there are still things we have to do to at least optimize our code.
But let’s go step by step.
First, let’s add Data Annotation Attributes to the EmployeeForUpdateDto record:
public record EmployeeForUpdateDto { [Required(ErrorMessage = "Employee name is a required field.")]
[MaxLength(30, ErrorMessage = "Maximum length for the Name is 30 characters.")] public string Name? { get; init; } [Range(18, int.MaxValue, ErrorMessage = "Age is required and it can't be lower than 18")] public int Age { get; init; } [Required(ErrorMessage = "Position is a required field.")] [MaxLength(20, ErrorMessage = "Maximum length for the Position is 20 characters.")] public string? Position { get; init; } }Once we have done this, we realize we have a small problem. If we compare this class with the DTO class for creation, we are going to see that they are the same. Of course, we don’t want to repeat ourselves, thus we are going to add some modifications.
Let’s create a new record in the DataTransferObjects folder:
public abstract record EmployeeForManipulationDto { [Required(ErrorMessage = "Employee name is a required field.")] [MaxLength(30, ErrorMessage = "Maximum length for the Name is 30 characters.")] public string? Name { get; init; } [Range(18, int.MaxValue, ErrorMessage = "Age is required and it can't be lower than 18")] public int Age { get; init; } [Required(ErrorMessage = "Position is a required field.")] [MaxLength(20, ErrorMessage = "Maximum length for the Position is 20 characters.")] public string? Position { get; init; } }We create this record as an abstract record because we want our creation and update DTO records to inherit from it:
public record EmployeeForCreationDto : EmployeeForManipulationDto; public record EmployeeForUpdateDto : EmployeeForManipulationDto;Now, we can modify the UpdateEmployeeForCompany action by adding the model validation right after the null check:
if (employee is null) return BadRequest("EmployeeForUpdateDto object is null"); if (!ModelState.IsValid) return UnprocessableEntity(ModelState);The same process can be applied to the Company DTO records and actions. You can find it implemented in the source code for this chapter.
Let’s test this:
https://localhost:5001/api/companies/C9D4C053-49B6-410C-BC78-2D54A9991870/employees/80ABBCA8-664D-4B20-B5DE-024705497D4A

Great.
Everything works well.
13.5 Validation for PATCH Requests
The validation for PATCH requests is a bit different from the previous ones. We are using the ModelState concept again, but this time we have to place it in the ApplyTo method first:
patchDoc.ApplyTo(employeeToPatch, ModelState);But once we do this, we are going to get an error. That’s because the current ApplyTo method comes from the JsonPatch namespace, and we need the method with the same name but from the NewtonsoftJson namespace.
Since we have the Microsoft.AspNetCore.Mvc.NewtonsoftJson package installed in the main project, we are going to remove it from there and install it in the Presentation project.
If we navigate to the ApplyTo method declaration we can find two extension methods:
public static class JsonPatchExtensions { public static void ApplyTo<T>(this JsonPatchDocument<T> patchDoc, T objectToApplyTo, ModelStateDictionary modelState) where T : class... public static void ApplyTo<T>(this JsonPatchDocument<T> patchDoc, T objectToApplyTo, ModelStateDictionary modelState, string prefix) where T : class... }We are using the first one.
After the package installation, the error in the action will disappear.
Now, right below thee ApplyTo method, we can add our familiar validation logic:
patchDoc.ApplyTo(result.employeeToPatch, ModelState); if (!ModelState.IsValid) return UnprocessableEntity(ModelState); _service.EmployeeService.SaveChangesForPatch(...);Let’s test this now:
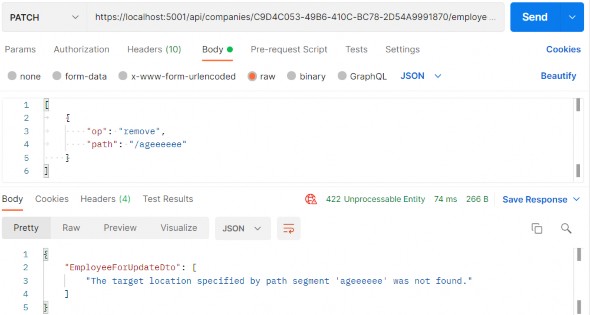
You can see that it works as it is supposed to.
But, we have a small problem now. What if we try to send a remove operation, but for the valid path:
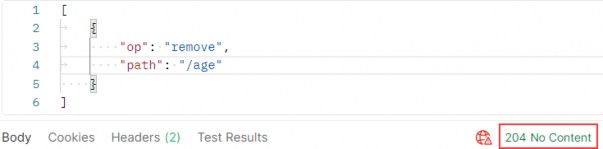
We can see it passes, but this is not good. If you can remember, we said that the remove operation will set the value for the included property to its default value, which is 0. But in the EmployeeForUpdateDto class, we have a Range attribute that doesn’t allow that value to be below 18. So, where is the problem?
Let’s illustrate this for you:
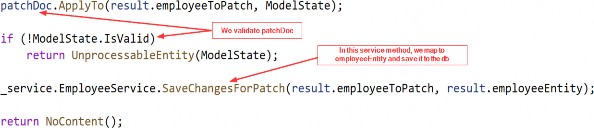
As you can see, we are validating patchDoc which is completely valid at this moment, but we save employeeEntity to the database. So, we need some additional validation to prevent an invalid employeeEntity from being saved to the database:
patchDoc.ApplyTo(result.employeeToPatch, ModelState); TryValidateModel(result.employeeToPatch); if (!ModelState.IsValid) return UnprocessableEntity(ModelState);We can use the TryValidateModel method to validate the already patched employeeToPatch instance. This will trigger validation and every error will make ModelState invalid. After that, we execute a familiar validation check.
Now, we can test this again:
https://localhost:5001/api/companies/C9D4C053-49B6-410C-BC78-2D54A9991870/employees/80ABBCA8-664D- 4B20-B5DE-024705497D4A
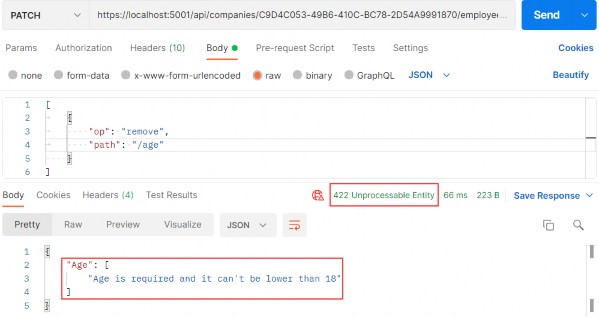
And we get 422, which is the expected status code.
14 ASYNCHRONOUS CODE
In this chapter, we are going to convert synchronous code to asynchronous inside ASP.NET Core. First, we are going to learn a bit about asynchronous programming and why should we write async code. Then we are going to use our code from the previous chapters and rewrite it in an async manner.
We are going to modify the code, step by step, to show you how easy is to convert synchronous code to asynchronous code. Hopefully, this will help you understand how asynchronous code works and how to write it from scratch in your applications.
14.1 What is Asynchronous Programming?
Async programming is a parallel programming technique that allows the working process to run separately from the main application thread.
By using async programming, we can avoid performance bottlenecks and enhance the responsiveness of our application.
How so?
Because we are not sending requests to the server and blocking it while waiting for the responses anymore (as long as it takes). Now, when we send a request to the server, the thread pool delegates a thread to that request. Eventually, that thread finishes its job and returns to the thread pool freeing itself for the next request. At some point, the data will be fetched from the database and the result needs to be sent to the requester. At that time, the thread pool provides another thread to handle that work. Once the work is done, a thread is going back to the thread pool.
It is very important to understand that if we send a request to an endpoint and it takes the application three or more seconds to process that request, we probably won’t be able to execute this request any faster in async mode. It is going to take the same amount of time as the sync request.
Let’s imagine that our thread pool has two threads and we have used one thread with a first request. Now, the second request arrives and we have to use the second thread from a thread pool. At this point, our thread pool is out of threads. If a third request arrives now it has to wait for any of the first two requests to complete and return assigned threads to a thread pool. Only then the thread pool can assign that returned thread to a new request:
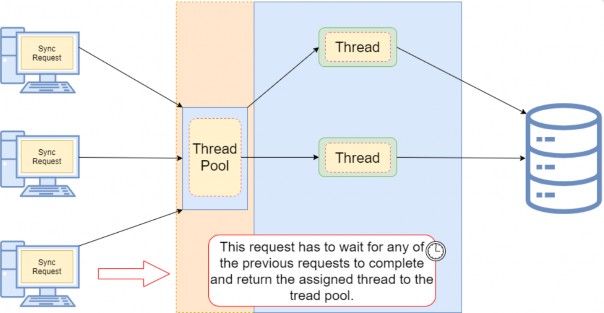
As a result of a request waiting for an available thread, our client experiences a slow down for sure. Additionally, if the client has to wait too long, they will receive an error response usually the service is unavailable (503). But this is not the only problem. Since the client expects the list of entities from the database, we know that it is an I/O operation. So, if we have a lot of records in the database and it takes three seconds for the database to return a result to the API, our thread is doing nothing except waiting for the task to complete. So basically, we are blocking that thread and making it three seconds unavailable for any additional requests that arrive at our API.
With asynchronous requests, the situation is completely different.
When a request arrives at our API, we still need a thread from a thread pool. So, that leaves us with only one thread left. But because this action is now asynchronous, as soon as our request reaches the I/O point where the database has to process the result for three seconds, the thread is returned to a thread pool. Now we again have two available threads and we can use them for any additional request. After the three seconds when the database returns the result to the API, the thread pool assigns the thread again to handle that response:
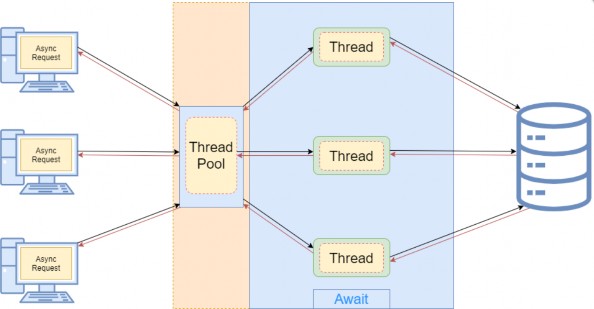
Now that we've cleared that out, we can learn how to implement asynchronous code in .NET Core and .NET 5+.
14.2 Async, Await Keywords and Return Types
The async and await keywords play a crucial part in asynchronous programming. We use the async keyword in the method declaration and its purpose is to enable the await keyword within that method. So yes,we can’t use the await keyword without previously adding the async keyword in the method declaration. Also, using only the async keyword doesn’t make your method asynchronous, just the opposite, that method is still synchronous.
The await keyword performs an asynchronous wait on its argument. It does that in several steps. The first thing it does is to check whether the operation is already complete. If it is, it will continue the method execution synchronously. Otherwise, the await keyword is going to pause the async method execution and return an incomplete task. Once the operation completes, a few seconds later, the async method can continue with the execution.
Let’s see this with a simple example:
public async Task<IEnumerable<Company>> GetCompanies() { _logger.LogInfo("Inside the GetCompanies method."); var companies = await _repoContext.Companies.ToListAsync(); return companies; }So, even though our method is marked with the async keyword, it will start its execution synchronously. Once we log the required information synchronously, we continue to the next code line. We extract all the companies from the database and to do that, we use the await keyword. If our database requires some time to process the result and return it, the await keyword is going to pause the GetCompanies method execution and return an incomplete task. During that time the tread will be returned to a thread pool making itself available for another request. After the database operation completes the async method will resume executing and will return the list of companies.
From this example, we see the async method execution flow. But the question is how the await keyword knows if the operation is completed or not. Well, this is where Task comes into play.
14.2.1 Return Types of the Asynchronous Methods
In asynchronous programming, we have three return types:
• Task<TResult>, for an async method that returns a value.
• Task, for an async method that does not return a value.
• void, which we can use for an event handler.
What does this mean?
Well, we can look at this through synchronous programming glasses. If our sync method returns an int, then in the async mode it should return Task<int> — or if the sync method
returns IEnumerable<string>, then the async method should return Task<IEnumerable<string>>.
But if our sync method returns no value (has a void for the return type), then our async method should return Task. This means that we can use the await keyword inside that method, but without the return keyword.
You may wonder now, why not return Task all the time? Well, we should use void only for the asynchronous event handlers which require a void return type. Other than that, we should always return a Task.
From C# 7.0 onward, we can specify any other return type if that type includes a GetAwaiter method.
It is very important to understand that the Task represents an execution of the asynchronous method and not the result. The Task has several properties that indicate whether the operation was completed successfully or not (Status, IsCompleted, IsCanceled, IsFaulted). With these properties, we can track the flow of our async operations. So, this is the answer to our question. With Task, we can track whether the operation is completed or not. This is also called TAP (Task-based Asynchronous Pattern).
Now, when we have all the information, let’s do some refactoring in our completely synchronous code.
14.2.2 The IRepositoryBase Interface and the RepositoryBase Class Explanation
We won’t be changing the mentioned interface and class. That’s because we want to leave a possibility for the repository user classes to have either sync or async method execution. Sometimes, the async code could become slower than the sync one because EF Core’s async commands take slightly longer to execute (due to extra code for handling the threading), so leaving this option is always a good choice.
It is general advice to use async code wherever it is possible, but if we notice that our async code runes slower, we should switch back to the sync one.
14.3 Modifying the ICompanyRepository Interface and the CompanyRepository Class
In the Contracts project, we can find the ICompanyRepository interface with all the synchronous method signatures which we should change.
So, let’s do that:
public interface ICompanyRepository { Task<IEnumerable<Company>> GetAllCompaniesAsync(bool trackChanges); Task<Company> GetCompanyAsync(Guid companyId, bool trackChanges); void CreateCompany(Company company); Task<IEnumerable<Company>> GetByIdsAsync(IEnumerable<Guid> ids, bool trackChanges); void DeleteCompany(Company company); }The Create and Delete method signatures are left synchronous. That’s because, in these methods, we are not making any changes in the database. All we're doing is changing the state of the entity to Added and Deleted.
So, in accordance with the interface changes, let’s modify our
CompanyRepository.cs class, which we can find in the Repository project:
public async Task<IEnumerable<Company>> GetAllCompaniesAsync(bool trackChanges) => await FindAll(trackChanges) .OrderBy(c => c.Name) .ToListAsync(); public async Task<Company> GetCompanyAsync(Guid companyId, bool trackChanges) => await FindByCondition(c => c.Id.Equals(companyId), trackChanges) .SingleOrDefaultAsync(); public void CreateCompany(Company company) => Create(company); public async Task<IEnumerable<Company>> GetByIdsAsync(IEnumerable<Guid> ids, bool trackChanges) => await FindByCondition(x => ids.Contains(x.Id), trackChanges) .ToListAsync(); public void DeleteCompany(Company company) => Delete(company);We only have to change these methods in our repository class.
14.4 IRepositoryManager and RepositoryManager Changes
If we inspect the mentioned interface and the class, we will see the Save method, which calls the EF Core’s SaveChanges method. We have to change that as well:
public interface IRepositoryManager { ICompanyRepository Company { get; } IEmployeeRepository Employee { get; } Task SaveAsync(); }And the RepositoryManager class modification:
public async Task SaveAsync() => await _repositoryContext.SaveChangesAsync();Because the SaveAsync(), ToListAsync()... methods are awaitable, we may use the await keyword; thus, our methods need to have the async keyword and Task as a return type.
Using the await keyword is not mandatory, though. Of course, if we don’t use it, our SaveAsync() method will execute synchronously — and that is not our goal here.
14.5 Updating the Service layer
Again, we have to start with the interface modification:
public interface ICompanyService { Task<IEnumerable<CompanyDto>> GetAllCompaniesAsync(bool trackChanges); Task<CompanyDto> GetCompanyAsync(Guid companyId, bool trackChanges); Task<CompanyDto> CreateCompanyAsync(CompanyForCreationDto company); Task<IEnumerable<CompanyDto>> GetByIdsAsync(IEnumerable<Guid> ids, bool trackChanges); Task<(IEnumerable<CompanyDto> companies, string ids)> CreateCompanyCollectionAsync (IEnumerable<CompanyForCreationDto> companyCollection); Task DeleteCompanyAsync(Guid companyId, bool trackChanges); Task UpdateCompanyAsync(Guid companyid, CompanyForUpdateDto companyForUpdate, bool trackChanges); }And then, let’s modify the class methods one by one.
GetAllCompanies:
public async Task<IEnumerable<CompanyDto>> GetAllCompaniesAsync(bool trackChanges) { var companies = await _repository.Company.GetAllCompaniesAsync(trackChanges); var companiesDto = _mapper.Map<IEnumerable<CompanyDto>>(companies); return companiesDto; }GetCompany:
public async Task<CompanyDto> GetCompanyAsync(Guid id, bool trackChanges) { var company = await _repository.Company.GetCompanyAsync(id, trackChanges); if (company is null) throw new CompanyNotFoundException(id); var companyDto = _mapper.Map<CompanyDto>(company); return companyDto; }CreateCompany:
public async Task<CompanyDto> CreateCompanyAsync(CompanyForCreationDto company) {
var companyEntity = _mapper.Map<Company>(company); _repository.Company.CreateCompany(companyEntity); await _repository.SaveAsync(); var companyToReturn = _mapper.Map<CompanyDto>(companyEntity); return companyToReturn; }GetByIds:
public async Task<IEnumerable<CompanyDto>> GetByIdsAsync(IEnumerable<Guid> ids, bool trackChanges) { if (ids is null) throw new IdParametersBadRequestException(); var companyEntities = await _repository.Company.GetByIdsAsync(ids, trackChanges); if (ids.Count() != companyEntities.Count()) throw new CollectionByIdsBadRequestException(); var companiesToReturn = _mapper.Map<IEnumerable<CompanyDto>>(companyEntities); return companiesToReturn; }CreateCompanyCollection:
public async Task<(IEnumerable<CompanyDto> companies, string ids)> CreateCompanyCollectionAsync (IEnumerable<CompanyForCreationDto> companyCollection) { if (companyCollection is null) throw new CompanyCollectionBadRequest(); var companyEntities = _mapper.Map<IEnumerable<Company>>(companyCollection); foreach (var company in companyEntities) { _repository.Company.CreateCompany(company); } await _repository.SaveAsync(); var companyCollectionToReturn = _mapper.Map<IEnumerable<CompanyDto>>(companyEntities); var ids = string.Join(",", companyCollectionToReturn.Select(c => c.Id)); return (companies: companyCollectionToReturn, ids: ids); }DeleteCompany:
public async Task DeleteCompanyAsync(Guid companyId, bool trackChanges) {
var company = await _repository.Company.GetCompanyAsync(companyId, trackChanges); if (company is null) throw new CompanyNotFoundException(companyId); _repository.Company.DeleteCompany(company); await _repository.SaveAsync(); }UpdateCompany:
public async Task UpdateCompanyAsync(Guid companyId, CompanyForUpdateDto companyForUpdate, bool trackChanges) { var companyEntity = await _repository.Company.GetCompanyAsync(companyId, trackChanges); if (companyEntity is null) throw new CompanyNotFoundException(companyId); _mapper.Map(companyForUpdate, companyEntity); await _repository.SaveAsync(); }That’s all the changes we have to make in the CompanyService class.
Now we can move on to the controller modification.
14.6 Controller Modification
Finally, we need to modify all of our actions in
the CompaniesController to work asynchronously.
So, let’s first start with the GetCompanies method:
[HttpGet] public async Task<IActionResult> GetCompanies() { var companies = await _service.CompanyService.GetAllCompaniesAsync(trackChanges: false); return Ok(companies); }We haven’t changed much in this action. We’ve just changed the return type and added the async keyword to the method signature. In the method body, we can now await the GetAllCompaniesAsync() method. And that is pretty much what we should do in all the actions in our controller.
NOTE: We’ve changed all the method names in the repository and service layers by adding the Async suffix. But, we didn’t do that in the controller’s action. The main reason for that is when a user calls a method from your service or repository layers they can see right-away from the method name whether the method is synchronous or asynchronous. Also, your layers are not limited only to sync or async methods, you can have two methods that do the same thing but one in a sync manner and another in an async manner. In that case, you want to have a name distinction between those methods. For the controller’s actions this is not the case. We are not targeting our actions by their names but by their routes. So, the name of the action doesn’t really add any value as it does for the method names.
So to continue, let’s modify all the other actions.
GetCompany:
[HttpGet("{id:guid}", Name = "CompanyById")] public async Task<IActionResult> GetCompany(Guid id) { var company = await _service.CompanyService.GetCompanyAsync(id, trackChanges: false); return Ok(company); }GetCompanyCollection:
[HttpGet("collection/({ids})", Name = "CompanyCollection")] public async Task<IActionResult> GetCompanyCollection ([ModelBinder(BinderType = typeof(ArrayModelBinder))]IEnumerable<Guid> ids) { var companies = await _service.CompanyService.GetByIdsAsync(ids, trackChanges: false); return Ok(companies); }CreateCompany:
[HttpPost]
public async Task<IActionResult> CreateCompany([FromBody] CompanyForCreationDto company) { if (company is null) return BadRequest("CompanyForCreationDto object is null"); if (!ModelState.IsValid) return UnprocessableEntity(ModelState); var createdCompany = await _service.CompanyService.CreateCompanyAsync(company); return CreatedAtRoute("CompanyById", new { id = createdCompany.Id }, createdCompany); }CreateCompanyCollection:
[HttpPost("collection")] public async Task<IActionResult> CreateCompanyCollection ([FromBody] IEnumerable<CompanyForCreationDto> companyCollection) { var result = await _service.CompanyService.CreateCompanyCollectionAsync(companyCollection); return CreatedAtRoute("CompanyCollection", new { result.ids }, result.companies); }DeleteCompany:
[HttpDelete("{id:guid}")] public async Task<IActionResult> DeleteCompany(Guid id) { await _service.CompanyService.DeleteCompanyAsync(id, trackChanges: false); return NoContent(); }UpdateCompany:
[HttpPut("{id:guid}")] public async Task<IActionResult> UpdateCompany(Guid id, [FromBody] CompanyForUpdateDto company) { if (company is null) return BadRequest("CompanyForUpdateDto object is null"); await _service.CompanyService.UpdateCompanyAsync(id, company, trackChanges: true); return NoContent(); }Excellent. Now we are talking async.
Of course, we have the Employee entity as well and all of these steps have to be implemented for the EmployeeRepository class, IEmployeeRepository interface, and EmployeesController.
You can always refer to the source code for this chapter if you have any trouble implementing the async code for the Employee entity.
After the async implementation in the Employee classes, you can try to send different requests (from any chapter) to test your async actions. All of them should work as before, without errors, but this time in an asynchronous manner.
14.7 Continuation in Asynchronous Programming
The await keyword does three things:
• It helps us extract the result from the async operation – we already learned about that
• Validates the success of the operation
• Provides the Continuation for executing the rest of the code in the async method
So, in our GetCompanyAsync service method, all the code after awaiting an async operation is executed inside the continuation if the async operation was successful.
When we talk about continuation, it can be confusing because you can read in multiple resources about the SynchronizationContext and capturing the current context to enable this continuation. When we await a task, a request context is captured when await decides to pause the method execution. Once the method is ready to resume its execution, the application takes a thread from a thread pool, assigns it to the context (SynchonizationContext), and resumes the execution. But this is the case for ASP.NET applications.
We don’t have the SynchronizationContext in ASP.NET Core applications. ASP.NET Core avoids capturing and queuing the context, all it does is take the thread from a thread pool and assign it to the request. So, a lot less background works for the application to do.
One more thing. We are not limited to a single continuation. This means that in a single method, we can use multiple await keywords.
14.8 Common Pitfalls
In our GetAllCompaniesAsync repository method if we didn’t know any better, we could’ve been tempted to use the Result property instead of the await keyword:
public async Task<IEnumerable<Company>> GetAllCompaniesAsync(bool trackChanges) => FindAll(trackChanges) .OrderBy(c => c.Name) .ToListAsync() .Result;We can see that the Result property returns the result we require:
// Summary: // Gets the result value of this System.Threading.Tasks.Task`1. // // Returns: // The result value of this System.Threading.Tasks.Task`1, which // is of the same type as the task's type parameter. public TResult Result { get... }But don’t use the Result property.
With this code, we are going to block the thread and potentially cause a deadlock in the application, which is the exact thing we are trying to avoid using the async and await keywords. It applies the same to the Wait method that we can call on a Task.
So, that’s it regarding the asynchronous implementation in our project. We’ve learned a lot of useful things from this section and we can move on to the next one – Action filters.
15 ACTION FILTERS
Filters in .NET offer a great way to hook into the MVC action invocation pipeline. Therefore, we can use filters to extract code that can be reused and make our actions cleaner and maintainable. Some filters are already provided by .NET like the authorization filter, and there are the custom ones that we can create ourselves.
There are different filter types:
• Authorization filters – They run first to determine whether a user is authorized for the current request.
• Resource filters – They run right after the authorization filters and are very useful for caching and performance.
• Action filters – They run right before and after action method execution.
• Exception filters – They are used to handle exceptions before the response body is populated.
• Result filters – They run before and after the execution of the action methods result.
In this chapter, we are going to talk about Action filters and how to use them to create a cleaner and reusable code in our Web API.
15.1 Action Filters Implementation
To create an Action filter, we need to create a class that inherits either from the IActionFilter interface, the IAsyncActionFilter interface, or the ActionFilterAttribute class — which is the implementation of IActionFilter, IAsyncActionFilter, and a few different interfaces as well:
public abstract class ActionFilterAttribute : Attribute, IActionFilter, IFilterMetadata, IAsyncActionFilter, IResultFilter, IAsyncResultFilter, IOrderedFilterTo implement the synchronous Action filter that runs before and after action method execution, we need to implement the OnActionExecuting and OnActionExecuted methods:
namespace ActionFilters.Filters { public class ActionFilterExample : IActionFilter { public void OnActionExecuting(ActionExecutingContext context) { // our code before action executes } public void OnActionExecuted(ActionExecutedContext context) { // our code after action executes } } }We can do the same thing with an asynchronous filter by inheriting from IAsyncActionFilter, but we only have one method to implement — the OnActionExecutionAsync:
namespace ActionFilters.Filters { public class AsyncActionFilterExample : IAsyncActionFilter { public async Task OnActionExecutionAsync(ActionExecutingContext context, ActionExecutionDelegate next) { // execute any code before the action executes var result = await next(); // execute any code after the action executes } } }15.2 The Scope of Action Filters
Like the other types of filters, the action filter can be added to different scope levels: Global, Action, and Controller.
If we want to use our filter globally, we need to register it inside the AddControllers() method in the Program class:
builder.Services.AddControllers(config => { config.Filters.Add(new GlobalFilterExample()); });But if we want to use our filter as a service type on the Action or Controller level, we need to register it, but as a service in the IoC container:
builder.Services.AddScoped<ActionFilterExample>(); builder.Services.AddScoped<ControllerFilterExample>();Finally, to use a filter registered on the Action or Controller level, we need to place it on top of the Controller or Action as a ServiceType:
namespace AspNetCore.Controllers { [ServiceFilter(typeof(ControllerFilterExample))] [Route("api/[controller]")] [ApiController] public class TestController : ControllerBase { [HttpGet] [ServiceFilter(typeof(ActionFilterExample))] public IEnumerable<string> Get() { return new string[] { "example", "data" }; } }15.3 Order of Invocation
The order in which our filters are executed is as follows:
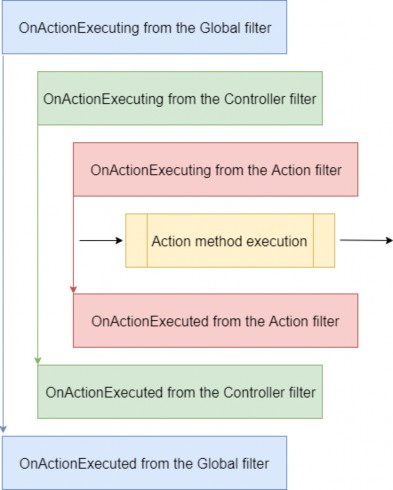
Of course, we can change the order of invocation by adding the Order property to the invocation statement:
namespace AspNetCore.Controllers { [ServiceFilter(typeof(ControllerFilterExample), Order = 2)] [Route("api/[controller]")] [ApiController] public class TestController : ControllerBase { [HttpGet] [ServiceFilter(typeof(ActionFilterExample), Order = 1)] public IEnumerable<string> Get() { return new string[] { "example", "data" }; } } }Or something like this on top of the same action:
[HttpGet]
[ServiceFilter(typeof(ActionFilterExample), Order = 2)] [ServiceFilter(typeof(ActionFilterExample2), Order = 1)] public IEnumerable<string> Get() { return new string[] { "example", "data" }; }15.4 Improving the Code with Action Filters
Our actions are clean and readable without try-catch blocks due to global exception handling and a service layer implementation, but we can improve them even further.
So, let’s start with the validation code from the POST and PUT actions.
15.5 Validation with Action Filters
If we take a look at our POST and PUT actions, we can notice the repeated code in which we validate our Company model:
if (company is null) return BadRequest("CompanyForUpdateDto object is null"); if (!ModelState.IsValid) return UnprocessableEntity(ModelState);We can extract that code into a custom Action Filter class, thus making this code reusable and the action cleaner.
So, let’s do that.
Let’s create a new folder in our solution explorer, and name
it ActionFilters. Then inside that folder, we are going to create a new class ValidationFilterAttribute:
public class ValidationFilterAttribute : IActionFilter { public ValidationFilterAttribute() {} public void OnActionExecuting(ActionExecutingContext context) { } public void OnActionExecuted(ActionExecutedContext context){} }Now we are going to modify the OnActionExecuting method:
public void OnActionExecuting(ActionExecutingContext context) { var action = context.RouteData.Values["action"]; var controller = context.RouteData.Values["controller"]; var param = context.ActionArguments .SingleOrDefault(x => x.Value.ToString().Contains("Dto")).Value; if (param is null) { context.Result = new BadRequestObjectResult($"Object is null. Controller: {controller}, action: {action}"); return; } if (!context.ModelState.IsValid) context.Result = new UnprocessableEntityObjectResult(context.ModelState); }We are using the context parameter to retrieve different values that we need inside this method. With the RouteData.Values dictionary, we can get the values produced by routes on the current routing path. Since we need the name of the action and the controller, we extract them from the Values dictionary.
Additionally, we use the ActionArguments dictionary to extract the DTO parameter that we send to the POST and PUT actions. If that parameter is null, we set the Result property of the context object to a new instance of the BadRequestObjectReturnResult class. If the model is invalid, we create a new instance of the UnprocessableEntityObjectResult class and pass ModelState.
Next, let’s register this action filter in the Program class above the AddControllers method:
builder.Services.AddScoped<ValidationFilterAttribute>();Finally, let’s remove the mentioned validation code from our actions and call this action filter as a service.
POST:
[HttpPost] [ServiceFilter(typeof(ValidationFilterAttribute))] public async Task<IActionResult> CreateCompany([FromBody] CompanyForCreationDto company) {
var createdCompany = await _service.CompanyService.CreateCompanyAsync(company); return CreatedAtRoute("CompanyById", new { id = createdCompany.Id }, createdCompany); }PUT:
[HttpPut("{id:guid}")] [ServiceFilter(typeof(ValidationFilterAttribute))] public async Task<IActionResult> UpdateCompany(Guid id, [FromBody] CompanyForUpdateDto company) { await _service.CompanyService.UpdateCompanyAsync(id, company, trackChanges: true); return NoContent(); }Excellent.
This code is much cleaner and more readable now without the validation part. Furthermore, the validation part is now reusable for the POST and PUT actions for both the Company and Employee DTO objects.
If we send a POST request, for example, with the invalid model we will get the required response:https://localhost:5001/api/companies
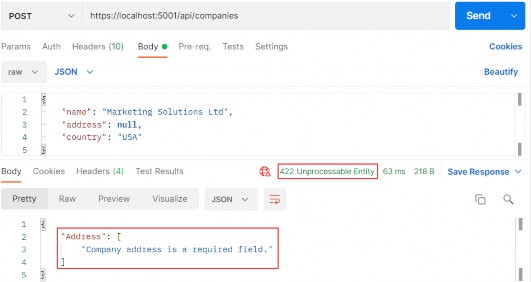
We can apply this action filter to the POST and PUT actions in the EmployeesController the same way we did in the CompaniesController and test it as well:
https://localhost:5001/api/companies/53a1237a-3ed3-4462-b9f0-5a7bb1056a33/employees
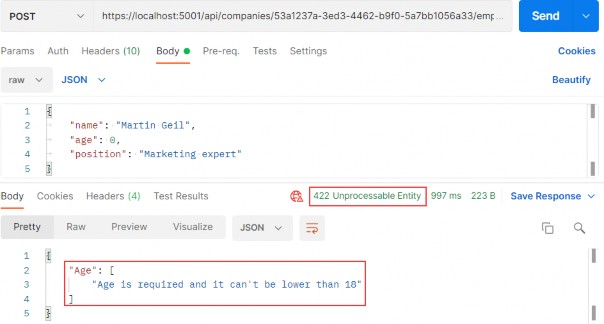
15.6 Refactoring the Service Layer
Because we are already working on making our code reusable in our actions, we can review our classes from the service layer.
Let’s inspect the CompanyServrice class first.
Inside the class, we can find three methods (GetCompanyAsync, DeleteCompanyAsync, and UpdateCompanyAsync) where we repeat the same code:
var company = await _repository.Company.GetCompanyAsync(id, trackChanges); if (company is null) throw new CompanyNotFoundException(id);This is something we can extract in a private method in the same class:
private async Task<Company> GetCompanyAndCheckIfItExists(Guid id, bool trackChanges) { var company = await _repository.Company.GetCompanyAsync(id, trackChanges); if (company is null) throw new CompanyNotFoundException(id); return company; }And then we can modify these methods.
GetCompanyAsync:
public async Task<CompanyDto> GetCompanyAsync(Guid id, bool trackChanges) { var company = await GetCompanyAndCheckIfItExists(id, trackChanges); var companyDto = _mapper.Map<CompanyDto>(company); return companyDto; }DeleteCompanyAsync:
public async Task DeleteCompanyAsync(Guid companyId, bool trackChanges) { var company = await GetCompanyAndCheckIfItExists(companyId, trackChanges); _repository.Company.DeleteCompany(company); await _repository.SaveAsync(); }UpdateCompanyAsync:
public async Task UpdateCompanyAsync(Guid companyId, CompanyForUpdateDto companyForUpdate, bool trackChanges) { var company = await GetCompanyAndCheckIfItExists(companyId, trackChanges); _mapper.Map(companyForUpdate, company); await _repository.SaveAsync(); }Now, this looks much better without code repetition.
Furthermore, we can find code repetition in almost all the methods inside the EmployeeService class:
var company = await _repository.Company.GetCompanyAsync(companyId, trackChanges); if (company is null) throw new CompanyNotFoundException(companyId); var employeeDb = await _repository.Employee.GetEmployeeAsync(companyId, id, trackChanges); if (employeeDb is null) throw new EmployeeNotFoundException(id); In some methods, we can find just the first check and in several others, we can find both of them.
So, let’s extract these checks into two separate methods:
private async Task CheckIfCompanyExists(Guid companyId, bool trackChanges) { var company = await _repository.Company.GetCompanyAsync(companyId, trackChanges); if (company is null)
throw new CompanyNotFoundException(companyId); } private async Task<Employee> GetEmployeeForCompanyAndCheckIfItExists (Guid companyId, Guid id, bool trackChanges) { var employeeDb = await _repository.Employee.GetEmployeeAsync(companyId, id, trackChanges); if (employeeDb is null) throw new EmployeeNotFoundException(id); return employeeDb; }With these two extracted methods in place, we can refactor all the other methods in the class.
GetEmployeesAsync:
public async Task<IEnumerable<EmployeeDto>> GetEmployeesAsync(Guid companyId, bool trackChanges) { await CheckIfCompanyExists(companyId, trackChanges); var employeesFromDb = await _repository.Employee.GetEmployeesAsync(companyId, trackChanges); var employeesDto = _mapper.Map<IEnumerable<EmployeeDto>>(employeesFromDb); return employeesDto; }GetEmployeeAsync:
public async Task<EmployeeDto> GetEmployeeAsync(Guid companyId, Guid id, bool trackChanges) { await CheckIfCompanyExists(companyId, trackChanges); var employeeDb = await GetEmployeeForCompanyAndCheckIfItExists(companyId, id, trackChanges); var employee = _mapper.Map<EmployeeDto>(employeeDb); return employee; }CreateEmployeeForCompanyAsync:
public async Task<EmployeeDto> CreateEmployeeForCompanyAsync(Guid companyId, EmployeeForCreationDto employeeForCreation, bool trackChanges) { await CheckIfCompanyExists(companyId, trackChanges); var employeeEntity = _mapper.Map<Employee>(employeeForCreation); _repository.Employee.CreateEmployeeForCompany(companyId, employeeEntity); await _repository.SaveAsync();
var employeeToReturn = _mapper.Map<EmployeeDto>(employeeEntity); return employeeToReturn; }DeleteEmployeeForCompanyAsync:
public async Task DeleteEmployeeForCompanyAsync(Guid companyId, Guid id, bool trackChanges) { await CheckIfCompanyExists(companyId, trackChanges); var employeeDb = await GetEmployeeForCompanyAndCheckIfItExists(companyId, id, trackChanges); _repository.Employee.DeleteEmployee(employeeDb); await _repository.SaveAsync(); }UpdateEmployeeForCompanyAsync:
public async Task UpdateEmployeeForCompanyAsync(Guid companyId, Guid id, EmployeeForUpdateDto employeeForUpdate, bool compTrackChanges, bool empTrackChanges) { await CheckIfCompanyExists(companyId, compTrackChanges); var employeeDb = await GetEmployeeForCompanyAndCheckIfItExists(companyId, id, empTrackChanges); _mapper.Map(employeeForUpdate, employeeDb); await _repository.SaveAsync(); }GetEmployeeForPatchAsync:
public async Task<(EmployeeForUpdateDto employeeToPatch, Employee employeeEntity)> GetEmployeeForPatchAsync (Guid companyId, Guid id, bool compTrackChanges, bool empTrackChanges) { await CheckIfCompanyExists(companyId, compTrackChanges); var employeeDb = await GetEmployeeForCompanyAndCheckIfItExists(companyId, id, empTrackChanges); var employeeToPatch = _mapper.Map<EmployeeForUpdateDto>(employeeDb); return (employeeToPatch: employeeToPatch, employeeEntity: employeeDb); }Now, all of the methods are cleaner and easier to maintain since our validation code is in a single place, and if we need to modify these validations, there’s only one place we need to change.
Additionally, if you want you can create a new class and extract these methods, register that class as a service, inject it into our service classes and use the validation methods. It is up to you how you want to do it.
So, we have seen how to use action filters to clear our action methods and also how to extract methods to make our service cleaner and easier to maintain.
With that out of the way, we can continue to Paging.
16 PAGING
We have covered a lot of interesting features while creating our Web API project, but there are still things to do.
So, in this chapter, we’re going to learn how to implement paging in ASP.NET Core Web API. It is one of the most important concepts in building RESTful APIs.
If we inspect the GetEmployeesForCompany action in the EmployeesController, we can see that we return all the employees for the single company.
But we don’t want to return a collection of all resources when querying our API. That can cause performance issues and it’s in no way optimized for public or private APIs. It can cause massive slowdowns and even application crashes in severe cases.
Of course, we should learn a little more about Paging before we dive into code implementation.
16.1 What is Paging?
Paging refers to getting partial results from an API. Imagine having millions of results in the database and having your application try to return all of them at once.
Not only would that be an extremely ineffective way of returning the results, but it could also possibly have devastating effects on the application itself or the hardware it runs on. Moreover, every client has limited memory resources and it needs to restrict the number of shown results.
Thus, we need a way to return a set number of results to the client in order to avoid these consequences. Let’s see how we can do that.
16.2 Paging Implementation
Mind you, we don’t want to change the base repository logic or implement any business logic in the controller.
What we want to achieve is something like this: https://localhost:5001/api/companies/companyId/employees?pa geNumber=2&pageSize=2. This should return the second set of two employees we have in our database.
We also want to constrain our API not to return all the employees even if someone calls https://localhost:5001/api/companies/companyId/employees.
Let's start with the controller modification by modifying the GetEmployeesForCompany action:
[HttpGet] public async Task<IActionResult> GetEmployeesForCompany(Guid companyId, [FromQuery] EmployeeParameters employeeParameters) { var employees = await _service.EmployeeService.GetEmployeesAsync(companyId, trackChanges: false); return Ok(employees); }A few things to take note of here:
• We’re using [FromQuery] to point out that we’ll be using query parameters to define which page and how many employees we are requesting.
• The EmployeeParameters class is the container for the actual parameters for the Employee entity.
We also need to actually create the EmployeeParameters class. So, let’s first create a RequestFeatures folder in the Shared project and then inside, create the required classes.
First the RequestParameters class:
public abstract class RequestParameters
{ const int maxPageSize = 50; public int PageNumber { get; set; } = 1; private int _pageSize = 10; public int PageSize { get { return _pageSize; } set { _pageSize = (value > maxPageSize) ? maxPageSize : value; } }And then the EmployeeParameters class:
public class EmployeeParameters : RequestParameters { }We create an abstract class to hold the common properties for all the entities in our project, and a single EmployeeParameters class that will hold the specific parameters. It is empty now, but soon it won’t be.
In the abstract class, we are using the maxPageSize constant to restrict our API to a maximum of 50 rows per page. We have two public properties – PageNumber and PageSize. If not set by the caller, PageNumber will be set to 1, and PageSize to 10.
Now we can return to the controller and import a using directive for the EmployeeParameters class:
using Shared.RequestFeatures;After that change, let’s implement the most important part — the repository logic. We need to modify the GetEmployeesAsync method in the IEmployeeRepository interface and the EmployeeRepository class.
So, first the interface modification:
public interface IEmployeeRepository { Task<IEnumerable<Employee>> GetEmployeesAsync(Guid companyId,
EmployeeParameters employeeParameters, bool trackChanges); Task<Employee> GetEmployeeAsync(Guid companyId, Guid id, bool trackChanges); void CreateEmployeeForCompany(Guid companyId, Employee employee); void DeleteEmployee(Employee employee); }As Visual Studio suggests, we have to add the reference to the Shared project.
After that, let’s modify the repository logic:
public async Task<IEnumerable<Employee>> GetEmployeesAsync(Guid companyId, EmployeeParameters employeeParameters, bool trackChanges) => await FindByCondition(e => e.CompanyId.Equals(companyId), trackChanges) .OrderBy(e => e.Name) .Skip((employeeParameters.PageNumber - 1) * employeeParameters.PageSize) .Take(employeeParameters.PageSize) .ToListAsync();Okay, the easiest way to explain this is by example.
Say we need to get the results for the third page of our website, counting 20 as the number of results we want. That would mean we want to skip the first ((3 – 1) * 20) = 40 results, then take the next 20 and return them to the caller.
Does that make sense?
Since we call this repository method in our service layer, we have to modify it as well.
So, let’s start with the IEmployeeService modification:
public interface IEmployeeService { Task<IEnumerable<EmployeeDto>> GetEmployeesAsync(Guid companyId, EmployeeParameters employeeParameters, bool trackChanges); ... }In this interface, we only have to modify the GetEmployeesAsync method by adding a new parameter.
After that, let’s modify the EmployeeService class:
public async Task<IEnumerable<EmployeeDto>> GetEmployeesAsync(Guid companyId, EmployeeParameters employeeParameters, bool trackChanges) {await CheckIfCompanyExists(companyId, trackChanges); var employeesFromDb = await _repository.Employee .GetEmployeesAsync(companyId, employeeParameters, trackChanges); var employeesDto = _mapper.Map<IEnumerable<EmployeeDto>>(employeesFromDb); return employeesDto; }Nothing too complicated here. We just accept an additional parameter and pass it to the repository method.
Finally, we have to modify the GetEmployeesForCompany action and fix that error by adding another argument to the GetEmployeesAsync method call:
[HttpGet] public async Task<IActionResult> GetEmployeesForCompany(Guid companyId, [FromQuery] EmployeeParameters employeeParameters) { var employees = await _service.EmployeeService.GetEmployeesAsync(companyId, employeeParameters, trackChanges: false); return Ok(employees); }16.3 Concrete Query
Before we continue, we should create additional employees for the company with the id: C9D4C053-49B6-410C-BC78-2D54A9991870. We are doing this because we have only a small number of employees per company and we need more of them for our example. You can use a predefined request in Part16 in Postman, and just change the request body with the following objects:
| {"name": "Mihael Worth","age": 30,"position": "Marketing expert"} | {"name": "John Spike","age": 32,"position": "Marketing expert II"} | {"name": "Nina Hawk","age": 26,"position": "Marketing expert II"} |
| {"name": "Mihael Fins","age": 30,"position": "Marketing expert" } | {"name": "Martha Grown","age": 35, "position": "Marketing expert II"} | {"name": "Kirk Metha","age": 30,"position": "Marketing expert" } |
Now we should have eight employees for this company, and we can try a request like this:
So, we request page two with two employees:
https://localhost:5001/api/companies/C9D4C053-49B6-410C-BC78- 2D54A9991870/employees?pageNumber=2&pageSize=2

If that’s what you got, you’re on the right track.
We can check our result in the database:
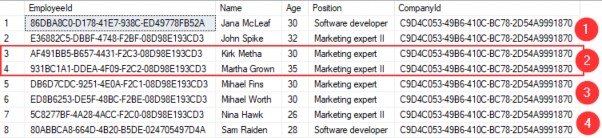
And we can see that we have the correct data returned.
Now, what can we do to improve this solution?
16.4 Improving the Solution
Since we’re returning just a subset of results to the caller, we might as well have a PagedList instead of List.
PagedList will inherit from the List class and will add some more to it. We can also move the skip/take logic to the PagedList since it makes more sense.
So, let’s first create a new MetaData class in the Shared/RequestFeatures folder:
public class MetaData { public int CurrentPage { get; set; } public int TotalPages { get; set; } public int PageSize { get; set; } public int TotalCount { get; set; } public bool HasPrevious => CurrentPage > 1; public bool HasNext => CurrentPage < TotalPages; }Then, we are going to implement the PagedList class in the same folder:
public class PagedList<T> : List<T> { public MetaData MetaData { get; set; } public PagedList(List<T> items, int count, int pageNumber, int pageSize) { MetaData = new MetaData { TotalCount = count, PageSize = pageSize, CurrentPage = pageNumber, TotalPages = (int)Math.Ceiling(count / (double)pageSize) }; AddRange(items); } public static PagedList<T> ToPagedList(IEnumerable<T> source, int pageNumber, int pageSize) { var count = source.Count(); var items = source.Skip((pageNumber - 1) * pageSize) .Take(pageSize).ToList(); return new PagedList<T>(items, count, pageNumber, pageSize); } }As you can see, we’ve transferred the skip/take logic to the static method inside of the PagedList class. And in the MetaData class, we’ve added a few more properties that will come in handy as metadata for our response.
HasPrevious is true if the CurrentPage is larger than 1, and HasNext is calculated if the CurrentPage is smaller than the number of total pages. TotalPages is calculated by dividing the number of items by the page size and then rounding it to the larger number since a page needs to exist even if there is only one item on it.
Now that we’ve cleared that up, let’s change our EmployeeRepository and EmployeesController accordingly.
Let’s start with the interface modification:
Task<PagedList<Employee>> GetEmployeesAsync(Guid companyId, EmployeeParameters employeeParameters, bool trackChanges);Then, let’s change the repository class:
public async Task<PagedList<Employee>> GetEmployeesAsync(Guid companyId, EmployeeParameters employeeParameters, bool trackChanges) { var employees = await FindByCondition(e => e.CompanyId.Equals(companyId), trackChanges) .OrderBy(e => e.Name) .ToListAsync(); return PagedList<Employee> .ToPagedList(employees, employeeParameters.PageNumber, employeeParameters.PageSize); }After that, we are going to modify the IEmplyeeService interface:
Task<(IEnumerable<EmployeeDto> employees, MetaData metaData)> GetEmployeesAsync(Guid companyId, EmployeeParameters employeeParameters, bool trackChanges);Now our method returns a Tuple containing two fields – employees and metadata.
So, let’s implement that in the EmployeeService class:
public async Task<(IEnumerable<EmployeeDto> employees, MetaData metaData)> GetEmployeesAsync (Guid companyId, EmployeeParameters employeeParameters, bool trackChanges) { await CheckIfCompanyExists(companyId, trackChanges); var employeesWithMetaData = await _repository.Employee .GetEmployeesAsync(companyId, employeeParameters, trackChanges); var employeesDto = _mapper.Map<IEnumerable<EmployeeDto>>(employeesWithMetaData); return (employees: employeesDto, metaData: employeesWithMetaData.MetaData); }We change the method signature and the name of the employeesFromDb variable to employeesWithMetaData since this name is now more suitable. After the mapping action, we construct a Tuple and return it to the caller.
Finally, let’s modify the controller:
[HttpGet] public async Task<IActionResult> GetEmployeesForCompany(Guid companyId, [FromQuery] EmployeeParameters employeeParameters) { var pagedResult = await _service.EmployeeService.GetEmployeesAsync(companyId, employeeParameters, trackChanges: false); Response.Headers.Add("X-Pagination", JsonSerializer.Serialize(pagedResult.metaData)); return Ok(pagedResult.employees); }The new thing in this action is that we modify the response header and add our metadata as the X-Pagination header. For this, we need the System.Text.Json namespace.
Now, if we send the same request we did earlier, we are going to get the same result:
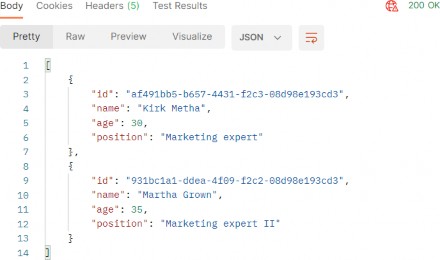
But now we have some additional useful information in the X-Pagination response header:
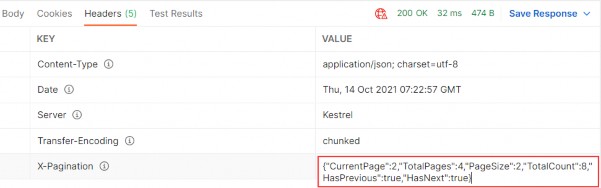
As you can see, all of our metadata is here. We can use this information when building any kind of frontend pagination to our benefit. You can play around with different requests to see how it works in other scenarios.
We could also use this data to generate links to the previous and next pagination page on the backend, but that is part of the HATEOAS and is out of the scope of this chapter.
16.4.1 Additional Advice
This solution works great with a small amount of data, but with bigger tables with millions of rows, we can improve it by modifying the GetEmployeesAsync repository method:
public async Task<PagedList<Employee>> GetEmployeesAsync(Guid companyId, EmployeeParameters employeeParameters, bool trackChanges) { var employees = await FindByCondition(e => e.CompanyId.Equals(companyId), trackChanges) .OrderBy(e => e.Name) .Skip((employeeParameters.PageNumber - 1) * employeeParameters.PageSize) .Take(employeeParameters.PageSize) .ToListAsync(); var count = await FindByCondition(e => e.CompanyId.Equals(companyId), trackChanges).CountAsync(); return new PagedList<Employee>(employees, count, employeeParameters.PageNumber, employeeParameters.PageSize); }Even though we have an additional call to the database with the CountAsync method, this solution was tested upon millions of rows and was much faster than the previous one. Because our table has few rows, we will continue using the previous solution, but feel free to switch to this one if you want.
Also, to enable the client application to read the new X-Pagination header that we’ve added in our action, we have to modify the CORS configuration:
public static void ConfigureCors(this IServiceCollection services) => services.AddCors(options => { options.AddPolicy("CorsPolicy", builder => builder.AllowAnyOrigin() .AllowAnyMethod() .AllowAnyHeader() .WithExposedHeaders("X-Pagination")); });17 FILTERING
In this chapter, we are going to cover filtering in ASP.NET Core Web API. We’ll learn what filtering is, how it’s different from searching, and how to implement it in a real-world project.
While not critical as paging, filtering is still an important part of a flexible REST API, so we need to know how to implement it in our API projects.
Filtering helps us get the exact result set we want instead of all the results without any criteria.
17.1 What is Filtering?
Filtering is a mechanism to retrieve results by providing some kind of criterion. We can write many kinds of filters to get results by type of class property, value range, date range, or anything else.
When implementing filtering, you are always restricted by the predefined set of options you can set in your request. For example, you can send a date value to request an employee, but you won’t have much success.
On the front end, filtering is usually implemented as checkboxes, radio buttons, or dropdowns. This kind of implementation limits you to only those options that are available to create a valid filter.
Take for example a car-selling website. When filtering the cars you want, you would ideally want to select:
• Car manufacturer as a category from a list or a dropdown
• Car model from a list or a dropdown
• Is it new or used with radio buttons
• The city where the seller is as a dropdown
• The price of the car is an input field (numeric)
• ......
You get the point. So, the request would look something like this:
Or even like this:
https://bestcarswebsite.com/sale/filter?data[manufacturer]=ford&[mod el]=expedition&[state]=used&[city]=washington&[price_from]=30000&[price_to]=50000
Now that we know what filtering is, let’s see how it’s different from searching.
17.2 How is Filtering Different from Searching?
When searching for results, we usually have only one input and that’s the one you use to search for anything within a website.
So in other words, you send a string to the API and the API is responsible for using that string to find any results that match it.
On our car website, we would use the search field to find the “Ford Expedition” car model and we would get all the results that match the car name “Ford Expedition.” Thus, this search would return every “Ford Expedition” car available.
We can also improve the search by implementing search terms like Google does, for example. If the user enters the Ford Expedition without quotes in the search field, we would return both what’s relevant to Ford and Expedition. But if the user puts quotes around it, we would search the entire term “Ford Expedition” in our database.
It makes a better user experience. Example:
https://bestcarswebsite.com/sale/search?name=fordfocus
Using search doesn’t mean we can’t use filters with it. It makes perfect sense to use filtering and searching together, so we need to take that into account when writing our source code.
But enough theory.
Let’s implement some filters.
17.3 How to Implement Filtering in ASP.NET Core Web API
We have the Age property in our Employee class. Let’s say we want to find out which employees are between the ages of 26 and 29. We also want to be able to enter just the starting age — and not the ending one — and vice versa.
We would need a query like this one:
https://localhost:5001/api/companies/companyId/employees?minAge=26&maxAge=29
But, we want to be able to do this too:
https://localhost:5001/api/companies/companyId/employees?minAge=26
Or like this:
https://localhost:5001/api/companies/companyId/employees?maxAge=29
Okay, we have a specification. Let’s see how to implement it.
We’ve already implemented paging in our controller, so we have the necessary infrastructure to extend it with the filtering functionality. We’ve used the EmployeeParameters class, which inherits from the RequestParameters class, to define the query parameters for our paging request.
Let’s extend the EmployeeParameters class:
public class EmployeeParameters : RequestParameters { public uint MinAge { get; set; } public uint MaxAge { get; set; } = int.MaxValue; public bool ValidAgeRange => MaxAge > MinAge; }We’ve added two unsigned int properties (to avoid negative year values):MinAge and MaxAge.
Since the default uint value is 0, we don’t need to explicitly define it; 0 is okay in this case. For MaxAge, we want to set it to the max int value. If we don’t get it through the query params, we have something to work with. It doesn’t matter if someone sets the age to 300 through the params; it won’t affect the results.
We’ve also added a simple validation property – ValidAgeRange. Its purpose is to tell us if the max-age is indeed greater than the min-age. If it’s not, we want to let the API user know that he/she is doing something wrong.
Okay, now that we have our parameters ready, we can modify the GetEmployeesAsync service method by adding a validation check as a first statement:
public async Task<(IEnumerable<EmployeeDto> employees, MetaData metaData)> GetEmployeesAsync (Guid companyId, EmployeeParameters employeeParameters, bool trackChanges) { if (!employeeParameters.ValidAgeRange) throw new MaxAgeRangeBadRequestException(); await CheckIfCompanyExists(companyId, trackChanges); var employeesWithMetaData = await _repository.Employee .GetEmployeesAsync(companyId, employeeParameters, trackChanges); var employeesDto = _mapper.Map<IEnumerable<EmployeeDto>>(employeesWithMetaData); return (employees: employeesDto, metaData: employeesWithMetaData.MetaData); }We’ve added our validation check and a BadRequest response if the validation fails.
But we don’t have this custom exception class so, we have to create it in the Entities/Exceptions class:
public sealed class MaxAgeRangeBadRequestException : BadRequestException { public MaxAgeRangeBadRequestException() :base("Max age can't be less than min age.") { } }That should do it.
After the service class modification and creation of our custom exception class, let’s get to the implementation in our EmployeeRepository class:
public async Task<PagedList<Employee>> GetEmployeesAsync(Guid companyId, EmployeeParameters employeeParameters, bool trackChanges) { var employees = await FindByCondition(e => e.CompanyId.Equals(companyId) && (e.Age >= employeeParameters.MinAge && e.Age <= employeeParameters.MaxAge), trackChanges) .OrderBy(e => e.Name) .ToListAsync(); return PagedList<Employee> .ToPagedList(employees, employeeParameters.PageNumber, employeeParameters.PageSize); }Actually, at this point, the implementation is rather simple too.
We are using the FindByCondition method to find all the employees with an Age between the MaxAge and the MinAge.
Let’s try it out.
17.4 Sending and Testing a Query
Let’s send a first request with only a MinAge parameter:
https://localhost:5001/api/companies/C9D4C053-49B6-410C-BC78-2D54A9991870/employees?minAge=32
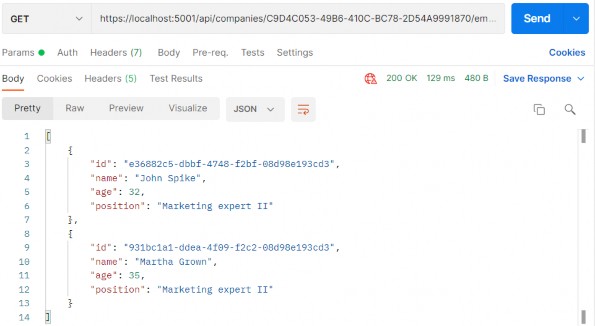
Next, let’s send one with only a MaxAge parameter:
https://localhost:5001/api/companies/C9D4C053-49B6-410C-BC78-2D54A9991870/employees?maxAge=26
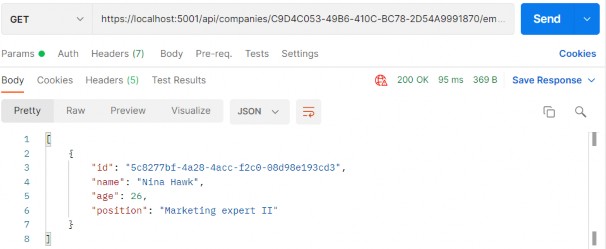
After that, we can combine those two:
https://localhost:5001/api/companies/C9D4C053-49B6-410C-BC78- 2D54A9991870/employees?minAge=26&maxAge=30
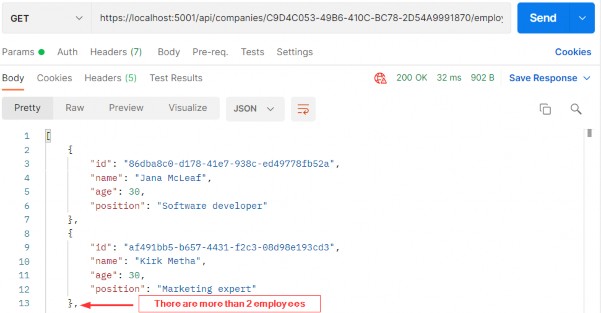
And finally, we can test the filter with the paging:
https://localhost:5001/api/companies/C9D4C053-49B6-410C-BC78-2D54A9991870/employees?pageNumber=1&pageSize=4&minAge=32&maxAge=35

Excellent. The filter is implemented and we can move on to the searching part.
18 SEARCHING
In this chapter, we’re going to tackle the topic of searching in ASP.NET Core Web API. Searching is one of those functionalities that can make or break your API, and the level of difficulty when implementing it can vary greatly depending on your specifications.
If you need to implement a basic searching feature where you are just trying to search one field in the database, you can easily implement it. On the other hand, if it’s a multi-column, multi-term search, you would probably be better off with some of the great search libraries out there like Lucene.NET which are already optimized and proven.
18.1 What is Searching?
There is no doubt in our minds that you’ve seen a search field on almost every website on the internet. It’s easy to find something when we are familiar with the website structure or when a website is not that large.
But if we want to find the most relevant topic for us, we don’t know what we’re going to find, or maybe we’re first-time visitors to a large website, we’re probably going to use a search field.
In our simple project, one use case of a search would be to find an employee by name.
Let’s see how we can achieve that.
18.2 Implementing Searching in Our Application
Since we’re going to implement the most basic search in our project, the implementation won’t be complex at all. We have all we need infrastructure-wise since we already covered paging and filtering. We’ll just extend our implementation a bit.
What we want to achieve is something like this:
https://localhost:5001/api/companies/companyId/employees?searchTerm=MihaelFins
This should return just one result: Mihael Fins. Of course, the search needs to work together with filtering and paging, so that’s one of the things we’ll need to keep in mind too.
Like we did with filtering, we’re going to extend our EmployeeParameters class first since we’re going to send our search query as a query parameter:
public class EmployeeParameters : RequestParameters { public uint MinAge { get; set; } public uint MaxAge { get; set; } = int.MaxValue; public bool ValidAgeRange => MaxAge > MinAge; public string? SearchTerm { get; set; } }Simple as that.
Now we can write queries with searchTerm=”name” in them.
The next thing we need to do is actually implement the search functionality in our EmployeeRepository class:
public async Task<PagedList<Employee>> GetEmployeesAsync(Guid companyId, EmployeeParameters employeeParameters, bool trackChanges) { var employees = await FindByCondition(e => e.CompanyId.Equals(companyId), trackChanges) .FilterEmployees(employeeParameters.MinAge, employeeParameters.MaxAge) .Search(employeeParameters.SearchTerm) .OrderBy(e => e.Name) .ToListAsync(); return PagedList<Employee> .ToPagedList(employees, employeeParameters.PageNumber, employeeParameters.PageSize); }We have made two changes here. The first is modifying the filter logic and the second is adding the Search method for the searching functionality.
But these methods (FilterEmployees and Search) are not created yet, so let’s create them.
In the Repository project, we are going to create the new folder Extensions and inside of that folder the new class RepositoryEmployeeExtensions:
public static class RepositoryEmployeeExtensions { public static IQueryable<Employee> FilterEmployees(this IQueryable<Employee> employees, uint minAge, uint maxAge) => employees.Where(e => (e.Age >= minAge && e.Age <= maxAge)); public static IQueryable<Employee> Search(this IQueryable<Employee> employees, string searchTerm) { if (string.IsNullOrWhiteSpace(searchTerm)) return employees; var lowerCaseTerm = searchTerm.Trim().ToLower(); return employees.Where(e => e.Name.ToLower().Contains(lowerCaseTerm)); } }So, we are just creating our extension methods to update our query until it is executed in the repository. Now, all we have to do is add a using directive to the EmployeeRepository class:
using Repository.Extensions;That’s it for our implementation. As you can see, it isn’t that hard since it is the most basic search and we already had an infrastructure set.
18.3 Testing Our Implementation
Let’s send a first request with the value Mihael Fins for the search term:
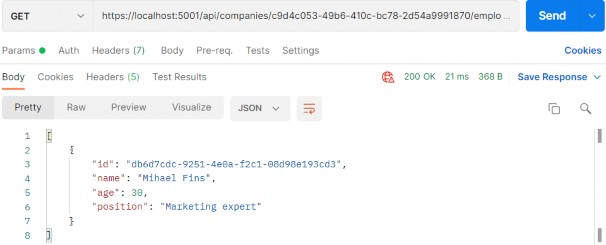
This is working great.
Now, let’s find all employees that contain the letters “ae”:
https://localhost:5001/api/companies/c9d4c053-49b6-410c-bc78-2d54a9991870/employees?searchTerm=ae
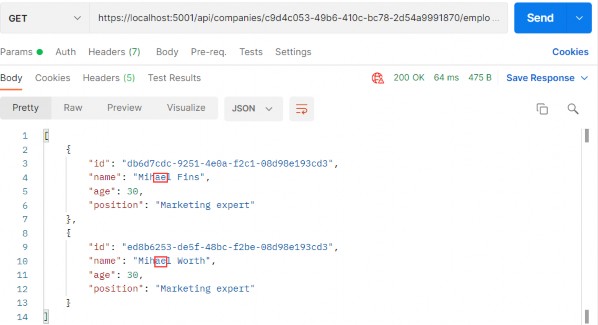
Great. One more request with the paging and filtering:

And this works as well.
That’s it! We’ve successfully implemented and tested our search functionality.
If we check the Headers tab for each request, we will find valid x- pagination as well.
19 SORTING
In this chapter, we’re going to talk about sorting in ASP.NET Core Web API. Sorting is a commonly used mechanism that every API should implement. Implementing it in ASP.NET Core is not difficult due to the flexibility of LINQ and good integration with EF Core.
So, let’s talk a bit about sorting.
19.1 What is Sorting?
Sorting, in this case, refers to ordering our results in a preferred way using our query string parameters. We are not talking about sorting algorithms nor are we going into the how’s of implementing a sorting algorithm.
What we’re interested in, however, is how do we make our API sort our results the way we want it to.
Let’s say we want our API to sort employees by their name in ascending order, and then by their age.
To do that, our API call needs to look something like this:
https://localhost:5001/api/companies/companyId/employees?orderBy=name,age desc
Our API needs to consider all the parameters and sort our results accordingly. In our case, this means sorting results by their name; then, if there are employees with the same name, sorting them by the age property.
So, these are our employees for the IT_Solutions Ltd company:
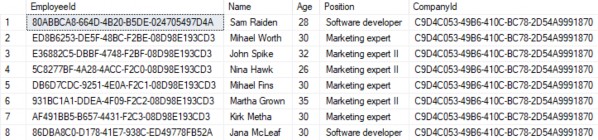
For the sake of demonstrating this example (sorting by name and then by age), we are going to add one more Jana McLeaf to our database with the age of 27. You can add whatever you want to test the results:
https://localhost:5001/api/companies/C9D4C053-49B6-410C-BC78-2D54A9991870/employees
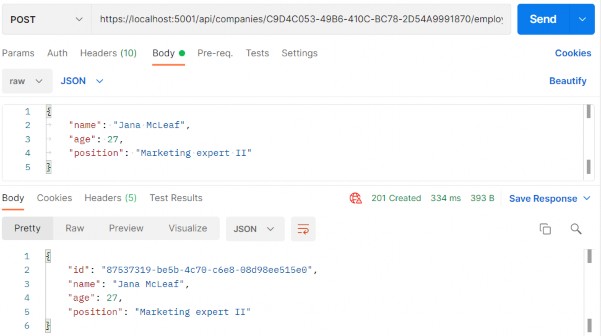
Great, now we have the required data to test our functionality properly.
And of course, like with all other functionalities we have implemented so far (paging, filtering, and searching), we need to implement this to work well with everything else. We should be able to get the paginated, filtered, and sorted data, for example.
Let’s see one way to go around implementing this.
19.2 How to Implement Sorting in ASP.NET Core Web API
As with everything else so far, first, we need to extend our RequestParameters class to be able to send requests with the orderBy clause in them:
public class RequestParameters { const int maxPageSize = 50; public int PageNumber { get; set; } = 1; private int _pageSize = 10; public int PageSize { get { return _pageSize; } set { _pageSize = (value > maxPageSize) ? maxPageSize : value; } } public string? OrderBy { get; set; } }As you can see, the only thing we’ve added is the OrderBy property and we added it to the RequestParameters class because we can reuse it for other entities. We want to sort our results by name, even if it hasn’t been stated explicitly in the request.
That said, let’s modify the EmployeeParameters class to enable the default sorting condition for Employee if none was stated:
public class EmployeeParameters : RequestParameters { public EmployeeParameters() => OrderBy = "name"; public uint MinAge { get; set; } public uint MaxAge { get; set; } = int.MaxValue; public bool ValidAgeRange => MaxAge > MinAge; public string? SearchTerm { get; set; } }Next, we’re going to dive right into the implementation of our sorting mechanism, or rather, our ordering mechanism.
One thing to note is that we’ll be using the System.Linq.Dynamic.Core NuGet package to dynamically create our OrderBy query on the fly. So, feel free to install it in the Repository project and add a using directive in the RepositoryEmployeeExtensions class:
using System.Linq.Dynamic.Core;Now, we can add the new extension method Sort in our RepositoryEmployeeExtensions class:
public static IQueryable<Employee> Sort(this IQueryable<Employee> employees, string orderByQueryString) { if (string.IsNullOrWhiteSpace(orderByQueryString)) return employees.OrderBy(e => e.Name); var orderParams = orderByQueryString.Trim().Split(','); var propertyInfos = typeof(Employee).GetProperties(BindingFlags.Public | BindingFlags.Instance); var orderQueryBuilder = new StringBuilder(); foreach (var param in orderParams) { if (string.IsNullOrWhiteSpace(param)) continue; var propertyFromQueryName = param.Split(" ")[0]; var objectProperty = propertyInfos.FirstOrDefault(pi => pi.Name.Equals(propertyFromQueryName, StringComparison.InvariantCultureIgnoreCase)); if (objectProperty == null) continue; var direction = param.EndsWith(" desc") ? "descending" : "ascending"; orderQueryBuilder.Append($"{objectProperty.Name.ToString()} {direction}, "); } var orderQuery = orderQueryBuilder.ToString().TrimEnd(',', ' '); if (string.IsNullOrWhiteSpace(orderQuery)) return employees.OrderBy(e => e.Name); return employees.OrderBy(orderQuery); }Okay, there are a lot of things going on here, so let’s take it step by step and see what exactly we've done.
19.3 Implementation – Step by Step
First, let start with the method definition. It has two arguments — one for the list of employees as IQueryable
https://localhost:5001/api/companies/companyId/employees?or derBy=name,age desc,
our orderByQueryString will be name,age desc.
We begin by executing some basic check against the orderByQueryString. If it is null or empty, we just return the same collection ordered by name.
if (string.IsNullOrWhiteSpace(orderByQueryString))
return employees.OrderBy(e => e.Name);Next, we are splitting our query string to get the individual fields:
var orderParams = orderByQueryString.Trim().Split(',');We’re also using a bit of reflection to prepare the list of PropertyInfo objects that represent the properties of our Employee class. We need them to be able to check if the field received through the query string exists in the Employee class:
var propertyInfos = typeof(Employee).GetProperties(BindingFlags.Public | BindingFlags.Instance);That prepared, we can actually run through all the parameters and check for their existence:
if (string.IsNullOrWhiteSpace(param)) continue; var propertyFromQueryName = param.Split(" ")[0]; var objectProperty = propertyInfos.FirstOrDefault(pi => pi.Name.Equals(propertyFromQueryName, StringComparison.InvariantCultureIgnoreCase));If we don’t find such a property, we skip the step in the foreach loop and go to the next parameter in the list:
if (objectProperty == null)
continue;If we do find the property, we return it and additionally check if our parameter contains “desc” at the end of the string. We use that to decide how we should order our property:
var direction = param.EndsWith(" desc") ? "descending" : "ascending";We use the StringBuilder to build our query with each loop:
orderQueryBuilder.Append($"{objectProperty.Name.ToString()} {direction}, ");Now that we’ve looped through all the fields, we are just removing excess commas and doing one last check to see if our query indeed has something in it:
var orderQuery = orderQueryBuilder.ToString().TrimEnd(',', ' '); if (string.IsNullOrWhiteSpace(orderQuery)) return employees.OrderBy(e => e.Name);Finally, we can order our query:
return employees.OrderBy(orderQuery);At this point, the orderQuery variable should contain the “Name ascending, DateOfBirth descending” string. That means it will order our results first by Name in ascending order, and then by DateOfBirth in descending order.
The standard LINQ query for this would be:
employees.OrderBy(e => e.Name).ThenByDescending(o => o.Age);This is a neat little trick to form a query when you don’t know in advance how you should sort.
Once we have done this, all we have to do is to modify the GetEmployeesAsync repository method:
public async Task<PagedList<Employee>> GetEmployeesAsync(Guid companyId, EmployeeParameters employeeParameters, bool trackChanges) { var employees = await FindByCondition(e => e.CompanyId.Equals(companyId), trackChanges) .FilterEmployees(employeeParameters.MinAge, employeeParameters.MaxAge).Search(employeeParameters.SearchTerm) .Sort(employeeParameters.OrderBy) .ToListAsync(); return PagedList<Employee> .ToPagedList(employees, employeeParameters.PageNumber, employeeParameters.PageSize); }
And that’s it! We can test this functionality now.
19.4 Testing Our Implementation
First, let’s try out the query we’ve been using as an example:
https://localhost:5001/api/companies/C9D4C053-49B6-410C-BC78- 2D54A9991870/employees?orderBy=name,age desc
And this is the result:

We can see that this list is sorted by Name ascending. Since we have two Jana’s, they were sorted by Age descending.
We have prepared additional requests which you can use to test this functionality with Postman. So, feel free to do it.
19.5 Improving the Sorting Functionality
Right now, sorting only works with the Employee entity, but what about the Company? It is obvious that we have to change something in our implementation if we don’t want to repeat our code while implementing sorting for the Company entity.
That said, let’s modify the Sort extension method:
public static IQueryable<Employee> Sort(this IQueryable<Employee> employees, string orderByQueryString) { if (string.IsNullOrWhiteSpace(orderByQueryString)) return employees.OrderBy(e => e.Name); var orderQuery = OrderQueryBuilder.CreateOrderQuery<Employee>(orderByQueryString); if (string.IsNullOrWhiteSpace(orderQuery)) return employees.OrderBy(e => e.Name); return employees.OrderBy(orderQuery); }So, we are extracting a logic that can be reused in the CreateOrderQuery
Let’s create a Utility folder in the Extensions folder with the new class OrderQueryBuilder:
Now, let’s modify that class:
public static class OrderQueryBuilder { public static string CreateOrderQuery<T>(string orderByQueryString) { var orderParams = orderByQueryString.Trim().Split(','); var propertyInfos = typeof(T).GetProperties(BindingFlags.Public | BindingFlags.Instance); var orderQueryBuilder = new StringBuilder();foreach (var param in orderParams) { if (string.IsNullOrWhiteSpace(param)) continue; var propertyFromQueryName = param.Split(" ")[0]; var objectProperty = propertyInfos.FirstOrDefault(pi => pi.Name.Equals(propertyFromQueryName, StringComparison.InvariantCultureIgnoreCase)); if (objectProperty == null) continue; var direction = param.EndsWith(" desc") ? "descending" : "ascending"; orderQueryBuilder.Append($"{objectProperty.Name.ToString()} {direction}, "); } var orderQuery = orderQueryBuilder.ToString().TrimEnd(',', ' '); return orderQuery; } }
And there we go. Not too many changes, but we did a great job here. You can test this solution with the prepared requests in Postman and you'll get the same result for sure:
But now, this functionality is reusable.
20 DATA SHAPING
In this chapter, we are going to talk about a neat concept called data shaping and how to implement it in ASP.NET Core Web API. To achieve that, we are going to use similar tools to the previous section. Data shaping is not something that every API needs, but it can be very useful in some cases.
Let’s start by learning what data shaping is exactly.
20.1 What is Data Shaping?
Data shaping is a great way to reduce the amount of traffic sent from the API to the client. It enables the consumer of the API to select (shape) the data by choosing the fields through the query string.
What this means is something like:
https://localhost:5001/api/companies/companyId/employees?fi elds=name,age
By giving the consumer a way to select just the fields it needs, we can potentially reduce the stress on the API. On the other hand, this is not something every API needs, so we need to think carefully and decide whether we should implement its implementation because it has a bit of reflection in it.
And we know for a fact that reflection takes its toll and slows our application down.
Finally, as always, data shaping should work well together with the concepts we’ve covered so far – paging, filtering, searching, and sorting.
First, we are going to implement an employee-specific solution to data shaping. Then we are going to make it more generic, so it can be used by any entity or any API.
Let’s get to work.
20.2 How to Implement Data Shaping
First things first, we need to extend our RequestParameters class since we are going to add a new feature to our query string and we want it to be available for any entity:
public string? Fields { get; set; }We’ve added the Fields property and now we can use fields as a query string parameter.
Let’s continue by creating a new interface in the Contracts project:
public interface IDataShaper<T> { IEnumerable<ExpandoObject> ShapeData(IEnumerable<T> entities, string fieldsString); ExpandoObject ShapeData(T entity, string fieldsString); }The IDataShaper defines two methods that should be implemented — one for the single entity and one for the collection of entities. Both are named ShapeData, but they have different signatures.
Notice how we use the ExpandoObject from System.Dynamic namespace as a return type. We need to do that to shape our data the way we want it.
To implement this interface, we are going to create a new DataShaping folder in the Service project and add a new DataShaper class:
public class DataShaper<T> : IDataShaper<T> where T : class { public PropertyInfo[] Properties { get; set; } public DataShaper() { Properties = typeof(T).GetProperties(BindingFlags.Public | BindingFlags.Instance); } public IEnumerable<ExpandoObject> ShapeData(IEnumerable<T> entities, string fieldsString) {var requiredProperties = GetRequiredProperties(fieldsString); return FetchData(entities, requiredProperties); } public ExpandoObject ShapeData(T entity, string fieldsString) { var requiredProperties = GetRequiredProperties(fieldsString); return FetchDataForEntity(entity, requiredProperties); } private IEnumerable<PropertyInfo> GetRequiredProperties(string fieldsString) { var requiredProperties = new List<PropertyInfo>(); if (!string.IsNullOrWhiteSpace(fieldsString)) { var fields = fieldsString.Split(',', StringSplitOptions.RemoveEmptyEntries); foreach (var field in fields) { var property = Properties .FirstOrDefault(pi => pi.Name.Equals(field.Trim(), StringComparison.InvariantCultureIgnoreCase)); if (property == null) continue; requiredProperties.Add(property); } } else { requiredProperties = Properties.ToList(); } return requiredProperties; }private IEnumerable<ExpandoObject> FetchData(IEnumerable<T> entities, IEnumerable<PropertyInfo> requiredProperties) { var shapedData = new List<ExpandoObject>(); foreach (var entity in entities) { var shapedObject = FetchDataForEntity(entity, requiredProperties); shapedData.Add(shapedObject); } return shapedData; } private ExpandoObject FetchDataForEntity(T entity, IEnumerable<PropertyInfo> requiredProperties) { var shapedObject = new ExpandoObject();foreach (var property in requiredProperties) { var objectPropertyValue = property.GetValue(entity); shapedObject.TryAdd(property.Name, objectPropertyValue); } return shapedObject; } }We need these namespaces to be included as well:
using Contracts;
using System.Dynamic;
using System.Reflection;There is quite a lot of code in our class, so let’s break it down.
20.3 Step-by-Step Implementation
We have one public property in this class – Properties. It’s an array of PropertyInfo’s that we’re going to pull out of the input type, whatever it is — Company or Employee in our case:
public PropertyInfo[] Properties { get; set; } public DataShaper() { Properties = typeof(T).GetProperties(BindingFlags.Public | BindingFlags.Instance); }So, here it is. In the constructor, we get all the properties of an input class.
Next, we have the implementation of our two public ShapeData methods:
public IEnumerable<ExpandoObject> ShapeData(IEnumerable<T> entities, string fieldsString) { var requiredProperties = GetRequiredProperties(fieldsString); return FetchData(entities, requiredProperties); } public ExpandoObject ShapeData(T entity, string fieldsString) { var requiredProperties = GetRequiredProperties(fieldsString); return FetchDataForEntity(entity, requiredProperties); }Both methods rely on the GetRequiredProperties method to parse the input string that contains the fields we want to fetch.
The GetRequiredProperties method does the magic. It parses the input string and returns just the properties we need to return to the controller:
private IEnumerable<PropertyInfo> GetRequiredProperties(string fieldsString) { var requiredProperties = new List<PropertyInfo>(); if (!string.IsNullOrWhiteSpace(fieldsString)) { var fields = fieldsString.Split(',', StringSplitOptions.RemoveEmptyEntries); foreach (var field in fields) { var property = Properties .FirstOrDefault(pi => pi.Name.Equals(field.Trim(), StringComparison.InvariantCultureIgnoreCase)); if (property == null) continue; requiredProperties.Add(property); } } else { requiredProperties = Properties.ToList(); } return requiredProperties; }There’s nothing special about it. If the fieldsString is not empty, we split it and check if the fields match the properties in our entity. If they do, we add them to the list of required properties.
On the other hand, if the fieldsString is empty, all properties are required.
Now, FetchData and FetchDataForEntity are the private methods to extract the values from these required properties we’ve prepared.
The FetchDataForEntity method does it for a single entity:
private ExpandoObject FetchDataForEntity(T entity, IEnumerable<PropertyInfo> requiredProperties) { var shapedObject = new ExpandoObject();foreach (var property in requiredProperties) { var objectPropertyValue = property.GetValue(entity); shapedObject.TryAdd(property.Name, objectPropertyValue); } return shapedObject; }Here, we loop through the requiredProperties parameter. Then, using a bit of reflection, we extract the values and add them to our ExpandoObject. ExpandoObject implements IDictionary<string,object>, so we can use the TryAdd method to add our property using its name as a key and the value as a value for the dictionary.
This way, we dynamically add just the properties we need to our dynamic object.
The FetchData method is just an implementation for multiple objects. It utilizes the FetchDataForEntity method we’ve just implemented:
private IEnumerable<ExpandoObject> FetchData(IEnumerable<T> entities, IEnumerable<PropertyInfo> requiredProperties) { var shapedData = new List<ExpandoObject>(); foreach (var entity in entities) { var shapedObject = FetchDataForEntity(entity, requiredProperties); shapedData.Add(shapedObject); } return shapedData; }To continue, let’s register the DataShaper class in the IServiceCollection in the Program class:
builder.Services.AddScoped<IDataShaper<EmployeeDto>, DataShaper<EmployeeDto>>();During the service registration, we provide the type to work with.
Because we want to use the DataShaper class inside the service classes, we have to modify the constructor of the ServiceManager class first:
public ServiceManager(IRepositoryManager repositoryManager, ILoggerManager logger, IMapper mapper, IDataShaper<EmployeeDto> dataShaper) { _companyService = new Lazy<ICompanyService>(() => new CompanyService(repositoryManager, logger, mapper)); _employeeService = new Lazy<IEmployeeService>(() => new EmployeeService(repositoryManager, logger, mapper, dataShaper)); }We are going to use it only in the EmployeeService class.
Next, let’s add one more field and modify the constructor in the EmployeeService class:
...
private readonly IDataShaper<EmployeeDto> _dataShaper; public EmployeeService(IRepositoryManager repository, ILoggerManager logger, IMapper mapper, IDataShaper<EmployeeDto> dataShaper) { _repository = repository; _logger = logger; _mapper = mapper; _dataShaper = dataShaper; }Let’s also modify the GetEmployeesAsync method of the same class:
public async Task<(IEnumerable<ExpandoObject> employees, MetaData metaData)> GetEmployeesAsync (Guid companyId, EmployeeParameters employeeParameters, bool trackChanges) { if (!employeeParameters.ValidAgeRange) throw new MaxAgeRangeBadRequestException(); await CheckIfCompanyExists(companyId, trackChanges); var employeesWithMetaData = await _repository.Employee .GetEmployeesAsync(companyId, employeeParameters, trackChanges); var employeesDto = _mapper.Map<IEnumerable<EmployeeDto>>(employeesWithMetaData); var shapedData = _dataShaper.ShapeData(employeesDto, employeeParameters.Fields); return (employees: shapedData, metaData: employeesWithMetaData.MetaData); }We have changed the method signature so, we have to modify the interface as well:
Task<(IEnumerable<ExpandoObject> employees, MetaData metaData)> GetEmployeesAsync(Guid companyId, EmployeeParameters employeeParameters, bool trackChanges);Now, we can test our solution:
https://localhost:5001/api/companies/C9D4C053-49B6-410C-BC78-2D54A9991870/employees?fields=name,age

It works great.
Let’s also test this solution by combining all the functionalities that we’ve implemented in the previous chapters:
https://localhost:5001/api/companies/C9D4C053-49B6-410C-BC78-2D54A9991870/employees?pageNumber=1&pageSize=4&minAge=26&maxAge=32&searchTerm=A&orderBy=name desc&fields=name,age
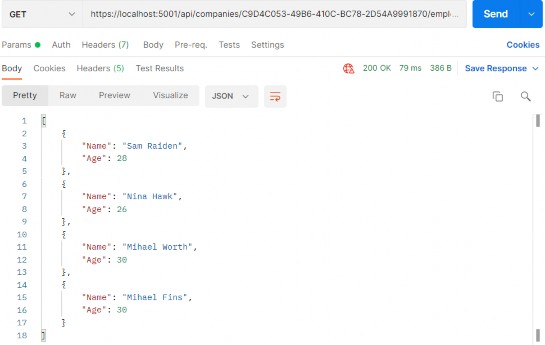
Excellent. Everything is working like a charm.
20.4 Resolving XML Serialization Problems
Let’s send the same request one more time, but this time with the different accept header (text/xml):

It works — but it looks pretty ugly and unreadable. But that’s how the XmlDataContractSerializerOutputFormatter serializes our ExpandoObject by default.
We can fix that, but the logic is out of the scope of this book. Of course, we have implemented the solution in our source code. So, if you want, you can use it in your project.
All you have to do is to create the Entity class and copy the content from our Entity class that resides in the Entities/Models folder.
After that, just modify the IDataShaper interface and the DataShaper class by using the Entity type instead of the ExpandoObject type. Also, you have to do the same thing for the IEmployeeService interface and the EmployeeService class. Again, you can check our implementation if you have any problems.
After all those changes, once we send the same request, we are going to see a much better result:
https://localhost:5001/api/companies/C9D4C053-49B6-410C-BC78-2D54A9991870/employees?pageNumber=1&pageSize=4&minAge=26&maxAge=32&searchTerm=A&orderBy=name desc&fields=name,age
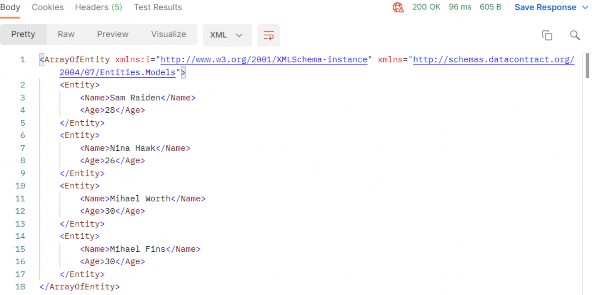
If XML serialization is not important to you, you can keep using ExpandoObject — but if you want a nicely formatted XML response, this is the way to go.
To sum up, data shaping is an exciting and neat little feature that can make our APIs flexible and reduce our network traffic. If we have a high- volume traffic API, data shaping should work just fine. On the other hand, it’s not a feature that we should use lightly because it utilizes reflection and dynamic typing to get things done.
As with all other functionalities, we need to be careful when and if we should implement data shaping. Performance tests might come in handy even if we do implement it.
21 SUPPORTING HATEOAS
In this section, we are going to talk about one of the most important concepts in building RESTful APIs — HATEOAS and learn how to implement HATEOAS in ASP.NET Core Web API. This part relies heavily on the concepts we've implemented so far in paging, filtering, searching, sorting, and especially data shaping and builds upon the foundations we've put down in these parts.
21.1 What is HATEOAS and Why is it so Important?
HATEOAS (Hypermedia as the Engine of Application State) is a very important REST constraint. Without it, a REST API cannot be considered RESTful and many of the benefits we get by implementing a REST architecture are unavailable.
Hypermedia refers to any kind of content that contains links to media types such as documents, images, videos, etc.
REST architecture allows us to generate hypermedia links in our responses dynamically and thus make navigation much easier. To put this into perspective, think about a website that uses hyperlinks to help you navigate to different parts of it. You can achieve the same effect with HATEOAS in your REST API.
Imagine a website that has a home page and you land on it, but there are no links anywhere. You need to scrape the website or find some other way to navigate it to get to the content you want. We're not saying that the website is the same as a REST API, but you get the point.
The power of being able to explore an API on your own can be very useful.
Let's see how that works.
21.1.1 Typical Response with HATEOAS Implemented
Once we implement HATEOAS in our API, we are going to have this type of response:
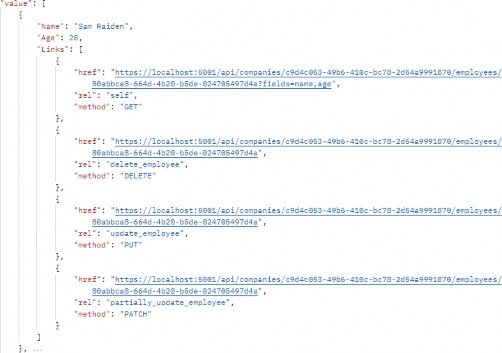
As you can see, we got the list of our employees and for each employee all the actions we can perform on them. And so on...
So, it's a nice way to make an API self-discoverable and evolvable.
21.1.2 What is a Link?
According to RFC5988, a link is "a typed connection between two resources that are identified by Internationalised Resource Identifiers (IRIs)". Simply put, we use links to traverse the internet or rather the resources on the internet.
Our responses contain an array of links, which consist of a few properties according to the RFC:
• href - represents a target URI.
• rel - represents a link relation type, which means it describes how the current context is related to the target resource.
• method - we need an HTTP method to know how to distinguish the same target URIs.
21.1.3 Pros/Cons of Implementing HATEOAS
So, what are all the benefits we can expect when implementing HATEOAS?
HATEOAS is not trivial to implement, but the rewards we reap are worth it. Here are the things we can expect to get when we implement HATEOAS:
• API becomes self-discoverable and explorable.
• A client can use the links to implement its logic, it becomes much easier, and any changes that happen in the API structure are directly reflected onto the client.
• The server drives the application state and URL structure and not vice versa.
• The link relations can be used to point to the developer’s documentation.
• Versioning through hyperlinks becomes easier.
• Reduced invalid state transaction calls.
• API is evolvable without breaking all the clients.
We can do so much with HATEOAS. But since it's not easy to implement all these features, we should keep in mind the scope of our API and if we need all this. There is a great difference between a high-volume public API and some internal API that is needed to communicate between parts of the same system.
That is more than enough theory for now. Let's get to work and see what the concrete implementation of HATEOAS looks like.
21.2 Adding Links in the Project
Let’s begin with the concept we know so far, and that’s the link. In the Entities project, we are going to create the LinkModels folder and inside a new Link class:
public class Link { public string? Href { get; set; } public string? Rel { get; set; } public string? Method { get; set; } public Link() { } public Link(string href, string rel, string method) { Href = href; Rel = rel; Method = method; } }Note that we have an empty constructor, too. We'll need that for XML serialization purposes, so keep it that way.
Next, we need to create a class that will contain all of our links — LinkResourceBase:
public class LinkResourceBase { public LinkResourceBase() {} public List<Link> Links { get; set; } = new List<Link>(); }And finally, since our response needs to describe the root of the controller, we need a wrapper for our links:
public class LinkCollectionWrapper<T> : LinkResourceBase { public List<T> Value { get; set; } = new List<T>(); public LinkCollectionWrapper() { } public LinkCollectionWrapper(List<T> value) => Value = value; }This class might not make too much sense right now, but stay with us and it will become clear later down the road. For now, let's just assume we wrapped our links in another class for response representation purposes.
Since our response will contain links too, we need to extend the XML serialization rules so that our XML response returns the properly formatted links. Without this, we would get something like:
<Links>System.Collections.Generic.List1[Entites.Models.Link]
private void WriteLinksToXml(string key, object value, XmlWriter writer) { writer.WriteStartElement(key); if (value.GetType() == typeof(List<Link>)) { foreach (var val in value as List<Link>) { writer.WriteStartElement(nameof(Link)); WriteLinksToXml(nameof(val.Href), val.Href, writer); WriteLinksToXml(nameof(val.Method), val.Method, writer); WriteLinksToXml(nameof(val.Rel), val.Rel, writer); writer.WriteEndElement(); } } else { writer.WriteString(value.ToString()); } writer.WriteEndElement(); }So, we check if the type is List. If it is, we iterate through all the links and call the method recursively for each of the properties: href, method, and rel.
That's all we need for now. We have a solid foundation to implement HATEOAS in our project.
21.3 Additional Project Changes
When we generate links, HATEOAS strongly relies on having the ids available to construct the links for the response. Data shaping, on the other hand, enables us to return only the fields we want. So, if we want only the name and age fields, the id field won’t be added. To solve that, we have to apply some changes.
The first thing we are going to do is to add a ShapedEntity class in the Entities/Models folder:
public class ShapedEntity { public ShapedEntity() { Entity = new Entity(); } public Guid Id { get; set; } public Entity Entity { get; set; } }With this class, we expose the Entity and the Id property as well.
Now, we have to modify the IDataShaper interface and the DataShaper class by replacing all Entity usage with ShapedEntity.
In addition to that, we need to extend the FetchDataForEntity method in the DataShaper class to get the id separately:
private ShapedEntity FetchDataForEntity(T entity, IEnumerable<PropertyInfo> requiredProperties) { var shapedObject = new ShapedEntity(); foreach (var property in requiredProperties) { var objectPropertyValue = property.GetValue(entity); shapedObject.Entity.TryAdd(property.Name, objectPropertyValue); } var objectProperty = entity.GetType().GetProperty("Id"); shapedObject.Id = (Guid)objectProperty.GetValue(entity); return shapedObject; }Finally, let’s add the LinkResponse class in the LinkModels folder; that will help us with the response once we start with the HATEOAS implementation:
public class LinkResponse
{ public bool HasLinks { get; set; } public List<Entity> ShapedEntities { get; set; } public LinkCollectionWrapper<Entity> LinkedEntities { get; set; } public LinkResponse() { LinkedEntities = new LinkCollectionWrapper<Entity>(); ShapedEntities = new List<Entity>(); } }With this class, we are going to know whether our response has links. If it does, we are going to use the LinkedEntities property. Otherwise, we are going to use the ShapedEntities property.
21.4 Adding Custom Media Types
What we want to do is to enable links in our response only if it is explicitly asked for. To do that, we are going to introduce custom media types.
Before we start, let’s see how we can create a custom media type. A custom media type should look something like this: application/vnd.codemaze.hateoas+json. To compare it to the typical json media type which we use by default: application/json.
So let’s break down the different parts of a custom media type:
• vnd – vendor prefix; it’s always there.
• codemaze – vendor identifier; we’ve chosen codemaze, because why not?
• hateoas – media type name.
• json – suffix; we can use it to describe if we want json or an XML response, for example.
Now, let’s implement that in our application.
21.4.1 Registering Custom Media Types
First, we want to register our new custom media types in the middleware. Otherwise, we’ll just get a 406 Not Acceptable message.
Let’s add a new extension method to our ServiceExtensions:
public static void AddCustomMediaTypes(this IServiceCollection services) { services.Configure<MvcOptions>(config => { var systemTextJsonOutputFormatter = config.OutputFormatters .OfType<SystemTextJsonOutputFormatter>()?.FirstOrDefault(); if (systemTextJsonOutputFormatter != null) { systemTextJsonOutputFormatter.SupportedMediaTypes .Add("application/vnd.codemaze.hateoas+json"); } var xmlOutputFormatter = config.OutputFormatters .OfType<XmlDataContractSerializerOutputFormatter>()? .FirstOrDefault(); if (xmlOutputFormatter != null) { xmlOutputFormatter.SupportedMediaTypes .Add("application/vnd.codemaze.hateoas+xml"); } }); }We are registering two new custom media types for the JSON and XML output formatters. This ensures we don’t get a 406 Not Acceptable response.
Now, we have to add that to the Program class, just after the AddControllers method:
builder.Services.AddCustomMediaTypes();Excellent. The registration process is done.
21.4.2 Implementing a Media Type Validation Filter
Now, since we’ve implemented custom media types, we want our Accept header to be present in our requests so we can detect when the user requested the HATEOAS-enriched response.
To do that, we’ll implement an ActionFilter in the Presentation project inside the ActionFilters folder, which will validate our Accept header and media types:
public class ValidateMediaTypeAttribute : IActionFilter { public void OnActionExecuting(ActionExecutingContext context) { var acceptHeaderPresent = context.HttpContext .Request.Headers.ContainsKey("Accept"); if (!acceptHeaderPresent) { context.Result = new BadRequestObjectResult($"Accept header is missing."); return; } var mediaType = context.HttpContext .Request.Headers["Accept"].FirstOrDefault(); if (!MediaTypeHeaderValue.TryParse(mediaType, out MediaTypeHeaderValue? outMediaType)) { context.Result = new BadRequestObjectResult($"Media type not present. Please add Accept header with the required media type."); return; } context.HttpContext.Items.Add("AcceptHeaderMediaType", outMediaType); } public void OnActionExecuted(ActionExecutedContext context){} }We check for the existence of the Accept header first. If it’s not present, we return BadRequest. If it is, we parse the media type — and if there is no valid media type present, we return BadRequest.
Once we’ve passed the validation checks, we pass the parsed media type to the HttpContext of the controller.
Now, we have to register the filter in the Program class:
builder.Services.AddScoped<ValidateMediaTypeAttribute>();And to decorate the GetEmployeesForCompany action:
[HttpGet] [ServiceFilter(typeof(ValidateMediaTypeAttribute))] public async Task<IActionResult> GetEmployeesForCompany(Guid companyId, [FromQuery] EmployeeParameters employeeParameters)Great job.
Finally, we can work on the HATEOAS implementation.
21.5 Implementing HATEOAS
We are going to start by creating a new interface in the Contracts project:
public interface IEmployeeLinks { LinkResponse TryGenerateLinks(IEnumerable<EmployeeDto> employeesDto, string fields, Guid companyId, HttpContext httpContext); }Currently, you will get the error about HttpContext, but we will solve that a bit later.
Let’s continue by creating a new Utility folder in the main project and the EmployeeLinks class in it. Let’s start by adding the required dependencies inside the class:
public class EmployeeLinks : IEmployeeLinks { private readonly LinkGenerator _linkGenerator; private readonly IDataShaper<EmployeeDto> _dataShaper; public EmployeeLinks(LinkGenerator linkGenerator, IDataShaper<EmployeeDto> dataShaper) { _linkGenerator = linkGenerator; _dataShaper = dataShaper; } }We are going to use LinkGenerator to generate links for our responses and IDataShaper to shape our data. As you can see, the shaping logic is now extracted from the EmployeeService class, which we will modify a bit later.
After dependencies, we are going to add the first method:
public LinkResponse TryGenerateLinks(IEnumerable<EmployeeDto> employeesDto, string fields, Guid companyId, HttpContext httpContext) { var shapedEmployees = ShapeData(employeesDto, fields); if (ShouldGenerateLinks(httpContext)) return ReturnLinkdedEmployees(employeesDto, fields, companyId, httpContext, shapedEmployees); return ReturnShapedEmployees(shapedEmployees);}So, our method accepts four parameters. The employeeDto collection, the fields that are going to be used to shape the previous collection, companyId because routes to the employee resources contain the Id from the company, and httpContext which holds information about media types.
The first thing we do is shape our collection. Then if the httpContext contains the required media type, we add links to the response. On the other hand, we just return our shaped data.
Of course, we have to add those not implemented methods:
private List<Entity> ShapeData(IEnumerable<EmployeeDto> employeesDto, string fields) => _dataShaper.ShapeData(employeesDto, fields) .Select(e => e.Entity) .ToList();The ShapeData method executes data shaping and extracts only the entity part without the Id property.
Let’s add two additional methods:
private bool ShouldGenerateLinks(HttpContext httpContext) { var mediaType = (MediaTypeHeaderValue)httpContext.Items["AcceptHeaderMediaType"]; return mediaType.SubTypeWithoutSuffix.EndsWith("hateoas", StringComparison.InvariantCultureIgnoreCase); } private LinkResponse ReturnShapedEmployees(List<Entity> shapedEmployees) => new LinkResponse { ShapedEntities = shapedEmployees };In the ShouldGenerateLinks method, we extract the media type from the httpContext. If that media type ends with hateoas, the method returns true; otherwise, it returns false. The ReturnShapedEmployees method just returns a new LinkResponse with the ShapedEntities property populated. By default, the HasLinks property is false.
After these methods, we have to add the ReturnLinkedEmployees method as well:
private LinkResponse ReturnLinkdedEmployees(IEnumerable<EmployeeDto> employeesDto, string fields, Guid companyId, HttpContext httpContext, List<Entity> shapedEmployees) { var employeeDtoList = employeesDto.ToList(); for (var index = 0; index < employeeDtoList.Count(); index++) { var employeeLinks = CreateLinksForEmployee(httpContext, companyId, employeeDtoList[index].Id, fields); shapedEmployees[index].Add("Links", employeeLinks); } var employeeCollection = new LinkCollectionWrapper<Entity>(shapedEmployees); var linkedEmployees = CreateLinksForEmployees(httpContext, employeeCollection); return new LinkResponse { HasLinks = true, LinkedEntities = linkedEmployees }; }In this method, we iterate through each employee and create links for it by calling the CreateLinksForEmployee method. Then, we just add it to the shapedEmployees collection. After that, we wrap the collection and create links that are important for the entire collection by calling the CreateLinksForEmployees method.
Finally, we have to add those two new methods that create links:
private List<Link> CreateLinksForEmployee(HttpContext httpContext, Guid companyId, Guid id, string fields = "") { var links = new List<Link> { new Link(_linkGenerator.GetUriByAction(httpContext, "GetEmployeeForCompany", values: new { companyId, id, fields }), "self", "GET"), new Link(_linkGenerator.GetUriByAction(httpContext, "DeleteEmployeeForCompany", values: new { companyId, id }), "delete_employee", "DELETE"), new Link(_linkGenerator.GetUriByAction(httpContext, "UpdateEmployeeForCompany", values: new { companyId, id }), "update_employee", "PUT"), new Link(_linkGenerator.GetUriByAction(httpContext, "PartiallyUpdateEmployeeForCompany", values: new { companyId, id }), "partially_update_employee", "PATCH") }; return links;
} private LinkCollectionWrapper<Entity> CreateLinksForEmployees(HttpContext httpContext, LinkCollectionWrapper<Entity> employeesWrapper) { employeesWrapper.Links.Add(new Link(_linkGenerator.GetUriByAction(httpContext, "GetEmployeesForCompany", values: new { }), "self", "GET")); return employeesWrapper; }There are a few things to note here.
We need to consider the fields while creating the links since we might be using them in our requests. We are creating the links by using the LinkGenerator‘s GetUriByAction method — which accepts HttpContext, the name of the action, and the values that need to be used to make the URL valid. In the case of the EmployeesController, we send the company id, employee id, and fields.
And that is it regarding this class.
Now, we have to register this class in the Program class:
builder.Services.AddScoped<IEmployeeLinks, EmployeeLinks>();After the service registration, we are going to create a new record inside the Entities/LinkModels folder:
public record LinkParameters(EmployeeParameters EmployeeParameters, HttpContext Context);We are going to use this record to transfer required parameters from our controller to the service layer and avoid the installation of an additional NuGet package inside the Service and Service.Contracts projects.
Also for this to work, we have to add the reference to the Shared project, install the Microsoft.AspNetCore.Mvc.Abstractions package needed for HttpContext, and add required using directives:
using Microsoft.AspNetCore.Http;
using Shared.RequestFeatures;Now, we can return to the IEmployeeLinks interface and fix that error by importing the required namespace. As you can see, we didn’t have to install the Abstractions NuGet package since Contracts references Entities. If Visual Studio keeps asking for the package installation, just remove the Entities reference from the Contracts project and add it again.
Once that is done, we can modify the EmployeesController:
[HttpGet] [ServiceFilter(typeof(ValidateMediaTypeAttribute))] public async Task<IActionResult> GetEmployeesForCompany(Guid companyId, [FromQuery] EmployeeParameters employeeParameters) { var linkParams = new LinkParameters(employeeParameters, HttpContext); var pagedResult = await _service.EmployeeService.GetEmployeesAsync(companyId, linkParams, trackChanges: false); Response.Headers.Add("X-Pagination", JsonSerializer.Serialize(pagedResult.metaData)); return Ok(pagedResult.employees); }So, we create the linkParams variable and send it instead of employeeParameters to the service method.
Of course, this means we have to modify the IEmployeeService interface:
Task<(LinkResponse linkResponse, MetaData metaData)> GetEmployeesAsync(Guid companyId, LinkParameters linkParameters, bool trackChanges);Now the Tuple return type has the LinkResponse as the first field and also we have LinkParameters as the second parameter.
After we modified our interface, let’s modify the EmployeeService class:
private readonly IRepositoryManager _repository; private readonly ILoggerManager _logger; private readonly IMapper _mapper; private readonly IEmployeeLinks _employeeLinks; public EmployeeService(IRepositoryManager repository, ILoggerManager logger, IMapper mapper, IEmployeeLinks employeeLinks) {_repository = repository; _logger = logger; _mapper = mapper; _employeeLinks = employeeLinks; } public async Task<(LinkResponse linkResponse, MetaData metaData)> GetEmployeesAsync (Guid companyId, LinkParameters linkParameters, bool trackChanges) { if (!linkParameters.EmployeeParameters.ValidAgeRange) throw new MaxAgeRangeBadRequestException(); await CheckIfCompanyExists(companyId, trackChanges); var employeesWithMetaData = await _repository.Employee .GetEmployeesAsync(companyId, linkParameters.EmployeeParameters, trackChanges); var employeesDto = _mapper.Map<IEnumerable<EmployeeDto>>(employeesWithMetaData); var links = _employeeLinks.TryGenerateLinks(employeesDto, linkParameters.EmployeeParameters.Fields, companyId, linkParameters.Context); return (linkResponse: links, metaData: employeesWithMetaData.MetaData); }First, we don’t have the DataShaper injected anymore since this logic is now inside the EmployeeLinks class. Then, we change the method signature, fix a couple of errors since now we have linkParameters and not employeeParameters as a parameter, and we call the TryGenerateLinks method, which will return LinkResponse as a result.
Finally, we construct our Tuple and return it to the caller.
Now we can return to our controller and modify the GetEmployeesForCompany action:
[HttpGet] [ServiceFilter(typeof(ValidateMediaTypeAttribute))] public async Task<IActionResult> GetEmployeesForCompany(Guid companyId, [FromQuery] EmployeeParameters employeeParameters) { var linkParams = new LinkParameters(employeeParameters, HttpContext); var result = await _service.EmployeeService.GetEmployeesAsync(companyId, linkParams, trackChanges: false); Response.Headers.Add("X-Pagination", JsonSerializer.Serialize(result.metaData));return result.linkResponse.HasLinks ? Ok(result.linkResponse.LinkedEntities) : Ok(result.linkResponse.ShapedEntities); }We change the pageResult variable name to result and use it to return the proper response to the client. If our result has links, we return linked entities, otherwise, we return shaped ones.
Before we test this, we shouldn’t forget to modify the ServiceManager’s constructor:
public ServiceManager(IRepositoryManager repositoryManager, ILoggerManager logger, IMapper mapper, IEmployeeLinks employeeLinks) { _companyService = new Lazy<ICompanyService>(() => new CompanyService(repositoryManager, logger, mapper)); _employeeService = new Lazy<IEmployeeService>(() => new EmployeeService(repositoryManager, logger, mapper, employeeLinks)); }Excellent. We can test this now:
https://localhost:5001/api/companies/C9D4C053-49B6-410C-BC78-2D54A9991870/employees?pageNumber=1&pageSize=4&minAge=26&maxAge=32&searchTerm=A&orderBy=namedesc&fields=name,age
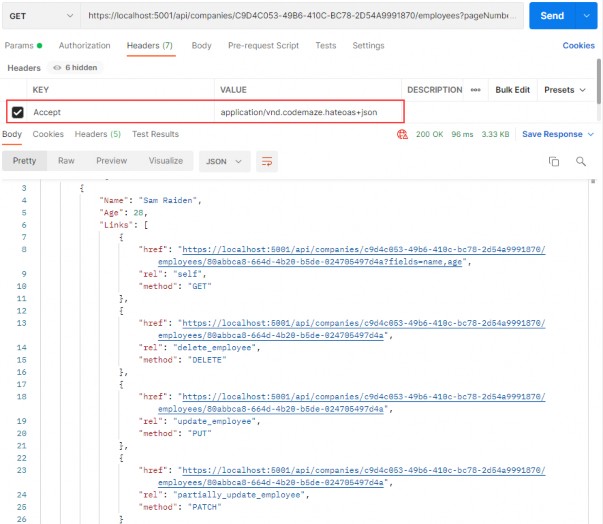
You can test this with the xml media type as well (we have prepared the request in Postman for you).
22 WORKING WITH OPTIONS AND HEAD REQUESTS
In one of the previous chapters (Method Safety and Method Idempotency), we talked about different HTTP requests. Until now, we have been working with all request types except OPTIONS and HEAD. So, let’s cover them as well.
22.1 OPTIONS HTTP Request
The Options request can be used to request information on the communication options available upon a certain URI. It allows consumers to determine the options or different requirements associated with a resource. Additionally, it allows us to check the capabilities of a server without forcing action to retrieve a resource.
Basically, Options should inform us whether we can Get a resource or execute any other action (POST, PUT, or DELETE). All of the options should be returned in the Allow header of the response as a comma- separated list of methods.
Let’s see how we can implement the Options request in our example.
22.2 OPTIONS Implementation
We are going to implement this request in the CompaniesController — so, let’s open it and add a new action:
[HttpOptions] public IActionResult GetCompaniesOptions() { Response.Headers.Add("Allow", "GET, OPTIONS, POST"); return Ok(); }We have to decorate our action with the HttpOptions attribute. As we said, the available options should be returned in the Allow response header, and that is exactly what we are doing here. The URI for this action is /api/companies, so we state which actions can be executed for that certain URI. Finally, the Options request should return the 200 OK status code. We have to understand that the response, if it is empty, must include the content-length field with the value of zero. We don’t have to add it by ourselves because ASP.NET Core takes care of that for us.
Let’s try this:
https://localhost:5001/api/companies
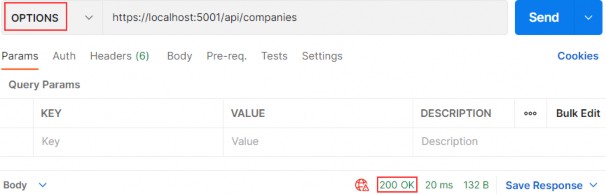
As you can see, we are getting a 200 OK response. Let’s inspect the Headers tab:
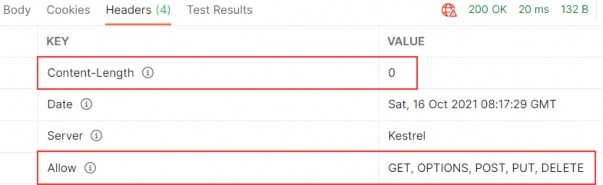
Everything works as expected.
Let’s move on.
22.3 Head HTTP Request
The Head is identical to Get but without a response body. This type of request could be used to obtain information about validity, accessibility, and recent modifications of the resource.
22.4 HEAD Implementation
Let’s open the EmployeesController, because that’s where we are going to implement this type of request. As we said, the Head request must return the same response as the Get request — just without the response body. That means it should include the paging information in the response as well.
Now, you may think that we have to write a completely new action and also repeat all the code inside, but that is not the case. All we have to do is add the HttpHead attribute below HttpGet:
[HttpGet] [HttpHead] public async Task<IActionResult> GetEmployeesForCompany(Guid companyId, [FromQuery] EmployeeParameters employeeParameters)We can test this now:
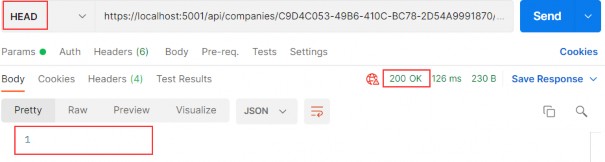
As you can see, we receive a 200 OK status code with the empty body.Let’s check the Headers part:

You can see the X-Pagination link included in the Headers part of the response. Additionally, all the parts of the X-Pagination link are populated — which means that our code was successfully executed, but the response body hasn’t been included.
Excellent.
We now have support for the Http OPTIONS and HEAD requests.
23 ROOT DOCUMENT
In this section, we are going to create a starting point for the consumers of our API. This starting point is also known as the Root Document. The Root Document is the place where consumers can learn how to interact with the rest of the API.
23.1 Root Document Implementation
This document should be created at the api root, so let’s start by creating a new controller:
[Route("api")] [ApiController] public class RootController : ControllerBase { }We are going to generate links towards the API actions. Therefore, we have to inject LinkGenerator:
[Route("api")] [ApiController] public class RootController : ControllerBase { private readonly LinkGenerator _linkGenerator; public RootController(LinkGenerator linkGenerator) => _linkGenerator = linkGenerator; }In this controller, we only need a single action, GetRoot, which will be executed with the GET request on the /api URI.
There are several links that we are going to create in this action. The link to the document itself and links to actions available on the URIs at the root level (actions from the Companies controller). We are not creating links to employees, because they are children of the company — and in our API if we want to fetch employees, we have to fetch the company first.
If we inspect our CompaniesController, we can see that GetCompanies and CreateCompany are the only actions on the root URI level (api/companies). Therefore, we are going to create links only to them.
Before we start with the GetRoot action, let’s add a name for the CreateCompany and GetCompanies actions in the CompaniesController:
[HttpGet(Name = "GetCompanies")] public async Task<IActionResult> GetCompanies()
[HttpPost(Name = "CreateCompany")] [ServiceFilter(typeof(ValidationFilterAttribute))] public async Task<IActionResult> CreateCompany([FromBody]CompanyForCreationDto company)
We are going to use the Link class to generate links:
public class Link { public string Href { get; set; } public string Rel { get; set; } public string Method { get; set; } … }This class contains all the required properties to describe our actions while creating links in the GetRoot action. The Href property defines the URI to the action, the Rel property defines the identification of the action type, and the Method property defines which HTTP method should be used for that action.
Now, we can create the GetRoot action:
[HttpGet(Name = "GetRoot")] public IActionResult GetRoot([FromHeader(Name = "Accept")] string mediaType) { if(mediaType.Contains("application/vnd.codemaze.apiroot")) { var list = new List<Link> { new Link { Href = _linkGenerator.GetUriByName(HttpContext, nameof(GetRoot), new {}), Rel = "self", Method = "GET" }, new Link { Href = _linkGenerator.GetUriByName(HttpContext, "GetCompanies", new {}), Rel = "companies", Method = "GET" }, new Link{ Href = _linkGenerator.GetUriByName(HttpContext, "CreateCompany", new {}), Rel = "create_company", Method = "POST" } }; return Ok(list); } return NoContent(); }In this action, we generate links only if a custom media type is provided from the Accept header. Otherwise, we return NoContent(). To generate links, we use the GetUriByName method from the LinkGenerator class.
That said, we have to register our custom media types for the json and xml formats. To do that, we are going to extend the AddCustomMediaTypes extension method:
public static void AddCustomMediaTypes(this IServiceCollection services) { services.Configure<MvcOptions>(config => { var systemTextJsonOutputFormatter = config.OutputFormatters .OfType<SystemTextJsonOutputFormatter>()?.FirstOrDefault(); if (systemTextJsonOutputFormatter != null) { systemTextJsonOutputFormatter.SupportedMediaTypes .Add("application/vnd.codemaze.hateoas+json"); systemTextJsonOutputFormatter.SupportedMediaTypes .Add("application/vnd.codemaze.apiroot+json"); } var xmlOutputFormatter = config.OutputFormatters .OfType<XmlDataContractSerializerOutputFormatter>()? .FirstOrDefault(); if (xmlOutputFormatter != null) { xmlOutputFormatter.SupportedMediaTypes .Add("application/vnd.codemaze.hateoas+xml"); xmlOutputFormatter.SupportedMediaTypes .Add("application/vnd.codemaze.apiroot+xml"); } }); }We can now inspect our result:
https://localhost:5001/api
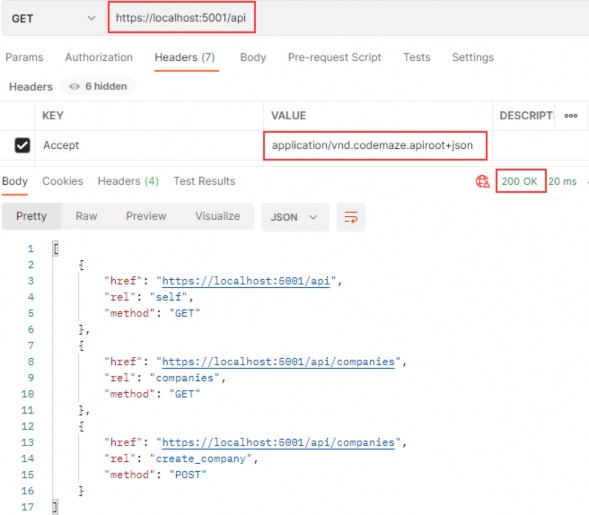
This works great.
Let’s test what is going to happen if we don’t provide the custom media type:
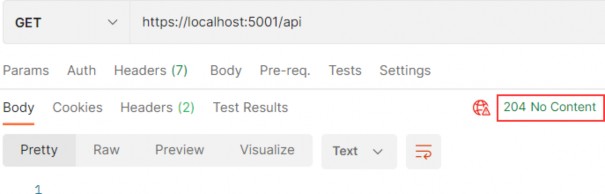
Well, we get the 204 No Content message as expected. Of course, you can test the xml request as well:
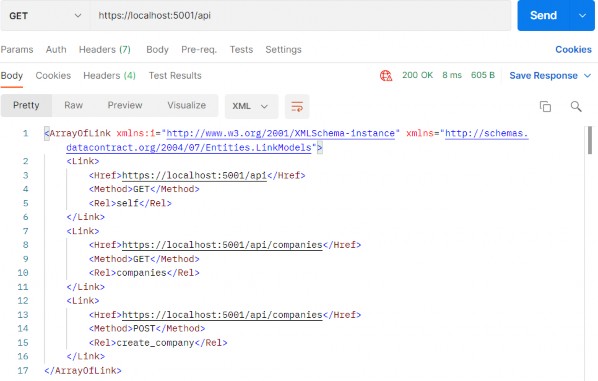
Great.
Now we can move on to the versioning chapter.
24 VERSIONING APIS
As our project grows, so does our knowledge; therefore, we have a better understanding of how to improve our system. Moreover, requirements change over time — thus, our API has to change as well.
When we implement some breaking changes, we want to ensure that we don’t do anything that will cause our API consumers to change their code. Those breaking changes could be:
• Renaming fields, properties, or resource URIs.
• Changes in the payload structure.
• Modifying response codes or HTTP Verbs.
• Redesigning our API endpoints.
If we have to implement some of these changes in the already working API, the best way is to apply versioning to prevent breaking our API for the existing API consumers.
There are different ways to achieve API versioning and there is no guidance that favors one way over another. So, we are going to show you different ways to version an API, and you can choose which one suits you best.
24.1 Required Package Installation and Configuration
In order to start, we have to install the Microsoft.AspNetCore.Mvc.Versioning library in the Presentation project:

This library is going to help us a lot in versioning our API.
After the installation, we have to add the versioning service in the service collection and configure it. So, let’s create a new extension method in the ServiceExtensions class:
public static void ConfigureVersioning(this IServiceCollection services) { services.AddApiVersioning(opt => { opt.ReportApiVersions = true; opt.AssumeDefaultVersionWhenUnspecified = true; opt.DefaultApiVersion = new ApiVersion(1, 0); }); }With the AddApiVersioning method, we are adding service API versioning to the service collection. We are also using a couple of properties to initially configure versioning:
• ReportApiVersions adds the API version to the response header.
• AssumeDefaultVersionWhenUnspecified does exactly that. It specifies the default API version if the client doesn’t send one.
• DefaultApiVersion sets the default version count.
After that, we are going to use this extension in the Program class:
builder.Services.ConfigureVersioning();API versioning is installed and configured, and we can move on.
24.2 Versioning Examples
Before we continue, let’s create another controller: CompaniesV2Controller (for example’s sake), which will represent a new version of our existing one. It is going to have just one Get action:
[ApiVersion("2.0")] [Route("api/companies")] [ApiController] public class CompaniesV2Controller : ControllerBase { private readonly IServiceManager _service; public CompaniesV2Controller(IServiceManager service) => _service = service; [HttpGet]public async Task<IActionResult> GetCompanies() { var companies = await _service.CompanyService .GetAllCompaniesAsync(trackChanges: false); return Ok(companies); } }By using the [ApiVersion(“2.0”)] attribute, we are stating that this controller is version 2.0.
After that, let’s version our original controller as well:
[ApiVersion("1.0")] [Route("api/companies")] [ApiController] public class CompaniesController : ControllerBaseIf you remember, we configured versioning to use 1.0 as a default API version (opt.AssumeDefaultVersionWhenUnspecified = true;). Therefore, if a client doesn’t state the required version, our API will use this one:
https://localhost:5001/api/companies
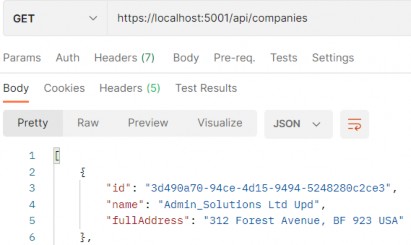
If we inspect the Headers tab of the response, we are going to find that the controller V1 was assigned for this request:
Of course, you can place a breakpoint in GetCompanies actions in both controllers and confirm which endpoint was hit.
Now, let’s see how we can provide a version inside the request.
24.2.1 Using Query String
We can provide a version within the request by using a query string in the URI. Let’s test this with an example:
https://localhost:5001/api/companies?api-version=2.0
So, we get the same response body.
But, we can inspect the response headers to make sure that version 2.0 is used:
24.2.2 Using URL Versioning
For URL versioning to work, we have to modify the route in our controller:
[ApiVersion("2.0")] [Route("api/{v:apiversion}/companies")] [ApiController] public class CompaniesV2Controller : ControllerBaseAlso, let’s just slightly modify the GetCompanies action in this controller, so we could see the difference in Postman by just inspecting the response body:
[HttpGet] public async Task<IActionResult> GetCompanies() { var companies = await _service.CompanyService .GetAllCompaniesAsync(trackChanges: false); var companiesV2 = companies.Select(x => $"{x.Name} V2"); return Ok(companiesV2); }We are creating a projection from our companies collection by iterating through each element, modifying the Name property to contain the V2 suffix, and extracting it to a new collection companiesV2.
Now, we can test it:
https://localhost:5001/api/2.0/companies
One thing to mention, we can’t use the query string pattern to call the companies v2 controller anymore. We can use it for version 1.0, though.
24.2.3 HTTP Header Versioning
If we don’t want to change the URI of the API, we can send the version in the HTTP Header. To enable this, we have to modify our configuration:
public static void ConfigureVersioning(this IServiceCollection services) { services.AddApiVersioning(opt => { opt.ReportApiVersions = true; opt.AssumeDefaultVersionWhenUnspecified = true; opt.DefaultApiVersion = new ApiVersion(1, 0); opt.ApiVersionReader = new HeaderApiVersionReader("api-version"); }); }And to revert the Route change in our controller:
[Route("api/companies")]
[ApiVersion("2.0")]Let’s test these changes:
https://localhost:5001/api/companies
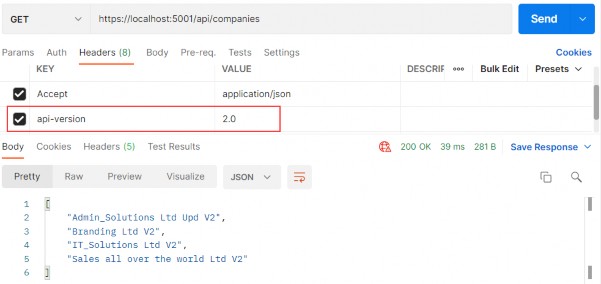
If we want to support query string versioning, we should use a new QueryStringApiVersionReader class instead:
opt.ApiVersionReader = new QueryStringApiVersionReader("api-version");24.2.4 Deprecating Versions
If we want to deprecate version of an API, but don’t want to remove it completely, we can use the Deprecated property for that purpose:
[ApiVersion("2.0", Deprecated = true)]We will be able to work with that API, but we will be notified that this version is deprecated:
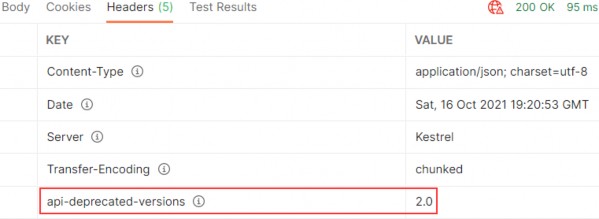
24.2.5 Using Conventions
If we have a lot of versions of a single controller, we can assign these versions in the configuration instead:
services.AddApiVersioning(opt => { opt.ReportApiVersions = true; opt.AssumeDefaultVersionWhenUnspecified = true; opt.DefaultApiVersion = new ApiVersion(1, 0); opt.ApiVersionReader = new HeaderApiVersionReader("api-version"); opt.Conventions.Controller<CompaniesController>() .HasApiVersion(new ApiVersion(1, 0)); opt.Conventions.Controller<CompaniesV2Controller>() .HasDeprecatedApiVersion(new ApiVersion(2, 0)); });Now, we can remove the [ApiVersion] attribute from the controllers.
Of course, there are a lot more features that the installed library provides for us — but with the mentioned ones, we have covered quite enough to version our APIs.
25 CACHING
In this section, we are going to learn about caching resources. Caching can improve the quality and performance of our app a lot, but again, it is something first we need to look at as soon as some bug appears. To cover resource caching, we are going to work with HTTP Cache. Additionally, we are going to talk about cache expiration, validation, and cache-control headers.
25.1 About Caching
We want to use cache in our app because it can significantly improve performance. Otherwise, it would be useless. The main goal of caching is to eliminate the need to send requests towards the API in many cases and also to send full responses in other cases.
To reduce the number of sent requests, caching uses the expiration mechanism, which helps reduce network round trips. Furthermore, to eliminate the need to send full responses, the cache uses the validation mechanism, which reduces network bandwidth. We can now see why these two are so important when caching resources.
The cache is a separate component that accepts requests from the API’s consumer. It also accepts the response from the API and stores that response if they are cacheable. Once the response is stored, if a consumer requests the same response again, the response from the cache should be served.
But the cache behaves differently depending on what cache type is used.
25.1.1 Cache Types
There are three types of caches: Client Cache, Gateway Cache, and Proxy Cache.
The client cache lives on the client (browser); thus, it is a private cache. It is private because it is related to a single client. So every client consuming our API has a private cache.
The gateway cache lives on the server and is a shared cache. This cache is shared because the resources it caches are shared over different clients.
The proxy cache is also a shared cache, but it doesn’t live on the server nor the client side. It lives on the network.
With the private cache, if five clients request the same response for the first time, every response will be served from the API and not from the cache. But if they request the same response again, that response should come from the cache (if it’s not expired). This is not the case with the shared cache. The response from the first client is going to be cached, and then the other four clients will receive the cached response if they request it.
25.1.2 Response Cache Attribute
So, to cache some resources, we have to know whether or not it’s cacheable. The response header helps us with that. The one that is used most often is Cache-Control: Cache-Control: max-age=180. This states that the response should be cached for 180 seconds. For that, we use the ResponseCache attribute. But of course, this is just a header. If we want to cache something, we need a cache-store. For our example, we are going to use Response caching middleware provided by ASP.NET Core.
25.2 Adding Cache Headers
Before we start, let’s open Postman and modify the settings to support caching:

In the General tab under Headers, we are going to turn off the Send no- cache header:

Great. We can move on.
Let’s assume we want to use the ResponseCache attribute to cache the result from the GetCompany action:
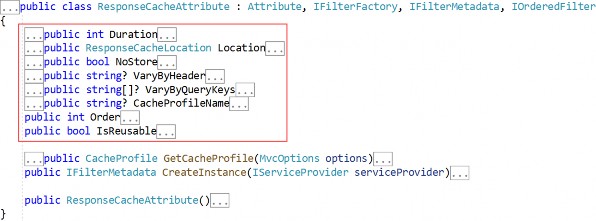
public async Task
[ResponseCache(Duration = 60)]
[HttpGet("{id}", Name = "CompanyById")]
It is obvious that we can work with different properties in the ResponseCache attribute — but for now, we are going to use Duration only:
[HttpGet("{id}", Name = "CompanyById")] [ResponseCache(Duration = 60)] public async Task<IActionResult> GetCompany(Guid id)And that is it. We can inspect our result now:
https://localhost:5001/api/companies/3d490a70-94ce-4d15-9494-5248280c2ce3
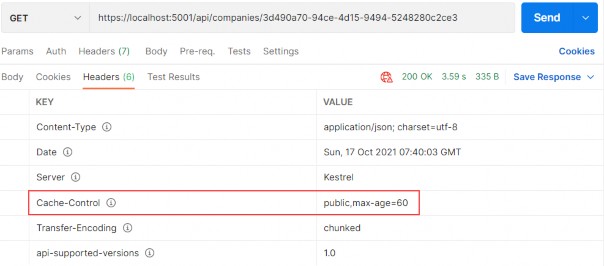
You can see that the Cache-Control header was created with a public cache and a duration of 60 seconds. But as we said, this is just a header; we need a cache-store to cache the response. So, let’s add one.
25.3 Adding Cache-Store
The first thing we are going to do is add an extension method in the ServiceExtensions class:
public static void ConfigureResponseCaching(this IServiceCollection services) => services.AddResponseCaching();We register response caching in the IOC container, and now we have to call this method in the Program class:
builder.Services.ConfigureResponseCaching();Additionally, we have to add caching to the application middleware right below UseCors() because Microsoft recommends having UseCors before UseResponseCaching, and as we learned in the section 1.8, order is very important for the middleware execution:
app.UseResponseCaching();
app.UseCors("CorsPolicy");Now, we can start our application and send the same GetCompany request. It will generate the Cache-Control header. After that, before 60 seconds pass, we are going to send the same request and inspect the headers:
https://localhost:5001/api/companies/3d490a70-94ce-4d15-9494-5248280c2ce3

You can see the additional Age header that indicates the number of seconds the object has been stored in the cache. Basically, it means that we received our second response from the cache-store.
Another way to confirm that is to wait 60 seconds to pass. After that, you can send the request and inspect the console. You will see the SQL query generated. But if you send a second request, you will find no new logs for the SQL query. That’s because we are receiving our response from the cache.
Additionally, with every subsequent request within 60 seconds, the Age property will increment. After the expiration period passes, the response will be sent from the API, cached again, and the Age header will not be generated. You will also see new logs in the console.
Furthermore, we can use cache profiles to apply the same rules to different resources. If you look at the picture that shows all the properties we can use with ResponseCacheAttribute, you can see that there are a lot of properties. Configuring all of them on top of the action or controller could lead to less readable code. Therefore, we can use CacheProfiles to extract that configuration.
To do that, we are going to modify the AddControllers method:
builder.Services.AddControllers(config => { config.RespectBrowserAcceptHeader = true; config.ReturnHttpNotAcceptable = true; config.InputFormatters.Insert(0, GetJsonPatchInputFormatter()); config.CacheProfiles.Add("120SecondsDuration", new CacheProfile { Duration = 120 }); })...We only set up Duration, but you can add additional properties as well. Now, let’s implement this profile on top of the Companies controller:
[Route("api/companies")] [ApiController] [ResponseCache(CacheProfileName = "120SecondsDuration")]We have to mention that this cache rule will apply to all the actions inside the controller except the ones that already have the ResponseCache attribute applied.
That said, once we send the request to GetCompany, we will still have the maximum age of 60. But once we send the request to GetCompanies:
https://localhost:5001/api/companies
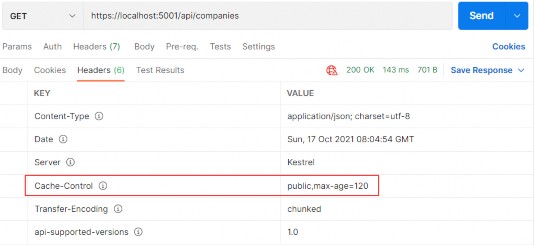
There you go. Now, let’s talk some more about the Expiration and Validation models.
25.4 Expiration Model
The expiration model allows the server to recognize whether or not the response has expired. As long as the response is fresh, it will be served from the cache. To achieve that, the Cache-Control header is used. We have seen this in the previous example.
Let’s look at the diagram to see how caching works:
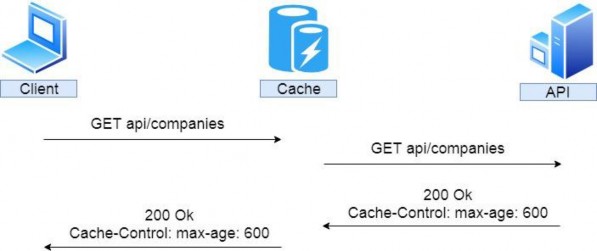
So, the client sends a request to get companies. There is no cached version of that response; therefore, the request is forwarded to the API. The API returns the response with the Cache-Control header with a 10- minute expiration period; it is being stored in the cache and forwarded to the client.
If after two minutes, the same response has been requested:

We can see that the cached response was served with an additional Age header with a value of 120 seconds or two minutes. If this is a private cache, that is where it stops. That’s because the private cache is stored in the browser and another client will hit the API for the same response. But if this is a shared cache and another client requests the same response after an additional two minutes:
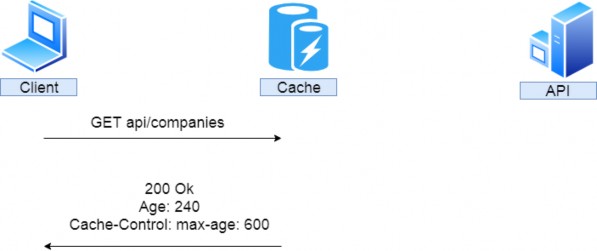
The response is served from the cache with an additional two minutes added to the Age header.
We saw how the Expiration model works, now let’s inspect the Validation model.
25.5 Validation Model
The validation model is used to validate the freshness of the response. So it checks if the response is cached and still usable. Let’s assume we have a shared cached GetCompany response for 30 minutes. If someone updates that company after five minutes, without validation the client would receive the wrong response for another 25 minutes — not the updated one.
To prevent that, we use validators. The HTTP standard advises using Last- Modified and ETag validators in combination if possible.
Let’s see how validation works:

So again, the client sends a request, it is not cached, and so it is forwarded to the API. Our API returns the response that contains the Etag and Last-Modified headers. That response is cached and forwarded to the client.
After two minutes, the client sends the same request:
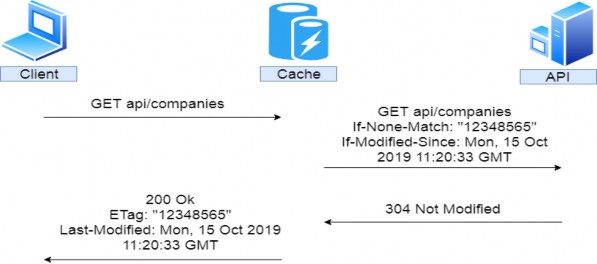
So, the same request is sent, but we don’t know if the response is valid. Therefore, the cache forwards that request to the API with the additional headers If-None-Match — which is set to the Etag value — and If- Modified-Since — which is set to the Last-Modified value. If this request checks out against the validators, our API doesn’t have to recreate the same response; it just sends a 304 Not Modified status. After that, the regular response is served from the cache. Of course, if this doesn’t check out, a new response must be generated.
That brings us to the conclusion that for the shared cache if the response hasn’t been modified, that response has to be generated only once. Let’s see all of these in an example.
25.6 Supporting Validation
To support validation, we are going to use the Marvin.Cache.Headers library. This library supports HTTP cache headers like Cache-Control, Expires, Etag, and Last-Modified and also implements validation and expiration models.
So, let’s install the Marvin.Cache.Headers library in the Presentation project, which will enable the reference for the main project as well. We are going to need it in both projects.
Now, let’s modify the ServiceExtensions class:
public static void ConfigureHttpCacheHeaders(this IServiceCollection services) => services.AddHttpCacheHeaders();We are going to add additional configuration later.
Then, let’s modify the Program class:
builder.Services.ConfigureResponseCaching();
builder.Services.ConfigureHttpCacheHeaders();And finally, let’s add HttpCacheHeaders to the request pipeline:
app.UseResponseCaching();
app.UseHttpCacheHeaders();To test this, we have to remove or comment out ResponseCache attributes in the CompaniesController. The installed library will provide that for us. Now, let’s send the GetCompany request:
https://localhost:5001/api/companies/3d490a70-94ce-4d15-9494-5248280c2ce3
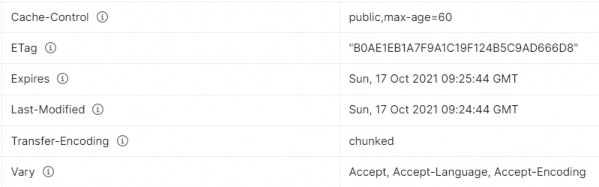
We can see that we have all the required headers generated. The default expiration is set to 60 seconds and if we send this request one more time, we are going to get an additional Age header.
25.6.1 Configuration
We can globally configure our expiration and validation headers. To do that, let’s modify the ConfigureHttpCacheHeaders method:
public static void ConfigureHttpCacheHeaders(this IServiceCollection services) => services.AddHttpCacheHeaders(
(expirationOpt) => { expirationOpt.MaxAge = 65; expirationOpt.CacheLocation = CacheLocation.Private; }, (validationOpt) => { validationOpt.MustRevalidate = true; }); After that, we are going to send the same request for a single company:
https://localhost:5001/api/companies/3d490a70-94ce-4d15-9494-5248280c2ce3
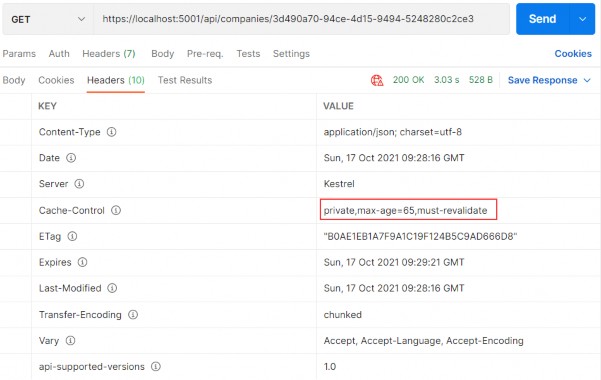
You can see that the changes are implemented. Now, this is a private cache with an age of 65 seconds. Because it is a private cache, our API won’t cache it. You can check the console again and see the SQL logs for each request you send.
Other than global configuration, we can apply it on the resource level (on action or controller). The overriding rules are the same. Configuration on the action level will override the configuration on the controller or global level. Also, the configuration on the controller level will override the global level configuration.
To apply a resource level configuration, we have to use the HttpCacheExpiration and HttpCacheValidation attributes:
[HttpGet("{id}", Name = "CompanyById")] [HttpCacheExpiration(CacheLocation = CacheLocation.Public, MaxAge = 60)] [HttpCacheValidation(MustRevalidate = false)] public async Task<IActionResult> GetCompany(Guid id)Once we send the GetCompanies request, we are going to see global values:

But if we send the GetCompany request:

You can see that it is public and you can send the same request again to see the Age header for the cached response.
25.7 Using ETag and Validation
First, we have to mention that the ResponseCaching library doesn’t correctly implement the validation model. Also, using the authorization header is a problem. We are going to show you alternatives later. But for now, we can simulate how validation with Etag should work.
So, let’s restart our app to have a fresh application, and send a GetCompany request one more time. In a header, we are going to get our ETag. Let’s copy the Etag’s value and use another GetCompany request:
https://localhost:5001/api/companies/3d490a70-94ce-4d15-9494-5248280c2ce3
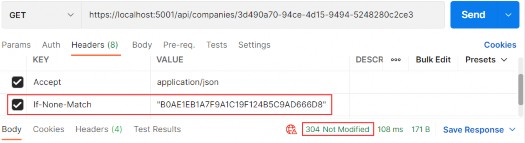
We send the If-None-Match tag with the value of our Etag. And we can see as a result we get 304 Not Modified.
But this is not a valid situation. As we said, the client should send a valid request and it is up to the Cache to add an If-None-Match tag. In our example, which we sent from Postman, we simulated that. Then, it is up to the server to return a 304 message to the cache and then the cache should return the same response.
But anyhow, we have managed to show you how validation works. If we update that company:
https://localhost:5001/api/companies/3d490a70-94ce-4d15-9494-5248280c2ce3
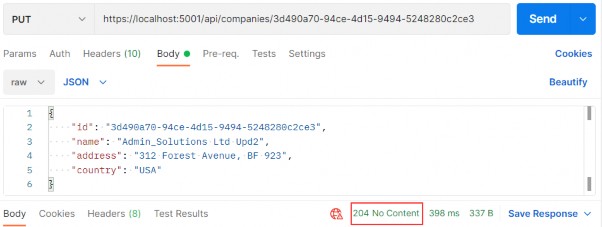
And then send the same request with the same If-None-Match value:
https://localhost:5001/api/companies/3d490a70-94ce-4d15-9494-5248280c2ce3
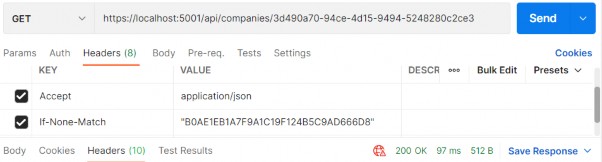
You can see that we get 200 OK and if we inspect Headers, we will find that ETag is different because the resource changed:
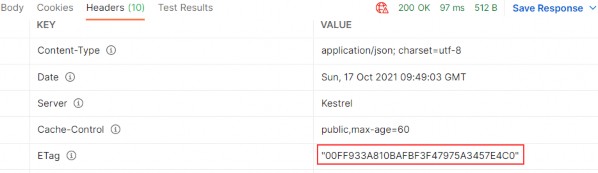
So, we saw how validation works and also concluded that the ResponseCaching library is not that good for validation — it is much better for just expiration.
But then, what are the alternatives? There are a lot of alternatives, such as:
• Varnish - https://varnish-cache.org/
• Apache Traffic Server - https://trafficserver.apache.org/
• Squid - http://www.squid-cache.org/
They implement caching correctly. And if you want to have expiration and validation, you should combine them with the Marvin library and you are good to go. But those servers are not that trivial to implement.
There is another option: CDN (Content Delivery Network). CDN uses HTTP caching and is used by various sites on the internet. The good thing with CDN is we don’t need to set up a cache server by ourselves, but unfortunately, we have to pay for it. The previous cache servers we presented are free to use. So, it’s up to you to decide what suits you best.
26 RATE LIMITING AND THROTTLING
Rate Limiting allows us to protect our API against too many requests that can deteriorate our API’s performance. API is going to reject requests that exceed the limit. Throttling queues exceeded requests for possible later processing. The API will eventually reject the request if processing cannot occur after a certain number of attempts.
For example, we can configure our API to create a limitation of 100 requests/hour per client. Or additionally, we can limit a client to the maximum of 1,000 requests/day per IP and 100 requests/hour. We can even limit the number of requests for a specific resource in our API; for example, 50 requests to api/companies.
To provide information about rate limiting, we use the response headers. They are separated between Allowed requests, which all start with the X- Rate-Limit and Disallowed requests.
The Allowed requests header contains the following information :
• X-Rate-Limit-Limit – rate limit period.
• X-Rate-Limit-Remaining – number of remaining requests.
• X-Rate-Limit-Reset – date/time information about resetting the request limit.
For the disallowed requests, we use a 429 status code; that stands for too many requests. This header may include the Retry-After response header and should explain details in the response body.
26.1 Implementing Rate Limiting
To start, we have to install the AspNetCoreRateLimit library in the main project:

Then, we have to add it to the service collection. This library uses a memory cache to store its counters and rules. Therefore, we have to add the MemoryCache to the service collection as well.
That said, let’s add the MemoryCache:
builder.Services.AddMemoryCache();After that, we are going to create another extension method in the ServiceExtensions class:
public static void ConfigureRateLimitingOptions(this IServiceCollection services) { var rateLimitRules = new List<RateLimitRule> { new RateLimitRule { Endpoint = "*", Limit = 3, Period = "5m" } }; services.Configure<IpRateLimitOptions>(opt => { opt.GeneralRules = rateLimitRules; }); services.AddSingleton<IRateLimitCounterStore, MemoryCacheRateLimitCounterStore>(); services.AddSingleton<IIpPolicyStore, MemoryCacheIpPolicyStore>(); services.AddSingleton<IRateLimitConfiguration, RateLimitConfiguration>(); services.AddSingleton<IProcessingStrategy, AsyncKeyLockProcessingStrategy>(); }We create a rate limit rules first, for now just one, stating that three requests are allowed in a five-minute period for any endpoint in our API. Then, we configure IpRateLimitOptions to add the created rule. Finally, we have to register rate limit stores, configuration, and processing strategy as a singleton. They serve the purpose of storing rate limit counters and policies as well as adding configuration.
Now, we have to modify the Program class again:
builder.Services.ConfigureRateLimitingOptions();
builder.Services.AddHttpContextAccessor();
builder.Services.AddMemoryCache();Finally, we have to add it to the request pipeline:
app.UseIpRateLimiting();
app.UseCors("CorsPolicy");And that is it. We can test this now:
https://localhost:5001/api/companies
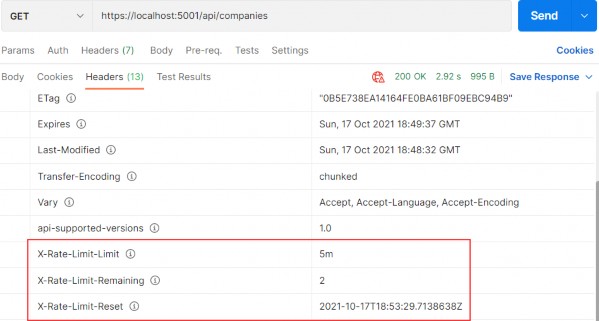
So, we can see that we have two requests remaining and the time to reset the rule. If we send an additional three requests in the five-minute period of time, we are going to get a different response:
https://localhost:5001/api/companies

The status code is 429 Too Many Requests and we have the Retry-After header.
We can inspect the body as well:
https://localhost:5001/api/companies
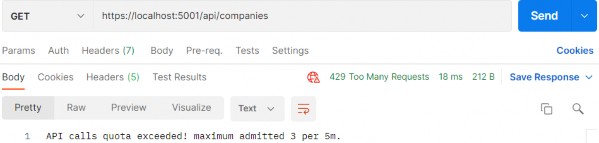
So, our rate limiting works.
There are a lot of options that can be configured with Rate Limiting and you can read more about them on the AspNetCoreRateLimit GitHub page.
27 JWT, IDENTITY, AND REFRESH TOKEN
User authentication is an important part of any application. It refers to the process of confirming the identity of an application’s users. Implementing it properly could be a hard job if you are not familiar with the process.
Also, it could take a lot of time that could be spent on different features of an application.
So, in this section, we are going to learn about authentication and authorization in ASP.NET Core by using Identity and JWT (Json Web Token). We are going to explain step by step how to integrate Identity in the existing project and then how to implement JWT for the authentication and authorization actions.
ASP.NET Core provides us with both functionalities, making implementation even easier.
Finally, we are going to learn more about the refresh token flow and implement it in our Web API project.
So, let’s start with Identity integration.
27.1 Implementing Identity in ASP.NET Core Project
Asp.NET Core Identity is the membership system for web applications that includes membership, login, and user data. It provides a rich set of services that help us with creating users, hashing their passwords, creating a database model, and the authentication overall.
That said, let’s start with the integration process.
The first thing we have to do is to install the Microsoft.AspNetCore.Identity.EntityFrameworkCore library in the Entities project:

After the installation, we are going to create a new User class in the Entities/Models folder:
public class User : IdentityUser { public string FirstName { get; set; } public string LastName { get; set; } }Our class inherits from the IdentityUser class that has been provided by the ASP.NET Core Identity. It contains different properties and we can extend it with our own as well.
After that, we have to modify the RepositoryContext class:
public class RepositoryContext : IdentityDbContext<User> { public RepositoryContext(DbContextOptions options) : base(options) { } protected override void OnModelCreating(ModelBuilder modelBuilder) { base.OnModelCreating(modelBuilder); modelBuilder.ApplyConfiguration(new CompanyConfiguration()); modelBuilder.ApplyConfiguration(new EmployeeConfiguration()); } public DbSet<Company> Companies { get; set; } public DbSet<Employee> Employees { get; set; } }So, our class now inherits from the IdentityDbContext class and not DbContext because we want to integrate our context with Identity. For this, we have to include the Identity.EntityFrameworkCore namespace:
using Microsoft.AspNetCore.Identity.EntityFrameworkCore;We don’t have to install the library in the Repository project since we already did that in the Entities project, and Repository has the reference to Entities.
Additionally, we call the OnModelCreating method from the base class. This is required for migration to work properly.
Now, we have to move on to the configuration part.
To do that, let’s create a new extension method in the ServiceExtensions class:
public static void ConfigureIdentity(this IServiceCollection services) { var builder = services.AddIdentity<User, IdentityRole>(o => { o.Password.RequireDigit = true; o.Password.RequireLowercase = false; o.Password.RequireUppercase = false; o.Password.RequireNonAlphanumeric = false; o.Password.RequiredLength = 10; o.User.RequireUniqueEmail = true; }) .AddEntityFrameworkStores<RepositoryContext>() .AddDefaultTokenProviders(); }With the AddIdentity method, we are adding and configuring Identity for the specific type; in this case, the User and the IdentityRole type. We use different configuration parameters that are pretty self-explanatory on their own. Identity provides us with even more features to configure, but these are sufficient for our example.
Then, we add EntityFrameworkStores implementation with the default token providers.
Now, let’s modify the Program class:
builder.Services.AddAuthentication();
builder.Services.ConfigureIdentity();And, let’s add the authentication middleware to the application’s request pipeline:
app.UseAuthorization();
app.UseAuthentication();That’s it. We have prepared everything we need.
27.2 Creating Tables and Inserting Roles
Creating tables is quite an easy process. All we have to do is to create and apply migration. So, let’s create a migration:
PM> Add-Migration CreatingIdentityTablesAnd then apply it:
PM> Update-DatabaseIf we check our database now, we are going to see additional tables:
For our project, the AspNetRoles, AspNetUserRoles, and AspNetUsers tables will be quite enough. If you open the AspNetUsers table, you will see additional FirstName and LastName columns.
Now, let’s insert several roles in the AspNetRoles table, again by using migrations. The first thing we are going to do is to create the RoleConfiguration class in the Repository/Configuration folder:
public class RoleConfiguration : IEntityTypeConfiguration<IdentityRole> { public void Configure(EntityTypeBuilder<IdentityRole> builder) {builder.HasData( new IdentityRole { Name = "Manager", NormalizedName = "MANAGER" }, new IdentityRole { Name = "Administrator", NormalizedName = "ADMINISTRATOR" } ); }For this to work, we need the following namespaces included:
using Microsoft.AspNetCore.Identity;
using Microsoft.EntityFrameworkCore;
using Microsoft.EntityFrameworkCore.Metadata.Builders;And let’s modify the OnModelCreating method in the RepositoryContext class:
protected override void OnModelCreating(ModelBuilder modelBuilder) { base.OnModelCreating(modelBuilder); modelBuilder.ApplyConfiguration(new CompanyConfiguration()); modelBuilder.ApplyConfiguration(new EmployeeConfiguration()); modelBuilder.ApplyConfiguration(new RoleConfiguration()); }Finally, let’s create and apply migration:
PM> Add-Migration AddedRolesToDb
PM> Update-DatabaseIf you check the AspNetRoles table, you will find two new roles created.
27.3 User Creation
To create/register a new user, we have to create a new controller:
[Route("api/authentication")] [ApiController] public class AuthenticationController : ControllerBase { private readonly IServiceManager _service; public AuthenticationController(IServiceManager service) => _service = service; }So, nothing new here. We have the basic setup for our controller with IServiceManager injected.
The next thing we have to do is to create a UserForRegistrationDto record in the Shared/DataTransferObjects folder:
public record UserForRegistrationDto { public string? FirstName { get; init; } public string? LastName { get; init; } [Required(ErrorMessage = "Username is required")] public string? UserName { get; init; } [Required(ErrorMessage = "Password is required")] public string? Password { get; init; } public string? Email { get; init; } public string? PhoneNumber { get; init; } public ICollection<string>? Roles { get; init; } }Then, let’s create a mapping rule in the MappingProfile class:
CreateMap<UserForRegistrationDto, User>();Since we want to extract all the registration/authentication logic to the service layer, we are going to create a new IAuthenticationService interface inside the Service.Contracts project:
public interface IAuthenticationService { Task<IdentityResult> RegisterUser(UserForRegistrationDto userForRegistration); }This method will execute the registration logic and return the identity result to the caller.
Now that we have the interface, we need to create an implementation service class inside the Service project:
internal sealed class AuthenticationService : IAuthenticationService { private readonly ILoggerManager _logger; private readonly IMapper _mapper; private readonly UserManager<User> _userManager; private readonly IConfiguration _configuration; public AuthenticationService(ILoggerManager logger, IMapper mapper, UserManager<User> userManager, IConfiguration configuration) { _logger = logger;_mapper = mapper; _userManager = userManager; _configuration = configuration; } }This code is pretty familiar from the previous service classes except for the UserManager class. This class is used to provide the APIs for managing users in a persistence store. It is not concerned with how user information is stored. For this, it relies on a UserStore (which in our case uses Entity Framework Core).
Of course, we have to add some additional namespaces:
using AutoMapper; using Contracts; using Entities.Models; using Microsoft.AspNetCore.Identity; using Microsoft.Extensions.Configuration; using Service.Contracts;Great. Now, we can implement the RegisterUser method:
public async Task<IdentityResult> RegisterUser(UserForRegistrationDto userForRegistration) { var user = _mapper.Map<User>(userForRegistration); var result = await _userManager.CreateAsync(user, userForRegistration.Password); if (result.Succeeded) await _userManager.AddToRolesAsync(user, userForRegistration.Roles); return result; }So we map the DTO object to the User object and call the CreateAsync method to create that specific user in the database. The CreateAsync method will save the user to the database if the action succeeds or it will return error messages as a result.
After that, if a user is created, we add that user to the named roles — the ones sent from the client side — and return the result.
If you want, before calling AddToRoleAsync or AddToRolesAsync, you can check if roles exist in the database. But for that, you have to inject RoleManager
We want to provide this service to the caller through ServiceManager and for that, we have to modify the IServiceManager interface first:
public interface IServiceManager { ICompanyService CompanyService { get; } IEmployeeService EmployeeService { get; } IAuthenticationService AuthenticationService { get; } }And then the ServiceManager class:
public sealed class ServiceManager : IServiceManager { private readonly Lazy<ICompanyService> _companyService; private readonly Lazy<IEmployeeService> _employeeService; private readonly Lazy<IAuthenticationService> _authenticationService; public ServiceManager(IRepositoryManager repositoryManager, ILoggerManager logger, IMapper mapper, IEmployeeLinks employeeLinks, UserManager<User> userManager, IConfiguration configuration) { _companyService = new Lazy<ICompanyService>(() => new CompanyService(repositoryManager, logger, mapper)); _employeeService = new Lazy<IEmployeeService>(() => new EmployeeService(repositoryManager, logger, mapper, employeeLinks)); _authenticationService = new Lazy<IAuthenticationService>(() => new AuthenticationService(logger, mapper, userManager, configuration)); } public ICompanyService CompanyService => _companyService.Value; public IEmployeeService EmployeeService => _employeeService.Value; public IAuthenticationService AuthenticationService => _authenticationService.Value; }Finally, it is time to create the RegisterUser action:
[HttpPost] [ServiceFilter(typeof(ValidationFilterAttribute))] public async Task<IActionResult> RegisterUser([FromBody] UserForRegistrationDto userForRegistration) { var result = await _service.AuthenticationService.RegisterUser(userForRegistration); if (!result.Succeeded){ foreach (var error in result.Errors) { ModelState.TryAddModelError(error.Code, error.Description); } return BadRequest(ModelState); } return StatusCode(201); }We are implementing our existing action filter for the entity and model validation on top of our action. Then, we call the RegisterUser method and accept the result. If the registration fails, we iterate through each error add it to the ModelState and return the BadRequest response. Otherwise, we return the 201 created status code.
Before we continue with testing, we should increase a rate limit from 3 to 30 (ServiceExtensions class, ConfigureRateLimitingOptions method) just to not stand in our way while we’re testing the different features of our application.
Now we can start with testing.Let’s send a valid request first:
https://localhost:5001/api/authentication
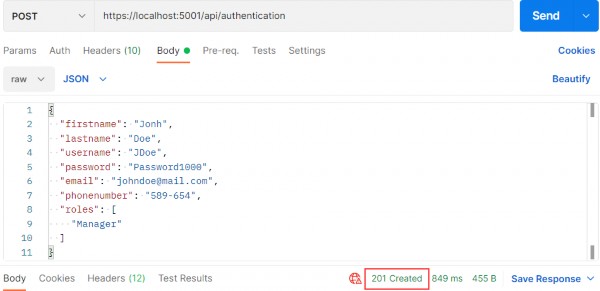
And we get 201, which means that the user has been created and added to the role. We can send additional invalid requests to test our Action and Identity features.
If the model is invalid:
https://localhost:5001/api/authentication
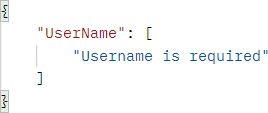
If the password is invalid:
https://localhost:5001/api/authentication
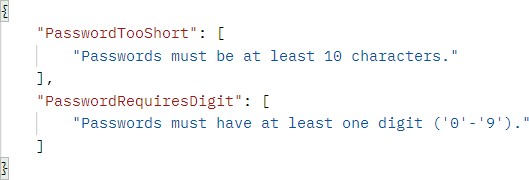
Finally, if we want to create a user with the same user name and email:
https://localhost:5001/api/authentication
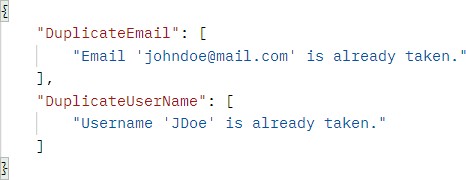
Excellent. Everything is working as planned. We can move on to the JWT implementation.
27.4 Big Picture
Before we get into the implementation of authentication and authorization, let’s have a quick look at the big picture. There is an application that has a login form. A user enters their username and password and presses the login button. After pressing the login button, a client (e.g., web browser) sends the user’s data to the server’s API endpoint:
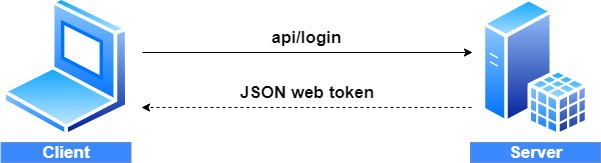
When the server validates the user’s credentials and confirms that the user is valid, it’s going to send an encoded JWT to the client. A JSON web token is a JavaScript object that can contain some attributes of the logged-in user. It can contain a username, user subject, user roles, or some other useful information.
27.5 About JWT
JSON web tokens enable a secure way to transmit data between two parties in the form of a JSON object. It’s an open standard and it’s a popular mechanism for web authentication. In our case, we are going to use JSON web tokens to securely transfer a user’s data between the client and the server.
JSON web tokens consist of three basic parts: the header, the payload, and the signature.
One real example of a JSON web token:
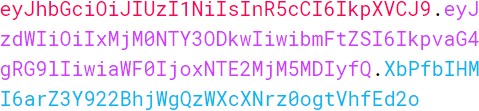
Every part of all three parts is shown in a different color. The first part of JWT is the header, which is a JSON object encoded in the base64 format. The header is a standard part of JWT and we don’t have to worry about it. It contains information like the type of token and the name of the algorithm:
{ "alg": "HS256", "typ": "JWT" }After the header, we have a payload which is also a JavaScript object encoded in the base64 format. The payload contains some attributes about the logged-in user. For example, it can contain the user id, the user subject, and information about whether a user is an admin user or not.
JSON web tokens are not encrypted and can be decoded with any base64 decoder, so please never include sensitive information in the Payload:
{ "sub": "1234567890", "name": "John Doe", "iat": 1516239022 }Finally, we have the signature part. Usually, the server uses the signature part to verify whether the token contains valid information, the information which the server is issuing. It is a digital signature that gets generated by combining the header and the payload. Moreover, it’s based on a secret key that only the server knows:
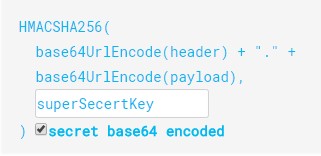
So, if malicious users try to modify the values in the payload, they have to recreate the signature; for that purpose, they need the secret key only known to the server. On the server side, we can easily verify if the values are original or not by comparing the original signature with a new signature computed from the values coming from the client.
So, we can easily verify the integrity of our data just by comparing the digital signatures. This is the reason why we use JWT.
27.6 JWT Configuration
Let’s start by modifying the appsettings.json file:
{ "Logging": { "LogLevel": { "Default": "Information", "Microsoft.AspNetCore": "Warning", } }, "ConnectionStrings": { "sqlConnection": "server=.; database=CompanyEmployee; Integrated Security=true" }, "JwtSettings": { "validIssuer": "CodeMazeAPI", "validAudience": "https://localhost:5001" }, "AllowedHosts": "*" }We just store the issuer and audience information in the appsettings.json file. We are going to talk more about that in a minute. As you probably remember, we require a secret key on the server-side. So, we are going to create one and store it in the environment variable because this is much safer than storing it inside the project.
To create an environment variable, we have to open the cmd window as an administrator and type the following command:
setx SECRET "CodeMazeSecretKey" /MThis is going to create a system environment variable with the name SECRET and the value CodeMazeSecretKey. By using /M we specify that we want a system variable and not local.
Great.
We can now modify the ServiceExtensions class:
public static void ConfigureJWT(this IServiceCollection services, IConfiguration configuration) { var jwtSettings = configuration.GetSection("JwtSettings"); var secretKey = Environment.GetEnvironmentVariable("SECRET"); services.AddAuthentication(opt => { opt.DefaultAuthenticateScheme = JwtBearerDefaults.AuthenticationScheme; opt.DefaultChallengeScheme = JwtBearerDefaults.AuthenticationScheme; }) .AddJwtBearer(options => { options.TokenValidationParameters = new TokenValidationParameters { ValidateIssuer = true, ValidateAudience = true, ValidateLifetime = true, ValidateIssuerSigningKey = true, ValidIssuer = jwtSettings["validIssuer"], ValidAudience = jwtSettings["validAudience"], IssuerSigningKey = new SymmetricSecurityKey(Encoding.UTF8.GetBytes(secretKey)) }; }); }First, we extract the JwtSettings from the appsettings.json file and extract our environment variable (If you keep getting null for the secret key, try restarting the Visual Studio or even your computer).
Then, we register the JWT authentication middleware by calling the method AddAuthentication on the IServiceCollection interface. Next, we specify the authentication scheme JwtBearerDefaults.AuthenticationScheme as well as ChallengeScheme. We also provide some parameters that will be used while validating JWT. For this to work, we have to install the Microsoft.AspNetCore.Authentication.JwtBearer library.
For this to work, we require the following namespaces:
using Microsoft.AspNetCore.Authentication.JwtBearer;
using Microsoft.AspNetCore.Identity;
using Microsoft.IdentityModel.Tokens;
using System.Text;Excellent. We’ve successfully configured the JWT authentication.
According to the configuration, the token is going to be valid if:
• The issuer is the actual server that created the token (ValidateIssuer=true)
• The receiver of the token is a valid recipient (ValidateAudience=true)
• The token has not expired (ValidateLifetime=true)
• The signing key is valid and is trusted by the server (ValidateIssuerSigningKey=true)
Additionally, we are providing values for the issuer, the audience, and the secret key that the server uses to generate the signature for JWT.
All we have to do is to call this method in the Program class:
builder.Services.ConfigureJWT(builder.Configuration);
builder.Services.AddAuthentication();
builder.Services.ConfigureIdentity();And that is it. We can now protect our endpoints.
27.7 Protecting Endpoints
Let’s open the CompaniesController and add an additional attribute above the GetCompanies action:
[HttpGet(Name = "GetCompanies")]
[Authorize]
public async Task<IActionResult> GetCompanies()The [Authorize] attribute specifies that the action or controller that it is applied to requires authorization. For it to be available we need an additional namespace:
using Microsoft.AspNetCore.Authorization;Now to test this, let’s send a request to get all companies:
https://localhost:5001/api/companies

We see the protection works. We get a 401 Unauthorized response, which is expected because an unauthorized user tried to access the protected endpoint. So, what we need is for our users to be authenticated and to have a valid token.
27.8 Implementing Authentication
Let’s begin with the UserForAuthenticationDto record:
public record UserForAuthenticationDto { [Required(ErrorMessage = "User name is required")] public string? UserName { get; init; } [Required(ErrorMessage = "Password name is required")] public string? Password { get; init; } }To continue, let’s modify the IAuthenticationService interface:
public interface IAuthenticationService { Task<IdentityResult> RegisterUser(UserForRegistrationDto userForRegistration); Task<bool> ValidateUser(UserForAuthenticationDto userForAuth); Task<string> CreateToken(); }Next, let’s add a private variable in the AuthenticationService class:
private readonly UserManager<User> _userManager; private readonly IConfiguration _configuration; private User? _user;Before we continue to the interface implementation, we have to install System.IdentityModel.Tokens.Jwt library in the Service project. Then, we can implement the required methods:
public async Task<bool> ValidateUser(UserForAuthenticationDto userForAuth) { _user = await _userManager.FindByNameAsync(userForAuth.UserName); var result = (_user != null && await _userManager.CheckPasswordAsync(_user, userForAuth.Password)); if (!result) _logger.LogWarn($"{nameof(ValidateUser)}: Authentication failed. Wrong user name or password."); return result; } public async Task<string> CreateToken() { var signingCredentials = GetSigningCredentials(); var claims = await GetClaims(); var tokenOptions = GenerateTokenOptions(signingCredentials, claims); return new JwtSecurityTokenHandler().WriteToken(tokenOptions); } private SigningCredentials GetSigningCredentials() { var key = Encoding.UTF8.GetBytes(Environment.GetEnvironmentVariable("SECRET")); var secret = new SymmetricSecurityKey(key); return new SigningCredentials(secret, SecurityAlgorithms.HmacSha256); } private async Task<List<Claim>> GetClaims() { var claims = new List<Claim> { new Claim(ClaimTypes.Name, _user.UserName) }; var roles = await _userManager.GetRolesAsync(_user); foreach (var role in roles) { claims.Add(new Claim(ClaimTypes.Role, role)); } return claims; }private JwtSecurityToken GenerateTokenOptions(SigningCredentials signingCredentials, List<Claim> claims) { var jwtSettings = _configuration.GetSection("JwtSettings"); var tokenOptions = new JwtSecurityToken ( issuer: jwtSettings["validIssuer"], audience: jwtSettings["validAudience"], claims: claims, expires: DateTime.Now.AddMinutes(Convert.ToDouble(jwtSettings["expires"])), signingCredentials: signingCredentials ); return tokenOptions; }For this to work, we require a few more namespaces:
using System.IdentityModel.Tokens.Jwt;
using Microsoft.IdentityModel.Tokens;
using System.Text;
using System.Security.Claims;Now we can explain the code.
In the ValidateUser method, we fetch the user from the database and check whether they exist and if the password matches. The UserManager
The CreateToken method does exactly that — it creates a token. It does that by collecting information from the private methods and serializing token options with the WriteToken method.
We have three private methods as well. The GetSignInCredentials method returns our secret key as a byte array with the security algorithm. The GetClaims method creates a list of claims with the user name inside and all the roles the user belongs to. The last method, GenerateTokenOptions, creates an object of the JwtSecurityToken type with all of the required options. We can see the expires parameter as one of the token options. We would extract it from the appsettings.json file as well, but we don’t have it there. So, we have to add it:
"JwtSettings": { "validIssuer": "CodeMazeAPI", "validAudience": "https://localhost:5001", "expires": 5 }Finally, we have to add a new action in the AuthenticationController:
[HttpPost("login")] [ServiceFilter(typeof(ValidationFilterAttribute))] public async Task<IActionResult> Authenticate([FromBody] UserForAuthenticationDto user) { if (!await _service.AuthenticationService.ValidateUser(user)) return Unauthorized(); return Ok(new { Token = await _service .AuthenticationService.CreateToken() }); }There is nothing special in this controller. If validation fails, we return the 401 Unauthorized response; otherwise, we return our created token:
https://localhost:5001/api/authentication/login
Excellent. We can see our token generated. Now, let’s send invalid credentials:
https://localhost:5001/api/authentication/login
And we get a 401 Unauthorized response.
Right now if we send a request to the GetCompanies action, we are still going to get the 401 Unauthorized response even though we have successful authentication. That’s because we didn’t provide our token in a request header and our API has nothing to authorize against. To solve that, we are going to create another GET request, and in the Authorization header choose the header type and paste the token from the previous request:
https://localhost:5001/api/companies
Now, we can send the request again:
https://localhost:5001/api/companies
Excellent. It works like a charm.
27.9 Role-Based Authorization
Right now, even though authentication and authorization are working as expected, every single authenticated user can access the GetCompanies action. What if we don’t want that type of behavior? For example, we want to allow only managers to access it. To do that, we have to make one simple change:
[HttpGet(Name = "GetCompanies")]
[Authorize(Roles = "Manager")]
public async Task<IActionResult> GetCompanies()And that is it. To test this, let’s create another user with the Administrator role (the second role from the database):
We get 201. After we send an authentication request for Jane Doe, we are going to get a new token. Let’s use that token to send the request towards the GetCompanies action:
https://localhost:5001/api/companies

We get a 403 Forbidden response because this user is not allowed to access the required endpoint. If we log in with John Doe and use his token, we are going to get a successful response for sure. Of course, we don’t have to place an Authorize attribute only on top of the action; we can place it on the controller level as well. For example, we can place just [Authorize] on the controller level to allow only authorized users to access all the actions in that controller; also, we can place the [Authorize (Role=…)] on top of any action in that controller to state that only a user with that specific role has access to that action.
One more thing. Our token expires after five minutes after the creation point. So, if we try to send another request after that period (we probably have to wait 5 more minutes due to the time difference between servers, which is embedded inside the token – this can be overridden with the ClockSkew property in the TokenValidationParameters object ), we are going to get the 401 Unauthorized status for sure. Feel free to try.
28 REFRESH TOKEN
In this chapter, we are going to learn about refresh tokens and their use in modern web application development.
In the previous chapter, we have created a flow where a user logs in, gets an access token to be able to access protected resources, and after the token expires, the user has to log in again to obtain a new valid token:
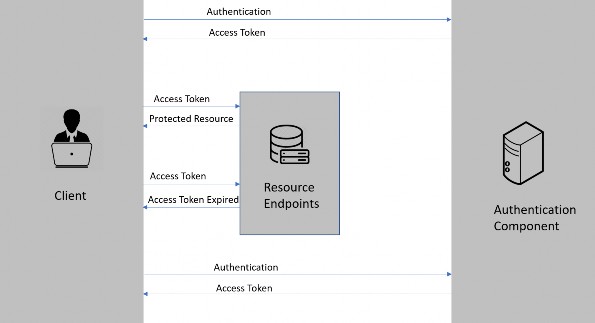
This flow is great and is used by many enterprise applications.
But sometimes we have a requirement not to force our users to log in every single time the token expires. For that, we can use a refresh token.
Refresh tokens are credentials that can be used to acquire new access tokens. When an access token expires, we can use a refresh token to get a new access token from the authentication component. The lifetime of a refresh token is usually set much longer compared to the lifetime of an access token.
Let’s introduce the refresh token to our authentication workflow:
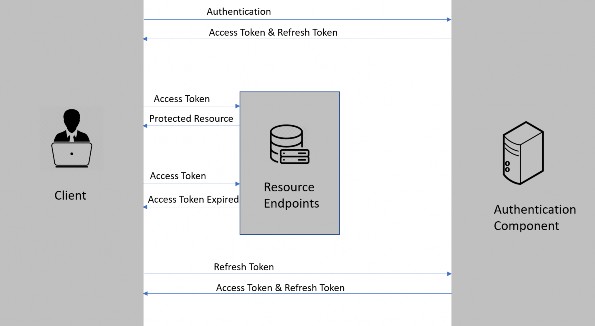
First, the client authenticates with the authentication component by providing the credentials.
Then, the authentication component issues the access token and the refresh token.
After that, the client requests the resource endpoints for a protected resource by providing the access token.
The resource endpoint validates the access token and provides a protected resource.
Steps 3 & 4 keep on repeating until the access token expires.
Once the access token expires, the client requests a new access token by providing the refresh token.
The authentication component issues a new access token and refresh token.
Steps 3 through 7 keep on repeating until the refresh token expires.
Once the refresh token expires, the client needs to authenticate with the authentication server once again and the flow repeats from step 1.
28.1 Why Do We Need a Refresh Token
So, why do we need both access tokens and refresh tokens? Why don’t we just set a long expiration date, like a month or a year for the access tokens? Because, if we do that and someone manages to get hold of our access token they can use it for a long period, even if we change our password!
The idea of refresh tokens is that we can make the access token short- lived so that, even if it is compromised, the attacker gets access only for a shorter period. With refresh token-based flow, the authentication server issues a one-time use refresh token along with the access token. The app stores the refresh token safely.
Every time the app sends a request to the server it sends the access token in the Authorization header and the server can identify the app using it. Once the access token expires, the server will send a token expired response. Once the app receives the token expired response, it sends the expired access token and the refresh token to obtain a new access token and a refresh token.
If something goes wrong, the refresh token can be revoked which means that when the app tries to use it to get a new access token, that request will be rejected and the user will have to enter credentials once again and authenticate.
Thus, refresh tokens help in a smooth authentication workflow without the need for users to submit their credentials frequently, and at the same time, without compromising the security of the app.
28.2 Refresh Token Implementation
So far we have learned the concept of refresh tokens. Now, let’s dig into the implementation part.
The first thing we have to do is to modify the User class:
public class User : IdentityUser { public string? FirstName { get; set; } public string? LastName { get; set; } public string? RefreshToken { get; set; } public DateTime RefreshTokenExpiryTime { get; set; } }Here we add two additional properties, which we are going to add to the AspNetUsers table.
To do that, we have to create and execute another migration:
Add-Migration AdditionalUserFiledsForRefreshTokenIf for some reason you get the message that you need to review your migration due to possible data loss, you should inspect the migration file and leave only the code that adds and removes our additional columns:
protected override void Up(MigrationBuilder migrationBuilder) { migrationBuilder.AddColumn<string>( name: "RefreshToken", table: "AspNetUsers", type: "nvarchar(max)", nullable: true); migrationBuilder.AddColumn<DateTime>( name: "RefreshTokenExpiryTime", table: "AspNetUsers", type: "datetime2", nullable: false, defaultValue: new DateTime(1, 1, 1, 0, 0, 0, 0, DateTimeKind.Unspecified)); } protected override void Down(MigrationBuilder migrationBuilder) { migrationBuilder.DropColumn( name: "RefreshToken", table: "AspNetUsers"); migrationBuilder.DropColumn( name: "RefreshTokenExpiryTime", table: "AspNetUsers"); }Also, you should open the RepositoryContextModelSnapshot file, find the AspNetRoles part and revert the Ids of both roles to the previous values:
b.ToTable("AspNetRoles", (string)null); b.HasData( new { Id = "4ac8240a-8498-4869-bc86-60e5dc982d27", ConcurrencyStamp = "ec511bd4-4853-426a-a2fc-751886560c9a", Name = "Manager", NormalizedName = "MANAGER" }, new { Id = "562419f5-eed1-473b-bcc1-9f2dbab182b4", ConcurrencyStamp = "937e9988-9f49-4bab-a545-b422dde85016", Name = "Administrator", NormalizedName = "ADMINISTRATOR" });After that is done, we can execute our migration with the Update- Database command. This will add two additional columns in the AspNetUsers table.
To continue, let’s create a new record in the Shared/DataTransferObjects folder:
public record TokenDto(string AccessToken, string RefreshToken);Next, we are going to modify the IAuthenticationService interface:
public interface IAuthenticationService { Task<IdentityResult> RegisterUser(UserForRegistrationDto userForRegistration); Task<bool> ValidateUser(UserForAuthenticationDto userForAuth); Task<TokenDto> CreateToken(bool populateExp); }Then, we have to implement two new methods in the AuthenticationService class:
private string GenerateRefreshToken() { var randomNumber = new byte[32]; using (var rng = RandomNumberGenerator.Create()) { rng.GetBytes(randomNumber); return Convert.ToBase64String(randomNumber);} } private ClaimsPrincipal GetPrincipalFromExpiredToken(string token) { var jwtSettings = _configuration.GetSection("JwtSettings"); var tokenValidationParameters = new TokenValidationParameters { ValidateAudience = true, ValidateIssuer = true, ValidateIssuerSigningKey = true, IssuerSigningKey = new SymmetricSecurityKey( Encoding.UTF8.GetBytes(Environment.GetEnvironmentVariable("SECRET"))), ValidateLifetime = true, ValidIssuer = jwtSettings["validIssuer"], ValidAudience = jwtSettings["validAudience"] }; var tokenHandler = new JwtSecurityTokenHandler(); SecurityToken securityToken; var principal = tokenHandler.ValidateToken(token, tokenValidationParameters, out securityToken); var jwtSecurityToken = securityToken as JwtSecurityToken; if (jwtSecurityToken == null || !jwtSecurityToken.Header.Alg.Equals(SecurityAlgorithms.HmacSha256, StringComparison.InvariantCultureIgnoreCase)) { throw new SecurityTokenException("Invalid token"); } return principal; }GenerateRefreshToken contains the logic to generate the refresh token. We use the RandomNumberGenerator class to generate a cryptographic random number for this purpose.
GetPrincipalFromExpiredToken is used to get the user principal from the expired access token. We make use of the ValidateToken method from the JwtSecurityTokenHandler class for this purpose. This method validates the token and returns the ClaimsPrincipal object.
After that, to generate a refresh token and the expiry date for the logged- in user, and to return both the access token and refresh token to the caller, we have to modify the CreateToken method in the same class:
public async Task<TokenDto> CreateToken(bool populateExp) { var signingCredentials = GetSigningCredentials();var claims = await GetClaims(); var tokenOptions = GenerateTokenOptions(signingCredentials, claims); var refreshToken = GenerateRefreshToken(); _user.RefreshToken = refreshToken; if(populateExp) _user.RefreshTokenExpiryTime = DateTime.Now.AddDays(7); await _userManager.UpdateAsync(_user); var accessToken = new JwtSecurityTokenHandler().WriteToken(tokenOptions); return new TokenDto(accessToken, refreshToken); }Finally, we have to modify the Authenticate action:
[HttpPost("login")] [ServiceFilter(typeof(ValidationFilterAttribute))] public async Task<IActionResult> Authenticate([FromBody] UserForAuthenticationDto user) { if (!await _service.AuthenticationService.ValidateUser(user)) return Unauthorized(); var tokenDto = await _service.AuthenticationService .CreateToken(populateExp: true); return Ok(tokenDto); }That’s it regarding the action modification.
Now, we can test this by sending the POST request from Postman:
https://localhost:5001/api/authentication/login
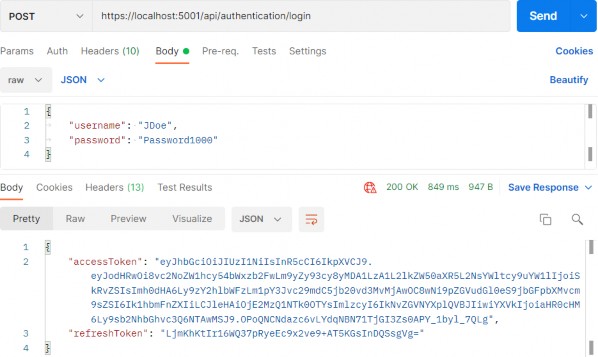
We can see the successful authentication and both our tokens. Additionally, if we inspect the database, we are going to find populated RefreshToken and Expiry columns for JDoe:

It is a good practice to have a separate endpoint for the refresh token action, and that’s exactly what we are going to do now.
Let’s start by creating a new TokenController in the Presentation project:
[Route("api/token")] [ApiController] public class TokenController : ControllerBase { private readonly IServiceManager _service; public TokenController(IServiceManager service) => _service = service; }Before we continue with the controller modification, we are going to modify the IAuthenticationService interface:
public interface IAuthenticationService { Task<IdentityResult> RegisterUser(UserForRegistrationDto userForRegistration); Task<bool> ValidateUser(UserForAuthenticationDto userForAuth); Task<TokenDto> CreateToken(bool populateExp); Task<TokenDto> RefreshToken(TokenDto tokenDto); }And to implement this method:
public async Task<TokenDto> RefreshToken(TokenDto tokenDto) { var principal = GetPrincipalFromExpiredToken(tokenDto.AccessToken); var user = await _userManager.FindByNameAsync(principal.Identity.Name); if (user == null || user.RefreshToken != tokenDto.RefreshToken || user.RefreshTokenExpiryTime <= DateTime.Now) throw new RefreshTokenBadRequest(); _user = user; return await CreateToken(populateExp: false); }We first extract the principal from the expired token and use the Identity.Name property, which is the username of the user, to fetch that user from the database. If the user doesn’t exist, or the refresh tokens are not equal, or the refresh token has expired, we stop the flow returning the BadRequest response to the user. Then we just populate the _user variable and call the CreateToken method to generate new Access and Refresh tokens. This time, we don’t want to update the expiry time of the refresh token thus sending false as a parameter.
Since we don’t have the RefreshTokenBadRequest class, let’s create it in the Entities\Exceptions folder:
public sealed class RefreshTokenBadRequest : BadRequestException { public RefreshTokenBadRequest() : base("Invalid client request. The tokenDto has some invalid values.") { } }And add a required using directive in the AuthenticationService class to remove the present error.
Finally, let’s add one more action in the TokenController:
[HttpPost("refresh")] [ServiceFilter(typeof(ValidationFilterAttribute))] public async Task<IActionResult> Refresh([FromBody]TokenDto tokenDto) { var tokenDtoToReturn = await _service.AuthenticationService.RefreshToken(tokenDto); return Ok(tokenDtoToReturn); }That’s it.
Our refresh token logic is prepared and ready for testing.
Let’s first send the POST authentication request:
https://localhost:5001/api/authentication/login
As before, we have both tokens in the response body.
Now, let’s send the POST refresh request with these tokens as the request body:
https://localhost:5001/api/token/refresh
And we can see new tokens in the response body. Additionally, if we inspect the database, we will find the same refresh token value:

Usually, in your client application, you would inspect the exp claim of the access token and if it is about to expire, your client app would send the request to the api/token endpoint and get a new set of valid tokens.
29 BINDING CONFIGURATION AND OPTIONS PATTERN
In the previous chapter, we had to use our appsettings file to store some important values for our JWT configuration and read those values from it:
"JwtSettings": { "validIssuer": "CodeMazeAPI", "validAudience": "https://localhost:5001", "expires": 5 },To access these values, we’ve used the GetSection method from the IConfiguration interface:
var jwtSettings = configuration.GetSection("JwtSettings");The GetSection method gets a sub-section from the appsettings file based on the provided key.
Once we extracted the sub-section, we’ve accessed the specific values by using the jwtSettings variable of type IConfigurationSection, with the key provided inside the square brackets:
ValidIssuer = jwtSettings["validIssuer"],This works great but it does have its flaws.
Having to type sections and keys to get the values can be repetitive and error-prone. We risk introducing errors to our code, and these kinds of errors can cost us a lot of time until we discover them since someone else can introduce them, and we won’t notice them since a null result is returned when values are missing.
To overcome this problem, we can bind the configuration data to strongly typed objects. To do that, we can use the Bind method.
29.1 Binding Configuration
To start with the binding process, we are going to create a new ConfigurationModels folder inside the Entities project, and a new JwtConfiguration class inside that folder:
public class JwtConfiguration { public string Section { get; set; } = "JwtSettings"; public string? ValidIssuer { get; set; } public string? ValidAudience { get; set; } public string? Expires { get; set; } }Then in the ServiceExtensions class, we are going to modify the ConfigureJWT method:
public static void ConfigureJWT(this IServiceCollection services, IConfiguration configuration) { var jwtConfiguration = new JwtConfiguration(); configuration.Bind(jwtConfiguration.Section, jwtConfiguration); var secretKey = Environment.GetEnvironmentVariable("SECRET"); services.AddAuthentication(opt => { opt.DefaultAuthenticateScheme = JwtBearerDefaults.AuthenticationScheme; opt.DefaultChallengeScheme = JwtBearerDefaults.AuthenticationScheme; }) .AddJwtBearer(options => { options.TokenValidationParameters = new TokenValidationParameters { ValidateIssuer = true, ValidateAudience = true, ValidateLifetime = true, ValidateIssuerSigningKey = true, ValidIssuer = jwtConfiguration.ValidIssuer, ValidAudience = jwtConfiguration.ValidAudience, IssuerSigningKey = new SymmetricSecurityKey(Encoding.UTF8.GetBytes(secretKey)) }; }); }We create a new instance of the JwtConfiguration class and use the Bind method that accepts the section name and the instance object as parameters, to bind to the JwtSettings section directly and map configuration values to respective properties inside the JwtConfiguration class. Then, we just use those properties instead of string keys inside square brackets, to access required values.
There are two things to note here though. The first is that the names of the configuration data keys and class properties must match. The other is that if you extend the configuration, you need to extend the class as well, which can be a bit cumbersome, but it beats getting values by typing strings.
Now, we can continue with the AuthenticationService class modification since we extract configuration values in two methods from this class:
... private readonly JwtConfiguration _jwtConfiguration; private User? _user; public AuthenticationService(ILoggerManager logger, IMapper mapper, UserManager<User> userManager, IConfiguration configuration) { _logger = logger; _mapper = mapper; _userManager = userManager; _configuration = configuration; _jwtConfiguration = new JwtConfiguration(); _configuration.Bind(_jwtConfiguration.Section, _jwtConfiguration); }So, we add a readonly variable, and create an instance and execute binding inside the constructor.
And since we’re using the Bind() method we need to install the Microsoft.Extensions.Configuration.Binder NuGet package.
After that, we can modify the GetPrincipalFromExpiredToken method by removing the GetSection part and modifying the TokenValidationParameters object creation:
private ClaimsPrincipal GetPrincipalFromExpiredToken(string token) { var tokenValidationParameters = new TokenValidationParameters { ValidateAudience = true, ValidateIssuer = true,ValidateIssuerSigningKey = true, IssuerSigningKey = new SymmetricSecurityKey( Encoding.UTF8.GetBytes(Environment.GetEnvironmentVariable("SECRET"))), ValidateLifetime = true, ValidIssuer = _jwtConfiguration.ValidIssuer, ValidAudience = _jwtConfiguration.ValidAudience }; ... return principal; }And let’s do a similar thing for the GenerateTokenOptions method:
private JwtSecurityToken GenerateTokenOptions(SigningCredentials signingCredentials, List<Claim> claims) { var tokenOptions = new JwtSecurityToken ( issuer: _jwtConfiguration.ValidIssuer, audience: _jwtConfiguration.ValidAudience, claims: claims, expires: DateTime.Now.AddMinutes(Convert.ToDouble(_jwtConfiguration.Expires)), signingCredentials: signingCredentials ); return tokenOptions; }Excellent.
At this point, we can start our application and use both requests from Postman’s collection - 28-Refresh Token - to test our configuration.
We should get the same responses as we did in a previous chapter, which proves that our configuration works as intended but now with a better code and less error-prone.
29.2 Options Pattern
In the previous section, we’ve seen how we can bind configuration data to strongly typed objects. The options pattern gives us similar possibilities, but it offers a more structured approach and more features like validation, live reloading, and easier testing.
Once we configure the class containing our configuration we can inject it via dependency injection with IOptions
If we need to reload the configuration without stopping the application, we can use the IOptionsSnapshot
The options pattern also provides a good validation mechanism that uses the widely used DataAnotations attributes to check if the configuration abides by the logical rules of our application.
The testing of options is also easy because of the helper methods and easy to mock options classes.
29.2.1 Using IOptions
We have already written a lot of code in the previous section that can be used with the IOptions interface, but we still have some more actions to do.
The first thing we are going to do is to register and configure the JwtConfiguration class in the ServiceExtensions class:
public static void AddJwtConfiguration(this IServiceCollection services, IConfiguration configuration) => services.Configure<JwtConfiguration>(configuration.GetSection("JwtSettings"));And call this method in the Program class:
builder.Services.ConfigureJWT(builder.Configuration); builder.Services.AddJwtConfiguration(builder.Configuration);Since we can use IOptions with DI, we are going to modify the ServiceManager class to support that:
public ServiceManager(IRepositoryManager repositoryManager, ILoggerManager logger, IMapper mapper, IEmployeeLinks employeeLinks, UserManager<User> userManager, IOptions<JwtConfiguration> configuration)We just replace the IConfiguration type with the IOptions type in the constructor.
For this, we need two additional namespaces:
using Entities.ConfigurationModels;
using Microsoft.Extensions.Options;Then, we can modify the AuthenticationService’s constructor:
private readonly ILoggerManager _logger; private readonly IMapper _mapper; private readonly UserManager<User> _userManager; private readonly IOptions<JwtConfiguration> _configuration; private readonly JwtConfiguration _jwtConfiguration; private User? _user; public AuthenticationService(ILoggerManager logger, IMapper mapper, UserManager<User> userManager, IOptions<JwtConfiguration> configuration) { _logger = logger; _mapper = mapper; _userManager = userManager; _configuration = configuration; _jwtConfiguration = _configuration.Value; }And that’s it.
We inject IOptions inside the constructor and use the Value property to extract the JwtConfiguration object with all the populated properties. Nothing else has to change in this class.
If we start the application again and send the same requests, we will still get valid results meaning that we’ve successfully implemented IOptions in our project.
One more thing. We didn’t modify anything inside the ServiceExtensions/ConfigureJWT method. That’s because this configuration happens during the service registration and not after services are built. This means that we can’t resolve our required service here.
Well, to be precise, we can use the BuildServiceProvider method to build a service provider containing all the services from the provided IServiceCollection, and thus being able to access the required service. But if you do that, you will create one more list of singleton services, which can be quite expensive depending on the size of your application. So, you should be careful with this method.
That said, using Binding to access configuration values is perfectly safe and cheap in this stage of the application’s lifetime.
29.2.2 IOptionsSnapshot and IOptionsMonitor
The previous code looks great but if we want to change the value of Expires to 10 instead of 5 for example, we need to restart the application to do it. You can imagine how useful would be to have a published application and all you need to do is to modify the value in the configuration file without restarting the whole app.
Well, there is a way to do it by using IOptionsSnapshot or IOptionsMonitor.
All we would have to do is to replace the IOptions
So the main difference between these two interfaces is that the IOptionsSnapshot service is registered as a scoped service and thus can’t be injected inside the singleton service. On the other hand, IOptionsMonitor is registered as a singleton service and can be injected into any service lifetime.
To make the comparison even clearer, we have prepared the following list for you:
IOptions
• Is the original Options interface and it’s better than binding the whole Configuration
• Does not support configuration reloading
• Is registered as a singleton service and can be injected anywhere
• Binds the configuration values only once at the registration, and returns the same values every time
• Does not support named options
IOptionsSnapshot
• Registered as a scoped service
• Supports configuration reloading
• Cannot be injected into singleton services
• Values reload per request
• Supports named options
IOptionsMonitor
• Registered as a singleton service
• Supports configuration reloading
• Can be injected into any service lifetime
• Values are cached and reloaded immediately
• Supports named options
Having said that, we can see that if we don’t want to enable live reloading or we don’t need named options, we can simply use IOptions
We have mentioned Named Options a couple of times so let’s explain what that is.
Let’s assume, just for example sake, that we have a configuration like this one:
"JwtSettings": { "validIssuer": "CodeMazeAPI", "validAudience": "https://localhost:5001", "expires": 5 }, "JwtAPI2Settings": { "validIssuer": "CodeMazeAPI2", "validAudience": "https://localhost:5002", "expires": 10 },Instead of creating a new JwtConfiguration2 class that has the same properties as our existing JwtConfiguration class, we can add another configuration:
services.Configure<JwtConfiguration>("JwtSettings", configuration.GetSection("JwtSettings")); services.Configure<JwtConfiguration>("JwtAPI2Settings", configuration.GetSection("JwtAPI2Settings"));Now both sections are mapped to the same configuration class, which makes sense. We don’t want to create multiple classes with the same properties and just name them differently. This is a much better way of doing it.
Calling the specific option is now done using the Get method with a section name as a parameter instead of the Value or CurrentValue properties:
_jwtConfiguration = _configuration.Get("JwtSettings");That’s it. All the rest is the same.
30 DOCUMENTING API WITH SWAGGER
Developers who consume our API might be trying to solve important business problems with it. Hence, it is very important for them to understand how to use our API effectively. This is where API documentation comes into the picture.
API documentation is the process of giving instructions on how to effectively use and integrate an API. Hence, it can be thought of as a concise reference manual containing all the information required to work with the API, with details about functions, classes, return types, arguments, and more, supported by tutorials and examples.
So, having the proper documentation for our API enables consumers to integrate our APIs as quickly as possible and move forward with their development. Furthermore, this also helps them understand the value and usage of our API, improves the chances for our API’s adoption, and makes our APIs easier to maintain and support.
30.1 About Swagger
Swagger is a language-agnostic specification for describing REST APIs. Swagger is also referred to as OpenAPI. It allows us to understand the capabilities of a service without looking at the actual implementation code.
Swagger minimizes the amount of work needed while integrating an API. Similarly, it also helps API developers document their APIs quickly and accurately.
Swagger Specification is an important part of the Swagger flow. By default, a document named swagger.json is generated by the Swagger tool which is based on our API. It describes the capabilities of our API and how to access it via HTTP.
30.2 Swagger Integration Into Our Project
We can use the Swashbuckle package to easily integrate Swagger into our .NET Core Web API project. It will generate the Swagger specification for the project as well. Additionally, the Swagger UI is also contained within Swashbuckle.
There are three main components in the Swashbuckle package:
• Swashbuckle.AspNetCore.Swagger: This contains the Swagger object model and the middleware to expose SwaggerDocument objects as JSON.
• Swashbuckle.AspNetCore.SwaggerGen: A Swagger generator that builds SwaggerDocument objects directly from our routes, controllers, and models.
• Swashbuckle.AspNetCore.SwaggerUI: An embedded version of the Swagger UI tool. It interprets Swagger JSON to build a rich, customizable experience for describing web API functionality.
So, the first thing we are going to do is to install the required library in the main project. Let’s open the Package Manager Console window and type the following command:
PM> Install-Package Swashbuckle.AspNetCoreAfter a couple of seconds, the package will be installed. Now, we have to configure the Swagger Middleware. To do that, we are going to add a new method in the ServiceExtensions class:
public static void ConfigureSwagger(this IServiceCollection services) { services.AddSwaggerGen(s => { s.SwaggerDoc("v1", new OpenApiInfo { Title = "Code Maze API", Version = "v1" }); s.SwaggerDoc("v2", new OpenApiInfo { Title = "Code Maze API", Version = "v2" }); }); }We are creating two versions of SwaggerDoc because if you remember, we have two versions for the Companies controller and we want to separate them in our documentation.
Also, we need an additional namespace:
using Microsoft.OpenApi.Models;The next step is to call this method in the Program class:
builder.Services.ConfigureSwagger();And in the middleware part of the class, we are going to add it to the application’s execution pipeline together with the UI feature:
app.UseSwagger(); app.UseSwaggerUI(s => { s.SwaggerEndpoint("/swagger/v1/swagger.json", "Code Maze API v1"); s.SwaggerEndpoint("/swagger/v2/swagger.json", "Code Maze API v2"); });Finally, let’s slightly modify the Companies and CompaniesV2 controllers:
[Route("api/companies")] [ApiController] [ApiExplorerSettings(GroupName = "v1")] public class CompaniesController : ControllerBase [Route("api/companies")] [ApiController] [ApiExplorerSettings(GroupName = "v2")] public class CompaniesV2Controller : ControllerBaseWith this change, we state that the CompaniesController belongs to group v1 and the CompaniesV2Controller belongs to group v2. All the other controllers will be included in both groups because they are not versioned. Which is what we want.
And that is all. We have prepared the basic configuration.
Now, we can start our app, open the browser, and navigate to https://localhost:5001/swagger/v1/swagger.json. Once the page is up, you are going to see a json document containing all the controllers and actions without the v2 companies controller. Of course, if you change v1 to v2 in the URL, you are going to see all the controllers — including v2 companies, but without v1 companies.
Additionally, let’s navigate to https://localhost:5001/swagger/index.html:
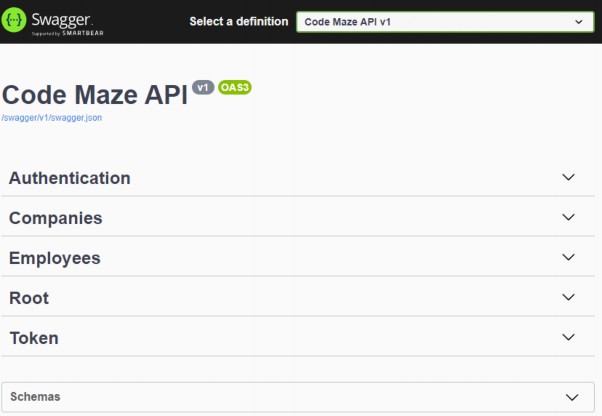
Also if we expand the Schemas part, we are going to find the DTOs that we used in our project.
If we click on a specific controller to expand its details, we are going to see all the actions inside:
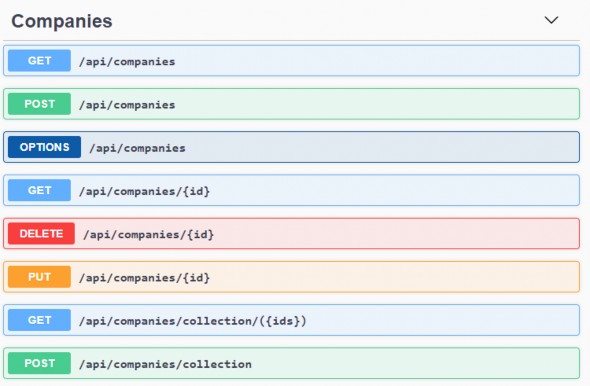
Once we click on an action method, we can see detailed information like parameters, response, and example values. There is also an option to try out each of those action methods by clicking the Try it out button.
So, let’s try it with the /api/companies action:
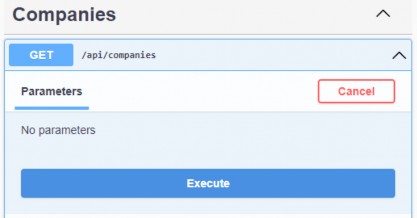
Once we click the Execute button, we are going to see that we get our response:
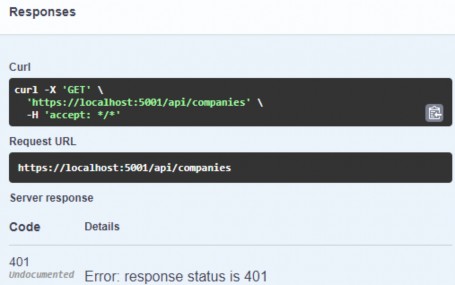
And this is an expected response. We are not authorized. To enable authorization, we have to add some modifications.
30.3 Adding Authorization Support
To add authorization support, we need to modify the ConfigureSwagger method:
public static void ConfigureSwagger(this IServiceCollection services) { services.AddSwaggerGen(s => { s.SwaggerDoc("v1", new OpenApiInfo { Title = "Code Maze API", Version = "v1" }); s.SwaggerDoc("v2", new OpenApiInfo { Title = "Code Maze API", Version = "v2" }); s.AddSecurityDefinition("Bearer", new OpenApiSecurityScheme { In = ParameterLocation.Header, Description = "Place to add JWT with Bearer", Name = "Authorization", Type = SecuritySchemeType.ApiKey, Scheme = "Bearer" }); s.AddSecurityRequirement(new OpenApiSecurityRequirement() { { new OpenApiSecurityScheme { Reference = new OpenApiReference { Type = ReferenceType.SecurityScheme, Id = "Bearer"}, Name = "Bearer", }, new List<string>() } }); }); }
With this modification, we are adding the security definition in our swagger configuration. Now, we can start our app again and navigate to the index.html page.
The first thing we are going to notice is the Authorize options for requests:
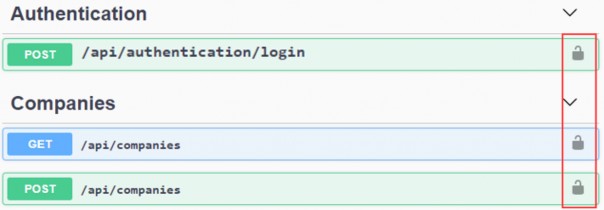
We are going to use that in a moment. But let’s get our token first. For that, let’s open the api/authentication/login action, click try it out, add credentials, and copy the received token:
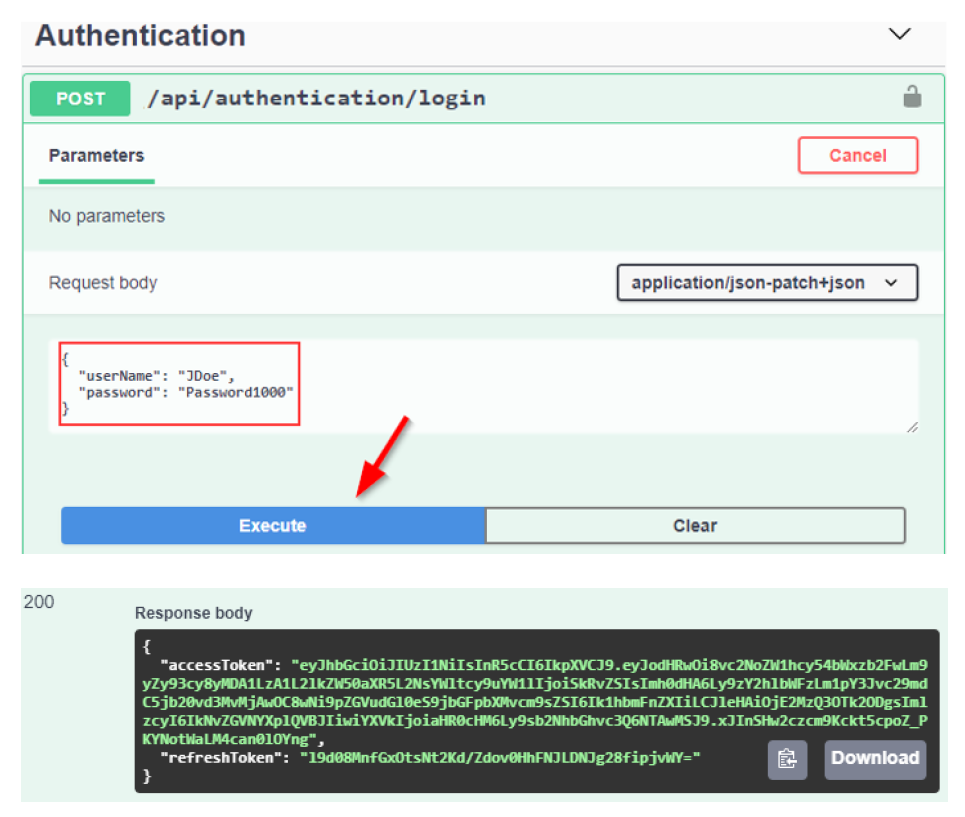
Once we have copied the token, we are going to click on the authorization button for the /api/companies request, paste it with the Bearer in front of it, and click Authorize:
After authorization, we are going to click on the Close button and try our request:
And we get our response. Excellent job.
30.4 Extending Swagger Configuration
Swagger provides options for extending the documentation and customizing the UI. Let’s explore some of those.
First, let’s see how we can specify the API info and description. The configuration action passed to the AddSwaggerGen() method adds information such as Contact, License, and Description. Let’s provide some values for those:
s.SwaggerDoc("v1", new OpenApiInfo { Title = "Code Maze API", Version = "v1", Description = "CompanyEmployees API by CodeMaze", TermsOfService = new Uri("https://example.com/terms"), Contact = new OpenApiContact { Name = "John Doe", Email = "John.Doe@gmail.com", Url = new Uri("https://twitter.com/johndoe"), }, License = new OpenApiLicense { Name = "CompanyEmployees API LICX", Url = new Uri("https://example.com/license"), } });
......We have implemented this just for the first version, but you get the point. Now, let’s run the application once again and explore the Swagger UI:
For enabling XML comments, we need to suppress warning 1591, which will now give warnings about any method, class, or field that doesn’t have triple-slash comments. We need to do this in the Presentation project.
Additionally, we have to add the documentation path for the same project, since our controllers are in the Presentation project:
<Project Sdk="Microsoft.NET.Sdk"> <PropertyGroup> <TargetFramework>net6.0</TargetFramework> <ImplicitUsings>enable</ImplicitUsings> <Nullable>enable</Nullable> </PropertyGroup> <PropertyGroup Condition="'$(Configuration)|$(Platform)'=='Debug|AnyCPU'"> <DocumentationFile>CompanyEmployees.Presentation.xml</DocumentationFile> <OutputPath></OutputPath> <NoWarn>1701;1702;1591</NoWarn> </PropertyGroup> <PropertyGroup Condition="'$(Configuration)|$(Platform)'=='Release|AnyCPU'"> <NoWarn>1701;1702;1591</NoWarn> </PropertyGroup>Now, let’s modify our configuration:
s.SwaggerDoc("v2", new OpenApiInfo { Title = "Code Maze API", Version = "v2" }); var xmlFile = $"{typeof(Presentation.AssemblyReference).Assembly.GetName().Name}.xml"; var xmlPath = Path.Combine(AppContext.BaseDirectory, xmlFile); s.IncludeXmlComments(xmlPath);Next, adding triple-slash comments to the action method enhances the Swagger UI by adding a description to the section header:
/// <summary> /// Gets the list of all companies /// </summary> /// <returns>The companies list</returns> [HttpGet(Name = "GetCompanies")] [Authorize(Roles = "Manager")] public async Task<IActionResult> GetCompanies()And this is the result:

The developers who consume our APIs are usually more interested in what it returns — specifically the response types and error codes. Hence, it is very important to describe our response types. These are denoted using XML comments and data annotations.
Let’s enhance the response types a little bit:
/// <summary> /// Creates a newly created company /// </summary> /// <param name="company"></param> /// <returns>A newly created company</returns> /// <response code="201">Returns the newly created item</response> /// <response code="400">If the item is null</response> /// <response code="422">If the model is invalid</response> [HttpPost(Name = "CreateCompany")] [ProducesResponseType(201)] [ProducesResponseType(400)] [ProducesResponseType(422)]Here, we are using both XML comments and data annotation attributes. Now, we can see the result:

And, if we inspect the response part, we will find our mentioned responses:
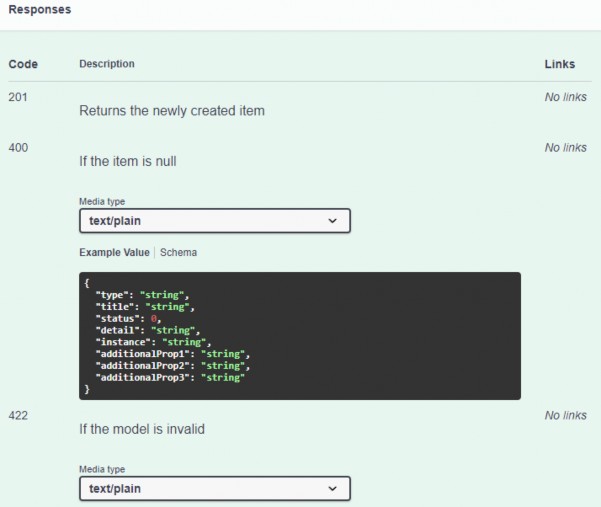
Excellent.
We can continue to the deployment part.
30 DEPLOYMENT TO IIS
Before we start the deployment process, we would like to point out one important thing. We should always try to deploy an application on at least a local machine to somehow simulate the production environment as soon as we start with development. That way, we can observe how the application behaves in a production environment from the beginning of the development process.
That leads us to the conclusion that the deployment process should not be the last step of the application’s lifecycle. We should deploy our application to the staging environment as soon as we start building it.
That said, let’s start with the deployment process.
31.1 Creating Publish Files
Let’s create a folder on the local machine with the name Publish. Inside that folder, we want to place all of our files for deployment. After the folder creation, let’s right-click on the main project in the Solution Explorer window and click publish option:
In the “Pick a publish target” window, we are going to choose the Folder option and click Next:
And point to the location of the Publish folder we just created and click Finish:
Publish windows can be different depending on the Visual Studio version.
After that, we have to click the Publish button:
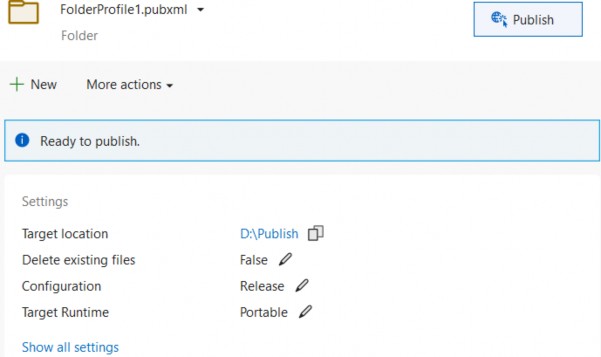
Visual Studio is going to do its job and publish the required files in the specified folder.
31.2 Windows Server Hosting Bundle
Before any further action, let’s install the .NET Core Windows Server Hosting bundle on our system to install .NET Core Runtime. Furthermore, with this bundle, we are installing the .NET Core Library and the ASP.NET Core Module. This installation will create a reverse proxy between IIS and the Kestrel server, which is crucial for the deployment process.
If you have a problem with missing SDK after installing the Hosting Bundle, follow this solution suggested by Microsoft:
Installing the .NET Core Hosting Bundle modifies the PATH when it installs the .NET Core runtime to point to the 32-bit (x86) version of .NET Core (C:\Program Files (x86)\dotnet). This can result in missing SDKs when the 32-bit (x86) .NET Core dotnet command is used (No .NET Core SDKs were detected). To resolve this problem, move C:\Program Files\dotnet\to a position before C:\Program Files (x86)\dotnet\ on the PATH environment variable.
After the installation, we are going to locate the Windows hosts file on C:\Windows\System32\drivers\etc and add the following record at the end of the file:
127.0.0.1 www.companyemployees.codemaze
After that, we are going to save the file.
31.3 Installing IIS
If you don’t have IIS installed on your machine, you need to install it by opening ControlPanel and then Programs and Features:
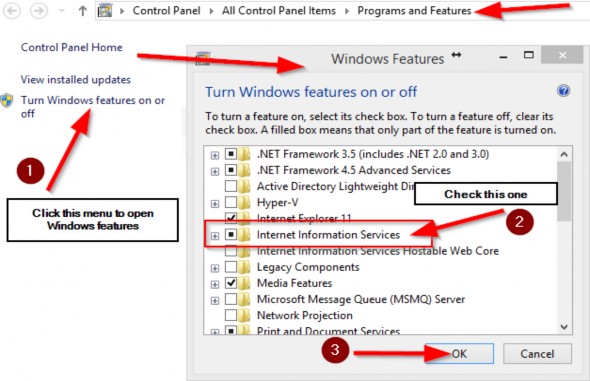
After the IIS installation finishes, let’s open the Run window (windows key + R) and type: inetmgr to open the IIS manager:

Now, we can create a new website:

In the next window, we need to add a name to our site and a path to the published files:
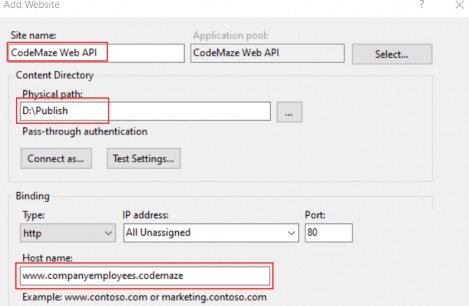
And click the OK button.
After this step, we are going to have our site inside the “sites” folder in the IIS Manager. Additionally, we need to set up some basic settings for our application pool:
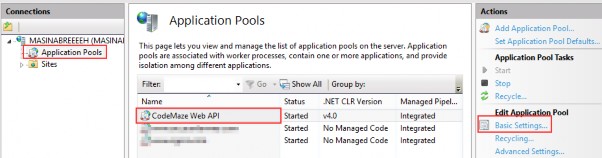
After we click on the Basic Settings link, let’s configure our application pool:
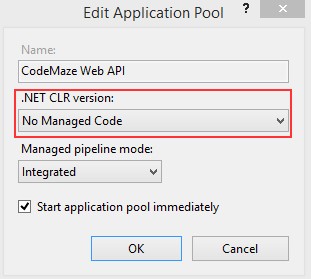
ASP.NET Core runs in a separate process and manages the runtime. It doesn't rely on loading the desktop CLR (.NET CLR). The Core Common Language Runtime for .NET Core is booted to host the app in the worker process. Setting the .NET CLR version to No Managed Code is optional but recommended.
Our website and the application pool should be started automatically.
31.4 Configuring Environment File
In the section where we configured JWT, we had to use a secret key that we placed in the environment file. Now, we have to provide to IIS the name of that key and the value as well.
The first step is to click on our site in IIS and open Configuration Editor:
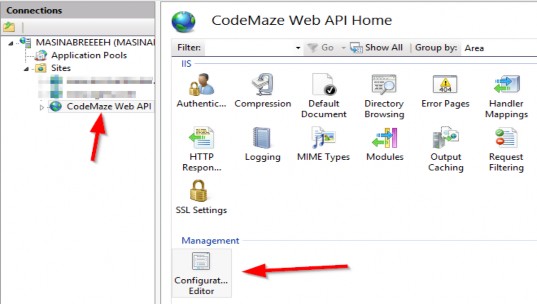
Then, in the section box, we are going to choose system.webServer/aspNetcore:
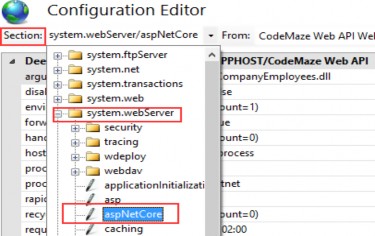
From the “From” combo box, we are going to choose ApplicationHost.config:

After that, we are going to select environment variables:
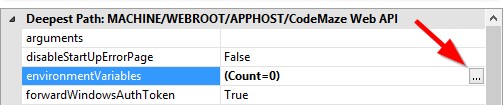
Click Add and type the name and the value of our variable:
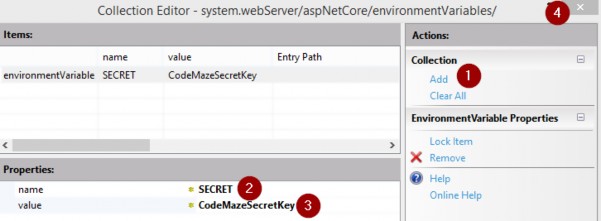
As soon as we click the close button, we should click apply in the next window, restart our application in IIS, and we are good to go.
31.5 Testing Deployed Application
Let’s open Postman and send a request for the Root document:
http://www.companyemployees.codemaze/api
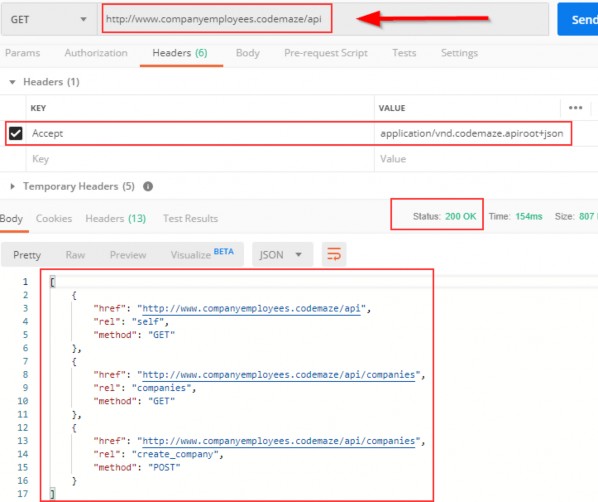
We can see that our API is working as expected. If it’s not, and you have a problem related to web.config in IIS, try reinstalling the Server Hosting Bundle package.
If you get an error message that the Presentation.xml file is missing, you can copy it from the project and paste it into the Publish folder. Also, in the Properties window for that file, you can set it to always copy during the publish.
Now, let’s continue.
We still have one more thing to do. We have to add a login to the SQL Server for IIS APPPOOL\CodeMaze Web Api and grant permissions to the database. So, let’s open the SQL Server Management Studio and add a new login:
In the next window, we are going to add our user:
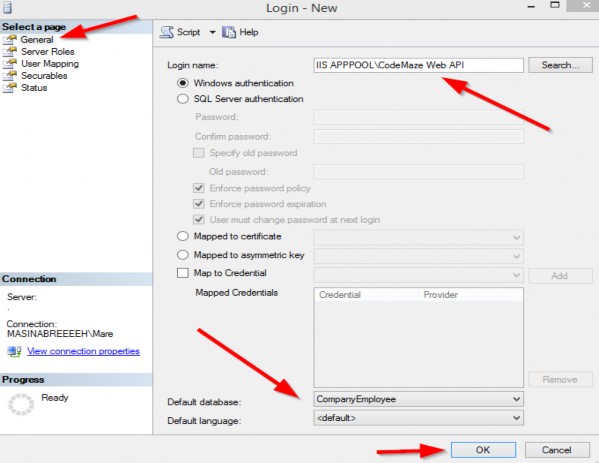
After that, we are going to expand the Logins folder, right-click on our user, and choose Properties. There, under UserMappings, we have to select the CompanyEmployee database and grant the dbwriter and dbreader roles.
Now, we can try to send the Authentication request:
http://www.companyemployees.codemaze/api/authentication/login
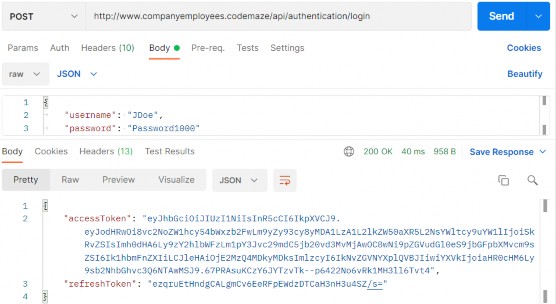
Excellent; we have our token. Now, we can send the request to the GetCompanies action with the generated token:
http://www.companyemployees.codemaze/api/companies
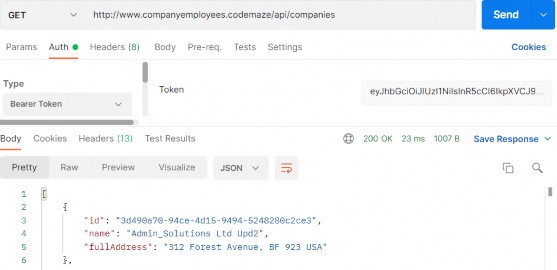
And there we go. Our API is published and working as expected.
32 BONUS 1 - RESPONSE PERFORMANCE IMPROVEMENTS
As mentioned in section 6.1.1, we will show you an alternative way of handling error responses. To repeat, with custom exceptions, we have great control of returning error responses to the client due to the global error handler, which is pretty fast if we use it correctly. Also, the code is pretty clean and straightforward since we don’t have to care about the return types and additional validation in the service methods.
Even though some libraries enable us to write custom responses, for example, OneOf, we still like to create our abstraction logic, which is tested by us and fast. Additionally, we want to show you the whole creation process for such a flow.
For this example, we will use an existing project from part 6 and modify it to implement our API Response flow.
32.1 Adding Response Classes to the Project
Let’s start with the API response model classes.
The first thing we are going to do is create a new Responses folder in the Entities project. Inside that folder, we are going to add our first class:
public abstract class ApiBaseResponse { public bool Success { get; set; } protected ApiBaseResponse(bool success) => Success = success; }This is an abstract class, which will be the main return type for all of our methods where we have to return a successful result or an error result. It also contains a single Success property stating whether the action was successful or not.
Now, if our result is successful, we are going to create only one class in the same folder:
public sealed class ApiOkResponse<TResult> : ApiBaseResponse { public TResult Result { get; set; } public ApiOkResponse(TResult result) :base(true) { Result = result; } }We are going to use this class as a return type for a successful result. It inherits from the ApiBaseResponse and populates the Success property to true through the constructor. It also contains a single Result property of type TResult. We will store our concrete result in this property, and since we can have different result types in different methods, this property is a generic one.
That’s all regarding the successful responses. Let’s move one to the error classes.
For the error responses, we will follow the same structure as we have for the exception classes. So, we will have base abstract classes for NotFound or BadRequest or any other error responses, and then concrete implementations for these classes like CompanyNotFound or CompanyBadRequest, etc.
That said, let’s use the same folder to create an abstract error class:
public abstract class ApiNotFoundResponse : ApiBaseResponse { public string Message { get; set; } public ApiNotFoundResponse(string message) : base(false) { Message = message; } }This class also inherits from the ApiBaseResponse, populates the Success property to false, and has a single Message property for the error message.
In the same manner, we can create the ApiBadRequestResponse class:
public abstract class ApiBadRequestResponse : ApiBaseResponse { public string Message { get; set; } public ApiBadRequestResponse(string message) : base(false) { Message = message; } }This is the same implementation as the previous one. The important thing to notice is that both of these classes are abstract.
To continue, let’s create a concrete error response:
public sealed class CompanyNotFoundResponse : ApiNotFoundResponse { public CompanyNotFoundResponse(Guid id) : base($"Company with id: {id} is not found in db.") { } }The class inherits from the ApiNotFoundResponse abstract class, which again inherits from the ApiBaseResponse class. It accepts an id parameter and creates a message that sends to the base class.
We are not going to create the CompanyBadRequestResponse class because we are not going to need it in our example. But the principle is the same.
32.2 Service Layer Modification
Now that we have the response model classes, we can start with the service layer modification.
Let’s start with the ICompanyService interface:
public interface ICompanyService { ApiBaseResponse GetAllCompanies(bool trackChanges); ApiBaseResponse GetCompany(Guid companyId, bool trackChanges); }We don’t return concrete types in our methods anymore. Instead of the IEnumerable
After the interface modification, we can modify the CompanyService class:
public ApiBaseResponse GetAllCompanies(bool trackChanges) { var companies = _repository.Company.GetAllCompanies(trackChanges); var companiesDto = _mapper.Map<IEnumerable<CompanyDto>>(companies); return new ApiOkResponse<IEnumerable<CompanyDto>>(companiesDto); } public ApiBaseResponse GetCompany(Guid id, bool trackChanges) { var company = _repository.Company.GetCompany(id, trackChanges); if (company is null) return new CompanyNotFoundResponse(id); var companyDto = _mapper.Map<CompanyDto>(company); return new ApiOkResponse<CompanyDto>(companyDto); }Both method signatures are modified to use APIBaseResponse, and also the return types are modified accordingly. Additionally, in the GetCompany method, we are not using an exception class to return an error result but the CompanyNotFoundResponse class. With the ApiBaseResponse abstraction, we are safe to return multiple types from our method as long as they inherit from the ApiBaseResponse abstract class. Here you could also log some messages with _logger.
One more thing to notice here.
In the GetAllCompanies method, we don’t have an error response just a successful one. That means we didn’t have to implement our Api response flow, and we could’ve left the method unchanged (in the interface and this class). If you want that kind of implementation it is perfectly fine. We
just like consistency in our projects, and due to that fact, we’ve changed both methods.
32.3 Controller Modification
Before we start changing the actions in the CompaniesController, we have to create a way to handle error responses and return them to the client – similar to what we have with the global error handler middleware.
We are not going to create any additional middleware but another controller base class inside the Presentation/Controllers folder:
public class ApiControllerBase : ControllerBase { public IActionResult ProcessError(ApiBaseResponse baseResponse) { return baseResponse switch { ApiNotFoundResponse => NotFound(new ErrorDetails { Message = ((ApiNotFoundResponse)baseResponse).Message, StatusCode = StatusCodes.Status404NotFound }), ApiBadRequestResponse => BadRequest(new ErrorDetails { Message = ((ApiBadRequestResponse)baseResponse).Message, StatusCode = StatusCodes.Status400BadRequest }), _ => throw new NotImplementedException() }; } }This class inherits from the ControllerBase class and implements a single ProcessError action accepting an ApiBaseResponse parameter. Inside the action, we are inspecting the type of the sent parameter, and based on that type we return an appropriate message to the client. A similar thing we did in the exception middleware class.
If you add additional error response classes to the Response folder, you only have to add them here to process the response for the client.
Additionally, this is where we can see the advantage of our abstraction approach.
Now, we can modify our CompaniesController:
[Route("api/companies")] [ApiController] public class CompaniesController : ApiControllerBase { private readonly IServiceManager _service; public CompaniesController(IServiceManager service) => _service = service; [HttpGet] public IActionResult GetCompanies() { var baseResult = _service.CompanyService.GetAllCompanies(trackChanges: false); var companies = ((ApiOkResponse<IEnumerable<CompanyDto>>)baseResult).Result; return Ok(companies); } [HttpGet("{id:guid}")] public IActionResult GetCompany(Guid id) { var baseResult = _service.CompanyService.GetCompany(id, trackChanges: false); if (!baseResult.Success) return ProcessError(baseResult); var company = ((ApiOkResponse<CompanyDto>)baseResult).Result; return Ok(company); } }Now our controller inherits from the ApiControllerBase, which inherits from the ControllerBase class. In the GetCompanies action, we extract the result from the service layer and cast the baseResult variable to the concrete ApiOkResponse type, and use the Result property to extract our required result of type IEnumerable
We do a similar thing for the GetCompany action. Of course, here we check if our result is successful and if it’s not, we return the result of the ProcessError method.
And that’s it.
We can leave the solution as is, but we mind having these castings inside our actions – they can be moved somewhere else making them reusable and our actions cleaner. So, let’s do that.
In the same project, we are going to create a new Extensions folder and a new ApiBaseResponseExtensions class:
public static class ApiBaseResponseExtensions { public static TResultType GetResult<TResultType>(this ApiBaseResponse apiBaseResponse) => ((ApiOkResponse<TResultType>)apiBaseResponse).Result; }The GetResult method will extend the ApiBaseResponse type and return the result of the required type.
Now, we can modify actions inside the controller:
[HttpGet] public IActionResult GetCompanies() { var baseResult = _service.CompanyService.GetAllCompanies(trackChanges: false); var companies = baseResult.GetResult<IEnumerable<CompanyDto>>(); return Ok(companies); } [HttpGet("{id:guid}")] public IActionResult GetCompany(Guid id) { var baseResult = _service.CompanyService.GetCompany(id, trackChanges: false); if (!baseResult.Success) return ProcessError(baseResult); var company = baseResult.GetResult<CompanyDto>(); return Ok(company); }This is much cleaner and easier to read and understand.
32.4 Testing the API Response Flow
Now we can start our application, open Postman, and send some requests.
Let’s try to get all the companies:
https://localhost:5001/api/companies

Then, we can try to get a single company:
https://localhost:5001/api/companies/3d490a70-94ce-4d15-9494-5248280c2ce3
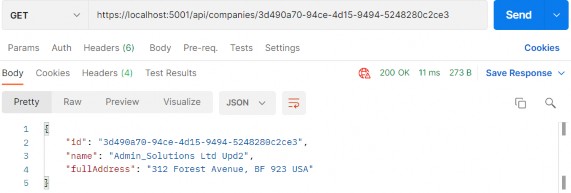
And finally, let’s try to get a company that does not exist:
https://localhost:5001/api/companies/3d490a70-94ce-4d15-9494-5248280c2ce2
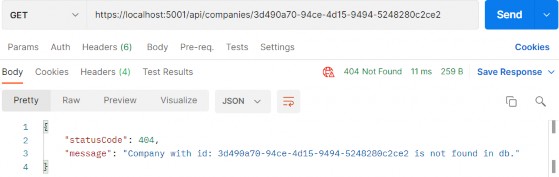
And we have our response with a proper status code and response body. Excellent.
We have a solution that is easy to implement, fast, and extendable.
Our suggestion is to go with custom exceptions since they are easier to implement and fast as well. But if you have an app flow where you have to return error responses at a much higher rate and thus maybe impact the app’s performance, the APi Response flow is the way to go.
33 BONUS 2 - INTRODUCTION TO CQRS AND MEDIATR WITH ASP.NET CORE WEB API
In this chapter, we will provide an introduction to the CQRS pattern and how the .NET library MediatR helps us build software with this architecture.
In the Source Code folder, you will find the folder for this chapter with two folders inside – start and end. In the start folder, you will find a prepared project for this section. We are going to use it to explain the implementation of CQRS and MediatR. We have used the existing project from one of the previous chapters and removed the things we don’t need or want to replace - like the service layer.
In the end folder, you will find a finished project for this chapter.
33.1 About CQRS and Mediator Pattern
The MediatR library was built to facilitate two primary software architecture patterns: CQRS and the Mediator pattern. Whilst similar, let’s spend a moment understanding the principles behind each pattern.
33.1.1 CQRS
CQRS stands for “Command Query Responsibility Segregation”. As the acronym suggests, it’s all about splitting the responsibility of commands (saves) and queries (reads) into different models.
If we think about the commonly used CRUD pattern (Create-Read- Update-Delete), we usually have the user interface interacting with a datastore responsible for all four operations. CQRS would instead have us split these operations into two models, one for the queries (aka “R”), and another for the commands (aka “CUD”).
The following image illustrates how this works:
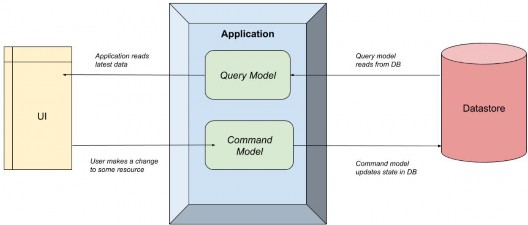
The Application simply separates the query and command models.
The CQRS pattern makes no formal requirements of how this separation occurs. It could be as simple as a separate class in the same application (as we’ll see shortly with MediatR), all the way up to separate physical applications on different servers. That decision would be based on factors such as scaling requirements and infrastructure, so we won’t go into that decision path here.
The key point being is that to create a CQRS system, we just need to split the reads from the writes.
What problem is this trying to solve?
Well, a common reason is when we design a system, we start with data storage. We perform database normalization, add primary and foreign keys to enforce referential integrity, add indexes, and generally ensure the “write system” is optimized. This is a common setup for a relational database such as SQL Server or MySQL. Other times, we think about the read use cases first, then try and add that into a database, worrying less about duplication or other relational DB concerns (often “document databases” are used for these patterns).
Neither approach is wrong. But the issue is that it’s a constant balancing act between reads and writes, and eventually one side will “win out”. All further development means both sides need to be analyzed, and often one is compromised.
CQRS allows us to “break free” from these considerations and give each system the equal design and consideration it deserves without worrying about the impact of the other system. This has tremendous benefits on both performance and agility, especially if separate teams are working on these systems.
33.1.2 Advantages and Disadvantages of CQRS
The benefits of CQRS are:
• Single Responsibility – Commands and Queries have only one job. It is either to change the state of the application or retrieve it. Therefore, they are very easy to reason about and understand.
• Decoupling – The Command or Query is completely decoupled from its handler, giving you a lot of flexibility on the handler side to implement it the best way you see fit.
• Scalability – The CQRS pattern is very flexible in terms of how you can organize your data storage, giving you options for great scalability. You can use one database for both Commands and Queries. You can use separate Read/Write databases, for improved performance, with messaging or replication between the databases for synchronization.
• Testability – It is very easy to test Command or Query handlers since they will be very simple by design, and perform only a single job.
Of course, it can’t all be good. Here are some of the disadvantages of CQRS:
• Complexity – CQRS is an advanced design pattern, and it will take you time to fully understand it. It introduces a lot of complexity that will create friction and potential problems in your project. Be sure to consider everything, before deciding to use it in your project.
• Learning Curve – Although it seems like a straightforward design pattern, there is still a learning curve with CQRS. Most developers are used to the procedural (imperative) style of writing code, and CQRS is a big shift away from that.
• Hard to Debug – Since Commands and Queries are decoupled from their handler, there isn’t a natural imperative flow of the application. This makes it harder to debug than traditional applications.
33.1.3 Mediator Pattern
The Mediator pattern is simply defining an object that encapsulates how objects interact with each other. Instead of having two or more objects take a direct dependency on each other, they instead interact with a “mediator”, who is in charge of sending those interactions to the other party:
In this image, SomeService sends a message to the Mediator, and the Mediator then invokes multiple services to handle the message. There is no direct dependency between any of the blue components.
The reason the Mediator pattern is useful is the same reason patterns like Inversion of Control are useful. It enables “loose coupling”, as the dependency graph is minimized and therefore code is simpler and easier to test. In other words, the fewer considerations a component has, the easier it is to develop and evolve.
We saw in the previous image how the services have no direct dependency, and the producer of the messages doesn’t know who or how many things are going to handle it. This is very similar to how a message broker works in the “publish/subscribe” pattern. If we wanted to add another handler we could, and the producer wouldn’t have to be modified.
Now that we’ve been over some theory, let’s talk about how MediatR makes all these things possible.
33.2 How MediatR facilitates CQRS and Mediator Patterns
You can think of MediatR as an “in-process” Mediator implementation, that helps us build CQRS systems. All communication between the user interface and the data store happens via MediatR.
The term “in process” is an important limitation here. Since it’s a .NET library that manages interactions within classes on the same process, it’s not an appropriate library to use if we want to separate the commands and queries across two systems. A better approach would be to use a message broker such as Kafka or Azure Service Bus.
However, for this chapter, we are going to stick with a simple single- process CQRS system, so MediatR fits the bill perfectly.
33.3 Adding Application Project and Initial Configuration
Let’s start by opening the starter project from the start folder. You will see that we don’t have the Service nor the Service.Contracts projects. Well, we don’t need them. We are going to use CQRS with MediatR to replace that part of our solution.
But, we do need an additional project for our business logic so, let’s create a new class library (.NET Core) and name it Application.
Additionally, we are going to add a new class named AssemblyReference. We will use it for the same purpose as we used the class with the same name in the Presentation project:
public static class AssemblyReference { }Now let’s install a couple of packages.
The first package we are going to install is the MediatR in the Application project:
PM> install-package MediatRThen in the main project, we are going to install another package that wires up MediatR with the ASP.NET dependency injection container:
PM> install-package MediatR.Extensions.Microsoft.DependencyInjectionAfter the installations, we are going to configure MediatR in the Program class:
builder.Services.AddMediatR(typeof(Application.AssemblyReference).Assembly);For this, we have to reference the Application project, and add a using directive:
using MediatR;The AddMediatR method will scan the project assembly that contains the handlers that we are going to use to handle our business logic. Since we are going to place those handlers in the Application project, we are using the Application’s assembly as a parameter.
Before we continue, we have to reference the Application project from the Presentation project.
Now MediatR is configured, and we can use it inside our controller.
In the Controllers folder of the Presentation project, we are going to find a single controller class. It contains only a base code, and we are going to modify it by adding a sender through the constructor injection:
[Route("api/companies")] [ApiController] public class CompaniesController : ControllerBase { private readonly ISender _sender; public CompaniesController(ISender sender) => _sender = sender; }Here we inject the ISender interface from the MediatR namespace. We are going to use this interface to send requests to our handlers.
We have to mention one thing about using ISender and not the IMediator interface. From the MediatR version 9.0, the IMediator interface is split into two interfaces:
public interface ISender { Task<TResponse> Send<TResponse>(IRequest<TResponse> request, CancellationToken cancellationToken = default); Task<object?> Send(object request, CancellationToken cancellationToken = default); } public interface IPublisher { Task Publish(object notification, CancellationToken cancellationToken = default); Task Publish<TNotification>(TNotification notification, CancellationToken cancellationToken = default) where TNotification : INotification; } public interface IMediator : ISender, IPublisher { }So, by looking at the code, it is clear that you can continue using the IMediator interface to send requests and publish notifications. But it is recommended to split that by using ISender and IPublisher interfaces.
With that said, we can continue with the Application’s logic implementation.
33.4 Requests with MediatR
MediatR Requests are simple request-response style messages where a single request is synchronously handled by a single handler (synchronous from the request point of view, not C# internal async/await). Good use cases here would be returning something from a database or updating a database.
There are two types of requests in MediatR. One that returns a value, and one that doesn’t. Often this corresponds to reads/queries (returning a value) and writes/commands (usually doesn’t return a value).
So, before we start sending requests, we are going to create several folders in the Application project to separate queries, commands, and handlers:
Since we are going to work only with the company entity, we are going to place our queries, commands, and handlers directly into these folders.
But in larger projects with multiple entities, we can create additional folders for each entity inside each of these folders for better organization.
Also, as we already know, we are not going to send our entities as a result to the client but DTOs, so we have to reference the Shared project.
That said, let’s start with our first query. Let’s create it in the Queries folder:
public sealed record GetCompaniesQuery(bool TrackChanges) : IRequest<IEnumerable<CompanyDto>>;Here, we create the GetCompaniesQuery record, which implements IRequest<IEnumerable
Here we need two additional namespaces:
using MediatR;
using Shared.DataTransferObjects;Once we send the request from our controller’s action, we are going to see the usage of this query.
After the query, we need a handler. This handler in simple words will be our replacement for the service layer method that we had in our project. In our previous project, all the service classes were using the repository to access the database – we will make no difference here. For that, we have to reference the Contracts project so we can access the IRepositoryManager interface.
After adding the reference, we can create a new GetCompaniesHandler class in the Handlers folder:
internal sealed class GetCompaniesHandler : IRequestHandler<GetCompaniesQuery, IEnumerable<CompanyDto>> { private readonly IRepositoryManager _repository; public GetCompaniesHandler(IRepositoryManager repository) => _repository = repository; public Task<IEnumerable<CompanyDto>> Handle(GetCompaniesQuery request, CancellationToken cancellationToken) { throw new NotImplementedException(); } }Our handler inherits from IRequestHandler<GetCompaniesQuery,IEnumerable
We also inject the repository through the constructor and add a default implementation of the Handle method, required by the IRequestHandler interface.
These are the required namespaces:
using Application.Queries;
using Contracts;
using MediatR;
using Shared.DataTransferObjects;Of course, we are not going to leave this method to throw an exception. But before we add business logic, we have to install AutoMapper in the Application project:
PM> Install-Package AutoMapper.Extensions.Microsoft.DependencyInjectionRegister the package in the Program class:
builder.Services.AddAutoMapper(typeof(Program));
builder.Services.AddMediatR(typeof(Application.AssemblyReference).Assembly);And create the MappingProfile class, also in the main project, with a single mapping rule:
public class MappingProfile : Profile { public MappingProfile() { CreateMap<Company, CompanyDto>() .ForMember(c => c.FullAddress, opt => opt.MapFrom(x => string.Join(' ', x.Address, x.Country))); } }Everything with these actions is familiar since we’ve already used AutoMapper in our project.
Now, we can modify the handler class:
internal sealed class GetCompaniesHandler : IRequestHandler<GetCompaniesQuery, IEnumerable<CompanyDto>> { private readonly IRepositoryManager _repository; private readonly IMapper _mapper; public GetCompaniesHandler(IRepositoryManager repository, IMapper mapper) {_repository = repository; _mapper = mapper; } public async Task<IEnumerable<CompanyDto>> Handle(GetCompaniesQuery request, CancellationToken cancellationToken) { var companies = await _repository.Company.GetAllCompaniesAsync(request.TrackChanges); var companiesDto = _mapper.Map<IEnumerable<CompanyDto>>(companies); return companiesDto; } }This logic is also familiar since we had almost the same one in our GetAllCompaniesAsync service method. One difference is that we are passing the track changes parameter through the request object.
Now, we can modify CompaniesController:
[HttpGet] public async Task<IActionResult> GetCompanies() { var companies = await _sender.Send(new GetCompaniesQuery(TrackChanges: false)); return Ok(companies); }We use the Send method to send a request to our handler and pass the GetCompaniesQuery as a parameter. Nothing more than that. We also need an additional namespace:
using Application.Queries;Our controller is clean as it was with the service layer implemented. But this time, we don’t have a single service class to handle all the methods but a single handler to take care of only one thing.
Now, we can test this:
https://localhost:5001/api/companies

Everything works great.
With this in mind, we can continue and implement the logic for fetching a single company.
So, let’s start with the query in the Queries folder:
public sealed record GetCompanyQuery(Guid Id, bool TrackChanges) : IRequest<CompanyDto>;Then, let’s implement a new handler:
internal sealed class GetCompanyHandler : IRequestHandler<GetCompanyQuery, CompanyDto> { private readonly IRepositoryManager _repository; private readonly IMapper _mapper; public GetCompanyHandler(IRepositoryManager repository, IMapper mapper) { _repository = repository; _mapper = mapper; } public async Task<CompanyDto> Handle(GetCompanyQuery request, CancellationToken cancellationToken) { var company = await _repository.Company.GetCompanyAsync(request.Id, request.TrackChanges); if (company is null) throw new CompanyNotFoundException(request.Id); var companyDto = _mapper.Map<CompanyDto>(company); return companyDto;} }So again, our handler inherits from the IRequestHandler interface accepting the query as the first parameter and the result as the second. Then, we inject the required services and familiarly implement the Handle method.
We need these namespaces here:
using Application.Queries;
using AutoMapper;
using Contracts;
using Entities.Exceptions;
using MediatR;
using Shared.DataTransferObjects;Lastly, we have to add another action in CompaniesController:
[HttpGet("{id:guid}", Name = "CompanyById")] public async Task<IActionResult> GetCompany(Guid id) { var company = await _sender.Send(new GetCompanyQuery(id, TrackChanges: false)); return Ok(company); }Awesome, let’s test it:
https://localhost:5001/api/companies/3d490a70-94ce-4d15-9494-5248280c2ce3
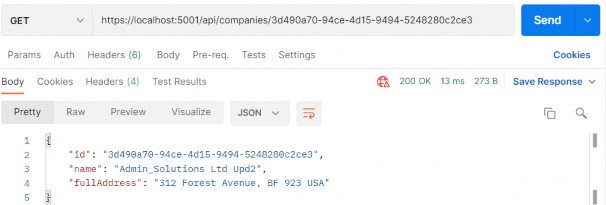
Excellent, we can see the company DTO in the response body. Additionally, we can try an invalid request:
https://localhost:5001/api/companies/3d490a70-94ce-4d15-9494-5248280c2ce2
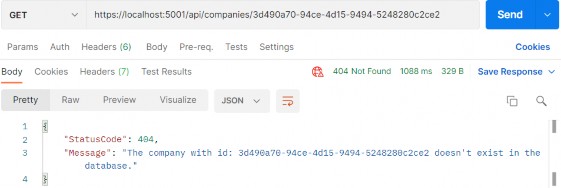
And, we can see this works as well.
33.5 Commands with MediatR
As with both queries, we are going to start with a command record creation inside the Commands folder:
public sealed record CreateCompanyCommand(CompanyForCreationDto Company) : IRequest<CompanyDto>;Our command has a single parameter sent from the client, and it inherits from IRequest
After the query, we are going to create another handler:
internal sealed class CreateCompanyHandler : IRequestHandler<CreateCompanyCommand, CompanyDto> { private readonly IRepositoryManager _repository; private readonly IMapper _mapper; public CreateCompanyHandler(IRepositoryManager repository, IMapper mapper) { _repository = repository; _mapper = mapper; } public async Task<CompanyDto> Handle(CreateCompanyCommand request, CancellationToken cancellationToken) { var companyEntity = _mapper.Map<Company>(request.Company); _repository.Company.CreateCompany(companyEntity); await _repository.SaveAsync();var companyToReturn = _mapper.Map<CompanyDto>(companyEntity); return companyToReturn; } }So, we inject our services and implement the Handle method as we did with the service method. We map from the creation DTO to the entity, save it to the database, and map it to the company DTO object.
Then, before we add a new mapping rule in the MappingProfile class:
CreateMap<CompanyForCreationDto, Company>();Now, we can add a new action in a controller:
[HttpPost] public async Task<IActionResult> CreateCompany([FromBody] CompanyForCreationDto companyForCreationDto) { if (companyForCreationDto is null) return BadRequest("CompanyForCreationDto object is null"); var company = await _sender.Send(new CreateCompanyCommand(companyForCreationDto)); return CreatedAtRoute("CompanyById", new { id = company.Id }, company); }That’s all it takes. Now we can test this:
https://localhost:5001/api/companies

A new company is created, and if we inspect the Headers tab, we are going to find the link to fetch this new company:
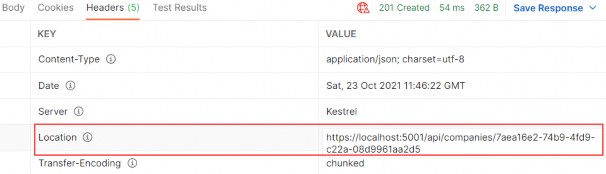
There is one important thing we have to understand here. We are communicating to a datastore via simple message constructs without having any idea on how it’s being implemented. The commands and queries could be pointing to different data stores. They don’t know how their request will be handled, and they don’t care.
33.5.1 Update Command
Following the same principle from the previous example, we can implement the update request.
Let’s start with the command:
public sealed record UpdateCompanyCommand
(Guid Id, CompanyForUpdateDto Company, bool TrackChanges) : IRequest;This time our command inherits from IRequest without any generic parameter. That’s because we are not going to return any value with this request.
Let’s continue with the handler implementation:
internal sealed class UpdateCompanyHandler : IRequestHandler<UpdateCompanyCommand, Unit> { private readonly IRepositoryManager _repository; private readonly IMapper _mapper; public UpdateCompanyHandler(IRepositoryManager repository, IMapper mapper) { _repository = repository; _mapper = mapper; } public async Task<Unit> Handle(UpdateCompanyCommand request, CancellationToken cancellationToken) {var companyEntity = await _repository.Company.GetCompanyAsync(request.Id, request.TrackChanges); if (companyEntity is null) throw new CompanyNotFoundException(request.Id); _mapper.Map(request.Company, companyEntity); await _repository.SaveAsync(); return Unit.Value; } }This handler inherits from IRequestHandler<UpdateCompanyCommand, Unit>. This is new for us because the first time our command is not returning any value. But IRequestHandler always accepts two parameters (TRequest and TResponse). So, we provide the Unit structure for the TResponse parameter since it represents the void type.
Then the Handle implementation is familiar to us except for the return part. We have to return something from the Handle method and we use Unit.Value.
Before we modify the controller, we have to add another mapping rule:
CreateMap<CompanyForUpdateDto, Company>();Lastly, let’s add a new action in the controller:
[HttpPut("{id:guid}")] public async Task<IActionResult> UpdateCompany(Guid id, CompanyForUpdateDto companyForUpdateDto) { if (companyForUpdateDto is null) return BadRequest("CompanyForUpdateDto object is null"); await _sender.Send(new UpdateCompanyCommand(id, companyForUpdateDto, TrackChanges: true)); return NoContent(); }At this point, we can send a PUT request from Postman:
https://localhost:5001/api/companies/7aea16e2-74b9-4fd9-c22a-08d9961aa2d5
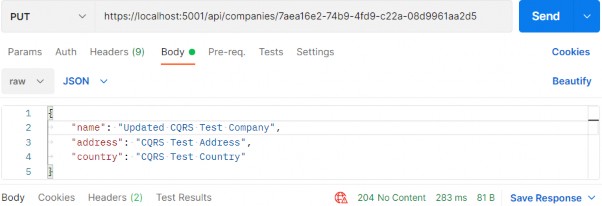
There is the 204 status code.
If you fetch this company, you will find the name updated for sure.
33.5.2 Delete Command
After all of this implementation, this one should be pretty straightforward.
Let’s start with the command:
public record DeleteCompanyCommand(Guid Id, bool TrackChanges) : IRequest;Then, let’s continue with a handler:
internal sealed class DeleteCompanyHandler : IRequestHandler<DeleteCompanyCommand, Unit> { private readonly IRepositoryManager _repository; public DeleteCompanyHandler(IRepositoryManager repository) => _repository = repository; public async Task<Unit> Handle(DeleteCompanyCommand request, CancellationToken cancellationToken) { var company = await _repository.Company.GetCompanyAsync(request.Id, request.TrackChanges); if (company is null) throw new CompanyNotFoundException(request.Id); _repository.Company.DeleteCompany(company); await _repository.SaveAsync(); return Unit.Value; } }Finally, let’s add one more action inside the controller:
[HttpDelete("{id:guid}")]
public async Task<IActionResult> DeleteCompany(Guid id) { await _sender.Send(new DeleteCompanyCommand(id, TrackChanges: false)); return NoContent(); }That’s it. Pretty easy.We can test this now:
https://localhost:5001/api/companies/7aea16e2-74b9-4fd9-c22a-08d9961aa2d5
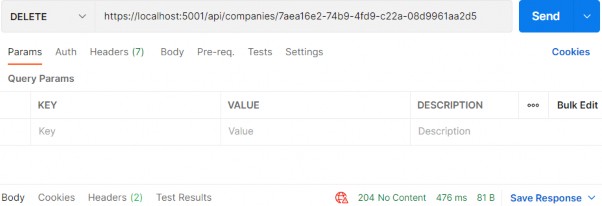
It works great.
Now that we know how to work with requests using MediatR, let’s see how to use notifications.
33.6 MediatR Notifications
So for we’ve only seen a single request being handled by a single handler. However, what if we want to handle a single request by multiple handlers?
That’s where notifications come in. In these situations, we usually have multiple independent operations that need to occur after some event. Examples might be:
• Sending an email
• Invalidating a cache
• ...
To demonstrate this, we will update the delete company flow we created previously to publish a notification and have it handled by two handlers.
Sending an email is out of the scope of this book (you can learn more about that in our Bonus 6 Security book). But to demonstrate the behavior of notifications, we will use our logger service and log a message as if the email was sent.
So, the flow will be - once we delete the Company, we want to inform our administrators with an email message that the delete has action occurred.
That said, let’s start by creating a new Notifications folder inside the Application project and add a new notification in that folder:
public sealed record CompanyDeletedNotification(Guid Id, bool TrackChanges) : INotification;The notification has to inherit from the INotification interface. This is the equivalent of the IRequest we saw earlier, but for Notifications.
As we can conclude, notifications don’t return a value. They work on the fire and forget principle, like publishers.
Next, we are going to create a new Emailhandler class:
internal sealed class EmailHandler : INotificationHandler<CompanyDeletedNotification> { private readonly ILoggerManager _logger; public EmailHandler(ILoggerManager logger) => _logger = logger; public async Task Handle(CompanyDeletedNotification notification, CancellationToken cancellationToken) { _logger.LogWarn($"Delete action for the company with id: {notification.Id} has occurred."); await Task.CompletedTask; } }Here, we just simulate sending our email message in an async manner. Without too many complications, we use our logger service to process the message.
Let’s continue by modifying the DeleteCompanyHandler class:
internal sealed class DeleteCompanyHandler : INotificationHandler<CompanyDeletedNotification> { private readonly IRepositoryManager _repository; public DeleteCompanyHandler(IRepositoryManager repository) => _repository = repository; public async Task Handle(CompanyDeletedNotification notification, CancellationToken cancellationToken) { var company = await _repository.Company.GetCompanyAsync(notification.Id, notification.TrackChanges); if (company is null) throw new CompanyNotFoundException(notification.Id); _repository.Company.DeleteCompany(company); await _repository.SaveAsync(); } }This time, our handler inherits from the INotificationHandler interface, and it doesn’t return any value – we’ve modified the method signature and removed the return statement.
Finally, we have to modify the controller’s constructor:
private readonly ISender _sender; private readonly IPublisher _publisher; public CompaniesController(ISender sender, IPublisher publisher) { _sender = sender; _publisher = publisher; }We inject another interface, which we are going to use to publish notifications.
And, we have to modify the DeleteCompany action:
[HttpDelete("{id:guid}")] public async Task<IActionResult> DeleteCompany(Guid id) { await _publisher.Publish(new CompanyDeletedNotification(id, TrackChanges: false)); return NoContent(); }To test this, let’s create a new company first:
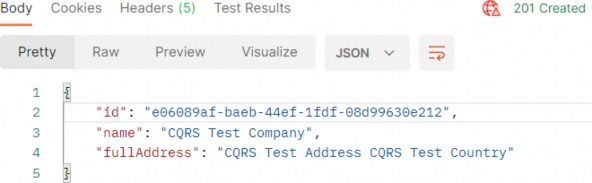
Now, if we send the Delete request, we are going to receive the 204 NoContent response:
https://localhost:5001/api/companies/e06089af-baeb-44ef-1fdf-08d99630e212

And also, if we inspect the logs, we will find a new logged message stating that the delete action has occurred:

33.7 MediatR Behaviors
Often when we build applications, we have many cross-cutting concerns. These include authorization, validating, and logging.
Instead of repeating this logic throughout our handlers, we can make use of Behaviors. Behaviors are very similar to ASP.NET Core middleware in that they accept a request, perform some action, then (optionally) pass along the request.
In this section, we are going to use behaviors to perform validation on the DTOs that come from the client.
As we have already learned in chapter 13, we can perform the validation by using data annotations attributes and the ModelState dictionary. Then we can extract the validation logic into action filters to clear our actions. Well, we can apply all of that to our current solution as well.
But, some developers have a preference for using fluent validation over data annotation attributes. In that case, behaviors are the perfect place to execute that validation logic.
So, let’s go step by step and add the fluent validation in our project first and then use behavior to extract validation errors if any, and return them to the client.
33.7.1 Adding Fluent Validation
The FluentValidation library allows us to easily define very rich custom validation for our classes. Since we are implementing CQRS, it makes the most sense to define validation for our Commands. We should not bother ourselves with defining validators for Queries, since they don’t contain any behavior. We use Queries only for fetching data from the application.
So, let’s start by installing the FluentValidation package in the Application project:
PM> install-package FluentValidation.AspNetCoreThe FluentValidation.AspNetCore package installs both FluentValidation and FluentValidation.DependencyInjectionExtensions packages.
After the installation, we are going to register all the validators inside the service collection by modifying the Program class:
builder.Services.AddValidatorsFromAssembly(typeof(Application.AssemblyReference).Assem bly);
builder.Services.AddMediatR(typeof(Application.AssemblyReference).Assembly); builder.Services.AddAutoMapper(typeof(Program));Then, let’s create a new Validators folder inside the Application project and add a new class inside:
public sealed class CreateCompanyCommandValidator : AbstractValidator<CreateCompanyCommand> {public CreateCompanyCommandValidator() { RuleFor(c => c.Company.Name).NotEmpty().MaximumLength(60); RuleFor(c => c.Company.Address).NotEmpty().MaximumLength(60); } }The following using directives are necessary for this class:
using Application.Commands;
using FluentValidation;We create the CreateCompanyCommandValidator class that inherits from the AbstractValidator
The NotEmpty method specifies that the property can’t be null or empty, and the MaximumLength method specifies the maximum string length of the property.
33.7.2 Creating Decorators with MediatR PipelineBehavior
The CQRS pattern uses Commands and Queries to convey information, and receive a response. In essence, it represents a request-response pipeline. This gives us the ability to easily introduce additional behavior around each request that is going through the pipeline, without actually modifying the original request.
You may be familiar with this technique under the name Decorator pattern. Another example of using the Decorator pattern is the ASP.NET Core Middleware concept, which we talked about in section 1.8.
MediatR has a similar concept to middleware, and it is called IPipelineBehavior:
public interface IPipelineBehavior<in TRequest, TResponse> where TRequest : notnull { Task<TResponse> Handle(TRequest request, CancellationToken cancellationToken, RequestHandlerDelegate<TResponse> next); }The pipeline behavior is a wrapper around a request instance and gives us a lot of flexibility with the implementation. Pipeline behaviors are a good fit for cross-cutting concerns in your application. Good examples of cross- cutting concerns are logging, caching, and of course, validation!
Before we use this interface, let’s create a new exception class in the Entities/Exceptions folder:
public sealed class ValidationAppException : Exception { public IReadOnlyDictionary<string, string[]> Errors { get; } public ValidationAppException(IReadOnlyDictionary<string, string[]> errors) :base("One or more validation errors occurred") => Errors = errors; }Next, to implement the IPipelineBehavior interface, we are going to create another folder named Behaviors in the Application project, and add a single class inside it:
public sealed class ValidationBehavior<TRequest, TResponse> : IPipelineBehavior<TRequest, TResponse> where TRequest : IRequest<TResponse> { private readonly IEnumerable<IValidator<TRequest>> _validators; public ValidationBehavior(IEnumerable<IValidator<TRequest>> validators) => _validators = validators; public async Task<TResponse> Handle(TRequest request, CancellationToken cancellationToken, RequestHandlerDelegate<TResponse> next) { if (!_validators.Any()) return await next(); var context = new ValidationContext<TRequest>(request); var errorsDictionary = _validators .Select(x => x.Validate(context)) .SelectMany(x => x.Errors) .Where(x => x != null) .GroupBy( x => x.PropertyName.Substring(x.PropertyName.IndexOf('.') + 1), x => x.ErrorMessage,(propertyName, errorMessages) => new { Key = propertyName, Values = errorMessages.Distinct().ToArray() }) .ToDictionary(x => x.Key, x => x.Values); if (errorsDictionary.Any()) throw new ValidationAppException(errorsDictionary); return await next(); } }This class has to inherit from the IPipelineBehavior interface and implement the Handler method. We also inject a collection of IValidator implementations in the constructor. The FluentValidation library will scan our project for all AbstractValidator implementations for a given type and then provide us with the instance at runtime. It is how we can apply the actual validators that we implemented in our project.
Then, if there are no validation errors, we just call the next delegate to allow the execution of the next component in the middleware.
But if there are any errors, we extract them from the _validators collection and group them inside the dictionary. If there are entries in our dictionary, we throw the ValidationAppException and pass the dictionary with errors. This exception will be caught inside our global error handler, which we will modify in a minute.
But before we do that, we have to register this behavior in the Program class:
builder.Services.AddMediatR(typeof(Application.AssemblyReference).Assembly); builder.Services.AddAutoMapper(typeof(Program)); builder.Services.AddTransient(typeof(IPipelineBehavior<,>), typeof(ValidationBehavior<,>)); builder.Services.AddValidatorsFromAssembly(typeof(Application.AssemblyReference).Assembly);After that, we can modify the ExceptionMiddlewareExtensions class:
public static class ExceptionMiddlewareExtensions
{ public static void ConfigureExceptionHandler(this WebApplication app, ILoggerManager logger) { app.UseExceptionHandler(appError => { appError.Run(async context => { context.Response.ContentType = "application/json"; var contextFeature = context.Features.Get<IExceptionHandlerFeature>(); if (contextFeature != null) { context.Response.StatusCode = contextFeature.Error switch { NotFoundException => StatusCodes.Status404NotFound, BadRequestException => StatusCodes.Status400BadRequest, ValidationAppException => StatusCodes.Status422UnprocessableEntity, _ => StatusCodes.Status500InternalServerError }; logger.LogError($"Something went wrong: {contextFeature.Error}"); if (contextFeature.Error is ValidationAppException exception) { await context.Response .WriteAsync(JsonSerializer.Serialize(new { exception.Errors })); } else { await context.Response.WriteAsync(new ErrorDetails() { StatusCode = context.Response.StatusCode, Message = contextFeature.Error.Message, }.ToString()); } } }); }); } }So we modify the switch statement to check for the ValidationAppException type and to assign a proper status code 422.
Then, we use the declaration pattern to test the type of the variable and assign it to a new variable named exception. If the type is ValidationAppException we just write our response to the client providing our errors dictionary as a parameter. Otherwise, we do the same thing we did up until now.
Now, we can test this by sending an invalid request:
https://localhost:5001/api/companies
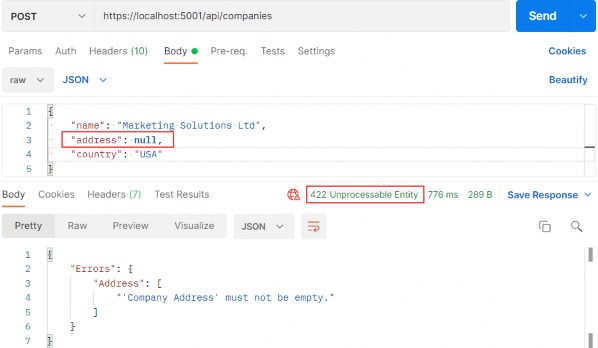
Excellent, this works great.
Additionally, if the Address property has too many characters, we will see a different message:
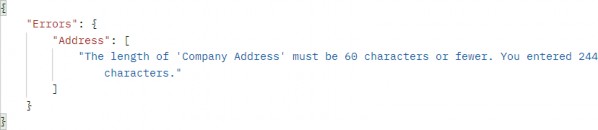
Great.
33.7.3 Validating null Object
Now, if we send a request with an empty request body, we are going to get the result produced from our action:
https://localhost:5001/api/companies
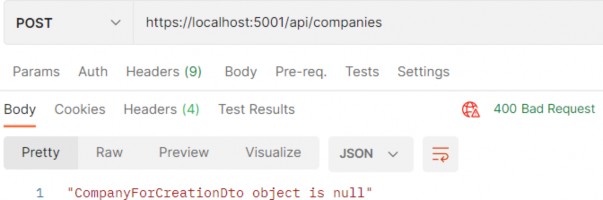
We can see the 400 status code and the error message. It is perfectly fine since we want to have a Bad Request response if the object sent from the client is null. But if for any reason you want to remove that validation from the action, and handle it with fluent validation rules, you can do that by modifying the CreateCompanyCommandValidator class and overriding the Validate method:
public sealed class CreateCompanyCommandValidator : AbstractValidator<CreateCompanyCommand> { public CreateCompanyCommandValidator() { RuleFor(c => c.Company.Name).NotEmpty().MaximumLength(60); RuleFor(c => c.Company.Address).NotEmpty().MaximumLength(60); } public override ValidationResult Validate(ValidationContext<CreateCompanyCommand> context) { return context.InstanceToValidate.Company is null ? new ValidationResult(new[] { new ValidationFailure("CompanyForCreationDto", "CompanyForCreationDto object is null") }) : base.Validate(context); } }Now, you can remove the validation check inside the action and send a null body request:
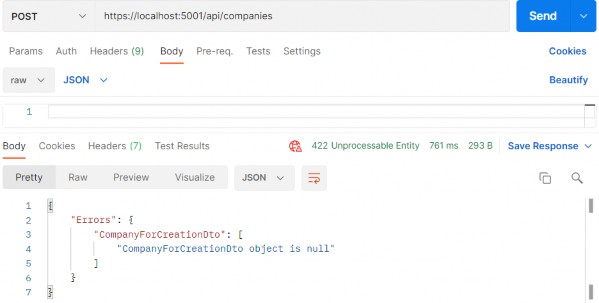
Pay attention that now the status code is 422 and not 400. But this validation is now part of the fluent validation.
If this solution fits your project, feel free to use it. Our recommendation is to use 422 only for the validation errors, and 400 if the request body is null.
--EOF--
介绍每种配置如何使用
基于内存的配置程序主要是在内存中维护了一个Key-Value键值对。
static void MemoryConfig()
{
List<KeyValuePair<string, string?>>? initialData = new List<KeyValuePair<string, string?>>();
initialData.Add(new KeyValuePair<string, string?>("name", "tom"));
IConfigurationRoot configuration = new ConfigurationBuilder()
.AddInMemoryCollection(initialData)
.Build();
Console.WriteLine("name:" + configuration["name"]);
}调用如下:
static void Main(string[] args)
{
MemoryConfig();
}这个配置提供程序用的相对较少,是微软在Microsoft.Extensions.Configuration类库中默认实现的一个配置提供程序,它可以把已经存在的配置IConfigurationRoot封装成一个配置提供程序。如果需要对针对现有配置快速Copy出一个新配置的话,可以使用这个配置提供程序。
static void ChainedConfig()
{
List<KeyValuePair<string, string?>>? initialData = new List<KeyValuePair<string, string?>>();
initialData.Add(new KeyValuePair<string, string?>("name", "tom"));
//初始化一个已有的配置
IConfigurationRoot configuration = new ConfigurationBuilder()
.AddInMemoryCollection(initialData)
.Build();
//基于已有的配置,重新生成一个一模一样的配置。
IConfigurationRoot newConfiguration = new ConfigurationBuilder()
.AddConfiguration(configuration)
.Build();
Console.WriteLine("name:" + configuration["name"]);
}基于命令行的配置程序,可以从控制台的命令行获取配置,这个配置提供程序可以快速将命令行参数分解成Key-Value键值对。而不需要我们自己手动对字符串进行处理(一般我们会按照空格拆分成数组,然后按照等号获取到键和值)
//基于命令行的配置
static void CommandLineConfig()
{
IConfigurationRoot configuration = new ConfigurationBuilder()
.AddCommandLine(["name=tom","age=32"])
.Build();
Console.WriteLine("name:" + configuration["name"]);基于环境变量的配置提供程序
.NET可以读取环境变量中的Key-Value键值对,并且可以过滤到指定的前缀来筛选。下面代码中,程序将会加载环境变量中以TEST_开头的所有变量到配置中,我们在系统变量中,新增一个TEST_Name的变量,一定要重启一下计算机,否则新增的环境变量不会生效。然后我们的程序就可以读取到TEST_Name的变量值
static void EnvironmentConfig()
{
IConfigurationRoot configuration = new ConfigurationBuilder()
.AddEnvironmentVariables("Test_")
.Build();
Console.WriteLine("name:" + configuration["Name"]);
}基于json的配置文件是我们最常用的配置文件格式了,.NET提供了标准的json配置提供程序,我们使用一下代码从一个app.json文件中加载配置,并且app.json被修改的时候,程序中的配置也会被更新。
//基于Json文件的配置
static void AddJsonFileConfig()
{
IConfiguration configuration = new ConfigurationBuilder()
.AddJsonFile("app.json", optional: true, reloadOnChange: true)
.Build();
Console.WriteLine("name:" + configuration["name"]);
}app.json的配置文件内容如下:
{
"person":
{
"name":"caoruipeng",
"age":12,
"school":"北京大学"
},
"name":"tom11"
}基于XML的配置文件也是我们比较常用的配置文件格式了,.NET提供了标准的XML配置提供程序,我们使用一下代码从一个app.xml文件中加载配置,并且app.xml被修改的时候,程序中的配置也会被更新。
//基于XML文件的配置
static void AddXmlFileConfig()
{
IConfiguration configuration = new ConfigurationBuilder()
.AddXmlFile("app.xml", optional: true, reloadOnChange: true)
.Build();
Console.WriteLine("name:" + configuration["name"]);
}app.xml的配置文件内容如下:
<?xml version="1.0" encoding="utf-8" standalone="yes"?>
<config>
<name>tom</name>
<age>21</age>
<school>beijing</school>
</config>
Ini配置文件平时 我们使用的比较少,不过微软还是帮我们提供了基于Ini文件的配置提供程序。
//基于INI文件的配置
static void AddIniFileConfig()
{
IConfiguration configuration = new ConfigurationBuilder()
.AddIniFile("app.ini", optional: true, reloadOnChange: true)
.Build();
Console.WriteLine("name:" + configuration["person:name"]);
}app.ini文件的内容如下:
[person]
name=tom
age=27官方提供的配置提供程序基本上可以满足我们的绝大部分需求,但是如果我们的配置存储在注册表中、存储在数据库中,这个时候官方的配置提供程序就无法满足我们的要求,我们就需要自定义配置提供程序。自定义配置提供程序很简单,主要包括两个类:自定义配置源IConfigurationSource、自定义配置提供程序ConfigurationProvider以及一个针对当前配置的扩展方法。下面代码,我们模拟一个基于数据库的配置提供程序,负责从数据库的配置表Config表中读取配置。当然案例代码,我们并不是真正的去读取数据库的表,大家可以自行完善代码。
//自定义配置源
public class DataBaseConfigurationSource : IConfigurationSource
{
public IConfigurationProvider Build(IConfigurationBuilder builder)
{
return new DataBaseConfigurationProvider();
}
}
//自定义配置提供程序
public class DataBaseConfigurationProvider : ConfigurationProvider
{
public override void Load()
{
base.Load();
//读取数据库配置
}
}
//数据库配置程序的扩展方法
public static class DataBaseConfigurationExtensions
{
public static IConfigurationBuilder AddDb(this IConfigurationBuilder configurationBuilder)
{
configurationBuilder.Sources.Add(new DataBaseConfigurationSource());
return configurationBuilder;
}
}
//调用案例
static void Main(string[] args)
{
var builder = new ConfigurationBuilder()
.AddDb()
.Build();
var value = builder["key"];
}.NET中的配置,本质上就是key-value键值对,并且key和value都是字符串类型。
在.NET中提供了多种配置提供程序来对不同的配置进行读取、写入、重载等操作,这里我们以为.NET 的源码项目为例,来看下.NET中的配置主要是有那些类库。下面这个截图是.NET 源码中和配置相关的所有类库,所有配置相关的类库都是都是以Microsoft.Extensions.Configuration开头的。
| 类库名称 | 类库作用 |
|---|---|
| 1、Microsoft.Extensions.Configuration.Abstractions | 定义配置相关的接口,其他所有配置类库都必须引用这个类库 |
| 2、Microsoft.Extensions.Configuration Microsoft.Extensions. | Configuration.Abstractions类库的简单实现 |
| 3、配置提供程序:Microsoft.Extensions.Configuration.CommandLine | 基于命令行的配置提供程序,负责对命令行的配置进行读写、载入、重载等操作。 |
| 4、配置提供程序:Microsoft.Extensions.Configuration.EnvironmentVariables | 基于环境变量的配置提供程序,负责对环境变量的配置进行读写、载入、重载等操作 |
| 5、配置提供程序:Microsoft.Extensions.Configuration.FileExtensions | 基于的文件提供程序的基类库,文件提供程序包括基于Json文件、Ini文件、Xml文件或者自定义文件等。 |
| 6、配置提供程序:Microsoft.Extensions.Configuration.Json | 基于Json文件的配置提供程序程序,负责从Json文本文件中对配置读写、载入、重载等操作。 |
| 7、配置提供程序:Microsoft.Extensions.Configuration.Ini | 基于Ini文件的配置提供程序,负责从Ini文件中对配置进行读写、载入、重载等操作。 |
| 8、配置提供程序:Microsoft.Extensions.Configuration.UserSecrets | 基于UserSecrets的配置提供程序,这个本质上也是一种基于Json文件类型的配置程序。主要用于管理应用机密 |
| 9、Microsoft.Extensions.Configuration.Binder | 负责将key-value键值对的配置列表绑定到指定的C#实体类上,方便程序使用。 |
从上面可以看到,主要有四个类库:第1个类库Abstractions负责定义配置的一些接口,第2个类库Configuration负责定义配置的简单实现。第3到第8个类库都是具体的配置提供程序,第9个类库Binder负责将配置绑定到指定的的Model,方便程序使用。
配置提供程序,.NET中有多个类库提供程序,每个类库提供程序都是以单独的类库向外提供,基本上每个类库就是三个文件,分别是ConfigurationExtensions.cs、ConfigurationProvider.cs和ConfigurationSource.cs,这三个类分别表示配置的扩展方法、配置提供程序和配置源。配置源用于生成配置提供程序。
在第2个类库中,微软帮助我们实现了一个基于类库的配置提供程序,我们在列表中没有单独列举这个类库提供程序。
配置源表示一个单独的配置集合,可以表示来自内存的配置源、来自Json文件的配置源。但是配置源不直接提供对配置的访问操作,它只有一个接口Build,该接口一个具体的配置提供程序IConfigurationProvider ,每个配置提供程序负责对配置的读取、写入、载入配置、重载配置等访问操作。
public interface IConfigurationSource
{
IConfigurationProvider Build(IConfigurationBuilder builder);
}配置提供程序负责实现配置的设置、读取、重载等功能,并以键值对形式提供配置。
public interface IConfigurationProvider
{
//读取配置
bool TryGet(string key, out string? value);
//修改配置
void Set(string key, string? value);
//获取重载配置的Token
IChangeToken GetReloadToken();
//载入配置
void Load();
//获取指定父路径下的直接子节点Key,然后 Concat(earlierKeys) 一同返回
IEnumerable<string> GetChildKeys(IEnumerable<string> earlierKeys, string? parentPath);
}上面的IConfigurationSource和IConfigurationProvider分别表示一种数据源和对一种数据源进行读写操作。但是一个程序的配置可能来自很多地方,可能一部分配置来自环境变量、一部分配置来自文件等等。这个时候IConfigurationBuilder配置构建者就诞生了,IConfigurationBuilder接口维护了多个配置源,并提供一个Build方法生成一个统一的配置IConfigurationRoot 来统一对整个程序的配置进行读取、写入、重载等操作。但是这里大家注意,IConfigurationRoot 对配置的访问,本质上还是通过配置提供程序IConfigurationProvider来进行的。
假设,当我们查找一个Key为Name的配置,IConfigurationRoot 内部会遍历所有Sources 属性生成的IConfigurationProvider,然后依次调用IConfigurationProvider的TryGet来获取Name的具体配置数据。
public interface IConfigurationBuilder
{
//保存Build的一些公开的字典属性,有需要的化可以使用该字段存放一些变量
IDictionary<string, object> Properties { get; }
//来自多个地方的配置源集合
IList<IConfigurationSource> Sources { get; }
//向Sources属性中添加一个配置源
IConfigurationBuilder Add(IConfigurationSource source);
//基于所有配置源生成一个全局的配置,供程序读写,一般我们都是用这个接口对配置进行读写。
IConfigurationRoot Build();
}在具体的配置构建者的Build方法中,我们可以看到,它依次调用IConfigurationProvider的Buid方法生成多个配置提供程序IConfigurationProvider ,然后将所有的配置提供程序providers 传给了ConfigurationRoot。ConfigurationRoot正是调用providers 的一系列方法实现对配置的读取、写入、重载等操作。
public class ConfigurationBuilder : IConfigurationBuilder
{
private readonly List<IConfigurationSource> _sources = new();
public IList<IConfigurationSource> Sources => _sources;
public IDictionary<string, object> Properties { get; } = new Dictionary<string, object>();
public IConfigurationBuilder Add(IConfigurationSource source)
{
ThrowHelper.ThrowIfNull(source);
_sources.Add(source);
return this;
}
public IConfigurationRoot Build()
{
var providers = new List<IConfigurationProvider>();
foreach (IConfigurationSource source in _sources)
{
IConfigurationProvider provider = source.Build(this);
providers.Add(provider);
}
return new ConfigurationRoot(providers);
}
}这个接口就是最核心的配置接口,提供了对配置的读取、写入、重载等操作,它的实现类是ConfigurationRoot,上面我们已经介绍过,IConfiguration本身还是通过各个配置提供程序对配置进行访问操作。
public interface IConfiguration
{
//获取或设置配置
string? this[string key] { get; set; }
//获取指定key的配置子节点
IConfigurationSection GetSection(string key);
//获取当前配置的直接子节点列表
IEnumerable<IConfigurationSection> GetChildren();
//当配置发生变更时的token
IChangeToken GetReloadToken();
}IConfigurationRoot其实是配置的根接口,该接口有个最重要的属性Providers 负责保存所有的配置提供程序,IConfiguration对配置的访问,就是通过遍历这个Providers来访问的。
public interface IConfigurationRoot : IConfiguration
{
//强制重载所有配置
void Reload();
//所有配置提供程序
IEnumerable<IConfigurationProvider> Providers { get; }
}实现自定义配置提供程序,其实只需要实现三个类就可以,一个是配置源、一个是配置提供程序、一个是针对当前配置的扩展方法。第三个类可有可无,不过我们一般都要实现。我们来参考下基于命令行的配置提供程序类库的文件。来实现一个基于数据库的配置提供程序,分别实现配置源DataBaseConfigurationSource 、配置提供程序DataBaseConfigurationExtensions 和扩展方法类DataBaseConfigurationExtensions,当然在这里我们只做对应的演示,没有实现具体的配置方法。
public class DataBaseConfigurationSource : IConfigurationSource
{
public IConfigurationProvider Build(IConfigurationBuilder builder)
{
return new DataBaseConfigurationProvider();
}
}
public class DataBaseConfigurationProvider : ConfigurationProvider
{
public override void Load()
{
base.Load();
//读取数据库配置
}
}
public static class DataBaseConfigurationExtensions
{
public static IConfigurationBuilder AddDb(this IConfigurationBuilder configurationBuilder)
{
configurationBuilder.Sources.Add(new DataBaseConfigurationSource());
return configurationBuilder;
}
}static void Main(string[] args)
{
var builder = new ConfigurationBuilder()
.AddDb()
.Build();
var value = builder["key"];
}Clean Architecture with .NET
Dino Esposito
2024
Introduction
CHAPTER 1 The quest for modular software architecture
CHAPTER 2 The ultimate gist of DDD
CHAPTER 3 Laying the ground for modularity
PART II ARCHITECTURE CLEANUP
CHAPTER 4 The presentation layer
CHAPTER 5 The application layer
CHAPTER 8 The infrastructure layer
PART III COMMON DILEMMAS
CHAPTER 9 Microservices versus modular monoliths
CHAPTER 10 Client-side versus server-side
CHAPTER 11 Technical debt and credit
Contents
Acknowledgments
Introduction
PART I THE HOLY GRAIL OF MODULARITY
Chapter 1 The quest for modular software architecture
In the beginning, it was three-tier
Core facts of a three-tier system
Layers, tiers, and modularization
The DDD canonical architecture
The proposed supporting architecture
Adding more to the recipe
Different flavors of layers
Hexagonal architecture
Clean architecture
Feature-driven architecture
Summary
Chapter 2 The ultimate gist of DDD
Design driven by the domain
Strategic analysis
Tactical design
DDD misconceptions
Tools for strategic design
Ubiquitous language
A domain-specific language vocabulary
Building the glossary
Keeping business and code in sync
The bounded context
Making sense of ambiguity
Devising bounded contexts
The context map
Upstream and downstream
An example context map
An example deployment map
Summary
Chapter 3 Laying the ground for modularity
Aspects and principles of modularization
Separation of concerns
Loose coupling
Reusability
Dependency management
Documentation
Testability
Applying modularization
The presentation layer: interacting with the outside world
The application layer: processing received commands
The domain layer: representing domain entities
The data/infrastructure layer: persisting data
Achieving modularity
More modularity in monoliths
Introducing microservices
The simplest solution ever
Maintainability
Designing for testability
Summary
PART II ARCHITECTURE CLEANUP
Chapter 4 The presentation layer
Project Renoir: the final destination
Introducing the application
The abstract context map
Designing the physical context map
Business requirements engineering
Breakdown of software projects
Event-based storyboards
Fundamental tasks of Project Renoir
Boundaries and deployment of the presentation layer
Knocking at the web server’s door
ASP.NET application endpoints
Presentation layer development
Connecting to business workflows
Front-end and related technologies
API-only presentation
Summary
Chapter 5 The application layer
An architectural view of Project Renoir
The access control subsystem
The document-management subsystem
Project Renoir in Visual Studio
Task orchestration
What is a task, anyway?
An example distributed task
An example task in Project Renoir
Data transfer
From the presentation layer to the application layer
From the application layer to the persistence layer
Implementation facts
Outline of an application layer
Propagating application settings
Logging
Handling and throwing exceptions
Caching and caching patterns
Injecting SignalR connection hubs
Boundaries and deployment of the application layer
The dependency list
Deployment options
Summary
Chapter 6 The domain layer
Decomposition of the domain layer
The business domain model
Helper domain services
Devising a domain model
Shifting focus from data to behavior
Life forms in a domain model
The domain model in Project Renoir
The hitchhiker’s guide to the domain
Treating software anemia
Common traits of an entity class
Rules of etiquette
Style conventions
Writing truly readable code
Summary
Chapter 7 Domain services
What is a domain service, anyway?
The stateless nature of domain services
Marking domain service classes
Domain services and ubiquitous language
Data access in domain services
Data injection in domain services
Common scenarios for domain services
Determining the loyalty status of a customer
Blinking at domain events
Sending business emails
Service to hash passwords
Implementation facts
Building a sample domain service
Useful and related patterns
The REPR pattern adapted
Open points
Are domain services really necessary?
Additional scenarios for domain services
Summary
Chapter 8 The infrastructure layer
Responsibilities of the infrastructure layer
Data persistence and storage
Communication with external services
Communication with internal services
Implementing the persistence layer
Repository classes
Using Entity Framework Core
Using Dapper
Hosting business logic in the database
Data storage architecture
Introducing command/query separation
An executive summary of event sourcing
Summary
PART III COMMON DILEMMAS
Chapter 9 Microservices versus modular monoliths
Moving away from legacy monoliths
Not all monoliths are equal
Potential downsides of monoliths
Facts about microservices
Early adopters
Tenets of a microservices architecture and SOA
How big or small is “micro”?
The benefits of microservices
The gray areas
Can microservices fit all applications?
The big misconception of big companies
SOA and microservices
Are microservices a good fit for your scenario?
Planning and deployment
Modular monoliths
The delicate case of greenfield projects
Outlining a modular monolith strategy for new projects
From modules to microservices
Summary
Chapter 10 Client-side versus server-side
A brief history of web applications
The prehistoric era
The server-scripting era
The client-scripting era
Client-side rendering
The HTML layer
The API layer
Toward a modern prehistoric era
Server-side rendering
Front-end–back-end separation
ASP.NET front-end options
ASP.NET Core versus Node.js
The blocking/non-blocking saga
Summary
Chapter 11 Technical debt and credit
The hidden cost of technical debt
Dealing with technical debt
Ways to address debt
Debt amplifiers
The hidden profit of technical credit
The theory of broken windows
The power of refactoring
Do things right, right away
Summary
As hair thins and grays, memories return of when I was the youngest in every meeting or conference room. In 30 years of my career, I witnessed the explosion of Windows as an operating system, the rise of the web accompanied by websites and applications, and then the advent of mobile and cloud technologies.
Several times, I found myself having visions related to software technology developments, not too far from what happened a few years later. At other times, I surprised myself by formulating personal projects halfway between dreams and ambitious goals.
The most unspoken of all is the desire to travel the world, speaking at international conferences without the pressure to talk about what is cool and trendy but only about what I have seen and made work—without mincing words and without filters or reservations. To do this, I needed to work—finally—daily on the development of real applications that contributed to some kind of business and simplified the lives of some kind of audience.
Thanks to Crionet and KBMS Data Force, this is now a reality.
After many years, I have a full-time position (CTO of Crionet), a team of people grown in a few years from juniors to bold and capable professionals, and the will to share with everyone a recipe for making software that is neither secret nor magical.
I have nothing to sell; only to tell. And this book is for those who want to listen.
This book is for Silvia and Francesco.
This book is for Michela.
This book is for Giorgio and Gaetano.
This book was made possible by Loretta and Shourav and came out as you’re getting it thanks to Milan, Tracey, Dan, and Kate.
This book is my best until the next one!
I graduated in Computer Science in the summer of 1990. At the time, there were not many places in Europe to study computers. The degree course was not even set up with its own Computer Science faculty but was an extension of the more classical faculty of Mathematics, Physics, and Natural Sciences. Those with strong computer expertise in the 1990s were really cool people—in high demand but with unclear career paths. I started as a Windows developer. Computer magazines were popular and eagerly awaited every month. I dreamt of writing for one of them. I won the chance to do it once and liked it so much that I’m still doing it today, 30 years later.
My passion for sharing knowledge was so intense that five years after my first serious developer job it became my primary occupation. For over two decades all I did was write books and articles, speak at conferences, teach courses, and do occasional consulting. Until 2020, I had a very limited exposure to production code and the routine of day-by-day development. Yet, I managed to write successful books for those who were involved in real-world projects.
Still, in a remote area of my mind was a thorny doubt: Am I just a lecture type of professional or am I also an action person? Will I be able to ever build a real-world system? The pandemic and other life changes brought me to ultimately find an answer.
I faced the daunting task of building a huge and intricate system in a fraction of the time originally scheduled that the pandemic sharply cut off. No way to design, be agile, do testing and planning—the deadline was the only certain thing. I resorted to doing—and letting a few other people do—just what I taught and had discovered while teaching for years. It worked. Not just that. Along the way, I realized that the approach we took to build software, and related patterns, also had a name: clean architecture. This book is the best I know and have learned in three years of everyday software development after over two decades of learning, teaching, and consulting.
In our company, we have several developers who joined as juniors and have grown up using and experimenting with the content of this book. It worked for us; I hope it will work for you, too!
Software professionals are the audience for this book, including architects, lead developers, and—I would say, especially—developers of any type of .NET applications. Everyone who wants to be a software architect should find this book helpful and worth the cost. And valid architects are, for the most part, born developers. I strongly believe that the key to great software passes through great developers, and great developers grow out of good teachers, good examples, and—hopefully—good books and courses.
Is this book only for .NET professionals? Although all chapters have a .NET flavor, most of the content is readable by any software professional.
This book expects that you have at least a minimal understanding of .NET development and object-oriented programming concepts. A good foundation in using the .NET platform and knowledge of some data-access techniques will also help. We put great effort into making this book read well. It’s not a book about abstract design concepts, and it’s not a classic architecture book either, full of cross-references or fancy strings in square brackets that hyperlink to some old paper listed in a bibliography at the end of the book. It’s a book about building systems in the 2020s and facing the dilemmas of the 2020s, from the front end to the back end, passing through cloud platforms and scalability issues.
If you’re seeking a reference book or you want to find out how to use a given pattern or technology then this book might not for you. Instead, the goal is sharing and transferring knowledge so that you know what to do at any point. Or, at least, you now know what other guys—Dino and team—did in an analogous situation.
In all, modern software architecture has just one precondition: modularity. Whether you go with a distributed, service-oriented structure, a microservices fragmented pattern, or a compact monolithic application, modularity is crucial to build and manage the codebase and to further enhance the application following the needs of the business. Without modularity, you can just be able to deliver a working system once, but it will be hard to expand and update it.
Part I of this book, titled “The Holy Grail of modularity,” lays the foundation of software modularity, tracing back the history of software architecture and summarizing the gist of domain-driven design (DDD)—one of the most helpful methodologies for breaking down business domains, though far from being an absolute necessity in a project.
Part II, “Architecture cleanup,” is about the five layers that constitute, in the vision of this book, a “clean” architecture. The focus is not much on the concentric rendering of the architecture, as popularized by tons of books and articles, but on the actual value delivered by constituent layers: presentation, application, domain, domain services, and infrastructure.
Finally, Part III, “Common dilemmas,” focuses on three frequently faced stumbling blocks: monoliths or microservices, client-side or server-side for the front end, and the role and weight of technical debt.
Part II of the book describes a reference application, Project Renoir, whose entire codebase is available on GitHub at:
https://github.com/Youbiquitous/project-renoir
A zipped version of the source code is also available for download at MicrosoftPressStore.com/NET/download.
We’ve made every effort to ensure the accuracy of this book and its companion content. You can access updates to this book—in the form of a list of submitted errata and their related corrections—at:
MicrosoftPressStore.com/NET/errata
If you discover an error that is not already listed, please submit it to us at the same page.
For additional book support and information, please visit MicrosoftPressStore.com/Support.
Please note that product support for Microsoft software and hardware is not offered through the previous addresses. For help with Microsoft software or hardware, go to http://support.microsoft.com.
Let’s keep the conversation going! We’re on Twitter: http://twitter.com/MicrosoftPress
Part I
The Holy Grail of modularity
CHAPTER 1 The quest for modular software architecture
CHAPTER 2 The ultimate gist of DDD
CHAPTER 3 Laying the ground for modularity
The purpose of software engineering is to control complexity, not to create it.
—Dr. Pamela Zave, Princeton University
Software as we know it today, in the middle of the 2020s, is the waste product of a more profound learning and transformation process whose origins are deeply rooted within the history of logic and mathematics. Since the 17th century, some of the world’s greatest minds focused on building a coherent, logical system that could allow for mechanical reasoning. The proof that it was not just dreaming came only in the 1930s with Kurt Gödel’s Theorem of Incompleteness. From there, Alan Turing and John Von Neumann started engineering physical machines.
None of them, though, ever dreamed of anything near the software of today. Their goal was to mechanize the human way of reasoning, as simple and ambitious as that may still sound. The early “thinking” machines of the 1950s were iron monoliths made of valves, pistons, and cables—wired hardware, no more, no less. John Von Neumann had the intuition that instructions were better separated from hardware so that the same machine could do different things, such as mathematics and text processing. The popular “von Neumann architecture” ultimately refers to having a stored program whose instructions are fetched one by one and processed sequentially.
Software gained its own dignity and identity only at the end of the 1960s, about the time humankind landed on the moon. The first reported use of the term “software engineering” dates to the mid-1960s. Nobody ever managed to create the software; rather, it emerged as a side effect—or waste product—of more ambitious research. Separating hardware from software was the first step of modularization ever experienced in computer science.
It seems that humans have always approached solving problems using an end-to-end sequence of steps, with references and interconnections between states set and exchanged as needed to reach a solution. As spaghetti code has shown, software is no exception.
Note
The quest for modularization started as early as software itself and soon moved from the level of application code to the level of application architecture.
The first historical example of a software architecture that expands beyond the realm of a single computer was proposed in the 1960s with the IBM 360 system. The idea was that a remote workstation could send the central mainframe a request to execute some non-interactive data-processing operation, called a job. Further refined in successive years, the model became universally known as client/server architecture after the paper “Separating Data from Function in a Distributed File System,” written by a group of Xerox PARC computer scientists in 1978. Client/server was the canonical way of building business applications when I got my first job as a developer right after graduating from university.
Note Von Neumann broke up the computer monolith into hardware and software components, and IBM and Xerox researchers broke the software monolith into client and server components.
We all heartily welcomed three-tier architecture in the late 1990s. At the time, the definition of an additional software tier, which took on some client liabilities and some server tasks, proved necessary to better handle the complexity of the (new) applications being built at a fairly rapid pace.
Note In the previous paragraph, I deliberately placed the adjective “new” in parentheses because it referred to applications planned and built using the three-tier architecture before the commercial explosion of the internet. At the time, colossus line-of-business applications (for example, financial, telecom, government, utilities, healthcare systems, and so on) remained safely anchored to the existing mainframe-based client/server schema. Even today, mainframes remain hard at work carrying on high-volume, real-time transactions, such as credit card and ATM operations. Performance and cost-effectiveness are the crucial reasons for this, despite the emergence of cloud, edge computing, Blockchain, and massively distributed systems.
Although the skeleton of a three-tier system should be very well known to everyone in the software space, I’ve included Figure 1-1 to illustrate it as a memento of the progressive breakup of monoliths observed in the software industry, at least until the commercial explosion of the internet.
FIGURE 1-1 First stages of the evolution from single-tier to multi-tier architecture.
The figure is a diagram made of three main horizontally laid out blocks separated by two right-pointing thick arrows. The leftmost element is a filled block named “One tier”. The central block presents two labels “Client tier” and “Server tier” vertically separated by a dashed line. The third block has three labels separated vertically by two dashed lines. They are labeled “Presentation tier”, “Business tier” and “Data tier”.
The advent of multi-tier systems was hailed as a vast improvement over the monolithic applications of “prehistoric” software. Today, though—in the mid-2020s—the proposal of a multi-tier architecture is often blissfully dismissed as obsolete and badly tagged merely as a “monolith.”
Software monoliths
The current definition of a software monolith is different from what it was in the 1990s—a start-to-finish sequence of instructions with some input loop to keep it live and waiting for further instructions. Today, monolithic software is commonly intended to be an application made of multiple components combined in a single, self-contained deliverable. All the codebase lives in a single code solution and is deployed in a single step on a single production server, whether on-premises or in the cloud. Any constituent components become invisible from the outside once the application is deployed. Any disastrous bug could potentially take the entire application down, and any necessary improvements for scalability must be applied to the entire block. This can lead to significant rewrites of parts or pure vertical hardware-based scalability.
Tier versus layer
Tiers were initially introduced to achieve physical separation between software components. In the client/server model, the remote workstation was wired to the central server. Later, the top tier became the presentation logic, whether made of masks, a console, or a graphical user interface (GUI). The business tier, or application tier, was another application responsible for accessing the database server.
In the common industry jargon, the terms tier and layer are often used interchangeably. In reality, they both refer to distinct pieces of a software application but differ significantly from a deployment perspective. A tier denotes a physical server, or at least a different process-execution space. In contrast, a layer is a logical container for different portions of code and needs a physical tier to be deployed.
Note All layers are deployed to a physical tier, but different layers can go to different tiers.
When it comes to production, a debatable point is whether a multi-layer application should be mapped to a multi-tier architecture, with a one-to-one match between layers and tiers. Multiple tiers seem to give more flexibility and ease of maintenance and scalability, but this comes at the cost of spreading latency between tiers and subsequently making every single operation potentially slower. In addition, deployment is more expensive in a multi-tier scenario, as more resources (on-premises or in the cloud) are necessary.
In summary, tiers can provide a structure for scaling an application, but their mere presence doesn’t guarantee faster performance. Efficient scaling involves not only the organization of tiers but also factors such as load balancing, code optimization, and the use of appropriate technologies for decoupling (for example, a bus). Tiers help by offering a logical separation of responsibilities, but their performance benefits are realized through thoughtful design, resource allocation, and performance tuning.
The value of N
The term multi-tier (or multi-layer) refers to a number (N) of tiers (or layers) that conventionally equals three. So, is three the ideal number of tiers (or layers)? To answer this, consider Figure 1-2.

FIGURE 1-2 Variable number of tiers in a massively distributed application architecture.
The figure is a diagram split in three columns separated by two vertical dashed lines. The leftmost column contains a block labeled “Presentation”. The central column contains three blocks and an ellipsis to indicate “possibly more”. The blocks are labeled “Business #1”, “Business #2” and “Business #N”. The third column has an identical structure except that blocks are labeled “Data #1”, “Data #2” and “Data #N”.
Tiers and layers have followed different scales. The popular approach based on microservices tends to increase the number of physical tiers up to hundreds. In contrast, the number of layers within a single tier rarely exceeds four, which is considered the ideal number by the canonical supporting architecture of the domain-driven design (DDD) methodology. As you’ll see shortly, the four layers are:
■ Presentation This layer collects user requests and input to submit to processing layers down the stack.
■ Application This layer receives raw input from the presentation layer and orchestrates any necessary tasks.
■ Domain This layer contains reusable domain and business logic.
■ Infrastructure This layer deals with external services (for example, APIs and web services) and storage.
Compared to a three-tier architecture, a multi-layered architecture is more granular, because it splits in two an otherwise thick (and likely more convoluted) business tier.
Multi-tiered systems today
Multi-tier architecture is a well-established pattern that still serves most business scenarios today. Let’s reflect on the flavors of multi-tier we see today in the industry.
One flavor is the web application. For the purposes of this book, a web application is a line-of-business (LoB) application consumed through a client web browser application. This contrasts with a website, in which the stratification of what is referred to as the front end is quite simple in terms of domain complexity and workflows.
In action, a typical web application develops over two tiers: the client browser and the server (cloud) environment, sometimes referred to as the back end. How many tiers and layers exist within the back end? Classic ASP.NET and ASP.NET Core applications and Blazor server applications often count two tiers and multiple (N > 3) layers. One tier is the core application, and another is represented by the primary database server—for example, a relational database management system (RDBMS).
The challenge for everyone, then, is learning the good and bad of every possible application architecture pattern, making a thoughtful choice based on the specific business context, and, most of all, avoiding dogmatic disputes.
Note While researching the origin of the three-tier architecture, I ran into a curious fact I’d never heard before. In the United States during the 1930s, right after the repeal of the Prohibition Act, the government introduced a new distributed system for ensuring people’s access to alcohol. Guess what? It was named the three-tier system, and the tiers were, from bottom to top, producers, distributors, and retailers.
Modularization is the primary reason for the introduction of multiple tiers and layers. Having been in this industry for more than 30 years now, I have observed many attempts to develop a universal approach to componentization (or should I say, Legolization?) in software development, from Visual Basic and Delphi components to ActiveX and COM, from JavaBeans to Web Forms server controls, and from old-fashioned web services to microservices. Frankly, my age-dependent disillusion leads me to state that none of them worked for more than a few people or for a limited amount of time. Still, I have no hope and no room for universality.
Behind known benefits such as the ability to reuse components, the parallelization of development, and ease of maintenance, the ultimate goal and primary benefit of modularization is separation of concerns (SoC)—a universal principle of software formalized in 1974 by Edsger W. Dijkstra in the paper “On the Role of Scientific Thought.”
Note Although I have stated the core difference between a tier and a layer, from now on, for the sake of simplicity, I’ll use the term layer to indicate tier or layer unless it becomes necessary to distinguish between the two.
The presentation layer
Each of the layers briefly discussed here shares a common idea but a different implementation. In a desktop application, for example, such as legacy Windows Forms or Windows Presentation Foundation (WPF) applications, the presentation layer is the user interface. It contains a minimal amount of presentation logic to validate input and to adjust the user interface to reflect the current state of the application.
In contrast, in a web scenario, the user interface consists of a mixture of HTML, CSS, and JavaScript rendered in a browser. Alternatively, it can be a runnable piece of WebAssembly code, like the code generated by Blazor. Being run on a physically different machine, it is a real tier. The application, though, might also consist of a special presentation layer whose primary purpose is to route requests to some module to handle it. For ASP.NET Core applications, the presentation layer contains controller classes and, more generally, code that is directly connected to reachable endpoints.
The business layer
In very abstract terms, the business layer processes information collected in the presentation layer with other information managed by the data layer. It is also the place where business rules are known and applied. In an ASP.NET Core scenario, the business layer is made by handlers that can respond to a controller request and return a response for the controller to package it back to the browser.
In recent years, a commonly recurring query in training sessions and workshops pertained to the optimal placement of specific code segments. For instance, questions often arose regarding the appropriate location for input validation code. Should it reside in the presentation or business layer? Alternatively, is it advisable to defer validation until it hits the database, possibly handled by a stored procedure or some surrounding code?
At its core, the business layer leaves such gray areas unclear. For this reason, a four-layer architecture emerged.
The data layer
This is where information processed by the application is persisted and read. The thickness of the data layer is highly variable. It might coincide with a database server—whether relational or NoSQL—or it could be created by code that arranges raw calls to the storage server via dedicated object-relational mappers (ORMs) such as Entity Framework (EF) or Dapper.
Recently, the data layer has been abstracted into an infrastructural layer where persistence is just the primary (but not unique) responsibility. Seen as infrastructure, this layer is also responsible for emails and connections to external APIs.
Important The primary purpose of a multi-layered architecture is to achieve separation of concerns (SoC) and to ensure that different families of tasks execute in a properly isolated environment. A crucial consequence of SoC, especially when applied across multiple layers, is that dependencies between layers must be strictly regulated. Discussing how to plan SoC across layers in the context of a web application written for the .NET stack is the main goal of this book.
In the early 2000s, the software industry faced a gigantic challenge: modernizing, or just migrating, existing business applications to seize new opportunities presented by the breakthrough of the internet. Attempting to adapt mainframe applications to handle the growing demand for e-commerce introduced monumental levels of complexity.
The three-tier architecture started creaking under the weight of this complexity—not so much because of its inherent inefficiencies, but rather due to the need to increase modularization to manage business and implementation requirements and (hopefully) scale. (It was at this time that the term scalability rose to prominence and gained its meaning as we know today—a system’s ability to maintain a good level of service even if the number of requests grows unexpectedly.)
The domain-driven design (DDD) methodology systematized several practices and solutions that proved valid on the ground. Bundled with the design methodology, there was also a canonical supporting architecture.
Note I don’t use the phrase “monumental complexity” by chance. It is a quote from the stories I’ve heard from the people who devised DDD and an homage to all of them.
DDD proponents suggested a layered architecture to implement modules. This layered architecture generalized the three-tier architecture obtained in three steps:
Tiers were generalized to layers.
The business layer was broken in two, with an application layer for the orchestration of use cases and a domain layer for pure business logic. The domain layer in turn was composed of two elements: a collection of persistence-agnostic domain models and a collection of persistence-aware domain services. This is a key aspect of DDD.
The data layer was renamed the infrastructure layer, and the most common and important service it provided was persistence.
The resulting architecture—which also includes a presentation layer—is monolithic in its simplest form but has clear boundaries at any level and well-defined flows of data exchange. In some ways, it is even cleaner than the actual trumpeted clean architecture!
The presentation layer
The presentation layer handles interactions with external systems that send input data to the application. This primarily includes human users, but also API calls from other running applications, notifications, bus messages, triggered events, and so on. Put another way, the presentation layer receives requests for tasks that will be processed down the stack, producing some effect on the domain. The presentation layer is also responsible for packaging results generated by internal layers in response to an accepted request and for sending it back to the requestor.
The presentation layer can take various technological forms. It might be a desktop application (for example, .NET MAUI, Electron, old-fashioned WPF, or Windows Forms), a mobile application, a minimal API, or a fully-fledged web application (whether ASP.NET Core, Blazor, Angular, React, or Svelte and friends). Also, the protocols involved may vary a bit, and include HTTPS, gRPC, and, in scenarios involving the internet of things (IoT), Message Queue Telemetry Transport (MQTT), Advanced Message Queuing Protocol (AMQP), and more.
Considering this, it is key to remember that despite the fact that the layer name (presentation) evokes the presence of some graphical front end, a visual interface is not necessary. Even when the bounded context is expected to be a plain web API, a presentation layer makes sense because, as mentioned, it represents a sort of reception and the gateway to internal functions and layers.
The application layer
Whereas the presentation layer collects requests, the application layer coordinates any subsequent processing. The application layer, in fact, is where business workflows are launched and monitored. Any single request managed at the upper level finds a concrete executor in the application layer. A term that well describes the behavior of the application layer is orchestrator. A more elaborate job description is that the application layer is responsible for the implementation of the various use cases.
Important In a classic three-tier scenario, the well-defined responsibilities described here are shared between all the tiers—presentation, business, and data—in percentages that vary between implementations based on the view and sensitivity of the involved teams.
The application layer goes hand-in-hand with the presentation layer and supplies one action method for each possible trigger detected by the presentation actors. When multiple versions of an application are necessary (say, one for web and one for mobile), each should have its own application layer unless the triggers and expected reactions are nearly the same.
The domain layer
You can have multiple application layers—one per presentation layer. However, the domain layer must be unique and shared. That’s the key principle of DDD: The domain layer is where all business rules and logic are coded.
The domain layer is made of two related parts:
■ Domain model This is a plain library of classes that contains the definitions of all business entities plus any value objects, aggregates, factories, enumerations, and whatever else is helpful to provide a realistic representation of the business model. Ideally, this is coded as a distinct class library. Domain classes are empty and stateless crunching machines with the logic to process data according to business rules. A few important aspects of domain models are as follows:
■ ■ One team is in charge of the domain model.
■ ■ In the .NET space, the domain model is preferably shared as a NuGet package via a private company- or team-specific feed.
■ ■ The domain model should have as few dependencies as possible on other packages or projects. Any dependencies that might arise (such as on helper third-party packages) should be evaluated bluntly and incorporated only if strictly necessary.
■ ■ The domain model has no reference to the persistence layer (which is part of the infrastructure layer) and is completely database-agnostic.
■ Domain services How do you query for data and load it into the empty and stateless crunching machines? That’s what domain services do. These are database-aware classes that load into domain entity classes and run updates starting from those domain classes. Domain services have a dependency on the domain model and on the infrastructure layer (the persistence layer in particular).
The infrastructure layer
The infrastructure layer is the container for persistence layer, external services such as email and messaging systems, and connectors to external APIs.
Data access is usually the primary service provided by the infrastructure layer. It includes all the possible combinations of read and write operations that the business needs. The most common scenario is when full persistence (read/write) is required. Other scenarios are possible as well, such as read-only, when data is read from existing external services, and write-only, when the infrastructure layer is used only to log events.
You isolate the components responsible for database access through the use of repositories. Interestingly, the use of repositories does not compromise SoC. The persistence layer, which is part of the infrastructure layer, is where repositories are collected. If you intend to use interfaces on top of repositories (for example, for testing purposes) then those interfaces can be placed in the domain service library. Another simpler approach, however, may be to place domain services and actual repositories in the persistence layer or even to build richer repositories that are not limited to CRUD methods but expose smarter methods. In this case, domain services blurs into the persistence layer.
Figure 1-3 shows the recommended way to set dependencies between the layers of a classic DDD architecture.
FIGURE 1-3 Interconnections between layers in DDD layered architecture.
The figure is a diagram of four rectangular blocks. The topmost block, labeled Presentation connects to the block labeled Application placed just below it. The Application block connects to another block below named Infrastructure. The left side the Presentation block also connects to the Infrastructure block via a dotted elbow line. Both Application and Infrastructure connect to a fourth block (Domain) vertically placed in between them but on the right edge of the diagram.
Note The purpose of this chapter is to provide the big picture of application architecture and how the industry adopted modularity over the decades. It only scratches the surface of DDD and layered architectures. You will learn much more about the essence of DDD in Chapter 2, “The ultimate gist of DDD.“ The rest of this book covers the layers of the DDD-inspired architecture in detail, with code examples.
The canonical DDD architecture was devised as a helpful reference. Its use is never mandatory. It first came with a strong flavor of object-orientation, but this aspect, too, was never a requirement. The object-oriented nature of DDD evolved over the years to incorporate some functional capabilities. Again, the resulting multi-layered pattern was just a recommendation, and simpler solutions (for example, CMS, CRM, coupled CRUD, and two-layer systems) were always acceptable as long as they could fit the requirements. More recently, two additional flavors have gained popularity: command/query responsibility segregation (CQRS) and event sourcing. I see both as additional ingredients for the original layered recipe.
Add CQRS to taste
CQRS is simply a pattern that guides in the architecture of a specific component of a possibly larger system. Applied to a layered architecture, CQRS breaks up the domain layer into two distinct parts. This separation is obtained by grouping query operations in one layer and command operations in another. Each layer then has its own model and its own set of services dedicated to only queries and commands, respectively. Figure 1-4 compares plain layered architecture (left) with a CQRS-based version of it (right).
FIGURE 1-4 Visual comparison between classic layers and CQRS.
The figure is the composition of two diagrams. The one on the left presents the classic layered architecture of the Domain Model in which a single domain layer exists and there's no distinction between commands and queries. The diagram on the right, instead, separates commands and queries and is based on different domain layers.
Unlike DDD, CQRS is not a comprehensive approach to the design of an enterprise class system. As mentioned, it’s simply a guide. A DDD analysis based on ubiquitous language to identify bounded contexts remains a recommended preliminary step. (More on this in Chapter 2.) CQRS is just a valid alternative for the implementation of a particular module of the whole application.
Any operation against a software system is either a query that reads the status of the system or a command that alters the existing status. For example, a command is an action performed against the back end, such as registering a new user, processing the content of a shopping cart, or updating the profile of a customer. From a CQRS perspective, a task is mono-directional and generates a workflow that proceeds from the presentation layer to the domain layer, and likely ends up modifying some storage.
A model that only deals with queries would be much easier to arrange than a model that must deal with both queries and updates. A read model has a structure of classes more similar to data transfer objects (DTOs), and properties tend to be much more numerous than methods. The resulting model is therefore more anemic, as it loses all methods that alter the state of the object.
The application layer doesn’t experience significant changes in a CQRS scenario. It’s a matter of triggering the server task associated with the request. The same doesn’t hold true for the infrastructure layer. This is where another flavor—event sourcing—kicks in.
Add event sourcing to taste
Event sourcing takes CQRS command and query separation further by storing data as a series of immutable events, capturing every change to the system’s state over time. These events provide a complete historical record of a system’s evolution, enabling auditing, replay, and complex data analysis, including what-if analysis. Event sourcing is particularly valuable in systems where data changes are frequent or when a detailed historical context is essential, making it an evolution from the principles of CQRS.
In general, when the frequency of commands overwhelms the frequency of reads, you might want to consider a dedicated persistence subsystem within the infrastructure layer. Figure 1-5 shows a possible design.
FIGURE 1-5 The abstracted architecture of an event-sourcing system.
The figure is another variation of the layered architecture diagram. Presentation and Application blocks are laid out vertically with a connecting arrow. From Application two elbow arcs depart connecting to a Command Domain Layer block and a Query Domain Layer block. Each of these blocks points to another block (Event Store and Read Model respectively) in the Infrastructure container. Finally, Event Store connects via a thick dashed line to Read Model.
In the real world, we merely observe events. But for some reason, we feel the need to build a model to capture any information carried by events and store it. Models are immensely helpful when dealing with queries, but not so much for commands. For these, event-based systems are best. We could even take this further to say that event-based systems should be the norm and models the exception. Whenever we use a model, we’re somehow working on a good-enough approximation.
The model of Figure 1-5 can even be extended to change the internal organization of the application layer. Usually, the logic necessary to implement use cases is written as a code-based workflow orchestrated by classes and methods in the application layer. However, when you opt for a full event-based view of the application, then all you do in the application layer is push a message describing the received request. The message is then delivered to a bus, where domain service handlers are listening. Each handler reacts to events of interest by performing actions and pushing other messages to the bus for other listeners to react. As in Figure 1-6, the whole business logic of each task ends up coded as a sequence of messages rather than a sequence of code-based workflow activities.
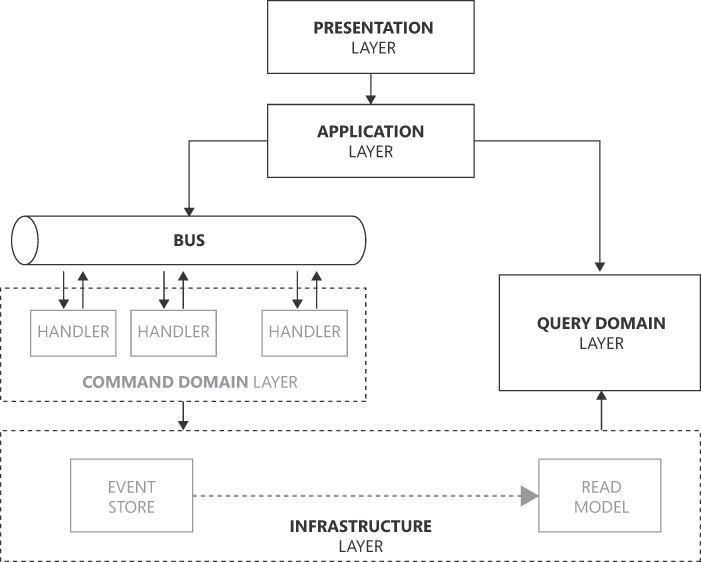
FIGURE 1-6 Message-based business logic.
This figure is a diagram that represents the overall architecture of an Event Sourcing system. The application layer pushes commands to the bus. The bus orchestrates the execution of the process associated with the command. It does that by finding handlers that can react to the message and push other messages after completion or during the processing. Events pushed to the bus are persisted to the store. Compared to Figure 1-5 this figure just expands the block “Command Domain Layer”.
The biggest issue with events in software architecture is the concept of the “last-known good state” of a system, which has been mainstream for decades. It’s being replaced by the “what’s happened” approach that treats domain events as the core of the architecture.
Having events play such a central role in software architecture poses some new challenges and may even face some inertial resistance. Here are some of the reasons events have a deep impact on software architecture:
■ You don’t miss a thing By designing an event-based architecture, you give yourself the power to easily track nearly everything that takes place in the system. New events can be added almost any time, allowing for an increasingly more precise replica of the business space.
■ Extensibility of the business representation Using a model to persist business use cases limits you to whatever can be stored and represented within the boundaries of the model. Using events instead removes most limits; as mentioned, adding or modifying business scenarios is possible and relatively inexpensive.
■ Well-positioned for scalability Used in combination with CQRS, event sourcing prepares the ground for any system to be scalable should the time ever come that scalability becomes crucial.
In abstract terms, the DDD layered architecture remains an extremely logical way of organizing individual applications. However, modern times have created new toppings for the final cake. As with any baking recipe, the correct amount of CQRS and event sourcing is “to taste.”
For reasons that I can only try to guess, at some point in time, the layered architecture was considered not so much for its level of abstraction but as a concrete, horizontal, and object-oriented way of building applications. So, other flavors of application architecture with fancy names have emerged. As I see it, though, these are nothing more than different ways to dress software layers.
Non-layered software architecture
The idea of modularity goes hand-in-hand with layers. Although the two concepts might seem a bit polarized, layers can be recognized everywhere. That said, though, the internal design details of a layer are sometimes so pervasive that they overflow the boundaries of the layer and become non-layered software architecture of its own. For example, this is the case with event-driven architecture (EDA). Essentially, EDA is what was shown in Figure 1-6, assuming that everything—including requests to the read model—passes from the bus or, more generally, through a broker component. (Look ahead to the left side of Figure 1-7.)
Another non-layered type of architecture is microservices. Chapter 9, “Microservices versus modular monoliths,” is devoted to microservices. For now, it’s crucial to simply grasp the intended meaning of the term, and to achieve this, one must have clear in mind the size of components. This means answering the question, “How large is micro?” If micro is large enough, we’re back to a layered architecture. If micro is really small, we get close to EDA. In the context of a cloud-native architecture, microservices are relatively simple, and often stateless, handlers of events. The logic to orchestrate the activity of multiple microservices in a business action may exist in various places—the front end, in some GraphQL middleware, or in a gateway service. (See the right side of Figure 1-7.)
The main benefit of non-layered architecture is the inherent decentralization of functions compared to the monolithic nature of layered solutions. However, software always involves trade-offs. So, decentralization is not necessarily better in all cases, and monolithic solutions are not always dirty and bloated. How do architects decide which to use? Well, it depends!
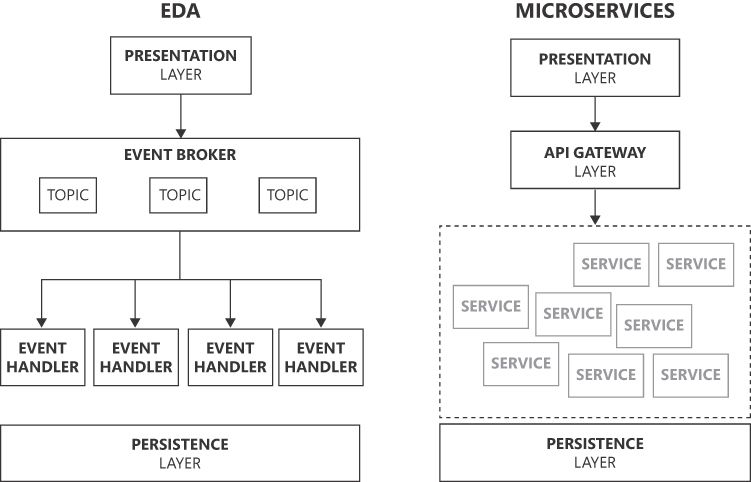
FIGURE 1-7 Event-driven architecture versus microservices architecture.
The figure is the composition of two diagrams. The leftmost diagram represents an event-driven architecture in which the block Presentation connects to a box labeled Event Broker that dispatches arrows to four boxes labeled “Event Handler”. The rightmost diagram describes a microservices architecture. The Presentation box connects to the API Gateway box which, in turn, points to a large container full of mini boxes named Service.
Layered architecture often comes with different names and visions. Making sense of these is beyond me, but as I see it, at least a couple of these names are merely different flavors of layered architecture. This section discusses a few of these flavors: hexagonal architecture, clean architecture, and feature-driven architecture.
Note All the architectural patterns discussed here (along with others you may encounter) share a common goal (modularity and separation of concerns) and a common tactic (software layers).
Hexagonal architecture (HA) is based on the idea that the central part of an application is a core library that interacts with the outside world through well-defined interfaces. When compared to layered architecture, the application core in HA corresponds to the domain and application layers (implementation of use cases). The key factor in HA is that any communication between the core application and the rest of the world is set up via contracted interfaces, known as ports. Adapters serve as the interface between ports and various layers. At the minimum, there will be an adapter for the presentation layer and the persistence layer. (See Figure 1-8.)
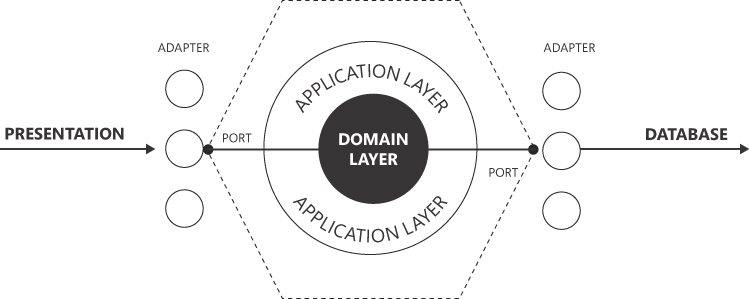
FIGURE 1-8 Schema of a hexagonal, port/adapter architecture.
The diagram develops around two concentric circles-Domain Layer and Application Layer-wrapped up in a comprehensive, dashed hexagon. From the outermost circle depart two arrows labeled “port” that connect to a vertical list of circles symbolizing adapters. The left list of adapters is reached by an arrow labeled “Presentation”. The right list is connected to a an arrow labeled “Database”.
NoteAlistair Cockburn conceived and named the hexagonal architecture in 2005. Cockburn, who was also one of the authors of the Agile Manifesto, was close to the people who devised DDD, and his hexagonal architecture is essentially an attempt to mitigate possible pitfalls of object-oriented modeling, which is central to DDD. However, although hexagonal architecture originated about the same time as DDD and its layered architecture, it has little to do with it. Its main purpose was to achieve even more modularity by putting a port interface behind any real-world task the core application could execute.
The collection of input ports forms the API layer that the application defines so that the outside world (that is, the presentation layer) can interact with it. These ports are also known as driver ports. Ports placed on the other side of the hexagon are driven ports and form the interface that the application defines to communicate with external systems such as databases. Methods on the ports are all that application and domain services know. Similarly, adapters are implementations of the port interfaces that actually know how to package input data transfer objects and to read/write to the database.
Note Because of the relevance that ports and adapters have in the hexagonal architecture, “port/adapter” is another popular name for HA.
Popularized by Robert Martin (a.k.a., Uncle Bob) around 2012, clean architecture (CA) is yet another flavor of layered architecture, which grabs from both DDD and HA. It brings nothing new to the table beyond an attempt to reorder and (arguably) clarify concepts. However, in the end, adding yet another pattern name and yet another style of diagram probably added confusion too. You’re not too far from absolute truth by saying that CA is a way to call slightly different concepts by a new, unifying name.
CA renders itself with concentric circles rather than vertical bars or a hexagon. The outermost circle represents any possible communication with the outside world, whether via web front ends, user interfaces, or databases. The innermost circle is the domain layer—the repository of invariant business rules. The domain layer is surrounded by the layer of use-cases—namely, the application layer. Next, is the presentation layer, which is where input from outside users is conveyed. (See Figure 1-9.)
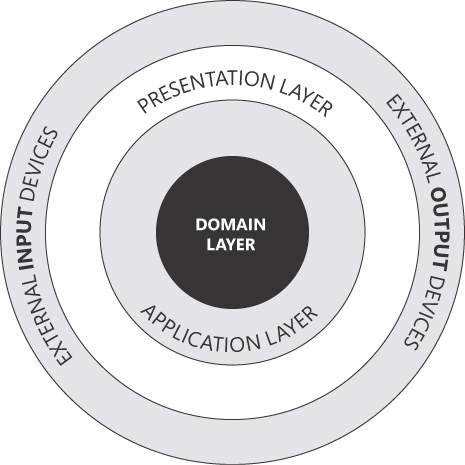
FIGURE 1-9 Schema of a clean architecture.
The figure is a diagram to illustrate the Clean Architecture. The diagram is composed of four concentric circles. The outermost has one label on the left (External input devices) and one on the right (External output devices). Proceeding to the innermost circle, the diagram has the labels “Presentation Layer”, “Application Layer” and “Domain Layer”.
It would be nice to compare the diagram in Figure 1-9 with the one in Figure 1-3. That diagram illustrates the same concepts vertically, groups output external devices under the name of infrastructure, and assumes (without rendering) the existence of input devices on top of the presentation block.
The acclaimed benefits of CA are the same as any other (properly done) layered architecture. They can be summarized as follows:
■ Inherent testability of the business logic, which remains segregated from external dependencies on the UI, services, and databases
■ Independence of the UI, as the architecture is not bound in any way to using ASP.NET, .NET MAUI, rich front ends, or whatever else; frameworks have no impact on the business rules
■ Persistence agnosticism, as any knowledge of database details is restricted to the closest layer and ignored at any upper level
One final comment on the necessity of interfaces to cross the boundaries of each layer: In HA, those interfaces (ports) are, in a way, a mandatory and constituent part of the architecture itself. In CA and in general layered architecture, the use of interfaces is left to implementors. The use of interfaces—and coding against interfaces rather than implementations—is the universal principle of software low coupling. However, dropping interfaces while having their role clear in mind is a great sign of self-discipline and pragmatism.
? What do we really mean by “clean”?
When someone says, “clean architecture,” it is not obvious what “clean” is referring to—the concentric clean architecture as described by Robert Martin or just a well-done, modular architecture. But either way, when it comes to software architecture, clean can be seen as a synonym of layered.
So, what do we really mean by “layered”? Well, a software layer, whether logical or physical, is a segregated module connected to other modules through contracted interfaces. As a result, it is relatively easy to test both in isolation and in integration mode. When it comes to software architecture, therefore, layered is a synonym of modular.
What is “modular,” then? This concept dates back to Dijkstra’s universal principle of SoC. It translates to separating the whole set of features into independent blocks, each of which contains all the parts needed to run to functional perfection. A module is self-contained and connected to other modules via identifiable plugs and clear, preferably injected, dependencies.
The sore point of modularity relates less to devising modules and features and more to coding them—keeping connection points under control without creating hidden dependencies. Code written in this way, whether monolithic or distributed, can be baptized as “clean.”
Note Clean code is a universal attribute. You don’t achieve clean code by using a specific technology stack (for example, .NET, Java, Android, Python, Go, or TypeScript) or a particular version.
Feature-driven architecture (FDA) is a software architectural approach that emphasizes organizing the system’s architecture around functional components that are crucial to the software’s vitality. FDA is not exactly distinct from the architectural patterns we’ve explored thus far; it merely offers an alternative perspective on system design and building. FDA revolves around the identification of pivotal software features and orchestrates the architecture to prioritize their comprehensive support. A notable benefit of FDA is that it often results in a modular and component-based architecture.
The set of core features represents the smallest ever amount of complexity inherently related to the system. The real complexity is a combination of the organic feature complexity plus any sort of accidental complexity we add on top because of misunderstandings, technical debt, legacy code, or inaccurate design choices.
Vertical slice architecture
A feature-driven approach to a system development usually goes hand-in-hand with vertical slice architecture (VSA). For example, a development team might adopt feature-driven architecture as a design approach and then use vertical slicing to implement and release those features incrementally, providing value to users at each step of development.
Reasoning by features doesn’t have much impact on the architecture, which remains layered from use-case logic to domain logic to persistence. However, it does help organize development, including coding and testing. In fact, VSA involves implementing one slice after the next of functionality, each spanning the entire stack of layers, including the user interface, application logic, and data storage.
Designing a system in vertical slices means rebuilding the diagram in Figure 1-3 by putting vertical slices side by side, as in Figure 1-10.
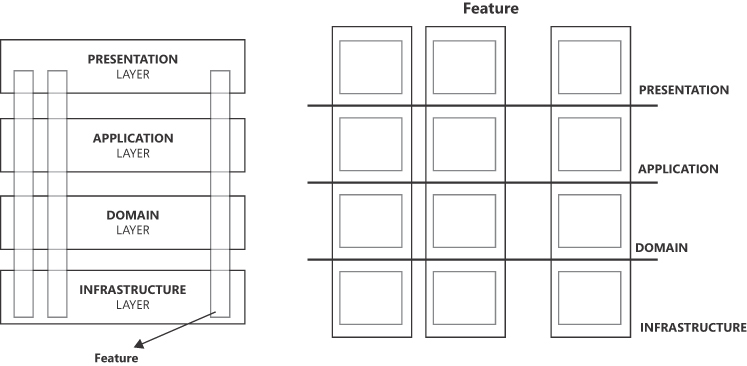
FIGURE 1-10 Vertical slicing of features.
The figure is made of two diagrams side by side. The leftmost has the four layers of Presentation, Application, Domain and Infrastructure laid out vertically in transparent boxes. From top to bottom, three thinner transparent boxes are rendered pointing out to the label “Feature”. The rightmost diagram has three larger vertical rectangles to represent features that cut the horizontal four layers.
Agility and trade-offs
Feature-driven thinking and VSA can help you better estimate the cost of development. VSA originates in relationship to Agile methodologies and is often used to build minimum viable products (MVPs) or develop incremental releases. The goal is to deliver a fully functional part of the software that can be used, tested, and demonstrated to stakeholders, while providing value to end-users early in the development process.
As the right diagram in Figure 1-10 shows, though, feature-driven design may fragment all the horizontal layers, creating some potential for code duplication. Furthermore, if one or more layers are deployed independently on their own app services, the costs may increase if you deploy each layer, for each feature, independently. To avoid that, some feature-specific pieces of the same layer (for example, the application layer) may be fused together, forming what DDD calls a shared kernel. (More on this in Chapter 2.)
In the end, a feature-driven approach sounds like a shortcut if applied at the architecture level, but it is an effective way to organize everyday development as well as files and folders in the code repository. The bottom line is that a DDD analysis is the ideal way to go because it proceeds through requested features and isolates them in a bounded context and shared kernel, providing the ultimate list of software components to code.
If there was ever a time when architecture was negligible, that’s no longer the case today. Especially for modern software, good architecture is a structural requirement, not a luxury.
If you ask around about what software architecture is most suitable for the current times, you will get one common answer: microservices. Objectively, microservices is an abused term that means little to nothing if not paired with a definition of the intended size of the components and the surrounding environment. As I see it, microservices are too often chosen for use as a pure act of faith in a pattern. You’ll learn much more about microservices in Chapter 9; in brief, they fit nicely in a cloud-native, event-driven architecture if hosted within a serverless platform.
So, if not microservices, what else? A popular, ongoing debate today contrasts microservices with modular monoliths. The funny thing is that microservices emerged as a way to replace tightly coupled monolithic software applications. The breakdown was excessively granular and created other problems—essentially, how to gather sparse and small components. As popular wisdom passes down through proverbs, the virtue is in the middle. In this context, the middle way is a modular layered architecture.
This chapter provided a historical overview of tiers and layers and ended on the most abstract flavor of them—the layered architecture as defined in DDD and recently renamed clean architecture. The chapter mentioned DDD several times; the next chapter provides a summary of what DDD actually is.
Get your facts first, and then you can distort them as much as you please.
—Mark Twain
Domain-driven design (DDD) is a 20-year-old methodology. Over the years, there have been several books, learning paths, and conferences dedicated to it, and every day, various social networks archive hundreds of posts and comments about it. Still, although the essence of DDD remains surprisingly simple to grasp, it is much less simple to adopt.
Today more than ever, software adds value only if it helps streamline and automate business processes. For this to happen, the software must be able to faithfully model segments of the real world. These segments are commonly referred to as business domains.
For a few decades, client/server, database-centric applications have provided an effective way to mirror segments of the real world—at least as those segments were perceived at the time. Now, though, working representations of segments of the real world must become much more precise to be useful. As a result, a database with just some code around is often no longer sufficient. Faithfully mirroring real-world behaviors and processes requires an extensive analysis.
What does this have to do with DDD? Ultimately, DDD has little to do with actual coding. It relates to methods and practices for exploring the internals of the business domain. The impact of DDD on coding and on the representation of the real world depends on the results of the analysis.
DDD is not strictly required per se, but it is an effective method for exploring and understanding the internal structure of the business domain. What really matters is getting an accurate analysis of the domain and careful coding to reflect it. DDD systematizes consolidated practices to produce an architectural representation of the business domain, ready for implementation.
Conceptually, DDD is about design rather than coding. It rests on two pillars: one strategic and one tactical. The original authors of DDD outlined the strategy pillar and suggested tactics to achieve it. Today, however, I believe strategic analysis is the beating heart of DDD.
Any world-class software application is built around a business domain. Sometimes, that business domain is large, complex, and intricate. It is not a natural law, however, that an application must represent an intricate business domain to be broken down into pieces with numerous and interconnected function points. The strategic analysis can easily return the same monolithic business domain you started from.
Top-level architecture
The ultimate goal of the DDD strategic analysis is to express the top-level architecture of the business domain. If the business domain is large enough, then it makes sense to break it down into pieces, and DDD provides effective tools for the job. Tools like ubiquitous language (UL) and bounded contexts may help identify subdomains to work on separately. Although these subdomains may potentially overlap in some way, they remain constituent parts of the same larger ecosystem.
Figure 2-1 illustrates the conceptual breakdown of a large business domain into smaller pieces, each of which ultimately results in a deployed application. The schema—overly simplified for the purposes of this book—is adapted from a real project in sport-tech. The original business domain—a data-collection platform—is what stakeholders attempted to describe and wanted to produce. The team conducted a thorough analysis and split the original domain into five blocks. Three of these blocks were then further broken into smaller pieces. The result is 10 applications, each independent from the other in terms of technology stack and hosting model, but still able to communicate via API and in some cases sharing the same database.
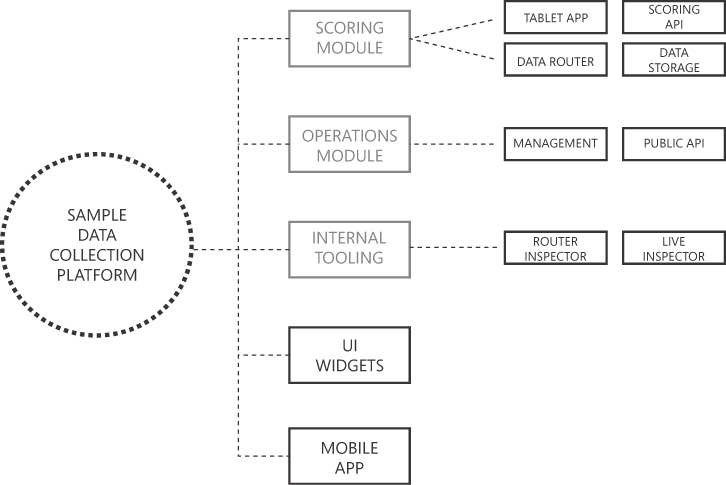
FIGURE 2-1 Breakdown of a business domain.
The figure is a diagram conceptually divided into three segments laid out horizontally. The leftmost segment shows a dashed circle labeled “Sample Data Collection Platform” and symbolizes the business domain to break up. The central segment counts five blocks placed vertically connected to the circle. The first three are grayed out and are further expanded in the rightmost segment.
Business domain breakdown
Nobody really needs DDD (or any other specific methodology) to move from the dashed circle on the left of Figure 2-1 to the final list of 10 bold squares on the right. As hinted at earlier, DDD doesn’t push new revolutionary practices; rather, it systematizes consolidated practices. With knowledge of the business and years of practice in software architecture, a senior architect might easily design a similar diagram without using DDD, instead relying on the momentum of experience and technical common sense. Still, although deep knowledge of a business domain might enable you to envision a practical way to break up the domain without the explicit use of an analytical method, DDD does provide a step-by-step procedure and guidance.
Subdomains versus features
Recall the block labeled “Management” in Figure 2-1. This refers to a piece of functionality whose cardinality is not obvious. That is, whereas all the other blocks in Figure 2-1 reasonably map to a single leaf-level application, this one doesn’t. Within the Management block, you could identify the functions shown in Figure 2-2.
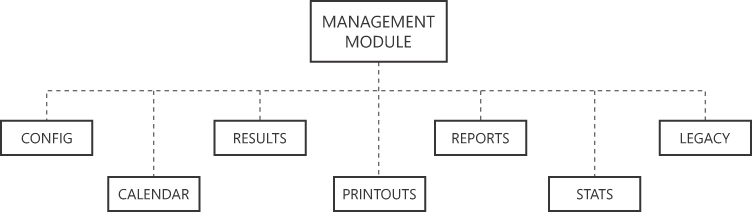
FIGURE 2-2 Further functional split of the Management module.
The figure is a diagram whose structure resembles an organizational chart and is made of squares connected to a root block via dashed lines. The topmost root block is labeled “Management Module”. Children blocks below from left to right are labeled “Config”, “Calendar”, “Results”, “Printouts”, “Reports”, “Stats” and “Legacy”.
The question is, are these functions just features in a monolithic application or independent services? Should this block be broken down further?
Determining the ideal size of building blocks is beyond DDD. That task requires the expertise and sensitivity of the architect. In the actual project on which this example is based, we treated the Management module as a whole and treated the smaller blocks shown in Figure 2-2 as features rather than subdomains. Ultimately, the DDD breakdown of subdomains hinges on the invisible border of local functions. All the blocks in Figure 2-2 are objectively local to the Management module and not impactful or reusable within the global, top-level architecture. Hence, in the actual project we treated them as features.
The confusing role of microservices
These days, at this point of the domain breakdown, one inevitably considers microservices. I’ll return to microservices in Chapter 3, “Laying the ground for modularity,” and in Chapter 9 “Microservices versus modular monoliths.” Here, however, I would like to make a clear statement about microservices and DDD: DDD refers only to top-level architecture and breaks the business domain in modules known as bounded contexts. A bounded context is an abstract element of the architectural design. It has its own implementation, and it can be based on microservices, but microservices are on a different level of abstraction than bounded context and DDD.
Note The term microservices refers to physical boundaries of deployable units, whereas the term bounded contexts refers to logical boundaries of business units. Technically, though, a microservice might implement all business functions of a bounded context. When this happens, calling it “micro” is a bit counterintuitive!
With reference to Figure 2-2, the question whether blocks are features of a domain or subdomains relates to top-level architecture. Once it is ascertained that the Management block is a leaf subdomain—namely, a bounded context—its recognized features in the implementation can be treated as in-process class libraries, functional areas, lambda functions, or even autonomous microservices. The abstraction level, though, is different.
The actual scale of DDD solutions
Many articles and blog posts that discuss DDD and bounded contexts presume that the entire enterprise back end is the domain that needs to be decomposed. So, they identify, say, Sales, Marketing, IT, Finance, and other departments as bounded contexts on which to focus. Such a large-scale scenario is fairly uncommon, however; companies rarely plan a big rewrite of the entire back end. But should this happen, the number of architects involved at the top level of the design, as large as that may be, would be relatively small.
DDD is a design approach primarily used for designing and organizing the architecture of software systems. It’s not tied to a specific scale in terms of the size of the system. Instead, it focuses on the organization of domains and subdomains within the software. Since the beginning, it has been pushed as a method dealing with enterprise-scale applications, but it is also applicable and effective at a medium- and small-scale level.
In general terms, strategy sets out what you want to achieve; tactics define how you intend to achieve it. Strategically, DDD provides tools to partition the business domain in smaller bounded contexts. Tactically, DDD suggests a default architecture to give life to each bounded context.
The default supporting architecture
Chapter 1 presented the highlights of the default DDD supporting architecture—the layered architecture, whose inspiring principles are now at the foundation of clean architecture. The layered architecture evolved from the multi-tier architecture in vogue when DDD was first devised.
The DDD reference architecture, monolithic and OOP-friendly, is just one suggestion. It was ideal in 2004 but sufficiently abstract and universal to retain great value even now. Today, though, other options and variations exist—for example, command/query responsibility segregation (CQRS), event sourcing, and non-layered patterns such as event-driven patterns and microservices. The key point is that for a long time, with respect to DDD, applying the layered architecture and some of its side class modeling patterns has been the way to go, putting domain decomposition in the background.
What’s a software model, anyway?
Beyond the preliminary strategic analysis, DDD is about building a software model that works in compliance with identified business needs. In his book Domain-Driven Design: Tackling Complexity at the Heart of Software (2003), author Eric Evans, uses the object-oriented programming (OOP) paradigm to illustrate building the software model for the business domain, and calls the resulting software model the domain model.
At the same time, another prominent person in the software industry, Martin Fowler—who wrote the foreword for Evans’ book—was using the same term (domain model) to indicate a design pattern for organizing the business logic. In Fowler’s definition, the domain model design pattern is a graph of interconnected objects that fully represent the domain of the problem. Everything in the model is an object and is expected to hold data and expose a behavior.
In a nutshell, in the context of DDD, the domain model is a software model. As such, it can be realized in many ways, such as OOP, functional, or CRUD. In contrast, the domain model design pattern as defined by Martin Fowler is just one possible way to implement such a software model.
Important Important
In DDD, the outcome of the analysis of the business model is a software model. A software model is just the digital twin of the real business in software form. It doesn’t necessarily have to be an object-oriented model written following given standards.
The name conflict with Fowler’s design pattern—quite paradoxical in a methodology in which unambiguous language is key—sparked several misconceptions around DDD.
The relevance of coding rules
The DDD definition details certain characteristics of the classes that participate in an object-oriented domain model: aggregates, value types, factories, behaviors, private setters, and so on. Having an object-oriented model, though, is neither mandatory nor crucial. To be crystal-clear, it’s not the extensive use of factory methods in lieu of unnamed constructors, or using carefully crafted value objects instead of loose primitive values, that makes a software project run on time and budget.
Put another way, blind observation of the coding rules set out in the DDD tactics guarantees nothing, and without a preliminary strategic design and vision, may generate more technical issues and debt than it prevents. For example, using a functional approach in the design of the domain model is neither prohibited nor patently out of place. You’re still doing DDD effectively even if you code a collection of functions or build an anemic object model with stored procedures doing the persistence work.
The value of coding rules
When it comes to DDD coding rules, though, there’s a flip side of the coin. Those rules—value types over primitive types, semantic methods over plain setters, factory methods over constructors, aggregates to better handle persistence—exist for a clear and valid reason. They enable you to build a software representation of the business model that is much more likely to be coherent with the language spoken in the business. If you don’t first identify the language of the business (the ubiquitous language) and the context in which that language is spoken, the blind application of coding rules just creates unnecessary complexity with no added value.
Database agnosticism
When you examine DDD, it’s easy to conclude that the domain model should be agnostic of the persistence layer—the actual database. This is great in theory. In practice, though, no domain model is truly agnostic from the persistence.
Note, though, that the preceding sentence is not meant to encourage you to mix persistence and business logic. A clear boundary between business and persistence is necessary. (More on this in the next chapter.) The point of DDD is that when building an object-oriented software model to represent the business domain, persistence should not be your primary concern, period.
That said, however, be aware that at some point the same object model you may have crafted ignoring persistence concerns will be persisted. When this happens, the database and the API you may use to go to the database—for example, Entity Framework (EF) Core, Dapper, and so on—are a constraint and can’t always be blissfully ignored. More precisely, blissfully ignoring the nature of the persistence layer—although a legitimate option—comes at a cost.
If you really want to keep the domain model fully agnostic of database concerns, then you should aim at having two distinct models—a domain model and a persistence model—and use adapters to switch between the two for each operation. This is extra work, whose real value must be evaluated case by case. My two cents are that a pinch of sane pragmatism is not bad at times.
Language is not simply about naming conventions
DDD puts a lot of emphasis on how entities are named. As you’ll soon see, the term ubiquitous language (UL) simply refers to a shared vocabulary of business-related terms that is ideally reflected in the conventions used to name classes and members. Hence, the emphasis on names descends from the need for code to reflect the vocabulary used in the real world. It’s not a mere matter of choosing arbitrary descriptive names; quite the reverse. It’s about applying the common language rules discovered in the strategic analysis and thoughtfully choosing descriptive names.
I’ve touched on the tools that DDD defines to explore and describe the business domain. Now let’s look at them more closely.
You use three tools to conduct an analysis of a business model to build a conceptual view of its entities, services, and behavior:
■ Ubiquitous language
■ Bounded context
■ Context mapping
By detecting the business language spoken in a given area, you identify subdomains and label them as bounded context of the final architecture. Bounded contexts are then connected using different types of logical relationships to form the final context map.
Note In the end, DDD is just what its name says it is: design driven by a preliminary, thorough analysis of the business domain.
As emphatic as it may sound, the creation of the software model for a business domain may be (fancifully) envisioned as the creation of a new world. In this perspective, quoting a couple of (sparse) sentences about the genesis of the universe from the Gospel of John may be inspiring:
■ In the beginning was the Word
■ The Word became flesh, and dwelt among us
Setting aside the intended meaning of “the Word,” and instead taking it literally and out of the original context, the word is given a central role in the beginning of the process and in the end it becomes substance. Ubiquitous language (UL) does the same.
As a doctor or an accountant, you learn at the outset a set of core terms whose meaning remains the same throughout the course of your career and that are—by design—understood by your peers, counterparts, and customers. Moreover, these terms are likely related to what you do every day. It’s different if, instead, you are, say, a lawyer—or worse yet, a software architect or software engineer.
In both cases, you may be called to work in areas that you know little or nothing about. For example, as a lawyer, you might need to learn about high finance for the closing argument on a bankruptcy case. Likewise, as a software engineer in sport-tech, you would need to know about ranking and scoring rules to enable the application’s operations to run week after week. In DDD, this is where having a UL fits in.
Motivation for a shared glossary of terms
At the end of the day, the UL is a glossary of domain-specific terms (nouns, verbs, adjectives, and adverbs, and even idiomatic expressions and acronyms) that carry a specific and invariant meaning in the business context being analyzed. The primary goal of the glossary is to prevent misunderstandings between parties involved in the project. For this reason, it should be a shared resource used in all forms of spoken and written communication, whether user stories, RFCs, emails, technical documentation, meetings, or what have you.
In brief, the UL is the universal language of the business as it is done in the organization. In the book Domain-Driven Design, author Eric Evans recommends using the UL as the backbone of the model. Discovering the UL helps the team understand the business domain in order to design a software model for it.
Choosing the natural language of the glossary
As you discover the UL of a business domain and build your glossary of terms, you will likely encounter a few unresolved issues. The most important is the natural language to use for the words in the glossary. There are a few options:
■ Plain, universal English
■ The customer’s spoken language
■ The development team’s spoken language
While any answer might be either good or bad (or both at the same time), it can safely be said that there should be no doubt about the language to use when the team and the customer speak the same language. Beyond that, every other situation is tricky to address with general suggestions. However, in software as in life, exceptions do almost always apply. Once, talking DDD at a workshop in Poland, I heard an interesting comment: “We can’t realistically use Polish in code—let alone have Polish names or verbs appear in public URLs in web applications—as ours is an extremely cryptic language. It would be hard for everyone. We tend to use English regardless.”
Note In the novel Enigma (1995), author Robert Harris tells the story of a fictional character who deciphers stolen Enigma cryptograms during World War II. Once the character decrypts some code, though, he discovers the text looks as if it contains yet another level of cryptography—this one unknown. The mystery is solved when another cryptogram reveals the text to be a consecutive list of abbreviated Polish names!
If the language of the glossary differs from the language used by some involved parties, and translations are necessary for development purposes, then a word-to-word table is necessary to avoid ambiguity, as much as possible. Note, though, that ambiguity is measured as a function that approaches zero rather than reaches zero.
You determine what terms to include in the glossary through interviews and by processing the written requirements. The glossary is then refined until it takes a structured form in which natural language terms are associated with a clear meaning that meets the expectations of both domain (stakeholder) and technical (software) teams. The next sections offer a couple of examples.
Choosing the right term
In a travel scenario, what technical people would call “deleting a booking” based on their database-oriented vision of the business, is better referred to as “canceling a booking,” because the latter verb is what people on the business side would use. Similarly, in an e-commerce scenario, “submitting an order form” is too HTML-oriented; people on the business side would likely refer to this action simply as “checking out.”
Here’s a real-world anecdote, from direct experience. While building a platform for daily operations for a tennis organization, we included a button labeled “Re-pair” on an HTML page, based on language used by one of the stakeholders. The purpose of the button was to trigger a procedure that allowed one player to change partners in a doubles tournament draw (in other words, as the stakeholder said, to “re-pair”). But we quickly learned that users were scared to click the button, and instead called the Help desk any time they wanted to “re-pair” a player. This was because another internal platform used by the organization (to which we didn’t have access) used the same term for a similar, but much more disruptive, operation. So, of course, we renamed the button and the underlying business logic method.
Discovering the language
Having some degree of previous knowledge of the domain helps in quickly identifying all the terms that may have semantic relevance. If you’re entirely new to the domain, however, the initial research of hot terms may be like processing the text below.
As a registered customer of the I-Buy-Stuff online store, I can redeem a voucher for an order I place so that I don’t actually pay for the ordered items myself.
Verbs are potential actions, whereas nouns are potential entities. Isolating them in bold, the text becomes:
As a registered customer of the I-Buy-Stuff online store, I can redeem a voucher for an order I place so that I don’t actually pay for the ordered items myself.
The relationship between verbs and nouns is defined by the syntax rules of the language being used: subject, verb, and direct object. With reference to the preceding text,
■ Registered customer is the subject
■ Redeem is the verb
■ Voucher is the direct object
As a result, we have two domain entities: (Registered-Customer and Voucher) and a behavior (Redeem) that belongs to the Registered-Customer entity and applies to the Voucher entity.
Another result from such an analysis is that the term used in the business context to indicate the title to receive a discount is voucher and only that. Synonyms like coupon or gift card should not be used. Anywhere.
Dealing with acronyms
In some business scenarios, most notably the military industry, acronyms are very popular and widely used. Acronyms, however, may be hard to remember and understand.
In general, acronyms should not be included in the UL. Instead, you should introduce new words that retain the original meaning that acronyms transmit—unless an acronym is so common that not using it is a patent violation of the UL pattern itself. In this case, whether you include it in the UL is up to you. Just be aware that you need to think about how to deal with acronyms, and that each acronym may be treated differently.
Taken literally, using acronyms is a violation of the UL pattern. At the same time, because the UL is primarily about making it easier for everyone to understand and use the business language and the code, acronyms can’t just be ignored. The team should evaluate, one by one, how to track those pieces of information in a way that doesn’t hinder cross-team communication. An example of a popular and cross-industry acronym that can hardly be renamed is RSVP. But in tennis, the acronyms OP and WO, though popular, are too short and potentially confusing to maintain in software. So, we expanded them to Order-of-Play and Walkover.
Dealing with technical terms
Yet another issue with the UL is how technical the language should be. Although we are focused on understanding the business domain, we do that with the purpose of building a software application. Inevitably, some spoken and written communication is contaminated by code-related terms, such as caching, logging, and security. Should this be avoided? Should we instead use verbose paraphrasing instead of direct and well-known technical terms? The general answer here is no. Instead, limit the use of technical terms as much as possible, but use them if necessary.
Sharing the glossary
The value of a language is in being used rather than persisted. But just as it is helpful to have an English dictionary on hand to explain or translate words, it might also be useful to have a physical document to check for domain-specific terms.
To that end, the glossary is typically saved to a shared document that can be accessed, with different permissions, by all stakeholders. This document can be an Excel file in a OneDrive folder or, better yet, a file collaboratively edited via Microsoft Excel Online. It can even be a wiki. For example, with an in-house wiki, you can create and evolve the glossary, and even set up an internal forum to openly discuss features and updates to the language. A wiki also allows you to easily set permissions to control how editing takes place and who edits what. Finally, a GitBook site is another excellent option.
Important Any change to the language is a business-level decision. As such, it should always be made in full accordance with stakeholders and all involved parties. Terms of the language become software and dwell in code repositories. You should expect a one-to-one relationship between words and code, to the point that misunderstanding a term is akin to creating a bug, and wrongly naming a method misrepresents a business workflow.
The ultimate goal of the UL is not to create comprehensive documentation about the project, nor is it to set guidelines for naming code artifacts like classes and methods. The real goal of the UL is to serve as the backbone of the actual code. To achieve this, though, it is crucial to define and enforce a strong naming convention. Names of classes and methods should always reflect the terms in the glossary.
Note As strict as it may sound, you should treat a method that starts a process with a name that is different from what users call the same process as technical debt—no more, no less.
Reflecting the UL in code
The impact of the UL on the actual code is not limited to the domain layer. The UL helps with the design of the application logic too. This is not coincidental, as the application layer is where the various business tasks for use cases are orchestrated.
As an example, imagine the checkout process of an online store. Before proceeding with a typical checkout process, you might want to validate the order. Suppose that you’ve set a requirement that validating the order involves ensuring that ordered goods are in stock and the payment history of the customer is not problematic. How would you organize this code?
There are a couple of good options to consider:
■ Have a single Validate step for the checkout process in the application layer workflow that incorporates (and hides) all required checks.
■ Have a sequence of individual validation steps right in the application layer workflow.
From a purely functional perspective, both options would work well. But only one is ideal in a given business context. The answer to the question of which is the most appropriate lies in the UL. If the UL calls for a validate action to be performed on an order during the checkout process, then you should go with the first option. If the vocabulary includes actions like check-payment-history or check-current-stock, then you should have individual steps in the workflow for just those actions.
Note If there’s nothing in the current version of the UL to clarify a coding point, it probably means that more work on the language is required—specifically, a new round of discussion to break down concepts one more level.
Ubiquitous language changes
There are two main reasons a UL might change:
■ The team’s understanding of the business context evolves.
■ The business context is defined while the software application is designed and built.
The former scenario resulted in the idea of DDD more than 20 years ago. The business model was intricate, dense, and huge, and required frequent passes to define, with features and concepts introduced, removed, absorbed, or redesigned on each pass.
Note This type of iterative process usually occurs more quickly in the beginning of a project but slows down and perhaps almost stops at some point later. (This cycle might repeat with successive major releases of the software.)
The latter scenario is common in startup development—for example, for software specifically designed for a business project in its infancy. In this case, moving fast and breaking things is acceptable with both the software and the UL.
So, the UL might change—but not indefinitely. The development team is responsible for detecting when changes are needed and for applying them to the degree that business continuity allows. Be aware, though, that a gap between business language and code is, strictly speaking, a form of technical debt.
Everyone makes mistakes
I have worked in the sport-tech industry for several years and have been involved in building a few platforms that now run daily operations for popular sports organizations. If tournaments run week after week, it’s because the underlying software works. Sometimes, however, that software may still have design issues.
Yes, I do make mistakes at times, which result in design issues. More often, though, any design issues on my software exist because I’m pragmatic. To explain, let me share a story (with the disclaimer that this design issue will likely be sorted out by the time you read this).
Recently, my team adapted an existing software system for a different—though nearly identical—sport. One difference was that the new system did not need to support singles matches. Another difference was that points, rather than positions, would be used to order players in draws.
A segment of the domain layer and a few data repositories in the persistence layer used two properties—SinglesRank and DoublesRank. Initially, we didn’t change anything in the naming (including related database tables). We simply stored doubles rankings in the DoublesRank property and left the SinglesRank property empty. Then, to use points instead of positions to order players in draws, I pragmatically suggested repurposing the otherwise-unused SinglesRank property—a perfectly effective solution that would require very minimal effort.
Just two weeks later, however, people began asking repeatedly what the heck the actual value of SinglesRank was. In other words, we experienced a gap between the UL and its representation in the code and data structures.
Helpful programming tools
There are several features in programming languages to help shape code around a domain language. The most popular is support for classes, structs, records, and enum types. Another extremely helpful feature—at least in C#—is extension methods, which help ensure that the readability of the code is close to that of a spoken language.
An extension method is a global method that developers can use to add behavior to an existing type without deriving a new type. With extension methods, you can extend, say, the String class or even an enum type. Here are a couple of examples:
public static class SomeExtensions
{
// Turns the string into the corresponding number (if any)
// Otherwise, it returns the default value
public static int ToInt(this string theNumber, int defaultValue = 0)
{
if (theNumber == null)
return defaultValue;
var success = int.TryParse(theNumber, var out calc);
return success
? calc
: defaultValue;
}
// Adds logic on top of an enum type
public static bool IsEarlyFinish(this CompletionMode mode)
{
return mode == CompletionMode.Disqualified ||
mode == CompletionMode.OnCourtRetirement ||
mode == CompletionMode.Withdrawal;
}
}The first extension method extends the core String type to add a shortcut to turn the string to a number, if possible.
// With extension methods
var number = "4".ToInt();
// Without extension methods
int.TryParse("4", out var number);Suppose you want to query all matches with an early finish. The code for this might take the following form:
var matches = db.Matches
.Where(m => m.MatchCompletionMode.IsEarlyFinish())
.ToList();The benefit is having a tool to hide implementation details, so the actual behavioral logic can emerge.
Value types and factory methods
Remember the misconceptions around DDD mentioned earlier in this chapter? I’m referring in particular to the relevance of coding rules.
DDD recommends several coding rules, such as using factory methods over constructors and value types over primitive types. By themselves, these rules add little value (hence, the misconception). However, in the context of the UL, these rules gain a lot more relevance. They are crucial to keeping language and code in sync.
For example, if the business domain involves money, then you’d better have a Money custom value type that handles currency and totals internally rather than manually pairing decimal values with hard-coded currency strings. Similarly, a factory method that returns an instance of a class from a named method is preferable to an unnamed constructor that is distinguishable from others only by the signature.
Tweaking the business language and renaming classes and methods is tricky, but thanks to integrated development environment (IDE) features and plug-ins, it is not terribly problematic. However, failing to identify subdomains that are better treated independently could seriously undermine the stability of the whole solution.
No matter how hard you try, your UL will not be a unique set of definitions that is 100-percent unambiguous within your organization. In fact, the same term (for example, customer) might have different meanings across different business units. Like suitcases on an airport baggage belt that look alike, causing confusion among travelers, functions and names that look alike can cause problems in your solution.
Understanding differences between functions and names is crucial, and effectively addressing those differences in code is vital. Enter bounded contexts.
When analyzing a business domain, ambiguity occurs. Sometimes we run into functions that look alike but are not the same. When this occurs, developers often reveal an innate desire to create a unique hierarchy of highly abstracted entities to handle most scenarios and variations in a single place. Indeed, all developers have the secret dream of building a universal code hierarchy that traces back to a root Big-Bang object.
The reality is that abstraction is great—but more so in mathematics than in mere software. The great lesson we learn from DDD is that sometimes code fragmentation (and to some extent even code duplication) is acceptable just for the sake of maintenance.
Note Code duplication can be just the starting point that leads to a model that is ideal for the business. Experience teaches us that when two descriptions seem to point to the same entity (except for a few attributes), forcing them to be one is almost always a mistake; treating them as distinct entities is usually acceptable even if it is not ideal.
The cost of abstraction
Abstraction always comes at a cost. Sometimes this cost is worth it; sometimes it is not.
Originally, abstraction came as a manna from heaven to help developers devise large domain models. Developers examined a larger problem and determined that it could be articulated as many smaller problems with quite a few things in common. Then, to combat code duplication, developers righteously added abstraction layers.
As you proceed with your analysis and learn about new features, you might add new pieces to the abstraction to accommodate variations. At some point, though, this may become unmanageable. The bottom line is that there is a blurred line between premature abstraction (which just makes the overall design uselessly complex) and intelligent planning of features ahead of time. In general, a reasonable sign that abstraction may be excessive is if you catch yourself handling switches in the implementation and using the same method to deal with multiple use cases.
So much for abstraction in coding. What about top-level architecture? With this, it’s nearly the same issue. In fact, you might encounter a business domain filled with similar functions and entities. The challenge is understanding when it’s a matter of abstracting the design and when it’s breaking down the domain in smaller parts. If you break it down in parts, you obtain independent but connected (or connectable) functions, each of which remains autonomous and isolated.
Using ambiguity as the borderline
A reasonable sign that you may need to break a business domain into pieces is if you encounter ambiguity regarding a term of the UL. In other words, different stakeholders use the same term to mean different things. To address such a semantic ambiguity, the initial step is to determine whether you really are at the intersection of two distinct contexts. One crucial piece of information is whether one term can be changed to a different one without compromising the coherence of the UL and its adherence to the business language.
An even subtler situation is when the same entity appears to be called with different names by different stakeholders. Usually, it’s not just about having different names of entities (synonyms); it often has to do with different behaviors and different sets of attributes. So, what should you do? Use coding abstractions, or accept the risk of some duplication? (See Figure 2-3.)
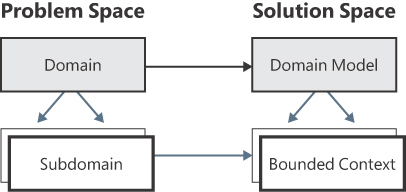
FIGURE 2-3 Domain and subdomains versus domain models and bounded contexts.
The figure is composed of two small tree diagrams. The left tree starts with a box labeled “Domain” from which two arrows depart to connect to a multitude of boxes labeled “Sub-domain”. The tree is titled “Problem Space”. The right tree is titled “Solution Space” and is made of a root box labeled “Domain Model” with arrows pointing to a multitude of child boxes labeled “Bounded Context”.
Discovering ambiguity in terms is a clear sign that two parts of the original domain could possibly be better treated as different subdomains, each of which assigns the term an unambiguous meaning. DDD calls a modeled subdomain a bounded context.
Note Realistically, when modeling a large domain, it gets progressively harder to build a single unified model. Also, people tend to use subtly different vocabularies in different parts of a large organization. The purpose of DDD is to deal with large models by dividing them into different bounded contexts and being explicit about their interrelationships.
The savings of code duplication
From long experience in the code trenches, my hearty suggestion is that whenever you feel unsure whether abstraction is necessary, then by default, it isn’t. In that case, you should use code duplication instead.
That said, I know that tons of articles and books out there (including probably a few of mine) warn developers of the “don’t repeat yourself” (DRY) principle, which encourages the use of abstraction to reduce code repetitions. Likewise, I’m also well aware that the opposite principle—write every time (WET)—is bluntly dismissed as an anti-pattern.
Yet, I dare say that unless you see an obvious benefit to keeping a piece of the top-level architecture united, if a term has ambiguity within the business language that can’t just be solved by renaming it using a synonym, you’d better go with an additional bounded context.
In coding, the cost of a bad abstraction is commonly much higher than the cost of duplicated code. In architecture, the cost of a tangled monolith can be devastating, in much the same way the cost of excessive fragmentation can be. Yes, as usual, it depends!
A bounded context is a segment of the original model that turns out to be better modeled and implemented as a separate module. A bounded context is characterized by three aspects:
■ Its own custom UL
■ Its own autonomous implementation and technology stack
■ A public interface to other contexts, if it needs be connected
As a generally observed fact, the resulting set of bounded contexts born from the breakdown of a business domain tends to reflect (or at least resemble) the structure of the owner organization.
Breakdown of a domain
Here’s an example taken from a realistic sport-tech scenario. If you’re called to build an entire IT system to manage the operations of a given sport, you can come up with at least the partitions in subdomains shown in Figure 2-4.
FIGURE 2-4 Breakdown of an example domain model in a sport-tech scenario.
The figure is a diagram in which a large circle labeled “Sport Management Platform” placed on the left edge is exploded in six child smaller circles placed on the right edge.. The explosion is represented by an arrow pointing to the right. The six smaller circles are labeled “Live Scoring”, “Event Operations”, “Legacy Platform”, “Live Monitor”, “Data Dispatcher”, and “3rd Party Widgets”.
It’s unrealistic to build the system as a single monolith. And it’s not a matter of faith in the software creed of microservices; it’s just that, with a decent analysis of the domain, processes, and requirements, you’ll see quite a few distinct clusters of related operations (although maybe not just the six shown in Figure 2-4). These distinct blocks should be treated as autonomous projects for further analysis, implementation, and deployment.
In summary, each bounded context is implemented independently. And aside from some technical resources it may share with other contexts (for example, a distributed cache, database tables, or bus), it is completely autonomous from both a deployment and coding perspective.
Shared kernels
Suppose you have two development teams working on what has been identified as a bounded context and you have an agreed-upon graph of functionalities in place. At some point, team 1 and team 2 may realize they are unwittingly working on the same small subset of software entities.
Having multiple teams share work on modules poses several synchronization issues. These range from just keeping changes to the codebase in sync to solving (slightly?) conflicting needs. Both teams must achieve coherency with their respective specs—not to mention any future evolutions that might bring the two teams into a fierce contrast. (See Figure 2-5.)
FIGURE 2-5 Discovering a shared kernel.
The figure is a diagram composed of a background graph of ten square boxes connected by random arrows. On top of that, two curved closed loops envelop five and seven blocks on the left and right edge respectively. A grayed area covers two central blocks that result from the intersection of the two curved closed lines (like a Venn diagram). Three labels complete the diagram pointing to the leftmost area as Team 1, the rightmost area as Team 2 and the overlapping gray area as “???”.
There are three possible ways to deal with such a situation. The most conservative option is to let each team run its own implementation of the areas that appear common. Another option is to appoint one team the status of owner, giving it the final word on any conflicts. As an alternative, you could just let the teams come to a mutual agreement each time a conflict arises. Finally, there is the shared kernel option.
Shared kernel is a special flavor of bounded context. It results from a further breakdown of an existing bounded context. For example, the subdomain in Figure 2-5 will be partitioned in three contexts—one under the total control of team 1, one under the total control of team 2, and a third one. Who’s in charge of the shared kernel? Again, the decision is up to the architect team, but it can be one of the existing teams or even a new team.
Legacy and external systems
For the most part, bounded contexts isolate a certain related amount of behavior. Identifying these contexts is up to the architect team. However, certain pieces of the overall system should be treated as distinct bounded contexts by default—in particular, wrappers around legacy applications and external subsystems.
Whenever you have such strict dependencies on systems you don’t control (or are not allowed to control), the safest thing you can do is create a wrapper around those known interfaces—whether a plain shared database connection string or an API. These wrappers serve a double purpose. First, they are an isolated part of the final system that simply call remote endpoints by proxy. Second, they can further isolate the general system from future changes on those remote endpoints.
In DDD jargon, the isolated wrappers around an external system are called an anti-corruption layer (ACL). Simply put, an ACL is a thin layer of code that implements a familiar pattern. It offers your calling modules a dedicated and stable (because you own it) programming interface that internally deals with the intricacies of the endpoints. In other words, the ACL is the only section of your code where the nitty-gritty details of the remote endpoints are known. No part of your code is ever exposed to that. As a result, in the event of breaking changes that occur outside your control, you have only one, ideally small, piece of code to check and fix.
Coding options of bounded contexts
How would you code a bounded context? Technically, a bounded context is only a module treated in isolation from others. Often, this also means that a bounded context is deployed autonomously. However, the range of options for coding a bounded context is ample and includes in-process options.
The most common scenario—and the most common reason for wanting a bounded context—is to deploy it as a standalone web service accessible via HTTPS and JSON, optionally with a private or shared database. A bounded context, though, can easily be a class library distributed as a plain DLL or, better yet, as a NuGet package. For example, it is almost always a class library when it represents the proxy to an external system.
The public interface of a bounded context with other bounded contexts can be anything that allows for communication: a REST or gRPC gateway, a SignalR or in-process dependency, a shared database, a message bus, or whatever else.
Note Does the definition of a bounded context sound like that of a microservice? As you’ll see in Chapter 9, there is a resemblance to the definition of microservice given by Martin Fowler: a module that runs in its own process and communicates through lightweight mechanisms such as an HTTPS API. In Fowler’s vision, a microservice is built around specific business capabilities. The issue is in the intended meaning of the prefix micro. Size aside, I like to think of a bounded context as the theoretical foundation of a microservice. The same is true if we consider the alternative architecture of modular monoliths (see Chapter 9). A bounded context is also the theoretical foundation of a module in a monolith. I say “theoretical” for a reason: microservices and modular monoliths live in the space of the software solution, whereas bounded contexts exist in the space of the business domain.
The outcome of a DDD analysis of business domain requirements is a collection of bounded contexts that, when combined, form the whole set of functions to implement. How are bounded contexts connected? Interestingly, connection occurs at two distinct levels. One is the physical connection between running host processes. As mentioned, such connections can take the form of HTTPS, SignalR, shared databases, or message buses. But another equally important level of connection is logical and collaborative rather than physical. The following sections explore the types of business relationships supported between bounded contexts.
Bounded contexts and their relationships form a graph that DDD defines as the context map. In the map, each bounded context is connected to others with which it is correlated in terms of functionalities. It doesn’t have to be a physical connection, though. Often, it looks much more like a logical dependency.
Each DDD relationship between two bounded contexts is rendered with an arc connecting two nodes of a graph. More precisely, the arc has a directed edge characterized by the letter U (upstream context) or D (downstream context). (See Figure 2-6.)
FIGURE 2-6 Graphical notation of a context map relationship.
The figure is a simple diagram made of two circles connected by a thick line. The first circle contains the text “Bounded Context A”, and the second circle is labeled “Bounded Context B”. The thick line is cut in two by a sign “Relationship.“ The left connection point of the line is marked with a D. The right connection point is labeled with a U.
An upstream bounded context influences a downstream bounded context, but the opposite is not true. Such an influence may take various forms. Obviously, the code in the upstream context is available as a reference to the downstream context. It also means, though, that the schedule of work in the upstream context cannot be changed on demand by the team managing the downstream context. Furthermore, the response of the upstream team to requests for change may not be as prompt as desired by the downstream team.
Starting from the notion of upstream and downstream contexts, DDD defines a few specific types of relationships. Essentially, each relationship defines a different type of mutual dependency between involved contexts. These relationships are as follows:
■ Conformist A conformist relationship indicates that the code in the downstream context is totally dependent on the code in the upstream context. At the end of the day, this means that if a breaking change happens upstream, the downstream context must adapt and conform. By design, the downstream context has no room to negotiate about changes. Typically, a conformist relationship exists when the upstream context is based on some legacy code or is an external service (for example, a public API) placed outside the control of the development teams. Another possible scenario is when the chief architect sets one context as high priority, meaning that any changes the team plans must be reflected, by design, by all other contexts and teams.
■ Customer/supplier In this parent–child type of relationship, the downstream customer context depends on the upstream supplier context and must adapt to any changes. Unlike the conformist relationship, though, with the customer/supplier relationship, the two parties are encouraged to negotiate changes that may affect each other. For example, the downstream customer team can share concerns and expect that the upstream supplier team will address them in some way. Ultimately, though, the final word belongs to the upstream supplier context.
■ Partner The partner relationship is a form of mutual dependency set between the two involved bounded contexts. Put another way, both contexts depend on each other for the actual delivery of the code. This means that no team is allowed to make changes to the public interface of the context without consulting with the other team and reaching a mutual agreement.
Considering this discussion of bounded contexts and relationships, one might reasonably ask how these work in a realistic example. Figure 2-4 showed an example breakdown of a sport-tech data-collection business domain. Figure 2-7 shows a possible set of relationships for that scenario.
FIGURE 2-7 An example context map for the bounded contexts identified in Figure 2-4.
The figure contains six circles, each of which represents a named bounded context. They are laid out approximately on three columns of two vertically rendered circles. Connections between circles contain the letter U for upstream and D for downstream (as appropriate) at each edge. Labels decorate the connecting arcs to name the type of defined relationship.
Let’s review the diagram proceeding from left to right:
■ The Live Scoring context dominates the Data Dispatcher and Live Monitor contexts. So, any changes required for the Live Scoring context must be immediately accepted and reflected by the downstream contexts. This is reasonable, because the Data Dispatcher context is simply expected to route live information to takers and the Live Monitor context just proxies live data for internal scouting and analysis. Indeed, both relationships could be set to conformist, which is even stricter.
■ The Live Scoring context partners with the Event Operations context. This is because in the architect’s vision, the two modules may influence each other, and changes in one may be as important as changes in the other. A similar production system might have a partner relationship between the Live Scoring and Event Operations contexts, in which case it’s often true that one team must conform to changes requested by the other (always for strict business reasons).
■ The Event Operations context is totally dependent on the legacy applications connected to the system. This means that live data should be packaged and pushed in exactly the legacy format, with no room for negotiation.
■ The Data Dispatcher context and the Event Operations context are partners, as both contexts collect and shape data to be distributed to the outside world, such as to media and IT partners.
■ The Third-Party Widgets context contains widgets designed to be embedded in websites. As such, they are subject to conditions set by the Data Dispatcher context. From the perspective of the widget module, the dispatcher is a closed external system.
Important The person responsible for setting up the network of relationships is the chief architect. The direction of connections also has an impact on teams, their schedule, and their way of working.
The context map is a theoretical map of functions. It says nothing about the actual topology of the deployment environment. In fact, as mentioned, a bounded context may even be a class library coded in an application that turns out to be another bounded context. Often, a bounded context maps to a deployed (web) service, but this is not a general rule. That said, let’s imagine a possible deployment map for the context map in Figure 2-7. Figure 2-8 shows a quite realistic high-level deployment scenario for a sport-tech data-collection platform.
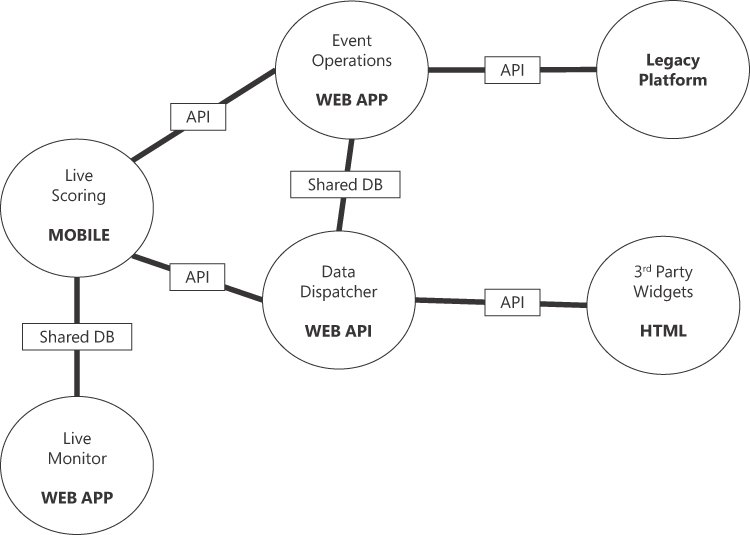
FIGURE 2-8 An example deployment map.
The figure contains six circles, each of which represents a named bounded context with the type of application it turns out to be. They are laid out approximately on three columns of two vertically rendered circles. Connections between circles are labeled API or Shared DB to denote the means through which the physical connection between contexts is realized.
This chapter focused on DDD strategic design in a way that is mostly agnostic of software technology and frameworks. The strategic part of DDD is crucial; it involves discovering the top-level architecture of the system using a few analysis patterns and common practices.
The chapter covered the role of the UL, the discovery of distinct bounded contexts, and the relationships the chief architect may use to link contexts together. The map of contexts—the final deliverable of the DDD strategic analysis—is not yet a deployable architecture, but it is key to understanding how to map identified blocks to running services.
All these notions are conceptually valid and describe the real mechanics of DDD. However, it might seem as though they have limited concrete value if measured against relatively simple and small business domains. The actual value of DDD analysis shines when the density of the final map is well beyond the tens of units. Indeed, the largest map I’ve ever seen (for a pharmaceutical company) contained more than 400 bounded contexts. The screenshot of the map was too dense to count!
The next chapter draws some conclusions about the structure of a .NET and ASP.NET project that maintains clear boundaries between layers. In Part II of the book, we’ll delve into each layer.
The price of reliability is the pursuit of the utmost simplicity. It is a price which the very rich may find hard to pay.
—Sir Tony Hoare, lecture at the 1980 ACM Turing Award in Nashville, TN, USA
In software development, the primary goal of introducing multiple tiers and layers is to achieve modularity, and the primary goal of modularization is to enhance software maintainability. Modularization involves breaking down a complex system into smaller, independent modules. Each module encapsulates a specific functionality and can be developed, tested, and maintained independently. Modularization works best when applied at the architecture level. When modules are well-isolated but clearly connected, it becomes much easier for the teams involved to understand what is going on and where to intervene to fix problems or add new features. Extensive use of modularization also helps to achieve two other crucial goals: reusability and scalability.
Having been in the software industry for more than 30 years, I have witnessed many attempts to develop a universal way of componentizing software development—from Visual Basic and Delphi components to ActiveX and (D)COM; from JavaBeans to Web Forms server controls; and from old-fashioned web services to microservices. Frankly, my age-related disillusion leads me to state that none of them worked, except perhaps for a few people and for a limited amount of time. There is no hope and no room for universality.
The only universal principle of software development is separation of concerns (SoC). SoC was formalized in 1974 by Edsger W. Dijkstra in the paper “On the Role of Scientific Thought,” from which modularity is a direct emanation. In terms of software architecture, once you have a modular vision of a system, it’s all about identifying logical layers and mapping them to physical tiers. Various software architecture patterns simply differ in how this mapping takes place.
You can apply modularization at any level, from coding a method within a class to implementing a systemwide feature such as a scheduler library, and from defining the pillars of an entire web application to envisioning the forest of services and standalone applications that form a business platform. (See Figure 3-1.)
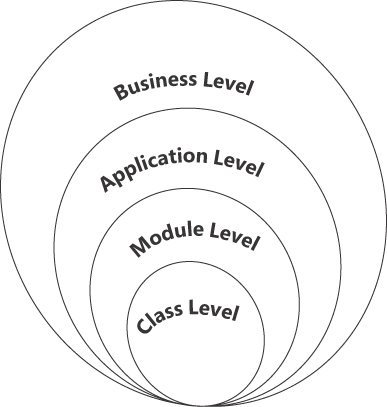
FIGURE 3-1 All possible levels of modularization.
The figure is a combination of four nested, non-concentric circles with a tangent point in common. From smallest to largest, they are labeled “Class Level”, “Module Level”, “Application Level” and “Business Level”.
Regardless of where you apply modularization, there are several key aspects and principles involved. These are nothing new; any student of computer science learns them early on. But seasoned professionals sometimes forget them when facing deadlines and last-minute changes. They include the following:
■ Separation of concerns
■ Loose coupling
■ Reusability
■ Dependency management
■ Documentation
■ Testability
By far the most important aspect of any real-world software project of some complexity, separation of concerns (SoC) refers to the division of responsibilities within a software system. To achieve SoC, each module should have a clearly defined and focused purpose that addresses a specific aspect of the overall functionality. In theory, SoC—which is widely used—allows for better code organization and easier readability and comprehension.
The difficulty with SoC is identifying the exact position of the boundary and the area it fences in. In a software project, giving substance to expressions like “clearly defined and focused purpose” is a real sore point. A too-large area invalidates the SoC itself; a too-small one results in excessive fragmentation, which may add latency (thereby reducing performance), increase the cost of deployment, and make the code too verbose.
Ideally, you apply SoC at any of the levels shown in Figure 3-1, using different metrics at each level. At the class level, you focus on the micro actions of a method to forge the behavior of the entity class. At the module level, you identify and abstract away a common pattern of behavior and sandbox it into reusable (or just more readable) classes. This works for general-purpose modules such as an email sender or a task scheduler, as well as for business-specific modules such as rule validators and data importers.
Modules should interact with each other through well-defined interfaces or contracts, minimizing direct dependencies. Loose coupling ensures that changes in one module have minimal impact on other modules, promoting flexibility and ease of maintenance. Loose coupling also facilitates the replacement of modules and swapping modules with alternative implementations, which enhances modularity.
Loose coupling requires encapsulation. Encapsulation hides the internal complexity of a module and provides a clear boundary for communication and collaboration between modules. A module should ideally encapsulate its internal implementation details and expose a well-defined interface, or set of APIs, for interaction with other modules.
When done well, modularization results in the development of reusable modules that can be leveraged within the same project or wrapped up into closed packages (such as NuGet packages) for reuse across projects and teams. Well-designed modules with clear boundaries and encapsulated functionality can be easily extracted and reused, minimizing effort, limiting development time, and most importantly, promoting consistency.
Note One so-called “strength” of microservices—when the intended meaning of microservice is a very focused, small, autonomous, and independently deployable module—is that it can be created using any language or stack. So, any developer (or team) can select their pet stack (Python, C#, Java) to code their microservice. My take on this approach is that it breaks consistency and fragments the deployment. And while it might promote reusability, it does so for micro functionality only. So, microservices might offer a quick way to release software, but they can be limiting, and perhaps more expensive if the developer or team that created them leaves the company.
Effective modularization requires the management of dependencies between modules to avoid unnecessary coupling and to ensure that each module relies only on the specific functionality it needs from other modules. At the application level, it usually suffices to select the minimal subset of necessary projects and packages. At a finer-grained level, though—when you are within a software component—dependency injection can help manage dependencies and promote loose coupling.
Note In literature, the term dependency injection often appears related to inversion of control (IoC). According to the IoC principle—which precedes the concept of dependency injection and is considered more general—when an application needs to perform a certain behavior, the instructions for that behavior do not appear in the main code. Instead, they come from the outside, as a parameter. In other words, the control of the flow is “inverted.” In contrast, dependency injection is a concrete pattern through which the inversion of control is achieved, thus removing hidden dependencies from the code.
Modularization involves building a map of references. So, it requires clear documentation of module interfaces, dependencies, and usage guidelines. This helps developers understand how modules interact, fostering collaboration and enabling the smooth integration of modules within a larger system.
The clear separation of boundaries and the effective management of dependencies are the pillars of testable code. Along the course of my career, I’ve never emphasized the need for unit tests or the value of code coverage. And I always found test-driven design (TDD) to be a weird way to write code. At the same time, though, I’ve always stressed the absolute necessity of writing code that is testable. Indeed, I believe this is more valuable than actually running batteries of tests.
Designing for testability stems from modularization and facilitates unit testing and validation by isolating modules and their functionality. Each module can be tested independently, enabling faster feedback cycles, easier debugging, and better overall system stability. Testing at the module level also promotes reusability and modifiability because you can confidently modify or replace modules without worrying about affecting the entire system.
One practical approach I take and recommend is to write black boxes of code that do nothing but take and return expected data anytime you’re implementing a process. At the end of the day, this is the second step of the canonical TDD practice: write a test for the method that fails, edit the method to barely pass the test, add more code to make it functional, and test indefinitely.
DDD strategic analysis and—even more—your domain expertise and abstraction capabilities enable you to identify the main concerns of the system. At the highest level, this probably results in several independent app services and database servers. Next, each app service—a web application—and any non-web services are addressed individually. This represents the second outermost circle of Figure 3-1: the application level.
I see two possible scenarios:
■ The application is a mere algorithm so simple that it can be coded from start to finish, with or without a user interface and with nearly no external dependencies. It is just a self-contained module.
■ The application is more complex, so anything like a layered architecture serves well for achieving modularity.
The modules of a layered application are the four layers presented in Chapter 1: presentation, application, domain, and data/infrastructure. These layers, which are discussed individually in greater detail in the second part of this book, map to four fundamental system functions:
■ Interacting with the outside world
■ Processing received commands
■ Representing domain entities
■ Persisting data
The first duty of any application is to receive commands from the outside world and filter valid commands from those that, for whatever reason, are invalid. Typically, this interaction occurs via a user interface or API and, in terms of code, is handled at the presentation layer.
In a classic web scenario (such as ASP.NET), the presentation layer is not what the user views in the browser. Rather, it resides on the server. Its primary purpose is to route requests to some module that can handle them. For ASP.NET applications, the presentation layer consists of controller classes and, more generally, the code that is directly connected to reachable endpoints. For example, a minimal API has request handlers mapped directly to endpoints with no ceremony at all. In a rich client scenario—that is, a single-page application (SPA)—the presentation layer lives on the client browser and incorporates both interactions and routing to external server endpoints.
Every command needs a handler to process. This handler must be explicit and contracted—that is, it accepts a given input and returns a given output. The purpose of this is simple: to decouple the handling of request messages from the receiving environment.
In an ASP.NET Core scenario, the application layer consists of handlers that respond to a controller request and return a response to the controller for packaging back to the browser. The controller receives the input in the form of an HTTP request, but the application service processes that devoid of the HTTP context.
Any command handler has one main responsibility: to interact with the system infrastructure using domain entities as the currency. Essentially, domain entities—which are ideally database agnostic but must be populated with data—are where you code most business logic. The part of the business logic that relates to fetching and saving entities to the persistence layer belongs to another bunch of classes, which DDD refers to as domain services.
Ideally, domain entities are classes with read properties and methods to alter their state. Instantiation and persistence occur in the care of domain services or simple repositories—classes that just abstract basic create-read-update-delete (CRUD) operations.
The data layer is where the module persists and reads information processed by the application. The thickness of this layer varies. It might coincide with a database server—whether relational or NoSQL—or it can be created by code (that is, repository classes) that arranges raw calls to the storage server via dedicated object/relational mappers such as Entity Framework or Dapper.
Recently, the data layer has been abstracted to an infrastructure layer, whose primary (but not only) responsibility is persistence. Seen as infrastructure, this layer is also responsible for emails and connection to external APIs.
In the beginning, all software was built as a single block of code. The resulting monolithic architecture is characterized by a single, tightly coupled application in which all components and functionalities are bundled together. In a monolith, the entire system is built and deployed as a single unit.
This is not modular in the commonly accepted sense of the word in software. Modular in software refers to a design approach that involves breaking down a software system into multiple, self-contained, and possibly reusable units. In contrast, a monolith, seen from the outside, is made of just one module.
Monolithic applications are typically developed on a single codebase and deployed as a single unit, with all components packaged together. Sharing code and logic is easy, and deployment is often really a matter of just one click within the integrated development environment (IDE) of choice.
What’s wrong with monoliths, then?
It’s the same old story from the ashes from which DDD was raised a couple of decades ago: managing business complexity effectively. When complexity grows, the codebase grows larger and development becomes more challenging, with increased dependencies and the need for careful coordination between team members. At the same time, updates and changes require redeploying the entire application, leading to longer deployment cycles and potential disruptions. Furthermore, making changes or updates can be complex due to the tight coupling between components. A modification in one part of the system may require regression testing of the entire application. Additionally, the complexity of the codebase can make debugging and issue resolution more challenging.
OK, so we have a problem. But what about the solution?
Making a monolithic application more modular is a common approach when you want to improve its maintainability and scalability and make development more efficient. This process typically involves breaking down the monolith into smaller, more manageable components that remain confined within the same deployable unit. The operation is based on the following points:
■ Identifying the core functionalities
■ Decoupling dependencies
Let’s find out more.
Identifying logical modules
In a monolith application that covers an inevitably large business domain, a deep understanding of the domain is crucial. Not just knowledge of the general domain, though—also having a deep understanding of the business processes is fundamental so you can identify the actual atomic tasks to be performed and decide how best to orchestrate them into a workflow.
To keep it really modular, connectable, and interoperable, each identified module should be given a clear and well-documented interface or API. These interfaces will specify how other modules can interact with and access the functionality of each module.
Decoupling dependencies
In a modular architecture, components are isolated but should still be allowed to communicate. Like in a geographical archipelago, many islands form the unit, each isolated but connected through bridges and transport lines. You want to have connections, but not too many.
In software, dependencies between modules should be reduced so that each remaining module performs one—and only one—specific atomic task and supplies an interface for others to call it. Achieving this cleanup of the internal code may involve refactoring code, moving shared functionality into separate libraries, or using dependency injection to manage dependencies more flexibly.
Scalability of monoliths
Moving from a monolith to a modular monolith doesn’t fully address the main issue that often plagues monolithic applications: the level of scalability they can reach. Because a monolith is built and deployed as a single unit, when it comes to scalability, the safest option is vertical scaling. Vertical scaling means increasing the physical hardware resources available to the single instance of running code—in other words, more CPU, more memory, and more powerful database servers.
In contrast to vertical scaling is horizontal scaling, which means running the application on multiple servers simultaneously in combination with additional resources such as clustering and load balancing. Applied to monoliths, horizontal scaling may not turn out to be as efficient as planned.
When scaling up the application becomes an urgent need, it’s because some parts of the application are slowing down the whole system. In a monolithic scenario, though, there is no way to separate a system’s stable functionalities from those that are critical for ensuring a constant and decent level of service. The single block will be multiplied across servers, potentially resulting in the overprovisioning of resources and higher costs.
Note Horizontal scalability with monolithic applications is not always possible. For example, the presence of global data can lead to contention and locking issues in the shared state. Furthermore, proper load balancing is crucial for efficiently distributing incoming requests across multiple instances, and in a monolith, load balancing can be more challenging due to the complex nature of the application and the need to balance the load evenly. Finally, horizontal scalability in the case of monoliths is empirically limited to just a few instances before it starts being impractical or inefficient.
To address these issues, companies often consider transitioning from a monolithic architecture to a microservices-based architecture. Microservices are designed to overcome many of the limitations associated with monoliths in terms of scalability and modularity. In a microservices architecture, individual services can be independently scaled, maintained, and updated, making it easier to take full advantage of horizontal scalability.
Key aspects of microservices
A microservices architecture makes a point of decomposing a system into smaller, autonomous, and interoperable components. Microservices communicate with each other through well-defined APIs, often using lightweight protocols like HTTP or messaging systems. Each component focuses on a specific business capability and operates as a separate application independent from any other when it comes to development and deployment. A microservices architecture therefore promotes modularity by design.
Furthermore, microservices enable more efficient resource utilization, because only the necessary components are scaled rather than the entire application. Microservices can handle varying workloads and scale specific services horizontally as needed.
Note Microservices aren’t the only way to achieve modularity. Modularity is a higher-level architectural aspect, which teams are responsible for achieving. With microservices, achieving modularity is nearly free. But with development discipline and design vision, you can make any monolith modular enough to deliver nearly the same benefits innate in a microservices architecture.
Technology diversity
Breaking up a codebase into smaller pieces may also lead to faster development cycles, as teams can focus on specific services without being hindered by the constraints of a monolithic codebase and the need to merge code with other teams. In addition, each team can use different technologies, programming languages, or frameworks. (See Figure 3-2.)
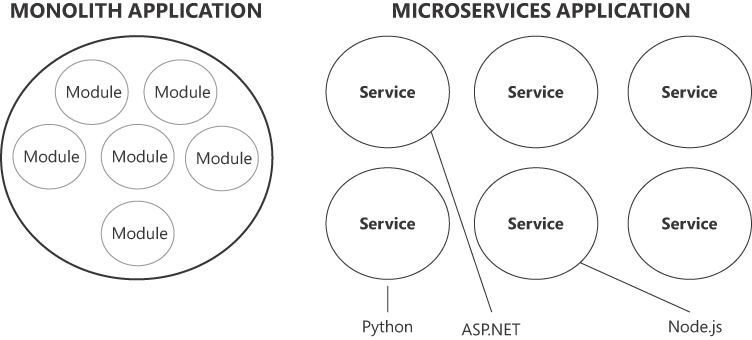
FIGURE 3-2 Technology diversity in a microservices application.
The figure is composed of two parts titled “Monolith Application” and “Microservices Application” respectively. On the left, a large circle contains six inner circles labeled as “Module”. On the right, six circles are laid out three per row and labeled “Service”. From the circles a line connects to text labels such as Python, ASP.NET and Node.js. The idea is linking services to a technology stack.
Frankly, I’m not sure I would always place this aspect of microservices in the list of good points. Whether it’s good or bad depends. Using different technology stacks breaks consistency, and having multiple technology stacks might be painful if teams change in number or composition. As usual, trade-offs guide any choice, and only actual results will tell whether a choice was good or bad.
If dedicated and permanent teams are allocated for each service, then it may be reasonable to give them the freedom to choose the most suitable tools and make them responsible for development, testing, deployment, and maintenance. Otherwise, a mix-and-match of languages and frameworks will likely turn into a maintainability nightmare.
Note In general, modularity is necessary. How you achieve it, however, is subject to specific business and project considerations. No one chose to write intricate and tightly coupled monoliths, but if you choose microservices on the hype of modernity and technology trends, you may run into trouble you might otherwise have avoided.
Challenges of microservices
While microservices offer numerous benefits, they’re not free of challenges. Microservices introduce significant complexity in several areas:
■ Service communication
■ Data consistency
■ Distributed transaction management
■ Security and logging
■ Operational overhead
It’s clear that embarking on a microservices architecture is not a decision to take with a light heart. Ultimately, the choice between microservices and monoliths depends on factors such as the size and complexity of the project, scalability needs, team structure, and the desire for flexibility and autonomy. If the benefits offered by a microservice architecture overtake their (objective) downsides, then it’s OK. Otherwise, facing failure is more than just an option.
Note This chapter has looked at monoliths and microservices mostly from a modularity perspective. Chapter 9 returns to this same topic for a more thorough discussion.
Whatever problem you face, you should start with the simplest possible solution for that problem. This is the simplest solution ever (SSE) principle.
For example, although it’s crucial to ensure that an application is fine-tuned for the expected workload, not all software systems need to scale indefinitely. Likewise, continuous delivery—a hallmark of the DevOps approach—is not essential if the system is expected to be updated via controlled upgrades or to receive a hotfix in case of emergency.
Ultimately, any new software project should be based on an architectural solution with these minimal characteristics:
■ Modularity
■ Maintainability
■ Design for testability
We’ve already discussed modularity. Let’s look more closely at maintainability and designing for testability.
In software parlance, maintainability refers to the ease with which a software system can be modified, repaired, and enhanced over its lifetime. It is a measure of how well the application supports ongoing development, bug fixes, and the introduction of new features, while minimizing the risk of introducing errors or negatively affecting system stability.
If the level of maintainability remains constant over time, a pleasant side effect is that anybody who lays their hands on the codebase can quickly figure out where to look for things. If there’s a bug to fix, the developer can quickly determine the areas of code to explore. If consistency exists in both the technology stack and the writing patterns, any such tasks become much simpler and effective.
Related points are the readability of the code, the reusability of the code, and the scalability of the code.
Readability
Too often, readability is dismissed as a volatile recommendation to use clear and descriptive variable names, following consistent and sensible coding conventions, and organizing code into logical and modular components. While this is true and necessary, it is largely insufficient.
Readability increases considerably if at least a couple of SOLID principles are applied often. One is the single responsibility principle, which basically boils down to being extremely focused when coding any task and avoiding God objects and omniscient methods. The other is the open/closed principle. This principle states that code should be open to extensions but closed to changes. In other words, it refers to spotting blocks of code that can be abstracted into a reusable component that is generic—that is, it accepts one or more types of parameters—or supports the injection of interface-based behavior.
Applying both these principles on any line of code is unnecessary and even detrimental, but ignoring them entirely is bad as well. In any case, any time you succeed with the open/closed principle, you smooth the way to code maintenance.
Readability is also a product of a more pragmatic set of coding standards such as writing fluent code, extensively using value types in lieu of primitives, and leveraging C# extension methods to make any task look like schematic natural language.
Reusability
I wouldn’t suggest pursuing reusability as a primary goal or feeling bad if no derived classes exist in the codebase. This is because while code duplication may smell bad, it often saves lives.
On its own, code is merely an insentient collection of lines. As such, repeating it in multiple places is not necessarily an issue. Any repetition is isolated from all others and, if needed, each can be further extended without affecting others. If repetition is avoided at any cost, however, then you end up with a single piece of behavior that is called from many different places. That’s all good until requirements change, and you need to break up that common piece into multiple units.
If repetition of lines of code may be acceptable, what should be absolutely avoided is repetition of code that expresses some logical behavior common in business. If you strive to spot repeated pieces of logical behavior and make them open/closed or just reusable, the codebase shrinks, and the effort to read and understand the code diminishes. Reusability is not much for big things—for that we have modularity and packages. Reusability is for small things like helper classes and HTML components.
Scalability
Today, developers commonly plan overly sophisticated software architecture with the justification that you need scalability sooner rather than later. Paraphrasing the popular quote attributed to Donald Knuth, “Premature optimization is the root of all evil,” we could state that premature arrangements for scalability are the root of most projects’ evil.
Only the likelihood of some significant increase in traffic—not just hope or random numbers in some aleatory business plan—calls for developers to lay out the system in a way that makes it easier to accommodate higher volumes of traffic down the line. Even then, that should not occur until there is clear evidence of scalability issues.
Besides, there aren’t really very many ways to pursue scalability. In fact, I’d say there’s just one: planning the system so it is easier to reconfigure the deployment of certain pieces, or even a rewrite, when necessary. When it comes to scalability, the most important precaution you can take is to keep the system as modular as possible and with clear boundaries between modules.
Note With modularity and maintainability comes everything else.
It is common to read about the need for unit tests for every single line of code. It is much less common, however, to read about the necessity of writing code to be easily testable.
Designing a system for testability involves incorporating certain principles and techniques during the design phase. Here are some aspects to consider (not surprisingly, they all touch on points I’ve covered already):
■ Mastery of the domain context : Any method written should be the result of a deep and true understanding of the (correct and validated) user story.
■ Focus : Every module, at all the levels shown in Figure 3-1, should focus on one—and only one—clear task.
■ Minimal dependencies : Minimizing dependencies between modules reduces the impact of changes and facilitates independent testing. You can use techniques like dependency injection to decouple modules and enable the substitution of dependencies during testing.
■ Encapsulation : Try to encapsulate internal implementation details within modules and expose only necessary interfaces to other components. This promotes modularity and allows for more focused testing, as the internal workings of a module can be hidden.
In addition, code testability is augmented by using one or more of the following programming practices:
■ Dependency injection : This provides external dependencies to a class or method, making it easier to substitute real implementations with mock objects.
■ No global state : Eliminating global variables or shared state between methods makes it easier to test each scenario more comfortably without having to know more than just what the method to test does.
■ Immutable data structures : These make it easier to reason about the state of the system during testing and can prevent unexpected side effects.
Often associated with the theme of testability are two more, fairly divisive topics: design patterns and test-driven development (TDD). I have my views on these, as strong and unpopular as they may sound.
Important Following the principles of design for testability—not a pile of unit tests—is what really raises the quality of the code.
Personal notes on design patterns
Design patterns, as we know them in the software development field, owe their origins to Christopher Alexander, an environment architect. In the late 1970s, he introduced the concept of a pattern language to enable individuals to express their inherent design sensibilities through an informal grammar. A pattern, he said, “is a recurring problem within our environment, for which a core solution is described. This solution can be applied countless times without ever being exactly the same.”
In software, design patterns have come to be a well-established core solution that can be applied to a set of specific problems that arise during development. You can envision a design pattern as a comprehensive package, encompassing a problem description, a roster of actors involved in the problem, and a pragmatic solution.
How do you apply a design pattern? How do you recognize the need and the value of using a particular one? It’s too superficial to just advocate the generic use of design patterns; I don’t believe in their salvific use. Using design patterns per se doesn’t enhance the value of your solution. Ultimately, what truly counts is whether your solution effectively functions and fulfills the specified requirements.
As a developer, you simply code armed with requirements and the software principles with which you are familiar. Along the way, though, a systematic application of design principles will eventually bring you to a solution with some structural likeness to a known design pattern, because patterns are essentially pre-discovered and documented solutions. Your responsibility is to assess whether explicitly adapting your solution to such a pattern offers any added value.
Ultimately, patterns can serve both as a goal when refactoring and as a tool when encountering a problem with a clear pattern-based solution. They don’t directly enhance your solution’s value but do hold value for you as an architect or developer.
Note At the very least, every developer should be familiar with design patterns such as Adapter, Builder, Chain of Responsibility, Prototype, Singleton, and Strategy.
Personal notes on TDD
My stance on TDD is clear and without much nuance. I don’t care whether developers adopt TDD or not, as long as they push tested and reliable code to the repository. Whether you write unit tests—specific of the single developer activity—or not, and the order in which you write code and test, doesn’t matter to me as long as the result is tested code that covers at least common business scenarios.
I don’t believe in the salvific power of TDD either—which, in my opinion, remains a perfectly acceptable personal practice. Forcing it throughout a team or, worse yet, an entire company sounds like an arbitrary imposition that only makes people feel more uncomfortable.
This chapter emphasized the role of modularization in software development in managing complexity, improving maintainability, and promoting reusability. Modularization involves breaking down a system into smaller, independent modules with well-defined boundaries, encapsulated functionality, and loosely coupled interactions. Through proper separation of concerns, encapsulation, loose coupling, and effective dependency management, modularization enhances the overall quality and scalability of software systems.
A discussion of breaking up software into modules inevitably involves the topic of microservices compared to monolithic architectures. As explained in this chapter, I’m not a big fan of microservices as a one-size-fits-all tool, nor am I an advocate of tightly coupled monolithic systems in which any update can quickly become an adventure—touch here and break there.
Instead, I am a fan of the SSE principle—a sort of software interpretation of Occam’s razor. These days, my best suggestion is to start with modular—strictly modular—monoliths and then investigate what else can be done when you have evidence of heavy scalability issues. This is the approach we employed to design the platform to run daily operations in professional tennis and Padel since the international calendar resumed after early pandemic lockdowns. We’re still running it successfully over a modular monolith with super-optimized database procedures, and every day we deliver thousands of touches on on-court tablets all the way through media takers, on various APIs up to betting companies. No bus, little cache, no serverless, no ad hoc cloud-native architectures—just plain ASP.NET and religious attention to modularity. As a final piece of wisdom, keep in mind that using an overkill approach to build software quickly results in technical debt.
This chapter ends the first part of the book. Part II—comprising the next five chapters—is devoted to covering the layers of a typical layered (monolithic) architecture that is modular and maintainable.
Part II
Architecture cleanup
CHAPTER 4 The presentation layer
CHAPTER 5 The application layer
CHAPTER 6 The domain layer
CHAPTER 7 Domain services
CHAPTER 8 The infrastructure layer
Learn the rules like a pro, so you can break them like an artist.
—Pablo Picasso
Abstractly speaking, the presentation layer is simply the segment of a computer system responsible for providing a user-friendly interface, representing data visually, ensuring a positive user experience, and facilitating communication with other layers of the software application. In more concrete terms, however, the presentation layer ultimately serves one main purpose: collecting external input and routing commands to the more operational layers of the system.
In any interactive application, all activity consists of requests sent by human or software agents to a known set of endpoints, and responses generated by those endpoints. The presentation layer acts as a gateway to receive requests and return responses.
Is presentation the most appropriate name for a layer that acts as a virtual front office? Probably not. But for historical reasons, this name is set in stone, even though gateway would probably be a more appropriate term for this layer in modern applications.
In most real-world cases, the presentation (or gateway) layer produces the user interface. In doing so, it assumes the responsibility of adding a sense of character and style to improve the experience of end users. Recently, the advent of single-page applications (SPAs) and the success of JavaScript-based frameworks such as Angular and React have moved the burden of building a canonical user interface to a dedicated team (and project). Yet, at some point, this distinct front end packs up and sends requests to some back-end system. The back-end system, however, still has its own presentation/gateway layer to collect requests and forward commands to generate responses, whether JSON or HTML. In brief, the purpose of this chapter is to illustrate the facts, features, and technologies of the (necessary) gateway that sits in between external input and invoked tasks.
Important In spite of its name, the presentation layer is primarily about routing requests and controlling subsequent tasks. This gateway role is recognizable not just in server web applications but also in client-based single-page applications (SPAs) written using the Angular and React frameworks. Underneath the direct DOM-level interaction, in fact, some gateway code (mostly event handlers) handles the routing of requests to the back end.
I’ve always been a strong believer in top-down development—and I’ve become even more so in recent years as the user experience has gained relevance and traction. To really be user-friendly, software applications must faithfully mirror real-world processes, and even improve them where possible and technologically appropriate.
When I talk to stakeholders, I try to mentally translate their words into items on an abstract menu long before I focus on the domain and data models. I usually like to start from the beginning, but to begin well, you need to envision the final outcome first. This part of the book is devoted to developing a sample project from scratch, called Project Renoir.
Project Renoir is a web application built on the .NET Core stack. It is restricted to a set of authorized users: admins, product owners, contributors, and simple viewers. It is centered around three fundamental business entities: product, release note, and roadmap. Depending on their role and assigned permissions, logged users can:
■ Create and edit products
■ Assign contributors to a product
■ Create and edit release notes and roadmaps
■ Navigate the list of available documents (release notes and roadmaps)
■ Export and share documents
The sample project is not just another to-do list, nor is it some simplistic e-commerce system. Instead, it’s a quick and dirty tool that anyone can use: a release note builder and reporter. The application’s name, Project Renoir, is derived from its capabilities: Release Notes Instant Reporter.
The rest of this chapter (on the presentation layer), and the next four chapters (on the application, domain, domain services, and infrastructure layers), are dedicated to the construction of Project Renoir using DDD analysis and a layered architecture. It will be a monolithic application with clear separation between layers—in other words, a modular monolith, as many like to say these days.
Release notes in a nutshell
A release note document is a concise summary of changes, improvements, and bug fixes introduced in a new software release. It serves as a communication tool to inform users and, more importantly, stakeholders about modifications made to a software product. Release notes highlight key features, enhancements, and resolved issues, providing an overview of what users can expect from the new release. It may also include instructions, known issues, and compatibility information to help users work with the product more effectively.
Release notes can also serve another purpose: to document work done. By navigating release notes documents, one can track the history of an app’s development, counting the number of fixes, hot fixes, and new features, as well as noting any maintenance that has been done within a specific range of time.
Too often, release notes are treated as an annoying chore, if not an afterthought. As a professional actively involved in the development of company-owned software products, I’ve long considered writing release notes to be so boring that it’s actually enjoyable to pass the task on to someone else—at least I did until a key user disputed whether work we had done on a product had actually been completed, and our release notes hadn’t been updated to prove that it had. Release notes matter!
Who writes release notes?
Who’s in charge of writing release notes? The release notes document is typically created by tech leads or by people within the product team such as a product manager, product owner, or members of the quality assurance (QA) team. Whoever takes the job, though, should strive to be empathetic and keep engagement and satisfaction high. That’s why technical writers and even marketers are good candidates—especially when the communication doesn’t have to be strictly technical or delve deeply into business rules and processes.
Writing a release notes document
Release notes must be easily navigable for authors, company managers, members of the sales team, and stakeholders. Ultimately, a release notes document consists of free text content, usually saved as a plain rich text format file. What the release notes contain is up to you, although a few generally accepted guidelines do exist. Here’s a common template:
■ An introduction header and brief overview of the changes
■ A clear explanation of affected users (if any)
■ Changes to previous release notes
■ A list of feature enhancements and new features added
■ Fixed issues
I tend to use a slightly different template. Beyond the introductory header and explanatory notes to possible affected users, I usually just list development items and catalog them as fixes, new features, or ordinary maintenance. I also group these release notes items by area of impact—visuals, core functions, security, configuration, or performance.
My ideal release notes document—which is what Project Renoir is all about—contains a list of items queried from a table in a given time interval. These items are related to another key document to share with users and stakeholders: the product roadmap. A roadmap item is similar to a release note item except its feature descriptions are less granular. That is, roadmap items are macro features whereas release notes items are more like items assigned in task-management applications such as YouTrack, Asana, Trello, Monday, Jira, and others.
Tools to create release notes
Nearly any task-management software—not to mention a variety of dedicated products—offers you the ability to create release notes from the list of assigned tasks. For example, you can create a release notes document on GitHub.com right from the main page of the repository. You simply click the Draft a New Release link and follow the prompts to generate release notes from known pushes. From there, you can edit and embellish the generated text.
To be honest, I don’t particularly like this approach. It’s what people do when they treat release notes like an afterthought. I much prefer for someone on the product team to invest some time composing a dedicated document for users and peers. I also like having a tailor-made, dedicated environment that stakeholders can access, too, to navigate the work done. This is the foundation for Project Renoir.
Note Project Renoir is not meant to be a new task-management full-fledged application. Although we use it internally in our company, it has also arisen from the need to develop a (hopefully) attractive demo for the purposes of this book.
Chapter 2 explained that within the boundaries of the DDD methodology, ubiquitous language, bounded contexts, and context maps are the strategic foundation of any real-world application with some amount of complexity. This section presents a quick DDD analysis of Project Renoir.
Ubiquitous language
To review, ubiquitous language (UL) refers to a shared language and set of terms used by all stakeholders involved in a project to ensure effective communication and understanding of the domain model. Table 4-1 lists the main UL business terms for Project Renoir and their intended meaning, and Table 4-2 lists the personas defined within the UL who are entitled to access and use the platform.
Table 4-1 Dictionary of business terms in Project Renoir
| Business Term | Intended meaning |
|---|---|
| Product | A software product whose releases and roadmaps are managed by Project Renoir. |
| Release notes | A release notes document expressed as a list of release notes items. Each release note has a version number, date, and description. |
| Release notes item | A piece of work done in the context of a product release. Each item has a description, a category, and a delivery date. |
| Roadmap | A document that outlines features planned for inclusion in the product in list form. Each roadmap has a description and a time reference (for example, Summer 2024). |
| Roadmap item | A feature planned for inclusion in the product. Each item has an estimated delivery date and an actual delivery date to enable stakeholders to easily see how closely “promises” align with reality. |
TABLE 4-2 Personas in Project Renoir
| Persona | Intended meaning |
|---|---|
| Admin | The unlimited system account from which everything within the system can be checked and edited. In the case of Project Renoir, a multi-tenant application, the admin persona is the global administrator and can create new products and product owners. |
| Product owner | A role with full control over contributions to and releases of a specific product. |
| Contributor | A role that can create documents (notes and roadmaps) under the umbrella of a given product. A contributor can be active on multiple products, with different permissions on each. |
| Viewer | A role that is limited to viewing and possibly downloading available documents. |
Bounded contexts
As noted in Chapter 2, a bounded context is a specific domain within a software system where concepts, rules, and language have clear boundaries and meaning. Project Renoir is too small to require multiple bounded contexts. In Project Renoir, both the business domain and the business language are unique, and there are no ambiguous business terms. So, Project Renoir can be a compact, stateless web module deployed to a single app service, easy to duplicate in case of growing volumes of traffic.
Still, it is helpful to treat the following parts as a distinct bounded context:
■ Main application The core web application, built as an ASP.NET Core application.
■ Domain model The repository of invariant business logic. It is built as a reusable class library and possibly published as an internal NuGet package to streamline reuse.
■ Infrastructure This contains the database server and all code and dependencies necessary to save and retrieve data. This context also acts as an anti-corruption layer for external services.
■ External services This describes any external web services used by the application such as those necessary to create PDF documents or send emails.
Recall that in DDD, the relationships and planned interactions between the different bounded contexts of a project are rendered in a diagram called the context map.
Context map
Figure 4-1 shows a reasonable map for Project Renoir. Note that reasonable here doesn’t mean mandatory. The actual relationships are chosen by the lead architect and match the availability of teams, the skills of the people in those teams, and the attitude of the lead architect with regard to exercising control over artifacts.

FIGURE 4-1 The context map of Project Renoir.
The figure is a diagram made of five squares: WEB APP has a thick border and connectors to all the other four. The connector with DOMAIN MODEL is labeled Partnership. Same for the connector to the PERSISTENCE/INFRASTRUCTURE block. WEB APP is also connected to EMAIL SERVICES and PDF SERVICES. Both connectors are labeled Conformist. Finally, a connector labeled Customer/Supplier links DOMAIN MODEL and PERSISTENCE/INFRASTRUCTURE.
The main application operates in partnership with the domain model and the infrastructure contexts. This is the only point that can be arguable. The ultimate decision should be made based on people, teams, and skills. The other relationships are much more established and harder to question.
Domain Model and Infrastructure work together, but the need (and purity) of Domain Model prevails in case of doubt, and preserving that should be the primary goal.
The use of Entity Framework (EF)—or any other object-relational mapping (O/RM) tool—as the gateway to databases represents a threat to the purity of the domain model. In fact, unless a completely different data model is used for persistence (and a costly set of adapters to go from the domain to the persistence model and back), serializing a domain model via an O/RM requires, at a minimum, that you leave default constructors and public setters in place for all entities so that dehydration of those entities can be performed. (See Figure 4-2.)
Important The development of domain model and infrastructure contexts occurs in parallel to the extent possible, and the teams work together. In case of conflicts, though, the needs of the domain model (for example, preserving design purity) prevail.
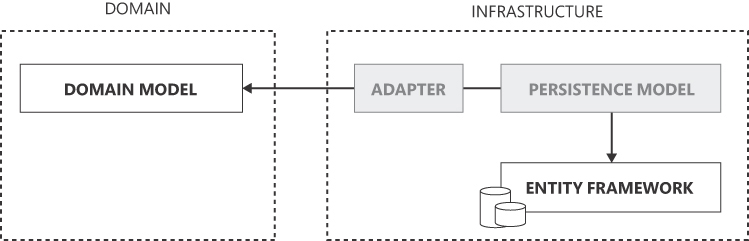
FIGURE 4-2 The business-oriented domain model is converted into a persistence model tailor-made for the physical database structure managed by Entity Framework.
The figure is a diagram characterized by two dashed blocks laid side by side. The leftmost is labeled “Domain”; the rightmost is labeled “Infrastructure”. Domain contains a block titled Domain Model. Infrastructure contains two grayed out blocks (Adapter and Persistence Model) and one labeled Entity Framework. A thick double arrow elbow connects the extremes.
Finally, a conformist relationship is inevitable between the infrastructure context and the external services to which the application itself is a subscriber. For example, suppose SendGrid introduces breaking changes to the public interface of its API. In that case, all subscribers must conform to the new interface if they want to continue using the service.
With the big-picture aspects of Project Renoir clear in mind, let’s create a physical context map. This will show the organization of the Visual Studio projects that, once assembled, will build the application. Figure 4-3 lists these projects and their dependencies.
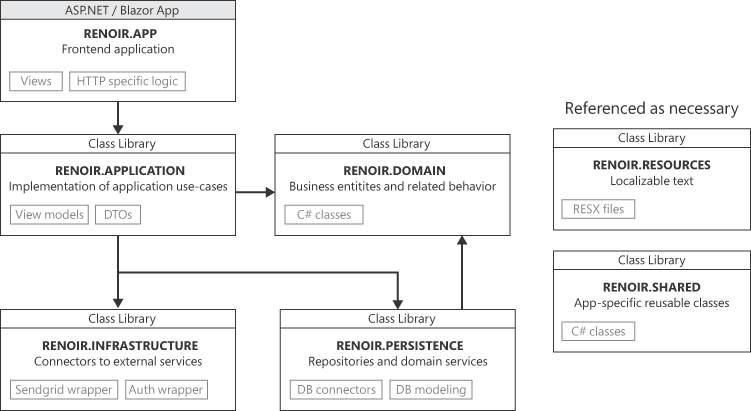
FIGURE 4-3 The physical context map for Project Renoir.
Seven blocks appear in the figure, each representing a project. Arrows between blocks represent project dependencies. Two of the seven blocks (on the right edge) are not explicitly linked to any other as they are intended to be referenced as necessary. The topmost block (APP) connects to APPLICATION which in turn connects to DOMAIN (on its right) and INFRASTRUCTURE and PERSISTENCE. In turn, PERSISTENCE connects back to DOMAIN.
The front-end application project
Conceived as an ASP.NET Core application, Project Renoir is actually configured as a Blazor server application. All views are managed and rendered on the server and served as fast-to-render HTML to the browser.
The processing of incoming requests is assigned to MVC or code-behind classes of Razor pages, as appropriate. (This is determined on a case-by-case basis.) HTTP context information is exclusively managed at this level and never trespasses the boundary of controllers or code-behinds.
The front-end application references the application services class library—in fact, the application layer. Ideally, data exchange occurs through tailor-made data-transfer objects (DTOs) defined in the application class library. Any intermediate proxy, though, always represents a cost in terms of development time and sometimes in terms of performance too.
The application services library
This class library project contains the entry points of each business task that users can request from the front end. The front-end application just formalizes commands out of raw HTTP requests and dispatches them to this logical layer. Any task is orchestrated from start to finish, distinct actions of the underlying process are spawned (sequentially or in parallel), and results are collected and merged as appropriate. Beyond implementing the actual business use cases, the library exposes all necessary DTOs to communicate in both directions with the presentation layer.
Note (again) that the application layer is not necessarily reusable across multiple front ends. If the overall application exposes multiple front ends for collecting data and requests such as web, mobile, or even an AI-based chatbot, each of these may need its own application layer or, at a minimum, its own personalization of the common application layer.
Figure 4-4 shows a presentation layer with multiple front ends. Two of these (web browser and mobile app) call directly into the same application layer API. The chatbot front end, however, calls into a dedicated API that, realistically, may take care of adapting the raw JSON feed captured by the chatbot into well-formed and semantically correct calls into the core application services.
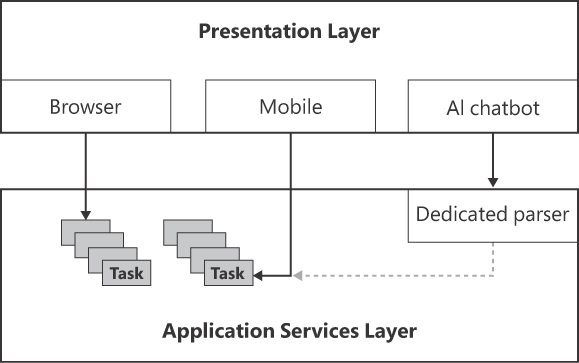
FIGURE 4-4 Presentation layer with multiple front ends.
The diagram is made of two thick squares vertically laid out and labeled Presentation Layer and Application Services Layer. The topmost Presentation Layer block contains three thinner blocks distributed horizontally: Browser, Mobile, and AI chatbot. The Application Services Layer has only one thinner child block in the top-right edge, just underneath AI chatbot. Arrow connectors go from top to bottom. AI chatbot connects to Dedicated Parser. Mobile and Browser connect to symbols representing tasks. A dashed gray line connects Dedicated Parser and tasks.
Note The advent of large language models (LLMs), of which GPT (short for generative pre-trained transformer) is one of the most popular, has the true potential of a terrific breakthrough. GPT is a form of artificial intelligence (AI) that possesses a remarkable ability to comprehend and generate human language. Nicely enough, it can also turn its understanding into a formal JSON feed, ready for an endpoint to receive. The use of LLMs has the potential to spark a completely new breed of applications as well as a new development paradigm: conversational programming. For more information, we recommend Programming Large Language Models with Azure OpenAI by Francesco Esposito (Microsoft Press, 2024).
In Project Renoir, you’ll code the application layer as a class library referenced directly from the front-end ASP.NET application. That can be easily wrapped up as a NuGet package for easier distribution across teams. Furthermore, with the sole cost of a (minimal) API layer, it can become an autonomously deployable service in a distributed application.
The domain model library
The domain model is the nerve center of the application. As a class library—ideally wrapped up in an internal-use NuGet package—it defines all business entities.
The DDD philosophy calls for defining these entities as object-oriented classes that honor a number of constraints: factory methods over constructors, no property setters, very limited use of primitive types and, most of all, a set of methods that ensure the class can be used in software workflows in the same way the entity is treated in real business processes.
This library is referenced by the application layer and possibly by the front-end application. It may also be referenced by the persistence layer if no persistence model is defined (whether due to pragmatism, laziness, or attitude. The domain model library has no external dependencies except for the .NET Core framework and a few helper packages.
Note For Project Renoir, you’ll use a free NuGet package, Youbiquitous.Martlet, that contains several extension methods and facility classes. This will help you streamline programming and ensure that your code is as readable as possible. This kind of dependency is acceptable in a domain model. To access this package on NuGet, use the following link: https://www.nuget.org/packages/Youbiquitous.Martlet.Core.
The infrastructure library
In a DDD-inspired layered architecture, the infrastructure layer serves as the depot of several services, such as data access and persistence, integration of external services (for example, the email platform and message queues), caching, logging, file system access, authentication, and cryptography.
Ultimately, it falls to the team leaders to decide whether to implement all these functions in a single project or to split them into multiple projects. This decision depends on various factors, including the need to manage scalability in a timely manner, team availability, and the skills of the team members involved. It also depends on the nature of the application and the number and weight of the required functions. The higher the impact of an infrastructural function, the more you want to isolate it to minimize the likelihood of breaking or slowing down other parts. If all you need is data access and an email service, however, everything can be packed up in a single class library project.
More for demo purposes than for actual needs, in Project Renoir, you’ll separate infrastructure and persistence layers. Referenced by the application layer, the infrastructure layer sends emails and performs authentication. To achieve this, it references the persistence layer for physical access to databases.
The persistence library
This is the only place in the whole application where database details (for example, connection strings, the number and design of tables, and so on) are known and managed explicitly. This layer references whatever (micro) O/RM or data access API (for example, raw SQL, ADO.NET, Mongo DB, Cosmos DB, or Dapper) you intend to use.
In Project Renoir, the persistence library will hold a reference to Entity Framework Core and the SQL Server connector. All application entities not strictly related to the business domain, or that don’t have a direct link to nouns in the UL, will be coded in a dedicated, internal namespace of the persistence layer.
Helper libraries
Very rarely, an application that supplies a web front end doesn’t need to be localized. However, even if an application doesn’t strictly require it, it’s a good practice to use resource files and mnemonic monikers for any visual text. It also helps structure the verbal communication between the application and end users and removes ugly and always dangerous magic strings all over the place.
The immediacy of just putting some static text in a Razor view is unparalleled. At the same time, though, programming is the art of method much more than it is the art of getting straight to the point, no matter what. Furthermore, programming is the art of establishing a bridgehead in the domain of the problem to identify a working solution. The most effective way to achieve this is to go straight to the point with a method. Using resource files for visual text and packaging it in a separate helper library is just a good practice—one with significant potential and a minimal surcharge.
Along with a library of localizable strings, in Project Renoir, you will find a shared library with miscellaneous classes and functions. This is largely business-agnostic code that’s good to have coded just once. In my programming style, most of the time, these are extension methods that are not general-purpose enough to make it to a NuGet package.
Note Helper libraries may prove necessary to encapsulate somewhat reusable classes and functions in a sandbox to prevent them from spreading and hiding throughout the codebase.
Whether done up front or along the way, collecting and processing business requirements is a crucial and unavoidable activity. The internet literature is full of buzzwords and self-branded, loudly marketed recipes for this. I have nothing to sell here, but I’d love to link together some observables.
I’ve been in software since the forgotten days of enterprise waterfall projects, in which a rigid sequential flow demanded that each phase of the project rely on the deliverables from the previous phase, and that each phase focus on specialized tasks with nearly no overlap.
The waterfall model
Devised in a different software business era, the waterfall model is treated badly today—seen as a legacy antique at best and worthless junk at worst. However, the steps on which it is based are invariant and universal. A typical waterfall flow follows six steps:
Capture software requirements in a product requirements document.
Build models, schema, and business rules based on requirements.
Outline the software architecture based on the models, schema, and rules.
Write the necessary code based on the software architecture.
Test and debug the code.
Depending on test results, deploy the system to production.
What makes waterfall look obsolete today is not the constituent steps but the order in which they occur. Ultimately, the waterfall model is too rigid and formal (read: slow) for the time-to-market needs of the modern software business.
The (non) sense of Agile
In 2001, a group of software developers signed what they called the Agile Manifesto. This document outlined a new software-development approach to combat the rigidity of the waterfall model. The 12 original principles laid out in the Agile Manifesto are pure common sense. They’re impossible to disagree with. However, they are also too abstract to give specific guidance to working teams.
Since the release of the Agile Manifesto, Agile-branded methodologies have proliferated, each with the perfect recipe to take projects home on time and on budget. But the initial question remains largely unanswered: How do you realistically collect and make sense of requirements in a timely manner without jeopardizing the market appeal of the solution?
Since the formalization of DDD in 2004, a lot has happened in the software industry along a track that runs parallel with Agile. Whereas the term Agile deviated toward project management, the concept of events within a business domain emerged in software design as a method to replace the waterfall model.
Within a business domain, an event is a significant and relevant occurrence. Events represent notable changes or interactions within the domain, capturing important information that can trigger subsequent actions.
In the previous decade, a couple of correlated methodologies solidified around the concept of events in a business domain: event storming and event modeling. Although they each resulted from a different approach, both deliver the same output: a visual representation of the expected system’s behavior, organized as a collection of flowcharts rooted in fundamental business events.
The overall look and feel of the output of event modeling and event storming resembles a storyboard. Indeed, event-based storyboarding provides a modern and effective way to summarize the first four steps of the waterfall model. Following a storyboarding session, you may be ready to begin conceptualizing the architecture and writing code. Along with proper coding strategies (for example, unit-testing, a test-driven development, and so on) and DevOps artifacts (that is, continuous deployment pipelines), storyboarding turns the old, multi-phase waterfall into a more agile, two-step version: storyboarding and development.
Event storming
Event storming is a collaborative technique, usually conducted within the boundaries of a (preferably) in-person workshop, to facilitate exploration and comprehension of a business domain. Although it was conceived for the purposes of planning a software application, the technique can be applied to nearly any business-related brainstorming or assessment activity.
In an event-storming session, stakeholders, domain experts, software experts, and sales team members work together to identify and define relevant events that occur within the system. Discovered events are typically represented as sticky notes or cards arranged in chronological order on a timeline. For each discovered event, it is key to identify the trigger, whether it’s a user action, another event, or some external factor.
In addition to events, event storming involves capturing the following:
■ Commands : These represent actions or requests initiated by users or other systems.
■ Aggregates : These are logical groupings of related events and data.
■ Policies : These capture the business rules and constraints that must be respected.
The outcome of event storming is simply a mental model supplemented by photos of the whiteboard and written notes to keep some persistent memory of it. However, the knowledge acquired during event storming serves as a valuable reference for the development team throughout the software development life cycle. It also ensures a shared understanding among stakeholders, facilitates communication and collaboration, and provides a solid foundation for designing and implementing the system in a fully aligned manner.
Event modeling
Shortly after the “invention” of event storming came an approach called event modeling. It allows for a deeper analysis at a level of detail closer to that of programming. Put another way, event storming focuses on uncovering and understanding the problem space, whereas event modeling aims to create a blueprint of the final application. The core of event modeling is in the definition of longer stories, built as the concatenation of business events in which changes of state and service boundaries are identified and marked out clearly.
The outcome of domain modeling is a structured representation of the essential concepts, relationships, and rules that define a specific problem domain. The primary outputs of domain modeling are as follows:
■ Domain model diagrams : These visual representations use various notations to depict the entities within the domain and how they relate to each other. Common diagram types are class diagrams (in UML) and entity-relationship diagrams.
■ Entity definitions : Each entity within the domain has defined its attributes and behavior through properties and methods. This provides a clear understanding of what information each entity should hold and how it can be manipulated.
■ Use cases : A use case, or scenario, is the representation of a specific interaction that the application can have with its external actors. A use case illustrates how the application behaves in response to certain events or actions, typically from the perspective of an external user.
To some extent, event modeling can also be used to explore the problem space, but the opposite is not true. By the same token, event storming can explore areas of the business not strictly related to software development—for example, to validate a business idea or assess a production system.
The primary goal of domain modeling is to facilitate clear communication and shared understanding among developers, domain experts, and other project stakeholders. This shared understanding, in turn, serves as a foundation for developing software that accurately and effectively addresses the specific needs and requirements of the problem domain. It helps reduce ambiguity, improve the software’s alignment with the real-world domain, and supports more efficient software development and maintenance processes.
Note Event modeling shines at exploring the problem space, whereas event storming focuses more on the exploration of the business processes. In this regard, event storming can explore areas of the business not strictly related to software development—for example, to validate a business idea or assess a production system.
To assess the features of the sample Project Renoir, let’s first identify the actions we want users of the application to complete. (See Figure 4-5.) It all starts from the product, for which it is critical to have release notes and roadmap documents that can be managed, explored, and shared by authorized users.
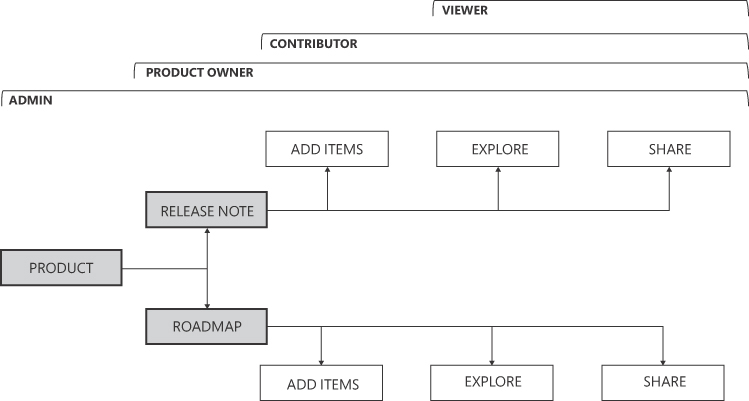
FIGURE 4-5 Functions map of Project Renoir.
The diagram represents the function map of Project Renoir. It is rendered as a tree expanding from left to right. The root is Product with two children: Release Note and Roadmap. All three blocks are gray and thick bordered. Each of the children has three leaves: Add Items, Explore and Share. On top of the tree, four overlapping brackets from left to right represent user roles enabled to encompass the underlying functions. The four brackets are labeled Admin, Product Owner, Contributor and Viewer.
User access control
In Renoir, there will be four distinct roles:
■ Admin : Users with this role have superpowers; they can control and override every aspect of products and contributions. The creation of new products is a prerogative of admins too.
■ Product : owner (PO) As shown in Figure 4-5, the PO has jurisdiction over the entire life cycle of product-specific release notes and roadmaps. This includes the power to nominate contributors and give individual viewers permission to view and share read-only versions of the documents.
■ Contributor : Users with this role have permission to create, read, edit, share, and/or download documents for one or more products.
■ Viewer : This role is for individuals inside and outside the organization who need permission to view, share, and/or download a specific document.
The entire Renoir application is available only to authenticated users.
Product-related features
The product catalog lists software products for which release notes and roadmaps are issued and updated. The product catalog supports basic create, read, update, delete (CRUD) functions. When a product owner logs into the product catalog, they will see only those products to which they have been granted access.
From the documents manager section, product owners create, edit, review, and share release notes and roadmap documents. This user interface is also available to any contributors for which the PO has granted permissions spanning from read-only, to read-write, up to sharing and deleting.
From the export manager, it is possible to allow users to share documents via email, download them as Word files in HTML format, save them as PDF files, and print them. Users perform these actions from the export manager. The export subsystem is subject to strict, permission-based control.
The final Project Renoir application is deployed to an Azure app service to use the default in-process hosting model: ASP.NET Core applications. In-process hosting means that the application is hosted directly within an IIS application pool, running within the same process as the IIS worker process (w3wp.exe).
In contrast, out-of-process hosting involves running the application in a separate process from the IIS worker process. In this case, requests made to the IIS (acting as a reverse proxy server) are forwarded to the ASP.NET Core internal Kestrel web server.
The first thing that Project Renoir users see is a login page. This is an unavoidable step unless the user can present a valid and unexpired authentication cookie. The initial hit of the login page and any successive interaction involves a negotiation between the client browser and the IIS HTTP listener on the Azure side.
The IIS middleware
In Azure app services, when the in-process hosting model is in place, the IIS middleware—a tailor-made IIS plugin—acts as a web server to handle incoming HTTP requests. Installed on top of an ASP.NET Core application, the middleware intercepts the request and performs initial processing tasks such as handling SSL/TLS, managing connection pooling, and managing the hosting environment.
When this initial processing is done, the IIS middleware then routes the request to the appropriate ASP.NET Core application. This routing is typically based on URL patterns and configuration settings. The middleware passes the request to the ASP.NET Core runtime, which then invokes the appropriate middleware pipeline and executes the necessary middleware components to handle the request.
The ASP.NET Core middleware
The ASP.NET Core middleware pipeline consists of various components that perform tasks such as authentication, authorization, request/response transformations, logging, caching, and much more. Each middleware component in the pipeline can inspect, modify, or terminate the request/response as needed.
After the request has been processed by the middleware pipeline, the resulting response is sent back through the IIS middleware, which then delivers it to the client. In summary, the IIS middleware in ASP.NET Core acts as a bridge between the IIS web server and the ASP.NET Core application, facilitating the processing of HTTP requests and managing the hosting environment.
The crucial step in the ASP.NET Core middleware pipeline is the actual processing of the request that generates the response (for example, HTML, JSON, file content) for the caller. This is where the presentation layer of the overall application enters the game.
The ASP.NET Core application gateway
Each request forwarded to a given ASP.NET Core application is managed by the built-in routing middleware, which examines the URL and matches it against a collection of configured route templates. Each route template specifies a pattern that defines how the URL should look to match a particular route. The overall table of routes results from URL patterns and route attributes placed on individual controller methods.
When a match is found, the routing middleware sets the endpoint for the request, extracts the relevant information from the URL (such as route parameters), and stores it in the request’s route data so that subsequent middleware can use it if needed.
The endpoint represents the specific action to be executed to handle the request. Here’s an excerpt from the startup class of a typical ASP.NET Core application that uses MVC and Blazor page endpoints:
app.UseEndpoints(endpoints =>
{
endpoints.MapControllerRoute(
name: "default",
pattern: "{controller=home}/{action=index}/{id?}");
// If necessary, place SignalR endpoints here
endpoints.MapHub<YourSignalrHub>("some URL here");
});
// If server-side Blazor is used, reference the built-in here
// SignalR hub and fallback page
app.MapBlazorHub();
app.MapFallbackToPage("/_Host");
There are three types of ASP.NET application endpoints: MVC methods, Razor pages (with and without the Blazor server layer), and direct minimal API. Interestingly, no ASP.NET Core application is limited to exposing endpoints of just one type. In fact, Project Renoir features all three of them. This is simply for the sake of demonstration. Exposing multiple flavors of endpoints is neither a requirement nor a random or arbitrary idea; whether you do so depends on the scenario. But technically speaking, it is doable.
MVC methods
It’s the classic model of ASP.NET applications to externally expose callable actions. Vaguely inspired by the MVC pattern, according to this model, requests are routed to controller classes that define actions to handle them. Controller classes have methods that trigger business logic and interact with models and views to generate responses.
Quite a bit of work is done by the runtime environment between the receipt of the request and the actual invocation of the actionable controller method. It’s mostly for flexibility and neat separation of concerns between logic processing, data management, and response packaging. Controller methods allow for more complex routing, behavior customization, and easier unit testing, as the logic for handling requests is separate from the UI. Controllers provide a clear separation between the request-handling code and the views responsible for rendering the UI.
Sometimes, all this flexibility and rigorous structure comes at the cost of killing the immediacy of development. For this, there are Razor pages and, more recently, minimal API endpoints.
Razor page code-behind classes
A Razor page is a page-based programming model in ASP.NET Core that combines both the UI and the code for handling requests in a single file. Razor pages were introduced to simplify the development of less complex scenarios where the UI and code logic are tightly coupled, such as basic CRUD operations or simple form submissions. They provide a more straightforward and compact approach, as the code for handling requests may reside directly within the Razor page file.
Razor pages allow a direct content request—the page—whereas controller methods handle requests by defining action methods to process the request and return a response.
A Razor page is a convenient choice for scenarios with tightly coupled UI and logic, while controller methods provide greater flexibility and separation of concerns, making them suitable for more complex applications. Especially if the overall project is also configured as a Blazor server application, the two types of endpoints can easily go hand in hand—even more so when you take further small precautions such as using code-behind classes.
A code-behind class is a separate file that contains the logic and event-handling code associated with a Razor page or a Blazor component, providing a separation between the component’s UI markup and its code functionality. Conceptually, the code-behind class of a Razor page and the body of a controller method serve the same purpose: to trigger the orchestration of the process that will produce the final response for the client.
Minimal API endpoints
Minimal API endpoints provide an even more lightweight and streamlined approach for handling HTTP requests. Minimal API is designed to simplify the development process by reducing the ceremony and boilerplate code required for traditional MVCs.
With minimal API, you can define routes and request handlers directly within the startup class of the web application by using attributes like MapGet, MapPost, and so on. A minimal API endpoint acts more like an event handler, with any necessary code being placed inline to orchestrate workflows, perform database operations, or generate an HTML or JSON response.
In a nutshell, minimal API endpoints offer a concise syntax for defining routes and handling requests, making it easier to build lightweight and efficient APIs. However, minimal APIs might not be suitable for complex applications that require extensive separation of concerns provided by traditional MVC architecture.
Admittedly, in application development, the word presentation may sound a bit misleading. Although it evokes the visual and interactive elements of a user interface designed to convey information and engage users, with a web application, it is quite different.
The presentation layer of a web application is operational code that runs on the server. Its only concrete link to the user interface is the markup it produces. We all call it front end or presentation; we all act as if it is strictly UI-related. But in the end, the presentation layer runs and thrives on the server by way of the artifacts of controllers or Razor pages.
This section explores a few technical aspects and related technologies and, more importantly, how the presentation layer links to the downward layers to ensure separation of concerns.
As the programming blocks of the presentation layer (for example, controller methods) process incoming HTTP requests, their main purpose is to trigger the workflow that ultimately produces a response. In terms of event modeling, each incoming request is an event that triggers a new instance of a process or advances a running one.
Internet literature is full of articles and posts that discuss the ideal thickness of controller (or code-behind) methods. Let’s try to create some order and clarity.
Fat-free controller methods
In an ideal world, every controller (or code-behind class) method is as thin as the following:
[HttpGet]
public IActionResult ReviewDocument(long docId)
{
// Let the application layer build a view model
// containing data related to the request.
var vm = _doc.GetDocViewModel(docId);
// Render out the given view template with given data
return View("/views/docs/doc.cshtml", vm);
}The controller receives input data from the body of the HTTP Get request that the ASP.NET machinery binds to method parameters. Within the body of the controller method, an instance of an application layer service class (_doc in the preceding snippet) fetches and massages any necessary data into a view model class. Finally, the view model class is passed as an argument to the View method in charge of merging the selected view template with view model data.
The schema is not much different in the case of HTTP Post requests.
[HttpPost]
public IActionResult SaveDocument(ReleaseNoteWrapper doc)
{
// Let the application layer turn the content of the DTO
// into a domain model object and save it.
var response = _doc.SaveDoc(doc);
// Render out the response of the previous operation
return Json(response);
}The controller method receives any necessary data—the content of a document to save—through a tailor-made data-transfer object and passes it to the application layer for further processing. It receives back a command response—usually a custom class—with details on additional processing needed (if any). At a minimum, the response object will contain a Boolean to indicate the final success status of the operation.
Dependency on the application layer
Ideally, any publicly reachable endpoint should have a connection to a method in the application layer that governs the execution of a specific task. Figure 4-6 illustrates the relationship between the presentation and application layers in the context of an ASP.NET Core web application.
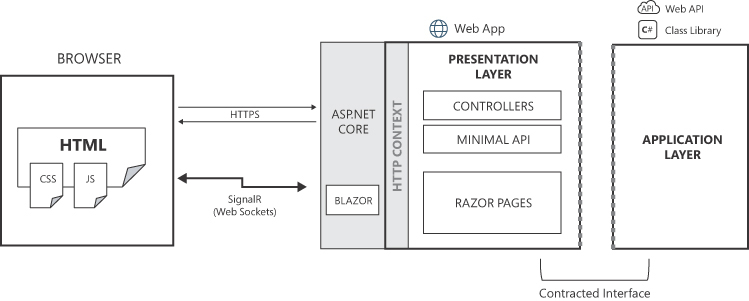
FIGURE 4-6 From presentation layer to application layer.
The diagram presents on the left a block representing the client browser and a block on the right representing the back-end application. The two blocks are connected by arrows to denote HTTPS conversations and web sockets transport of messages. Within the rightmost block, a few vertical slices appear. One is the web server front end (ASP.NET and/or Blazor). Behind it is the HTTP context and then the presentation layer made of controllers, minimal API and Razor pages. The presentation layer doesn't do much more than delegating actual work to the application layer-the final block at the right edge. Dashed lines indicate the point of contact between layers and sanction the separation of concerns.
The presentation layer is the only segment of a web application where HTTP context information—such as HTTP headers, logged users, or session or cookie data—is directly available. Any part of the HTTP context that business requires to be propagated beyond the boundaries of the presentation layer should be extracted from the envelope and passed as plain data.
public IActionResult SaveDocument(ReleaseNoteWrapper doc)
{
// Obtain the email of the currently operating user
var currentUserEmail = User.Logged().Email;
// Save the document along with a reference to the actual user
var response = _doc.SaveDoc(doc, currentUserEmail);
return Json(response);
}A contracted programming interface exists between controllers and application layers. The contract is ideally expressed through an interface, and the application services are provided to the controllers via dependency injection.
public class DocController
{
private IDocService _doc;
public DocController(IDocService doc)
{
_doc = doc;
}
// More code
:
}In summary, the presentation layer should merely be a pass-through layer that links external commands with internal use-case implementations. It should be as thin as possible and delegate work to other layers down the stack. In terms of dependencies, it should reference only the application layer, and data exchange between the presentation and application layers should take place via DTOs exposed by the application layer.
Exceptions to the rules
Fortunately, the internal structure of a controller is not strictly ruled, and none of the aforementioned practices have the force of law. You should look at these practices as vectors that indicate a direction and stick to that, but feel free to simplify (in some cases even oversimplify) and apply shortcuts and bypasses as long as everything is done in full awareness of the context.
Typical exceptions to the rules for controllers are as follows:
■ Programming directly to instances of application services rather than to interfaces.
■ Being lax with DTOs and working with domain model objects at the presentation level as a shortcut. In this case, the presentation layer would set a dependency on the domain model library.
■ Coding some very simple actions directly from the controller’s method body. Common actions include basic CRUD operations coded in static repository methods, and logging/auditing operations such as tracking user agents and, if authorized, geolocation parameters.
To keep the controller class testable, many suggest injecting application services via interfaces and dependency injection. Using application services from within controllers promotes a clear separation of concerns, as controllers are responsible for handling HTTP requests and responses while application services handle the business logic. There’s no question about using application services, but I argue whether wrapping them in an interface brings concrete benefits—or just the need of using an additional DI layer. Many would argue that not using interfaces makes the controller less testable. True, but are you really willing to test controllers? If you rightly introduce application services, why testing controllers?
As for DTO and domain model objects, there are several reasons why using DTOs should be the first option: separation of concerns, testability challenges, tighter coupling between presentation and domain, and even potential security risks of unwanted data injection. DTOs, though, are yet another layer of code to add, maintain, and test. As usual, it’s a trade-off.
Connection through mediators
You can take one of two approaches to connect the presentation layer to the application layer:
■ Directly invoking methods : With this approach, one component explicitly invokes the methods of another component to achieve a desired behavior. It’s a straightforward and simple way to establish communication between components across layers.
■ Using mediators : A mediator acts as a centralized hub to coordinate and control interactions between components instead of having those components communicate with each other directly. Instead of invoking methods on each other, parties interact with the mediator, which then relays the commands to the appropriate components. A benefit of this approach is that it decouples components from each other, promoting loose coupling.
In the .NET space, a popular mediator library is MediatR, available at https://github.com/jbogard/MediatR. When MediatR is used in the presentation layer of an ASP.NET application, controller methods interact with the mediator and operate by packing messages, as shown in the following code. The controller knows nothing about the application layer or the code that will ultimately process the issued command.
[HttpPost]
public async Task<IActionResult> SaveDocument(ReleaseNoteWrapper doc)
{
// MediatR reference inject via configuration
await _mediator.Send(new SaveDocumentCommand(doc));
return StatusCode(201);
}In MediatR, messages are defined as objects that represent requests, commands, or notifications. These messages are used to communicate between the requester and the handlers. The requester is responsible for initiating a request by sending a message to the MediatR pipeline, whereas handlers are tasked with processing messages received from the requester. Each message type can have multiple handlers associated with it. Handlers implement specific logic to handle the messages and produce the desired result.
public class SaveDocumentHandler : IRequestHandler<SaveDocumentCommand>
{
// Some code
}It should also be noted that MediatR also supports pub/sub scenarios and can be extended with custom behaviors and pipelines to add cross-cutting concerns, such as logging or validation, to the request/response processing flow.
However, like everything else in code and life, the mediator approach is not free of issues. For example:
■ It adds complexity over operations that might otherwise be plain and simple. In fact, for every operation, you must write the actual routine plus the command and the handler class.
■ Because the mediator is responsible for coordinating communication between multiple components, it may become more complex as the number of components and message types increases. This complexity can potentially affect the responsiveness of the mediator, especially if it needs to handle a large number of messages or perform complex logic for message routing.
■ The mediator is a single point of failure. If it fails or becomes overloaded, it can affect the entire system’s communication.
■ The mediator itself must resort to optimization, caching, and scalability tricks when handling large volumes.
In the end, what do you really get in return for all this? Loose coupling between presentation and application layers? While there might be situations in which loose coupling at this level is a nice feature, in most common cases, the presentation and application layers work together and therefore must know each other. A plain separation of concerns is more than enough.
Note In complex scenarios, instead of a mediator, you might want to consider using an enterprise-level message bus that supports commands and handlers but is more robust and offers better performance (plus advanced caching/storage features). Put another way, the mediator pattern (of which the MediatR library is a rich implementation) may serve as a bus within the context of a single application.
Having established that the presentation layer of an ASP.NET web application is server-side code that is ultimately responsible for pushing out HTML markup, let’s examine a few common corollary scenarios.
Server-side rendering
A lot has happened since the trumpeted days when humankind discovered single-page applications (SPAs). Before that were the prehistoric days of plain old server-side rendering (SSR)—that is, platforms that generated HTML on the server and served it ready-for-display, at no extra cost beyond plain rendering, to client browsers.
On the wave of SPAs, new frameworks conquered the prime time, and terms like front-end development, and even micro-front-end development, became overwhelmingly popular. The net effect of doing more and more work on the client, combined with a substantial lack of programming discipline, was to reach incredible levels of convoluted code, tons of dependencies on never-heard JavaScript modules, and long waiting times for users upon first display.
Guess what? At some point, all proud proponents of API-only back ends and supporters of the neat separation between front end and back end started eagerly looking back at those days in which HTML could be generated on the server and become instantaneously available to users. No popular front-end frameworks today lack some SSR capabilities in production or on the roadmap. Hence, as of the time of this writing, the future of web development is (again) on the server—which is great news.
Blazor server apps
As surprising as it may sound, in the .NET space, the oldest line-of-business applications are still built with Web Forms or Windows Forms. Companies that embarked on renewal projects for the most part used popular front-end technologies such as Angular and React. These frameworks, though, have dramatic startup costs—even higher in cases of teams with a strong ASP.NET background.
An excellent alternative for the visual part of the presentation layer in the .NET stack is Blazor—especially the server hosting model. It allows full reuse of ASP.NET skills, promotes C# to the rank of a full-stack language, and returns JavaScript to its original role as a mere scripting language. In this way, Blazor server becomes a technology for building better ASP.NET applications, specifically in terms of responsivity and rapid prototyping—responsivity because you forget page refreshes (except for full navigation to other URLs) due to the underlying SignalR transport, and rapid prototyping because of Razor pages and Blazor’s excellent support for componentization. The Blazor version with .NET 8 fits well in this development trend. It is a strong candidate for handling visual presentation in the coming years due to the following features:
■ Fast HTML-based initial loading
■ Async background tasks
■ Component-oriented
■ No full-page refreshes
As I see things, pure client-only front ends are destined to become legacy. SSR is the (temporary) winner of the endless war between web technologies. A combination of ASP.NET controllers and Blazor pages is an extremely reasonable solution to employ in web applications.
The Wisej model
Is there life in the front-end industry beyond Angular, React, and Blazor? An interesting commercial product to consider is Wisej (https://wisej.com)—a .NET development platform for building web applications using C#.
With Wisej, developers can create web applications that closely resemble desktop applications, including features like resizable and dockable windows, desktop-style menus, toolbars, and keyboard shortcuts. Wisej follows an SPA architecture, where all necessary UI components and logic are loaded once, and subsequent interactions happen without full page reloads in much the same way as with Blazor. The Wisej programming model closely mimics that of Windows Forms.
Any code you write in Wisej executes on the server, which can provide better performance and scalability compared to traditional client-side JavaScript-based web frameworks. Wisej also allows you to leverage the power of the .NET framework and use existing .NET libraries and components. Finally, Wisej integrates seamlessly with Microsoft Visual Studio, offering a design-time experience and leveraging features and tools such as IntelliSense, debugging, and code refactoring.
In addition to HTML markup, an ASP.NET presentation layer may provide clients with JSON payloads. The term web API is sometimes used to label API-only ASP.NET servers. It is purely a mnemonic difference; there’s no difference between web API applications and plain ASP.NET applications that expose endpoints that return JSON. In both cases, you have controllers or minimal API endpoints.
Exposing an API over the web
Technically speaking, a UI-less ASP.NET application that only (or mostly) exposes JSON endpoints is similar to a plain ASP.NET application with a visual front end. However, a web API library is subject to a few precautions:
■ Support a non-cookie authentication
■ Provide fewer runtime services
■ Define routes more carefully
■ Support a Swagger interface
Within a web API, authentication is preferably implemented using API keys or more sophisticated JSON web tokens (JWTs). API keys are simpler to implement and represent an excellent choice when the primary focus is authorizing rather than collecting and analyzing user-specific information. JWTs work more as a replacement for authentication cookies. They are issued upon successful login, are encrypted and signed, and are subject to expiration. Within a JWT, you might find claims about the user, such as their role and other carry-on information.
Finally, Swagger is an open-source software framework providing a standardized format to describe, test, and visualize RESTful APIs. Linked to the API ASP.NET pipeline, Swagger generates interactive API documentation and test endpoints. It is Swagger in any web API to be shared outside the development team.
Minimal endpoints
Speaking of web APIs, the aforementioned minimal API endpoints return on stage. They’re reachable URLs that perform some action and return some data but are not subject to the ceremony and flexibility of controllers. Minimal APIs do not facilitate authorization, but they don’t deny it either. They are yet another option for having the system expose operations to external clients coded and executed in a really quick and direct way.
Since their inception, web applications were built to do most of their work on the server. The client was used merely to display prebuilt markup with some little pieces of JavaScript to animate and make it more interactive. At some point—a decade after the explosion of e-commerce and the internet as we know it today—the industry switched to the SPA model in an attempt to add more interactivity and create a smoother and more pleasant user experience.
This attempt, made with all the best intentions, is now deteriorating. Why? Because huge and complex frameworks to support code written in “artificial” (because they’re made-to-measure) programming languages form deliverables that are extremely slow to load and painful to develop and maintain.
The current reevaluation of server-side rendering is returning the community to square one—namely, to multi-page applications rendered on the server but with some improved mechanisms to provide rich, interactive experiences in the browser. So, the presentation layer of a web application (again) collects external input and renders the next visual interface. The presentation layer of a web application lives on the server, separated but well connected to other layers.
This chapter introduced the example application—Project Renoir—that will be developed further in the chapters to come. It also summarized the methods to convert a basic understanding of the application into concrete features and projects. Devised with DDD and layered architecture principles in mind, the stage of a reference application that fulfills the vision of a clean architecture is set. In the next chapter, you’ll begin focusing on more Visual Studio aspects, functional diagrams, and code.
Simplicity is prerequisite for reliability.
—Edsgar W. Dijkstra
The classic three-tier architecture—presentation, business, and data tiers—leaves the burden of deciding what goes where to architects (and often to developers). If it’s largely unquestionable where presentation and data access go, the content of the middle tier—and especially its boundaries—has never been clarified. Frankly, business logic is more of an umbrella term than a well-defined concept. It represents a group of related concepts such as rules, processes, and operations that define how an organization conducts business.
Such a definition—while perhaps quite clear at a fairly high level of abstraction—becomes blurry when planning project components. That’s why, in my opinion, one of the most impactful changes brought by DDD is simply having split business logic into two distinct parts: application logic and domain logic. Domain logic is an invariant in the context of the whole and sits in a position of strength (technically as an upward node) in any relationship within a context map. It expresses how business entities are represented and behave. In contrast, application logic depends on the presentation layer and provides the end-to-end implementation of every single use case that can be triggered from the outside.
As a result, the application layer serves as the beating heart of modern systems designed to chase the ideal of a clean architecture. Within this layer, the intricate interplay of various components and functionalities comes to life, enabling the creation of applications that effectively mirror real-world processes.
This chapter delves into the application layer, exploring key concepts such as task orchestration, cross-cutting concerns, data transfer, exception handling, and deployment scenarios. First, though, it expands on the list of use cases for the Project Renoir application.
Project Renoir is a web application implemented in ASP.NET Core. The slice of reality that shines through it centers on three key entities: software product, release notes, and roadmap documents. All use cases therefore relate to creating, editing, and viewing instances of those entities.
Figure 5-1 presents an overall function-oriented view of the Project Renoir application. The login subsystem module is the barrier that users must overcome by providing valid credentials. When this occurs, each user is provided with a list of products to access, depending on what permissions the user has been assigned. Beyond that, each user will have their own menu for conducting CRUD operations on assigned products and documents.
The figure is a diagram made of three main parts laid out horizontally. The central part represents the Project Renoir application and is a square with a vertical box on the left (named Login) and another on the right (named Domain). In the middle are four vertically laid out boxes: Presentation, Application Services, Domain Services and, on the same row, Persistence and Infrastructure. The left component is made of three vertical squares: Users, Roles and Permissions. The right component has three squares one on top of the other named Products, Release Note and Roadmap.
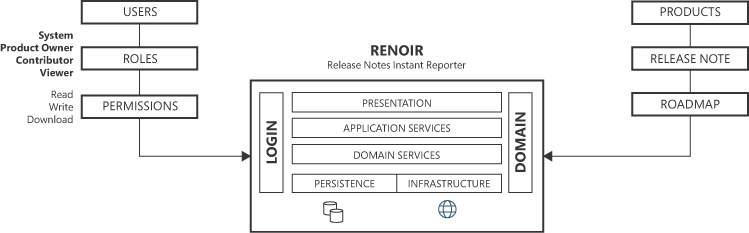
FIGURE 5-1 An architectural view of the Project Renoir application.
The access control subsystem Users, roles, and permissions play a crucial role in managing and regulating user interactions and privileges within an application. In Project Renoir, an admin subsystem is responsible for preparing the application for first use by defining products and assigning the default product owner to each one. The product owner—a regular user with admin permissions for a product—is then free to create new users and give them any desired permissions.
Note Upon creation, every user is only a guest in the system and cannot perform any operation other than logging in and observing an empty page.
Authenticating users
Each user is identified by an email address and uses a password to authenticate. The user’s profile may contain a photo, a display name, and perhaps a few personal notes. Each user record also has a flag to indicate a possible locked-out state. Locked-out users are allowed to attempt to log in but will be denied access. Only the system admin has the power to lock and unlock users.
Project Renoir supports cookie-based authentication, meaning that after credentials have been successfully verified, a unique user identifier is stored in a cookie, which the browser will present on any subsequent request. Project Renoir is envisioned as a document-sensitive application, so it is recommended to check the user lock status regardless of the evidence of a valid cookie. Because this approach requires direct access to the user record on every request, no claims will be saved to the cookie other than the identifier.
Fixed user/role association
In general, a role defines a fixed set of permissions assigned to a user within a system. With roles, one can organize users into logical categories based on their operational requirements. For example, in an e-commerce system, common roles could include admin, customer, and vendor.
This basic pattern works only in relatively flat access-control scenarios, however. For example, in Project Renoir, the product owner role enables a user to perform several operations such as adding contributors and managing documents.
Should any product owner have access to all products? There is no answer that is absolutely right or wrong. It all depends solely on the business requirements. If it is acceptable that all users in a given role can perform all possible operations on the entire dataset, then the role can be assigned to the user once and become a constituent part of the user profile. Otherwise, a more flexible mechanism is necessary.
Flexible user/asset/role association
The user profile is agnostic of role information, but a separate table keeps track of bindings set between users, assets, and roles. (See Figure 5-2.) As a result, when the user logs in with the same unique credentials, they are shown a list of assets they can work on, although with different roles. Typically, each role has an associated menu of permissible actions and possibly a dedicated controller to group them in a single place. Among this list of functions, there should be a few to edit the binding table and to create/remove bindings.
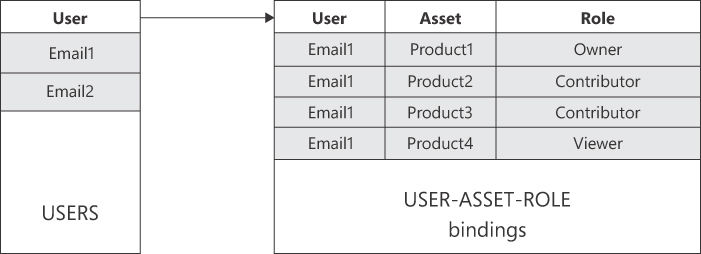
FIGURE 5-2 Schema of a USER/ASSET/ROLE association.
The figure is made of two blocks. The one on the left represents the Users table and contains rows labeled “Emai1” and “Email2”. The block on the right represents bindings between users, assets and roles. It is made of four rows and three columns. The first column contains “Email1” on all rows. The other two columns contain names for an asset and a role. An arrow connects the two blocks. The overall sense shows how a user with a given email address is linked through multiple bindings to unique combinations of an asset and a role.
Note To take this approach even further, consider adding a few more columns to the bindings table to set a start and an end date and/or a Boolean flag to denote the state (active/non-active) of the binding. The benefit is that you maintain a history of bindings and a full record of each user.
More granular control with permissions
Permissions are access rights granted to a user that define what actions a user is allowed to perform (or not). Permissions are typically tied to specific assets or functions within the system. For instance, a new user might be added to the system with the product owner role but be denied the permission to add new contributors. Likewise, a user with the contributor role might be granted permission to add new contributors to the same asset. (See Figure 5-3.)
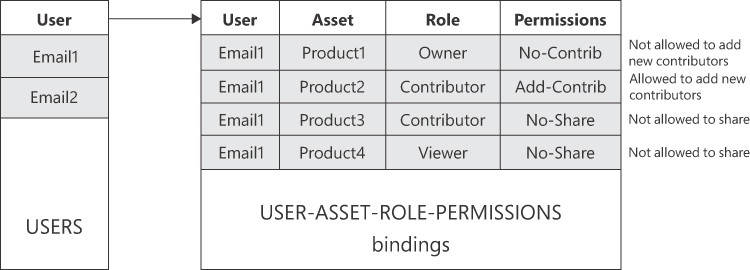
FIGURE 5-3 Schema of a USER-ASSET-ROLE-PERMISSIONS association.
The figure is made of two blocks. The one on the left represents the Users table and contains rows labeled “Emai1” and “Email2”. The block on the right represents bindings between users, assets, roles and permissions. It is made of four rows and three columns. The first column contains “Email1” on all rows. The other three columns contain names for an asset, a role and a permission. An arrow connects the two blocks. The overall sense shows how a user with a given email address is linked through multiple bindings to unique combinations of an asset, a role and a permission.
Permissions are more fine-grained than roles and allow for precise control over user actions. This ensures data security and gives customers the necessary flexibility. In summary, permissions are a way to override the characteristics of roles.
Project Renoir users work on products (software applications) and manage documents related to those products. The application layer implements the following use cases:
■ Product creation Only admin users are allowed to create and manage new products. An admin is also responsible for adding product owners. A product is fully described by code, a display name, and an optional logo. In addition, it can be given a start/end date range for support.
■ Document permissions Upon login, product owners see the list of products they can work on. An owner is entitled to create and edit new release notes and roadmaps as well as to assign and revoke contributors. A contributor operates based on the permissions received, as in Table 5-1. The granularity of a permission can be adapted as needed. For example, you can grant permission for all documents of a given type or just specific documents.
Table 5-1 List of supported permissions in Project Renoir
| Permission | Description |
|---|---|
| CREATE | Allows the creation of a new document (release note or roadmap) |
| EDIT | Allows the modification of an existing document (release note or roadmap) |
| DELETE | Allows the deletion of an existing document (release note or roadmap) |
| VIEW | Allows the viewing of an existing document (release note or roadmap) |
| DOWNLOAD | Allows the downloading of an existing document (release note or roadmap) |
■ Document sharing Documents are presented as a list of items. Bound to a product, a document has a code to identify its type (release note or roadmap), a date of release, a status, and various descriptors. A document item has a type column (for example, bug fix, internal feature, requirement, or new public feature) and a description of the feature. Sharing a document—whether as a printout, a PDF file, or perhaps a Word file—poses the issue of composing the rows of data into a single container with a human-readable structure. Figure 5-4 presents the persistence schema of a Project Renoir document.
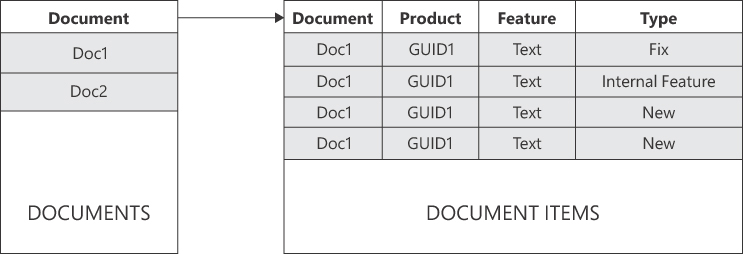
FIGURE 5-4 Persistence schema of a document in Project Renoir.
The figure is made of two blocks. The one on the left represents the Documents table and contains rows labeled “Doc1” and “Doc2” where each references a different document. The block on the right represents bindings between documents, products, features (description and type). It is made of four rows and three columns. The first column contains “Doc1” on all rows. The other three columns contain IDs and names for a product, a feature and a type. An arrow connects the two blocks. The overall sense is showing how a document with a given ID is related to a product and is composed of several features.
Project Renoir also introduces the concept of a document renderer—the actual implementation of a strategy pattern instance aimed at obtaining data records and returning a printable object. The default renderer uses a Razor template to produce a document that can be printed as HTML or PDF. Another renderer could perhaps build a Word document.
Figure 5-5 shows the example Project Renoir solution live in Visual Studio. The solution comprises seven distinct projects: the startup ASP.NET Core web application and six class library projects. (These project nodes are collapsed in Figure 5-5.) As you can see, the projects follow a consistent naming convention, with a common prefix of Youbiquitous.Renoir followed by App, Application, DomainModel, Infrastructure, Persistence, Resources, and Shared.
The rest of this chapter focuses on the application layer and its main purpose: orchestrating tasks to provide a concrete implementation of use cases.
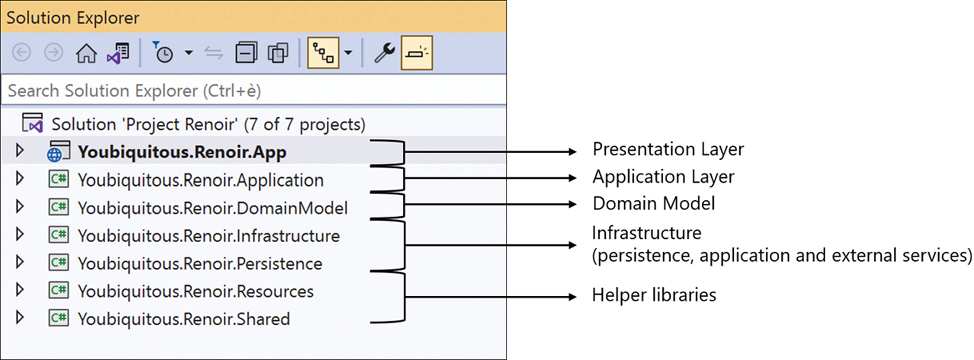
FIGURE 5-5 Project Renoir at a glance in Visual Studio.
The figure is a screenshot that captures a view of the Visual Studio Solution Explorer window when the Project Renoir solution is loaded. The solution is made of seven distinct projects each of which is an expandable node in the view. In the figure, all project nodes are collapsed. Nodes are named in a consistent manner, with a common prefix of Youbiquitous.Renoir followed by App, Application, DomainModel, Infrastructure, Persistence, Resources, and Shared.
Task orchestration lies at the core of building complex applications that seamlessly coordinate multiple processes and workflows. From managing intricate sequences of operations to synchronizing diverse components, task orchestration encompasses the design and implementation of effective systems that are faithful to requirements and business processes, are relatively simple to modify as needed, and can easily be fixed in the event of errors or misinterpretation of business rules.
As the volume of traffic within a system grows, patterns of task orchestration also touch on the fields of efficiency and scalability of operations. However, unless you’re researching ways to improve the capacity of a huge application (for example, Netflix or Amazon subsystems), task orchestration is fairly simple, as represented by a plain flow chart with at most a few chained operations in which the results of one are processed by the other. More often, a task is just a few isolated operations whose results are combined in some response object.
This section focuses on the abstract definition of a task and common practices rather than best practices (as best is quite problematic to define) for orchestrating tasks.
In the current context of a layered software architecture, a task is a cohesive piece of functionality within an application—a specific unit of work that represents a meaningful action in the domain. It’s a piece of code that receives some input and returns some output—as simple as it could be. Ideally, the task does its job relying on the minimum possible number of dependencies on other layers and services.
In the context of a layered architecture, a task is typically a standalone service class or a method in a cross-feature service class. The class lives in the application layer library. The task is triggered by a request from the outside—typically an HTTP request, a form post, or a scheduled action.
If the task is fully represented by its own service class, then the service class is envisioned as a sort of command handler, with just one publicly invocable method that triggers action and a few protected helper methods to do the actual job. In simpler scenarios, the task can just be one method in a cross-feature service class.
Abstractly speaking, a task encapsulates and coordinates interactions between the presentation layer and the domain layer to achieve a specific business goal. It serves as a bridge between the user interface and the domain logic. A task in the application layer is the ultimate implementation of a user story. A user story is a high-level description of a feature or functionality from the perspective of an end-user. It captures the who, what, and why of a particular requirement in a user-centric manner. A user story is intentionally concise. It does not go into the details of a possible technical implementation. Rather, it is a simple placeholder for conversations between the development team and stakeholders to clarify requirements and expectations.
Once a user story is defined, the development team breaks it down into units of works. A task in the application layer is one of these units of work—the root one that coordinates the functioning of most of the others. Other units of work not in the application layer typically relate to designing the user interface and coding data access logic.
A task triggered by some user-interface element to carry out a business operation is not necessarily a self-contained piece of code. Although we have defined a task as the centralized orchestrator of a business operation—and it is at the highest level of abstraction—in practice it may be split into various pieces. In other words, the task is always a single unit of work, but its implementation may not always be an end-to-end flow chart. Rather, it might be split across multiple subtasks invoked asynchronously. The following sections explore both scenarios—a distributed task and a self-contained task.
To make sense of tasks broken up into distinct and asynchronous subtasks, let’s consider the classic checkout task of an e-commerce application. Typically, the checkout operation reaches its peak at the insertion of a new order record in the database. Before that, though, a lot usually happens. The application layer task triggers after all data has been collected. Here are some likely steps of a checkout flow chart:
Validate the input data to see if it coheres with business rules and expectations.
Check the payment history of the customer placing the request and raise flags to other subsystems in the event of non-clean records.
Check whether the ordered goods are in stock. Also check whether the store will run short of goods after serving the order and, if so, notify other parts of the system.
Proceed to payment and interact with any external payment gateway.
If all is well, create any necessary database records.
Email the customer to confirm order as appropriate.
All these steps are orchestrated by the Checkout task in the application layer. Given the complexity of the operations, it might be coded in a standalone CheckoutService class, as schematized here:
public class CheckoutService
{
// Checkout flow chart (until payment)
public static CheckoutResponse PreProcess(CheckoutRequest request)
{
if (Validate(request))
return CheckoutResponse.Fail();
CheckPaymentHistory(request.Customer);
CheckGoodsInStock(request.Order);
// Time to pay...
}
private bool Validate(CheckoutRequest request)
{
:
}
private void CheckPaymentHistory(Customer customer)
{
:
}
private void CheckGoodsInStock(Order order)
{
:
}
:
}Let’s take one step back and look at where in the presentation layer the task is triggered:
public class OrderController : Controller
{
public IActionResult Checkout(CheckoutRequest request)
{
var response = CheckoutService.PreProcess(request);
if (response.Success)
return Redirect("/payment-gateway");
}
public IActionResult PostPayment(PaymentResponse paymentResponse)
{
var response = CheckoutService.Finalize(paymentResponse);
return View("success", response);
}
}In a real-world e-commerce system, payment occurs outside the control of the application according to slightly different workflows depending on the payment gateway. In some cases, you need to redirect to a dedicated page and indicate via configuration your endpoint to call back after physical processing of the payment. If a redirect to some UI is required, the controller must become part of the orchestration. If the gateway exposes an API, then all can be coordinated by the application layer.
The payment gateway may return a direct JSON response or invoke an endpoint. In the former case, post-processing of the payment and actual creation of orders and confirmation emails take place within the application layer. In the latter case, a new request hits the presentation layer, which must then be forwarded to another segment of the checkout service—in the preceding example, the PostPayment controller method.
In the example Project Renoir application, no use case requires interaction with external services except perhaps when (or if) a PDF printing service is used. Creating or editing a document is a simple matter of executing a data-driven sequence of operations—most of the time, within a SQL transaction. Thanks to the numerous data access APIs available in .NET Core (for example, Entity Framework, Dapper, and ADO.NET), the underlying database is abstracted away, and the task implementation is all in a self-contained method. Here’s a possible outline:
public class DocumentService
{
public static CommandResponse SaveChanges(ReleaseNote doc)
{
if (!doc.IsGoodToSave())
return CommandResponse.Fail();
return DocumentRepository.SaveReleaseNote(doc);
}
}It’s admittedly a simple scenario, but not too far from many real-world situations. Most applications are line-of-business systems that, for the most part, need only to perform CRUD operations on database tables. For all these cases, a task matches up closely to a SQL transaction. Any method that implements a task coordinate calls to one or more repositories using the same database connection or distinct connections per operation. A use case implementation forms a bridge between presentation and infrastructure and moves data around, from user interface to persistence and back. Let’s find out more about data transfer and data representation.
For a massively distributed application made of relatively focused and small services, data transfer is fairly simple. It’s all about plain-old C# classes (POCO) serialized as JSON across endpoints. In this context, the concept of a data transfer object (DTO) shines.
A DTO is a lightweight, immutable data container used to exchange information between different parts of a software application. DTOs promote simplicity and security in data communication—simplicity because a DTO is a POCO packaged with data and devoid of behavior, and security because it is inert data, rather than potentially harmful code, that is serialized and travels across the wire.
For every request to a web application, the presentation layer manages data from two sources—one explicit and one implicit. The explicit data source is the data the layer receives through query strings, route parameters, or the body of the request. It’s packaged as plain text within an HTTP request. The implicit data source is the HTTP context that may hold information about the session state, HTTP headers, cookies, and the authentication state—namely, claims about the currently logged user. In observance of separation of concerns, no information in one layer should be directly accessible from another layer. At the same time, any information that must be forwarded should be rendered through plain DTOs.
Implementing DTOs in C#
Conceptually, a DTO is a plain C# class, but C# offers three data structures to code a DTO:
■ Class : A class is a reference type that represents a blueprint for creating objects. Instances of classes are typically allocated on the heap, and variables of class types hold references to the actual objects. Classes support inheritance and are mutable by default, meaning you can change the values of their fields and properties after creating an instance. Finally, a class can contain methods, properties, fields, and events.
■ Struct : A struct is a value type. Instances of structs are typically stack-allocated, making them generally more lightweight than classes. Structs are suitable for representing small, simple data types like points, rectangles, or simple numeric types. They do not support inheritance but can implement interfaces. By default, structs are mutable, but you can create immutable structs using the readonly modifier. Structs are passed by value, meaning they are copied when passed to methods or assigned to other variables. The default equality comparison for structs is based on value comparison. Two structs with the same field values are considered equal.
■ Record : A record is a reference type like a class but optimized for immutability and equality comparison. Records provide a concise syntax for declaring properties and automatically generate value-based equality comparisons. Records are immutable by default, meaning their properties cannot be changed after creation. To modify properties, you must use the with keyword to create a new record with the desired modifications.
Which one should you use for DTOs? Any option is good, but records were introduced with C# 9 in 2020 to provide a tailor-made solution for modeling data-centric classes and DTOs.
Disconnecting from the HTTP context
Usually, most information in the HTTP context of the current request lives and dies within the boundaries of the presentation layer. There are a few relevant exceptions, though.
The unique identifier (for example, email address or username) of the logged user often travels deep down the stack to reach the level of database repositories. This occurs when, for auditing purposes, you log the author of each relevant action. In Project Renoir, for example, you will need to keep track of the author of each version of each document. The name of the author is extracted as a plain string from the authentication cookie and propagated across the layers.
Any web application that uses session state does so because any stored information must then be consumed by some other layer down the stack. A good example is a shop application (for example, a ticketing platform) that needs to track the session ID of the user to retrieve the content of the shopping cart.
Another small piece of information to extract and propagate from the HTTP context may be the language in use, whether it comes from a dedicated culture cookie or the browser’s settings. Finally, one more chunk of data to capture and propagate, if required, is the IP address of the caller.
As a rule, no information in the HTTP context should trespass the boundaries of the presentation layer. Hence, any information that must be consumed elsewhere should be extracted and explicitly passed as an argument, as shown here:
public IActionResult Checkout()
{
var cart = (ShoppingCart) Session["ShoppingCart"];
CheckoutService.PreProcess(cart);
:
}More realistically, you want to be very careful when it comes to session state in modern web applications. Session state refers to the storage of user-specific data on the server between HTTP requests. It’s a simple and secure practice that was widely used during the first three decades of the World Wide Web. Today, however, it faces one huge drawback: conceived to live in the memory of one specific server, the session state is unreliable in a multi-server scenario, which is fairly common today.
Sticky sessions are an alternative. In this case, the load balancer that distributes traffic across the server farm also takes care of consistently routing user requests to the same server during the same session. Another alternative is to implement sessions through a distributed storage such as a SQL database or a cache platform (for example, Redis). A broadly accepted approach is simply to use a distributed cache instead of a session and perhaps use only a session ID as a unique identifier to index data in the cache.
The input view model
In an ASP.NET web application, any user click or API invocation initiates a request handled by a controller class. Each request is turned into an action mapped to a public method defined on a controller class. But what about input data?
As mentioned, input data is wrapped up in the HTTP request, whether in the query string, any form of posted data, or perhaps HTTP headers or cookies. Input data refers to data being posted for the system to take an action.
Input data can be treated as loose values and mapped to primitive variables (int, string, or DateTime) or grouped into a class acting as a container. If a class is used, the ASP.NET model binding subsystem automatically matches HTTP parameters and public properties on the bound class by name.
// Parameters to build a filter on some displayed table of data are expressed as loose values
public IActionResult Filter(string match, int maxRows)
{
var model = FilterTable(match, maxRows);
:
}
// Parameters to build a filter on some displayed table of data are expressed as a class
public IActionResult Filter(Query query)
{
var model = FilterTable(query.Match, query.MaxRows);
:
}The collection of input classes forms the overall input model for the application. The input model carries data in the core of the system in a way that precisely matches the expectations of the user interface. Employing a separated input model makes it easier to design the user interface in a strongly business-oriented way. The application layer will then unpack any data and consume it as appropriate.
The response view model
Any request ultimately generates a response. Often, this response is an HTML view or a JSON payload. In both cases, you can spot a response DTO class that is calculated to finalize the processing of the request. If HTML must be served, the response class holds the data to be embedded in the HTML view. If JSON must be served, the response class just holds the data to be serialized.
In ASP.NET MVC, the creation of an HTML view is governed by the controller that invokes the back end of the system and receives some response. It then selects the HTML template to use and passes it and any data to an ad-hoc system component called the view engine. The view engine then mixes the template and data to produce the markup for the browser.
In summary, the application layer receives input model classes and returns view model classes:
public IActionResult List(CustomerSearchInputModel input)
{
var model = _service.GetListOfCustomers(input);
return View(model);
}Important In general, the ideal data format for persistence differs from the ideal format for presentation. The presentation layer is responsible for defining the clear boundaries of acceptable data, and the application layer is responsible for accepting and providing data in just those formats.
Are domain entities an option?
When it comes to plain CRUD actions on domain entities, is it acceptable to bypass input and view model classes and just use domain entities? Here’s an example:
[HttpPost]
public IActionResult Save(ReleaseNote doc)
{
var response = _service.Save(doc);
return Json(response);
}The Save method in some controller class receives data to save (or create) a release note document—a domain entity in the Project Renoir application. Built-in ASP.NET model binding does the magic of matching HTTP values to properties of the domain entities.
Is this approach recommended? Generally, it is not, for two reasons:
■ It is not entirely secure.
■ It generates dirtier code than necessary.
As far as security is concerned, by using a domain entity as the target of an endpoint, you delegate to the ASP.NET model binding subsystem the task of binding input HTTP data to properties of the entity. The state injected in the domain entity is not entirely under your control.
If the controller method is effectively invoked from the HTML page (and/or JavaScript code) you wrote, then all is well. But what if someone sets up an HTML form injection attack? An HTML form injection attack is when an attacker injects malicious content into the fields of an HTML form to manipulate the application’s behavior or compromise user data. For example, an entity passed down to repositories could set fields you don’t expect to be set or could pass dangerous parameters. This risk undoubtedly exists, but if you require proper validation and sanitize the entity’s content before proceeding with storage or action, you reduce it nearly to zero.
Another reason to avoid putting domain entities at the forefront of a controller’s methods is that conceptually, a domain entity is not a DTO. By design, a DTO has public get/set methods on properties and freely accepts and returns data via properties. A domain entity may be a different, much more delicate beast in which you hardly have public setters and resort to behavioral methods to alter the state. Hence, for model binding to work on domain entities, domain entities must open their properties setters, which may spoil the design of the business domain.
All this said, is this approach acceptable? Speaking pragmatically, yes, it is. But it all depends on how much pragmatism you (are allowed to) support.
Note The point of having public setters in domain classes is broader than discussed so far, as it touches on the design of the persistence model used by Entity Framework (or other data access frameworks) to persist data to some storage. We’ll return to this topic in a moment, and in much more detail in the next chapter.
The application layer receives DTOs from the presentation layer and orchestrates business tasks, such as handling database operations coded in repository classes and building response models for HTML views or JSON payloads. Data must flow from the application layer toward more inner layers, performing various calculations, and return to be massaged in view-oriented models.
Exchanging data with repositories
By design, a repository class encapsulates the logic required to access well-defined aggregates of data. Repositories centralize common data access functionality while decoupling the infrastructure used to access databases from all other layers. Ideally, you aim at having one repository class per aggregate root.
Aggregate root is a DDD term that refers to the principal (root) entity of a cluster of domain entities that are better treated as a single unit of data for the purpose of CRUD operations. For example, in Project Renoir, the ReleaseNote entity is an aggregate root that encompasses the ReleaseNoteItem entity. Put another way, you don’t want to give a release-note item its own independent layer of CRUD operations because the business domain itself doesn’t recognize an item if it is not bound to a release note. Subsequently, any CRUD operation that involves a release-note item necessarily passes through the release note aggregate root. (More on this in the next chapter.)
Note By design, the methods of a repository class accept and return data as lists, or instances, of domain entities.
In the case of update operations, it is essentially up to you to either pass pre-built domain entities to repositories for them to blindly process or just pass loose values and have repositories create any necessary domain entities. The more work you delegate to repositories, the harder it gets to produce a generic structure of repository classes that would dramatically reduce the number of necessary classes.
In the case of queries, the application layer obtains data from the persistence layer expressed as domain entities. This data may flow into rendering models without concerns. If the rendering model produces HTML, then its server-side Razor views process it to prepare inert HTML for the browser. If the rendering model produces JSON, the domain entity is serialized into inert data and reduced to a plain DTO.
Note For JSON payloads obtained from the serialization of domain entities, you may face additional issues. By nature, domain entities are inherently intricate, with classes that refer to each other following the connections of the real-world business domain. When it comes to serialization, you risk obtaining quite large chunks of data or, worse, data incurring in cycles. Therefore, it is recommended that you always export relevant data of domain entities to ad hoc DTOs before serializing them as JSON.
Persistence model versus domain model
Abstractly speaking, the domain model is a plain software model expected to mirror the business domain. It is not strictly related to persistence but serves the supreme purpose of implementing business rules. Yet, at some point, data must be read from storage and saved. How does this happen?
If you save data using, say, non-O/RM frameworks (for example, a stored procedure or ADO.NET), then no confusion arises around the role of the domain model. Moreover, its design can follow the characteristics of the business domain without conflicts or constraints. If you use an O/RM, however, things might be different—especially if the O/RM you use is a fairly powerful and invasive one, like Entity Framework. An O/RM needs its own model of data to map to database tables and columns. Technically, this is a persistence model.
What’s the difference between a domain model and a persistence model? A domain model that focuses on logic and business rules inevitably has classes with factories, methods, and read-only properties. Factories, more than constructors, express the logic necessary to create new instances. Methods are the only way to alter the state of the entities according to business tasks and actions. Finally, properties are simply a way to read the current state of an instance of the domain model.
A domain model is not necessarily an entity relationship model. It can be simply a collection of sparse and loose classes that just contain data and behavior. In contrast, a persistence model matches the target database exactly. Its classes must honor relationships between tables and map to columns via properties. Furthermore, classes of a persistence model have no behavior and are effectively plain DTOs.
If the persistence model and the domain model are not the same thing, are both necessary? Technically speaking, you should have both, and you should introduce mapper classes to go from, say, the ReleaseNote entity rich class to the anemic class that represents how the release-note data is laid out on some (relational) database table. This is often a huge pain in the neck. Some middle ground is possible, though: using a partially pure domain model.
The domain model is initially designed to be pure and business-oriented with value types, factories, behavior, and private setters. At some point, Entity Framework stops saving and loading the domain model, complaining that it misses a default constructor or a public setter. By simply releasing the constraints as they show up and isolating the database mapping in a distinct partial class, you can have an acceptable compromise: a sufficiently elegant and independent domain model that also works well as a persistence model. (More on this in the next chapter.)
Dealing with business logic errors
Any service class method in the application layer is invoked to execute either a command or query for some segment of the current application state. In the latter case, all it is expected to return is a response object, empty or in a default state, in case of failure. If the requested operation is a command, it should return an application-specific object that represents the response to the execution of a command. Project Renoir uses a class like the following:
public class CommandResponse
{
public bool Success { get; }
public string Message { get; }
:
public CommandResponse(bool success = false, string message = "")
{
Success = success;
Message = message;
}
public static CommandResponse Ok()
{
return new CommandResponse(true);
}
public static CommandResponse Fail()
{
return new CommandResponse();
}
}This class can be extended and expanded in many ways—for example, to receive an exception object and to carry additional strings representing IDs, URLs, or even error codes. It serves two main purposes: reporting an error message and reporting a flag that clearly indicates whether the operation was successful.
The ASP.NET platform moved toward a revisited model-view-controller (MVC) pattern around 2010. Since the beginning, controllers—the beating heart of the presentation layer—have been designed as a fairly thick and highly flexible layer of code. As a result, every request involves a long trip through middleware to reach the final destination of an action method. In ASP.NET Core, nearly all middleware services are optional, and the developer is in full control of the length of the pipeline that connects an HTTP request to some action method.
Once within the boundary of an action method, a broadly accepted practice is to offload work related to the implementation of the use case to an application service. But how should you physically code an application layer?
Earlier in this chapter, Figure 5-5 showed the Project Renoir solution in Visual Studio, in which it was evident that the application layer was a separate class library project. In this class library project, one can expect to have a collection of application service classes. Each method in these classes delivers the end-to-end implementation of a use case.
Application service classes (and, why not, solution folders) serve the sole purpose of grouping use-case workflows into coherent and consistent aggregates. The granularity that counts is that of public methods rather than public classes. This said, in general, you might want to aim at having a one-to-one relationship between controller and application service classes so that, say, DocumentController offloads its use cases to an instance of DocumentService and its methods.
An application service blueprint
Let’s try to build a skeleton for an application service that serves as the blueprint for any classes in the application. In Project Renoir, all application service classes inherit from a common base class: ApplicationServiceBase. The inheritance is set up for the sole purpose of easily sharing a subset of features among all application service classes.
public class ApplicationServiceBase
{
public ApplicationServiceBase(RenoirSettings settings) :
this(settings, new DefaultFileService(settings.General.TemplateRoot))
{
}
public ApplicationServiceBase(RenoirSettings settings, IFileService fileService)
{
Settings = settings;
FileService = fileService;
}
/// <summary>
/// Reference to application settings
/// </summary>
public RenoirSettings Settings { get; }
/// <summary>
/// Reference to the app-wide file service
/// (i.e., required to load email templates from files)
/// </summary>
public IFileService FileService { get; }
}This example base class shares two functions with all its inheritors: application settings and file services. We’ll return to application settings in a moment. For now, let’s focus on the file I/O service.
Abstracting file access
The IFileService optional interface abstracts access to the file system in case plain text files must be read from and saved to disk. A possible use case for the file service is reading email templates or any sort of configuration data from disk files deployed as part of the web application.
public interface IFileService
{
string Load(string path);
void Save(string path, string content);
}If your application makes intensive use of files, you can extend the interface as much as needed. As long as text files are all you need, you can start from the following minimal implementation:
public class DefaultFileService : IFileService
{
private readonly string _root;
public DefaultFileService(string root = "")
{
_root = root;
}
public string Load(string path)
{
var file = Path.Combine(_root, path);
if (file == null)
return null;
var reader = new StreamReader(file);
var text = reader.ReadToEnd();
reader.Close();
return text;
}
public void Save(string path, string content)
{
throw new NotImplementedException();
}
}Any implementation of IFileService lives in the infrastructure layer as a system service to manage the file system visible to the application, but it is mostly managed by the application layer.
Implementing a use-case workflow
To form a clear idea of the code that goes into an application layer class, let’s focus on a common scenario: the password reset. If a user forgets a password, they click a link on the login page to initiate a controller method like the one that follows:
public partial class AccountController
{
[HttpGet]
[ActionName("recover")]
public IActionResult DisplayForgotPasswordView()
{
var model = SimpleViewModelBase.Default(Settings);
return View(model);
}
// More code
}The user then enters the email address where they want to receive the link to reset the password and posts the form. The following action method captures this:
public partial class AccountController
{
private readonly AuthService _auth;
public AccountController(HospiSettings settings, IHttpContextAccessor accessor)
: base(settings, accessor)
{
// Alternatively, add AuthService to DI and inject the reference in the constructor
_auth = new AuthService(Settings);
}
[HttpPost]
[ActionName("recover")]
public IActionResult SendLinkForPassword(string email)
{
var lang = Culture.TwoLetterISOLanguageName;
var response = _auth.TrySendLinkForPasswordReset(email, ServerUrl, lang);
return Json(response);
}
// More code
}The _auth variable references an instance of the application layer class in charge of account-related use cases. The class is named AuthService. The password-reset workflow is orchestrated from within the TrySendLinkForPasswordReset method. This method receives as loose values the email address of the requesting user, the root URL of the current application, and the ISO code of the language set on the current thread. The method returns a command response object with a Boolean flag to denote success or failure and an optional error message to present to the user.
public async Task<CommandResponse> TrySendLinkForPasswordReset(
string email, string server, string lang)
{
// 1. Get the user record using the email as the key
// 2. Generate a token (GUID) and save it in the user record
var user = UserLoginRepository.PrepareAccountForPasswordReset(email);
// 3. Prepare the text of parameters to be inserted in the email text
var parameters = EmailParameters.New()
.Add(EmailParameters.Link, $"{server}/account/reset/{user.PasswordResetToken}")
.Build();
// 4. Finalize and send email
var message = _emailService.ResolveMessage<PasswordResetResolver>(lang, parameters);
var response = await _emailService.SendEmailAsync(email, "subject ...", message);
return response;
}In Project Renoir, the message resolver is an abstraction for a component capable of retrieving the actual email template from a disk file (via FileService) or a database table. The template accepts parameters provided through an aptly built dictionary. The email service is another infrastructure service that works as a wrapper around the actual email API, which, in Project Renoir, is SendGrid.
In a nutshell, any method of an application layer class implements all the steps necessary to carry out a given business operation by orchestrating the behavior of one or more repositories and infrastructural services. It returns plain data for query actions and a command response for update actions.
Addressing cross-cutting concerns
In the pursuit of building maintainable and extensible applications, developers often encounter cross-cutting concerns. These are aspects of software that transcend individual components, affecting multiple layers and functionalities. Because all workflows are triggered from the application layer, all references to cross-cutting functions should also be accessible from this layer. Typical cross-cutting concerns are logging, permissions, error handling, and caching. Before exploring any of these, though, let’s talk about sharing global application-wide settings.
Application settings are configurable parameters and options that can be adjusted within the application to control its behavior, appearance, and functionality. These settings should not be confused with user settings. Application settings are global, are loaded once, and remain constant until they are changed by the development team and the application is restarted.
In ASP.NET Core applications, settings are loaded upon application startup. Data is collected from several sources—mostly, but not limited to, JSON files—and arranged in a data structure accessible to the rest of the application.
Merging data from various sources
In ASP.NET Core, settings are first composed in a graph object with a dedicated API to inspect and set. You use a path-based addressing pattern to reach any desired element in the graph. The graph is generated by merging data from a variety of data sources. Here’s an example taken from the startup class of the Project Renoir project:
private readonly IConfiguration _configuration;
public RenoirStartup(IWebHostEnvironment env)
{
_environment = env;
var settingsFileName = env.IsDevelopment()
? "app-settings-dev.json"
: "app-settings.json";
var dom = new ConfigurationBuilder()
.SetBasePath(env.ContentRootPath)
.AddJsonFile(settingsFileName, optional: true)
.AddEnvironmentVariables()
.Build();
_configuration = dom;
}The _configuration member accesses the graph built from the contents of the settings JSON file and all available environment variables. Of course, more JSON files could be added, as can data from any valid setting providers you have or build.
It’s a matter of preference and attitude but, for what it’s worth, my personal stance is that accessing loaded settings via the members of the IConfiguration interface is annoying and uncomfortable. There are two alternative approaches to it: using the IOptions
Settings-related classes
Whether you use direct binding or IOptions
public class RenoirSettings
{
public const string AppName = "RENOIR";
public RenoirSettings()
{
Languages = new List<string>();
General = new GeneralSettings();
Run = new RunSettings();
}
public GeneralSettings General { get; set; }
public List<string> Languages { get; set; }
public RunSettings Run { get; set; }
}GeneralSettings and RunSettings are similar classes that just focus on a subset of the application settings—project information in GeneralSettings and operational behavior (for example, functions to mock in debug mode, extra logging enabled, and so on) in RunSettings. The Languages property indicates the languages supported by the user interface.
The content of the configuration DOM is mapped to the hierarchy of settings classes using either the IOptions
public void ConfigureServices(IServiceCollection services)
{
// Need IOptions<T> to consume, automatically listed in DI engine
services.Configure<RenoirSettings>(_configuration);
// Direct binding, explicitly added to the DI engine
var settings = new RenoirSettings();
_configuration.Bind(settings);
services.AddSingleton(settings);
}As a result, whether through IOptions
Injecting settings in application services
Linked to the DI system, settings are injected into the controllers and from there passed to all application services. The ability for application services to access global settings is crucial for orchestrating tasks in a manner that is consistent and coheres with business requirements.
Here’s an excerpt from an example application service—the one that takes care of authentication in Project Renoir. The service is invoked directly from the AccountController class:
public class AccountService : ApplicationServiceBase
{
public AccountService(RenoirSettings settings) : base(settings)
{
}
public AuthenticationResponse TryAuthenticate(AuthenticationRequest input)
{
// More code
}
:
}The singleton object with all settings injected during startup becomes available to any application service class that inherits from ApplicationServiceBase. Should settings be required down the stack (for example, in repositories or in domain services), any needed data will be passed as loose values. The following code snippet illustrates this point:
public CommandResponse TryConfirmAccount(ConfirmAccountRequest input)
{
return AccountRepository
.ConfirmAccount(input.Email, Settings.Run.ConfirmTokenLifetime);
}The service method responsible for handling the click that confirms the creation of a new account receives the default expiration time to check whether the link the user received is still valid. The token lifetime is globally indicated in the settings and passed as a loose value.
Hot reload of application settings
So far, application settings—whether loaded through IOptions
Whatever route you explore to achieve this must take into account the fact that after the ASP.NET Core DI container has been finalized, no embedded registrations can be changed. No matter what you manage to do in your code (for example, recalculating settings on the fly), there’s no way to replace the instance that has been stored in the container via IOptions
■ Use IOptionsSnapshot
■ Use IOptionsMonitor
■ Replicate the same underlying pattern of the IOptionsXXX interface in your direct-binding logic.
Code wise, the main difference between IOptionsXXX interfaces and direct binding logic is that in the former case, the controller doesn’t receive the settings reference directly, but rather receives a wrapper to it:
public AccountController(IOptions<RenoirSettings> options)
{
// Dereference the settings root object
Settings = options.Value;
}If the interface is IOptionsMonitor, you use CurrentValue instead of Value. How does this mechanism circumvent the limitation of the ASP.NET DI container that doesn’t allow changes past the startup phase? Quite simply, it wraps the actual settings in a container class. The container class reference is added as a singleton to the DI system and never changes. Its content, however—the actual settings—can be programmatically replaced at any time and be instantaneously available. By manually coding this artifact yourself, you can also hot-reload settings in the case of direct binding. (See the Project Renoir source code for more details.)
Logging is crucial for tracking application behavior, diagnosing reported issues, and monitoring performance. It provides valuable insights into errors, events, and user interactions, aiding in effective troubleshooting and ensuring a stable and reliable application. For any application, you should always seriously consider building an application-wide logging infrastructure that handles exceptions raised in production and audits steps taken during various application tasks. In ASP.NET Core, logging is performed by tailor-made logger components. All logger instances pass through the system-provided logger factory—one of the few services added to the DI system by default.
Note In ASP.NET Core applications, only the exceptions processed through the UseExceptionHandler middleware are automatically logged. This is less than the bare minimum for any application as it leaves the application completely devoid of logging when in production, where a different middleware is typically used.
Registering loggers
Unless you override the default web host builder in program.cs—the bootstrapper of any ASP.NET Core application—a few loggers are automatically registered. (See Table 5-2.)
Table 5-2 List of default ASP.NET loggers
| Logger | Storage and description |
|---|---|
| Console | Displays events in the console window. No actual storage takes place through this provider. |
| Debug | Writes events to the debug output stream of the host platform. In Windows, this goes to a registered trace listener and commonly ends up being mirrored in a dedicated view of the integrated development environment (IDE). In Linux, any log is written to a system file log. |
| EventSource | Writes events on a tailor-made logging platform specific to each hosting platform. On Windows, this uses the Event Tracing for Windows (ETW) tool. |
| EventLog | Writes events to the Windows Event Log (registered only on Windows). |
The default configuration likely won’t work for most common applications. In the startup phase, you can edit the list of registered logging providers at your leisure. The following code from the ConfigureServices method of the startup class clears out all default loggers and adds only selected ones:
services.AddLogging(config =>
{
config.ClearProviders();
if(_environment.IsDevelopment())
{
config.AddDebug();
config.AddConsole();
}
});You may have noticed that in the preceding code snippet, the Console and Debug loggers are added only if the application is configured to run from a host environment labeled for development purposes. The net effect of this code is that the application has no logger registered to run in production mode.
Production-level loggers
Both the Debug and Console loggers are useful during the development phase, albeit with different target outputs. The Debug logger is specialized for use with debuggers, while the Console logger is designed to display log messages directly in the command-line interface. Both allow developers to quickly see log messages while working on the application locally. Neither of these loggers is well-suited for the production environment, however. Fortunately, there are alternatives.
The loggers shown in Table 5-3 provide more comprehensive and powerful logging and monitoring services for production environments, offering deeper insights into application performance and user behavior. They are not part of the .NET Core framework and require a separate NuGet package and an Azure subscription.
Table 5-3 Production-level loggers provided by Microsoft
| Logger | Storage and description |
|---|---|
| AzureAppServicesFile | Writes logs to text files created in an Azure App Service application’s file system. |
| AzureAppServicesBlob | Writes logs to a blob storage in an Azure Storage account. |
| ApplicationInsights | Writes logs to Azure Application Insights, a service that also provides tools for querying and analyzing telemetry data. (More on this in a moment.) |
Note As weird as it may sound, ASP.NET Core doesn’t come with a logging provider capable of writing logs to plain disk files. To achieve that, you must resort to a third-party logging provider such as Log4Net, NLog, Serilog, or one of many others. While each library has its own documentation, using most third-party loggers requires only a couple more steps than using a built-in provider—specifically, adding a NuGet package to the project and calling an ILoggerFactory extension method provided by the framework.
Application Insights is designed for production environments. It enables you to gain valuable insights into how your application is performing in the real world, helping you to identify and resolve issues proactively. With Application Insights, you can collect, store, and analyze various types of data—not just explicitly written log records—including exceptions, request metrics, and custom telemetry data. Application Insights also provides sophisticated querying and visualization capabilities, making it a robust solution for monitoring and troubleshooting applications at scale.
Here’s how to set up Application Insights telemetry in the startup class:
public void ConfigureServices(IServiceCollection services)
{
// Telemetry
var key = "...";
if (_environment.IsDevelopment())
services.AddApplicationInsightsTelemetry(key);
else
services.AddApplicationInsightsTelemetry();
// More code
}If you deploy your application to an Azure app service, you can configure your Application Insights subscription in the Azure portal. Otherwise, you need to explicitly provide the instrumentation key. Note, however, that a local emulator of Application Insights is available free of charge, which allows you to first test the functionality and migrate to the live service (and hence start paying) later.
In summary, a scenario in which you use console and debug logging in development and Application Insights in production is quite reasonable. In production, you can automatically log unhandled exceptions, various telemetry, and any other data you programmatically indicate through the logger.
Note You don’t need to host your application on Azure to use Application Insights. You do need to have a valid Azure subscription for the Application Insights resource, but your application can be hosted anywhere else and just log to Azure.
Configuring loggers
You can configure a running logger for one key aspect: the relevance of messages. Expressed through the LogLevel property, relevance is measured on a scale from 0 to 6, where 0 merely traces activity, 5 blocks critical errors, and 6 means no logging. In between, there are levels for debug messages (1), informational messages (2), warnings (3), and errors (4).
You commonly set the log level from within a JSON property in the settings file, as shown here:
"Logging": {
"LogLevel": {
"Default": "Warning" // Logs only warnings and errors
}
}This script is interpreted as “ignore all log messages of a level below warning for any categories of message and all registered providers.” Of course, you can be more specific by assigning different log levels per category and provider, like so:
"Logging": {
"LogLevel": {
"Default": "Warning"
}
},
"Console": {
"LogLevel": {
"Default": "Information",
"Microsoft.AspNetCore": "Warning"
}
}This script is read as “ignore all log messages of a level below warning for any categories of message and all registered providers but the Console provider. For this one, instead, start logging at the Information level but ignore informational messages that are tagged as coming from Microsoft.AspNetCore.”
The logger configuration doesn’t need to be mapped to the root application settings objects. All you need to do is place one or more calls to the following line, changing the name of the section as appropriate (Logging, Console, and so on):
services.AddLogging(config =>
{
config.ClearProviders();
config.AddConfiguration(_configuration.GetSection("Logging"));
if(_environment.IsDevelopment())
{
config.AddDebug();
config.AddConsole();
}
});Application Insights gets its own settings automatically if you add an ApplicationInsights section in the JSON file with exactly the same syntax as for other loggers. The default behavior of Application Insights, however, is to capture only logs above warning level from all categories.
Logging application facts
Logging providers work by writing messages to their respective storage destinations. A log, therefore, is a related set of messages identified by name. The application code writes to a log through the services of the ILogger interface.
You can create a logger in a couple of different ways. One way is to do so right from the factory. The following code snippet shows how to create a logger and give it a unique name. Typically, the logger logs within the scope of a controller.
public class DocumentController : Controller
{
private ILogger _logger;
public DocumentController(ILoggerFactory loggerFactory)
{
_logger = loggerFactory.CreateLogger("Document Controller");
_logger.LogInformation("Some message here");
}
}In this case, the CreateLogger method gets the name of the log and creates it across registered providers. The LogInformation method is just one of the many methods that let you write to the log. The ILogger interface exposes one logging method for each supported log level—for example, LogInformation to output informational messages and LogWarning and LogError for more serious messages. Logging methods can accept plain strings, format strings, and even exception objects to serialize.
The other way is to simply resolve the ILogger
public class DocumentController : Controller
{
private ILogger _logger;
public DocumentController(ILogger<DocumentController> logger)
{
_logger = logger;
}
// Use the internal member in the action methods
...
}The log that gets created in this case uses the full name of the controller class as a prefix. Here’s how to log a message when a (managed) exception occurs:
try
{
// Code that fails
}
catch (Exception e)
{
// Apply logic to determine the message and logs as error
var text = DetermineLogMessage(e);
_logger.LogError(text);
}Creating a logger for each controller can be annoying and even error-prone. Let’s see how to abstract things and save the logger in a common controller base class instead.
Embedding loggers in a base controller
It’s a good practice to have all controller classes of an application be created by inheriting from a base class. In this way, some common pieces of information can be easily packaged up in one place so they’re easily accessible from any action method.
public class RenoirController : Controller
{
public RenoirController (AppSettings settings,
IHttpContextAccessor accessor,
ILoggerFactory loggerFactory)
{
Settings = settings;
HttpConnection = accessor;
Logger = loggerFactory.CreateLogger(settings.General.ApplicationName);
}
// Helper properties: server base URL
protected string ServerUrl => $"{Request.Scheme}://{Request.Host}{Request.PathBase}";
// Helper properties: current culture
protected CultureInfo Culture => HttpContext
.Features
.Get<IRequestCultureFeature>()
.RequestCulture
.Culture;
// Helper properties: standard logger
protected ILogger Logger { get; }
}Note Along with application settings and HTTP access, logging is another functionality to enable at the base controller level.
In the complex world of software, exceptions are inevitable. Robust exception handling is vital for maintaining system stability and ensuring graceful error recovery. This section delves into the intricacies of exception handling within the application layer, covering topics such as exception propagation and fault tolerance.
Exception-handling middleware
ASP.NET Core’s exception-handling middleware acts as a safety net, using your custom logic to capture any unhandled exceptions to arrange an appropriate error user interface:
app.UseExceptionHandler("/app/error");The UseExceptionHandler middleware simply routes control to the specified URL that is responsible for any user interface and displayed error information. Although you can access and attach any context information to the view, during development, it is preferable to use another middleware, as shown here:
if (settings.Run.DevMode)
app.UseDeveloperExceptionPage();
else
app.UseExceptionHandler("/app/error");The UseDeveloperExceptionPage automatically provides stack-trace information and a snapshot of the HTTP context at the time of the exception. This information is invaluable during development to track down unexpected behavior. A common pattern for forking middleware is the following, slightly different version of the preceding snippet:
if (environment.IsDevelopment())
app.UseDeveloperExceptionPage();
else
app.UseExceptionHandler("/app/error");Overall, I prefer to take full control of the conditions that determine the switch. This is easier done with a custom setting than with system information. There are two types of scenarios you want to be able to address properly:
■ Testing the production error page
■ Temporarily enabling development-style functions on a production system to diagnose a reported issue
Of the two, only the former can be done by simply changing the target environment from Visual Studio. The latter requires more control and hot reloading of settings.
Accessing exception details
The error handling page (/app/error in the preceding snippet) is a single-entry point that receives no additional parameter and is left alone to try to figure out what has gone wrong. Here’s a possible implementation of the method in the controller class:
public IActionResult Error()
{
var exception = HttpContext.Features.Get<IExceptionHandlerFeature>()?.Error;
var model = new ErrorMainViewModel(Settings, exception);
// NOTE: You're recovering here, so log-level may be less than error
// and the message may be customized
Logger.LogWarning(exception.Message);
return View(model);
}The HTTPContext.Features service can retrieve the last error set. From there, you retrieve the logged exception and pack it for the subsequent Razor view.
Custom exception classes
Using an application-specific or team-specific base exception class gives you the flexibility you need to structure the error page and make exceptions easier to locate in potentially long system logs. A custom exception class might be more than a thin layer of code that simply presents a different name. For example, here’s the one in Project Renoir:
public class RenoirException : Exception
{
public RenoirException(string message) : base(message)
{
RecoveryLinks = new List<RecoveryLink>();
ContinueUrl = "/";
}
public RenoirException(Exception exception) : this(exception.Message)
{
ContinueUrl = "/";
}
// Optional links to go after an exception
public List<RecoveryLink> RecoveryLinks { get; }
// Default URL to go from an exception page
public string ContinueUrl { get; private set; }
// Add recovery URLs (with display text and link target)
public RenoirException AddRecoveryLink(string text, string url, string target = "blank")
{
RecoveryLinks.Add(new RecoveryLink(text, url, target));
return this;
}
public RenoirException AddRecoveryLink(RecoveryLink link)
{
RecoveryLinks.Add(link);
return this;
}
}Displaying an error page that recovers from an exception is not sufficient. If the error is tolerable and the user can continue within the application, it would be nice to supply a list of clickable links.
When to bubble, reformulate, or swallow
Often, multiple operations are coordinated within the methods of an application layer class. But what if one of the methods—a given step in a workflow—fails and throws an exception?
In some cases, you might want the whole workflow to fail. In others, you might prefer that the workflow continue until the end and report which steps didn’t complete successfully. This means that any thrown exception has three possible outcomes:
■ It bubbles up until it is captured by the application error safety net.
■ It is captured and rethrown (reformulated) with a different name and/or message.
■ It gets swallowed and disappears as if it never happened.
Let’s explore a few scenarios, starting with the most common situation—the code spots some inconsistent situation and throws an exception, the current module stops execution, and the burden of recovering shifts to the caller:
public bool TrySaveReleaseNote(Document doc)
{
if (doc == null)
throw new InvalidDocumentException()
.AddRecoveryLink(...)
.AddRecoveryLink(...);
// More code
}Swallowing an exception is as easy as setting up an empty try/catch block, as shown here:
try
{
// Code that may fail
}
catch
{
}Usually, code assistant tools signal an empty try/catch as a warning, with reason. However, swallowing exceptions may be acceptable if it is done with full awareness and not just to silence a nasty bug. Reformulating an exception looks like this:
try
{
// Code that may fail
}
catch(SomeException exception)
{
// Do some work (i.e., changing the error message)
throw new AnotherException();
}Especially within the application layer, though, you often want to silence exceptions but track them down and report facts and data within a response object. For example, suppose the application layer method triggers a three-step workflow. Here’s a valid way to code it:
public CommandResponse ThreeStepWorkflow( /■ input */ )
{
var response1 = Step1(/■ input */ );
var response2 = Step2(/■ input */ );
var response3 = Step3(/■ input */ );
var title1 = "Step 1";
var title2 = "Step 2";
var title3 = "Step 3";
return new CommandResponse
.Ok()
.AppendBulletPoint(response1.Success, title1, response1.Message)
.AppendBulletPoint(response2.Success, title2, response2.Message)
.AppendBulletPoint(response3.Success, title3, response3.Message);
}The bullet point method acts as an HTML-oriented string builder and creates a message made of bullet points of different colors, depending on the status of the related CommandResponse object. (See Figure 5-6.)
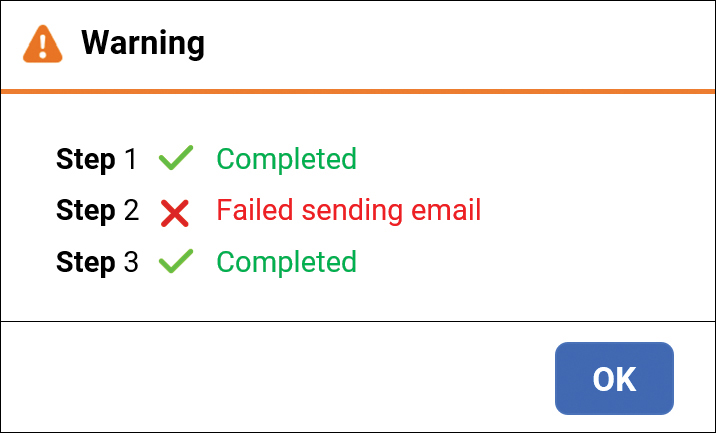
FIGURE 5-6 An example message box for a multi-step workflow in which exceptions have been silenced.
The figure is an example screenshot that represents a dialog presented to the user at the end of a multi-step operation. It has a clickable button (OK) at the bottom to dismiss it. The title is Warning and is decorated with a yellow icon. The content is articulated on three lines of text, each of which represents the outcome of a step: name of the step, icon for success or failure and an error message.
Caching is a technique that stores frequently accessed data in a temporary memory location rather than the original source for faster access. Typically, a cache saves data in memory, reducing the need to query a database for every request. The use of a caching mechanism improves system responsiveness and results in reduced processing time and network load.
In-memory cache
In ASP.NET Core, the most basic form of caching is built upon the IMemoryCache interface and is nothing more than a cache stored in the memory of the web server. A memory cache is just a sophisticated singleton dictionary shared by all requests. Items are stored as key-value pairs.
The memory cache is not limited to plain read/write operations but also includes advanced features such as item expiration. Item expiration means that each stored item can be given a (sliding or absolute) expiration and is removed at some point. This keeps the size of the cache under control and mitigates data staleness.
When in-memory cache applications run on a server farm with multiple servers, it is crucial to ensure that sessions are sticky. Sticky sessions, in fact, guarantee that requests from a client are always directed to the same server. To avoid sticky sessions in a web farm, you need to switch to a distributed cache to avoid data consistency issues.
Distributed cache
A distributed cache is a cache shared by multiple application servers and stored externally from those servers. A distributed cache provides two key benefits:
■ It enables efficient data sharing by centralizing global data in a single place regardless of the number of servers in a web farm or cloud environment.
■ It reduces redundant data fetching from primary sources such as databases.
Furthermore, by offloading cache memory to an external process, it optimizes response times for a more efficient application experience.
ASP.NET Core provides the IDistributedCache interface to unify the programming model for caches regardless of the actual store. No realistic implementation of this interface is provided as part of the ASP.NET Core platform. However, a few free NuGet packages exist, as do commercial products such as Redis and NCache. In addition, you can use the AddDistributedSqlServerCache class, which employs a SQL Server database as its backing store. Redis and NCache store data in memory and are significantly faster than a SQL Server-based cache.
Today, in-memory cache is just not an option anymore. A distributed cache like Redis is the de facto standard for any situation in which an intermediate cache proves necessary. However, the local or distributed nature of the cache is only one facet of the whole problem. Local and distributed refer to the store location of the data. In contrast, caching patterns refers to how cached data is retrieved by the application layer code. There are two caching patterns: cache aside and write-through.
Note To be precise, ASP.NET comes with a class that provides in-memory distributed cache: AddDistributedMemoryCache. However, it doesn’t really work as a real distributed cache because data is saved in the memory of each server. It exists only for testing purposes.
The cache-aside pattern
The cache-aside pattern is an extremely popular approach. With this pattern, when the application needs to read data from the database, it checks the cache to see if the data is available in memory. If the data is found in the cache (in other words, you have a cache hit), the cached data is returned, and the response is sent to the caller. If the data is not available in the cache (that is, you have a cache miss), the application queries the database for the data. The retrieved data is stored in the cache, and it is then returned to the caller.
A cache-aside cache pattern only caches data that the application requests, making the cache size quite cost-effective. Furthermore, its implementation is straightforward, and its performance benefits are immediately visible. That said, it is worth mentioning that with the cache-aside pattern, data is loaded only after a cache miss. Hence, any requests that end up in a cache miss take extra time to complete due to additional round trips to the cache and database.
Note Despite its apparent unquestionable effectiveness, the cache-aside pattern is not applicable everywhere. In situations in which requested data may vary significantly, keeping previously requested data in cache incurs a cost beyond resources and performance. In such (rather borderline) situations, spending more time optimizing database access and skipping the cache layer entirely is a sounder approach.
The write-through pattern
With the write-through caching pattern, data updates are first written to the cache and then immediately propagated to the underlying data storage (for example, a database). When an application modifies data, it updates the cache and waits for the cache update to be successfully committed to the storage before acknowledging the write operation as complete. This ensures that the cache and the data storage remain consistent.
Although write-through caching offers data integrity and reduces the risk of data loss, it can introduce higher latency for write operations because it must wait for the data to be written to both the cache and storage.
Where does caching belong?
In a layered architecture, caching typically sits between the presentation layer and the data storage layer. The application layer is therefore the first place where one can think to install caching—maybe.
Generally, a caching mechanism intercepts data requests from the application before they reach the data storage layer. When a request for data is made, the caching mechanism checks whether the data is already cached. If so, the cached data is returned to the application, avoiding the need to access the original data source through repositories. If not, the caching mechanism retrieves it from the data storage layer, caches it for future use, and then delivers it to the application. Here’s some pseudo-code to illustrate this process:
public AvailableDocumentsViewModel GetAvailableDocuments(long userId)
{
// This is likely just one step of a longer workflow
// Cache-aside pattern being used
var docs = _cache.Get("Available-Documents");
if (docs.IsNullOrEmpty())
{
docs = DocumentRepository.All();
_cache.Set("Available-Documents", docs);
}
// Proceed using retrieved data
...
}This code works, but it’s a bit too verbose because the access for each chunk of cached data takes the same few lines every time. As an alternative, consider embedding the caching mechanism in the repositories. Here’s how:
public AvailableDocumentsViewModel GetAvailableDocuments(long userId)
{
// This is likely just one step of a longer workflow
// Cache injected in the data repository (as an instance of IDistributedCache)
var docs = DocumentRepository.All(_cache);
// Proceed using retrieved data
...
}The resulting code is much more compact. From the perspective of the application layer, there’s just one counterpart to ask for data, period.
Note For simplicity, this code—while fully functional—doesn’t use DI. DI forces you to keep the code clean and more testable but doesn’t add programming power. It also clogs constructors and renders them unreadable. As weird as it may sound, DI is a matter of trade-offs, but clean boundaries are essential.
Organizing data within the cache
A cache is a flat key-value dictionary. When distributed, it’s also a remote dictionary. In this case, any cached data is transmitted over the network, at which point it must be serialized. The serialization process involves traversing existing objects, extracting their data, and converting it into serialized data.
The main difficulty with this approach is ensuring that a cached object is serializable, whether to a binary or JSON stream. A common issue is facing circular references within complex object graphs. Circular references may force you to treat data through plain DTOs with the addition of yet another layer of adapters to and from native domain entities.
Related to serialization is how you flatten cached data from the entity-relationship model of a classic SQL database to the key-value space of a dictionary. Possible options are as follows:
■ Try to keep cache data one-to-one with database tables and make any data joins and grouping in memory.
■ Create ad hoc serializable graphs, use them frequently, and cache them as is.
■ Organize data in domain-specific entities that don’t have a direct database counterpart but that are used in various use cases.
In the first case, packing cache in repositories is a good option. For the other two scenarios, the recommendation is to create yet another layer of software, called the data-access layer, between the application layer and the infrastructure/persistence layer. If the shape of the cached data looks like domain entities, the data access layer can coincide with the domain services layer covered in Chapter 7, “Domain services.”
SignalR is a real-time, open-source library developed by Microsoft to add bidirectional communication capabilities to web applications. Among other things, SignalR enables real-time updates and the sending of notifications from the server to connected browsers. Here, I want to address a scenario that involves setting up a mechanism for the back end to notify clients about the progress of potentially long-running operations, whether end-to-end or fire-and-forget.
Setting up a monitoring hub
In the Configure method of the startup class, the following code sets up a SignalR hub. A hub is a high-level programming abstraction that acts as the main communication pipeline between the server and connected clients. It serves as the central point for sending and receiving messages in real time. The hub manages the connection life cycle, including establishing connections, maintaining the connection state, and handling reconnections.
App.UseEndpoints(endpoints =>
{
endpoints.MapControllerRoute(
name: “default”,
pattern: “{controller=home}/{action=index}/{id?}”);
// SignalR endpoint for monitoring remote operations
endpoints.MapHub<DefaultMonitorHub>(DefaultMonitorHub.Endpoint);
});A SignalR hub is essentially a class on the server side that inherits from the Hub class provided by the library. Within this Hub class, developers can define methods that can be called by clients to send data to the server, as well as methods that can be invoked by the server to send data back to connected clients. Most of the time, however, you can just inherit the core services of the base class. So, for the sole purpose of reporting the progress of a server operation, you can use the following.
public class DefaultMonitorHub : Hub
{
public static string Endpoint = "/monitorhub";
}SignalR requires some JavaScript on the client page to trigger the long-running operation and receive feedback about the progress. The controller triggering the task needs to receive just the unique ID of the SignalR connection.
Propagating the SignalR hub
Here’s an example controller that knows how to handle SignalR connections and report the progress of generating a PDF file from a Project Renoir document:
private readonly IHubContext<DefaultMonitorHub> _monitorHubContext;
public PdfController( /■ other */, IHubContext<DefaultMonitorHub> monitorHubContext)
: base(/■ other */)
{
_monitorHubContext = monitorHubContext;
}Invoked via POST, the example method GeneratePdf receives the GUID that identifies the SignalR open connection. It packs the connection GUID and the reference to the hub in a container class and passes it to the service methods orchestrating the long-running task.
[HttpPost]
[Route(“/pdf/export”)]
public IActionResult GeneratePdf(long docId, string connId = “”)
{
// Pack together what’s needed to respond
var signalr = new ConnectionDescriptor<DefaultMonitorHub>(connId, _monitorHubContext);
// Invoke the potentially long-running task to report progress
var response = _pdfService.Generate(docId, signalr);
return Json(response);
}The ConnectionDescriptor class is a plain DTO, as illustrated here:
public class ConnectionDescriptor<T>
where T : Microsoft.AspNetCore.SignalR.Hub
{
public ConnectionDescriptor(string connId, IHubContext<T> hub)
{
this.ConnectionId = connId;
this.Hub = hub;
}
public string ConnectionId { get; set; }
public IHubContext<T> Hub { get; set; }
}What happens next depends on how the long-running task is orchestrated.
Sending notifications to the client browser
When reporting the progress of a potentially long-running task to the user interface, a message with either the percentage of completion or a description of the current step is sent back to the SignalR listener on the client page. The code that sends messages looks like this:
public CommandResponse Generate (long docId,
ConnectionDescriptor<DefaultMonitorHub> signalr)
{
// Update status on the client
signalr.Hub
.Clients
.Client(signalr.ConnectionId)
.SendAsync("updateStatus", new object[] {"STARTING"});
// Step 1
...
// Update status on the client
signalr.Hub
.Clients
.Client(signalr.ConnectionId)
.SendAsync("updateStatus", new object[] {"STEP 1"});
// More steps
...
}Essentially, you intersperse update messages with the steps of the operation on which you want to report. But what if the steps are not entirely carried out in the service method? What if, for example, one step involves an operation on some repository with multiple steps within it to report? In that case, you simply inject the connection hub in the repository too.
A final note on the updateStatus tag: That’s just the name of the JavaScript function that will receive the message that handles updating the user interface.
Where the domain layer (covered in Chapter 6, “The domain layer”) is the beating heart of the application, the application layer is the nerve center. Any actions requested from the outside, whether through the user interface or an exposed API, are processed by the application layer from start to finish.
The application layer needs connections to the domain model, the infrastructure layer, and, finally, the persistence layer. If a cached data access layer is implemented, then it needs to access it as well. At the same time, the application layer should have no dependency on the HTTP context or authentication details. Any access control logic should be applied at the controller’s gate. If, for some reason, the application layer needs to know details of the logged user (for example, the user ID), cookie items, or request headers, those must be passed as loose values.
There are many ways to code the application layer, and they are all legitimate—even the often dismissed option of tight coupling with the web application. The following sections discuss three of these approaches, including that one.
Tightly coupled with the web application
The simplest approach is to code the services in the application layer as classes under the common Application folder in the web application project. (See Figure 5-7.) This approach is by far the most direct and quick to code. It has one drawback, though: Because the code lives in the same ASP.NET web project, it shares the same dependencies as the main web application. So, ensuring that no silent extra dependencies slip in the layer is entirely a matter of self-discipline. In the end, it’s the good and bad of tight coupling!
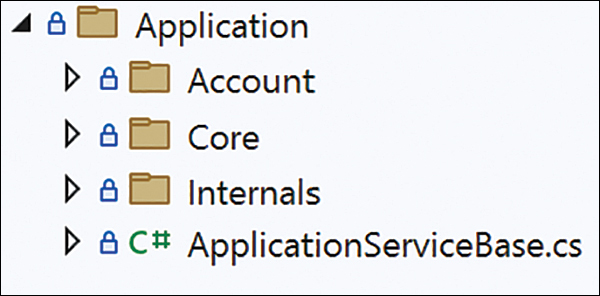
FIGURE 5-7 In-project implementation of the application layer.
The figure is a screenshot presenting a section of the Visual Studio Solution Explorer window with a root node named “Application” and a few child folders named “Account”, “Core” and “Internals”. Each child folder contains features-based segments of the application layer.
Separate class library
After a couple of decades of high-level consulting and technical disclosure, I returned to—or maybe just started on—actual core development. In the beginning, we were a small team of five people, and it was relatively easy and inexpensive to keep an eye on every aspect of the code being written. So, for simplicity and directness, our first projects had the application layer tightly coupled to the rest of the web application.
Now the team has grown five times its initial size, and monitoring every aspect of the code is much more problematic. Self-discipline is now really a matter of individual self-control. My perspective has changed, and a tightly coupled application layer is no longer the way to go. Instead, we switched to implementing the application as a separate class library project in the same solution as the main web application. This is also the approach chosen for Project Renoir.
The application layer as a class library forces you to add external dependencies explicitly and to offer reviewers a quick way to check whether something—a NuGet package or an embedded project—is wrongly or unnecessarily referenced.
Note Implemented as a class library, the application layer can be easily wrapped up as an internal NuGet package and reused across projects. Note, though, that the application layer is by design coupled to the presentation layer. This means that although reuse is certainly not prohibited, it shouldn’t become your main goal. In other words, duplicating the application layer in different projects, in all or in part, is not a bad thing per se.
Separate (micro) service
A class library lives in-process with the main web application and doesn’t add any extras to the cloud bill. Because it runs in-process, it also provides much better performance than if deployed as an independent, autonomous service. But is deploying the application layer as an independent app service a reasonable approach? As usual, it depends.
Let’s first consider a scenario in which you deploy the entire application layer as an independent service. You simply move the class library to a new ASP.NET web application project, add one or more controller classes or minimal API endpoints, connect the necessary dots, and go. In this scenario, any deployed service has its own deployment pipeline, scaling strategy, and resource allocation. This is good because it allows teams to work on different services simultaneously. But this is bad because it increases costs and maintenance operations, and every call to the application layer experiences network latency.
If you want to split the application layer from the rest of the application, then you probably should consider breaking it into even smaller pieces, moving toward a true microservices solution. This is a serious decision, as it involves radical changes to the existing architecture, including the addition of a message queue somewhere and the implementation of an event-driven business logic via sagas or workflow instances. It’s not as simple as just creating a new Azure app service and deploying the app to it!
The application layer serves as a critical foundation for the development of modern software systems. Through the exploration of task orchestration, cross-cutting concerns, data transfer, exception handling, caching, and deployment scenarios, this chapter equips developers with the knowledge and insights necessary to build robust, scalable, and maintainable applications. By mastering the intricacies of the application layer, developers can unlock new realms of innovation and create software that meets the evolving needs of users and businesses alike.
The application layer is conceptually tightly coupled to the presentation layer and is ideally different depending on the front end used. Historically, types of front ends have included web, mobile, and desktop, but the recent bold advancement of large language models (LLMs), of which GPT is only the most popular, has yielded a fourth type of front end: conversational front ends based on chatbots (which are much more effective than in the recent past).
Deploying the application layer as a separate microservice involves breaking down a monolithic application into smaller, more manageable services. With this approach, the application’s core business logic and functionality reside within individual microservices. This promotes better modularity, scalability, and maintainability, but also raises a long list of new problems.
This book is about clean architecture, which is inherently a layered architecture. A layered architecture is not about microservices. That said, the main purpose of this book beyond elucidating clean architecture is to explain and demonstrate separation of boundaries between layers. Using microservices is about enforcing physical separation, while layered architecture is about design and logical separation. You can certainly go from layered architecture to microservices if the business really requires it, but the opposite requires a complete redesign. My best advice is to consider starting with a modular layered (monolithic) architecture and then follow the natural evolution of the business.
The next chapter continues our exploration of the layers of a layered clean architecture, reaching the beating heart: the domain layer.
I’m not a great programmer; I’m just a good programmer with great habits.
—Kent Beck
In DDD, the crucial concept of the domain layer emphasizes the importance of understanding and modeling the core domain of a business to create a shared understanding between technical and non-technical stakeholders. By focusing on the domain layer, DDD aims to capture and implement the business logic in a way that closely aligns with the real-world domain, promoting a richer and more meaningful representation of the problem space. This helps create more maintainable and scalable software systems that reflect the intricacies of the business domain they serve.
The purpose of this chapter is to disambiguate the meanings associated with the term domain layer and to provide a practical guide to creating a C# class library that mimics the behavior of entities in the business domain.
From a purely architectural perspective, the domain layer is the space within the software solution that focuses on the invariant parts of the core business. Unlike the presentation and application layers, though, the domain layer doesn’t have just one “soul.” Rather, it has two: a business domain model and a family of helper domain services. Not surprisingly, both souls are independent but closely related.
A domain model is a conceptual representation of a business domain in which entities and value objects are connected together to model real-world concepts and to support real-world processes. The business domain model is ultimately the machinery—or, if you prefer, the wizardry—that transforms business requirements into running software.
Abstractly speaking, the model in the domain layer is just that—a model. It’s a conceptual representation of the business domain in the software system. Such a definition must be materialized in software form for the application to be built and to work, but it is agnostic of any known programming paradigm such as functional or object-oriented. The domain model, therefore, is just a software model of the business domain. Usually, but not always, it is implemented as an object-oriented model. Furthermore, following the DDD principles, the object-oriented model is not a plain object model but rather an object model with a bunch of additional constraints.
The domain layer in perspective
Figure 6-1 provides an overall view of the domain layer in relation to business requirements and the business’s ubiquitous language. Understanding the business language helps you identify bounded contexts to split the design. Each bounded context may be, in turn, split into one or more modules, and each module is related to a domain model and a family of domain services.
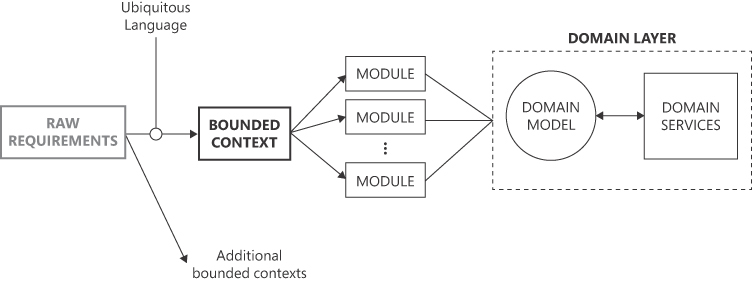
FIGURE 6-1 From raw requirements to the domain layer, the DDD way via analysis of the ubiquitous language.
The figure is a diagram read from left to right. It starts with a block labeled “Raw requirements” connected by an arrow to another block named “Bounded context”. From there, a vertical list of “Module” blocks departs with arrows that later connect to dashed block on the right. Within the dashed block labeled “Domain Layer”, is a circle labeled “Domain model” and a block labeled “Domain Services”. The two blocks are connected by a double-edged arrow.
How does this correlate to software elements of a layered architecture? A bounded context represents the application as a whole, while modules are close relatives of application services. Chapter 2, “The ultimate gist of DDD,” stated that each bounded context is characterized by its own domain model. Well, now that we’re closer to the implementation level, that statement can be slightly rephrased to something like, each bounded context is characterized by its own slice of the domain model. In other words, the domain model can be a single artifact shared by multiple bounded contexts (and potentially multiple distinct applications) or just be conveniently partitioned so that each bounded context has its own domain model. Making this architectural decision contributes to your ability to shape a single model that can serve all bounded contexts without making it overly complex, fragile, or unmanageable.
Internals of a domain model
Within the realm of a domain model, you find software counterparts for concepts such as the following:
■ Entities : These represent the main actors in the domain and are characterized by unique identities and life cycles. Entities have behaviors and encapsulate business rules related to their state and interactions.
■ Value objects : These represent characteristics and attributes that are essential to the domain. They have no identity and are immutable. Value objects are used to encapsulate complex data structures and are typically shared by multiple entities.
■ Aggregates : These are clusters of related entities and value objects that are better treated as a single unit for the purpose of faithfully implementing business processes. They provide transactional consistency and define boundaries within the domain to enforce business rules and invariant conditions.
Paradigms for a domain model
DDD does not prescribe specific software paradigms or programming languages. Instead, DDD provides a set of principles, patterns, and concepts to guide the design and development of a domain model that accurately represents the business domain. As a result, you can use a variety of software paradigms to build a domain model, depending on the requirements and preferences of the development team. Here are a few common options, roughly in order of popularity:
■ Object-oriented programming (OOP) : This is probably the most natural approach, as concepts like entities, value objects, and aggregates fit nicely within a class in the OOP paradigm. Likewise, behavior is naturally fit for class methods, and relationships can be represented using inheritance and encapsulation.
■ Functional programming : With functional programming, domain entities and value objects can be represented as immutable data structures, and domain behaviors can be implemented using pure functions. Note that a pure function always produces the same output for a given set of input parameters and does not depend on any external state or mutable data.
■ Anemic programming : An anemic model has classes that match the classes in the underlying persistence layer and maps the domain model to the data store. Behavior is usually coded in database-level stored procedures or in dedicated global methods exposed by some standalone class.
Ultimately, your choice of software paradigm depends on factors such as the programming languages and frameworks being used, the team’s expertise, the nature of the domain, and the specific requirements of the project.
Note For the rest of this book, when I say domain model, I mean an object-oriented model (unless otherwise specified).
Persistence of a domain model
Realistically, any domain model must have persistence, but it does not handle its own persistence directly. In fact, the domain model includes no references to loading or saving operations, even though these operations are essential for creating instances of domain entities and implementing business logic.
To handle persistence on behalf of entities, a specific type of component, called a repository, comes into play. Repositories are responsible for managing the persistence of entities. They are typically invoked from outside the domain model, such as from the application layer, or from other components within the domain layer, like domain services. The actual implementation of repositories belongs to a separate layer. This layer can be a distinct persistence layer (as in Project Renoir) or just a module within a larger, more general, infrastructure layer.
Note It is correct to state that repositories take care of persisting entities based on what has been discussed so far. However, as you progress through this chapter and gain a broader perspective, you will realize that repositories don’t actually persist entities, but rather persist a specific subset of entities called aggregates that sometimes coincide with plain entities. If it now sounds a bit obscure, don’t worry, I’ll shed some light on aggregates and entities in just a few moments.
Cross-cutting concerns in a domain model
Let’s consider four common cross-cutting concerns—validation, logging, caching, and security—and see how they affect the development of a domain model.
The latter two—caching and security—don’t really apply to the domain model. As for caching, it’s simply not a concern of the domain model. And security should be applied at the gate of the domain model, making it the responsibility of higher layers. Quite simply, no call should reach out to the domain model in unauthorized conditions. Security-at-the-gate means that security restrictions are applied as early as possible in the call stack—often in application services at the beginning of the use case.
As for logging, the decision of what to log and where to log it is entirely up to you. If you determine that logging from within the domain model is essential, you will need a reference to the logging infrastructure directly in the domain model. However, it is important to avoid creating a strong dependency between the domain model and the logger component to maintain flexibility and modularity. To achieve logging from the domain model without tight coupling, you can inject a logger interface into the model classes. This way, the domain model remains unaware of the specific logger implementation. Instead, the actual implementation of the logger is placed in the infrastructure project, where it can be customized and configured as needed.
Finally, validation is a primary concern of the domain model. Classes of the domain model should perform thorough checks and raise specific exceptions whenever they encounter erroneous conditions. The domain model is not intended to be forgiving; rather, it should promptly raise alarms when something deviates from expected behavior. As for error messages, a domain model should define its own set of exceptions and make them accessible to higher layers, such as the application layer. The application layer will then decide how to handle these domain-specific exceptions—whether to propagate them directly to the presentation layer, re-throw them, or handle them internally. However, the actual content of the error messages should be left to the presentation layer. The domain model is focused on the business logic and on ensuring that the application’s invariants are upheld, while the presentation layer is better suited for customizing error messages for end users or specific UI requirements.
So, classes in a domain model are agnostic of persistence and receive the state to work on from the outside when initialized. Furthermore, domain model classes encapsulate data and expose behavior through methods. Not in all cases, though. The entire behavior expected from a domain can be easily partitioned across the various constituent classes. This is where helper domain services fit in.
Filling behavioral gaps
Helper domain services are just helper classes whose methods implement the domain logic that doesn’t fit within a particular entity or, more likely, spans over multiple entities. Domain services coordinate the activity of entities, aggregates, and repositories with the purpose of implementing a business action. In some cases, domain services may consume additional services from the infrastructure, such as when sending an email or a text message is necessary.
Bridging domain and infrastructure
All business domains are made of processes, and it’s difficult to map these processes to a single behavior on a specific entity. Sometimes, these processes are essential for the domain and involve dedicated calculations, data aggregations, and access to storage.
You start coding the expected behavior using domain entities and aggregate-specific repositories. Whatever doesn’t naturally fit in these is a great candidate for a domain service. When you conclude that you need a separate, special container of code that bridges the domain layer and the infrastructure layer, you have a domain service.
Concretely, a domain service can be a class in the domain model—if no persistence is required—or it can be part of the persistence layer if queries and updates are required. Here’s a common example of a functionality that is ideal for a domain service. Imagine that an online shop rewards customers for purchases by issuing points. Beyond a certain threshold, the customer changes status, becoming Silver or Gold. Chances are, the customer class will have a property that reports the current status and a few Boolean methods, like IsGold and IsSilver. When the customer class is queried from the data store, where does the status value come from? The status is not something that pertains to the demographics of the customer; rather, it is information that descends from the customer’s history in the system. It can be handled in either of two ways:
■ When an instance of the entity is loaded from the data store, a separate query is run to check the status from the list of purchases and attributed points.
■ The customer’s status is calculated and saved to the Customers table (or even a separate linked table) every time a purchase is finalized. In this way, the status is guaranteed to be up to date.
In both cases, you need some piece of code that goes through the history of purchases and updates the sum of points. This is the ideal work of a domain service.
Note Domain services do not have their own state. They are stateless and maintain no data between invocations. They rely only on the input they receive when performing operations.
A domain model is a representation of a domain’s concepts and behaviors. The model should reflect the actual problem space and the rules governing it and expressed in the terms of the ubiquitous language. By design, the entities in a domain model are agnostic of the persistence layer, and it is assumed they will be filled with data in some way. Their state is altered by exposed methods that represent business actions rather than by exposing writable properties to be updated from some logic living outside. In a nutshell, DDD shifts the design focus from data to behavior.
Important A key point to fully comprehend the turnaround brought by DDD is how entities get their state. Domain entities are definitely stateful objects in the sense that they have properties that determine a state of working. However, such a state must be retrieved from storage and injected in some way into the machinery of the domain entity. In other words, entities expose behavior based on state, but the state itself is an external parameter whose persistence is managed elsewhere. I’ll return to this point with examples in a few moments.
In a system design driven mostly by the nature of the business domain (like DDD), the focus shifts from mapping data structures directly from the database to building a meaningful, expressive model of the domain. But what’s the point of doing this?
Well, there is no point if the domain isn’t complex enough. No game-changing benefit will realistically result from DDD for relatively simple domains. Although the principles of DDD are universally valid and ensure that code is more maintainable and flexible, you won’t see any concrete benefit or increase in programming expressivity if the model lacks complexity.
Still, adopting a domain-driven approach yields two main benefits: the ability to handle growing levels of complexity and intricacy and to improve communication between technical and non-technical stakeholders. These two benefits are clearly mutually related.
The evergreen data-centric focus
Since the advent of relational databases, the main approach to building systems has been more or less the following:
You gather requirements and analyze them to identify relevant entities and processes involved.
Based on this understanding, you design a physical data model, almost always relational, to support the processes.
While ensuring relational consistency (primary keys, constraints, normalization, indexing), you build software components against tables in the model that represent critical business entities.
Sometimes, you use database-specific features like stored procedures to implement behavior while abstracting the database structure from upper-level code.
You choose a suitable data representation model and move data to and from the presentation layer.
This approach to modeling a business domain is not wrong per se. It’s a mature and consolidated practice. More than that, it just works well. Furthermore, every developer knows about it because it’s taught in all programming courses.
So why should you move away from a working and consolidated practice to embrace a different approach that, beyond having an attractive and exotic name like DDD, also represents a sort of leap into the unknown? The answer lies in the subtitle of the highly influential 2003 book by Eric Evans: Domain-Driven Design: Tackling Complexity in the Heart of Software.
Note The relational model for databases was devised in 1970 by Dr. Edgar F. Codd, a computer scientist working at IBM’s San Jose Research Laboratory. Codd introduced the concept of representing data as tables with rows and columns, as well as the principles of data normalization, relationships between tables through primary and foreign keys, and using a query language (Structured Query Language, or SQL) to interact with data. The work laid the foundation for the development of modern relational database management systems (RDBMS) that are widely used in the software industry today.
Me and DDD
I began studying DDD around 2006. Frankly, my initial interest was mainly fueled by the need to always have cutting-edge topics on hand to write and talk about. However, I found DDD intriguing and decided to try it in some toy projects.
That was my first mistake. One can’t realistically experience the power of DDD in toy projects. My first project was a classic to-do list application, and I spent the entire time struggling to figure out what should be considered an entity, an aggregate, or an aggregate root. I also struggled to make sense of persistence—what loaded and saved the state of entities?
At some point, though, I obtained a clear picture of the theory and practice of DDD. This was great for writing insightful books and articles about it, but I was still missing that direct, hands-on, everyday experience that could give me a real sense of DDD. For that, I knew I’d have to wait for the chance to work night and day on a complex project.
The chance came in 2020 when my company started building a new live-scoring platform for a major professional tennis circuit. The platform’s ultimate objective was to convert every tap on the chair umpire’s tablet into data and transmit it to a central hub that served betting companies—for every match in every tournament. To achieve this, several entities were in play, including tournament calendars, players, umpires, courts, entry lists, draws, schedules, and matches, just to name a few. Plus, there were a variety of other entities to support specific business rules and processes. And every year at the start of a new season—and sometimes in the middle of the season—we needed to update rules and processes.
Ultimately, we articulated the overall business domain in three major bounded contexts, each made by a handful of distinct deployments—mostly Azure app services carrying ASP.NET Core applications. The domain model—an internal NuGet package shared by all related projects and maintained by a single team in conformity with the customer/supplier relationship discussed in Chapter 2—was significant, and the shift to a behavior approach saved us from sinking in a troubled sea of requirements, implementations, and misunderstandings.
What is a model and why do you need one?
Using the term model is dangerous in a software-based conversation. Its meaning depends strictly on the context, so there’s a high risk of defining it inaccurately. In DDD, a model is a representation of the business domain. Of these two words, the key one is business rather than domain. A model built for a domain must faithfully and effectively represent the core business.
Here’s an example. Suppose you’re working on a logistics application and need to calculate the shortest distance between places in the world. To do this, you would probably use an existing service, like Bing Maps, Google Maps, ESRI, or OpenStreetMap. But how do such services work internally? They use a graphical representation of the world on a map, but it’s not the real world!
Major online map providers use Web Mercator—a modified and web-adapted version of the original Mercator projection in use since the 16th century. The Web Mercator projection allows for easy representation of map data on the web, much like how the original Mercator projection proved particularly suitable for nautical purposes. Still, the Mercator projection is a world map model. It does not truly mirror the real world. In fact, it distorts both areas and distances, with the scale increasing toward the poles. This causes some areas to appear larger or smaller than they really are. For instance, Greenland appears to be similar in size to all of South America, when in fact South America is more than eight times larger than Greenland. However, the Mercator projection is invaluable for measuring courses and bearings in nautical cartography due to its constant angles. While not at all suitable as an accurate map of the world, it serves its specific purpose effectively.
Map providers need a model to represent the world and distances and paths between places. They represent the world, but they do not use a universally valid model of the world. Rather, they use a business-specific model that is apt only for the domain.
Persistence ignorance
Persistence ignorance is a DDD principle that advocates for keeping the domain model classes independent of the persistence layer. Domain model classes should not have direct knowledge of how they are being persisted to or retrieved from a database or storage. Similarly, they should not expose methods that require access to the persistence layer to perform operations like saving or materializing instances.
By adhering to persistence ignorance, the domain model remains focused on representing the business domain and its behavior without being tied to specific persistence mechanisms. This separation of concerns allows for greater flexibility and maintainability in the code base. The responsibility for handling persistence is typically delegated to specialized infrastructure layers or repositories, which interact with the domain model to deal with database operations while keeping the domain classes free from such concerns.
By decoupling the domain model from the persistence layer, the code becomes more reusable and testable, and easier to reason about. It also promotes better separation of concerns and prevents domain logic from being polluted with persistence-related code.
The building blocks of a DDD domain model are entities, value objects, and aggregates. Entities represent a concept from the business domain, value objects represent business-specific primitive types, and aggregates are clusters of related entities treated as a single unit for business and persistence convenience. Closely related to these are domain services (which encapsulate domain logic that doesn’t naturally belong to entities or value objects) and repositories (which handle the persistence of domain entities).
Domain entities
All business concepts have attributes, but not all are fully identified by their collection of attributes. When attributes are not enough to guarantee uniqueness, and when uniqueness is important to the specific business concept, then in DDD you have domain entities. Put another way, if the business concept needs an ID attribute to track it uniquely throughout the context for the entire life cycle, then the business concept requires an identity and can then be recognized as an entity.
Key characteristics of domain entities include the following:
■ Identity : An entity has a unique identity that remains constant throughout its life cycle. This identity is typically represented by a unique identifier, such as an ID or a combination of attributes that uniquely identify the entity. Once persisted to a relational database table, the identity often becomes the primary key.
■ Mutability : Entities are mutable, meaning their state can change over time. They can be modified by applying domain-specific business rules and operations. Such operations take the form of methods, whereas modifiable attributes are ideally implemented as public read-only properties.
■ Life : cycle Entities have a life cycle, starting with creation and potentially ending with deletion or archiving. They can exist independently and can be related to other entities within the domain. Persistence is managed outside the domain model.
■ Consistency :Entities enforce invariants and business rules to maintain consistency within the domain. The entity’s behavior and attributes are designed to ensure that the domain remains in a valid state. Consistency, however, is just the first constraint you may be forced to sacrifice for the sake of pragmatism.
In terms of implementation, does being recognized as an entity change something? In an object-oriented domain model, an entity is typically a plain class with some optional, but recommended, characteristics, such as a common behavior inherited from a common base class.
Domain value types
A value type (or value object) represents a simpler business concept that has attributes but no distinct identity. In other words, a value type is defined solely by the value of its attributes.
Key characteristics of value types include the following:
■ Immutability : Value types are immutable. Their state cannot change after creation. If a value needs to be modified, a new value object with the updated attributes is created.
■ Attribute-based equality : Value types are considered equal based on their attribute values rather than by their business identity. Two value objects are equal if all their attributes have the same value.
■ No life cycle : Value types do not have a distinct life cycle. They are created when needed and discarded when they are no longer used. They are often used as part of the state of an entity or within aggregates.
■ Consistency and invariants : Value types can enforce invariants and business rules related to their attributes. These rules ensure that the value remains in a valid state.
■ Immutable collections : Value types often contain collections of other value types or primitive data. These collections are typically immutable, meaning their elements cannot be modified directly.
A canonical example of a value type is the concept of a Money value object used to represent an amount of currency. Each Money value object could have attributes like CurrencyCode and Amount, and they can be compared based on their attribute values for equality or used for calculations. Since Money value objects are immutable, operations like addition or subtraction would result in new Money instances with the updated values rather than modifying the original instances.
Note Value types are business-specific primitive types. In a generic programming language, you have primitive types like int or string. This is because programming languages are not natively designed to build applications for specific business scenarios. Rather, they are designed with a general-purpose, math-oriented mindset, which makes them flexible enough to be adapted to any business scenario. In a real business domain, you typically have concepts that can be faithfully represented as integers or strings but are not generic numbers or alphanumeric expressions. In a business domain, you might have a temperature, weight, or quantity that is well represented by a language primitive like an integer but, in the business domain, expresses a primitive type of its own. This is where value objects fit.
Aggregates and roots
The term aggregate abstractly refers to a number of domain entities grouped together into a single unit with well-defined boundaries. The primary purpose of an aggregate is to enforce consistency and invariability within a domain, ensuring that the entities within the aggregate remain in a valid and consistent state.
In contrast, the term aggregate root refers to a specific entity within the aggregate that acts as the entry point for all access and manipulation of other objects within the aggregate. The aggregate root is the only object that can be accessed from outside the aggregate, and it ensures that all changes to the objects within the aggregate are made in a controlled and consistent manner.
Key characteristics of aggregates include the following:
■ Consistency boundaries : All domain entities within an aggregate are designed to adhere to the aggregate’s invariants and business rules.
■ Transactional boundaries : All changes to the entities within the aggregate are treated as a single unit of work, and changes are persisted to the database or rolled back as a whole.
■ Isolation : Entities within an aggregate are isolated from objects outside the aggregate. Access to the objects within the aggregate is possible only through the aggregate root.
■ Relationships : Aggregates can have relationships with other aggregates, but these relationships are typically represented through references to the aggregate roots rather than direct access to the objects within the aggregate.
As an example of an aggregate, consider an online bookstore with two domain entities: Book and Author. In the domain, each book can have one or more authors. In pseudo-C# code, the aggregate might look like this:
class Book : IAggregateRoot
{
// Book properties
int BookId { get; private set; }
string Isbn { get; private set; }
string Title { get; private set; }
:
// Authors
IReadOnlyCollection<Author> Authors { get; private set; }
// Book methods
Book SetTitle(string title)
{ ... }
Book AddAuthor(Author author)
{ ... }
:
}The IAggregateRoot interface in the pseudo code doesn’t need to be a full interface with a defined contract. It can simply be a marker interface used to flag a class in some way. For example:
public interface IAggregateRoot
{
// Marker interface, no members
}Having such a marker interface is only helpful to restrict a generic repository class to accept only aggregate root classes:
public class BaseRepository<T> where T : IAggregateRoot
{
...
}Note The aggregate should be a different aggregator class (for example, some BookAggregate class), or the aggregation takes place silently within the root entity itself, in which case, an aggregate root contains other child aggregates? In all implementations I have considered, I’ve never had a separate aggregate class. The option of just designating the root to be a root is also much closer to the real world in which you may use Entity Framework for persistence. In this case, the aggregate results from the database level of table relationships and constraints.
Loading state into domain entities
Due to their ignorance of persistence, domain entities should not be designed to allow access to storage either directly or via references packages. That’s great, but where does an instance of, say, the Book entity grab any state that makes it qualify as an instance representing the author, ISBN, and title of a given manuscript? As shown in Figure 6-2, state must be loaded into a domain entity.
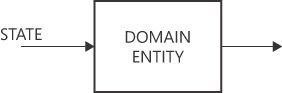
FIGURE 6-2 Because entities are persistence ignorant, any state must be explicitly injected.
The figure is a diagram made by a large central block labeled “Domain Entity”. An arrow links to the left edge labeled “State”. Another arrow departs from the right edge of the central block. The overall meaning is that state enters into the empty box of a domain entity and gives it substance.
One option is to incorporate a public constructor in the entity class that allows you to set all the data—something like this:
public Book( /■ all properties forming a valid state for the book */ )
{ ... }To be used directly, such a constructor must be public. To avoid misuse, you should clearly document it, specifying that it’s intended solely for data construction and should not be used elsewhere. Alternatively, you can consider using a factory.
In a realistic implementation of an object-oriented domain model, you might want to leverage an object-database mapper library like Entity Framework Core, which handles the data population process automatically. Within your infrastructure layer, you can directly query the domain entity from the database. To facilitate this, add private setters for each property and include a private default constructor. The Entity Framework will then instantiate your object using the default constructor and populate its properties using reflection. (You’ll see this demonstrated later in this chapter.)
Project Renoir has the domain model implemented as a C# class library in the main solution. Should it be shareable with other projects in the context of a larger bounded context, you can configure the build pipeline to produce and deploy it as a private NuGet package within your Azure DevOps. (Sharing the class library as an assembly or a public NuGet package is an option too.)
The dependency list
The domain model class library has no project dependencies. For convenience, it references a house-made NuGet package for utilities—the Youbiquitous.Martlet.Core package—which supplies a variety of extension methods for working with primitive types like numbers, strings, and dates. If resource strings are required, you can place them in a resource embedded in the project or, for larger projects, link to a specific resource project.
As for the target of the project, you must decide whether to go with .NET Standard or a specific version of the .NET Core framework. In general, .NET Standard is designed for cross-platform compatibility and facilitates code sharing between different .NET platforms. If your model is intended to be used across .NET Framework, .NET Core, MAUI, Xamarin, and others, well, go for it. On the other hand, if your library is designed exclusively for a particular .NET implementation, such as .NET Core 8, you might consider directly targeting the specific framework version. This approach may provide additional optimization opportunities or enable you to take advantage of platform-specific features.
Life forms in the library
The Project Renoir domain model is centered around a few entities and counts a couple of aggregates. All entities descend from a base class that provides a bunch of predefined attributes and overridable methods:
■ Product : This refers to the software products for which release and roadmap documents are created. A product is not part of any larger aggregation; it is a plain simple entity characterized by its own identity and life cycle.
■ ReleaseNote : This represents a release notes document and is composed of a list of ReleaseNoteItem entities In this regard, it is an aggregate root. It also references a Product.
■ Roadmap : This represents a roadmap document and is composed of a list of RoadmapItem entities. In this regard, it is an aggregate root. It also references a Product.
Two more sections form the domain model of Renoir: classes related to membership (user accounts, roles, and permissions) and classes related to bindings between entities necessary for the persistence of the authorization layer (user-to-product, user-to-release note, and user-to-roadmap).
Persistence-driven definition of aggregates
A domain model library should be designed to be independent of any specific object-relational mapping (O/RM) dependencies. Ideally, you have a domain model and a persistence layer devised in total freedom with some intermediate layer to make necessary transformations to and from storage. (See the left side of Figure 6-3.) With this approach, you don’t just code a domain model, you also code a mapper and any wrapper around the data store (for example, stored procedures). The model can be designed in full observance of DDD principles, using some other code to understand it and map it to storage. To save to storage, you can still use an O/RM.
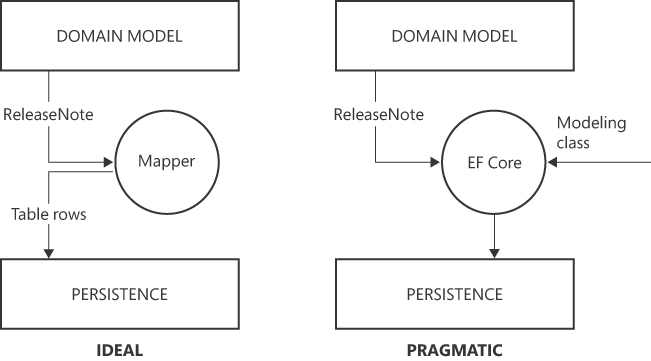
FIGURE 6-3 A mapper takes care of turning domain classes into storage items.
The figure is the composition of two distinct but similar diagrams. The one on the left is labeled “Ideal”; the one on the right “Pragmatic”. Both diagrams are made by two rectangles laid out vertically and a circle in between them. The two rectangles are described as Domain Model and Persistence respectively. In the left diagram, the circle is called “Mapper” and one arrow labeled ReleaseNote connects the topmost rectangle to the circle. Another arrow departs from the circle to connect to the rectangle Persistence. The arrow is labeled “Table rows”. In the Pragmatic diagram the circle is instead labeled “EF Core”. The arrow ReleaseNote connects the circle with the topmost rectangle. In addition, an arrow from the outside connects to the circle with a label of “Modeling class”.
A more pragmatic approach is to use a rich O/RM like Entity Framework Core to simplify things, at the cost of dirtying the model a bit. The right side of Figure 6-3 shows that with EF Core, you can use just one model and a modeling class that declaratively sets a correspondence between entities and database objects. When this occurs—for mere convenience—it is not uncommon to make some minor concessions in the O/RM to facilitate model serialization. For instance, you might need to include a hidden constructor or introduce an additional property and some scaffolding to enable the serialization of arrays or enumerated types. Property setters also must be defined, although they can be private.
The ultimate objective is a domain model with as few infrastructure dependencies as possible—ideally zero. While achieving complete independence might not always be feasible due to specific serialization requirements or other practical considerations, a realistic goal is to keep the domain model’s dependency on infrastructure to an absolute minimum. In Project Renoir, we opted for a pragmatic approach, so the same model presented as the domain model is used as the model that lets Entity Framework Core persist data to the database.
Having a domain model instead of a plain list of anemic classes—essentially DTOs—guarantees neither faster development nor bug-free code. It’s a habit with a couple of plusses—readability and subsequently the ability to handle complexity. Figure 6-4 summarizes the decision tree.
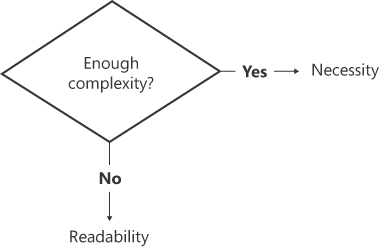
FIGURE 6-4 A basic decision tree for choosing a domain model versus a more anemic model.
The figure is a diagram containing a very minimal flow chart made of a single decision block labeled “Enough complexity?” and two arrows, one on the right and one at the bottom. The arrow on the right indicates the branch “Yes” and is linked to the text “Necessity”. The arrow at the bottom is labeled “No” and is connected to the text “Readability”.
Do you have enough complexity? If so, a domain model is nearly a necessity to avoid sinking in the troubled waters of requirements and features. Is it simple enough that you can just produce functional code successfully? Even then, learning to use a domain model is not an excessive investment. If you use an O/RM like Entity Framework, you already have a bunch of classes ready; you just need to put a bit more attention and vision into their code and design. It’s not a matter of being a great developer or visionary architect; it’s simply a matter of having “good habits.”
Note In modern business, complexity is a monotonic increasing function, its graph moving ever upward as you jump from one project to another or as the same project evolves and expands.
Software anemia is typically assessed by the amount of behavior present in classes. In a model that is merely inferred from a database, there is usually very little behavior, making the model anemic. Is software anemia a serious disease, however?
Technical threat
In humans, anemia—caused by a deficiency of red blood cells, which are responsible for delivering oxygen to body tissues for vitality and energy—leads to weariness. In a software context, anemia signifies a lack of energy to cope with changes, but it is not considered a disease. An anemic model can still function effectively if the development team can manage the complexity of the domain and its evolution.
Ultimately, an anemic model is not a mistake per se. But like the sword of Damocles, it poses a threat to your code. According to Greek myth, Damocles sat on a throne with a massive sword hanging over him, supported only by a single hair. This serves as a fitting metaphor: everything is fine as long as the sword remains suspended. So, an anemic model is not certified technical debt; rather, it is a sort of technical threat that could one day (in near time) become technical debt. For this reason, DDD pundits argue that models should not be anemic.
Methods over properties
DDD’s emphasis on behavior serves two main purposes: to create objects with a public interface that closely resemble entities observable in the real world, and to facilitate easier modeling that aligns with the names and rules of the ubiquitous language.
When modeling, a kind of backward thinking drives us to focus on attributes first, perhaps because the relational data model often drives our learning path. We then mark attributes with properties that have public getters and setters. At that point, having methods to alter the state of properties seems a useless extra effort. This is precisely where the change must happen.
Here’s a quick example. Suppose you have a UserAccount class that models the concept of a signed-up user to some software system. The user forgets their password, and the system manages to reset it. The state of the persisted user should change to host a password-reset token and the time it was requested. The user is then sent an email with a link that incorporates the token. When the user follows the link, the system uses the token to confirm the identity, checks the expiration of the link, and sets the new password.
How would you code the change of state due to the initial request? You would probably use code like this:
user.PasswordResetToken = Guid.NewGuid();
user.PasswordResetRequested = DateTime.UtcNow;
But what about using this, instead?
User.RequestPasswordReset();Internally, the method includes just the two lines shown here to set properties. What’s the difference? You simply shifted from a data-centric vision to a behavior-centric perspective. Where is readability? In the name of the action. Where is maintainability? In your ability to change how the password reset is implemented by simply rewriting the method in one place only.
A domain entity is a straightforward C# class designed to encompass both data (properties) and behavior (methods). While an entity may have functional public properties, it should not be intended as a mere data container.
General guidelines
Following are some general guidelines that any C# class should adhere to when becoming a part of a domain model:
■ Behavior is expressed through methods, both public and private.
■ State is exposed through read-only properties.
■ There is very limited use of primitive types; value objects are used instead.
■ Factory methods are preferred over multiple constructors.
Let’s make it clear up front: these are just guidelines. Using, say, primitive types instead of value objects and constructors instead of factory methods won’t make any project fail. Still, guidelines exist for a purpose. To borrow from the dictionary, a guideline is a comprehensive set of recommended instructions that offer guidance and direction for performing tasks or making decisions effectively and appropriately. It serves as a reference to achieve desired outcomes or standards.
Top-level base class
Project Renoir has a top-level base class for entities that provide support for auditing, state validation, and soft deletion to all derived classes. Here is the code:
public partial class BaseEntity
{
public BaseEntity()
{
Deleted = false;
Created = new TimeStamp();
LastUpdated = new TimeStamp();
}
protected bool Deleted { get; private set; }
public TimeStamp Created { get; private set; }
public TimeStamp LastUpdated { get; private set; }
}The TimeStamp class in the example is a helper class that tracks who made the change—creation or update—and when: Here’s the list of methods saved to a separate partial file:
public partial class BaseEntity
{
public virtual bool IsValid()
{
return true;
}
public bool IsDeleted()
{
return Deleted;
}
public void SoftDelete()
{
Deleted = true;
}
public void SoftUndelete()
{
Deleted = false;
}
}In particular, the method IsValid can be overridden by derived classes to add any invariant logic necessary for the specific entity.
The need for identity information
Each entity within the domain is typically expected to have a distinct identity that sets it apart from other entities, even if they share similar attributes. For example, consider a Person class in a domain model. Each individual person would have a unique identity, often represented by an ID or a combination of attributes that collectively serve as a unique identifier. The identity of an entity allows the system to track and manage individual instances, supporting operations such as retrieval, update, and deletion.
The definition of an identity is entity-specific. Most of the time, it takes the form of a GUID, a progressive number, an alphanumeric string, or some combination of these.
Application-specific base class
What can an application-specific entity base class add on top of the core base entity class? Not much, except that you keep the base class in a separate library or package, and for a particular application you need something more or something less. As long as all the source code is in the domain model class library, another application-specific base class may add something significant, especially with multi-tenant applications. In these cases, the identity of the tenant can be packaged in the application’s domain base class to be shared by all other entities, along with a few helper methods. Here’s an example:
public class RenoirEntity : BaseEntity
{
public RenoirEntity()
: this(new Tenant())
{
}
public RenoirEntity(Tenant owner)
{
Owner = owner;
}
[Required]
[MaxLength(30)]
public string OrganizationId
{
get => Owner.OrganizationId;
set => Owner.OrganizationId = value;
}
[Required]
[MaxLength(30)]
public string DeptId
{
get => Owner.DeptId;
set => Owner.DeptId = value;
}
public int Year
{
get => Owner.Year;
set => Owner.Year = value;
}
public Tenant Owner { get; protected set; }
public string ToName()
{
return $"{Owner}";
}
}The tenant identity is defined as a triple containing the organization, department, and year. All classes that inherit from RenoirEntity get the Owner tenant property and a few helper methods.
Use of data annotations
In the preceding code snippets, you may have noticed sparse attributes decorating some properties—Required and MaxLength in particular. These attributes are part of the .NET Core framework. Specifically, they belong to the Data Annotations namespace. To use them, you won’t need to add any external dependencies to the domain model class library.
So, why use them? Being decorations, they won’t add any special capabilities to your code. However, such decorations do help the Entity Framework code that maps domain classes to the database structure to figure out which column attributes to use. In particular, MaxLength saves you from having nvarchar table columns set to MAX. Faced with string properties, in fact, Entity Framework would generate table columns of type nvarchar(MAX) unless MaxLength is specified.
Note, though, that the same effect on the database structure achieved through Required and MaxLength attributes can also be obtained using fluent code in the class in the infrastructure layer that does the object-to-relational mapping. (More on this in Chapter 8, “The infrastructure layer.”)
Note Having string table columns with a maximum possible length (2 GB) simplifies data handling because you don’t have to worry about the actual size of the string being stored. At the same time, you must employ nvarchar(MAX) fields with care. Indeed, their use should be considered a mistake unless proven otherwise. Storing large amounts of data in fields can reduce performance compared to using fixed-length fields when querying or indexing the table. In addition, it can dramatically increase the size of the database, affecting backup, restore, and storage operations. Finally, large nvarchar(MAX) fields may lead to page fragmentation, affecting data-retrieval performance.
Although the exact definition of clean code may not be precise, its outcomes are clear. Clean code tells a story, much like a well-written novel. Easy-to-read code facilitates understanding and subsequently cost-effective maintenance and extension. Code never belongs to a single individual; at some point, other people will need to get hold of that code. Beyond the functional effectiveness of the code, readability falls somewhere between a courtesy and a duty. It’s a matter of etiquette.
This section contains 10 essential coding recommendations that warrant meticulous consideration. These suggestions encompass reducing nesting, minimizing loops, simplifying convoluted logic, avoiding magic numbers, and prioritizing conciseness and clarity in your code. Following these rules ensures that you don’t violate coding etiquette.
The early return principle
The early return (ER) principle calls for code to return from a method as soon as a certain condition is met or a specific result is obtained. Instead of using nested if…else statements, you use early returns to handle each case separately. Here’ s an example:
public string BuildReport(int year)
{
if (year < 2021)
return null;
// Proceed
...
}Related to ER are a method’s preconditions. At the beginning of each method, it’s a good practice to quickly exclude all known situations that are not acceptable or supported and just return a default value or throw an exception.
Reducing if pollution
As a conditional construct, the if statement, along with loops and assignments, is a pillar of programming. But in modern code, which is so rich in nuances and complexity, the classic if…then…else statement—while crucial to control the flow of code—is too verbose and consumes too much space. To reduce so-called if pollution, you have three, non-mutually exclusive options:
■ Invert the condition : If the then branch is much larger than the else, invert the Boolean guard to apply ER and save one level of nesting. That is, treat the else branch as a precondition and then proceed with the direct coding of the then branch.
■ Use switch instead of if Both if and switch are conditional statements. The if handles multiple conditions sequentially and executes the first true branch. For a large set of conditions, though, the switch syntax is shorter and less polluted. switch is ideal for discrete value-based decisions, while if offers more flexibility. Human reasoning tends to be if-centric, but with three conditions to handle, moving to switch is an option.
■ Merge multiple if statements : When turning business rules into code, we typically reason step by step, and sometimes each step is an if statement. In our learning path, it may not be obvious when two or even more if conditions could be merged without affecting the outcome. However, merging if statements reduces the number of conditions and branches and keeps your code cleaner.
Pattern matching
In recent versions of C#, pattern matching has become an extremely flexible feature that enables conditional checks on data by matching its shape, structure, or properties. Pattern matching goes well beyond traditional equality checks to handle different types and structures effectively.
With pattern matching, you combine the is and when operators with familiar conditional constructs such as switch and if to compose concise, human-readable conditions that would be much more convoluted to express and hard to make sense of otherwise. Here’s an example:
if (doc is ReleaseNote { RelatedProduct.Code: "PUBAPI" } rn)
{
// Use the rn variable here
}Pattern matching does a couple of things. It first checks whether the doc variable is of type ReleaseNote and then if the expression RelatedProduct.Code equals PUBAPI. If both checks are successful, it returns a new variable named rn to work on the release note document for product PUBAPI.
However, pattern matching offers even more flexibility than this. Suppose you need to apply the following business condition to a search operation: all documents released between 2015 and 2022, but not those released in 2020. The following classic-style code works.
if (doc != null &&
doc.YearOfRelease >= 2015 &&
doc.YearOfRelease < 2023 &&
doc.YearOfRelease != 2020)
{
// Do some work
}Here’s how it could be rewritten with pattern-matching operators:
if (doc is
{ YearOfRelease: >= 2015 and
< 2023 and
not 2020 })
{
// Do some work
}This code looks a lot like the sentence in the preceding paragraph that describes the business condition to check.
Overall, I believe the issue with pattern matching is that its extremely flexible syntax may be harder to grasp than a plain if…then…else syntax, even for seasoned developers. However, code assistant tools do a great job of silently suggesting similar changes. (More on this in a moment.)
Using LINQ to avoid emissions of loops
The Language Integrated Query (LINQ) syntax resembles natural language and makes it easier to express the intent of a query. Furthermore, LINQ allows you to chain multiple operations together, creating a pipeline of operations. This enables developers to break down complex tasks into smaller and more manageable steps. More importantly, with LINQ you have no explicit loops. Like if statements, loops are the pillars of programming but tend to pollute code with nested blocks and consume too many lines of the code editor.
With LINQ, you don’t need to write explicit loops (such as for or foreach) to perform operations on collections. The query operators encapsulate the iteration logic, reducing the need for boilerplate code and enhancing clarity.
Here’s a demonstration of how to generate a list of even numbers without using LINQ:
var numbers = new List<int> { 1, 2, 3, 4, 5 };
var squares = new List<int>();
foreach (int n in numbers)
{
if (n % 2 == 0)
{
var squared = n ■ n;
squares.Add(squared);
}
}One easy way to improve readability is to invert the if statement within the loop. But using LINQ, you can do even more, with less:
var numbers = new List<int> { 1, 2, 3, 4, 5 };
var squares = numbers.Where(n => n % 2 == 0).Select(n => n ■ n);LINQ is primarily focused on working with collections, so not all loops can be turned into LINQ calls. For example, general-purpose while or do-while loops based on a condition cannot be directly converted to LINQ calls. The same goes for for iterations except when they just iterate a collection (and could be replaced with foreach). Finally, loops with complex nested structures, especially if they interact with multiple variables and conditions, cannot be easily expressed using a single LINQ pipeline. In general, LINQ is more suitable for single-pass transformations and for filtering operations. All loops that fall into this range may be effectively replaced, making the code much more concise.
The Extract Method refactoring pattern
The Extract Method refactoring pattern is a technique to improve code structure and readability. It involves moving a group of statements within a method into a new, separate method with a meaningful name that reflects its purpose.
Imagine a scenario in which you import content serialized in a comma-separated string into a RoadmapItem entity. At some point, you need to have the code that instantiates a RoadmapItem and copies in it any serialized content:
public IList<RoadmapItem> ImportFrom(IList<string> csvLines)
{
var list = new List<RoadmapItem>();
foreach(var line in csvLines)
{
var tokens = line.Split(',');
var rmi = new RoadmapItem();
rmi.ProductCode = tokens[0];
rmi.Text = tokens[1];
rmi.Eta = tokens[2];
list.Add(rmi);
}
return list;
}It’s just 15 lines of code—not even the most cryptic code you could write—but it can still be refactored for clarity and conciseness by using the Extract Method pattern with LINQ. First, move the code involved with the creation of the RoadmapItem to a factory method on the entity class, like so:
public static RoadmapItem FromCsv(string line)
{
var tokens = line.Split(',');
var rmi = new RoadmapItem();
rmi.ProductCode = tokens[0];
rmi.Text = tokens[1];
rmi.Eta = tokens[2];
return rmi;
}Next, make the loop disappear using LINQ. The entire code is now four lines long—two more if you opt to break long instructions into multiple lines for further clarity:
public IList<RoadmapItem> ImportFrom(IList<string> csvLines)
{
return csvLines
.Select(RoadmapItem.ImportCsv)
.ToList();
}Here, the details of the creation of the roadmap item are hidden from the main view but are accessible if you drill down. Moreover, you added a factory to the entity, accepting the fact that the entity in the domain can be created—on business demand—from, say, a CSV file. So, you didn’t just compact the code, but you also made it more business focused (moving business and implementation details one level downward) and immediately comprehensible.
Extension methods
The term syntactic sugar in programming refers to language features that don’t add new functionality but offer a more convenient syntax for existing operations. Extension methods fit this definition as they allow developers to add new functionality to existing types without modifying their original code. For example, here’s how to add a new Reverse method to the type string:
public static class StringExtensions
{
// Extension method for type String that adds the non-native
// functionality of reversing content
public static string Reverse(this string theString)
{
var charArray = theString.ToCharArray();
Array.Reverse(charArray);
return new string(charArray);
}
}Technically, extension methods are static methods that can be called as if they were instance methods of the extended type. The trick is to use the this keyword as the first parameter; this allows the compiler to identify the target type and successfully resolve dependencies.
Extension methods enhance code readability, reusability, and maintainability, enabling developers to create custom methods that seamlessly integrate with built-in or third-party types. To experience the power of extension methods, look at the following code snippet based on the free Youbiquitous.Martlet.Excel NuGet package (which, in turn, depends on the DocumentFormat.OpenXml package):
// Get a SpreadsheetDocument using the OpenXml package
var document = SpreadsheetDocument.Open(file, isEditable: false);
// The Read extension method does all the work of preparing a worksheet object
// The injected transformer will turn into a custom class
var data = document.Read(new YourExcelTransformer(), sheetName);Using the OpenXml library, going from a file or stream to manageable data takes several lines of code and involves several Excel objects. But at the end of the day, all you want is to specify an Excel reference and some code that accesses content and copies it into an app-specific data structure:
public static T Read<T>(this SpreadsheetDocument document,
IExcelTransformer<T> transformer, string sheetName = null)
where T : class, new()
{
if (transformer == null)
return new T();
// Extract stream of content for the sheet
// (Uses another extension method on SpreadsheetDocument)
var (wsPart, stringTable) = document.GetWorksheetPart(sheetName);
return transformer.Read(wsPart, stringTable);
}Even more nicely, in the transformer class, you can use the following code to read the content of cell C23 as a DateTime object:
var day = wsp.Cell("C23").GetDate();In essence, extension methods are useful for adding utility methods to classes that are not directly under the developer’s control, such as framework types or external libraries.
Boolean methods
Earlier in this chapter, I presented the following code as a significant improvement because of the use of LINQ to remove the inherent loop:
var squares = numbers.Where(n => n % 2 == 0).Select(n => n ■ n);To be honest, though, this snippet has a readability problem: the Boolean expression. At a glance, can you say what filter is being applied to the numbers collection? Here’s how to rewrite it for readability:
var squares = numbers.Where(n => n.IsEven()).Select(n => n ■ n);Especially if named following conventions such as IsXxx, HasXxx, SupportsXxx, ShouldXxx, or perhaps CanXxx, a Boolean method is incomparably clearer than any explicit Boolean expression.
Where does the example method IsEven come from? It could, for example, be an extension method:
public static bool IsEven(this int number)
{
return number % 2 == 0;
}This approach is pretty good for primitive .NET Core types, but it’s even more powerful if you scale it up to the level of domain entities. The “behavior” to add to domain entities definitely includes Boolean methods for whatever conditions you want to check.
Naturalizing enums
You can apply extension methods and the Boolean method rule to values of enumerated types. In programming, an enum type defines a distinct set of named numeric values, making it easier to work with a predefined set of related constants and improving code readability:
public enum RevisionStatus
{
Unsaved = 0,
Draft = 1,
Published = 2,
Archived = 3
}How would you verify whether a specific document has been published? Based on what’s been stated so far, you would likely go with a method on the entity:
public class ReleaseNote : RenoirEntity
{
public bool IsPublished()
{
return Status == RevisionStatus.Published;
}
// More code
...
}Great, but now imagine that the enum value is passed as an argument to some method. Consider the following:
public enum BulkInsertMode
{
SkipExisting = 0,
Replace = 1
}
public void DocumentBulkCopy(IList<ReleaseNote> docs, BulkInsertMode mode)
{
// Classic approach
if (mode == BulkInsertionMode.SkipExisting)
{ ... }
// More readable approach
if (mode.ShouldSkipExisting())
{ ... }
// More code
...
}Needless to say, ShouldSkipExisting is another extension method defined to work on individual enum values:
public static bool ShouldSkipExisting(this BulkInsertMode mode)
{
return mode == BulkInsertMode.SkipExisting;
}Surprised? Well, that’s exactly how I felt when I found out that extension methods could also work with enum values.
Using constant values
Hard-coded values without meaningful context or explanation should never appear in code. That doesn’t mean your million-dollar project will fail if you use a constant somewhere, nor does it mean that you should toss an entire code base if you find a few hard-coded values here and there. Instead, you need to take a pragmatic stance.
As long as explicit constants remain confined to a method, a class, or even an entire library, then they are basically harmless. It’s more a matter of technical threat than technical debt. It’s a different story, however, if those constants are interspersed throughout the entire code base without a clear map of where, how, and why. So, as a rule, don’t use magic numbers and magic strings. Constants are part of a business domain and belong to a domain model; as such, they should be treated as value types.
In a business domain, quite often you encounter small groups of related numbers or strings. For numbers, you can use enum types. But for strings? Very few programming languages natively support string enums (Kotlin, Rust, TypeScript), and C# is not in the list. In C#, string enums can be implemented through a proper class, as shown here:
// Valid surfaces for tennis matches
public class Surface
{
private static readonly Surface[] _all = { Clay, Grass, Hard };
private Surface(string name)
{
Name = name;
}
// Public readable name
public string Name { get; private set; }
// Enum values
public static readonly Surface Clay = new Surface("Clay");
public static readonly Surface Grass = new Surface("Grass");
public static readonly Surface Hard = new Surface("Hard");
// Behavior
public static Surface Parse(string name)
{ ... }
public IEnumerable<Surface> All()
{
return _all;
}
}As the string enum is ultimately a class, you may not need extension methods to extend its functionality as long as you have access to the source code.
Avoiding the Data Clump anti-pattern
The Data Clump anti-pattern describes a situation in which a group of data items or variables frequently appear together in multiple parts of the code. These data items are tightly coupled and are often passed around together as loose parameters to various methods.
Data clumps are problematic primarily because the resulting code is harder to read and understand due to the scattered and repeated data. In addition, the same group of data is duplicated in different parts of the code, leading to redundancy. Finally, code with data clumps is fragile. That is, if the data structure changes, you must update it in multiple places, increasing your odds of introducing bugs.
Here’s an example data clump:
public IEnumerable<ReleaseNote> Fetch(string tenant,
int year, string productCode, string author, int count)
{
// Expected to filter the list of documents based on parameters
}This method applies a dynamically built WHERE clause to the basic query that fetches release note documents. There are up to five possible parameters: tenant code, year, product code, document author, and maximum number of documents to return.
In a web application, all these data items travel together from the HTML front end to the presentation layer, and from there through the application layer down into a domain service or repository. This is a relatively safe scenario, as the data clump moves unidirectionally and through application layers. Writing the necessary code is ugly and boring but hardly error-prone. But what if, at some point, you need to add one more item to the clump—say, release date? At the very minimum, you need to put your hands in various places.
In general, data clumps may indicate that there is a missing abstraction or the need to create a separate data structure. Fortunately, addressing the data clump anti-pattern is easy. Just encapsulate related data into a single class—for example, QueryFilter. This promotes better organization, improves code readability, and reduces code duplication. Additionally, using data structures with a clear purpose makes it easier to understand the intent of the code and makes future changes less error-prone.
In addition to coding design practices, it also helps to adhere to common style practices. The resulting code is prettier to read and inspect. It also promotes positive emulation among developers, as no one wants to push code that looks ugly and untidy.
Common-sense coding guidelines
For the most part, the following coding style practices—which nobody should ignore—are just common sense. Each developer should follow them whenever writing code, and enforcing them across a team is critical. The guidelines are as follows:
■ Consistent indentation and bracing : Use consistent indentation (preferably with tabs) to visually align code blocks and improve readability. Be consistent with braces too. In C#, the convention is Allman style, where the brace associated with a control statement goes on the next line, indented to the same level as the control statement, and statements within braces are indented to the next level.
■ Meaningful naming : Use descriptive and meaningful names for variables, methods, and classes that reflect their purpose. Files and directories within a project should also be named and organized in a logical and consistent manner, following project-level conventions. (Typically, you want to have one class per file.)
■ Consistent naming convention : Follow the naming convention of the programming language. For C#, it is camelCase for variables and fields and PascalCase for classes and their properties. Exceptions (for example, snake_case) are acceptable but in a very limited realm such as a single class or method.
■ Proper spacing : Use proper spacing around operators, commas, and other elements to enhance code readability. Also, add one blank line between related groups of method calls to mark key steps of the workflow you’re implementing.
Partial classes
In C#, partial classes are used to split the definition of a single class across multiple source files. In this way, a large class can be divided into more manageable parts, each in its own file, while still being treated as a single cohesive unit at compile time. Partial classes are compiled as a single class during the build process; the separation is only a developer-time feature. Note that partial classes cannot be used to split non-class types (for example, structs or interfaces) or methods across multiple files.
With partial classes, related code members (for example, properties and methods) can be grouped together, enhancing code navigation and organization within the integrated development environment (IDE). The overall code base becomes more organized and easier to work with. To some extent, partial classes also assist with team collaboration, as multiple developers can work on different parts of a class simultaneously without having to merge their changes into a single file.
Note In general, partial classes are just a tool to better organize code; how you choose to split a class is entirely up to you.
Partial classes are widely used in Project Renoir, and most entity classes are coded over two or more partials. (See Figure 6-5.) The core classes of Project Renoir, BaseEntity and RenoirEntity, are split into two partial classes: the primary class with constructors and properties, and a child class with methods with a Methods suffix. Most repository classes in the infrastructure layer (see Chapter 8) have distinct partial classes for query and update methods.
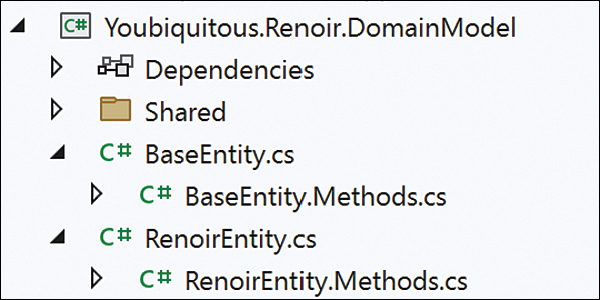
FIGURE 6-5 Partial classes in the Project Renoir domain model.
The figure is a Visual Studio screenshot that presents the domain model of the Renoir project open in Solution Explorer. Core classes BaseEntity and RenoirEntity are organized in two partial classes each-the main one and a child one named with a Methods suffix. In the screenshot, the File Nesting mode of Visual Studio is enabled and works in web mode.
Note With the File Nesting mode of the Visual Studio Solution Explorer set to Web, partial classes with a common prefix in the name (for example, BaseEntity and BaseEntity.Methods) are rooted in the same tree view node and can be expanded and collapsed, as in Figure 6-6.
Visual Studio regions
Visual Studio regions are another developer-time tool for working with large classes more effectively. A region is a code-folding feature that allows developers to organize and group sections of code within a file. It is used to create collapsible code blocks, providing a way to hide or show sections of code as needed.
Regions are commonly used to group related code, such as methods, properties, or specific functional sections. They can also be used for documentation purposes by adding comments explaining the purpose of the region.
Both partial classes (a C# feature) and regions (a Visual Studio feature) are helpful for organizing code, but both should be used judiciously. In particular, overusing regions can give a false sense of readability when in fact the class (or method) is bloated or polluted and in desperate need of refactoring. Similarly, misuse of partial classes may distribute complexity over multiple files, again giving a false sense of readability and organization when, in the end, all you have is a giant god-style class.
Note Regions are not a tool for magically making the code modular. Their use case is to logically group code and improve code organization, not to hide excessive complexity and code smells. So, you should make thrifty use of regions, but do use them.
Line and method length
Too often, we face blurry recommendations, such as, “Keep each method short and focused.” But what kind of guidance do we really get out of it? Beyond the general recommendation of conciseness and focus, we need to be much more specific about numbers and measures. For example, what is the recommended length for a single line of code? The C# compiler doesn’t pose limits, but most coding style guidelines rightly recommend keeping the maximum length to around 100, maybe 120, characters. (See Figure 6-6.)
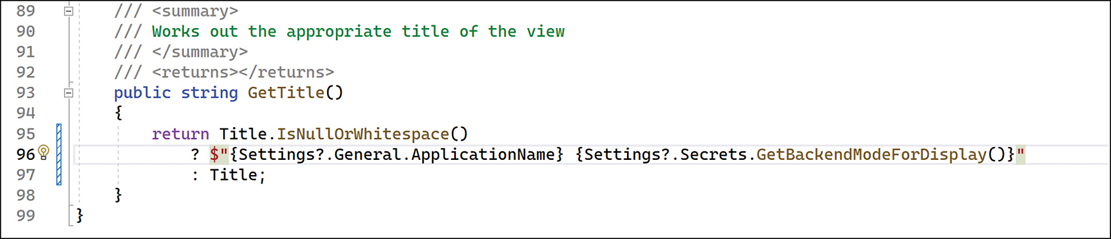
FIGURE 6-6 Visual measurement of line lengths.
The figure is a screenshot taken from Visual Studio that presents a short method returning a string from a ternary operator. Without breaks, the line would be over 150 characters wide. As in the figure, the longest line takes 93 characters and leaves about 6 cm of white space to the right before the Solution Explorer window using a hi-res laptop screen and 100% of font size.
The longest line of code in Figure 6-6 would exceed 150 characters if it were not broken. As shown in the figure, instead, the longest line spans 93 characters, leaving approximately 6 cm of whitespace to the right on a hi-res laptop screen and using the Cascadia Mono font with a default size of 12 points. So, in addition to improving code readability, limiting line length helps prevent horizontal scrolling and ensures code is more accessible on different screen sizes or when viewed side by side during version control.
As for the length of methods, giving a specific number is more problematic, but the same general principles apply. Methods that are too long can be harder to comprehend and maintain. Therefore, it is considered good practice to keep methods relatively short and focused on a single task. So, what is the recommended number of statements for a class method? My reference number is 300 lines, but the shorter the better.
To keep methods short, there are various approaches. One is to keep in mind that less logic requires fewer lines and to therefore focus the method on just one key task. Another is to use the most concise syntax reasonably possible. (Note that concise doesn’t mean cryptic!) Finally, you can break code into smaller components and use abstractions so that each piece of code describes only its main task, leaving separate, dedicated classes or methods elsewhere to deal with the details.
As an example, consider the following code to extract the content of an Excel file into a custom data structure using the extension methods of the Youbiquitous.Martlet.Excel package:
public partial class YourExcelImporter : IExcelImporter<List<YourDataStructure>>
{
public List<YourDataStructure> Load(Stream stream, string sheetName = null)
{
var document = SpreadsheetDocument.Open(stream, false);
var obj = document.Read(new YourDataStructureTransformer(), sheetName);
document.Close();
return obj;
}
}The Read extension method eliminates at least 20 lines of code, and the injected transformer—another file—does the work. For a fairly sophisticated Excel file, such a transformer would consume more than 200 lines.
Comments
Opinions on comments in code vary among developers, and there is no one-size-fits-all approach. Different developers and teams may have different perspectives on the value and use of comments in code. But nearly everyone agrees that well-written comments enhance code comprehension and provide insights into the code’s intent and purpose. Unfortunately, there are quite a few varying definitions of what qualifies as a “well-written” comment.
Some developers believe that code should be self-explanatory and that comments are a sign of poorly written code. They prefer to write clean and expressive code that doesn’t require comments to understand its functionality. Other developers just write random comments, depending on their mood and the task at hand. Yet other developers try to be as precise and verbose as they can—at least at first. Their effort inevitably diminishes with the pace of pushes to the repository.
When it comes to comments, here are some general considerations to keep in mind:
■ Although comments are valuable, too many comments can clutter code and hinder readability.
■ Relying only on inherent code readability is not ideal, but it’s probably better than dealing with outdated or incorrect comments.
■ Comments can sometimes be an indicator of code smells, such as excessive complexity, lack of modularity, or unclear variable/function names.
■ In general, over-commenting is never a great statement about the code.
Here are my directives to the teams I work with:
■ Always enter XML comments to describe the purpose of methods and public elements of a class. (I find it acceptable to skip over method parameters.)
■ Whether you comment or not, ensure that the purpose and implementation of each group of methods is clear to other developers (including yourself, when you get back to the code weeks later).
■ When you comment, be precise and concise, not chatty, silly, or long-winded.
Who’s the primary beneficiary of comments in code? Your peers, for sure. So, comments are not directed at newbies—meaning you should reasonably expect that whoever reads your comments has the requisite programming skills and knowledge of the domain context.
A common sentiment among developers is, “Write (and test) it first, and make it pretty later.” Unfortunately, one thing I’ve learned during three decades in the software industry is that nobody ever has the time (or the will) to make their own code prettier once it’s been pushed. The quote at the beginning of the chapter says it all. It’s not a matter of being a great developer; it’s simply a matter of being a good developer with great habits—and writing readable code is one of the greatest.
Fortunately, modern IDEs (such as Visual Studio, Visual Studio Code, Rider, and so on) and code assistant plugins can considerably accelerate your efforts to absorb the techniques discussed in this chapter and turn them into everyday habits. So, too, can principles like those in the SOLID framework. Both are discussed in this section.
Me and readable code
I started my career in the early 1990s as a regular product developer. A few years later, I became a freelance writer, consultant, and trainer. For several years, I focused on technology and demo code. When writing books, articles, and courseware, I simply put myself in the imaginary role of a professional developer coming to grips with any given technology and patterns. It mostly worked.
A decade later, I began taking on occasional professional development gigs and faced the first ins and outs of maintainable code. Even though these projects were intermittent, I had enough of them that I became even more comfortable in the shoes of a professional developer and was able to write even better and more realistic books, articles, and courses.
Then, in late 2020, I switched completely to product building. My attitude and sensitivity toward readable code have grown exponentially since then. When I look back, I realize it took me more than a decade to write readable code as my default mode. Had I focused more on development during my career, I would have achieved this more quickly, but it still would have been a matter of years.
The role of code assistants
So, how do I write readable and maintainable code? I focus on the task at hand and make a mental model of the necessary software artifacts. In my mental model, conditions are if statements and loops are while or at most foreach; I don’t even think about pattern-matching. Then I get going.
As I write, I rely on code assistants, particularly ReSharper. My code is constantly under review for conciseness and readability. I take nearly any suggestion a plugin may have with respect to style and patterns, and I avidly seek out any squiggles or tips I silently receive.
Code assistants suggest when and how to break complex expressions into multiple lines, when to invert or merge if statements, when a switch is preferable, and especially when your code can be rewritten using LINQ or pattern matching expressions. Visual Studio and other tools also offer refactoring capabilities to extract methods and, more importantly in a DDD scenario, rename classes and members. It all takes a few clicks and a few seconds. No excuses.
A new generation of code-assistant tools is surfacing following the incredible progress of AI technologies. GitHub Copilot employs sophisticated machine-learning models trained on publicly accessible code from GitHub repositories. As you input code in Visual Studio, the underlying AI examines the context and offers pertinent suggestions in real time. Additionally, you can type comments about the code you will write and have the AI use your notes as a prompt to generate code on the fly.
Note Using Visual Studio and ReSharper together can be problematic in terms of memory consumption and overall stability, but nothing that a middle developer-class PC with a good amount of RAM can’t handle.
SOLID like personal hygiene
When it comes to software principles, I believe that it’s important to strike a balance and not rigidly enforce the principles in every situation. For this reason, I look skeptically at posts and articles that enthusiastically illustrate the benefits of SOLID, as if deviating from these principles would inevitably lead to project failure. SOLID is an acronym for the following five principles:
■ Single responsibility principle (SRP) : This principle suggests that a class (or method) should encapsulate a single functionality and should not take on multiple responsibilities. In essence, it says, “Focus on just one task.” But the boundary of the task is up to you, based on your expertise and sensitivity. What’s the right granularity of the task? Nobody knows, and anyway, it might change on a case-by-case basis. I don’t see any strict and concrete guidance in it, such as inverting an if or using Boolean methods.
■ Open/closed principle (OCP) : This principle states that software entities, such as classes, should be open for extension but closed for modification. This means that you should be able to add new functionality through inheritance or interface implementation without altering the existing code.
■ Liskov’s substitution principle (LSP) : This has to do with when you inherit one class from another—specifically, the derived class should never restrict the public interface of the parent class. Clients using the base class should not need to know the specific subclass being used; they should rely only on the common interface or contract provided by the base class.
Note LSP was introduced by Barbara Liskov in 1987 and was popularized as one of the SOLID principles by Robert C. Martin over two decades ago. Today, the C# compiler emits a warning if you break LSP, and the new keyword has been added to enable developers to work around poor inheritance design and avoid exceptions. In the end, LSP remains a valid point in design, but only if you extensively use object orientation. Surprisingly, this is not so common these days. Now, we use flat collections of classes, and when we inherit, we mostly override virtual members or add new ones. In all these common cases, LSP doesn’t apply.
■ Interface segregation principle (ISP) : This one’s obvious: Don’t make classes depend on more interfaces than they need to. Sometimes I think it’s included just to obtain a nicer acronym than SOLD.
■ Dependency inversion principle (DIP) : This principle suggests that high-level modules, such as application services, should not depend on low-level modules, like database access or specific implementations. Instead, both should depend on abstractions, allowing for flexibility and ease of modification in the system.
Personally, I would reduce both OCP and DIP to one core principle of software design: program to an interface, not to implementation. However, this principle is helpful when it’s helpful. If used blindly, however, it only results in the over-engineering of projects.
Overall, SOLID principles aim to make software development more modular and maintainable. The problem is that they are relatively easy to understand but not so easy to turn into code—as evidenced by the counterarguments noted in some of the preceding bullets. These counterarguments do not dismiss the value of SOLID principles entirely; they simply raise a caution in terms of making sure you know how to translate them into effective actions in a project. Like personal hygiene, you must know about and practice SOLID. But it won’t save you from any serious disease.
Dedicated to the unchanging aspects of the core business logic, the domain layer consists of two distinct but interconnected components: a domain model and an optional set of domain-specific services.
This chapter focused on the key aspects of an object-oriented domain model. The domain model embodies the underlying conceptual framework and essential business rules of a software application. It serves as an abstract portrayal of the problem the software intends to solve, encompassing elements such as entities, relationships, events, and business logic.
By depicting the significance and interactions among domain entities, the domain model aids development teams in giving life and substance to business processes within the context of a cohesive and flexible solution. When well-crafted, the domain model enhances communication between technical and non-technical teams and fosters the creation of robust and requirements-focused software.
This chapter also delved into the process of constructing a domain model as a C# class library composed of highly readable and aesthetically pleasing code. It also explored the benefits of utilizing IDE plugins to aid in this endeavor.
The next chapter is about domain services. As you’ll see, in simple cases, domain services are interspersed as plain helper classes in the application and infrastructure layers. Yet, they play a role in the DDD vision, and that’s where we’ll start.
Before I came here, I was confused about this subject. Having listened to your lecture, I am still confused. But on a higher level.
—Enrico Fermi
The primary focus of the domain model is to accurately model the real-world concepts and processes of the domain it represents. In the model, domain entities are objects that possess a unique identity and encapsulate state and behavior related to the domain. Entities contain the business logic and invariants that ensure the consistency and integrity of the data they hold. Where needed, aggregates group together entities and value objects, serving as a transactional boundary and ensuring consistency within the domain.
Unfortunately, the domain model is often insufficient to cover the entire set of necessary operations and behaviors. There might be specific processes to implement that do not naturally belong to a single entity or aggregate. These are typically operations that encapsulate multifaceted logic that involves interactions between multiple entities or requires coordination across various components of the system.
Enter domain services.
Domain services encompass operations that are essential for the functionality of the domain but are not inherently tied to any specific entity. Unlike domain entities, domain services do not have their own state; they are stateless machines that simply retrieve and process data.
Let’s state this up front: Although domain services have a distinct place in the DDD framework, they aren’t absolutely essential in a practical real-world application. The tasks that domain services are intended to take on can always be assigned to application services. Furthermore, some of these tasks can also be assigned to repositories if it is acceptable to raise the abstraction level of repositories from the granularity of a traditional CRUD library. (More on repositories in the next chapter.)
So, why even talk about domain services? Well, domain services offer more than pure programming power. They also offer precision and clarity in the software rendering of the domain. By housing multifaceted domain logic within dedicated services, domain entities can focus on their core responsibilities, remaining cohesive and maintaining a clean separation of concerns. At the same time, the application layer remains responsible solely for the orchestration of use cases, and the infrastructure layer focuses only on persistence and external services.
In his book Domain-Driven Design: Tackling Complexity in the Heart of Software, Eric Evans identifies three distinct attributes of a well-crafted domain service:
■ A domain service handles any operation that pertains to a domain concept that is not inherently part of any domain entity.
■ In contrast to application services that employ DTOs for communication, a domain service operates directly with domain entities.
■ Any performed operation is stateless; some data flows in, and some other data flows out.
Domain services are usually designed to be stateless for a few reasons. The primary reason is to prevent unintended side effects and unwanted interactions with other parts of the system. Because they are stateless, domain services are not tied to any specific context. So, their behavior remains consistent regardless of where or when they are called. The overall behavior of a domain service is not affected by mutable internal states, so it is predictable and deterministic. Predictability makes it easy to reason how the service will respond to different inputs, making it simpler to understand, test, and maintain.
The lack of a shared state brings other benefits too. For example, multiple requests can be processed simultaneously without risking data corruption or unexpected interactions. Additionally, services can be used across different parts of the system without carrying along any contextual baggage. Implementation and testing become easier, minimizing the chances of bugs related to state inconsistency.
Note Overall, designing domain services to be stateless aligns well with the principles of DDD, emphasizing clear boundaries, separation of concerns, and focused responsibilities.
Because they’re intended to work only with domain entities, domain service classes remain out of direct reach of the presentation layer. They are just one of the tools that application services may use to orchestrate use cases. (See Figure 7-1.)
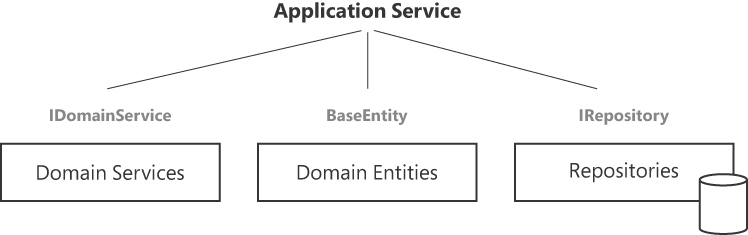
FIGURE 7-1 Application services orchestrate use cases coordinating the activity of domain services, entities, and repositories.
The figure is a diagram in which a root text element (named Application Service) is loosely connected to three rectangular blocks: Domain Services, Domain Entities and Repositories. The last block also presents an overlapping cylinder to denote the access to databases. On top of the rectangular blocks grayed out text indicates the main interface: IDomainService, BaseEntity and IRepository.
Although not strictly necessary, you can adhere to convention and mark each domain service class with some IDomainService interface and, in case of common functionality (for example, logging, localization, or application settings) a DomainService base class. The IDomainService interface can simply be a marker interface, as shown here:
// A plain marker interface
public interface IDomainService
{
}You can leverage a common root—whether in the form of an interface or base class—to automatically register domain services as transient instances in the .NET Core dependency injection (DI) system. Nevertheless, even without inheritance, the service can still be injected as necessary.
In a DDD implementation that relies on several different classes of services (application, domain, and external), communicating the clear intent of each class with an unambiguous name is a great practice. So, it is advisable to give domain services clear and descriptive names that accurately convey their purpose. This intentional naming approach—respectful of the ubiquitous language—also promotes efficient communication among the team.
Because domain services are responsible for carrying out tasks that involve coordination between multiple entities, they are tightly bound to the names and concepts crystalized in the ubiquitous language vocabulary. By design, a domain service is a piece of business logic; as such it must be aptly named, strictly following business conventions. Choosing the appropriate business name is particularly important in the event of a logical or implementation bug because it streamlines communication between domain experts (usually non-technical stakeholders who understand the business requirements) and developers.
Consider an e-commerce system in which calculating the total price of an order typically involves discounts, taxes, and currency conversion. It’s likely an array of entities and value objects, none of which naturally bear the full responsibility of the task. What should you name the domain service, then? Would something like OrderPricingService be good? Well, it depends on the language used by stakeholders. If the business terminology commonly used is, say, “finalize the order” then the right name is (a variation of) OrderFinalizerService. Not following this rule leaves a crack in the system’s wall and will likely create a logical bug.
The behavior of a stateless component such as a domain service is solely determined by provided inputs. The domain service doesn’t store any data about past interactions and treats each request as an independent interaction. If data is required for a particular operation, it must be provided as input to that operation, and such external data is not stored.
Statelessness doesn’t mean that a component can’t have any data at all. Rather, it means that any data a component requires must be explicitly provided when needed through method parameters or injected dependencies. Statelessness emphasizes autonomy, predictability, and separation of concerns, not a total absence of stateful data. So, to function effectively, domain services typically rely on externally persisted data stored in a durable storage medium.
This brings us to a fundamental question: Should a domain service directly engage in retrieving the data it operates on that may also be modified as part of its core business task? There’s no one-size-fits-all answer. Certainly, domain services should not have any direct exposure to database details or connection strings and should rely on separate repositories for any such needs. Beyond that, the decision of whether domain services should directly access data or receive it from the outside depends only on the application. The more a specific domain operation requires coordination between multiple entities and involves complex data retrieval logic, the more it might orchestrate these interactions internally and use repositories to fetch any necessary data.
In a design where domain services are seen as pristine logic entities, deliberately isolated from repositories, who assumes the responsibility of retrieving necessary data? As it happens, it is up to the application layer to coordinate the interaction between domain services and repositories.
Within an application service, you would use the appropriate repositories to retrieve required data. This data could be transformed, if necessary, into domain entities or value objects. The application service is also responsible for preparing the necessary data before passing it to the domain service. Once the data is retrieved and prepared, the application service invokes the domain service, passing the transformed data as parameters. The domain service then carries out its domain-specific logic without having to worry about data retrieval.
By structuring your application in this way, you fully adhere to the principle of separation of concerns. Each component has a clear responsibility: Domain services focus on domain logic, repositories handle data access, and application services coordinate the interactions. Furthermore, components can be developed, tested, and maintained independently. In particular, domain services can be unit-tested with controlled inputs, and application services can be tested for their interaction and orchestration.
Usually, domain services are employed when a specific business operation involves complex rules and calculations over multiple domain entities or aggregates to mediate these interactions while maintaining aggregate boundaries. This section explores a few examples from a functional viewpoint before reviewing a few concrete implementation facts.
Suppose that within an e-commerce system, every time a customer finalizes an order, the system needs to add points to that customer’s loyalty card. To achieve this, the application service can simply delegate the task to some LoyaltyStatusService domain service. Here’s a possible programming interface:
public class LoyaltyStatusService : IDomainService
{
public int AccruePoints(Order order)
{
// Return new total of points
}
...
}This interface is too simplistic. Realistically, the domain service method can’t operate without also fetching the customer’s purchase history. Moreover, the number of points to add is not necessarily a linear function based on the purchased amount. There might be extra points or other benefits (for example, a change of customer status to silver or gold) depending on the duration of the customer’s fidelity. Furthermore, fetching data is only one step; you also likely need to write back some updated information. If you leave the application layer in control of everything, the system will access the database multiple times, which may (or may not) be an additional issue.
A more realistic interface could be as follows:
public int AccruePoints(Order currentOrder, IEnumerable<Order> history)
{
// Return new total of points and/or other
// information such as the new customer status
}Yet another interface could pass an IOrderRepository reference to the service to enable it to fetch and save data autonomously. All these interfaces could be good or bad; the ultimate decision of which one to use belongs to the architect. This decision is typically made by looking at the dynamics of the business domain and nonfunctional constraints—for example, how often campaigns change, the presence of legacy code, team skills, and organizational preferences.
Domain services can also play a role in publishing or subscribing to domain events. They can broadcast events related to specific domain actions or subscribe to events from other parts of the system. Broadly speaking, a domain event is an event that could be triggered within the domain model’s scope.
An alternative implementation for the loyalty status scenario might involve the application layer triggering an event within the domain that requires one or more handlers. A domain event can take the form of a straightforward C# event within an aggregate class, or it might use a publish/subscribe infrastructure. Information is placed on a bus, and designated handlers receive and process it as required. Handlers belong to domain service classes.
Important Domain events are a powerful aspect of DDD, but mainly if the application is designed around events and its overall architecture qualifies as an event-driven architecture. Domain events implement business logic in a more extensible and adaptable way than hard-coded workflows. It’s a new architectural resource for addressing the same problem and smoothing the work required to keep the system aligned to the business needs in the long run.
Could an action like sending an email (such as a confirmation email or a legal reminder) be thought of as behavior intrinsic to the domain logic? Yes and no. Whether it is or not depends on the specific context and requirements of the application.
In many cases, sending an email is not considered a core domain concern, but rather a technical detail associated with communication and notifications. However, there are scenarios for which sending emails might be closely related to the domain and should be treated as such. In a recent project, we treated the task of sending a particular email as a core domain behavior. The email was an unofficial legal reminder about an upcoming deadline, and we determined that it was directly tied to a core business process.
In general, to determine whether sending an email should be part of the domain logic, you should look at the domain relevance of the action and how tightly it relates to some business rule or task. If the timing, content, recipients, or other attributes of the email are dictated by specific business requirements, this indicates that sending the email is more than just a technical concern.
Still, not all emails an application may send involve a core domain behavior. If sending even a legal reminder is purely a technical detail and doesn’t directly relate to the inherent behavior of your application’s domain, it might be better suited as part of the application or infrastructure layer. In such cases, an application service or a dedicated service responsible for communication might handle this responsibility.
public class LegalReminderService : IDomainService
{
public NotificationResponse NotifyDeadline(string recipient, DateTime deadline)
{
// Return success or failure of sending the reminder
}
...
}Note An important signal about the domain relevance of an email action is if nothing in the names of the methods and classes involved refers explicitly to the act of sending an email. What ultimately turns out to be an automatic email is referred to as a legal reminder in the ubiquitous language.
Whenever interacting with an external system, API, or email service is part of the business logic, the domain service responsible must receive a reference to some service that knows how to do it. The email service is often an external component built around a third-party email provider such as SendGrid or Mailgun.
public class LegalReminderService : IDomainService
{
private readonly IEmailService _email;
public LegalReminderService(IEmailService emailService)
{
_email = emailService;
}
public NotificationResponse NotifyDeadline(string recipient, DateTime deadline)
{
// Use _email reference to send actual emails
// Return success or failure of sending the reminder
}
...
}The logic of the service must abstract away the technical details and provide a clean interface for the domain to receive.
Note The definition of the interface (for example, IEmailService) belongs to the domain model, whereas the actual implementation (that uses, say, Sendgrid) lives in the infrastructure layer.
In a typical domain model, there is often a UserAccount entity, and its associated password might find storage within the application’s database. However, retaining passwords in their clear state within this database inevitably introduces a substantial security vulnerability. So, the business logic firmly dictates the need to transform passwords into hash values before storage. The question is, where does the password-hashing functionality belong? Is it a domain service?
Password hashing is generally considered a technical concern and not a part of the domain logic. It’s quite unlikely that the ubiquitous language contains business wording that relates explicitly to password storage. At most, you might find a requirement that clarifies the level of hash security to target. So, password hashing is more closely related to security and infrastructure, and it’s commonly implemented as an infrastructure security service invoked from the application layer. Although there might be some rare situations for which you could argue that password hashing is tightly integrated with some specific domain security processes, DDD generally recommends treating it as a technical detail separated from the core domain logic.
Imagine code that handles a login attempt. The application layer receives the input from a visual form and retrieves the user that matches the identity. The job of checking hashed passwords occurs within a dedicated hashing service injected in the application layer, like so:
public class AccountService
{
private readonly IHashingService _hash;
public AccountService(IHashingService hashing)
{
_hash = hashing;
}
public bool ValidateCredential(string email, string clearPassword)
{
var user = _userRepository.Find(email);
return _hash.Validate(user.Password, clearPassword);
}
}It’s plain, simple, and well-isolated—and kept outside the domain logic.
The first commandment of domain services is to perform operations strictly related to the business domain working on domain entities and value objects. The first warning that you might not be on track comes from the names chosen for classes and methods. Whenever you find it natural and seamless to use terms that are too technical (for example, email, hashing, caching, tables, or auditing) to code the body of a service, you should carefully reconsider what you’re doing. It might even be that you’re treating as a domain service something that’s better handled as an external, non-domain concern. When this happens, the primary risk is not introducing bugs, but rather spoiling the overall design, which may ultimately result in convoluted code and tight coupling—in short, technical debt.
Project Renoir deals with documents—release notes and roadmaps—created and managed by authorized users. One of the tasks accomplished through the application is therefore assigning users to a given document. The nature of this task can vary based on the desired business logic, encompassing anything from adding a record in a binding table to a more intricate endeavor entailing the validation of policies and constraints. The former case requires nothing more than a plain repository invoked from the application layer. The latter case, however, involves some business logic that might ideally be placed in a domain service.
Dependencies on other functions
In Project Renoir, the domain service layer is a separate class library project referenced by the application layer. The library maintains a dependency on the domain model and the persistence layer where repositories live.
Checking policies to validate the assignment of a user to a document might require you to check the latest actions performed by the user within the system as well as any documents they’ve worked on in the past. Past actions can be fetched by the application layer and passed as an argument. However, in Project Renoir, we have opted to keep the domain service entirely focused on the task of validating document policies with full autonomy.
Creating the interface
The behavior of the domain service is summarized by the interface in the following code. It’s called IDocumentPolicyValidator—a name that implies that the service simply evaluates whether outstanding policies are reflected in any document assignment to a given user.
public interface IDocumentPolicyValidator: IDomainService
{
bool CanAssign(UserAccount user, ReleaseNote doc);
bool CanAssign(UserAccount user, Roadmap doc);
AssignmentResponse Assign(UserAccount user, ReleaseNote doc, AssignmentMode mode);
AssignmentResponse Assign(UserAccount user, Roadmap doc, AssignmentMode mode);
}The interface is made by two pairs of methods—one per type of document supported. One method checks whether the document assignment violates any outstanding policy and returns a Boolean flag. The other method attempts to make assignments based on the value of the AssignmentMode enumeration.
public enum AssignmentMode
{
AssignAndReportViolation: 0,
FailAndReportViolation: 1
}In the default case, the assignment is performed, and any detected violations are reported. In the other case, no assignment is performed, and violation is reported.
Implementing the DocumentManagerService class
The domain service class DocumentManagerService is solely responsible for ensuring that users are assigned documents based on established policies (if any). Here’s the skeleton of the class:
public class DocumentManagerService
: BaseDomainService, IDocumentPolicyValidator
{
public const int MaxActiveDocsForUser = 3;
private readonly IDocumentAssignmentRepository _assignmentRepository;
public DocumentManagerService(IDocumentAssignmentRepository repository)
{
_assignmentRepository = repository;
}
// More
...
}The class receives a reference to the repository that deals with records in the document/user binding table. Both methods in the domain service interface—Assign and CanAssign—deal with specific business policies. An example policy might be that each user can’t be assigned more than, say, three documents at the same time. Another might require checking the calendar of each user and skipping over users who are expected to be on leave before the next document deadline.
public AssignmentResponse Assign(UserAccount user, ReleaseNote doc, AssignmentMode mode)
{
// Check whether already assigned
var binding = assignmentRepository.Get(user.Id, doc.Id);
if (binding != null)
return AssignmentResponse.AlreadyAssigned();
// Check whether document is ready for public assignment
if (!doc.IsReadyForAssignment())
return AssignmentResponse.NotReady();
// Evaluate specific policies
var response = EvaluatePolicies(user, doc);
if (mode.IsFailAndReport() && !response.Success)
return response;
// All good, just assign
var assignment = new DocumentUserAssignment(doc, user);
return _assignmentRepository.Add(assignment);
}Here’s a snippet from EvaluatePolicies:
public AssignmentResponse EvaluatePolicies(UserAccount user, ReleaseNote doc)
{
if (HasMaxNumberOfAssignments(user))
return AssignmentResponse.MaxAssignments();
if (HasIncomingLeave(user))
return AssignmentResponse.MaxAssignments();
return AssignmentResponse.Ok();
}The HasMaxNumberOfAssignments and HasIncomingLeave methods are protected (or even private) methods of the domain service class. They have access to any necessary repositories and perform data access to arrange a response.
Note If you face a scenario like the one depicted in HasIncomingLeave, then the domain service needs an additional repository reference to access the calendar of each user to determine whether they will take leave at some point in the near future.
You may have noticed that the earlier code snippets used tailor-made methods from some AssignmentResponse class to describe the outcome of a domain service method call. Why not just throw an exception?
The If…Then…Throw pattern
The decision to raise an exception within a domain service or to maintain control over potential issues is a matter of individual preference. From my perspective, exceptions should primarily address extraordinary circumstances. If there’s an opportunity to anticipate a specific code malfunction, a more elegant approach would involve managing the situation properly, providing relevant feedback to upper layers, and leaving them free to handle the response. Also, it should take into account that any try/catch block used to handle a thrown exception is costly compared to dealing with a regular method response.
Here’s a glimpse of a method defined on a response class that describes a specific failure in the business logic:
public class AssignmentResponse
{
public bool Success { get; private set; }
public string Message { get; private set; }
public int FailedPolicy { get; private set; }
public AssignmentResponse MaxAssignments()
{
return new AssignmentResponse
{
Success = false,
Message = "Maximum number of assignments",
FailedPolicy = MaxAssignments
};
}
}The FailedPolicy property is optional and may represent application-specific code to quickly communicate to the caller the reason for the failure. MaxAssignments can be a constant or maybe a value of a new enumerated type.
Note Although I generally avoid throwing exceptions from domain services and repositories, I lean toward implementing this practice within the domain model instead. The reason is that the domain model is a self-contained library intended for external use, particularly within various modules of the same application. Considering the pivotal role the domain model plays in the application, I believe that its code should be forthright in signaling any instances of invalid input or potential failures. I deem it acceptable to throw exceptions from domain services or repositories in the case of glaringly invalid input.
The request-endpoint-response (REPR) pattern is typically associated with a microservices architecture. However, it also clearly describes the flow of communication between any caller (typically an application service) and any responder (for example, a domain service or repository). As indicated by its name, this pattern consists of the following:
■ Request : This contains input data to process. In an API scenario (more on this in Chapter 9, “Microservices versus modular monoliths”), it may also include HTTP information and express data as JSON or XML payloads. In this application context, it often consists of a handful of loose values, possibly grouped in a data clump.
■Endpoint : In an API scenario, this represents a specific URL to receive incoming requests. More generally, it defines the location and context of the requested operation.
■ Response : This comprehends the responses generated after processing the request. It typically includes the Boolean result of the operation, plus additional data such as an error message and other metadata the client may need (for example, IDs or redirect URLs).
Outside the native realm of microservices architecture, the REPR pattern provides a structured approach for clients and services to communicate. It also acts as a safeguard against resorting to exceptions for application flow control—a practice that stands as an anti-pattern.
Dependency injection
Among the relevant patterns for a domain service implementation, dependency injection (DI) furnishes the domain service with essential resources like repositories, factories, and other services. Meanwhile, interfaces play a pivotal role in delineating the agreements between the domain service and its dependencies.
In the ASP.NET Core stack, you typically inject services via the native DI subsystem. In particular, domain services being stateless operations, you can configure them as singletons. Notice, though, that in ASP.NET Core, registered services can be injected into controllers, middleware, filters, SignalR hubs, Razor pages, Razor views, and background services. You can’t have a plain class, such as a domain service class, instantiated and all its declared dependencies resolved automatically.
This brings up the point of a small pragmatic optimization known as poor man’s DI. Consider the following class:
public class SampleDomainService : BaseDomainService
{
private readonly ISampleRepository _repository;
public SampleDomainService() : this(new DefaultSampleRepository())
{
}
public SampleDomainService(ISampleRepository repo)
{
_repository = repo;
}
...
}This class shows off a couple of constructors—the default parameter-less constructor and another one that allows the injection of an implementation of the needed ISampleRepository interface. Interestingly, the default constructor silently invokes the passage by the other constructor of a fixed implementation of the interface. Is this a poor form of tight coupling? Well, pragmatically, you’d use just one implementation in the various use cases. In this regard, there’s no reason to use a DI container and all its extra machinery. All you want to do is to get a new instance of the domain service class with a valid reference to a particular implementation of the repository. It’s you, not the DI container, who resolves the dependency on ISampleRepository. The code obtained couldn’t be simpler or more direct.
What are some possible disadvantages? One could be that code becomes tightly coupled and therefore potentially less maintainable. We’re simply silently using the same concrete class we’re supposed to use. Tightly coupled? Yes, but at the level of an individual class, doing otherwise would smell of overengineering.
Another disadvantage could be that you might (I repeat, might) experience difficulties in changing or swapping dependencies. Again, it’s overengineering. Realistically, you have just one repository doing the job for the entire application. If you need to change it, you just replace the class and recompile. If something weird happens, like having to replace the underlying database, well, that would be a huge change—well beyond the granularity of one repository interface.
The only sensible objection to the poor man’s DI, however, is that testing might become more challenging and ultimately lead to hidden dependencies. The second constructor—silently used also in case the default one is invoked—simply explicitly accepts an interface. You can still unit-test the domain service in full isolation without the risk of overengineering.
Overall, injection right in the constructor of the class is considered a best practice in modern software design. It provides a more robust and maintainable architecture than the poor man’s DI approach. Although the poor man’s DI might seem easier in the short term, it can lead to problems as your application grows in complexity. DI containers in frameworks like ASP.NET Core make it convenient to manage the creation and injection of dependencies, resulting in more modular and testable code.
NoteDid the ASP.NET Core team make a mistake by setting up a dedicated DI container? Although the ASP.NET DI container does a great job letting you access system services, it is not as powerful for general use as other products and requires developers to blindly use it without making sense of what they need. It just makes doing a good enough thing easy enough. Note, though, that you can still plug in your favorite DI library and a more powerful DI container comes with .NET 8. In contrast, the poor man’s DI requires discipline and understanding. It’s not worse; moreover, it’s more direct, faster, and equally testable and declarative.
Handling business rules with the strategy pattern
In a realistic application, the domain service layer typically handles most business rules due to the fundamental fact that, in most instances, the process of applying rules entails retrieving data from one or more tables. It’s worth restating that the domain model, instead, should remain entirely detached from the details of persistence and data storage.
Processing business rules is dynamic, especially in B2C contexts. Business rules and policies of diverse kinds might undergo frequent changes. You should feel free to hard-code business-rule validation if those rules remain consistent or only shift over longer spans—say, every few years. However, the landscape changes significantly when business rule updates happen more frequently, such as on a weekly basis. In this case, you should avoid even the slightest chance of encountering hidden dependencies or tangled code.
This is where the strategy pattern may be beneficial. The strategy pattern is a design principle that allows you to dynamically swap algorithms or behaviors within a class. Encapsulating these behaviors as interchangeable strategies promotes flexibility, reusability, and easier maintenance. This pattern enables the selection of a specific strategy at runtime, aiding in adapting to changing requirements without altering the core code structure.
Here’s an example in which the strategy pattern is used to abstract the payment method. The IPaymentStrategy interface defines the expected course of action:
public interface IPaymentStrategy
{
void ProcessPayment(double amount);
}
Here’s a possible implementation for the preceding strategy:
Click here to view code image
public class CreditCardPayment : IPaymentStrategy
{
public void ProcessPayment(double amount)
{
...
}
}Finally, the strategy will be used by some domain service, as shown here:
public class PaymentProcessorService
{
private IPaymentStrategy _paymentStrategy;
public PaymentProcessorService(IPaymentStrategy paymentStrategy)
{
_paymentStrategy = paymentStrategy;
}
public void MakePayment(double amount)
{
_paymentStrategy.ProcessPayment(amount);
}
}From the application layer, it all works like this:
var processor = new PaymentProcessorService(new CreditCardPayment());
processor.MakePayment(amount);In summary, the IPaymentStrategy interface defines the common method for processing payments. Concrete payment methods implement this interface. The PaymentProcessor class uses the selected payment strategy to process payments dynamically at runtime. This pattern allows for easy addition of new payment methods without modifying existing code. Back to our initial policies evaluation example, you can use a strategy pattern to encapsulate the logic that evaluates document-user policies.
The special case pattern
The special case pattern tackles a fundamental question: what is the recommended behavior when a code segment intends to return, say, a Document object, but there’s no appropriate object available? Should the code just return null? Should the code opt for some unconventional return values? Or should you introduce intricacies to discern the presence or absence of some result?
Look at the following code snippet, which attempts to retrieve a document from storage:
public Document Find(int id)
{
var doc = _documentRepository.Get(id)
return doc;
}If the search failed, what’s returned? In a similar situation, most methods would commonly return a valid Document instance or null. Therefore, the idea behind the pattern is to return a special document that represents a null document but, in terms of code, is still a valid instance of the Document class. Applying the special case pattern leads to the following:
public class NullDocument : Document
{
…
}NullDocument is a derived class that initializes all properties to their default or empty values. This allows any code designed for Document to also handle NullDocument instances. Type checking then aids in identifying any potential errors.
if(order is NullDocument)
{
...
}This is the essence of the special case pattern. In addition to this fundamental implementation, you have the freedom to incorporate numerous extra functionalities, such as introducing a singleton instance or even integrating an optional status message to circumvent the need for type checking.
At this point, we have established that domain services excel at handling cross-entity operations and domain-specific functionalities based on the history of past operations. Domain services are not database agnostic. Quite the reverse. They often need access to stored or cached data through repositories. In summary, the nature of domain services is to facilitate complex interactions and orchestrations across the domain model.
Considering that domain services are usually called from the application layer (refer to Figure 7-1), it’s understandable to question why the application service doesn’t encompass all the logic that is typically found within the domain service. The purpose of this section is to address this question.
At the design level, one open point is this: Why not just use application services to arrange the business flow otherwise delegated to domain services? More generally, if all tasks specific to domain services can be performed by application services or some richer repository classes, are domain services really necessary? Let’s find out more.
Domain services versus application services
Application services and domain services may have conceptual similarities, but they are distinct entities. Although both entail stateless classes capable of interacting with domain entities, this is where their resemblance ends. The key differentiation arises from the fact that only domain services are meant to embody domain logic. (See Figure 7-2.)
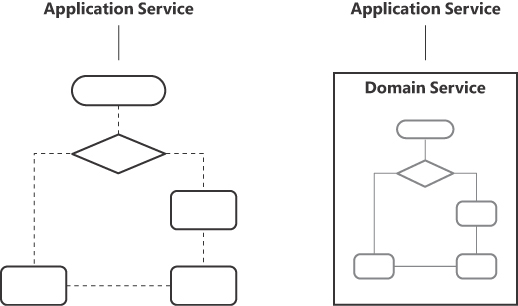
FIGURE 7-2 Keeping domain logic isolated from application logic.
The figure is made of two diagrams laid out side by side. Both have a label “Application Service” at the top with a thin connector that points to the content below. The leftmost diagram consists of a flow chart directly connected to the line that starts from the label “Application Service”. The diagram on the right, instead, is made of a rectangle that contains the same flow chart rendered in gray.
Application logic and domain logic are different segments of the application. Whereas application logic deals with the orchestration of use cases, domain logic deals with business decisions. Unfortunately, the boundary between use cases and business decisions is thin and blurred. There’s no quick and safe answer to the question of which is which. To some extent, any answer is questionable. It depends on how much you know about the business domain and its future evolution. It also depends on the quality of the guidance you receive from stakeholders and domain experts. What seems to fit perfectly in the boundaries of a use case today may qualify as domain logic tomorrow, and vice versa.
Always using application services is far from a perfect solution—although it causes minimal (though non-zero) damage. When you take this approach, instead of spending time on granular decisions, you can simply assume that every step is part of a use case. A guiding principle for determining whether to extract a domain service from an application use case is if you identify a business decision that necessitates supplementary information from the external world (for example, the database) and cannot be made solely by entities and value objects.
Note When it comes to implementation aspects of domain-driven design, the belief that you can attain one ultimate truth is simply unrealistic. There will always be someone who questions any choice. As long as the code works, is relatively fluent, and, more importantly, matches your current understanding of the domain, you should feel confident about its quality and relative maintainability.
Pure and impure domain services
Let’s return to the widely accepted definition of a domain service. The purpose of a domain service is to span voids in the domain model to address behaviors that cannot be sufficiently encapsulated within a single entity. They’re about plain logic, but also about business decisions that may require access to external sources—typically a database.
A pure domain service is a domain service that algorithmically deals with crucial business decisions. A pure domain service is plain logic that doesn’t need external input. It would be like the plain behavior assigned to a domain entity if a single domain entity could logically host it. Conversely, an impure domain service is a domain service that performs data-related business operations in reading and writing. For example, determining whether a customer deserves the status of gold requires checking their payment and purchase history.
Expanding the scope of repositories
Imagine the following scenario: You are registering a purchase, and there’s an added discount accessible to customers with gold status. How would you handle that? Here’s some sample code you may use in the application layer:
// Use the Fidelity domain service to know about the customer status
if (_fidelityService.IsStatus(customer, CustomerStatus.Gold))
purchase.Discount += 0.05; // extra 5% discount
// Plain update operation on the database
_purchaseRepository.Save(purchase);Once you’ve found out about the status of the customer, you can add the extra discount to the purchase and save it permanently. With a domain service in the middle, the use case would reduce to the following:
_fidelityService.RegisterPurchase(purchase)Internally, the RegisterPurchase method retrieves the customer, checks their status, and adjusts the discount rate.
What if you used the following instead?
_purchaseRepository.RegisterPurchase(purchase);In this case, the repository is not simply a CRUD proxy for aggregate roots, but also holds some business logic. What kind of practice is this? Good? Bad? Neutral?
As you’ll see in more detail in the next chapter, repository methods must refrain from encompassing business or application logic. Their scope should solely encompass data-related or ORM-specific tasks. Furthermore, the number of dependencies on other services should be zero or kept to a bare minimum.
From a pure DDD perspective, expanding the scope of repositories beyond pure persistence is not a best practice. That’s mostly because in DDD, databases tend to be just a detail, and according to many purists, the same model should be persisted regardless of the physical storage.
The real world is different, and no application is designed without the actual database in mind. Furthermore, relational databases allow you to save business logic in stored procedures—which is within the database server—and that’s still the fastest way to run it. From a persistence perspective, therefore, merging domain services and repositories—custom made and richer than just CRUD proxies—is as acceptable as having everything done from within the application layer or having domain services with unclear boundaries.
The situations for which you might want to employ domain services depend on the nuances and subtleties of the domain. The objective is to maintain a pristine, targeted, and articulate domain model, employing domain services to encapsulate business logic that doesn’t seamlessly integrate into any of the identified entities.
Domain services are a mere tool for augmenting the isolation of the domain model from the more operational parts of the whole application. Beyond implementing cross-entities logic, domain services may apply in several additional scenarios.
■ Domain validation : When certain validations involve complex rules that span multiple entities or value objects, a domain service can centralize the validation logic, ensuring consistent validation across the domain.
■ Data normalization : In cases where data needs to be transformed or normalized before being used by domain logic, a domain service can handle the transformations to ensure that the data is suitable for the operations. Similarly, if the domain needs to process data in a format that’s not native to the domain model, a domain service can convert and adapt external data into a compatible format.
■ Security and authorization : Even though authorization is better handled at the gate of the presentation layer, you might want to enforce security and authorization checks within the flow of operations, especially when those checks involve complex domain-specific rules. In this case, the ideal place to implement security checks is in domain services.
■ Integration with legacy systems : A domain service can effectively serve as an adapter when integrating with legacy systems that don’t align with the existing domain model. They can, for instance, be used to translate between the legacy system’s structure and your domain’s structure.
DDD has emerged as a potent methodology for (giving teams a better chance of) crafting robust and maintainable systems. At the heart of DDD is the domain model, covered in the previous chapter. This chapter was devoted to domain services, which, along with the domain model, form the application’s domain layer.
Although the domain model establishes the fundamental elements of the domain, outlining its entities, connections, and principles, domain services assume the role of orchestrators for more complex business logic that extends beyond individual domain entities. In synergy, the domain model and domain services constitute a potent amalgamation within the DDD methodology for closely mirroring the slice of the real world behind the application. Overall, domain services may still be considered optional, but their use promotes precision and clarity in the domain-driven design of a business application.
The next chapter, which covers repositories and the infrastructure layer, concludes the exploration of the DDD-inspired layered and clean architecture.
What goes up must come down.
—Isaac Newton
The infrastructure layer provides the technical foundations that support the core domain and application layers. Its primary objective is to handle concerns that are not directly related to the core business logic but are necessary for the system’s operation. These concerns include data storage, communication with external services, dedicated services for the user interface, and various technical integrations, such as with legacy platforms.
Note From a mere functional perspective, all these tasks can be loosely accomplished by various components in the application layer or maybe domain services. However, segregating these technical details from the domain layer promotes an even cleaner and more maintainable architecture.
One of the key components of the infrastructure layer is the repository pattern. Repositories are responsible for managing the persistence and retrieval of domain objects. The idea is to abstract the data access logic from the domain layer, enabling a separation of concerns to facilitate changes to the underlying data storage technology without affecting the core domain logic. More realistically, however, although a mere physical separation of concerns between the domain model and persistence—distinct class libraries and contracted interfaces—is achievable, a hidden thread will still link the domain model and the database structure. The ideal of a mapping layer that can persist “any” domain model to “any” storage remains just that—an aspirational goal or maybe a benchmark to attain.
This chapter focuses mainly on the implementation of persistence in a realistic application. It discusses domain models and persistence models and how to merge both concerns in a single, slightly impure library. In addition, one section is devoted to data access frameworks (O/RM and micro-O/RM) and data storage architecture. However, keep in mind that although persistence is a pivotal responsibility of the infrastructure, it’s not the only responsibility. Let’s start with a quick refresher of the various concerns of the layer.
The infrastructure layer is not just about persistence. It also relates to any dependencies on external services that are not clearly constituent blocks of the business domain—from emails to printing, and from external web services to internal clock and time zone management.
Whether you keep the infrastructure layer coded as a single project with multiple features or split it into two or more feature-based projects, the logical set of responsibilities is fairly large. Appropriately separating it from the rest of the application is necessary whether or not you adhere to DDD. This section lists core responsibilities of the infrastructure layer.
The primary responsibility of the infrastructure layer is to handle data persistence and storage. This involves interacting with databases, caching mechanisms, and any external storage systems that the application may require. The term primary responsibility relates more to the fact that few business applications can thrive without storage than to the relative relevance of storage compared to other infrastructural responsibilities.
Persistence is about having an API that knows how to deal, in reading and writing, with the data storage. The DDD domain model is ideally 100% persistence ignorant; yet its objects, at some point, must be saved to storage and rehydrated from there. This requires an extra software component. In DDD, these components are repository classes.
The domain model does not need to know how its classes are saved. That’s the sole responsibility of repositories. A repository class is a plain utility class that serves the superior purpose of saving the domain model while encapsulating persistence logic and all necessary details.
Regardless of the thousands of articles that advertise the best homemade recipe for the perfect repository class, no dictates exist on how the repository class should be designed internally. There are some common practices, though. The most relevant of these is to have one repository class for each aggregate recognized in the domain model. The repository is therefore responsible for several CRUD tasks on the root object of the aggregate.
Apart from this, whether you persist the domain model directly through stored procedures or map it to another persistence model managed by an O/RM tool, well, that’s up to you! It’s your design and your choice. In both cases, however, you will adhere to DDD—assuming strict adherence to DDD principles is a plus for the production application.
Nearly every modern application needs to communicate with one or more external services, whether publicly accessible web services, messaging systems, or legacy applications. The infrastructure layer manages these interactions, including handling network requests, authentication, and data serialization. These infrastructure services encapsulate the communication complexities and ensure that the domain layer remains decoupled from the specifics of external interactions.
The link between the infrastructure layer and external services is realistically established in one of the following ways:
■ Web API : With this approach, and with some authentication on top, the application connects via HTTPS and downloads JSON payloads. The JSON classes should remain confined to the library that downloaded them. At the same time, they should be exposed to the rest of the application using an intermediate layer of classes that remain constant to the application. In terms of DDD, this is an instance of the anti-corruption layer (ACL) pattern mentioned in Chapter 2, “The ultimate gist of DDD.” Should the JSON format of the web API change, you must simply fix the JSON-to-C# mapper, with no need to intervene in more than just one place.
■ WCF reference classes : Legacy applications usually expose their connection points as old-fashioned Windows Communication Foundation (WCF) services. Visual Studio and Rider allow you to import WCF endpoints as reference classes. In other words, your code just deals with methods in these classes, which internally manage the details of the protocols required to establish the connection and exchange data.
■ Shared files or databases : When no HTTPS or WCF endpoints exist, communication may occur via FTP or, more likely, through access to shared folders to read/write files or via ad hoc logins to some relational database server.
Note Sending emails or creating PDF printouts is a recognized example of a web API being incorporated in the infrastructure layer.
The phrase internal services is relatively uncommon in software architecture. But in this case, having used external services to refer to remote web services and legacy applications, I find it acceptable to employ a form of name symmetry to refer to another family of services typically implemented in the infrastructure layer: frameworks for the user interface, logging, dependency injection (DI), authentication/authorization, localization, configuration, and more.
Configuration and environment management is another internal concern that may be delegated to the infrastructure layer. It deals with different running environments (development, staging, production, and so on) that may require varying configurations.
An often-disregarded internal service that is extremely helpful within the boundaries of a contracted service is the clock service. The clock service is the application API responsible for returning the current application time. Within a web platform, the question “What time is now?” is difficult to answer. Of course, you can easily obtain the UTC time, but that’s it. Keeping track of the time zone of the logged-in user (assuming the User entity tracks a fixed time zone) helps convert UTC time to a more usable local time. Still, the time you get—local or universal—is always the current time. You have no way to test your application as if it were assigned a random date and time. For this reason, for applications for which the current time is an issue, you should code a workaround to take control of the system current time. Here’s an example of a class to achieve this, which would live in the infrastructure layer:
public static class ClockService
{
public static DateTime UtcNow()
{
return Now();
}
public static DateTime Now(int timeZoneOffsetInMins = 0)
{
var now = _systemDate.HasValue ? _systemDate : DateTime.UtcNow;
return now.AddMinutes(timeZoneOffsetInMins);
}
}This code snippet defines a couple of global static methods that override the .NET UTC time with the value of a variable read from some setting storage (such as a file or database). All you need to do is use ClockService.Now or ClockService.UtcNow wherever you would use DateTime counterparts.
Note As weird as it may sound, no form of time abstraction existed for years in .NET Core or in the .NET Framework. .NET 8 finally brings support for this feature through the TimeProvider base class.
The persistence layer forms the bedrock upon which the seamless interaction between application and data storage is built, ensuring the durability and integrity of vital information. The constituent blocks of the persistence layer don’t have an obvious and common configuration. Persistence could come in many ways, and no single approach is right or wrong as long as it maintains separation with other layers.
In general, you will have a data access layer made of classes that know how to access the database. You can craft these classes in many ways, with a domain-centric or database-centric view. No approach is right or wrong per se. It all boils down to looking at a few possible ways (and related technologies) to code such a data access layer. In DDD, the classes that form a general-purpose bridging layer across the domain model and any durable store of choice have a particular name: repositories.
Note There’s no right or wrong way to implement repositories that could qualify the whole application as well or poorly written. Repositories are just an architectural element whose implementation is completely opaque as long as it works as a bridge from storage to the rest of the application.
A repository class acts as an intermediary between the application code and the underlying data storage. It typically provides methods to perform CRUD operations while abstracting the complexities of data interaction and manipulation.
While a repository class typically handles CRUD operations, its actual role can extend beyond basic data manipulation. It can encapsulate more complex data access logic, including querying, filtering, and data aggregation. This allows the repository to abstract various data-related tasks, promoting a cleaner separation between application code and data storage concerns.
Domain services or rich repositories?
Richer repositories may extend to intersect the space of domain services. The borderline between them is blurry—hence my statements that there’s no right or wrong way to write repositories.
If a line must be drawn—and one does—between domain services and rich repositories, it is on the domain specificity of data manipulated by repositories. The more specific it is to the business domain, the more it is a domain service. And the more it involves plain query or (bulk) updates, the more it is rich repositories.
The repository pattern
When building a repository class (or just a plain data access class), it may be advisable to look at the repository pattern. This is a popular software-design pattern that provides the logical backbone for repository classes. The repository pattern centralizes data access logic by encapsulating CRUD operations and other data-related tasks for specific domain entities within repository classes.
Using the pattern brings a few clear benefits:
■ It decouples the application code from data-storage details, increasing maintainability.
■ Repositories can be easily mocked or replaced with test implementations during unit testing, allowing for thorough testing of application logic without involving the actual data store.
■ By centralizing data access logic, the repository pattern can facilitate scalability, as the resulting data access layer can be optimized or adjusted as needed without affecting the rest of the application.
Most recognized implementations of the repository pattern begin with the list of operations to be supported on the target entity. Here’s an example:
public interface IReleaseNoteRepository
{
ReleaseNote GetById(Guid documentId);
IEnumerable<ReleaseNote> All();
void Add(ReleaseNote document);
void Update(ReleaseNote document);
void Delete(Guid documentId);
}An actual repository class simply implements the interface:
public class ReleaseNoteRepository: IReleaseNoteRepository
{
public ReleaseNoteRepository(/■ connection details */)
{
...
}
public IEnumerable<ReleaseNote> All()
{
...
}
// More code
...
}Gaining access to the database, whether through a direct connection string or a more complex object such as an Entity Framework DbContext object, is one of the responsibilities of the repository. The repository’s implementor must decide what data access API to use. In the .NET space, common options are as follows:
■ ADO.NET : This is a low-level API to access databases centered around connections, commands, and data readers. For a long time, it was the only data access API in .NET. While still fully functional, it is now largely considered obsolete. Many developers opt instead for Entity Framework Core (discussed next) due to its higher level of abstraction, modern features, and alignment with the architectural goals of .NET Core applications.
■ Entity Framework (EF) Core : A modern object-relational mapping (O/RM) framework for .NET applications, EF Core simplifies data access by allowing developers to work with database entities as plain .NET objects, abstracting the complexities of SQL queries and data manipulation. With features like LINQ support and migrations, EF Core streamlines database-related tasks and facilitates a more object-oriented approach to data access.
■ Micro O/RM : A micro-O/RM is a lightweight O/RM framework for mapping database records to objects in software applications. It focuses on simplicity and minimalism, offering basic CRUD operations and limited features compared to full-fledged O/RM solutions such as EF Core. The most popular micro-O/RM framework is Dapper. Micro O/RMs are suitable for scenarios in which a lightweight data access layer, made only of relatively simple queries and plain CRUD operations, is sufficient to fulfill the needs of the application.
Consider that, unless blatant mistakes are made in the arrangement of a query, no .NET data access framework can perform better than ADO.NET data readers. This is because both EF and any .NET micro-O/RMs are built on top of ADO.NET. So, why not just use ADO.NET? Developed more than 25 years ago, when the O/RM model was little more than an academic concept, ADO.NET doesn’t know how to map plain table records to typed C# objects. ADO.NET allows cursor-based navigation over the stream of data provided by the database server and can load the whole result set in memory untyped dictionaries. In a nutshell, ADO.NET is not suitable for modern data access coding strategies and doesn’t meet the expectations of today’s developers.
Faithfully mapping database objects to C# objects is the mission of full O/RM frameworks. Micro O/RMs represent some middle ground, offering basic (and faster) object-to-database mapping but lacking more advanced features such as change tracking, lazy loading, LINQ, and migrations.
Here are my two cents when it comes to coding the internals of a repository class: Start with EF but be ready to switch to Dapper (or other micro-O/RMs) when you need to optimize specific queries. And when you need to optimize update commands, consider switching to plain SQL commands or stored procedures.
Is the repository pattern really valuable?
I am not particularly inclined toward design patterns in general. It’s not that I disregard the idea of common solutions for common problems—quite the reverse. Rather, I don’t see any value in using design patterns just for the sake of it.
I am fully aligned with the DDD vision of using repository classes to decouple the whole application from the data storage details. I also agree with the directive of having one repository class per aggregate in the domain model. But I question the use of explicit interfaces and even more generic repository interfaces, like so:
public interface IRepository<T> where T : class
{
T GetById(object id);
IEnumerable<T> GetAll();
void Add(T entity);
void Update(T entity);
void Delete(T entity);
}Each real-world aggregate (outside the realm of toy example applications) has its own set of business characteristics that hardly fit with the schema of a generic CRUD-oriented repository. Yet, using a generic repository brings value only if it solves a precise design problem. There’s no value in using it just because it exists.
Using an interface for every repository allows you to switch implementations without affecting any code that depends on it. This modularity makes it easier to mock the repository during testing, enabling unit testing of application layer and domain services without involving a real database. If you test extensively, this is important.
On the other hand, resorting to repository interfaces because at some point you might decide to change the underlying data access technology isn’t realistic. Choosing the data access technology is a key project decision. In general, starting with meticulous interfaces for every repository sounds like overengineering.
In the end, although the repository pattern is a valuable tool, it might not be necessary for every application. It’s beneficial in larger applications where data access complexity is high and maintaining a clear separation of concerns is a priority. Smaller applications might call for simpler data access strategies, however.
Important The higher the degree of code reusability, the lower its actual usability tends to be. The appeal of the generic repository pattern approach lies in the notion that you can create a single, universal repository and employ it to construct various sub-repositories to reduce the amount of code required. In practice, though, this approach is effective only at the beginning. As complexity increases, necessitating the addition of progressively more code to each specific repository, it becomes inadequate.
The unit-of-work pattern
In discussions about repository patterns, another frequently referenced design pattern is the unit-of-work (UoW) pattern. The purpose of this pattern is to manage and track multiple database operations within a single cohesive transactional context. The main idea is to encapsulate database-related operations—like inserts, updates, and deletes—within a transaction boundary. This boundary is defined by the lifespan of the UoW controller, which represents the unit of work—namely, a session of interactions with the database. By grouping these operations, the pattern prevents data inconsistencies that could arise from partially completed transactions.
The UoW pattern typically involves the domain entities subject to changes and updates and the repository classes that would perform database operations on those entities. All operations take place under the supervision of the UoW controller, an object responsible for tracking changes to entities and coordinating their persistence to the database. The UoW controller manages the transaction life cycle, ensuring all operations are either committed or rolled back together. Ultimately, the UoW pattern is a software abstraction for the use of the canonical SQL transactional commands (BEGIN TRAN, ROLLBACK, and COMMIT).
By using the UoW pattern, applications gain the ability to work with multiple repositories in a consistent transactional manner at an abstraction level higher than the actual SQL commands. This is invaluable. However, the UoW pattern might not be necessary for all projects, especially smaller applications in which the complexity and overhead might outweigh the benefits.
Note If you use EF (Core or .NET Framework) as the data access technology, then you can blissfully ignore the UoW pattern, as it is already implemented within the framework. In fact, the root object you need to use to execute any database access—the DbContext object—acts as a perfect UoW controller.
EF Core is a feature-rich O/RM framework developed by Microsoft. It is designed to work with a wide variety of databases and supports automatic generation of SQL statements for queries and updates, which results in rapid application development. EF Core also includes features such as change tracking, automatic relationship handling, migrations, lazy loading, and LINQ.
EF Core brings substantial advantages but does have a performance trade-off: The essential abstraction layer that facilitates these sophisticated functionalities introduces some performance overhead. Furthermore, EF Core provides you with no control over the actual SQL code being generated. This is both good and bad news, however. It’s good because it enables developers to plan data access code reasoning at a higher level of abstraction; it’s bad because it prevents developers from producing more optimized commands if really necessary.
The following sections reflect on a few facts related to using EF Core in the repository classes.
Note Overall, EF Core is the best default option for any data access task. If for certain operations (queries or updates) you need more performance, however, then consider a micro-O/RM like Dapper. Dapper offers excellent performance and is suitable for scenarios in which raw SQL control, performance, and simplicity are priorities. For updates, the best option is still raw SQL commands via EF Core utilities. This said, I am reluctant to use a micro-O/RM for any data access need in a large enterprise application, although exceptions do apply.
Connecting to the database
When you use EF Core, any data access operation passes through an instance of the DbContext class. As mentioned, the DbContext class represents a collection of tables (and/or views) in your database and behaves as a UoW transactional controller. You don’t use DbContext directly; instead, you create your own database-specific context class, as shown here:
public class RenoirDatabase : DbContext
{
// List of table mappings
public DbSet<ReleaseNote> ReleaseNotes { get; set; }
public DbSet<Product> Products { get; set; }
...
// Configure the database provider and connection string
protected override void OnConfiguring(DbContextOptionsBuilder optionsBuilder)
{
optionsBuilder.UseSqlServer("connection-string-here");
}
// More methods if needed: model creation, initial data, mappings to stored-procs
...
}The UoW controller must be configured to use a particular data access engine (for example, SQL Server) and must receive identity information to connect. Of course, you can have multiple DbContext instances in the same application to access different databases or even different views of the same physical database.
The following code snippet ensures that the configured database exists. If not, the code automatically creates the database, either locally or in the cloud, depending on the connection string.
var db = new RenoirDatabase();
db.Database.EnsureCreated();If created in a cloud, the new database may be subject to default settings based on your service tier, and its maximum size may be different from your expectations and budget. So, don’t let the code blindly create new databases without immediately checking what’s been created.
A DbContext is a lightweight and non-thread safe object whose creation and disposal do not entail any database operations. As a result, most applications can create a new instance of it in the constructor of the repository class without discernible performance implications. An alternative to direct instantiation is using dependency injection (DI), as shown here:
public class ReleaseNoteRepository: IReleaseNoteRepository
{
private RenoirDatabase _db;
public ReleaseNoteRepository(RenoirDatabase db)
{
_db = db;
}
public IEnumerable<ReleaseNote> All()
{
return _db.ReleaseNotes.ToList();
}
// More code
...
}In this case, the DbContext instance is set up in the ASP.NET DI system at application startup:
var connString = /■ Determine based on application static or runtime settings */
services.AddDbContext<CorintoDatabase>(opt => opt.UseSqlServer(connString));The code snippet also shows how to set a connection string determined dynamically based on runtime settings. Any application or domain service that needs to access repositories will receive a new instance through the constructor. By default, the DbContext instance has a scoped lifetime.
Note Is there any relevant difference between having a repository-wide DbContext instance and creating a new instance in every method? Yes, a global instance shares the same context across multiple methods possibly called on the same repository. This is usually a plus, but in some cases, it could become a problem with regard to change tracking. The best approach is to make any decisions based on the facts of the specific scenario.
Building an EF Core-specific persistence model
EF Core needs an object model to bridge the conceptual gap between the relational nature of databases and the object-oriented nature of modern application development. This object model is often referred to as the persistence model.
The classes within a persistence model need not have behavioral functionality. They essentially function as straightforward DTOs, maintaining a one-to-one relationship with the tables in the intended database and reflecting foreign-key relationships and other constraints. The persistence model is created by all the classes declared as DbSet
EF Core maps any referenced class to a database following a set of default rules. Here are a few of them:
■ The name of the table is the name of the DbSet
■ For each public property on the T type, a table column is expected with a matching type.
■ If the class has a collection property, by convention or by configuration, a foreign-key relationship is expected.
■ If the T type has value type properties, they result in table columns with a specific naming convention of the type ValueTypeName_Property.
■ String properties are always mapped as nvarchar(MAX) columns.
As a developer, though, you have full power to modify mappings as well as to create indexes, identity values, constraints, and relationships. You do this by overriding the OnModelCreating method on the DbContext custom class.
The following code snippet indicates that the Product class from the persistence model has an index on the ProductId column and its Name column has a max length of 100 characters and cannot be null:
// Configure the model and define the mappings between your entities and DB tables
protected override void OnModelCreating(ModelBuilder modelBuilder)
{
modelBuilder.Entity<Product>()
.HasKey(p => p.ProductId);
modelBuilder.Entity<Product>()
.Property(p => p.Name)
.IsRequired()
.HasMaxLength(100);
// Additional configurations...
...
}The next snippet instead maps the ReleaseNote entity to the ReleaseNotes table:
public class ReleaseNote
{
// Public properties
// ...
// Reference to the related product
public int ProductId { get; set; }
public Product RelatedProduct { get; set; }
// ...
}The class contains an integer property for the product ID and an object property for the full object to be internally resolved via an INNER JOIN. Following is an example mapping that also checks for a one-to-many relationship between the product and all its release notes and a cascading delete rule that automatically drops release notes if the parent product is deleted:
modelBuilder.Entity<ReleaseNote>()
.HasOne(rn => rn.RelatedProduct)
.WithMany(rn => rn.ReleaseNotes)
.HasForeignKey(rn => rn.ProductId)
.OnDelete(DeleteBehavior.Cascade);One more example relates to owned types. In the EF Core jargon, an owned type is a custom value type encapsulating a group of related properties that can be reused within multiple entities. When an entity is queried or saved, EF Core automatically handles the persistence and retrieval of these owned properties. In the following snippet, Timestamp is an owned type in an EF Core persistence model:
public class ReleaseNote
{
public Timestamp Timestamp { get; set; }
// More public properties
// ...
}
public record Timestamp
{
public DateTime? LastUpdate { get; set; }
public string Author { get; set; }
}Mapping the ReleaseNote entity with a Timestamp property requires the following:
modelBuilder
.Entity<ReleaseNote>()
.OwnsOne(rn => rn.TimeStamp);Owned types can also be nested. In addition, an owned type such as Timestamp can have properties of another custom value type. In this case, you chain multiple OwnsOne statements.
Note EF Core 8 reintroduced the Complex type, which has been absent since EF6—the last non-.NET Core version. The Complex type bears a striking resemblance to an owned entity, with a key difference: Unlike an Owned type, the same Complex type instance can be reused multiple times within the same or different entity.
Important You can express the mappings between the classes in the persistence model and the actual database tables using the EF Core fluent API (as in the preceding examples) or through data annotations. You can also combine these two techniques. The fluent API is the recommended choice, however. First, it’s more expressive. And second, if the implementation of domain and persistence model coincides (more on this in a moment), it enables you to keep the domain model free from dependencies on the database. In fact, some data annotations—such as Key and Index—could decorate domain model classes but require a dependency on some EF Core NuGet package.
Comparing domain models and persistence models
If you do DDD, you end up with a domain model. If you choose to persist the state of your application expressed by domain entities through EF Core, you need a persistence model. So, what is the relationship between domain models and persistence models?
Chapter 5, “The application layer,” briefly hinted at the conceptual difference between the business domain model and the persistence model required by O/RM tools such as Entity Framework. It is useful to recall and expand the points here in a broader perspective.
A basic principle of DDD is that the domain model should be made of plain old class object (POCO) classes that are ignorant of any database concerns, and that storage is the responsibility of data access classes, period. (See Figure 8-1.)
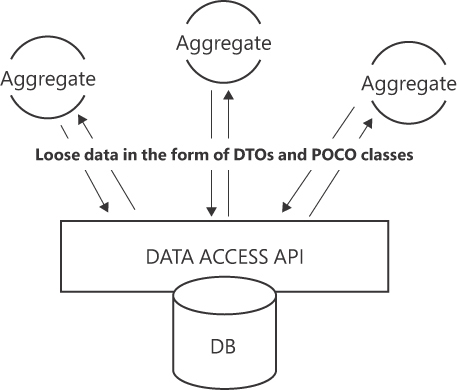
FIGURE 8-1 Using a non-object-based API to serialize and deserialize domain model aggregates.
The figure is a diagram with three main elements laid out vertically. At the bottom lies a cylinder to represent a database. The cylinder partly overlaps a rectangle labeled “Data Access API”. Finally, at the top, there are three circles with the label “Aggregate” connected through a pair of arrows (in and out) to the Data Access API rectangle.
If data is stored and reloaded without the help of an O/RM framework (for example, via stored procedures or ADO.NET), then you end up with a separated layer of code responsible for mere persistence. This persistence layer belongs to the infrastructure of the application, and neither its technology nor its implementation has any impact on domain aggregates.
Should you instead opt for an O/RM solution like EF Core, the scenario would vary. An O/RM tool necessitates the unique representation of data, which it employs to align with database structures like tables and fields. In essence, it’s another object model with different characteristics from the domain model discussed in Chapter 6, “The domain layer.” This additional model is the persistence model.
From a conceptual point of view, therefore, a domain model and a persistence model are radically different things. One focuses on business views, and the other focuses on database views. From a pure and ideal design perspective, you should have both domain and persistence models, well separated from each other. An additional layer of mapper classes would perform the task of building a domain aggregate from persistence classes and saving domain aggregates to persistence classes. (See Figure 8-2.)
FIGURE 8-2 Persistence model devised as a separate layer from domain.
The figure is a diagram made of two primary blocks, one on top of the other. At the bottom are two overlapping rectangles. The topmost is labeled “Persistence model”; the other is “O/RM”. A cylinder on the right-bottom corner of the underlying rectangle is labeled “DB”. At the top, three circles “Aggregate” are connected through three pairs of arrows (coming and going to the underlying block). The arrows are covered by a semi-transparent rectangle that spans horizontally. The rectangle is labeled “Mapping Layer”.
Of course, managing two distinct object models involves significant extra effort when not a straight pain in the neck. So, is using a single data model for domain and persistence acceptable? As usual, it depends. But I tend to use a single model as much as possible.
Impure but persistent domain models
The infrastructure layer is meant to shield the domain layer from the complexities of data storage and retrieval, thus maintaining the separation of concerns advocated by DDD. However, the entities in the domain model must be populated from some existing persisted state. Therefore, although the domain model must be isolated from the physical implementation of data storage, it cannot be logically disconnected from it.
A domain model in which some logical constraints are released to allow that same model to work as the persistence model for the O/RM of choice is probably not as pure as might be ideal. However, this compromise between code, design, and performance is worth exploring. I’d even go as far as to say you should consider it as your first option.
Suppose you adopt a single model for both domain logic and data storage. The application operates smoothly in production, but as time passes and changes accumulate, performance concerns arise. Despite having meticulously planned tables, views, and indexes, the tables grow at an alarming pace, necessitating some denormalization to maintain performance. So, a new database design emerges to accommodate performance demands. Unfortunately, though, the redesign dramatically alters the table structure. As a result, domain entities span multiple tables instead of adhering to the original one-table-per-entity approach. Under these circumstances, separating the domain and persistence models becomes a logical move, regardless of the associated costs. However, this extra cost surfaces only when you really need to tackle specific challenges.
As long as the organization of the database tables is close enough to the domain model hierarchy of classes, you don’t need to do much to make a domain model persistent through EF Core. The list of required changes for each entity class is very limited and, better yet, does not affect the public interface:
■ Add a private parameter-less constructor : This would only be used by EF Core for object materialization. Any other public constructors and factories you may have will remain available to callers as originally planned.
■ Mark all property setters as private : The state of a domain entity is rarely altered by assigning values to public setters but rather by calling methods that internally change the state as needed. Adding private setters helps EF Core to programmatically assign values corresponding to a fetched state and doesn’t alter the class’s public programming interface. When EF Core retrieves data from the database, in fact, it uses reflection to access the private setters and initialize the properties. This allows you to maintain control over the internal state of the entity while still enabling EF Core to populate the entity with data.
Applying these tricks and using the fluent API to mark mappings to database tables represents an acceptable compromise: a sufficiently elegant and independent domain model that also works well as a persistence model.
Unavoidable EF Core practices
There are certain practices in EF Core programming that, while not mandatory, are often necessary to work effectively within the EF Core framework. In most cases, there is no valid reason (except unawareness) to ignore them.
■ Eager loading : Lazy loading (the opposite of eager loading) frequently seems to be an advantageous approach to database logic. When lazy loading is enabled, related entities are automatically retrieved from the database when accessed in the code. This minimizes the loading of unnecessary related data (unlike explicit loading) and seemingly relieves developers from managing related entities. However, lazy loading can result in redundant roundtrips, which impedes application performance. With lazy loading, you also don’t know when data is actually queried, so the potential for the SELECT N+1 problem is high. Finally, lazy loading works only within the same DbContext instance, so it is not suitable for use within repositories. For this reason, you should use eager loading whenever possible. To use eager loading, you simply specify Include clauses in the LINQ queries for any related data to be loaded as early as possible.
■ Disable object tracking : This technique instructs EF Core not to track retrieved entities. This can improve performance and reduce memory usage when you are querying data but do not intend to modify or update it. If you are fetching a record in the context of an update operation, then all is well. But if you are simply fetching one or more records to return as a list of objects, it is advisable to chain AsNoTracking in the LINQ expression for better performance.
■ Use DbContext object pooling : As mentioned, DbContext is a lightweight object whose frequent instantiation and disposal is not usually an issue. However, for applications that require extensive DbContext management, it can become a problem. In EF Core, object pooling improves resource utilization and subsequently overall performance. DbContext pooling involves reusing existing instances from a pool instead of creating new ones, reducing the overhead of object creation and disposal. If you use DI to enable DbContext instances to reach out to the repositories, then all you need to do is replace AddDbContext with AddDbContextPool at startup. To use context pooling independently of DI, you initiate a PooledDbContextFactory and create context instances from it.
var options = new DbContextOptionsBuilder<RenoirDatabase>()
.UseSqlServer("connection-string-here")
.Options;
var factory = new PooledDbContextFactory<RenoirDatabase>(options);
using (var context = factory.CreateDbContext())
{
// ...
}■ Compiled queries : With compiled queries, you optimize performance by precompiling LINQ queries into reusable query execution plans. Compiled queries can then be stored and reused. Using compiled queries instead of dynamically generating and executing queries each time they are needed improves query execution times and reduces overhead.
From a developer’s perspective, they are just public methods on the DbContext class called in lieu of an EF Core LINQ expression.
public class RenoirDatabase : DbContext
{
public static Func< RenoirDatabase, int, IEnumerable<ReleaseNote>> ByYear =
EF.CompileQuery((RenoirDatabase context, int year) =>
context.ReleaseNotes.Where(rn => rn.Year == year));
}Essentially, you provide EF with a lambda that accepts a DbContext instance and a parameter of your choice to feed into the query. You can then trigger that delegate at your convenience whenever you want to run the query. In the code snippet, you can call ByYear, passing a database context and a year value.
--Note start--
Note Compiled queries represent a minor performance improvement—roughly 10% better than the same noncompiled query. While compiled queries are valuable, they aren’t the remedy for every query-performance issue.
■ Pagination : When managing large datasets, paging through an otherwise very long list of records is advisable. For this, EF Core provides Take and Skip methods to slice just the segment of records you want. However, in this context, it is key to note that DbContext instances are not thread safe. This means that employing multiple threads to concurrently query tables via the same shared DbContext instance is decidedly a bad idea.
■ Batch operations : This technique enables you to execute multiple database operations as a single batch rather than issuing individual SQL commands for each operation. This can lead to significant performance improvements when dealing with numerous database updates, inserts, or deletes. It’s not a native feature of EF Core and requires you to install a dedicated Microsoft NuGet package: Microsoft.EntityFrameworkCore.Relational.
// Enable batch operations
optionsBuilder.UseSqlServer("connection-string-here", options =>
{
options.UseRelationalNulls();
options.UseBatching(true);
});Once installed, the package operates silently, forcing EF Core to automatically group similar database operations together and execute them in a single batch when you call methods like SaveChanges.
--Note end--
Dapper is a lightweight, open-source mini-O/RM library for .NET developed by Stack Overflow. It was originally created to cater to the specific data-access needs of StackOverflow, the huge and high-performing Q&A website for programmers. Dapper was designed to mimic the appealing object-based experience with databases of full O/RM while minimizing the overhead of such complex libraries.
How Dapper works internally
Unlike EF Core, Dapper does not aim to abstract away the database entirely. Instead, it seeks to provide a simpler and convenient mapping mechanism between database results and object properties. Dapper does not automatically generate SQL statements; rather, it requires developers to craft SQL statements manually. This allows developers to gain full control over the actual query and leverage their SQL skills.
Dapper works by mapping the results of database queries to .NET objects. It uses reflection to match database columns to object properties. Dapper doesn’t generate SQL statements for you by translating some proprietary query syntax. Instead, you write your own (parameterized) SQL queries and let Dapper work on them. Dapper then uses the ADO.NET’s IDataReader interface to read data from the executed query. It iterates through the rows returned by the query, uses reflection to create instances of the object type, and sets the property values based on the column data. Dapper also supports batching, which allows you to execute multiple queries in a single roundtrip to the database, and multi-mapping, which facilitates mapping data from multiple tables or queries into complex object structures.
Dapper in action
The pattern of a Dapper call is the same as a classic database access: You connect to the database, prepare a (parameterized) command, and execute it. If the command is a query, Dapper returns a collection of objects. Here’s a first query example:
public IList<ReleaseNote> All()
{
using var connection = new SqlConnection("connection-string-here");
var query = "SELECT ■ FROM ReleaseNotes";
var docs = connection.Query(sql);
return docs;
}Here’s an example that illustrates updates (note that parameters are resolved by name):
public int Update(ReleaseNote doc)
{
using var connection = new SqlConnection("connection-string-here");
var sql = "UPDATE ReleaseNotes SET Description = @doc.Description WHERE Id = @doc.Id";
var rowCount = connection.Execute(sql);
return rowCount;
}Dapper was created over a decade ago by the Stack Overflow team to be used in lieu of the old-fashioned Entity Framework. Starting with EF 6, however, the performance of EF improved significantly—and even more when it was completely rewritten for .NET Core. Today, every new version of EF Core brings better performance, whereas Dapper is close to its physical limit with the performance of ADO.NET data readers. A significant performance gap will remain. A combined use of EF Core and Dapper is definitely a viable option.
Hosting business logic in the database involves placing application-specific logic and processing within the database itself, typically in the form of stored procedures, functions, or triggers. This approach contrasts with traditional application design, where business logic is split between the application and domain layers.
Pros and cons of stored procedures
Stored procedures are as old as relational databases. For decades, they were the most common (and recommended) way to code business logic strictly related to data. Legacy applications commonly have large chunks of crucial business logic coded as stored procedures. In this case, any new development on top must reuse the database hard-coded logic.
What if your project is a greenfield project, instead?
In general, you should carefully consider whether to host business logic in the database based on factors like your application’s architecture, performance requirements, data integrity needs, and team expertise. This said, it’s a mere matter of trade-offs between design and development comfort and raw speed.
The use of stored procedures is often contrasted with the use of O/RM frameworks, as if one choice would exclude the other. An O/RM framework aims to streamline development tasks, albeit with a trade-off in performance. For a project, the bulk of database operations typically involve basic CRUD operations. Allocating efforts toward these aspects might not be productive. Instead, delegating these routine responsibilities to the O/RM framework may be advisable. For intricate tasks or those demanding superior performance, stored procedures would indeed be a more suitable choice.
My personal take is to go with O/RMs by default and then adopt a hybrid approach—switching to stored procedures when particularly critical database-related operations surface. At any rate, using O/RM is OK, and using stored procedures is OK too. Not using one or the other doesn’t necessarily result in poor choices or poor code.
Using stored procedures in EF Core
Using stored procedures from within repository classes is definitely possible, whether you use EF Core or Dapper. Here’s an example in EF Core:
using var db = new RenoirDatabase();
var list = db.Set<SampleProcData>()
.FromSqlRaw(db.SampleProcSqlBuilder(p1, p2, p3))
.ToList();Connecting to a stored procedure may require a bit of preliminary work. In both Entity Framework and Dapper, you need to compose the SQL command that will run the stored procedure as if within the database console. For SQL Server, it would be the following:
EXEC dbo.sp_SampleProc 'string param', 2In this snippet, the procedure takes two parameters of type string and integer, respectively. It is assumed that the underlying database holds a stored procedure named sp_SampleProc. In EF Core, the stored procedure is run through the FromSqlRaw method. You can pass the command text as a plain string or have its definition abstracted in a method in the DbContext class.
Public string SampleProcSqlBuilder (string p1, int p2)
{
return $”EXEC dbo.sp_SampleProc ‘{p1}’, {p2}”;
}Each returned row must be abstracted as a C# DTO class, named SampleProcData in the snippet.
Public class SampleProcData
{
public string Column1 { get; set; }
:
public string ColumnN { get; set; }
}The caller then receives a list of SampleProcData or scalar values, if that is what the stored procedure returns.
So far, we’ve considered a monolithic data architecture in which data flows in and out of the application using the same tracks. A single stack of code and a shared data storage layer are used to handle both read and write operations.
A single stack data storage has the advantage of being consistent and easier to maintain in terms of data models, business rules, and user interfaces. On the other hand, it faces challenges when read-heavy and write-heavy workloads compete for resources. Furthermore, a single stack data architecture might limit your ability to use different data access technologies for different parts of the application. Let’s explore alternatives to a single read/write stack.
All actions carried out within a software system can be classified into one of two distinct categories: queries or commands. In this context, a query constitutes an operation that leaves the system’s state untouched and exclusively retrieves data. Conversely, a command is an operation that actively modifies the system’s state and doesn’t typically yield data, except for status acknowledgments.
An architectural perspective of CQRS
The inherent separation between queries and commands becomes less apparent when both sets of actions use the same domain model. Consequently, a new architectural approach has arisen in recent years: command/query responsibility segregation (CQRS). Figure 8-3 illustrates the architectural imprint of CQRS.
FIGURE 8-3 CQRS at a glance.
The figure is a diagram with a root block named “APPLICATION LAYER”. From it, an arrow departs downward labeled WRITE STACK. It joins two vertically laid out boxes (DOMAIN SERVICES and REPOSITORIES). A final arrow connects the boxes to a cylinder representing the storage. On the way up, on the right edge of the diagram another arrow connects the cylinder to another pair of vertically laid out boxes (DOMAIN SERVICES and REPOSITORIES). Yet another arrow connects to the root block. The two pairs of DOMAIN SERVICES and REPOSITORIES are separated by a dashed thick line.
A CQRS solution has two distinct projects for domain services and repositories taking care of command-only and query-only operations. The cardinality of the application layer and domain model is questionable, and no approach is right or wrong on paper. It can be a unique application layer serving both families (command/query) of use cases, or it can be two distinct application layers. The same goes for the domain model.
However, splitting the domain model in two stack-specific parts has a stronger connotation. The command domain model is essentially a simplified version of the single-stack domain model. The query domain model is essentially a read model—nothing more than a collection of DTOs tailor-made for the needs of the user interface and external callers and devoid of most business rules. (See Figure 8-4.)
FIGURE 8-4 More in-depth split of command/query stacks.
The figure is the composition of two specular diagrams separated by a thick dotted line. The leftmost has the top block “Command Use-Cases” vertically connected to “Domain Services” and “Repositories”. Side by side with these blocks, an additional grayed block sits labeled “Command Model” in the leftmost diagram and “Read Model” in the rightmost. From the bottom of each diagram, two arrows converge on a cylinder labeled “Storage”.
Note When the architecture adopts the structure shown in Figure 8-4, the necessity for a comprehensive domain model becomes less rigid. Queries, meant solely for data display, don’t require the intricate relationships of classic domain models. For the query side of a CQRS system, a simplified domain layer can consist only of tailored DTOs. This may lead to domain services functioning as implementers of business logic atop a much simpler model, even anemic for the query part.
A business perspective of CQRS
Decoupling queries and commands enables you to independently address scalability for each part. Furthermore, the clean segregation ensures that modifications to one stack won’t inadvertently affect the other, preventing regressions. This approach also encourages a task-based user interface, enhancing the user experience. Honestly, I see minimal drawbacks in using CQRS. A more relevant point is whether you really obtain concrete benefits from (learning and) adopting CQRS.
CQRS emerged from the need to handle complex collaborative systems where multiple users and software clients concurrently interact with data under intricate and frequently changing business rules. These systems involve ongoing data changes due to the actions of various users and components, resulting in potential data staleness. To address this situation, architects have two options:
■ Lock the entire aggregate during every operation, leading to poor throughput.
■ Permit ongoing aggregate modifications, risking potentially inconsistent data that eventually converges to coherence.
The first option quickly becomes unfeasible for collaborative systems. The second option, though plausible, can deliver inaccurate outcomes if the system lacks proper tuning, and may require excessive time to synchronize. This backdrop set the stage for the formalization of CQRS around 2010.
In summary, beyond the domain of collaborative systems, the effectiveness of CQRS wanes considerably. This underscores the importance of approaching CQRS as a viable architecture but with a lot of caution, and certainly not as a trend of the moment.
CQRS with shared databases
The architecture in Figure 8-4 is articulated in two parallel branches that converge in the same shared database. Admittedly, this results in a nicer picture, but it does not necessarily improve the architecture.
Using CQRS with a shared database is definitely possible, but the rationale behind CQRS also suggests it might not always be the most optimal choice. CQRS is employed to separate an application’s read and write concerns, allowing each to be optimized independently. However, if you use a shared database, some of these benefits might be diminished.
Introducing CQRS, even with a shared database, adds complexity to the architecture. You’ll need to manage two different models and potentially handle data synchronization and consistency issues. Even with a shared database, however, CQRS can lead to performance improvements if read and write operations have vastly different demands.
What does the trade-off look like? In a nutshell, CQRS mainly makes sense when read and write operations generate significantly different workloads. In this case, to maximize throughput, you might also want to use separate storage mechanisms for reads and writes so you can optimize each side for its specific use case and employ the most appropriate data storage and data access technology for the intended purpose.
CQRS with distinct databases
Figure 8-5 goes one step further, illustrating a CQRS architecture in which both the read stack and the command stack have their own data stores.
No matter what, CQRS starts as a small thing and ends up forcing radical changes to the entire architecture. For this reason, no one should blissfully embark on using it without compelling business reasons.
Suppose you opt for distinct read and write data stores, as in Figure 8-5. The good news is that you can use different database technologies in each stack. For example, you can use a relational DBMS in the command and a NoSQL store in the read stack. But whichever database technologies you use, an extra layer synchronizing the two stores is vital. For example, if a command saves the status of a document on the command store, then at some point a sync operation must update the status of the same information on the read store. Data synchronization can take place as soon as the command task ends as a synchronous or asynchronous operation or occurs as a scheduled job. The longer this takes to happen, though, the more data written and presented will be out of sync. Not all applications can afford this.
FIGURE 8-5 CQRS with distinct data stores.
The figure is the composition of two specular diagrams separated by a thick dotted line. The leftmost has the top block “Command Use-Cases” vertically connected to “Domain Services” and “Repositories”. Side by side with these blocks, an additional grayed block sits labeled “Command Model” in the leftmost diagram and “Read Model” in the rightmost. At the bottom of each diagram, a cylinder denotes the storage. Command and Read storage blocks are connected by a rightward arrow labeled “Synchronization”.
There’s an even deeper point, though. The separation between commands and queries introduces an alternative approach for the design of the application layer, potentially paving the way for even higher levels of scalability. Instead of performing any requested tasks internally, the application layer simply passes a command request to a dedicated processor. The processor then assumes the responsibility of command execution, by directly executing the command, dynamically assigning the command to a dedicated handler, or simply posting a message on a bus where registered listeners will react. (See Figure 8-6.)
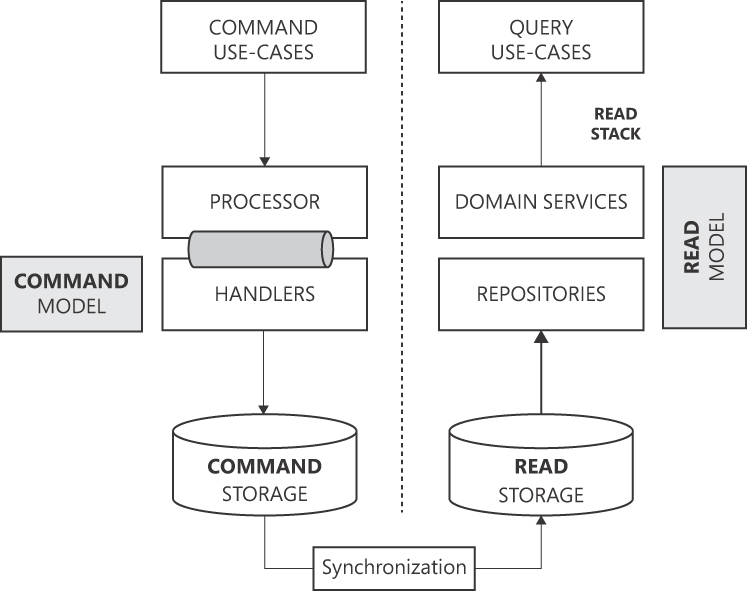
FIGURE 8-6 A message-based implementation of the business logic.
The figure is the composition of two diagrams separated by a thick dotted line. The leftmost has the top block “Command Use-Cases” vertically connected to “Processor” and “Handlers”. In between “Processor” and “Handlers” sits a horizontal cylinder denoting a message bus. At the bottom of the diagram, a cylinder denotes the Command Storage. The rightmost diagram is specular but has “Domain Services” and “Repositories” and the data cylinder is labeled “Read Storage”. Command and Read storage blocks are connected by a rightward arrow labeled “Synchronization”.
The ultimate destination of an architectural journey that starts with the separation of commands and queries is event sourcing. In the real world, we initiate actions and observe corresponding reactions, either instant or delayed. At times, reactions trigger subsequent actions, setting off a chain of responses. This mirrors the natural course of events. Over the years, however, conventional software design hasn’t consistently mirrored this pattern. Event sourcing is a software-development approach that grants primary importance to discernible business events, treating them as fundamental entities.
Note Event sourcing is a big topic—even more impactful than plain CQRS—and rightly deserves a book of its own. The purpose of this section is merely to provide an executive summary.
Characterizing traits
Event sourcing (herefter ES) departs from the traditional model of storing only the current state of an application’s data. Instead, it captures and stores a chronological series of business events that lead to changes in data state. Each event represents a discrete action that is deemed relevant in the context of the application’s domain. These events collectively form a comprehensive and unalterable audit trail, enabling a holistic view of an application’s history and evolution.
Instead of storing only the current state of the system after each update, ES allows you to store only the various changes (events) that occur over time and to recalculate the current state from it any time you need it, in any form you need it.
To grasp event sourcing, think of your bank account balance. It is a number that changes after each transaction. It is not stored, though, as a plain number overwritten every now and then. Instead, it reflects the result of all the discrete actions (expenses, withdrawals, payouts) performed on the account. The reported transactions constitute a list of events that occurred and are saved in the command data store, while the balance is one possible rendering of the state of the account in the form of a read model.
ES offers several advantages:
■ By recording every business event, it enables the precise reconstruction of an application’s state at any point in time. This audit trail proves invaluable for debugging, analysis, and regulatory compliance.
■ The event log provides the ability to query the data state at various historical moments—a capability that traditional databases often lack or don’t offer by default.
■ The audit trail mitigates data loss by enabling you to reconstruct states based on events. This enhances system reliability and disaster recovery.
ES presents challenges too. For example:
■ ES requires a fundamental shift in design thinking, which may introduce complexity in development, testing, and maintenance.
■ Evolving event structures while maintaining backward compatibility can be challenging and requires careful planning.
■ Careful synchronization strategies are often a necessity to guarantee consistency.
■ Storing events might consume more space compared to traditional state-based approaches.
Architectural implications
As mentioned, ES aligns well with the CQRS pattern and indeed represents its ultimate variation. Any ES solution is implicitly a CQRS solution because of the neat and structural separation between the write and read stacks. ES, though, makes mandatory a couple of architectural choices that are optional in CQRS.
At the core of ES is the event store—a specialized data repository responsible for persisting events. Unlike traditional databases, an event store captures every event as an immutable record, ensuring a complete and accurate historical record of application actions. Architects must carefully select an event store that aligns with the application’s requirements for performance, scalability, and fault tolerance. NoSQL databases (for example, Cosmos DB, Mongo DB) are a frequent choice.
ES naturally encourages asynchronous processing of events. Events are captured and stored first, and then processed by event handlers. An architecture that implements message-based business logic is therefore the natural choice. Furthermore, ES can replay events to re-create past states. Architects should consider incorporating tools and mechanisms to facilitate event replay for debugging, testing, and analytical purposes.
The infrastructure layer plays a pivotal role in ensuring the efficient and reliable functioning of the entire system. Often referred to as the “plumbing” of the application, the infrastructure assumes responsibilities that are crucial for the success of an application.
The infrastructure layer primarily contains code that deals with persistence and facades to access external services. This chapter covered repositories and various data access technologies, including EF Core and Dapper.
Even though the term infrastructure layer may evoke DDD, the technical concerns addressed by the layer are universal and common to any applications, whether or not they follow the dictates of DDD.
This chapter concludes the analysis of layered architecture. At this point, you should have enough vision to plan a monolithic but highly modular application. In the following chapters, you will complete your journey learning about clean architecture, including the difference between (modular) monoliths and microservices.
Part III
Common dilemmas
CHAPTER 9 Microservices versus modular monoliths
CHAPTER 10 Client-side versus server-side
CHAPTER 11 Technical debt and credit
All things are subject to interpretation; whichever interpretation prevails at a given time is a function of power and not truth.
—Friedrich Nietzsche
In the past decade or so, the microservices architecture has become an increasingly popular approach to designing and managing distributed applications. The microservices architectural style revolves around the development of independent, modular services, referred to as microservices, each focused on performing a distinct function.
Put this way, microservices can be seen as a clever idea—an important harbinger of great changes in how we think about and build applications. For a moment, let’s compare the advent of microservices to the advent of the wheel. At first, both look like groundbreaking inventions capable of increased efficiency and greater results. However, it didn’t take long for humans to recognize that the wheel alone was not sufficient to support the progress it enabled; as the challenge of transporting heavier and heavier loads on dirt paths arose, so too did road construction.
With microservices, we face nearly the same pattern. Transitioning to a microservices architecture raises the challenge of altering the communication model between the logical parts of the application. Simply converting in-memory method calls to remote procedure calls (RPCs) over some protocol inevitably results in excessive communication and a negative performance hit. Hence, it is essential to switch from a chatty communication model to a chunky model that, instead of exchanging numerous small messages, exchanges fewer but more comprehensive messages. This is a radical change that affects the whole application stack and, deeper still, the way we devise applications.
Although the microservices architecture is largely understood (mostly by top-level management) as a plain alternative to rewriting monolithic applications, using it changes the face of the resulting application and its underlying network architecture. With microservices, you have the wheel, but until you construct some roads, things may be even worse than before. For this reason, the microservices architecture is far from being universally applicable.
To grasp the essence of the microservices architecture, let’s start by discussing its architectural antagonist: the traditional monolithic style. Monoliths are software applications built as single, self-contained units. All functionalities are incorporated in the unit, potentially making it large and problematic to manage and update. Much like the Agile methodology was developed in response to the sequential—and much more rigid—waterfall approach, the microservices architecture initially emerged to address challenges in scalability, maintainability, deployment, and even technology diversity, due to the innate nature of monolithic applications.
Note According to this definition, Project Renoir is a monolith. Is that a problem? Does it mean this is the worst book ever about clean architecture and good software practices? The answer to both these questions, as you’ll soon see, is no.
In software, not all monoliths are terrible in terms of maintainability, scalability, deployment, and the like. The reality is that monoliths aren’t the enemy of microservices. Instead, applications written as tightly coupled, monolithic tangles of code are. These applications are often referred to as legacy applications.
Origin of legacy applications
Legacy applications are line-of-business applications that have been in use for quite some time, often well over a decade. These applications often play a critical role in an organization’s operations even though they have been written with old programming languages, use outdated technologies, or lack modern features. A legacy and aged application is not a big problem per se, but it becomes a huge problem when it needs to be enhanced or integrated with newer systems. Legacy applications, in fact, are typically difficult to maintain and update.
Why are legacy applications monolithic?
The monolithic software architecture has existed since the early days of computer programming. In those days, programs were often written as single, large, and self-contained pieces of code due to the limitations of the hardware and software systems of the time. So, the structure of legacy applications is simply the natural outcome of decades of cumulative programming efforts. That is, their monolithic structure is merely a sign of their times.
Dealing with legacy applications
For all companies and organizations involved, legacy applications are therefore a problem to solve or, at the very least, mitigate. At the same time, migrating from a legacy application to a newer one can be expensive and risky, leading some organizations to continue using the existing system despite its limitations.
For management, a legacy application means being faced with a devil’s alternative. On the one hand, if they keep using the old application, they take a risk on the business side because the issues that prompt consideration of a rewrite won’t resolve on their own over time. On the other hand, if they choose to build a new application, they will invest significant funds without a guarantee of success. Although whether to rewrite a legacy application may be a tough decision on the management side, it’s one that must be made.
In a similar stalemate, every piece of good news that arrives sounds celestial. So, several early success stories, and quite a bit of tech hype, contributed to labeling (legacy) monoliths as evil and microservices as the savior. The gracious and positive storytelling about a new architectural style provides non-technical management executives with the impetus needed to make the technical decision of spending money on a big rewrite of the legacy application using a microservices architecture.
The truth is somewhere in the middle. Not all monoliths are bad, and not just any microservices architecture is successful. The rest of this chapter sorts through the facts of monoliths and microservices and outlines a reasonable decision workflow.
Note In some very special cases, such as when the old application is a desktop Windows Forms or WPF application, you can try some dedicated commercial frameworks that can bring desktop Windows applications to new life in the cloud in the form of pure ASP.NET Core, Blazor-style applications. When applicable, this represents a pleasant exception to the rule that obsolete applications, at some point and in some way, should be renewed.
Like it or not, the natural approach to any software application is inherently monolithic. You see the whole thing built as a single unit. All the processing logic runs in a single process; it’s the basic features of the programming language and your framework of choice that enable you to split the whole thing into libraries, classes, and namespaces.
This approach to software development is not bad per se; it just requires a lot of self-discipline and team discipline to ensure modularity. And deployment pipelines should exist to guarantee that changes are properly deployed to production. As for scalability, horizontal scale may be an option as long as you run the instances behind a load balancer with no overlapping of state.
In a nutshell, a monolithic application can be successful, but without strict self-discipline to preserve a modular structure over time, it can soon turn into a tightly coupled beast that is nearly impossible to maintain or scale. This section discusses these and other problematic aspects of a monolithic application architecture.
Code development and maintenance
Initially, a monolithic architecture offers some clear plusses, such as simplicity of coding in the early stages of development and one-shot, immediate deployment. The problems with monoliths usually come later, as more use cases are added, and lines of code grow.
As new functions accumulate in monolithic applications, their complexity tends to grow. Moreover, this complexity occurs in the single, monolithic unit rather than being distributed—and therefore mitigated—across smaller units. Furthermore, if the code is not structured in watershed modules, then the application’s complexity can increase in a more than linear fashion. This makes it significantly harder for anyone on the team to understand and debug the code.
Testing may also become problematic due to limited isolation of software components. So, it may happen that changes in one part of the code base have unintended consequences in other parts. And the whole development cycle (coding, testing, and committing) takes time, making it challenging to respond quickly to functional requirements.
Merge conflicts
In larger teams, multiple developers may need to work on the same code base simultaneously. Git helps with branches and pulls, but conflicts are always lurking. Conflicts typically occur when two developers change the same lines within a file or when one developer deletes a file while another developer is modifying it. In such scenarios, Git cannot automatically ascertain the correct course of action, making manual intervention the sole (time-consuming) option.
To speed up the development cycle and reduce merge conflicts, discipline is the only remedy—but self-discipline more than team discipline. All developers should split extensive modifications into smaller increments and keep files and classes distinct to the extent that it is possible. If merge conflicts still occur (and they will), then developers should spend more time thoroughly reviewing the changes before merging. The only definitive way out is refactoring the code base into smaller, relatively independent chunks, both logical (behavior) and physical (files).
Scalability challenges
Monolithic applications lend to scale vertically but are challenging to scale horizontally. Vertical scaling (also known as scaling up) entails making the single server that runs the application more powerful by adding resources. It’s not just the server, though. Sometimes the underlying database also needs to be fine-tuned when traffic increases. Vertical scaling may not have a huge impact on the budget, but it does have the potential to turn into a fairly inefficient and costly option. Ultimately, it all depends on the amount of increased load.
In general, horizontal scaling (also known as scaling out) is a more effective technique, although it might not work for all applications. Horizontal scaling involves increasing the application’s capacity by running it on multiple servers instead of increasing the capability of a single server. (See Figure 9-1.)
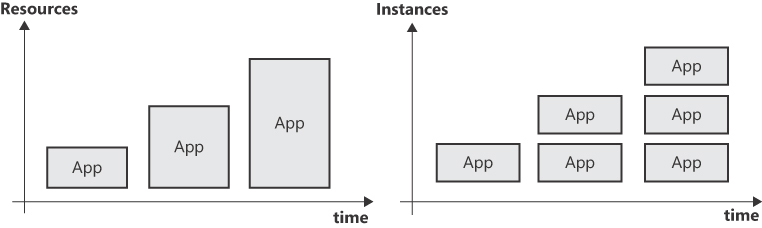
FIGURE 9-1 Vertical versus horizontal scaling.
The figure is made of two XY graphs rendered side by side. Both graphs have the X axis labeled as “time”. The Y axis of the leftmost graph is labeled “Resources” and the area contains three blocks titled “App” of growing height. The rightmost graph has the Y axis labeled as “Instances” and the area filled by three columns of blocks titled “App”. The first column has just one block. The second column has two blocks and the third column has three blocks.
With horizontal scaling, multiple instances of the same application run at the same time, usually under the control of a load balancer. This means that two successive requests may be handled by different instances, making statelessness a crucial application characteristic. This is why not all applications—especially those grown with little control in the wild—are a good fit for horizontal scaling.
Deployment challenges
Because monolithic applications exist as a single unit, they must be deployed in their entirety. So, even if all you change is a localized string, the entire application must be redeployed to any environments.
This is a fact. But is it really a problem?
In a massively distributed architecture, you typically deploy one piece at a time, meaning that only that piece will potentially be down during the update or offline if something goes wrong. The rest of the application will be up and running. In contrast, a monolithic application doesn’t let you deploy parts of an application. Still, using zero-downtime deployment techniques, you can release updates frequently and reliably.
These days, in fact, thanks to DevOps and cloud services, it’s easy to achieve zero downtime during deployment. In Azure, for example, you simply use app services with deployment slots enabled, deploy to preview, and swap to production only if all is good.
Technology diversity
Technology diversity refers to the presence and integration of a variety of technologies within a given software system. It emphasizes the coexistence and use of different software stacks to address diverse needs, challenges, or functionalities. This approach aims to leverage the strengths of various technologies while fostering innovation, adaptability, and resilience in the face of evolving requirements.
Technology diversity doesn’t structurally belong to monoliths.
Monoliths typically rely on a single technology stack. An ASP.NET web application, for example, can have parts written in C# and parts written in another language (for example, F# or Visual Basic), but remains locked to the .NET Core framework of choice. That same application, though, may be linked to external web services controlled by the same team, which may leverage other stacks such as Python and Java. This is another fact. Again, is it a problem? Personally, I don’t think so, but it’s a matter of perspective rather than absolute truth.
The practice of building software as a collection of small, loosely coupled, and independently deployable services gradually evolved from the principles of service-oriented architecture (SOA) that have been around since the early 2000s. SOA is a broader architectural approach that focuses on organizing software components (known as services) to support business processes. Services in SOA are larger, encompass modules, and are often subject to some centralized governance model so that changes to one service might have cascading effects on others. In other words, SOA services are aware of each other and are fairly coupled, though formally independent.
SOA laid the groundwork, and the microservice architectural style evolved over time as a response to the challenges posed by monolithic architectures and the changing landscape of software development. Compared to an SOA, a microservices architecture is made of more numerous and more granular and independent components.
However, there’s no specific time when microservices, as an architectural style and approach to software development, was born. Rather, the microservices style emerged organically in response to the evolving needs of the software industry.
Companies like Amazon and Netflix are often cited as early adopters—in some way, inventors—of microservices. In reality, they have simply been labeled as such. To be honest, it is even questionable whether their disclosed architectural diagrams really represent a microservices architecture or a distributed application articulated on multiple cohesive services.
The fact is that nobody initiates a project with the sole intention of inventing a new architectural style. Amazon, Netflix, and many other companies simply set out to develop their own method for building highly scalable and distributed systems to serve their business needs in the best possible way. They only cared about the results; others just played with putting labels on visible outcomes.
The resulting set of practices and principles attracted the attention of many individuals and organizations, eager to learn how a big company uses software to support its business. Over time, the practices and principles employed by early adopters have been refined and popularized, with contributions from various thought leaders, authors, and practitioners leading to their wider adoption. Some input also came from the Agile methodology and later from DevOps. Their emphasis on the importance of smaller, more frequent releases and closer collaboration between development and operations teams naturally drove developers to design and build new applications using a microservices approach.
The microservices architecture calls for the development of applications as a collection of services. Each service:
■ Is structured around a specific business functionality
■ Operates in its dedicated process
■ Communicates through lightweight mechanisms such as HTTPS endpoints
■ Can be deployed individually
As mentioned, microservices are an evolution of SOA. Out of curiosity, let’s review the fundamental tenets of SOA. Although there isn’t an established official standard for the SOA, consensus within the community indicates the following four fundamental principles of an SOA. In an SOA, each constituent service:
■ Has a clear definition of service boundaries
■ Operates in full autonomy
■ Shares contracts, not code, with its clients
■ Establishes compatibility through policies
The sense of déjà-vu is strong, isn’t it? In SOA, systems are decomposed into distinct services, each encapsulating a specific piece of functionality or business capability. These services have well-defined boundaries and are designed to be modular, autonomous, and independently deployable. Contracts delineate the business functionalities accessible through a service boundary, whereas policies encompass various constraints, including communication protocols, security prerequisites, and reliability specifications. Considering this, I dare say that a microservices architecture is essentially an SOA with a couple of unique traits. First, it’s not as strict or rigorous as an SOA. And second, there are no policies (or anything like them) to mediate—and therefore complicate—communication between components.
In the industry, the term “microservice” is often used interchangeably to describe both a tiny, highly specialized, and self-contained deployable service, and a comprehensive web service still focused on a single task but defined at a significantly higher level of abstraction and resembling an application in its logical scope. In fact, the term “microservice” does have a clear definition, but one so broad that it spills over into the territory of ambiguity: each microservice is designed to handle a specific business capability or function. It has a well-defined purpose and does one thing well.
Note that the term “micro” is relative and should not be interpreted as a strict size constraint. The size of a microservice can vary based on the specific requirements of the application and the organization’s goals. What’s essential is that each service is focused, independent, and aligns with the principles of microservices architecture.
Logical decomposition of the system
In the early 2000s, within the Windows environment, Windows Communication Foundation (WCF) was the framework specifically designed to facilitate the implementation of SOA principles. It was a huge subject that inspired tons of books, articles, and conference talks. At some point, a somewhat bold idea surfaced: turning every application class into a service.
From a WCF standpoint, services represented a means to separate the business logic from the essential infrastructure needed to support it, such as security, transactions, error handling, and deployment. Devoid entirely of every plumbing aspect, managed by the WCF infrastructure, services were isolated business components, completely autonomous in behavior, and exposing clear contracts to the outside world.
The question arose, how big should each service be? People soon began attempting to maximize the benefits of services by decomposing them to their most fundamental level, transforming even primitive elements into microscopic services. In other words, microscopic services represented the natural result of a carefully deconstructed system.
What began merely as an intellectual challenge within the realms of SOA and WCF has since evolved into a predominant characteristic of the microservices architectural approach. Indeed, this is the debatable point around which rotates both the good and the bad aspects of the microservices architecture: that the analysis should go as deep as possible to fully decompose any system into primitive and microscopic service units.
Physical deployment of microscopic services
Still, microscopic services are logical services. But the size of a deployable service (one we commonly refer to as a microservice) might not match the size of any logical microscopic services we may identify during the system analysis. (See Figure 9-2.)
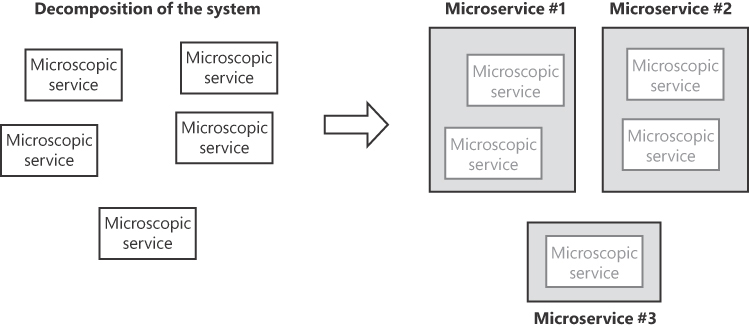
FIGURE 9-2 Decomposing a system into microservices.
The figure is a diagram in two parts, left and right of an arrow. On the left, five blocks labeled “Microscopic service” represent the decomposition of a system into primitive services. On the right, the same blocks are wrapped in three containers, labeled “Microservice #1”, “Microservice #2”, “Microservice #3”.
Missing the point of logical and physical microservices may jeopardize the whole design of the system and skyrocket costs and latency. A one-to-one relationship between logical and physical microservices is at one extreme. At the other extreme is a (modular) monolith. (See Figure 9-3.) I’ll return to microservices and modular monoliths later in the chapter. For now, let’s just find out more about the good and not-so-good parts of the microservices architectural style.
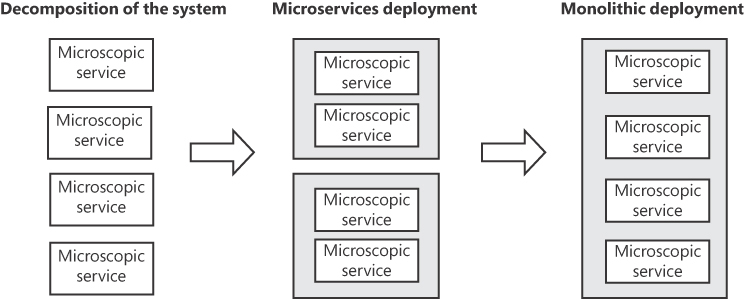
FIGURE 9-3 Logical decomposition may lead to microservices as well as to monoliths.
The figure is a diagram in three horizontal segments. The leftmost (titled “Decomposition of the system”) is made of four blocks laid out vertically, each labeled “Microscopic service”. A right-oriented arrow points to the central segment of blocks, titled “Microservices deployment”. The same four blocks are now wrapped in two gray containers. Another arrow points to the rightmost segment titled “Monolithic deployment”. Here the original four blocks are contained in a single surrounding gray block.
Note “Smart endpoints and dumb pipes” is a guiding principle in microservices architecture. It emphasizes placing intelligence and functionality within the microservices themselves while keeping communication channels simple and generic. The key idea is that microservices should be self-sufficient and self-contained, capable of processing data and making decisions independently.
An archipelago of services
In geography, the term archipelago describes a group of islands that are scattered close to each other in a large body of water, whether an ocean, enclosed sea, or lake. These islands can vary in size, and they are typically separated from each other by bodies of water like small seas or straits. Archipelagos can consist of just a few islands or extend to include tens of islands within the same chain.
I like the metaphor of the archipelago to describe a microservices architecture over the plain concept of suites or a collection of services because ultimately, services are scattered across a large body (the cloud), can vary in size, and are separated (and connected) by protocols like HTTPS, gRPC, TCP, and message buses.
Just because the microservices style emerged as a way to settle the troubled waters of distributed applications, it offers a considerable list of benefits that are objectively difficult to deny. After all, any architectural style in which an application is composed of independently deployable, small, and modular services clearly promotes flexibility, scalability, and the ability to develop, deploy, and maintain services separately. The following sections constitute a more structured list of the good parts of microservices.
More Agile development cycles
Decomposing the system into a reasonable number of interacting components lays the groundwork for unprecedented flexibility and parallelization of development. Each microservice can be developed, tested, and released independently, allowing developers to focus on one task at a time and make changes without affecting the entire system. This brings several benefits:
■ The development of separate microservices allows for more efficient division of work among development teams and members.
■ Each microservice is typically owned by a specific team (or developer), which promotes clear accountability and responsibility.
■ Each microservice can be managed and updated independently, reducing the risk of system-wide disruptions during maintenance.
■ Each microservice can exhibit technological diversity (programming stack, language, data storage), resulting in augmentation of developers’ skills.
■ Isolated (and ideally smaller) services are more manageable when it comes to unit testing, integration testing, and end-to-end testing.
Furthermore, more Agile development cycles encourage a culture of continuous deployment and DevOps practices, fostering rapid iteration and continuous improvement of the application. In this way, organizations can respond quickly to changing business requirements and market conditions. For example, the fact that microservices can be easily integrated into a larger ecosystem of systems facilitates collaboration with external partners and third-party services.
Increased potential for scalability
Microservices’ great potential for scalability stems directly from its architectural principles and represents one of their most significant advantages. The chief enabling factor is the granularity of services.
Because services are decoupled and independent, they can be individually scaled to meet varying levels of demand. This means you can allocate more resources to critical services (for example, CPU, memory, network bandwidth) while keeping less-used services lean to optimize resource use. This contrasts with monolithic architectures, where scaling typically involves ramping up the entire monolith, including components that may not require additional resources.
You can automatically manage and orchestrate this horizontal scalability using real-time metrics to accommodate traffic spikes and fluctuations. Note, though, that automated resource optimization isn’t exclusive to microservices but is a feature provided by the hosting cloud platform. Nevertheless, the level of granularity offered by microservices significantly enhances this capability. Likewise, you can fine-tune load balancing—which is also not unique to microservices—at the service level rather than at the application level, thus ensuring that no single service instance becomes a bottleneck.
Fault tolerance
The separation of microservices reduces the likelihood that an error in one service will compromise the entire application. There are two possible types of errors: a failure in the code (bug, incoherent status) or a network failure. In the latter case, only one service is down or unreachable; the rest of the application is up and running, and all functions that do not involve the failed service operate as usual. In contrast, if a monolithic application experiences a network failure, no one can use it.
In a scenario in which the failure is caused by a code exception, I see no relevant differences between microservices and a monolithic application. Any call that addresses the troubled service fails in much the same way as in a monolithic application, which throws an exception after any attempt to call a certain function. In both cases, to give users a friendly response, callers must catch exceptions and recover nicely. And with both microservices and monoliths, functions that do not relate to the troubled code work as usual.
While microservices offer numerous benefits, they also introduce considerable complexity in terms of service coordination, data management, and operational overhead. The interesting thing about the microservices architecture is that the same characteristic, in different contexts, can be seen as either good or bad. An illustrious example is the granularity of services. This is a great characteristic of microservices in that it improves the development cycle and increases fault tolerance. But it’s a bad characteristic because it adds a lot of complexity and communication overhead. This section covers the downsides of the architecture.
Note My two cents are that microservices surfaced as an approach with clear benefits in the implementation of some (large) early adopters. Among everyone else, this generated the idea that microservices could be the long-awaited Holy Grail of software. In practice, though, the microservices architecture—like nearly everything else in life—has pros and cons. I’d even dare say that for most applications, it has more cons than pros. I’ll return to this later in this chapter.
Service coordination
Let’s face it: The first point in the preceding list of good characteristics—more agile and accelerated development cycles—is frequently (over)emphasized to make the microservices approach more appealing to decision makers. In reality, no application is an island, let alone an archipelago. So, you don’t just need digital bridges and tunnels to connect islands (for example, protocols); you also need some centralized service management and coordination. This results in additional—and to some extent, accidental—complexity.
Centralized service management refers to standard ways of handling various aspects of the development cycle such as deployment, configuration settings, authentication, authorization, discovery of available microservices, versioning, monitoring, logging, documentation, and so on. The general guideline is to keep centralized management of microservices operations to a minimum and favor independence of individual modules. It’s a delicate trade-off, though: Addressing cross-cutting services within an archipelago (or just an island) is much more problematic than on the mainland.
Coordination, in contrast, refers to the mechanisms used to ensure that the various microservices within an application work together harmoniously to achieve the intended functionality. This is normally achieved via orchestration or choreography. In the former case, a central workflow engine coordinates the execution of multiple microservices in a specific sequence driven by business logic. In contrast, the latter case relies on microservices collectively collaborating to achieve a desired outcome. Each service performs its part of the process autonomously based on the events and messages it receives, usually via a bus. A message bus, though, represents another level of complexity.
Cross-cutting concerns
A cross-cutting concern is an aspect of a software application that affects multiple constituent parts. All applications deal with concerns such as security, monitoring, logging, error handling, and caching, but handling these within a monolithic application is much easier than with microservices because everything takes place within the same process. In contrast, in the realm of microservices, cross-cutting concerns may affect multiple processes—let me repeat: multiple processes. They may also require global collection and centralized handling of distributed results captured by each running service.
You can use an identity provider for security, distributed memory caches for caching, centralized loggers for tracing and health checks, and standardized error responses for error handling. Note, though, that the list of cross-cutting concerns is also longer in a microservices architecture than it is within a monolithic one. Microservices’ cross-cutting concerns include managing service registries, load balancing, dynamic routing, and auto-scaling. In addition, defining consistent communication protocols, API standards, and data formats is crucial for enabling microservices to interact seamlessly. Hence, cross-cutting concerns should also include API versioning, contract testing, and documentation.
Centralized logging service
Tracing the activity and monitoring the health of individual microservices poses challenges because the logs for each microservice are typically stored on its respective machine. Implementing a centralized logging service that aggregates logs from all microservices, such as an Application Insights agent, is highly advisable.
Within a microservices architecture, it’s common to encounter never-before-seen errors. But you don’t want to have to navigate numerous log files to gain insights into the root causes of these errors. If one or more microservices fail, you must be able to answer questions such as which services were invoked and in what order. Understanding the flow of requests across microservices is also essential for diagnosing performance bottlenecks and troubleshooting issues.
Here are a few microservices logging best practices:
■Use a correlation ID : A correlation ID is a distinct value assigned to a request and exchanged among the services involved in fulfilling that request. In case of anomalies, tracing the correlation ID provided with the request allows you to filter the pertinent log entries without sifting through potentially millions of records.
■ Log structured information : A structured logging format such as JSON makes it much easier to search and analyze logs. Be sure to include enough context in your logs to understand the events that led to an error. This might include information such as the correlation ID, request URL and parameters, service name, user ID, time stamp, overall duration, and so on.
■ Use log levels : Using different log levels (error, warning, info, and so on) to indicate the severity of a log message speeds up your search for the most important issues while ensuring that you don’t miss any significant but less urgent issues.
In addition to recording error messages, it is also advisable to log performance metrics like response times and resource consumption. This way, you can closely monitor the services’ performance and pinpoint any possible concerns.
Authentication and authorization
In a monolithic application, authenticating users can be as easy as checking their email and password against a proprietary database and issuing a cookie for successive access. Then, anytime the user logs in, the system can fully trust any request they issue. Authorization revolves around checking the user’s claims (such as their role or feature-specific permissions) that are also tracked via the cookie. Cookies, however, work well only if the client is the browser.
A microservices architecture generally requires a different approach: using an API gateway and an identity provider. (See Figure 9-4.) Here, the client calls the API gateway and provides its own authentication token. If the token is invalid, the client is redirected to the identity provider for authentication. When authentication is successful, details of the identity are returned to the client in the form of a token. The token is then attached to every successive call to the API gateway directed at the various microservices.
FIGURE 9-4 Authentication using an API gateway and identity provider.
The figure is a diagram that extends from left to right. The first block is “Client” and is connected to another block titled “Gateway”. The gateway block is connected to an upper “Identity Provider” block through a thick double arrow. From the gateway block depart three dashed lines connecting to three distinct blocks labeled “Microservice”. The label “Claims” overlaps the arrows to indicate that claims are passed to microservices.
How can every microservice check the permissions of the requesting user? A reasonable option is to simply store all the user’s permissions in the token as claims. That way, when a microservice receives a request, it first decodes and validates the token, and then verifies whether the user holds the necessary permissions for the action requested.
Distributed transaction management
A distributed transaction is a transaction that involves multiple operations and changes to data in different systems. Ensuring the consistency and reliability of such transactions is a complex issue in distributed systems, and various techniques and protocols have been developed to effectively manage them in some way. Distributed transactions are not specific to microservices but, in a system made of many interacting parts, the chance for distributed transactions is much higher.
Managing distributed transactions is challenging due to factors like network latency, system failures, and the need to coordinate among multiple resources. Various protocols and techniques have been developed to handle distributed transactions, but the best option remains avoiding them in the first place.
I categorize this as a “gray area” because what might be a straightforward transaction within a monolithic system can readily transform into a distributed transaction when transitioning to a microservices architecture. The larger the microservice is, the more it can do internally without distributed transactions. At the same time, the larger the microservice is, the more things it may end up doing. In general, by appropriately breaking down the system into microservices, it’s quite unlikely you would need to resort to distributed transactions. Moreover, the integration of eventual consistency, if acceptable for the application, would further decrease the requirement.
Various protocols and techniques have been developed to handle distributed transactions, including two-phase commit (2PC) and three-phase commit (3PC). The former is a widely used protocol that involves a coordinator and multiple participants. The coordinator ensures that all participants either commit or abort the transaction. It has some limitations, though, such as possible blocking and scalability issues. 3PC addresses these by adding an extra phase.
Another option for breaking down the inherent complexity of distributed transactions is to use the Saga pattern. Instead of trying to ensure all-or-nothing atomicity, this pattern suggests you break the larger operation into smaller, more manageable steps. Each step is a separate transaction, and compensation steps are defined to reverse the effects of completed steps if needed. Introducing the Saga pattern, though, has a relevant impact on the existing code and, even when coded in a greenfield scenario, requires advanced design and development skills.
Note Eventual consistency assumes that data replicas may temporarily exhibit inconsistency due to network delays and concurrent updates. Unlike strong consistency models that enforce immediate synchronization, eventual consistency guarantees that all replicas will converge to the same consistent state, but over time and in the absence of further updates. This approach allows for high availability and scalability in distributed systems, as nodes can operate independently without the need for constant coordination. From a development standpoint, though, applications must be designed to handle temporary data divergence through conflict-resolution mechanisms.
Data management
This is a huge topic with so many implications that it probably deserves a book of its own. First and foremost, no known laws currently prohibit the deployment of a microservices architecture on top of a single and shared database server. In my opinion, this is the best trade-off possible in terms of development costs and effective results. More importantly, this approach saves time spent grouping and joining data, possibly from multiple sources and heterogeneous storage technologies.
So, using a shared database is one option. Unfortunately, it is considered an antipattern. (This is an amply questionable point, but that’s just it—if you advertise such a decision, be prepared to face a host of opponents who claim otherwise.) Why is a shared database considered an antipattern? A common (albeit somewhat abstract) answer is that tying microservices to a shared database can compromise microservices’ fundamental characteristics of scalability, resilience, and autonomy. The alternative is the database-per-service approach, whereby each microservice has its own database. This ensures that services are loosely coupled and allows teams to choose the most appropriate database technology for each service’s specific needs. Table 9-1 and Table 9-2 present the pros and cons of both patterns.
| Table 9-1 Benefits of microservices database patterns | Database-per-service | Shared database |
|---|---|---|
| Services are loosely coupled and independent. | There’s no need to resort to distributed transactions. | |
| Each service can have the best data storage technology for its particular needs (or sometimes just the developer’s ego). | The entire dataset is fully constrained and well structured, with integrity preserved at the root. | |
| There is clear ownership of data. | Sophisticated GROUP and JOIN operations can retrieve data from multiple tables simultaneously. | |
| Changes to the database schema or data of a given service database have no impact on other services. | There is reduced need for data duplication and redundancy. |
| Table 9-2 Drawbacks of microservices database patterns | Database-per-service | Shared database |
|---|---|---|
| Each microservice can only access its own data store directly. | The database is a single point of failure | |
| Each microservice must expose an API to exchange data with other services. | Ownership of data is unclear. | |
| A circuit-breaker layer of code is needed to handle failures across service calls. | Changes to the database schema or data may hit multiple services. | |
| There is no simple way to execute JOIN queries on multiple data stores or to run transactions spanning multiple databases. | Microservices lack complete independence in terms of development and deployment because they are interconnected and operate on a shared database. | |
| Data-related operations spanning multiple microservices could be hard to debug in the event of a problem. |
Notice that the drawbacks associated with the database-per-service pattern stem directly from the initial pattern choice. Moreover, you can mitigate them only by introducing complexities like circuit breakers, data APIs, and data aggregators (for example, GraphQL), and embracing eventual consistency.
Note A circuit breaker is a software design pattern used in distributed systems to enhance resilience and prevent system failures caused by repeated attempts to access an unresponsive service. It functions like an electrical circuit breaker, monitoring service calls. When failures reach a certain threshold, the circuit breaker temporarily halts requests to the problematic service, preventing further damage. It then periodically checks if the service has recovered. If so, it closes the circuit, allowing requests to resume. Circuit breakers improve system stability, reduce latency, and enhance overall fault tolerance in modern applications and microservices architectures.
What about the drawbacks of the shared database approach? Looking at Table 9-2, it becomes evident that skillful programming techniques and the judicious use of cloud services can reduce the effects of the first two points. Interestingly, these measures also indirectly alleviate the other two sore points.
There are several established strategies to prevent the database from becoming a single point of failure, including primary/replica sync coupled with manual or automated failover, clustering, and high-availability solutions. All these strategies are designed to diminish the potential for downtime. Supplementary actions like data backups and load balancing can also preempt problems that might ultimately lead to a breakdown.
Regarding data ownership, you can act at the code level by constraining each service to exclusively use the specific tables it requires. You can achieve this using Entity Framework by employing multiple DbContext components, each focusing on a particular set of tables. Or, in cases where your data allows for it, consider database sharding. This divides your data into smaller, more manageable pieces, with each shard potentially residing on its own server. This approach not only lessens the repercussions of a single-server malfunction but also imposes limitations on service access.
What’s the bottom line? In my experience, if a shared database appears to be the most suitable solution for a microservices project, you might not need to use microservices at all. In such cases, a well-implemented monolithic architecture could be a more appropriate choice. Typical reasons to choose a shared database within a microservices application include the need to retain existing data tables or if the existing data access code is highly valued. Another critical factor is when efficient transaction management is of utmost importance.
Operational overhead
Despite its apparent beauty, massively modular architectures have hidden wrinkles in terms of managing and maintaining the system. By design, an independent service lives on its own server and is good at one specific task. So, complex business operations must orchestrate interactions and communication among multiple services. This can lead to issues such as network latency, message delivery failures, and the need for robust error-handling and recovery strategies.
The overhead of inter-service communication—especially in a networked environment—can also affect performance. Efficient communication patterns and optimizations are required to mitigate this issue. In this context, gRPC becomes a viable option, often preferable to HTTPS, which is tailored more for public-facing web APIs.
Note gRPC is an open-source remote procedure call (RPC) framework developed by Google. It enables efficient and high-performance communication between distributed systems by using Protocol Buffers (Protobufs) for data serialization and HTTP/2 for transport. gRPC is used for building fast and efficient APIs in various programming languages, making it ideal for internal microservices communication and scenarios requiring high performance.
Operational overhead is not limited to runtime. While testing a single microservice may be easier, end-to-end testing and debugging of multi-service operations can be challenging and may require sophisticated testing strategies and tools.
As part of their design, microservices inherently bring significant overhead in various areas, including communication, testing, and deployment, as well as discovery and version management. Notably, the financial aspect cannot be overlooked. In this regard, microservices also entail a substantial overhead. While they can offer cost savings through resource optimization, the initial setup and management of microservices infrastructure can be costly—not to mention the costs associated with the necessary shift in mindset when transitioning from a monolithic paradigm to a microservices approach.
Designing a microservices architecture requires architects to undergo a notable shift in their approach to handling requirements and transforming them into cohesive and interoperable components. The transition to microservices presents complex challenges and the potential for substantial costs. Thus, it should be imperative to thoroughly evaluate the project’s precise business needs before proceeding. Yet, many software managers have an unhealthy passion for silver bullets—especially when they are coated with a thick layer of technical jargon. As a result, microservices have garnered a reputation for being a universal remedy for all software-related challenges. Is that reputation truly well-deserved?
The dominant message today is that microservices are good for all applications because several large companies use them. If it works for them, managers and architects say, then all the more reason it will work for us; after all, we are smaller and less demanding. This viewpoint is overly simplistic.
In fact, many large companies do run a software architecture whose description closely matches the definition of an abstract microservices architecture—a system broken down into small, independent, and loosely coupled services that communicate through APIs. And representatives of these companies rightly tell the world their success stories (even if sometimes those stories are bittersweet). People hear these stories during conference talks or read about them in articles and interviews, then go back to the office and say, “Let’s do it too.” But partitioning an application into independent services only seems like an easy task. It’s challenging when you have an existing monolith to compare to; it’s a true leap in the dark when you use it for a new application.
Large companies like Amazon and Netflix have contributed significantly to the evolution and fame of the microservices approach. I vividly recall the industry-wide impact when Amazon adopted an SOA around 2004. Netflix, however, is the iconic example of a company that has embraced microservices. In any case, Amazon and Netflix did not one day spontaneously decide to divide their existing applications into independently operating microservices. It occurred naturally within a broader evolutionary journey.
How Netflix discovered microservices
According to Adrian Cockcroft, who led Netflix’s migration to a large-scale, highly available public-cloud architecture around 2010 before joining Amazon as VP of Cloud Architecture Strategy in 2013, the original Netflix back end was essentially a monolith founded on an Oracle database. The business need that triggered the first crucial move toward microservices was to give each user their own back end.
The thinking was that the company’s extensive and growing user base—each with a lengthy history that required frequent updates—could potentially overwhelm any relational database. So, the team at Netflix decided to denormalize the data store and move to a distributed key-value NoSQL database. The team also reviewed its data access code and refactored complex queries to optimize scalability. Finally, the team transferred all user data—previously handled via sticky in-memory sessions—to a Memcached instance, resulting in a stateless system. As a result, users interacted with a different front end during each visit, which fetched their data from Memcached.
Breaking up the monolith yielded various consequences. One was that it defined clear boundaries between parts, adding logical layers of code. Another was that it necessitated the replacement of existing chatty communication protocols between components with chunky protocols to proficiently handle timeouts and retries.
The Netflix team implemented these changes incrementally, developing new patterns and technologies and capitalizing on emerging cloud services as they went. Ultimately, the company transitioned from a monolithic architecture with a centralized relational database to a distributed, service-based stateless one. But this architecture didn’t really have a name—that is, until the industry began calling it microservices in the early 2010s. This name would eventually be used to describe an extremely modular system in which each component is autonomous and features a well-defined service interface.
Note For a retrospective of the Netflix microservices story, you can read the transcript of Cockcroft’s talk at QCon London in March 2023. It’s located here: https://www.infoq.com/presentations/microservices-netflix-industry.
Are you using a microservices architecture to build a global-scale system serving hundreds of thousands of users? Or are you simply using microservices to build enterprise line-of-business applications with a moderate and relatively constant user base and linear traffic volumes? Put another way, are you sure that what might be pompously defined a microservices architecture isn’t simply an SOA with a lot of unnecessary infrastructure?
SOA is a traditional architectural style that focuses on creating reusable, loosely coupled services that communicate through standardized protocols (for example, REST or SOAP). These services are designed to be independent but can also be interconnected. SOA promotes interoperability and is suitable for complex enterprise systems.
Microservices represent a more recent architectural approach that decomposes applications into numerous smaller, self-contained services, each responsible for a specific business function. These services communicate through lightweight protocols like REST and gRPC and can be developed and deployed independently. Microservices emphasize agility, scalability, and ease of maintenance, making them well-suited for rapidly evolving applications.
The key difference between them lies in their granularity. SOA typically involves larger, coarser-grained services, while microservices are finer-grained, focusing on individual features or functions. This affects how changes are managed. With SOA, updates may require the coordination of multiple services, whereas with microservices, changes can be isolated to a single service.
Improper use of microservices leads to more complexity and even higher costs. Determining whether microservices are suitable for a given application scenario depends on factors like scalability needs, state of the infrastructure, and development resources. A well-informed decision considers the application’s growth potential and the team’s ability to manage distributed development effectively. This section contains a short list of key factors for determining whether a microservices approach is right for you.
Assessing scalability needs
To quote Paul Barham, Principal Scientist at Google, “You can have a second computer once you’ve shown you know how to use the first one.” Application scalability functions similarly. An application requires a more scalable architecture only if it is proven that the current architecture can’t go beyond a critical threshold, and that this critical threshold is reached often enough to risk damaging the business.
An application’s scalability requirements are not derived solely from the projected numbers in the vague and distant future promised by some enticing business model. More concrete actions are required to gauge these requirements. Specifically, you must:
■ Analyze current and projected user traffic patterns.
■ Recognize peak usage periods and trends through server logs and the use of tools such as Google Analytics.
■ Evaluate the application’s responsiveness under simulated high traffic scenarios.
■ Monitor network, CPU, and memory usage under different loads.
■ Listen to user feedback and address complaints about slow performance or downtime, which may be signs of scalability issues.
■ Compare your scenario with that of your competitors to ensure you remain competitive in the market.
■ Consider future growth projections.
Before switching your development mindset and practices, first confirm that your existing architecture has real bottlenecks and performance issues and can’t effectively handle increased loads. And if it does have bottlenecks, make sure whatever different architectural style you are considering will address them.
Having said all this, back-office applications and even most line-of-business applications rarely face highly variable volumes of traffic and users. In these cases, justifying a scalable but more complex architecture becomes challenging.
Ensuring infrastructure readiness
Hosting a microservices application requires a robust infrastructure capable of handling the specific needs and challenges that come with a distributed architecture. One approach is to deploy each microservice on a plain virtual machine (VM) on-premises. In doing so, though, you lose most of the benefits of the microservices architecture. A more advisable choice is to deploy each microservice to its own container in an ad hoc platform such as Docker.
Managing and deploying several independent containers at scale, though, is tricky. Here, orchestration tools such as Kubernetes and Docker Swarm come into play. Kubernetes (K8S) is particularly popular for microservices due to its rich feature set and ecosystem. In particular, K8S provides a service-discovery mechanism to manage communication between microservices. You also need load balancers (for example, HAProxy, NGINX, or cloud-based load balancers) to distribute incoming traffic to microservices instances, and an API gateway (for example, NGINX) to help manage and secure external access to your microservices.
In summary, if the current company infrastructure is predominantly on-premises with a surplus of VMs, you can still deploy a microservices application; however, you might not be able to fully harness its scalability potential.
Evaluating the importance of technology diversity
Because of the high degree of granularity offered by microservices, combined with containerization, you can develop each microservice using a distinct technology stack and programming language, which many developers see as advantageous. Personally, I consider this advantage somewhat exaggerated. In my experience, the technology stack tends to be relatively uniform. Even in the event of an acquisition, an initial step typically involves consolidating and standardizing technology stacks to the extent feasible. So, while technological diversity has its advantages, I don’t consider it a significant factor when deciding to switch architectures.
Calculating costs
Many people claim that a microservices architecture reduces costs. But whether that’s true or not depends on the calculations that make most sense for the specific scenario. The function cost has many parameters:
■ Operational costs : Microservices typically involve more operational overhead than monolithic architectures. You’ll need to manage and monitor multiple services, which can increase infrastructure and personnel costs. Container orchestration tools like Kubernetes might also require additional operational expertise and resources.
■ Infrastructure costs : Running multiple containers or VMs increases your cloud or datacenter expenses. You could incur additional infrastructure costs, especially if you adopt containerization. Furthermore, implementing distributed monitoring, logging, security, and other necessary tools and services can add to the overall cost more than with a monolith application.
■ Human resources costs : Microservices require a team with specific expertise in containerization, orchestration, and distributed systems. Hiring and retaining such talent can be costly.
■ Maintenance costs : Microservices-based applications require ongoing maintenance, updates, and bug fixes for each service. These maintenance efforts can accumulate over time. You will also likely face higher costs associated with troubleshooting, debugging, and coordinating among teams.
What about development costs?
Adopting a microservices architecture might require significant effort at the outset as you decompose your existing application into smaller, self-contained services that must be orchestrated and synchronized. You’ll also likely expend increased effort designing and developing inter-service communication and coordinated data access systems. Finally, integration testing becomes notably more intricate and, consequently, costly. However, you might be able to balance these extra costs by parallelizing your development process to achieve a more aggressive and beneficial time-to-market.
All these cost items add up in the final bill. Interestingly, though, what often receives the most attention is the ability to exert finer control over resource allocation, which can potentially lead to the optimization of costs. The bottom line is that although microservices bring higher operational and development costs, they also offer benefits like improved scalability, agility, and fault tolerance. The ultimate cost-effectiveness of a microservices architecture depends on your specific use case, long-term goals, and ability to effectively manage the added complexity. Conducting a thorough cost/benefit analysis before adopting a microservices architecture is more than essential.
Note In some cases, the benefits of microservices may outweigh the additional costs; in others, a monolithic or hybrid approach might be more cost-effective.
The case of Stack Overflow
For high-performance applications, many people assume that a microservices architecture is the only viable option. After all, internet giants like Amazon and Netflix, not to mention companies in the gaming, betting, and fintech sectors, use microservices because they could not achieve their goals using a more conventional approach. These companies adopted microservices—as well as other modern methods, like CQRS, and event-driven design—because they needed to efficiently handle concurrent and continuous write and read operations from hundreds of thousands of users.
But what if you only need to handle read operations? In that case, you can achieve an efficient solution without resorting to microservices. A great example is Stack Overflow. Launched in 2008 by Jeff Atwood and Joel Spolsky, Stack Overflow—a popular question-and-answer website for programmers—is a monolithic application hosted on a cluster of on-premises web servers. It relies heavily on Microsoft SQL Server to meet its database requirements. SQL Server alone, though, is not enough to seamlessly serve thousands of requests per second without expert use of indexing, finely tuned queries, and aggressive caching strategies.
Despite experiencing a decline in traffic after the explosion of ChatGPT, Stack Overflow has consistently maintained its position as among the top 100 most-visited websites worldwide. The key to its remarkable performance is its extensive use of caching. Stack Overflow employs multiple caching layers, ranging from front end to Redis, to significantly reduce the impact on the database.
Over the years, the initial ASP.NET model-view-controller (MVC) application has undergone multiple rounds of refactoring, including the migration to ASP.NET Core. Although the fundamental structure of the application remains monolithic, its architectural design is modular. Essential functions have been strategically separated and deployed as individual services, thus enabling the optimization of tasks without introducing unnecessary complexity to the overarching architecture.
Ultimately, Stack Overflow runs a suite of monolithic applications. The successful use of this pattern hinges on three factors:
■ Predictable traffic Stack Overflow benefits from a well-monitored and well-understood traffic pattern, which enables precise capacity planning.
■ Experienced team Stack Overflow’s team boasts a wealth of expertise in building software and managing distributed applications.
■ Overall low resource intensity Stack Overflow pages are fairly basic and demand little processing power and memory. So, the application’s resource requirements remain relatively modest.
The lesson from Stack Overflow is that complexity is not a prerequisite for achieving scalability or success. Through the judicious use of appropriate technologies, you can achieve great outcomes without employing an extensively intricate architecture. However, it’s also worth noting that although Stack Overflow hasn’t embraced microservices, it has evolved significantly from its original straightforward ASP.NET monolith architecture and now features a notably intricate infrastructure.
For further insights into Stack Overflow, listen to episode 45 of the DotNetCore Show, which features an interview with Nick Craver, the company’s chief architect. You can find this episode at https://dotnetcore.show.
Note For a different perspective, consider a collection of applications I routinely manage. Collectively, they support and guarantee daily operations across various sports events and tournaments. These applications comprise a network of discrete services, but like Stack Overflow, none of them can be classified as micro. Instead, they are coarse-grained services implemented as straightforward layered ASP.NET applications or web APIs. Given their current traffic volumes, these services perform admirably and demand only minimal Azure resources to operate efficiently.
The planning of a microservices application involves one crucial step: breaking down the business domain into small, independent services, each responsible for a specific business capability. The objective is straightforward to comprehend but proves quite challenging to implement in practice. Yet, the resulting set of independent services is key to plan deployment, and to put the whole microservices architectural style into a new perspective.
How many microservices?
The prevailing view on microservices is that having more of them allows for improved scalability, localized optimization, and the use of diverse technologies. When seeking advice on gauging the ideal number of microservices for your scenario, you might encounter somewhat arbitrary recommendations, such as these:
■ There should be more than N lines of code in each microservice.
■ Each functional point calls for a microservice.
■ Each database table owner calls for a microservice.
In reality, the ideal number is the one that maximizes cohesion among components and minimizes coupling. As for the formula to arrive at this number? Simply put, it’s “Not too many and not too few, and each of them is not too big and not too small.”
Admittedly, this does not provide much concrete guidance. If you’re looking for something more specific, I’ll simply say that to my knowledge—without pretending it’s exhaustive—it is common to encounter more than 100 microservices in a sizable application. As for my feelings on the matter, however, this strikes me as a huge number.
Yet, deployable microservices live in the application space, whereas business capabilities they implement live in the business space. The analysis starts breaking down the business domain into bounded contexts, and each bounded context—a business space entity—into more and more granular blocks. Once you have enough business capabilities, start mapping them into new entities in the application space—actual candidates to become deployed microservices. This is what we called microscopic services in Figure 9-2—logical, atomic functions to implement and deploy for a sufficiently modular application.
The key lies in this functional decomposition. Once you’ve achieved that, whether to use microservices or another physical architecture becomes a mere infrastructural decision.
Architectural patterns for a logically decomposed system
From the global list of microscopic logical components, you create the aggregates that you intend to assemble in the same code module. Figure 9-5 shows the various options (thick borders in the figure indicate a deployable unit). The number of deployable units required to establish the business functionalities within a specific bounded context varies based on the chosen architectural pattern.
With a microservices approach, it’s essential to keep the unit sizes relatively small, because the goal is to break down the model into the smallest possible autonomous components. There isn’t a predefined threshold that dictates when to halt the decomposition; it’s a matter of discretion. However, in most cases, you will find it advantageous to delve quite deeply into it. The SOA pattern shown in Figure 9-5 reflects essentially the same approach, with one distinction: The decomposition is halted earlier, yielding coarser-grained components. These are referred to as monoliths to emphasize that they aren’t single-function modules. Finally, Figure 9-5 shows a monolith as a unified deployable unit that encompasses all functions within a single process.
FIGURE 9-5 Architectural options for implementing a logically decomposed business domain.
The figure begins with a circled text labeled “Logically decomposed domain” from which four lines span downward in the direction of four graphical items. The leftmost is a stacked set of six rectangles with a thick border labeled “Microservice”. The item is titled “Microservices”. The next item is a set of three stacked rectangles with a thick border labeled “Monolith”. The item is titled “SOA”. The third item is titled “Monolith” and is a larger rectangle with a thick border that wraps three smaller rectangles with thin borders labeled “Module”. Finally, the rightmost item is titled “Serverless”, has a thick border and contains a stacked set of thin-bordered smaller rectangles labeled “Microservice”.
Deployment options
When outlining a deployment strategy, your DevOps and development teams must make three crucial decisions:
■ On-premises or cloud
■ Processes or containers
■ Whether to use orchestrators (for example, Kubernetes)
■ Whether to go serverless
The golden rule is to build and deploy microservices within the cloud instead of relying on a conventional on-premises IT infrastructure. The cloud plays a pivotal role in facilitating the acclaimed benefits of scalability, flexibility, and optimization.
Hosted in-process on a server or VM, a microservice acts as an individual operating system-level process. It’s probably the most lightweight approach in terms of resource use because it doesn’t require the additional runtime overhead of containerization. However, the operational burden of setting up a VM should not be underestimated.
Containers offer stronger isolation than processes. Containers ensure that each microservice has its own isolated runtime environment, preventing any possible conflicts. But the crucial benefit of containers is portability across various environments, from development to production. Furthermore, building a container is generally easier than setting up a VM. And containers are well suited for orchestration platforms like Kubernetes. This simplifies scaling, load balancing, and managing microservices in a distributed environment.
When deploying applications to Kubernetes, you typically create a set of resources that define components, configurations, and how they should run within the Kubernetes cluster. Pods are the smallest deployable units in Kubernetes. They can contain one or more containers (for example, Docker images) that share the same network namespace and storage volumes. The main concern with Kubernetes is the steep learning curve. Using Kubernetes involves numerous concepts, components, and YAML configuration files, which can be overwhelming for beginners. To address these issues, organizations often invest in external expertise, implement best practices, and use other tools and services to simplify management and monitoring. Managed Kubernetes services from cloud providers (for example, Azure Kubernetes Service) can also alleviate some of these challenges by handling cluster-management tasks.
Note On the ASP.NET Core stack, a microservice is a web application or web API project. In the latter case, the microservice can have dedicated middleware for the communication protocol of choice—HTTP, gRPC, plain WebSocket, SignalR, GraphQL, or background processing. An HTTP interface can also be coded with a minimal API specifically designed to require only essential code and configuration and to remove the overhead of a traditional MVC setup. If desired, an ASP.NET microservice can be containerized using Docker. This enables you to deploy and scale using an orchestration platform like Kubernetes.
The serverless environment
Recently, another option has gained acceptance and popularity: deploying microservices within a serverless environment. In this case, you don’t worry about processes, containers, and servers; instead, you run code directly in the cloud. With a serverless approach, your operational overhead shrinks to close to zero.
Serverless computing is a cloud computing model in which developers deploy and run code without managing traditional servers. Instead of provisioning and maintaining server infrastructure, serverless platforms automatically allocate resources as needed, scaling seamlessly in concert with demand. In the billing model adopted by many cloud providers, users are billed only for actual code-execution time, making it cost-effective and eliminating the need for infrastructure management.
Cost effectiveness is not a constant, though. In fact, cloud providers may have pricing models that become more expensive at scale. For example, certain pricing tiers or constraints may apply when dealing with numerous invocations, concurrent executions, or resource usage. Even with flat pricing, having more functions may lead to extra managing and coordination calls between various components and subsequently to additional costs.
Using a serverless platform such as AWS Lambda, Azure Functions, Google Cloud Functions, or Apache OpenWhisk, you package each microservice as a function. Each function is triggered by events such as HTTP requests, database changes, or timers. The serverless platform automatically handles resource allocation, scaling, and load balancing, eliminating the need to manage servers. Developers simply upload their code and define event triggers.
The effectiveness of the serverless model stems from lowered infrastructure costs and the ability to make rapid and precise updates to individual microservices to meet evolving application needs. Are there any drawbacks? Well, yes. The sore point of any serverless solution is potential vendor or platform lock-in, be it Azure, AWS, or Google Cloud.
More than a decade ago, IBM began development of an open-source serverless computing platform, which they donated to the Apache Software Foundation in 2016. The main strength of the platform, called Apache OpenWhisk, is its cloud-agnostic nature. In other words, it can be deployed across multiple cloud providers, including Azure, AWS, and Google Cloud, thus reducing vendor lock-in concerns. Furthermore, using OpenWhisk, developers can write functions in various programming languages and seamlessly integrate them with external services and event sources.
Whether to use an open-source solution or buy a commercial package is clearly a delicate business decision. Open-source software is typically free to use, whereas commercial packages come with a cost. If the open-source code does not fully meet your needs, you customize it at will (assuming you have the time and expertise to do so), whereas commercial packages typically come with professional support and service level agreements (SLAs), which can be crucial for critical applications. And, of course, any commercial package represents a form of vendor lock-in, although it is generally less binding than being tied to an entire platform.
Note An interesting commercial platform built on top of the Apache OpenWhisk code base is Nuvolaris (https://nuvolaris.io). If you use microservices and intend to run your FaaS serverless application across multiple clouds, including on private or hybrid infrastructure, it is definitely worth a look.
As outlined in the section “The big misconception of big companies” earlier in this chapter, the microservices approach originated from the organic evolution of specific large-scale platforms that were initially constructed using more traditional patterns. This evolution was spearheaded by top experts at leading companies. This is quite different from obtaining a round of investment, assembling a team of developers overnight (half junior and half part-time seniors), and expecting to use microservices to turn a tangled mess of ideas into an enterprise-level, high-scale application, as is often the case today. There are two prerequisites for successfully implementing a microservices architecture. One is deep knowledge of the application domain, and the other is the participation of a team of real experts—ideally with a powerful sense of pragmatism.
What could be a smoother alternative?
A modular monolith is a software architecture that combines elements of a monolithic structure with modular design principles. In a modular monolith, the application is organized into distinct, loosely coupled modules, each responsible for specific functionalities. Unlike legacy monolithic applications, a modular (just well-written) monolith allows for separation of concerns and easier maintenance by dividing the application into manageable, interchangeable components. This approach aims to provide the benefits of modularity and maintainability while still maintaining a single, cohesive codebase. It represents a much more approachable way of building modern services.
The ghost of big up-front design
Big up-front design (BUFD) is a software development approach that emphasizes comprehensive planning and design before coding. It aims to clarify project requirements, architecture, and design specifications up front to minimize uncertainties and changes during development. While BUFD offers structure and predictability, it can be less adaptive to changing needs. Agile methodologies emerged just to contrast BUFD and make the project adaptive to changing requirements.
Approaching any new development with a microservices architectural mindset generally involves two main risks: getting a tangle of poorly designed endpoints and ending up with some BUFD. The first risk stems from a deadly mix of unclear objectives and the need to bring something to market as quickly as possible. It evokes parallels with the memorable conversation between Dean Moriarty and Sal Paradise in Jack Kerouac’s groundbreaking novel, On the Road:
“Where we going, man?”
“I don’t know but we gotta go.”
This dialog captures the spirit of adventure and improvisation typical of the Beat Generation—two qualities that do not align seamlessly with the field of software development:
“What we coding, man?”
”I don’t know but we gotta code.”
To mitigate the potential for a chaotic and unwieldy web of minimal endpoints—which can be challenging even to safely remove—the team must perform an in-depth initial assessment, based primarily on assumptions, as to how a system might develop in a future that remains largely unpredictable. This initial assessment closely resembles the infamous BUFD. Worse, the BUFD will likely involve stabbing in the dark to identify highly dynamic requirements.
Considering the widespread popularity and proven success of microservices, you might reasonably wonder whether they are appropriate for every new project. My response is, no, initiating a project with microservices is not advisable—even if the application may eventually need to accommodate a substantial volume of traffic and experience unexpected peaks.
Microservices inherently introduce additional complexity in terms of managing a distributed system, inter-service communication, and deployment. This necessitates a highly skilled team. If your team lacks direct experience with microservices, not only will there be a learning curve, but there will also be a significant amount of trial and error involved. So, going against the mainstream, I say that if you want to develop your solution quickly, and you want your solution to be adaptable as requirements change, you should not start with microservices.
Note Project Renoir, discussed in Chapters 4–8, is an example of a modular monolith.
So, what would be a serious alternative? Well, the answer is a monolith. By monolith, though, I don’t mean a collection of tightly interconnected classes—quite the opposite. Instead, I mean a modular monolith, which is essentially a well-designed monolithic application that can be reasonably transitioned to a microservices architecture should the need arise.
Monoliths are simpler to develop and deploy but may struggle with scalability and fault tolerance. Microservices offer greater scalability and fault isolation but come with increased complexity and operational overhead. Still, in general, there are too many unknowns to make microservices the right choice at the start of a new project. For the sake of budget and target goals, I strongly advocate a more cautious approach.
Why not use microservices right from the start?
Why is a new project more likely to fail if you start with microservices? Ultimately, it comes down to two factors: inherent operational complexity and unclear boundaries.
Architecturally speaking, an application based on microservices is a massively distributed system, and according to the notorious “Eight Fallacies of Distributed Computing,” articulated more than 20 years ago by software engineers Peter Deutsch and James Gosling (the father of the Java language) at Sun Microsystems, distributed systems exist to unsettle assumptions. (Three of the truest and most hard-hitting of these fallacies are “the network is reliable,” “latency is zero,” and “bandwidth is infinite.”)
Beyond the inherent operational complexity of microservices, a trickier problem relates to erecting stable, well-defined boundaries to separate services. Defining accurate boundaries can be a daunting task, even when dealing with a well-known business domain. This is the primary reason teams sometimes resort to a BUFD approach.
Together, the complexity of microservices and the difficulties associated with defining boundaries makes refactoring between services considerably more intricate compared to a modular monolith architecture.
The KISS principle
Not coincidentally, this approach aligns perfectly with a core software design principle: Keep It Super Simple (KISS). KISS is a design principle that encourages developers to keep solutions as simple and straightforward as possible. The KISS principle suggests that simplicity should be a key goal in software design, and that unnecessary complexity should be avoided. Keeping things simple doesn’t mean ignoring potential future needs, however. It’s often better to start with a simple solution and iterate on it as requirements evolve rather than trying to predict all possible future scenarios up front.
Software architecture is the means
The goal of software investment is to create a successful application—not a successful microservices architecture. So, as a software architect, you should not chart a path to success for the microservices architecture but rather for the entire project.
Many microservice success stories advance through several well-defined stages, like the growth of a majestic tree. They begin with the establishment of a robust monolithic foundation—the actual roots of the system. Over time, the system expands until its size and complexity become unwieldy and overwhelming. As with a grand tree, this is the season for careful pruning, in which the original monolith is broken up into a constellation of microservices that can thrive independently while maintaining harmony within the ecosystem.
In the end, the success story of a modern application unfolds in three basic stages:
Build of the initial monolith.
Grow the monolith according to business needs.
If, after a time (perhaps a few years), the monolith becomes unwieldy, consider migrating to a more distributed architecture, such as a microservices architecture.
Traits of a modular monolith
The term monolith is sometimes unfairly demonized as something obsolete and dilapidated. As stated, such a strong repulsion can be justified when in response to legacy monoliths whose code base is full of hidden dependencies, untestable, poorly documented, and resistant to changes. It cannot be justified, however, for a freshly developed modular monolith, built from the ground up and inspired by the guiding principles of separation of concerns.
Modular monoliths exhibit several intriguing qualities:
■ Single code base : Although the entire application is built as a single code base, it’s organized into loosely coupled modules. You can think of these modules as self-contained units of functionality. An application, built as a single code base, is generally quick and easy to deploy using a DevOps CI/CD pipeline or even manually through publish profiles.
■ Testing and debugging : Both testing and debugging are straightforward in a modular monolith because everything is in one place. Also, tracing and logging pose no additional issues.
■ Performance : Modular monoliths can perform better than microservices because in-process communication is significantly more efficient than inter-service communication. In addition, latency is reduced to a bare minimum, and data remains consistent by design (unless you deliberately opt for a CQRS data architecture with distinct data stores).
■ Development velocity : For smaller teams or simpler projects, a modular monolithic architecture can result in faster development because there’s less overhead in managing multiple services. Furthermore, you don’t need to manage the complexities of a distributed system.
On the downside, scaling a modular monolith can be challenging. Because it’s a single deployable unit, you can’t selectively add resources only where they’re really needed. You can, however, give more power to the underlying database (most of the time, this will suffice) or spin up multiple instances of the application under a load balancer.
Note To safely run multiple instances of the application, it is imperative that no shared state exists, such as global static data or in-memory caches. If session state is used, then sticky sessions must be enabled.
Loosely coupled modules
In software design, coupling refers to the degree of independence and interconnection between modules at various layers of abstraction (e.g., classes, libraries, applications). In other words, low coupling means that each component can function and evolve without relying heavily on others.
What about communication? Communication between loosely coupled components occurs through a well-defined interface or contract that comprehensively sets a service boundary. Physical communication is carried out through APIs, messages, or events, depending on the abstraction layer—often without needing detailed knowledge of each other’s internal workings.
You might recognize some of the points in the list of benefits brought by microservices. Quite simply, microservices apply loose coupling at the service level, whereas in a modular monolith, it takes place at the level of constituent libraries. A successful modular monolith is generally built using the guidelines of DDD layered architecture, as outlined in Chapters 4–8 and exemplified by Project Renoir.
A highly emphasized statement like “applications composed of loosely connected microservices can be swiftly adjusted, modified, and expanded in real-time” contains a sacrosanct truth but overlooks a crucial aspect: One can adjust, modify, expand and power up existing microservices. The statement doesn’t point out the cost associated with determining the optimal microservice boundaries through trial and error. In contrast, starting with a monolith allows you to experiment with different boundaries at almost no cost.
Logical boundaries first
With the monolith successfully in production, you have a valid topology of logical services packaged into a single deployable unit. You can still expand the monolith to address new business requirements and any changes that become necessary. For example, if you need more horsepower, you can scale horizontally through replication or vertically through the addition of more resources. This doesn’t offer the same granularity and flexibility as microservices, but it might be more than enough.
When additional requirements arise, these logical boundaries serve as the perfect foundation for the microservices architecture. At that point, the next step is to transform these logical boundaries into physical ones. As a practical exercise, suppose you want to convert the logical boundaries of Project Renoir into physical boundaries hosting independently deployable services. The starting point would be the monolith shown in Figure 9-6, an ASP.NET Core solution inspired by a DDD layered architecture blueprint.
FIGURE 9-6 The monolithic Project Renoir Visual Studio solution.
The figure is a screen capture that presents the Project Renoir example project opened in Visual Studio. The original screenshot has been slightly edited by cutting the list of collapsed projects into two parts: the main App on top and the list of all other projects on the bottom. A dashed line marks the boundary between the two chunks of the figure. The idea is breaking the project into smaller pieces.
Extracting boundaries in Project Renoir
Deriving physical boundaries from a simple monolith relies on the selected technology stack and your willingness to embrace more or less radical architecture changes. For instance, assume you have an ASP.NET Core stack and don’t want to deviate very far from it. The initial step is almost indisputable: separating the presentation and application layers.
The presentation layer is now the front end and may remain an ASP.NET Core web application. The application layer is the entry point in the back end and becomes a standalone web API project. In the presentation layer, controllers retain the same job, except now they no longer call application service methods in-process.
The communication between the front end and the back end can take various forms, depending on your scalability needs:
■ HTTP endpoints
■ A homemade (or cloud-provided) API gateway
■ A message bus
Ideally, HTTP calls go through resilient clients capable of coping with transient network faults. To handle transient faults, developers often resort to retries, implement circuit breakers to temporarily halt requests when failures occur, set timeouts to avoid waiting indefinitely, and provide fallback mechanisms to maintain essential functionality during faults. (In .NET Core, an excellent (and open-source) framework that takes care of all these tasks is Polly. You can check it out at https://www.thepollyproject.org or on the NuGet platform.) The front end can optimize essential requests by using faster communication protocols like gRPC and web sockets, while user interface updates are commonly managed through SignalR.
After the initial step, you have only two blocks and a single back-end service to maintain full references to the persistence layer. The various services in the infrastructure layer are all good candidates for decomposition. Deciding whether you decompose, though, is an application-specific decision.
There is further potential to break down the application layer into smaller components. Ideally, the application layer is organized around vertical slices of functionality built based on business features. Each feature has the potential to evolve into one or more individual microservices as needed. Depending on requirements, one or more features could also be implemented as serverless components. The database can remain unchanged (for example, a single shared database) or undergo changes such as migrating specific data partitions to separate stores managed by dedicated microservices. Additionally, you can encapsulate common code components—particularly the persistence and domain models—as NuGet packages for convenient sharing among microservices projects. (see Figure 9-7).
Note In Figure 9-7, the presentation is condensed into a block and given the abstract label of “Front End.” One effect of decomposing a monolith into distinct services is that the original ASP.NET web application (including view models and Razor files) becomes a standalone front end that connects to other parts via HTTP. This opens a whole new world of opportunity for the front end, ranging from ASP.NET client Blazor to JavaScript-based platforms. I’ll discuss this in more detail in Chapter 10, “Client-side versus server-side.”
FIGURE 9-7 Blueprint for decomposing a modular monolith like Project Renoir into a microservices architecture.
The figure is a diagram. A rectangular block labeled “Front End” spans at the top from left to right. Below it, three distinct containers are laid out horizontally. The leftmost is made of two rectangles one atop the other. They are labeled “Domain Services package” and “Domain Model package”. The central container is made by two dashed rectangles one atop the other. The topmost is “Application Layer”; the other is “Persistence Layer”. The application layer block contains four small rectangles vertically titled “Feature”. The persistence layer instead has three rectangles “Model package”, each decorated with a small cylinder in the bottom-left corner. A few lines connect the Feature and Model rectangles. Finally, the rightmost block is a dashed rectangle titled “Infrastructure layer”. It contains three small vertical rectangles titled “Service”.
Taking a feature-first approach
In a software application, a feature is a distinct and identifiable piece of functionality that fulfills a specific business requirement. Features are the building blocks of software applications; they’re what make software useful and valuable to its users. In other words, features constitute the essence of the software, embodying the minimal complexity that no design or architecture can circumvent.
A feature-first approach to software development prioritizes the identification, design, and implementation of key features that directly address user needs or business objectives. This approach not only ensures that all pivotal components are built, it also subtly encourages development in modules with distinct and well-defined boundaries.
In a monolithic ASP.NET Core architecture, features are implemented within the application layer. These features can take the form of classes, with their methods being called on by controllers. Each method is responsible for a particular use case. At the project level, features are organized as class files neatly grouped within dedicated folders.
The evolution of software is driven by a combination of user feedback, technological advancements, and the changing needs of companies and organizations. Software engineering also evolves to meet changing demands while remaining relevant in the technology landscape. Microservices are the latest development in the evolution of software architecture and engineering.
In the past decade, microservices have firmly established themselves within the IT landscape and are unlikely to diminish in relevance, even if they now have reached a point of stability. Compared to a more traditional software architecture, microservices introduce significant structural complexity from the outset. If your team cannot manage this complexity, the decision to implement microservices becomes a boomerang and strikes back. As usual, in software architecture, adopting microservices is a matter of trade-offs.
This chapter recounted the origin of the microservices architecture before outlining its benefits and gray areas. Ultimately, it concluded that microservices represent a significant evolutionary step in the life of a durable application when serious performance and scalability issues arise. However, starting a greenfield project with microservices is not necessarily the best path to success.
Microservices introduce deployment and infrastructure costs due to their distributed nature, containerization, and need for orchestration. However, these costs may be offset by benefits, such as improved scalability and faster development cycles. Monolithic applications, on the other hand, are often simpler and have lower operational costs but may lack the necessary level of scalability and agility in the long run. In summary, microservices don’t offer a universal solution, and one should never underestimate the benefits and simplicity of a well-crafted modular monolith. Chapter 10 delves further into distributed application scenarios and explores challenges related to the front end.
Not all who wander are lost.
—J. R. R. Tolkien, The Fellowship of the Ring, 1954
Chapter 4, “The presentation layer,” summarized the presentation layer from a DDD perspective as the outermost layer of the application. Responsible for handling user interactions and displaying information to users, the presentation layer includes components like controllers and API endpoints. In web applications, what users ultimately see on their screens is the output of controllers.
Controllers may be designed to generate HTML on the server or to expose plain information (usually in JSON format) for client browser pages to invoke. This means there is a server presentation layer, which fits the description in Chapter 4, and a client presentation layer. The client presentation layer identifies the user interface and how information is visually and interactively presented to users. It encompasses design elements, layout, and user experience considerations, ensuring that data is displayed in a comprehensible and engaging manner. This layer typically includes components such as webpages, graphical user interfaces (GUIs), mobile app interfaces, and the use of technologies such as HTML, CSS, and JavaScript.
Today, the common idea is that the front end and back end should be physically divided, with different teams at work on each, using different technologies. Years of hype about client-centric technologies and frameworks and fervent emphasis on what is right and what is wrong have hidden the natural value of software elements. In relentlessly pursuing what seemed a great idea—client and server treated as separate applications—we ended up creating new problems each time that an idea proved problematic. Instead of having the courage to abandon the original idea, we added layers of new problems and new solutions, only to realize that, well, we ultimately need something much simpler and faster to write and to execute.
Yet, the most concrete act of change we perceive is self-deprecation, which leads to the use of the term frontrend and sardonic smiles at the tons of JavaScript files each front(r)end project needs to survive to deploy successfully. Web development has evolved, but the overall level of abstraction is still fairly low—as if back-end development teams were still using libraries of assembly code.
This is the digest of 25 years of web development. I have had the good fortune to live all these years on the front lines. For this reason—and only this reason—I now have a broad, non-tunneled perspective on the whys and wherefores of the evolution of the web landscape.
Web applications as we know them today began to gain prominence in the late 1990s and strongly consolidated with the advent of .NET and ASP.NET in 2002. One of the earliest examples of a web application was the Hotmail service, launched in 1996, which enabled users to access their email accounts through a web browser. Another notable early web application was Amazon.com, which launched in 1995 as an online bookstore and quickly evolved into a full-fledged e-commerce platform.
Until the early 2000s, technologies like JavaScript and XML (used for data exchange) played a role in making web applications more interactive and responsive. This era also saw the emergence of various web-based productivity tools and content-management systems, leading to the rich ecosystem of web applications we have today.
As ridiculous as it may sound today, in the mid-1990s, a typical website was merely a collection of static HTML pages with very little style and nearly no JavaScript. Over time, however, that changed.
Cascading style sheets
Cascading style sheets (CSS) became an official recommendation of the World Wide Web Consortium (W3C) in December 1996. It allowed for control over the basic style and layout of documents. A minimally usable version (by today’s standards) arrived in 1998, introducing more advanced styling capabilities and positioning options. That was CSS Level 2. CSS3 followed shortly thereafter; to date, it remains the latest large release of CSS specifications. This is because the CSS group at W3C adopted a new release policy: no more large but infrequent releases. Instead, new features would be added independently to the CSS3 standard as soon as they were finalized and approved. The responsibility (and timing) of implementing support for each feature would still fall to the actual web browsers.
JavaScript
In 1995, Sun Microsystems introduced the Java programming language. Shortly thereafter, Netscape—at that time the primary web browser on the market—declared its intent to incorporate Java into the browser. However, Netscape developers quickly realized that Java was too intricate for web designers to use; at the time, web development wasn’t yet considered a core programming discipline. Consequently, Netscape opted to develop JavaScript, a sibling language that was smaller and easier to learn than its big brother.
Netscape presented JavaScript as a lightweight API, easy enough for HTML practitioners to learn, to script events and objects. Suggested use cases for JavaScript included checking for valid telephone numbers and ZIP codes in a form, playing an audio file, executing a Java applet (a small application written in Java running in the browser), or communicating with an externally installed plugin. Most of the time, though, JavaScript was employed to incorporate useless—if not annoying—features such as flashing images and scrolling messages in the status bar.
Although the groundwork for its use was laid, JavaScript had few applications until browsers exposed their internal representation of the page as a modifiable document object model (DOM).
The document object model
A web browser is an application that points to a remote web server address and downloads files. An internal engine orchestrates all necessary downloads (HTML, images, scripts, and style sheets) and assembles the downloaded content into a viewable graphical unit. Underneath the visuals lies the document object model (DOM). The DOM is an in-memory tree that reflects the layout of elements in the HTML source for the page. The engine constructs the DOM upon loading the page.
The DOM is a standard established by the W3C in 1995 and serves as a standard interface to enable scripts to access and modify the content, organization, and appearance of a webpage. In particular, scripts can manipulate attributes and content of existing HTML elements, introduce new ones, and adjust their CSS styles. The initial DOM proposed by Netscape and approved by W3C was very basic and insufficient for serious real-world use.
The browser wars
The race to achieve technological supremacy in the new world of the internet initiated what became known as the browser wars. The browser wars were an intense competition among web browser companies during the late 1990s and early 2000s. The main players in the browser wars were Microsoft’s Internet Explorer (IE) and Netscape Navigator (often referred to as just Netscape).
Since the early days of the web, Netscape Navigator had been the dominant web browser, with a significant market share. Seeing the potential, however, Microsoft began bundling its brand-new IE browser with the Windows operating system. Users often found IE pre-installed on their computers, leading to rapid adoption. Both companies started adding new features and enhancements to their browsers, leading to a cycle of innovation and competition. This included support for HTML and CSS standards as well as JavaScript, and the introduction of proprietary features to gain a competitive edge.
The competition was intense, with each company releasing new versions in quick succession to outdo the other. This led to rapid changes in web technologies but also caused nontrivial compatibility issues for web developers. In the early 2000s, despite antitrust investigations in both the United States and Europe, IE’s dominance became unquestioned and ended the war.
After the browser wars, new browsers such as Mozilla Firefox, Google Chrome, and others emerged, introducing competition and innovation once again. This new round of competition, though, also led to the gradual disappearance of compatibility issues between browsers.
Server-side scripting is closely intertwined with the evolution of the World Wide Web (WWW) itself. In the early days of the web, websites were static and composed primarily of HTML files. The web was essentially a repository of static information, and user interactions were limited. So, serious programmers quickly dismissed it as uninteresting.
With server-side scripting, however, browsers began dynamically receiving HTML chunks, which were assembled upon each request. This new technology captured the attention of developers, highlighting the internet’s potential and opening a whole new world of opportunities.
Server-side scripting unlocked the creation of dynamic content and data-driven websites for the dissemination of information. Server-side scripting also yielded web applications—highly interactive websites that enable user actions, processing of data, and delivery of dynamic content, often involving user registration, database interactions, and complex functionality for tasks like online shopping and social networking. Server-side scripting also made possible secure authentication and access control and the subsequent handling of sensitive operations. Finally, it raised the entire topic of application scalability.
Several server-side scripting languages and technologies were created over the years, all following the same pattern. These languages allow developers to embed code within HTML page skeletons that run on the server accessing databases, external services, local files, and libraries. The difference between them was mostly in the language (and frameworks) used to generate HTML. PHP, for example, is a programming language that relies on a cross-platform interpreter; Java Server Pages (JSP) uses Java snippets within HTML pages arranged following the model-view-controller (MVC) pattern; and Active Server Pages (ASP), developed by Microsoft, embeds code written in languages such as VBScript or JScript.
ASP.NET Web Forms
ASP.NET Web Forms is a web application framework developed by Microsoft as part of the ASP.NET platform. It made its debut alongside ASP.NET 1.0. For approximately a decade, it was the preferred option for building web applications. However, around 2010, its prominence began to wane, as the natural progression of web development exposed certain original strengths of the framework as unacceptable shortcomings.
It was not an ordinary decade, though. In the decade during which ASP.NET Web Forms thrived, a huge number of developers and companies used it to build (or rebuild) the enterprise back end to pursue the opportunity offered by the internet. ASP.NET Web Forms was the ideal vehicle to ferry thousands of client/server, Visual Basic, and even COBOL developers to the web.
Five primary factors underpinned the success of ASP.NET Web Forms:
■ It had an event-driven programming model, so it was similar to the way desktop applications were built.
■ Its architecture was component-based.
■ It offered deliberate, limited exposure to HTML, CSS, and JavaScript.
■ It was offered along with a Visual Studio integrated visual designer.
■ It supported automatic state management through the view state.
Altogether, these factors enabled rapid and effective development without a significant learning curve or intensive retraining. In particular, ASP.NET designers struggled to build a programming model in which JavaScript was used but, for the most part, was hidden to developers. The idea was to avoid scaring people with a non-web background (who at the time represented the vast majority) from developing web software.
A decade later, the same success factors turned into drawbacks. Specifically, the deliberate abstraction over HTML became a frustrating roadblock for competent web developers. Ultimately, limited testability and lock-in on the Windows platforms and IIS brought the ASP.NET Web Forms narrative to a definitive conclusion. Today, ASP.NET Web Forms is still supported and receives critical updates, but no more than that.
Note I lack reliable statistics to pinpoint the zenith of ASP.NET Web Forms’ popularity. But I do recall attending a conference in the early 2000s during which a Microsoft representative mentioned an audience of more than one million developers. Additionally, when conversing with component vendors, they consistently mention that a significant portion of their revenues still today originate from ASP.NET Web Forms controls.
The model-view-controller pattern
Undoubtedly, ASP.NET Web Forms left an important mark. Competitors analyzed its weak points and attempted to provide a better way of building web applications. One weak point was that ASP.NET Web Forms oversimplified the issue of separation of concerns (SoC). Although the framework forced developers to keep markup separated from C# handlers of markup elements, further structuring within layers required the self-discipline of developers.
A handful of new web development frameworks introduced a stricter programming paradigm—based on the model-view-controller (MVC) pattern—that forced developers to separate an application into distinct components for better maintainability. The most popular framework was Ruby on Rails whose simplicity conquered the heart of developers; another was Django, which used the Python language; and yet another was Zend for PHP.
Microsoft introduced ASP.NET MVC as an alternative to ASP.NET Web Forms. It offered a more structured and testable approach to web development using the MVC pattern. It quickly gained popularity among .NET developers and is now part of the broader ASP.NET Core ecosystem. Today, the MVC programming paradigm is the primary way to build applications within the ASP.NET Core pipeline on top of the .NET Core framework.
Note Unlike Web Forms, MVC frameworks reestablish the central role of core web technologies such as HTML, CSS, and JavaScript, over (possibly leaky) layers of abstraction introduced to shield from them. To work with MVC web frameworks, a substantial understanding of core web technologies and HTTP is imperative. Historically, this demand for knowledge coincided with a period when such expertise was plentiful within the developer community—well over a decade ago.
With web development more tightly integrated with the core elements of HTTP and HTML, the next objective became to minimize the server roundtrips required to refresh the page after any user interaction. Around 2010, it finally became possible to place remote calls from JavaScript without worrying about browser-compatibility issues. So, developers gave themselves a new challenge: Download plain data from the server and build HTML on the client.
AJAX
Asynchronous JavaScript and XML (AJAX) is a set of web-development techniques that enables web applications to make asynchronous requests to a server and then update parts of a webpage without requiring a full-page reload. Even though the very first product to use this type of technique (before it was baptized as AJAX) was Microsoft Exchange, it was Google Gmail that elevated the use of AJAX to the next level. Gmail uses AJAX calls extensively to enhance the user experience and provide dynamic and asynchronous updates. For example, Gmail uses AJAX to show email in real time, to auto-save email drafts, and to integrate Google Chat and Google Hangouts.
Although Gmail is a web application, the user experience it provides is so smooth and fluid that it resembles a desktop application. This led developers to think that hosting an entire application within the browser had to be possible, and that all transitions could just be updates of the “same” DOM, much like in desktop applications.
The first step in this direction has been the development of client-side data-binding JavaScript libraries such as KnockoutJS and AngularJS (a distant relative of today’s Angular, discussed in a moment). Client-side data binding is still at the core of what most JavaScript frameworks do: build HTML dynamically from provided data and given templates and attach them into the DOM.
Single-page applications
Gmail and client-side data-binding libraries paved the road to the single page application (SPA) paradigm. An SPA is a web application that loads a single HTML page initially and then dynamically updates its content as users interact with it, with no full-page reloads required. SPAs use JavaScript to handle routing, fetch data from servers via APIs, and manipulate the DOM to provide a fluid and responsive user experience. An SPA approach is a good fit for any application that requires frequent updates and is highly interactive.
Note Gmail is not an SPA in the traditional sense. It requests users to navigate between different sections (for example, Inbox, Sent Items, Drafts), each of which can be seen as its own SPA because it renders a basic HTML page that is modified further via AJAX calls.
Search engine optimization (SEO) has traditionally been a challenge for SPAs due to their reliance on client-side rendering. However, modern SPA frameworks have introduced solutions to enable server-side rendering (SSR), making SPAs more search-engine-friendly. With SSR, search engines can effectively crawl and index SPA content, ensuring that SPA-based websites are discoverable in search results.
Modern JavaScript application frameworks
Today, new applications built on top of a server-side development framework such as ASP.NET are fairly rare. In most cases, the front end and back end are neatly separated. ASP.NET is still considered an excellent option to build the back-end API, but other, more popular options exist for the front end—in particular, rich JavaScript-based frameworks, including React and Angular.
React
React is a component-based JavaScript library with a lot of extra features that elevate it to a full front-end framework for building SPAs. React—which originated at Facebook—is optimized for building applications that require constant data changes on the user interface.
In React, every element is regarded as a component, resulting in a web interface composed of numerous potentially reusable components. Each component is characterized by a rendering method that abstractly returns a description of the expected UI as a tree of elements. Internally, React compares the expected tree with the actual DOM and makes only necessary updates. This pattern is known as the virtual DOM pattern and is now commonly used by other frameworks as well.
React components are written using JavaScript or TypeScript. However, the framework’s component-based nature calls for the use of JavaScript XML (JSX) or TypeScript XML (TSX) language extensions to simplify how each component declares its desired user interface. At compile time, both JSX and TSX markup are transpiled into regular JavaScript code that, once downloaded within the browser, creates and manages the DOM elements and their interactions in the web application. This effort, though, is not handled by the actual developer.
Angular
Angular is a TypeScript-based full front-end framework designed from the ashes of AngularJS, which was simply a smart client-side data-binding library. Developed at Google and open-sourced, Angular is component-based and includes rich command-line interface (CLI) tools to facilitate coding, building, and testing. It also offers a collection of libraries that provide comprehensive functionality, including routing, forms management, client-server communication, and more.
An Angular application consists of a hierarchy of components. Each component is a TypeScript class with an associated template and styles. A template is an HTML file that defines the structure of the view associated with a component. It includes Angular-specific syntax and directives that enhance the HTML with dynamic behavior and data binding. Directives are instructions in the DOM that tell Angular how to transform or manipulate the DOM. Key Angular features include two-way data binding and dependency injection. Finally, its component-based architecture encourages code modularity and reusability.
Developing in Angular requires the use of the TypeScript language. It also means taking a component-based approach to architecting the front end, which is ultimately obtained by assembling potentially reusable components together. Each component expresses its own user interface via templates and employs two-way data binding to connect the application’s data to visual elements. Dependency injection manages the creation and distribution of application components and services. Finally, Angular is supported by a vibrant ecosystem of libraries and a strong community.
Client-side rendering (CSR) is a web development approach in which the rendering of the webpage is primarily performed on the client’s browser rather than on the server. In the context of client-side rendering, the server typically sends minimal HTML, CSS, and JavaScript to the client, and the client’s browser handles the rendering and dynamic updates.
The internet is saturated with posts, articles, and commercial whitepapers extolling the virtues of Angular and React. But that’s not all: Their qualities and popularity are indisputable. Currently, Angular and React dominate more than 60 percent of the market.
Working with one of these frameworks offers new developers a great chance to kickstart their careers. Naturally, though, Angular and React will shape their understanding of the web—and that’s a problem. Angular and React are designed to abstract away the inherent intricacies involved in harmonizing markup, styles, rendering logic, and data integration. But what they ultimately do is simply replace the natural intricacy of core web technologies with their own flavor of artificial complexity. So, most newer front-end developers have nearly no understanding of web basics and the rationale behind Angular and React’s advanced rendering capabilities and build infrastructure. To combat this lack of understanding, the following sections dissect the layers and fundamental patterns of front-end development.
Note JavaScript is not the ideal tool for the jobs it currently undertakes. And yet it is used. Angular and React simply attempt to create order from a mess of poor language tools, complex applications, and rendering constraints. In the last 15 years, the industry let a great chance to redesign the browser pass, losing the opportunity to make it support languages more powerful than JavaScript. As long as JavaScript remains the primary and preferred way to run logic within the browser (WebAssembly is an alternative), a significant amount of complexity will remain necessary to write front ends.
At the end of the day, every web application produces HTML for the browser to render. HTML can be read from a static server file, dynamically generated by server-side code, or dynamically generated on the client side. This is what Angular and React do. Their work passes through two distinct phases: text templating and actual HTML rendering.
Skeleton of a front-end page
Let’s first analyze the structure of the entry point in any Angular application as it is served to the requesting browser. This entry point is often named index.html.
<html>
<head> ... </head>
<body>
<app-root></app-root>
<!-- List of script files -->
</body>
</html>The app-root element represents the injection point for any dynamically generated HTML. The referenced script files work together to generate the HTML. The exact list of script files depends on the application configuration. Those script files are ultimately responsible for composing HTML and modifying the browser DOM to make it display. React follows the same pattern.
Text templating
Client-side HTML generation occurs in the context of a bare minimum page template downloaded from the server, like the index.html template shown in the preceding section. The process involves three main steps:
Retrieving data for display on the page
Understanding the schema of the downloaded data
Assembling the data within an HTML layout
Display data can be embedded directly in the downloaded template or fetched on demand from some remote endpoints. In the latter case, AJAX techniques are employed to download data in the background. Data can be expressed in several formats—most likely JSON, but also XML, markdown, or plain text. The invoked endpoint determines the format, and the downloader code adapts to it. The fetched data is then constructed within an HTML template.
In component-based frameworks like Angular and React, each component holds its own HTML template and is responsible for fetching and parsing external data. Typically, these frameworks provide engines to automate the assembly of HTML by defining templates with placeholders that will be filled with data.
A minimal example of HTML templating
Angular and React templating engines are sophisticated code, but what they do boils down to what you can do with any independent templating library. Here’s a minimal example of using the popular Mustache.js (around 10 KB in size) to render a template with some data. In addition to referencing the source of the library, the host HTML page includes one or more templates, as shown here:
<script id="my-template" type="text/template">
<h1>Hello, {{ name }}!</h1>
<p>Age: {{ age }}</p>
</script>The template includes placeholders enclosed in double curly braces, like {{ name }}, where name is replaced with actual data. The syntax of the placeholder is a requirement set by the library. So, let’s assume you have the display data shown here:
var data = {
name: "Dino",
age: 32
};As mentioned, data can be statically part of the host page or, more likely, the result of an AJAX call. The following line of JavaScript code builds the final HTML ready for display:
// Get the template from the HTML
var template = document.getElementById("my-template").innerHTML;
// Use Mustache to render the template with data
var html = Mustache.render(template, data);The library assembles the template and data into the following final piece of HTML:
<h1>Hello, Dino!</h1>
<p>Age: 32</p>The next step is rendering the generated markup into the browser’s DOM.
Rendering HTML
The innerHTML property, exposed by DOM elements like DIV and SPAN, provides programmatic access to the HTML content of the element. When you read the property, it returns the HTML content of the element and its descendants serialized as a string. When you set the innerHTML property to an HTML string, the browser parses the string and re-creates the DOM structure within the element.
The property is a direct and convenient way to add, modify, or remove content from a webpage via JavaScript. Returning to the Mustache.js example, the following code completes the demo by inserting the dynamically composed HTML into the page DOM:
// Use Mustache to render the template with data
var html = Mustache.render(template, data);
// Insert the rendered HTML into a specific element of the DOM
document.getElementById("id-of-the-target-element").innerHTML = html;There are a couple of points to note about the innerHTML property to advise against indiscriminate use. One point pertains to general security. Setting innerHTML with unfiltered user input can lead to security vulnerabilities like cross-site scripting (XSS) if the input is not sanitized or validated properly.
The other point has to do with performance. Although innerHTML is a convenient way to manipulate the content of elements, it can be less efficient than other methods, especially when used frequently to update large portions of the DOM. This is because it involves parsing and re-creating DOM elements, which can be computationally expensive. For better performance, consider using other DOM manipulation techniques like creating and appending new elements or modifying existing ones directly.
The DOM programming interface, based on innerHTML and direct DOM methods, is the only way to update webpages dynamically. Therefore, both Angular and React use the DOM interface under the hood of their customized and optimized API.
How Angular and React deal with the DOM
Angular and React have different approaches to DOM changes and use renderers that follow different philosophies. Driven by the principle of two-way data binding, Angular originally architected the rendering pipeline to make direct changes to the DOM for the entire HTML fragment being touched by changes. In contrast, React implements a mediator pattern known as the virtual DOM.
The virtual DOM is a lightweight, in-memory representation of the actual DOM of a webpage. When data changes in a React component, instead of directly updating the real DOM, React first updates the virtual DOM, which is faster and less resource-intensive. Then, it compares the updated virtual DOM with the previous virtual DOM snapshot, identifying the specific changes that must be made to the real DOM. Finally, it selectively updates only the parts of the real DOM that have changed.
React’s use of the virtual DOM minimizes the number of necessary low-level DOM operations. More recently, though, Angular introduced Ivy, a new rendering engine that supports incremental DOM updates. Basically, instead of completely re-rendering the entire component tree when data changes occur, Ivy updates only the parts of the DOM that have changed. (See Figure 10-1.)
FIGURE 10-1 Rendering pipelines of Angular, React, and generic web applications.
Aside from different implementation details, both Angular and React use optimized rendering engines based on the general mediator pattern, in which dedicated engines minimize the number of low-level DOM operations. Note that any web application that uses JavaScript to update the DOM (for example, via jQuery) dynamically applies its changes to the DOM without intermediation.
Note Maybe you’ve heard of shadow DOMs. Although shadow DOM and virtual DOM might sound related, they are distinct concepts in web development. The virtual DOM is an optimization technique employed by frameworks like React to enhance rendering efficiency. In contrast, the shadow DOM is a standard established by the W3C to achieve component isolation and styling. It provides a way to scope CSS styles to a specific DOM subtree and isolate that subtree from the rest of the document.
In a client side-rendering scenario, such as an SPA, the front end is physically segregated from the back end. Whether written with Angular, React, PHP, or some other JavaScript-intensive framework, the front end is a standalone project deployed independently.
All front-end applications need a back end to handle data processing, storage, and business logic. The API layer acts as a bridge between the front end and back end, allowing them to be developed, function, and be maintained independently. The API exposes a fixed contract for the front end to call and represents a security boundary where authentication and authorization rules are enforced. Because HTTP is the underlying communication protocol, the back end can be built using any technology stack capable of exposing HTTP endpoints, regardless of the front-end technology in use.
REST API versus GraphQL API
There are two main API architectural styles: representational state transfer (REST) and GraphQL. The main difference between these is in how data is transmitted to the client. In REST architecture, the client initiates an HTTP request and receives data as an HTTP response. In GraphQL, data is requested by sending a query command text.
A REST API is based on a predefined set of stateless endpoints and relies on HTTP methods such as GET, POST, PUT, and DELETE to perform operations on target resources. Data can be exposed in various formats, including plain text, CSV, XML, and JSON. More often, what is labeled as a REST API consists of a collection of public URLs accessed through HTTP GET and sometimes HTTP POST. Each of these endpoints features its own unique syntax, specifying input parameters and the data it returns.
There is an ongoing debate (which will likely continue indefinitely) as to whether a fully REST-compliant API is superior to a set of basic RPC-style HTTP endpoints. Many would agree that a plain HTTP endpoint is sufficient for simple tasks. However, as the complexity and functionality of an API grow, transitioning to a RESTful design may offer some benefits in terms of maintainability and developer experience, along with the potential to reduce the overall volume of API calls.
Aspects of REST that GraphQL overcomes
The challenge with a REST/RPC API is that the client application has no control over what the endpoints return. This is why the GraphQL API approach came into existence. GraphQL allows clients to request precisely the data they need, thereby preventing both over-fetching and under-fetching. Clients send queries specifying the data structure they desire, and the server responds with data matching that structure. This flexibility empowers front-end developers, as they can request all relevant data in a single query, reducing the number of round trips to the server.
Note A REST/RPC API doesn’t let the client application exercise control over what the endpoints return. Rather, the endpoints themselves expose features to let callers tailor the desired response. This capability is called data shaping and consists of adding to endpoints additional query string parameters (the selected syntax is entirely up to the API implementors) that the API code uses internally to filter returned data.
The GraphQL query language for APIs was developed by Facebook and released as an open-source project in 2015. Facebook resorted to GraphQL to mitigate the inefficiencies of a REST API in its very special scenario. Facebook’s data model is highly interconnected, with complex relationships between different types of data (for example, users, posts, comments, and likes). Facebook engineers needed a way to query such relationships efficiently—hence the development of GraphQL.
Here’s a simplified example of a GraphQL query you might use to fetch a Facebook user’s name and recent posts:
{
user(id: "123456789") {
id
name
posts(limit: 5, orderBy: "createdAt DESC") {
id
text
createdAt
}
}
}The query fetches data about a given user but returns only id and name properties. Furthermore, the query requests a maximum of five recent posts ordered by date. Each post contains id, text, and a timestamp. To execute the query, you would send an HTTP POST request to Facebook’s GraphQL endpoint. The request would include the query in the request body, and the caller would receive a JSON response containing the requested data. (See Figure 10-2.)
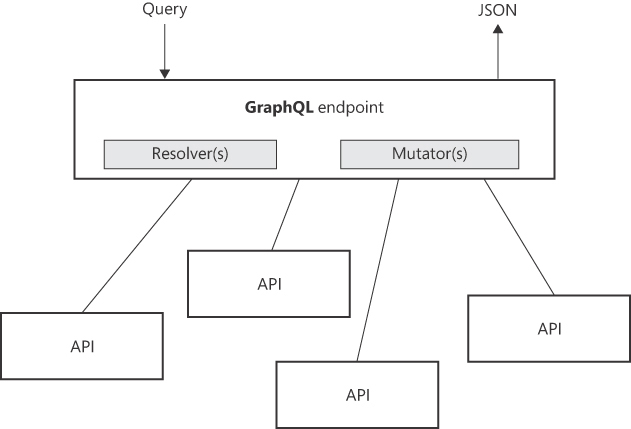
FIGURE 10-2 Working schema of a GraphQL endpoint.
GraphQL isn’t a magical solution. It requires real back-end code to make calls to APIs or database endpoints for executing queries and updates. Resolvers are dedicated modules that know how to selectively query an API. In contrast, mutators are components that modify data. In other words, the GraphQL runtime parses incoming queries, figures out which resolvers and mutators to use, and combines the fetched data to match the desired output. Resolvers and mutators must be written and deployed separately.
GraphQL exposes a single endpoint to access multiple back-end resources. In addition, resources are not exposed according to the views that you have inside your app. So, changes to the UI do not necessarily require changes on the server.
Aspects of GraphQL that REST overcomes
GraphQL is not a magic wand that returns any data the client application wants. You have a single, flexible endpoint, but constrained resolvers and mutators underneath it. Those resolvers may be performing complex queries and may need caching. The amount of queryable data is restricted by the amount of data that resolvers can retrieve without negatively impacting performance and scalability.
For complex queries or updates, a plain REST API might be easier to design because it would give a distinct endpoint for specific needs. GraphQL’s ability to request precisely the data you specify can also be achieved with a REST API by designing the HTTP endpoint to accept a list of desired fields through the URL.
Furthermore, an open protocol called OData provides an alternative. OData facilitates the creation and consumption of queryable and interoperable REST APIs in a standardized manner. OData equips you with a robust set of querying features. OData must be integrated and enabled when you implement the API, in much the same way you must set up resolvers in GraphQL.
The bottom line is that GraphQL was developed to address the specific needs of Facebook, which are relatively unusual compared to most other applications. Although GraphQL offers several advantages, many of these can also be addressed using a simpler HTTP REST API.
The rise of SPAs took the web-development world by storm. It marked a significant shift, challenging long-standing foundations of the web (JavaScript, HTML, CSS) that had intimidated an entire generation of developers. The prevailing message was to abstract the web and move away from direct HTML coding. Angular and React emerged, initially positioned as JavaScript libraries but ultimately expanding to replicate essential browser functions such as HTML rendering, routing, navigation, form handling, and cookie management.
In recent years, every new developer has faced choosing between these two camps. Consequently, many of today’s younger web developers lack a fundamental understanding of how the web operates and perceive web programming solely through the abstractions provided by all-encompassing frameworks like Angular and React. Ultimately, although the quality of these frameworks is indisputable, they raise questions when it comes to the day-to-day practical experience of constructing web applications.
Drawbacks of rich frameworks
While large frameworks like Angular and React provide a structured approach to development—which, in the case of large teams, may be a phenomenal argument in their favor—they’re not immune from a few substantial flaws:
■ Performance overhead : These frameworks require a specific project structure and the configuration of build tools and dependencies. It’s quite common for projects to accumulate directories filled with gigabytes of JavaScript packages and configuration files, which can be bewildering to anyone involved. Consequently, it’s not just the bundle you need to download that is sizeable, but the abstraction layer is too—resulting in longer loading times, especially for initial page loads.
■ SEO : Angular and React use JavaScript to generate HTML within the browser. The content is fetched and rendered after the page is loaded. Hence, search engine crawlers, like Googlebot, initially see an empty or minimal HTML structure. In addition, the dynamic nature of JavaScript-intensive applications, including the possible use of client-side routing to navigate between different views or pages, makes it harder for crawlers to understand the site’s structure and content and to index it properly.
■ Accessibility : Web accessibility relies heavily on semantic HTML and ARIA attributes, which may not be inherently assured in pages generated entirely with JavaScript. Moreover, when content is dynamically added to the page, users employing screen readers or keyboards might lose their context and even remain unaware of new content. Developers therefore must diligently ensure expressive HTML, maintain proper keyboard navigation, and manage focus to uphold accessibility standards.
Note When speaking of Angular and React, one often highlights performance optimization as a benefit, as they tend to alleviate server load and minimize data exchange between the client and server. However, this advantage becomes apparent only when the application is up and running. So, the immediate obstacle to overcome is understanding how to set up a project in the first place.
To tackle SEO issues, speed up initial page loading, and enhance accessibility, Angular and React have introduced server-side rendering (SSR) as an additional layer of functionality. The adoption of SSR ensures that the initial server response contains fully rendered HTML content, making it easier for web crawlers to index the page and faster for the browser to load the page. Furthermore, discernible HTML on the server simplifies the process of tweaking it for accessibility. While SSR is possible in both Angular (with Angular Universal) and React (with Next.js), it does add one more layer of complexity to an already convoluted development process.
Back end for front end (BFF)
Back end for front end (BFF) is a relatively recent term that indicates the presence of a dedicated back-end service designed and tailored to meet the specific needs of a front-end application. The idea is to have a back-end service that serves as an intermediary between the front end and the various APIs that make up the back end.
Consider a scenario where your back end provides APIs for use by the front end. The data returned to the front end might not precisely match the required format or filtering needed for representation. In such instances, the front end must incorporate logic to reformat incoming data, potentially leading to increased browser resource usage. To alleviate this, a BFF can be introduced as an intermediary layer.
The BFF acts as this intermediate layer, allowing some of the front-end logic to be shifted, enhancing efficiency. When the front end requests data, it communicates with the BFF through an API. One might wonder, can the desired BFF behavior be integrated directly into the back-end API? This integration approach has been common in countless web applications for many years. However, the BFF pattern is particularly beneficial in microservices applications where isolated APIs operate independently and lack awareness of the broader context—a scenario where BFF emerges as a valuable architectural pattern.
The Svelte way to HTML pages
The idea that SSR helps make Angular and React better frameworks is devastatingly revolutionary. To make a bold comparison, it’s like you’re a vegetarian, and then you discover that to be a stronger vegetarian, you must eat meat. In fact, a growing number of developers are welcoming a simpler, back-to-the-basics approach to web development.
This counter-revolution is heralded by a new open-source JavaScript framework: Svelte. What sets Svelte apart from other popular frameworks like React and Angular is its compilation model. Rather than shipping a large runtime library to the client and interpreting code in the browser, Svelte shifts much of the work to compile-time.
The core idea is that during development, you write high-level, component-based code, similar to other frameworks. However, instead of shipping this code directly to the browser, Svelte’s compiler transforms it into plain JavaScript code. So, at runtime, there’s no need for a heavyweight framework library; your application is smaller and faster to load.
With Svelte, you don’t write plain HTML directly. Instead, you write .svelte files—compositions of HTML with additional attributes, CSS, and JavaScript, and you add an explicit compile step that physically turns these files into deployable units. After compilation, the Svelte app will consist of HTML, JavaScript, and CSS files ready for production deployment.
In summary, you get much faster live pages, and a much simpler and cleaner development experience than with Angular or React. But Svelte still requires quite a bit of project configuration, a Node.js development environment, and build tools. An ad hoc development server (svelte-kit) helps keep the whole thing at a manageable level of difficulty and annoyance.
Static site generation
Static site generation (SSG) represents a somewhat radical response to the desire to move away from client-side rendering. SSG refers to the combined use of a development tool and a JavaScript framework to turn a dynamic web application into a static website. A static site is essentially an unembellished assembly of predetermined HTML pages, where the content remains constant rather than being dynamically generated in response to user actions or real-time data requests.
All websites created in the 1990s were static websites. The difference with SSG is that the pages of a modern static website are not manually authored one by one; instead, they are automatically generated, starting with the source code, written using a server-side JavaScript-based framework.
Popular SSG frameworks are Next.js and Nuxt.js, tailored to work on top of React and Vue applications, respectively. (The next section briefly discusses the Vue framework.) The operational method is the same. For example, when you initiate a new project using the Nuxt.js CLI, it sets up a conventional project structure comprising directories for managing assets, components, plugins, and pages. A Pages folder is populated with the source files of the parent framework, be it React or Vue. Before deploying, the application must be compiled in a collection of static HTML pages. The compile step is typically integrated in a build pipeline.
In the event of changes to the server source, the entire website must be rebuilt. For this, many SSG tools employ a technique known as incremental static regeneration (ISR). This approach enables the dynamic updating and regeneration of specific pages within a static website, either during the build process or at runtime, without the need to rebuild the entire site.
ASP.NET experts will find SSG conceptually analogous to compiling Web Forms and Razor pages to classes. When compiling into classes, a DLL is generated, but every incoming request still dynamically generates HTML for the browser. (Caching the dynamically generated HTML is an optional feature that can be enabled and configured on a per-page basis.) In contrast, with SSG, the result of compilation is static HTML that is immediately usable.
The Vue.js framework
In addition to Angular and React, there is Vue.js, an open-source JavaScript framework for interactive UI and SPAs first released in 2014. The unique trait of Vue is that it is designed to be incrementally adoptable, meaning you can start using it in your project at any level. For example, you could easily integrate it in an ASP.NET Core server application as a client-side data-binding library at the sole cost of injecting a single JavaScript file and adding some boilerplate code to trigger it. Vue is also component-based, making it suitable for building a full-fledged application with client routing much like Angular and React. Born as a plain data-binding library, Vue still retains a declarative syntax for defining the UI’s structure and behavior, making it straightforward to understand and work with. Unlike Angular and React, Vue requires no mindset shift.
The evergreen option of vanilla JavaScript
There are two different and largely incompatible meanings for the word JavaScript. The modern meaning refers to JavaScript as a sort of full-stack language. The original meaning refers to a simple tool to script changes to the page DOM.
Vanilla JavaScript refers to the fundamental core of the JavaScript language, devoid of additional libraries or frameworks. It is the native, browser-supported scripting language used to create dynamic and interactive web content. Vanilla JavaScript allows developers to manipulate the DOM, handle events, and perform various operations within web applications. Although modern frameworks like React and Angular raise the abstraction level of web development, mastering vanilla JavaScript is essential for obtaining a foundational understanding of the web and for effective troubleshooting.
Those who advocate full-stack JavaScript use the same language for both the front end and the back end. Specifically, JavaScript is used with feature-rich frameworks on the front end and as the basis for Node.js applications on the back end. (More on Node.js in a moment.) Adopting JavaScript as the exclusive language produces a relentless proliferation of new frameworks and tools that eradicate any sense of stability in mid-term and long-term projects. Moreover, JavaScript is a flawed language. It is single-threaded and lacks strong typing. TypeScript is a better option, but it’s still JavaScript in the end.
In Angular and React applications, JavaScript is regarded as a full-fledged programming language, serving as the driving force behind the functionality of the frameworks (which are also authored in JavaScript). But the core of the web is simply serving HTML to the browser with a bit of interactivity and style. In the end, all you need is a smart way to compose HTML dynamically and a way to surgically modify the DOM using JavaScript.
To achieve this, you don’t strictly need an all-encompassing client-side framework. This explains why proponents of both Angular and React have begun to recognize the advantages of server-side generated content. However, the development process remains somewhat intricate, involving an additional layer of tools and code—albeit primarily for the purpose of compilation.
The Node.js environment
Full-stack JavaScript? Enter Node.js. Node.js is a widely used open-source runtime environment for executing JavaScript outside of a web browser. It’s built on Chrome’s V8 JavaScript engine and represents a versatile choice not only for server-side web applications but also for development and networking tools. For example, you need Node.js installed on your development machine to build Angular, React, and Svelte applications, even when those applications are deployed as statically generated websites.
Node.js is cross-platform, running on Windows, macOS, and various Linux distributions. So, it is highly accessible to developers across different environments. It also supports modern JavaScript features and modules, making it compatible with the latest language standards. Furthermore, it has an extensive ecosystem of packages and libraries, thanks to its package manager, npm. And it is supported by a thriving community and a wealth of documentation and resources.
Node.js itself is not a web server, but it can be used to create web servers. Exposing Node.js endpoints typically involves creating routes using the built-in HTTP module to handle incoming HTTP requests. Alternatively, you can use a web framework like Hapi.js or Koa.js to simplify the process of handling HTTP requests, routing, middleware, and other web-related tasks.
To expose endpoints from a Node.js environment, you just need to write the HTTP action handler. This characteristic inspired Microsoft to create Minimal API in ASP.NET Core. If you compare Minimal API ASP.NET endpoints and Node.js endpoints, you will see virtually no difference.
Server-side rendering (SSR) is a web-development technique that involves generating webpage content on the server and sending the fully rendered HTML to the client’s browser. This contrasts with client-side rendering (CSR), where the browser loads a basic HTML template and relies on JavaScript to assemble and display the page content. SSR offers clear advantages, such as faster initial page loads, improved SEO (because search engines can index content more easily), and better support for users with slower devices or limited JavaScript capabilities.
As you have seen, CSR frameworks have recently turned to SSR to mitigate SEO and performance issues. They couldn’t cancel their client-side nature, though. So, SSR support has been implemented through additional frameworks like Next.js for React and Nuxt.js for Vue. But of course, CSR frameworks were developed in reaction to traditional SSR practices used since the early days of the web by server-side frameworks such as PHP, ASP.NET, Java Server Pages, and Java servlets. In those days, developers created endpoints to receive HTTP requests and templates that mixed HTML with server-side code to dynamically generate webpages ready to serve. Is this approach impractical today? I wouldn’t say so. ASP.NET, for example, continues to be highly suitable for web applications with extensive back-end functionality—specifically, line-of-business enterprise applications.
CSR frameworks showed us that having distinct stacks (front end and back end) is possible and in many ways convenient. It’s not a matter of separating concerns or improved security, though, as both are fundamental prerequisites in any piece of software. It’s more a matter of wanting to address technological diversity, creating the conditions for multiple front ends (for example, mobile and web) and leveraging specialization of roles and related expertise. Finally, separating front end and back end enables more work to be done in parallel.
Separating the front end and back end
Physically separating the front end and back end offers several advantages:
■ It makes it easier to scale different parts of the application independently—crucial for handling increased user traffic.
■ Teams can work in parallel on front-end and back-end development, reducing project timelines.
■ Front-end and back-end developers often have different skill sets and expertise, with front-end developers focusing on user interfaces and experiences and back-end developers handling data management, business logic, and server-side operations. So, separation of the front and back ends allows teams to specialize in their respective areas, leading to more efficient development.
■ You can use different technologies on the front end and back end, as long as they communicate via well-defined APIs (for example, REST or GraphQL). So, you can choose the best tools and technologies for each component independently.
Note It is not uncommon today for applications to feature an Angular front end and ASP.NET Core or Node.js back end.
Separating data and markup
A physically separated front end brings up the problem of obtaining updates from the server as the user interacts with the interface. Ultimately, within a web application of any kind, any update is simply data coming from a server endpoint in response to a request. Data can be returned as structured text (for example, JSON or XML) or markup (that is, data laid out in a graphical template). If the endpoint returns an HTML fragment, then the amount of data that travels over the wire is larger. However, the update is nearly instantaneous and, more importantly, can be managed with plain vanilla JavaScript.
If the endpoint is part of a web API and returns JSON, then the data must be parsed on the client and composed into an HTML fragment to attach to the DOM or turned into a list of update operations on the same DOM. Optimizing this process requires client-side templating engines and the implementation of some virtual DOM algorithm.
Single web stack
ASP.NET is a classic server-side framework that manages web development from start to finish. Combined with some vanilla JavaScript, it represents an effective choice for line-of-business applications.
In my opinion, a single stack (for example, ASP.NET) should always be the first option to consider for combining flexible markup definition through the Razor markup language and API development. ASP.NET is typically based on controllers—the presentation layer discussed in Chapter 4—but can be also further simplified through page-specific endpoints (Razor pages) or even UI-less minimal API endpoints.
Note Of course, there are compelling reasons to deviate from a single-stack approach. However, such decisions should be rooted in project-specific considerations rather than blind adherence to tech trends.
In terms of sheer simplicity and efficiency, it’s hard to deny that a single stack like ASP.NET, combined with little more than basic JavaScript, is one of the most lightweight yet effective solutions. Still, the definition of complexity can be relative. For example, I’ve been working with ASP.NET from the start, and I know quite a bit of it. So, it doesn’t seem complex to me at all. Similarly, all the younger developers currently employed at my company have used ASP.NET from day one and have become extremely familiar with it over the years. So, anything beyond it—such as React or Svelte—might initially seem more complex than it truly is, simply because they are unfamiliar with it. Similarly, developers who have spent three years on Angular may no longer view it as complex but might be bewildered by a server-side rendering engine or even more traditional technologies like jQuery or plain vanilla JavaScript.
When opting for a single ASP.NET stack, there are a few options to consider for building a highly interactive front end, as modern applications require.
Razor and Vanilla JS
Razor is a templating engine used within the ASP.NET framework. It enables developers to combine server-side C# or VB.NET code with HTML. A well-thought-out Razor page receives a view model object from the controller with all the data it needs to render the view. So, it doesn’t need to run any other business logic code. At the same time, the Razor syntax allows you to embed chunks of any sort of C# code.
Unlike some other data-binding frameworks, Razor doesn’t impose strict syntax for attribute binding. Rather, it gives developers the freedom to programmatically generate strings within the markup. Essentially, the Razor engine functions as a plain HTML string builder, allowing for the seamless injection of JavaScript code wherever it is required.
Razor and Svelte
The flexibility of ASP.NET Core and Razor make it possible to combine Svelte with Razor—an interesting scenario. With this approach, you create Razor views (or pages) as HTML templates, which you can then enrich by embedding Svelte components.
The ASP.NET project incorporates a few Svelte-specific folders for source files, tooling, configuration, and the output of builds. Any final view is a Razor template with either a single Svelte component or a component surrounded by other markup. The configuration of each Svelte component indicates the injection point in the DOM, whether the root body or a child DIV element. A Svelte component is referenced in a Razor view through a dedicated <script>
Razor and Vue
Integrating Razor with Vue.js is even easier. All you do is download the library from a content delivery network (CDN). In this case, no setup, no bundlers, and no other tools are needed. The host page remains fundamentally an ASP.NET Core Razor page—there’s just a new embedded script file that adds a bit of interactivity to the visual elements. The only requirement is that each Razor view that requires Vue must incorporate a bit of boilerplate code, as shown here:
```
<!-- Vue from CDN -->
<script src="https://unpkg.com/vue@3/dist/vue.global.js"></script>
<!-- CSHTML template enriched with Vue snippets -->
<h1>BEGIN of TEST</h1>
<div id="injection-point">
<div>{{ message1 }}</div>
<div>{{ message2 }}</div>
</div>
<h1>END</h1>
<!-- Vue bootstrapper -->
<script>
const { createApp } = Vue
createApp({
data() {
return {
message1: 'First message!',
message2: 'Second message!'
}
}
}).mount('#injection-point')
</script>
```
The #injection-point string identifies the injection point for any output under the control of Vue.js. The data function returns the object model to which Vue elements have access, and the object model is typically fetched from some remote source, which could include an endpoint of the same ASP.NET application.
Razor and HTMX
In Razor, the most prevalent use case for vanilla JavaScript is retrieving content from the internet and seamlessly integrating it into the current page layout. Some developers are not particularly fond of using endpoints that furnish pre-rendered HTML because it could disrupt the clear separation of concerns between the markup and the data within it. I have a different view, however. While I acknowledge the importance of maintaining separation, I am willing to compromise it slightly on the presentation layer to reduce the complexity of JavaScript logic on the client.
If it is acceptable to use HTML endpoints, then you’ll find yourself repeatedly employing the same vanilla JavaScript code to initiate an HTTP request, retrieve the response, handle potential errors, and subsequently update the DOM. While it is possible to write your custom routine for this purpose, it is often more efficient and elegant to use a compact library that facilitates this process with a clear and declarative syntax. This is where the HTMX JavaScript library comes into play.
With HTMX, developers use attributes like hx-get and hx-post to specify which server-side endpoints to fetch data from or send data to when certain user interactions occur, such as clicks or form submissions. These attributes can also dictate how the server’s response should update the DOM, allowing for seamless server-driven UI updates.
Look at the following rich markup from a sample Razor page:
<button hx-get="/download/data"
hx-trigger="click"
hx-target="#parent-div"
hx-swap="innerHTML">
Refresh
</button>The result is that clicking the button triggers an HTTP GET request to the specified URL. The returned content (ideally, HTML) will replace the inner HTML of the element designated by the hx-target attribute.
Note HTMX enhances the user experience at a very low cost while preserving accessibility and SEO-friendliness.
ASP.NET Blazor
Yet another option for an ASP.NET front end is Blazor. Blazor is a web application development framework with two hosting models:
■ Blazor WebAssembly : This runs on the client side, in web browsers. It compiles C# and .NET code into WebAssembly bytecode, which can be executed in modern web browsers without plugins or server-side processing. Suitable for building front-end SPAs, Blazor WebAssembly has a component-based architecture with a Razor-like syntax.
■ Blazor Server : This runs on the server side. With Blazor Server, the application’s logic and user interface are executed primarily on the server rather than in the client’s web browser. This approach relies on real-time communication between the client and the server to deliver interactive web applications. Blazor Server uses SignalR to establish a persistent connection between the client and the server. This connection enables instant updates and interaction without requiring frequent full-page reloads. For a server-side ASP.NET application, Blazor integration means an interactive user interface obtained without the use of JavaScript.
Both Node.js and ASP.NET Core are technologies used in web development. However, they serve different purposes and have different characteristics.
Although both platforms offer ways to build web applications, their architectural differences may make one more suitable than the other in certain use cases. It’s also not uncommon for developers to choose one or the other based on personal preference or familiarity. In general, there are very few scenarios where one significantly outperforms the other.
Node.js
Node.js is a runtime environment that allows you to execute JavaScript and TypeScript code. JavaScript applications within Node.js can be run anywhere—on desktop computers as well as (cloud) servers. A common use case for Node.js is creating command-line tools to automate tasks (for example, code compilation, minification, asset optimization), data processing, and other system-level operations. ASP.NET is not at all a competitor here.
The Internet of Things (IoT) is another use case for Node.js. In this context, Node.js is used to build server components to interact with devices and handle sensor data. Note, however, that this use case is not exclusive to Node.js; ASP.NET Core can also be used for the same purpose.
The versatile nature of Node.js makes it suitable for executing JavaScript code in a serverless environment such as AWS Lambda and Azure Functions as well as the backbone of Electron. Electron is a framework for building cross-platform desktop applications using HTML, CSS, and JavaScript. Electron includes a customized version of the Chromium browser (the open-source project behind Google Chrome). It also leverages Node.js (and a vast ecosystem of plugins) to access the underlying operating system and perform tasks like reading and writing files, making network requests, and accessing system resources. Ultimately, the Electron core sits between the JavaScript on the web front end and the JavaScript in Node.js on the back end. With Node.js, you can bring a web server environment wherever you need.
Note I have fond memories of a project in the late 1990s, in which I adapted an existing ASP website to run without modifications on a CD-ROM—essentially an early version of today’s Electron. To achieve this, I crafted a bespoke browser using the WebBrowser component from Internet Explorer and the Scripting Host component from Microsoft. This customization allowed me to tailor the browser’s scripting engine to handle ASP web references such as Session, Response, and Request within a self-contained and customized environment. Node.js did not arrive until several years later, in 2009.
ASP.NET Core
ASP.NET is a well-established server-only technology. The version of ASP.NET called ASP.NET Core can be used to develop web applications that run not just on native Windows platforms, but on Linux servers too. ASP.NET Core uses full-fledged programming languages such as C#, F# and Visual Basic.NET.
ASP.NET Core was designed from the ground up to build web applications, ranging from small websites to large-scale web applications and even web APIs. ASP.NET Core is also suitable in IoT scenarios in cooperation with other frameworks in the Azure ecosystem. ASP.NET Core provides a seamless development experience. It offers coding tools, languages, and patterns to streamline the process of writing well-architected and maintainable code that also addresses cross-cutting concerns like security, logging, and error handling.
Implementation of Web API
Both ASP.NET Core and Node.js can be used behind a web server to expose HTTP endpoints to handle various tasks. ASP.NET Core is incomparable for CPU-intensive tasks. But for I/O bound tasks, which tool will work better depends on your specific project.
Far too much literature emphasizes the overarching simplicity of Node.js endpoints and how little it may take to expose an endpoint. Here’s an example that uses Express.js to abstract most of the details related to the creation of a web server that listens to a port:
const express = require('express');
const app = express();
// Define a route for the current time
app.get('/current-time', (req, res) => {
const currentTime = new Date().toLocaleTimeString();
res.send(`Current time: ${currentTime}`);
});
// Start the Express server
const port = 5000;
app.listen(port, () => {
console.log(`Server is listening on port ${port}`);
});This code belongs to a single file (for example, app.js) which is all you need in a Node.js environment to spin up a web server on port 5000.
As surprising as it may sound, it doesn’t take much more to achieve the same in ASP.NET Core using Minimal API:
using Microsoft.AspNetCore.Builder;
using Microsoft.AspNetCore.Http;
using Microsoft.Extensions.Hosting;
var builder = WebApplication.CreateBuilder(args);
// Define a route for the current time
builder.MapGet("/current-time", () =>
{
var currentTime = DateTime.Now.ToString("hh:mm:ss tt");
return Results.Text($"Current time: {currentTime}");
});
var app = builder.Build();
app.Run();Furthermore, with ASP.NET Core, you can perform much more sophisticated operations by introducing controllers to manage incoming requests. Minimal APIs are more lightweight in terms of resource use and potentially offer better performance for simple use cases. Controllers are tailored for complex routing requirements and large numbers of endpoints, allow integration with middleware and action filters, and support model binding and attribute routing.
Note Model binding—that is, the ability to automatically map incoming HTTP request data to action method parameters based on their names and data types—is in Minimal API with ASP.NET Core 8 released in November 2023.
Essentially, the real debate about Node.js versus ASP.NET Core comes down to their ability to handle I/O bound operations. Node.js and ASP.NET have different architectures that affect how I/O bound operations can be handled. The winner—if there is one—is determined not by the number of amazing adjectives and superlatives in articles and posts, but by the context of a given project, including team preferences.
Node.js and ASP.NET Core take different approaches to handling concurrent connections and then improving the scalability of web APIs.
Node.js uses a single-threaded, event-driven architecture. This means it operates on a single thread, handling all incoming requests in an event loop. When a request is made, Node.js initiates the operation and continues processing other requests without waiting for the operation to complete. So, Node.js is always ready to handle new incoming requests, which minimizes the risk of a user receiving the infamous “503 service unavailable” error code. This behavior is referred to as non-blocking. In contrast, blocking refers to operations that halt further execution until the initial operation is complete.
Processing a Node.js request
Node.js handles non-blocking calls by using callbacks, promises, and async/await operations to receive the results of these (asynchronous) calls when they are finished. This ensures that the event loop remains responsive and can handle a high concurrency of operations without blocking. Callbacks, promises, and async/await operations are not functionally equivalent, but they can be used to achieve similar outcomes when dealing with asynchronous tasks. The key differences lie in their syntax, readability, and ability to handle errors. Figure 10-3 illustrates in more detail the non-blocking, event-driven architecture of Node.js.
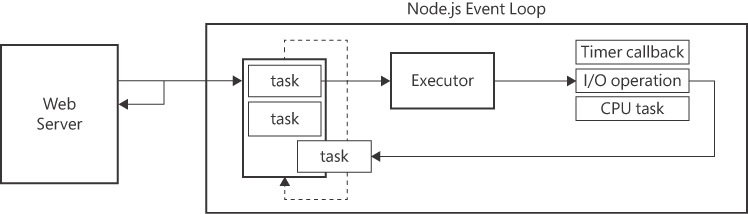
FIGURE 10-3 Node.js event-driven architecture.
As you can see, everything starts when the web server places a request. As in the preceding code snippet, the request provides a callback to run at the end of the operation. Processing the request involves queuing it and returning immediately. The Node.js event loop scans the list of queued tasks and executes them.
A task is generally one of three types: a timer, an I/O operation, or some algorithmic task. In all three cases, at the end of the operation, the callback that was originally provided is added to the list of pending tasks to be resolved as soon as possible.
For timer tasks, the JavaScript engine records the expiration time and places the callback in the queue. For CPU-based algorithmic tasks, the single Node.js thread runs the code. The longer the task takes to complete, the longer the wait for all other pending tasks. For this reason, Node.js is ineffective for implementing algorithmic endpoints, which require a multi-threaded environment. But what about I/O-bound tasks?
Processing I/O-bound tasks in Node.js
The strength of Node.js is its ability to perform tasks that do not engage the thread for too long. Reading files and querying or updating databases are potentially long-running operations but are accomplished by other processes. The JavaScript code just needs to wait for the operation to terminate.
In a single-threaded environment, what determines when the operation completes and adds a callback function to the queue? The answer is that in JavaScript, and particularly in Node.js, I/O operations use operating system-specific features. In Windows, Node.js leverages the operating system’s I/O completion ports to efficiently handle I/O operations. On non-Windows platforms (for example, Linux and macOS), Node.js uses other mechanisms, like epoll on Linux or kqueue on macOS, to manage I/O operations efficiently. Node.js abstracts these platform-specific details for many I/O operations, such as file system operations, network operations, and other asynchronous tasks.
ASP.NET multithreading
ASP.NET Core is a multithreaded framework. Each incoming request is typically handled by a separate thread from a thread pool. This allows ASP.NET Core to effectively handle concurrent requests. ASP.NET Core can leverage multiple CPU cores to process requests in parallel. This makes it suitable for CPU-bound operations in addition to I/O-bound operations.
How does ASP.NET process I/O-bound operations? The answer is, in the same way that Node.js does. However, you should note two important points. First, there is no alternative approach in contemporary operating systems to manage these tasks. Second, in ASP.NET Core, an optimization configuration for I/O-bound tasks is not automatic but is left to the developer. Here’s an example:
public IActionResult LengthyTask()
{
/■ … */
}
public async Task<IActionResult> LengthyTask()
{
/■ … */
}Of the two possible implementations of the same lengthy task, only the second is optimized for scalability, because it is marked for asynchronous execution. Let’s review the code needed to call both URLs:
// Synchronous call
var response = httpClient.Send(request);
// Asynchronous call
var response = await httpClient.GetAsync(url);In ASP.NET Core, you use the class HttpClient to place HTTP requests. All methods exposed by this class are asynchronous, with the sole exception of the generic Send method, added for compatibility and edge case scenarios.
When an ASP.NET Core asynchronous endpoint is called, ASP.NET Core selects a worker thread from its pool. This thread begins executing the endpoint’s code and pauses when it encounters an awaitable operation. At this point, it configures a completion port (on Windows) and returns to the pool for potential reuse handling other requests. When the offloaded awaitable operation—typically file or network activity—is complete, the completion port triggers an internal ASP.NET Core callback. This callback adds a new task to an internal queue to finalize the original request. The next available thread, which may be the same thread or a different one, picks it up and generates the final response. Consequently, it’s entirely plausible for a single request to undergo two distinct execution segments, managed by different threads.
The bottom line is that its multithreading nature makes ASP.NET Core much more suitable than Node.js for CPU-bound tasks. For I/O-bound tasks, both can be equally effective—although in ASP.NET Core, this requires the use of asynchronous controller methods or asynchronous Minimal API endpoints.
This chapter revisited the history of web development, whose foundational principles have remained the same despite the continuous proliferation of new tools and techniques over the years. In the beginning, the web consisted only of super simple (yet nearly ineffectual) client-side code. Later, server-side frameworks like PHP and Active Server Pages (ASP) emerged, which evolved into ASP.NET over the new millennium.
Around 2010, the advent of single-page applications (SPAs) transformed the web-development landscape, giving rise to the present-day robust—and at times complex—frameworks such as Angular and React. A significant outcome of this shift has been the segregation of front-end and back-end development. This transition has prompted a renewed exploration of server-side rendering to address concerns related to slow page loads, search engine optimization (SEO), and accessibility.
Modern server-side rendering continues to entail the creation of a distinct front end, but it is now often compiled into static HTML during the build process. This begs the question: Why not just opt for a traditional ASP.NET application instead? Alternatively, should you consider using Node.js? This chapter concluded with a thorough examination of the architectural aspects of Node.js and ASP.NET Core.
In summary, a much simpler web is possible—although a much simpler web is probably not for every team and every application.
A man who pays his bills on time is soon forgotten.
—Oscar Wilde
In software terms, technical debt is a metaphorical concept that describes the consequences of taking shortcuts or making compromises in the development process. Although these shortcuts might be necessary to meet tight deadlines or deliver features quickly, they accumulate interest over time and can affect the long-term health and efficiency of a software project.
A less-explored but equally essential concept is technical credit. Whereas technical debt embodies the negative consequences of shortcuts and compromises, technical credit results from deliberate investments made during the software development process to yield long-term gains.
Both words—debt and credit—have Latin origins. Over the centuries, these words have evolved to their current meanings, which generally relate to finances. Debt signifies an obligation to repay, while credit describes the ability to take on new debt. In this context, debt plays a complex and sometimes contradictory role. When used judiciously to finance productive investments, it can contribute to expansion. However, excessive or mismanaged debt can lead to instability and hinder growth. In contrast, credit—essentially a trust-based arrangement—allows one to access services with a promise to pay for them in the future.
Technical debt and credit are similar to financial debt and credit. Incurring technical debt can help a team deliver features more quickly; meanwhile, technical credit conveys trust that any technical debt will be repaid to keep the software highly maintainable. High maintainability allows new debt to deliver more features more quickly in a virtuous circle of development. Unlike financial debt, though, technical debt is not intentionally sought but rather tends to accumulate organically.
The term technical debt might be somewhat misleading. In essence, technical debt boils down to poorly written code. This encompasses a wide range of aspects, including coding practices, design choices, task breakdown, test relevance and coverage, code readability, and alignment with the latest versions of libraries and frameworks.
Poorly written code that just works isn’t inherently problematic. The challenge arises when the code requires frequent or ongoing updates.
In general, I believe that completely eliminating technical debt from software projects is an unrealistic aspiration. Dealing with it is necessary, though, and a pragmatic, rather than dogmatic, view helps considerably to achieve results.
A pragmatic perspective
From a pragmatic perspective, technical debt is seen as an inherent characteristic of the system—a mere trade-off between velocity and quality. Keeping it controllable is just one of the non-functional requirements of the project. Overzealous attempts to eliminate it are destined to fail miserably because generating technical debt is in the mechanics of the software project. Much like entropy in thermodynamic systems, technical debt tends to move toward a state of maximum disorder.
All one can realistically do is monitor and proactively address debt before it becomes excessive, sometimes employing creative solutions as necessary. The root cause of technical debt is poor code quality, but it is not simply a matter of inexperience and lack of knowledge. There are many other factors that lead to debt. Yet, raising the quality of code is the only reliable remedy. Of the many facets of poor code, the following are more directly related to technical debt. Not all of them have the same relevance, but all do count. More lightweight and easier to address are:
■ Inconsistent naming conventions
■ Failing to apply standard style conventions
Both can be easily avoided, or just mitigated, with the use of code assistant tools, external to the IDE or just integrated. Any warning does matter, but often developers—especially juniors I’d say—tend to ignore warnings. More relevant issues are:
■ Lack of comments and documentation
■ Hardcoded values
■ Insufficient modularity
■ Large and verbose methods
■ No unit tests
All these aspects of poor code have one common denominator—pressure to deliver features or releases quickly. In such cases, developers end up taking shortcuts or implementing quick-and-dirty solutions to meet deadlines, sacrificing long-term code quality for short-term gains. There are other factors, however, all linked together in a painful chain.
One common factor is lack of resources, whether time, budget, or skilled developers. Inadequate resources can force teams to make compromises, thus leading to suboptimal code and design choices. Lack of resources is typically the result of poor project planning, insufficient analysis, or unclear specifications. When developers must make assumptions or guesswork in order to progress and deliver, accumulating debt is inevitable. Poor planning may also be the result of attempting to build overly complex or ambitious architectural solutions following technology trends rather than measuring the actual project needs.
Reasons for creating debt
Overall, technical debt is a complex phenomenon that cannot be addressed either with the blunt force of aggressive schedules or with the resigned awareness that it cannot be entirely eliminated. It deserves attention and understanding. To start off, there are four distinct types of debt.
■ Intentional : This debt arises when a conscious decision is made to opt for a quick and rudimentary solution to fulfill a deadline or a given requirement, fully aware that it will necessitate future refactoring.
■ Unintentional : This debt happens when coding errors or shortcuts are introduced unknowingly due to a lack of knowledge or skills.
■ Avoidable : This debt occurs when it could have been avoided by simply adhering to established best practices, standards, or guidelines during the development process.
■ Unavoidable : This debt is caused by external factors such as shifting requirements, evolving dependencies, or changing technologies, which compel developers to adapt their code to accommodate these alterations.
Technical debt doesn’t necessarily carry a negative connotation. In certain situations, it can be taken with a positive outlook, especially in the initial phases of a project when the ultimate direction isn’t entirely defined. This might occur when you’re coding for a potential throw-away prototype, a minimally viable product, or to validate a new business model.
An example of avoidable debt is the debt caused by the behavior of executives and project managers who, blinded by the glow of business, may disregard the inherent mechanics of software development. This often occurs when these managers lack prior experience in software development, or, even worse, when they have been developers but only at a basic level. They tend to regard every time estimate as excessive and view explanations for such estimates as indications of laziness.
Usually, as a developer you experience technical debt on yourself long before you learn its perverse mechanics and explore ways to tame it.
Signs of technical debt
For instance, suppose you get to modify some existing code (which might even be code you wrote yourself months or weeks before) and you feel lost. You may feel lost because you find no valuable documentation except IntelliSense or sparse comments; because there are no automatic tests to ensure a minimally acceptable behavior; and because you find convoluted code flows in large and bloated methods. The most frustrating point, though, is when you start reading the instructions and find it hard to make sense of the logic because you find a lot of variables, methods, and classes with unclear and even cryptic names.
The technical debt of a software project is the sum of the technical debt that any single developer contributes. Being able to detect your own debt is just one of the most valuable signs of professional growth.
The first and most significant sign of an over-threshold technical debt is when even minor changes to the code become increasingly challenging and time-consuming. This complexity arises because it may not be immediately clear which directory or file to modify, or which specific lines need adjustment or removal, thus elevating the risk of introducing new errors or breaking existing functionality. This decreased agility can result in missed opportunities, delayed releases, and increased frustration.
Just like financial debt accrues interest, technical debt accumulates interest in the form of additional time and effort required for ongoing maintenance. As the debt grows, the maintenance burden becomes overwhelming, and valuable development resources are diverted from creating new features to fixing existing issues. Over time, these issues can compromise the software’s stability, security, and performance, ultimately eroding user trust and satisfaction.
To manage technical debt effectively, development teams must adopt a proactive approach that acknowledges the existence of debt and allocates time and resources to address it regularly. Before everything else, though, a method for measuring the level of debt must be established. It can be a combination of automatic static code analysis run by tools like SonarQube and manual code reviews conducted by fellow developers. The outcomes of this assessment can populate a technical debt backlog, where identified issues are documented, described, and categorized. Each issue can be associated with an estimated cost to fix.
Reducing the amount of technical debt is definitely possible. It is, however, a matter of engineering culture. The stronger it is, the greater is the awareness of technical debt as a serious issue to tackle. There are no best practices, though, let alone silver bullets.
Overall, there are only two possible ways to approach technical debt: as a separate project or side-by-side with the development of new features and releases.
Separate the project
Projects exclusively dedicated to technical debt reduction are not commonly encountered. The rationale behind this is rather straightforward: these projects have no immediately visible business value. Consequently, they don’t appeal to developers and represent a poorly understood cost for companies.
In contrast, a dedicated project can prove highly effective, as the team can operate without the constraints typically associated with side projects—notably, time limitations and the need to deliver new product builds. For a standalone debt reduction project to gain traction, it must address a well-recognized issue within an organization.
An excellent example is when a significant number of bugs are detected in production. Presenting a project that involves codebase analysis and the implementation of more automated tests has a great appeal to managers, as it pitches the potential to reduce the occurrence of production bugs and decrease the need for manual testing.
Ship and remove
Most of the time, your focus is on system enhancements, and you work according to an often demanding timeline for releases. Is it prudent to allocate additional time to each task on the list to reduce technical debt while advancing? From a manager’s perspective, this might not be the preferred approach. However, an effective compromise can be achieved by integrating debt reduction tasks alongside project-related tasks. A few times, I’ve observed team leaders with strong personalities and charisma subtly incorporating debt reduction actions into the standard to-do list, often without explicit authorization! They did their job and delivered the expected set of features in the context of a cleaner codebase.
The ship-and-remove strategy is also recommended for codebases where technical debt is present but in a relatively lightweight form. In such cases, it’s essential to adhere to the golden rule of leaving the codebase cleaner than you found it.
Inventory of debt items
For any actors involved in the project, taking a holistic view of the items within the backlog is helpful. There are situations where technical debt is managed in a separate container (a backlog other than the one that stores reported bugs and project to-dos), and this separation can sometimes hide debt from the view of product owners and managers. To enable the product owner to prioritize effectively, it is imperative that they have a comprehensive understanding and perspective of all the tasks and concerns at hand.
A regularly updated inventory of outstanding technical issues is essential for quantifying the potential impact of addressing each issue in the entire system. This process helps establish priorities. Take, for instance, the scenario of duplicated code. The straightforward solution involves moving the code to a shared library. However, what would be the ramifications of this move? What is the associated cost? Indeed, it would grow proportionally with the frequency of access to the codebase.
In general, for each specific issue (such as boilerplate code, insufficient modularity, naming conventions, long build time, automatic tests, or documentation), two values should be assigned: impact and reward.
Note Technical debt directly impacts the business. As such, it should be regularly communicated to stakeholders not merely as a numerical metric but rather as a characteristic or, if it looks more appealing, as a prerequisite for planning new features. As emphatic as it may sound, a hidden war between teams and management is of no help to anyone.
Agile techniques to tackle debt
To tackle technical debt, the initial step involves cataloging the outstanding issues that need attention. The next step consists in devising a strategy to seamlessly integrate these debt reduction tasks with routine development. There are three strategies commonly used to allocate time and resources for reducing technical debt.
■ Timeboxing : A fixed amount of time is reserved within every development cycle just to tackle technical debt. For common two-week sprints, a common value is 20%. Because tasks are part of the sprint, this approach guarantees a dedicated focus on reducing debt in a structured manner.
■ Spikes : Spikes represent a short amount of time explicitly dedicated to the investigation of a feature with the purpose of attaining deeper comprehension. Spikes are often used when the team encounters a technical challenge, a complex problem, or a piece of work that is not well understood. In this regard, a spike of one or two days can be spent to gain insights about the technical debt as a whole or just to start addressing specific items.
■ Slack time : This is some extra time deliberately added to the timeline just to be ready to handle unplanned work that may arise during the development process. If no urgent issue arises, the team can use the slack time to address technical debt problems.
All these strategies allow development teams to balance the ongoing need to reduce technical debt with the demand for delivering new features and enhancements.
Time constraints, and subsequent pressure to meet tight deadlines, are the most common reasons for technical debt because they lead to quick-and-dirty solutions to deliver on time. Usually, this deliberate discount on quality comes with the commitment to fix it soon, already the day after the deadline. Unfortunately, this day rarely arrives.
Lack of documentation
The first victim of time constraints is documentation. Tight deadlines mean that developers are focused on completing the core functionality of a project as quickly as possible and prioritize coding and testing over documentation to ensure that these features are completed on time.
Furthermore, some developers may perceive documentation as administrative overhead that doesn’t directly contribute to the completion of the project. They may believe that their time is better spent on coding, which puts them in the spotlight more than writing documentation. In some organizations, in fact, developers are not recognized for writing documentation. If there are no clear incentives or expectations for documentation, developers may not prioritize it.
There’s more to it, though.
Writing documentation requires focus and is time-consuming. Tight deadlines may also mean that there are limited resources available, including technical writers or documentation specialists who can assist with the documentation process. Without dedicated support, it is challenging to create comprehensive documentation.
Lack of documentation is not just a crucial part of the overall technical debt, but it is also the primary amplifier of it in the future. In the long run, poor or inadequate documentation leads to new errors, delays, and ultimately the accumulation of new technical debt. Factors other than time constraints, though, contribute to amplifying the amount and scope of the debt.
Scope creep
The expression scope creep refers to the uncontrolled growth of the project’s objectives and deliverables beyond what was initially planned. It occurs when new features and changes are introduced without proper evaluation and consideration of their impact on the project’s timeline, budget, and resources.
Often, scope creep is driven by stakeholder expectations on the wave of allegedly changing market conditions. While addressing stakeholder needs is important, it must be managed within the project’s constraints. When this doesn’t happen, technical debt surges.
In an ideal world, project managers and teams establish clear project boundaries, define a well-documented scope statement, and implement change control processes. Change requests are thoroughly assessed for their impact on the project’s timeline and budget before they are approved and implemented. Effective communication among project stakeholders ensures that everyone understands the project’s scope and any proposed changes.
In the real world, scope creep is often the norm. However, scope creep is not per se the real sore point. Business-wise, expanding the scope of a project is often a great sign. The problem arises when the expansion is gradual and the impact on timeline, budget, and resources is not perceived as an issue to address. Hence, if corresponding time and resource adjustments are not implemented, the project becomes an automatic generator of technical debt.
Rapid prototyping
Rapid prototyping is a product development approach that involves quickly creating a working model of a software application to test and validate its design, functionality, and feasibility. The primary goal of rapid prototyping is to accelerate the development process and reduce the risk of developing a final product that does not meet user needs or market requirements.
The key point is that a rapidly built prototype is neither intended nor designed for production use.
The misleading point for managers and stakeholders is that a prototype is a proof-of-concept and doesn’t just lack the full functionality of the final application. It lacks many other invisible aspects, crucial for a solid, production-ready application.
Most commonly, it lacks robustness and may not be able to handle errors and exceptions without crashing or failing catastrophically. It is also not devised for performance, scalability, or efficiency, which are crucial factors in production systems. It commonly has security concerns. Worse yet, prototypes are typically not designed for long-term maintenance. Their code may lack proper documentation, may not adhere to coding standards, or follow best practices, making ongoing support and updates difficult.
Yet, in the ideal world of business, this code just works and can find its way into production environments with just a few adjustments here and there. In the real world, instead, transitioning from a prototype to a production-ready system typically involves substantial additional development, testing, and refinement to ensure the system’s reliability, security, and performance.
Working on a project that was originally a prototype is a condition that works as a powerful amplifier of technical debt.
Lack of skills
Whether or not the project was originally a prototype, it will face continuously changing requirements. I didn’t spend all my career working day-by-day on software projects, but most projects I contributed were applications built with a customer in mind and then expanded to become multi-tenant applications. In such critical scenarios, all you receive are new, and sometimes contradictory, requirements to code as soon as possible.
It is viable to anticipate these changes, but only with deep domain understanding and sharp analytical capabilities. In these situations, if you fail to design the codebase to be flexible and adaptable, technical debt inevitably accrues as developers struggle to retrofit new requirements into the existing code.
It’s not just the architect though. The quality of developers is fundamental. A lack of skills should be addressed while being aware that a six-hour online course, or even a three-day workshop, will not make the difference overnight. Technical debt is unavoidable in these situations. The sooner you start integrating technical debt in the development cycle, the better you keep the project moving.
Note One more technical debt amplifier I have found is strong dependency on external libraries, frameworks, or third-party components. Especially in web applications, the extensive use of giant frameworks and component libraries creates a lock-in effect that over the years can hardly be fixed effectively, if not with a big rewrite. When I was purchasing my first house, my father advised me to contemplate how straightforward it might be to sell the same house in the years to come. Likewise, I warn against the adoption of a large library without first considering the potential challenges of removing it in the future.
When used for business reasons, and not for mere laziness, and when reduced below a safe threshold, technical debt can be useful to growth. A proven record of recovered technical debt represents a credit for the team and an allowance to incur other technical debt in the future. The sore point of technical debt is not so much the quantity of it you have at a certain time, but how the team is able to manage it. Managing debt means knowing how to reduce it and knowing how to keep it to a minimum. This is the measure of the technical credit of a team.
As foregone as it may sound, technical debt accumulates more slowly when best practices of maintainability and readability are applied to the software being developed. This scenario appears to be an instance of the well-known broken windows theory.
The theory has its origins in the field of criminology and was first developed by a team of social scientists in 1982. According to the theory, in a community, visible signs of disorder and neglect, such as broken windows, graffiti, and litter, lead to an increase in crime and antisocial behavior. A broken window left unrepaired signals to potential offenders that no one cares about maintaining order and that criminal behavior is, in a way, tolerated.
To draw an analogy, when a developer writes code hastily and without due diligence, it sends a message to the next developer that code quality isn’t a top priority and that taking shortcuts and writing messy code is acceptable. Conversely, encountering clear, readable, and well-organized code encourages others to uphold a similar standard of care.
In software, broken windows are coding practices such as duplication, large and bloated methods and classes, complex conditional statements, poor naming conventions, hardcoded values, code smells, and insufficient documentation. Refactoring is the technique to fix software broken windows.
The time to refactor will never come
Some developers write code as it comes, linearly, without paying attention to readability, duplication, organization, and comments. Tight deadlines are only a mitigating factor, but not a complete excuse for neglecting these aspects. I have seen far too many developers delivering functional yet mediocre code with the promise to return to it, later, to clean it up.
Well, this later time to refactor the code will never come.
One thing is counting as technical debt rigid code that may not be easily extended with additional features. Quite a different thing is, instead, fixing poorly written code that is unreadable, packed with code smells, and excessively long and convoluted. A developer who knowingly produces subpar code with the intention of fixing it later fails to demonstrate proper project respect. Every developer should always strive to deliver the best code possible. The extra time to refactor will never come, and even if it did come, the result is that it took twice the time to produce well-structured code.
Design principles are like hygiene
The world of software is full of nice acronyms sold as fundamental principles of coding. The list is long and includes at least the following:
■ DRY, or Don’t Repeat Yourself : This encourages developers to avoid duplicating code by abstracting common functionality into reusable components or functions.
■ KISS, or Keep It Simple, Stupid : This advocates for simplicity in design and implementation to make code easier to understand and maintain.
■ YAGNI, or You Aren’t Gonna Need It : This advises against adding unnecessary features or complexity to the codebase based on speculative future needs.
The most popular, however, is SOLID, an easy-to-remember cumulative name for a set of five design principles. S stands for Single Responsibility Principle, O for Open/Closed Principle, L for Liskov’s Substitution Principle, I for Interface Segregation Principle, and D for Dependency Inversion Principle. Overall, the principles offer valuable insights. Yet, it is naïve to think that failing them will compromise a project. A too-large class, or a too-long method, per se, will never jeopardize any project.
Rather than looking at SOLID and other acronyms as the tables of law, one should give them a relevance akin to that of personal hygiene. Just as maintaining personal hygiene is essential but cannot by itself cure or prevent any serious illness, these programming principles, if overlooked, may lead to issues but will never be the root cause of major problems in a project. Any system can well tolerate an amount of technical debt as long as the team masters the vision and techniques to reduce it.
Furthermore, these principles are often easy to grasp in theory but significantly more challenging to implement effectively. Simply taking a course on SOLID principles won’t automatically make you a better developer. However, mastering SOLID principles reduces the likelihood that increasingly more technical debt will accumulate in your code.
Agile doesn’t just mean faster
That Agile methodologies make coding faster is a misconception that arises from a few reasons. First, managers often oversimplify the Agile principles and read terms like “continuous delivery” and “rapid iterations” as the guarantee of faster delivery of a product as a whole. In doing so, they miss completely the broader context of Agile.
Agile promotes efficient and effective development practices, but the primary focus is on delivering the right features rather than just working at a faster pace. The goal is to deliver a continuous stream of valuable, working software while maintaining a sustainable pace for the development team. Agile methodologies provide frequent releases and iterations, which can create a perception of rapid progress. This can lead managers to believe that the development process itself is faster because they can see new features being delivered more frequently. The point is that with Agile the final product is delivered piecemeal with the possibility of changing direction after each step.
This is great value, but it doesn’t imply at all that coding is faster; in fact, it’s quite the opposite! The frequency of releases might be greater, creating the illusion of speed. It’s akin to breaking a marathon into a series of brief sprints. In the end, it may consume more time, but you can readily assess your progress at regular intervals.
It’s therefore important for managers and teams to have a well-rounded understanding of Agile principles and practices. Agile is about delivering value, adapting to change, improving collaboration, and maintaining high-quality software. It’s not (solely) about speed of development.
Testability is more important than tests
A unit test is a piece of code typically written and executed by developers during the development process to ensure that small, isolated parts of the codebase work correctly. Unit tests are typically automated, meaning they can be run automatically by a testing framework. This automation facilitates frequent testing and integration into the development workflow.
Unit tests serve two main purposes: they help catch bugs early in the development cycle, and they provide a safety net for developers to refactor or modify code with confidence, knowing that any regression is detected quickly. Furthermore, unit tests are also the first form of documentation for how individual units of code are expected to behave.
One big sword of Damocles hangs over the head of unit tests: the relevance of the tests written.
The mythical 100% coverage means that every line of code in the unit of code being tested has been executed at least once during the testing process. This ensures that there are no untested or uncovered code paths, increasing confidence that the unit functions as intended. However, 100% code coverage doesn’t guarantee at all that the unit is completely bug free or that all possible edge cases have been considered. It only means that every line of code has been exercised by the unit tests. It says nothing about which aspects of the method have been tested and whether they are relevant in the business case.
Unit tests do require code that lends itself to be tested. This aspect is known as testability. More than just having hundreds of unit tests for the sake of the code coverage magic number, I would aim at having high levels of testability in the codebase. Testability alone is not sufficient to reap the benefits of unit tests. At the same time, though, testable code makes it easier to write tests. And writing unit tests encourages developers to write clean, modular, and well-structured code.
Refactoring is a fundamental practice in software development that involves restructuring and improving the existing codebase without changing its external behavior. Refactoring is not about adding new features or fixing bugs. Refactoring focuses on optimizing the internal structure of code to make it more efficient, maintainable, and understandable without altering its functional behavior.
Refactoring is closely related to technical debt. It is, in fact, a deliberate and systematic approach to paying down technical debt. When developers refactor code, they rewrite it to be more maintainable, readable, and efficient. This process mitigates the issues that contributed to the technical debt.
Goals of refactoring
One decides to refactor to enhance the readability of the code or to simplify it. One refactors to restructure the code and give it a more manageable organization. Most of the time, achieving these goals is a matter of removing code smells.
Code smells are indicators of suboptimal code design. They consist of specific patterns or characteristics of the code that indicate potential problems or areas for improvement. Common code smells include long methods, duplicated code, large classes, complex conditional statements, deep nesting, lack of encapsulation, data clumps, and more.
There are several tools available to assist developers in performing code refactoring. These tools can automate repetitive and error-prone tasks and suggest refactoring actions to take.
Refactoring as a learning experience
Ideally, refactoring is seamlessly integrated into the development process as an ongoing practice. There should be no need to call it out explicitly; refactoring should happen as a normal coding-related activity: you check-out a file to perform a given action and while there you review the code with different eyes and apply needed changes just to make it better.
In this way, refactoring becomes a true learning experience as developers can analyze the existing code, understand its intricacies, and identify areas for improvement. Overall, the process enhances their understanding of the codebase, the underlying design principles, and the overall system architecture. What’s more, since refactoring often involves researching and implementing best practices, developers end up internalizing them.
In this way, refactoring evolves into a genuine learning opportunity for developers, enabling them to delve into the existing code and pinpoint areas for enhancement. This process ultimately makes developers more aware of the nature of the code, including the fundamental design principles and the overarching system architecture. Moreover, as refactoring becomes a regular practice, developers continually engage in research and the application of best practices, leading to the organic assimilation of these principles.
In the end, refactoring produces better code and better developers.
The genesis of technical debt
When it comes to coding, making the perfect decision from the start may not always be feasible. It often requires time for thoughtful reflection, which can sometimes conflict with the natural pressure that moves projects forward.
Whether or not we embrace it, the prevailing mantra of modern times is the well-known “move fast and break things,” which signifies a mindset focused on rapid innovation and development, even if it means taking risks and making mistakes along the way. The phrase was particularly associated with Facebook during its early years. But the early Facebook has very little to do with enterprise business applications that many write today. Applied outside the isolated cases of a (very) few devastatingly powerful unicorns, the “move fast and break things” mantra questions the actual objectives we should be pursuing. Do we really know the objectives we want to achieve so quickly?
As a result, teams are constantly busy and overwhelmed, in a perpetual state of stress, frequently delivering undesirable results. It’s likely that only a small portion of the team’s efforts are genuinely devoted to creating value, while the majority is expended on resolving issues arising from various factors, including skill gaps, misunderstandings, workflow inefficiencies, and even aspects of the company’s culture.
This is how technical debt is born.
Technical debt, however, isn’t necessarily a bad thing. When it arises from a deliberate choice, it can facilitate progress since it essentially involves deferring decisions. After deployment, at a later stage, you often have a better understanding of the code and are ideally positioned to devise a long-lasting solution for it.
This is how technical credit manifests.
Technical debt encompasses not only code-level issues but also architectural choices that may have been made with insufficient planning or are based on short-term expediency.
For example, choosing a certain database, framework, or system architecture because it seems convenient in the short term but doesn’t align with the long-term needs of the project is a clear example of technical debt. Such a questionable decision may require significant refactoring to address the resulting issues.
The Zen of software architecture
Just as Zen Buddhism emphasizes simplicity and harmony, the Zen of software architecture links to the same qualities to help software architects make informed decisions about the structure and design of systems. So it happens that the seasoned expert often identifies just one solution whereas a junior may see multiple options to choose from. Yet another piece of popular wisdom that comes handy here is the old saying that “great minds think alike.”
This is to say that even the architectural component of technical debt can be addressed from the start by expertise and domain knowledge.
In software architecture, critical decisions should be made as late as possible to take advantage of any single extra minute to reflect, but as early as possible to avoid building software on unstable pillars.
The Zen of coding
A hard lesson I’ve learned over the years is that you will never have time to do it nice and clean later. Your only chance, therefore, is to write code as clean and simple as possible, as harmonic and thoughtful as possible, right away.
Nearly flawless code from the outset is possible, and all it takes is discipline and mindfulness. No developer gains such awareness of the coding practice for a given business domain instantaneously. That’s where discipline and commitment, and tenacity and perseverance, arise. And a little help from powerful coding assistant tools such as ReSharper.
At the beginning of my career, I used to interview outstanding developers and book authors for a printed magazine. During one of these interviews, a notable author shared his approach to writing programming books. He emphasized the importance of presenting commercial-quality code in the companion examples and in printed listings. In fact, every code snippet he included was meticulously crafted, incorporating robust exception handling, uniform naming conventions, descriptive comments, concise methods, and showcasing an overarching commitment to elegance and simplicity despite the complex topics discussed.
Raising the quality bar
For every developer, the objective is to elevate the standard of quality and produce superior code that surpasses the fundamental requirement of mere functionality. For instance, while a pair of nested IF statements may achieve the intended outcome, it constitutes suboptimal code, no longer aligning with the standards of today. Not convinced? Read on!
There are several reasons why excessive nesting levels can pose challenges. First, as nesting levels increase, it becomes increasingly difficult to trace and understand the logic and progression of the code. Furthermore, when changes are necessary, deeply nested code becomes more prone to introducing new bugs unless you are extremely careful and conduct thorough testing.
Moreover, writing comprehensive tests for deeply nested code can be intricate and time-consuming, and typically requires creating multiple test cases to cover different code paths. To address these issues, it’s advisable to maintain strict control over nesting levels and, when necessary, refactor the code. This refactoring process often involves breaking down intricate code into smaller, more manageable functions or inverting the order of conditions tested.
Frequently, the IDE promptly signals nested IF statements that can be simplified with a simple click. However, even without an assistive IDE, whenever you encounter an IF-ELSE statement, take a moment to pause and consider whether there’s an alternative approach to achieve the same result. When done as routine practice, it only requires a few additional seconds of your time. If it does demand more time, instead, be aware that such an additional investment contributes to a deeper understanding of the problem and the codebase, ultimately adding value to the project.
Put simply, strive to become a better developer, and write the best code you can right from the start. If there was ever a secret, that’s the one.
Technical debt refers to the accumulated cost of suboptimal decisions and shortcuts in software development. These choices, often made to meet deadlines or reduce immediate effort, can lead to increased complexity, reduced code quality, and future maintenance challenges. Addressing technical debt is crucial for long-term software stability and efficiency.
Paying back technical debt can be a nuanced process because teams typically can’t halt their work, clean up the code, and resume. Instead, work on the recognized technical debt is often merged with ongoing development efforts. Agile methodologies offer several strategies to allocate dedicated time for these incremental refinements.
Not so popular as technical debt is technical credit. It is akin to making strategic investments in code quality, architecture, and development processes. These investments may involve allocating extra time and resources to ensure that software is not only functional but also robust, scalable, and maintainable. Unlike technical debt, which incurs long-term costs, technical credit may generate long-term profits by making the impact of technical debt much less harmful and minimizing the maintenance costs of a product.
As in finance, technical debt and credit run on the edge of the same razor.
By prioritizing clean code, relevant testing, and comprehensive documentation, you slow down the process but produce very lightweight debt. Furthermore, the quality of code is more than acceptable and can be adapted at a reasonable cost to whatever scenario the future has in store. At the same time, a team having technical credit makes it more palatable for a savvy manager to consider incurring new technical debt when no appealing alternative is available. On the other hand, offering credit to someone with a well-established history of payment is considerably more straightforward.